The Conversation (0)
Sign Up
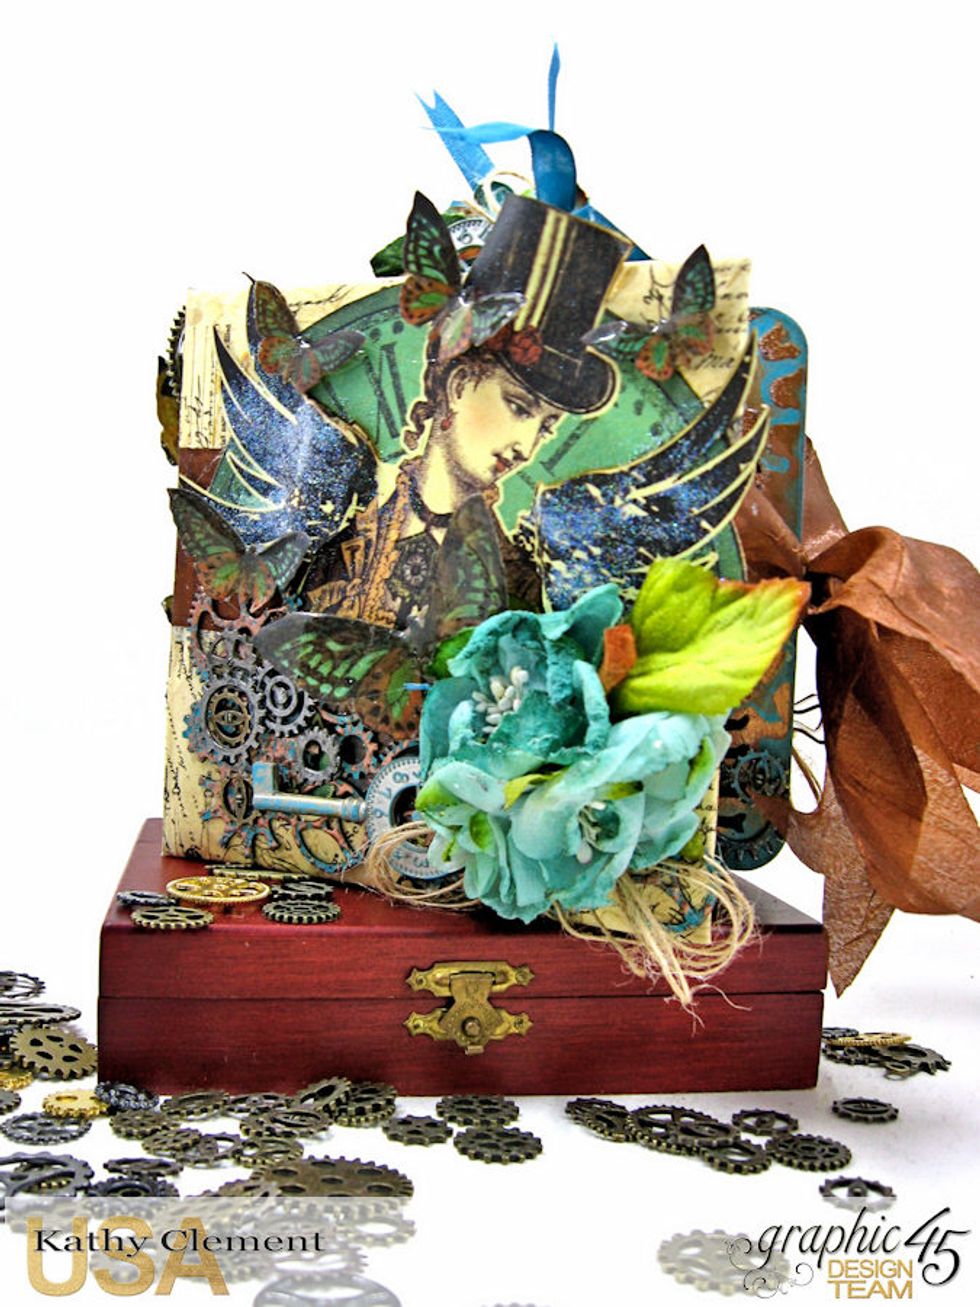
I created this 4.75" square album with G45 Steampunk Debutante Deluxe Collector's Edition. I am focusing today on altering the embellishments with mixed media techniques. Let's get started.
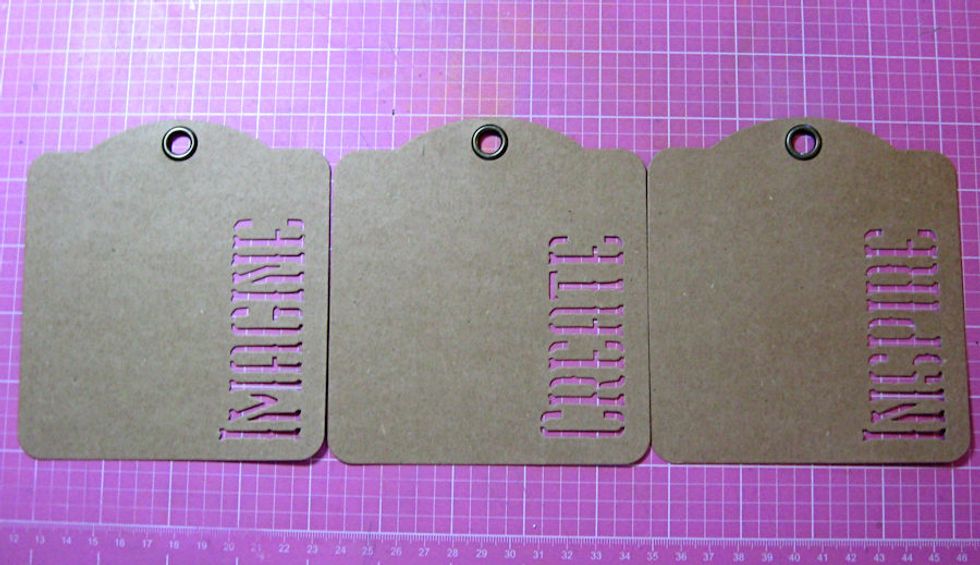
We'll start with the Staples Square tags: Imagine, Create, Inspire. Prepare a surface that you can paint/get messy on: old newspapers, plastic or a non-stick craft sheet.

First, Paint the front and back edges of each tag with Peacock Feathers Distress Paint. Heat dry. Then apply the Copper Crackle Texture through the Gears stencil as seen here.
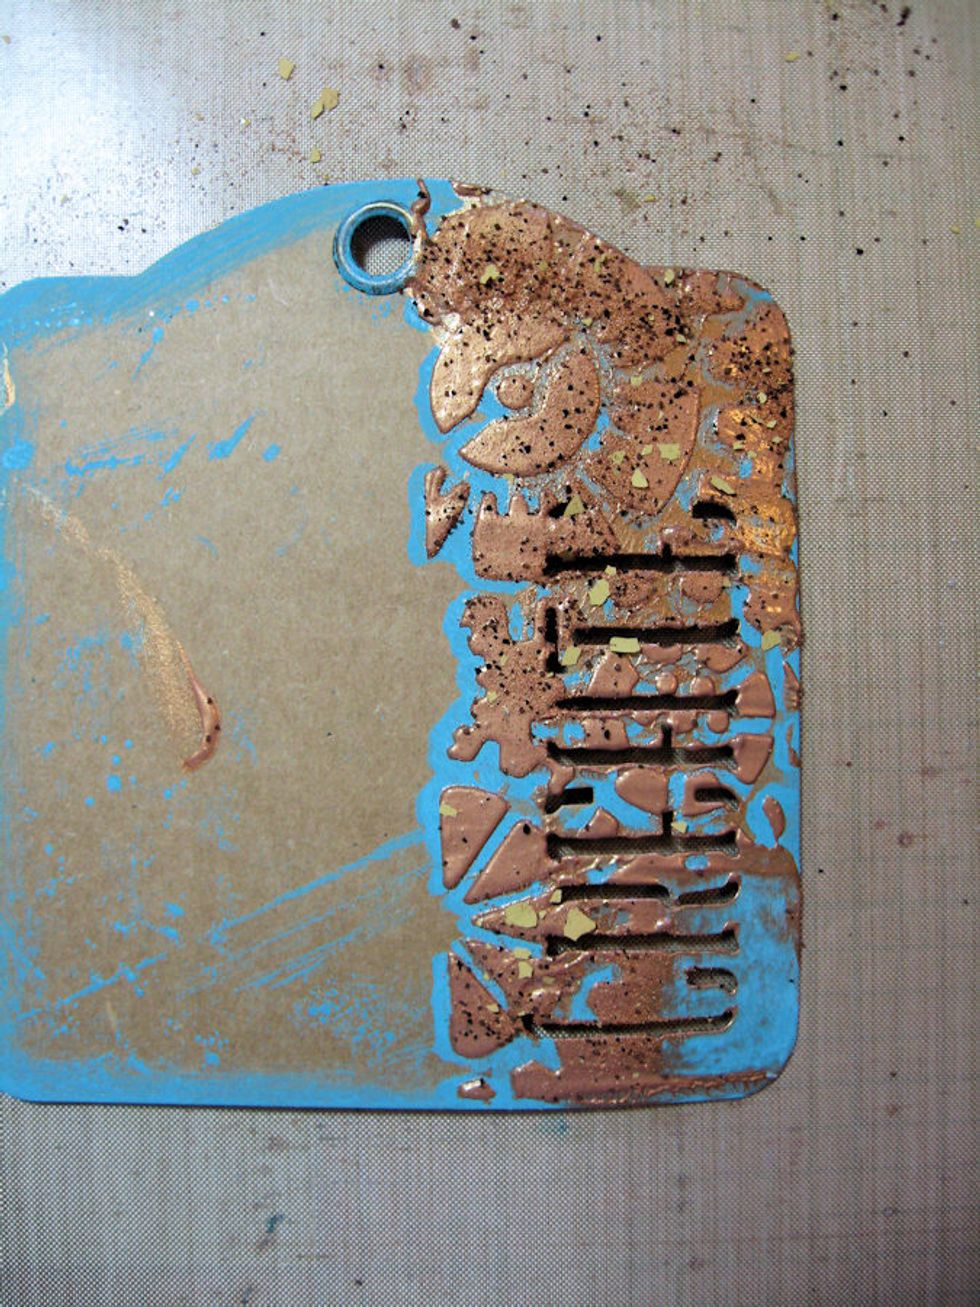
While the crackle texture is still wet, sprinkle it lightly with Spoonful of Rust Embossing powder. Let dry. Then heat emboss the powder until it melts.
Then you can decorate the tag as desired.
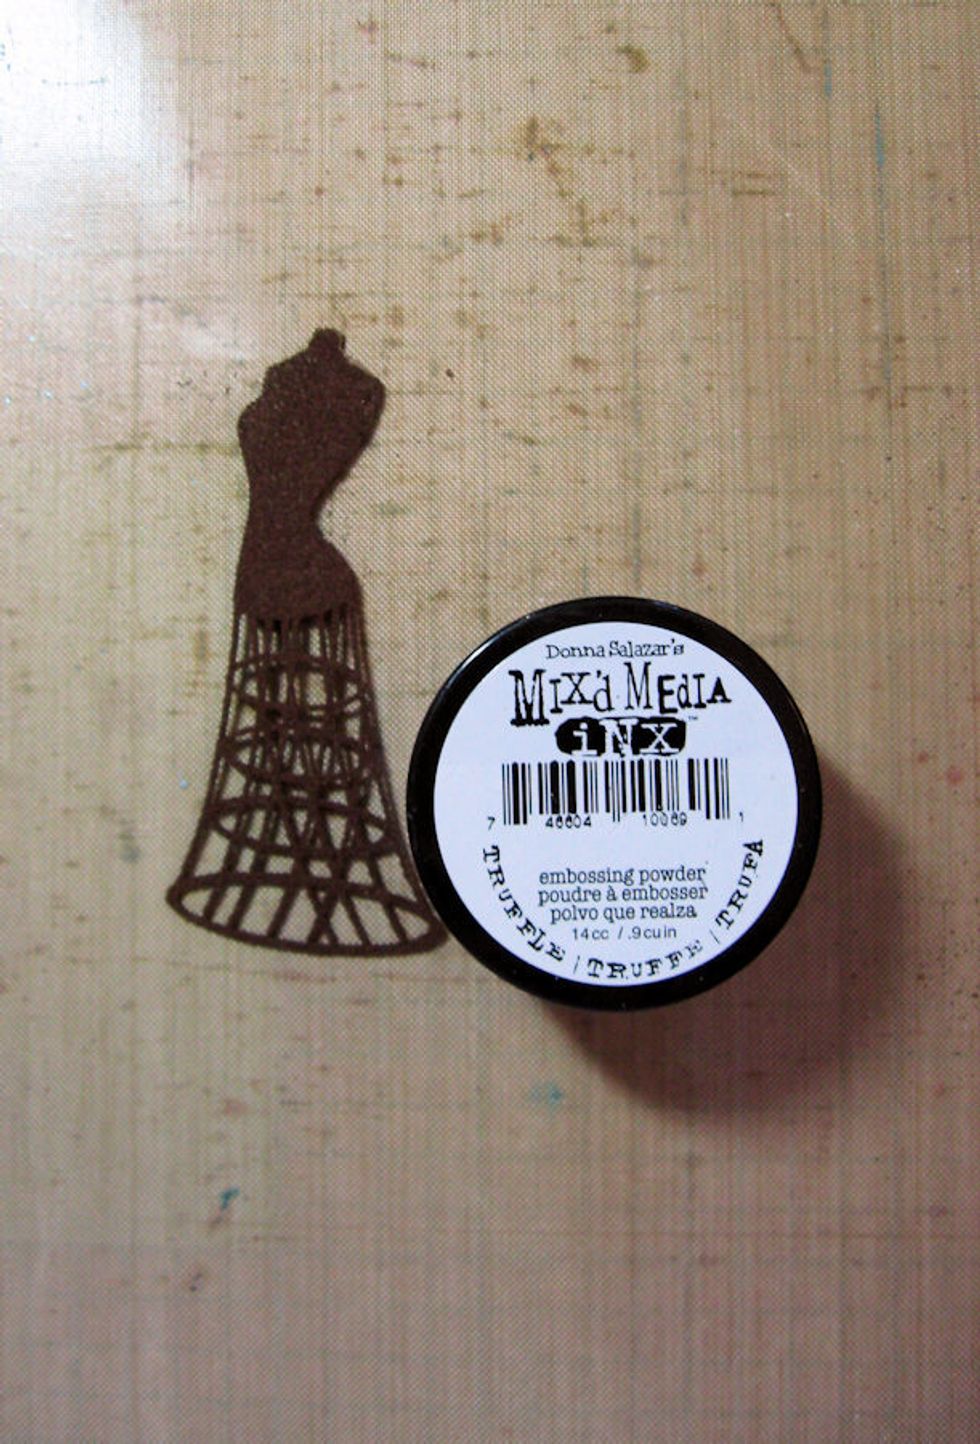
Now we will prepare the chipboard pieces. Press Versamark Embossing ink onto the surface of the chip until it is fully covered. I covered this dress form with Truffle Mix'd Media EP.

Let the excess powder slide off into a tray or clean piece of paper. Heat emboss to set the powder. Place a small amount of paint onto work surface and using your finger, tap it randomly on the chip
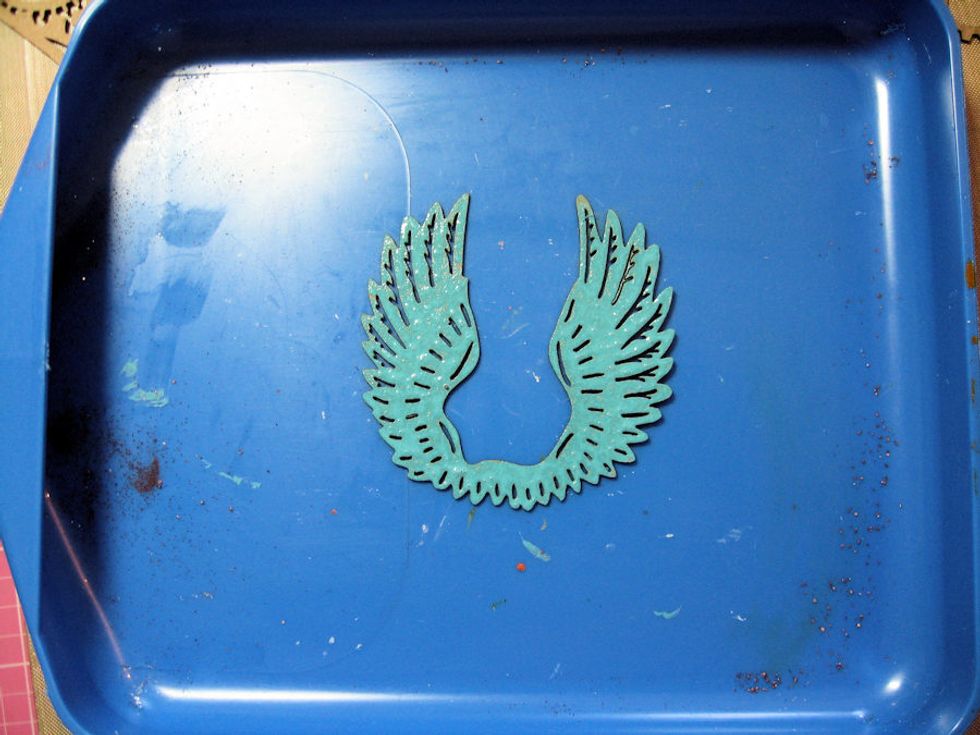
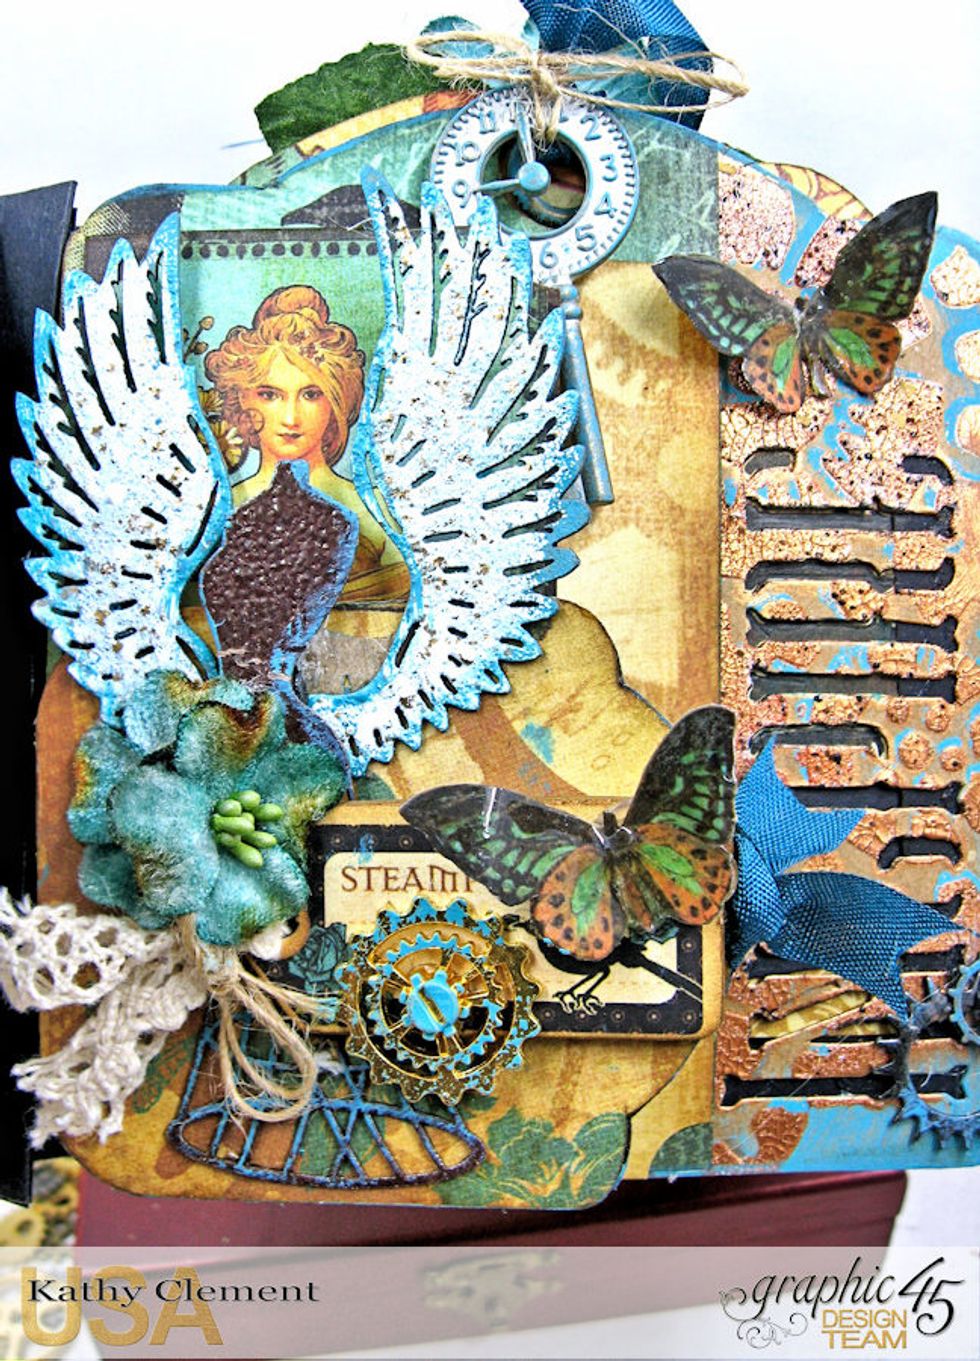
Paint Steampunk wings with Peacock Feathers Paint. Lay in a tray or other clean surface.

While the paint is still wet, cover liberally with Shabby Blue Embossing Enamel. Tilt the wings to let the excess powder slide off into the tray and return to the bottle.

Heat emboss until the enamel melts and becomes shiny. Tap the edges with Peacock Feathers Paint, if desired.
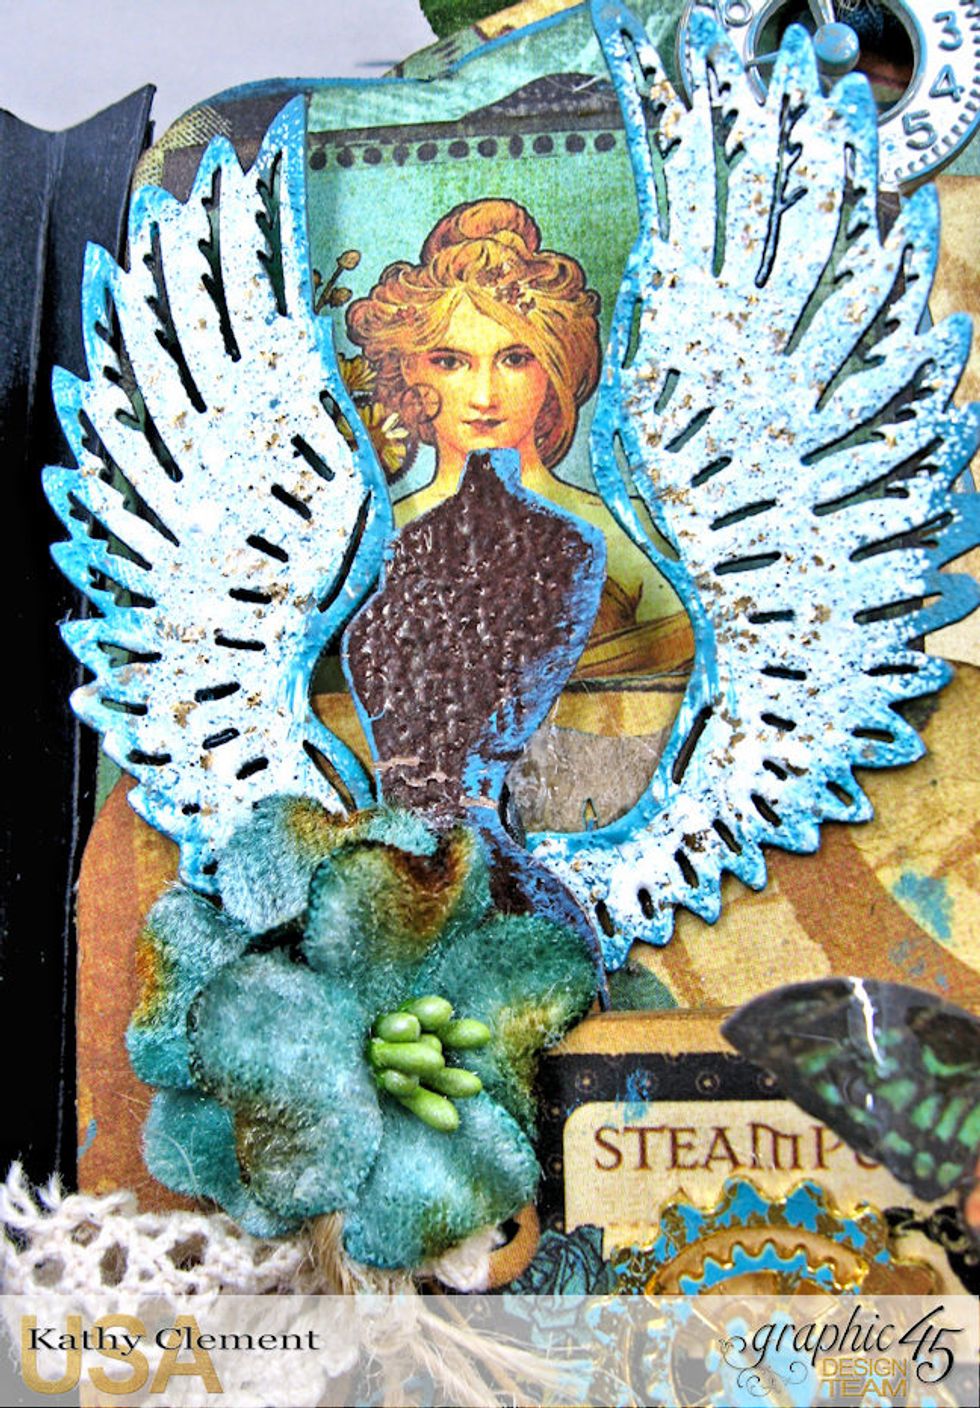
I layered the wings and dress forms over an image on my tag to create lots of drama, depth and texture.

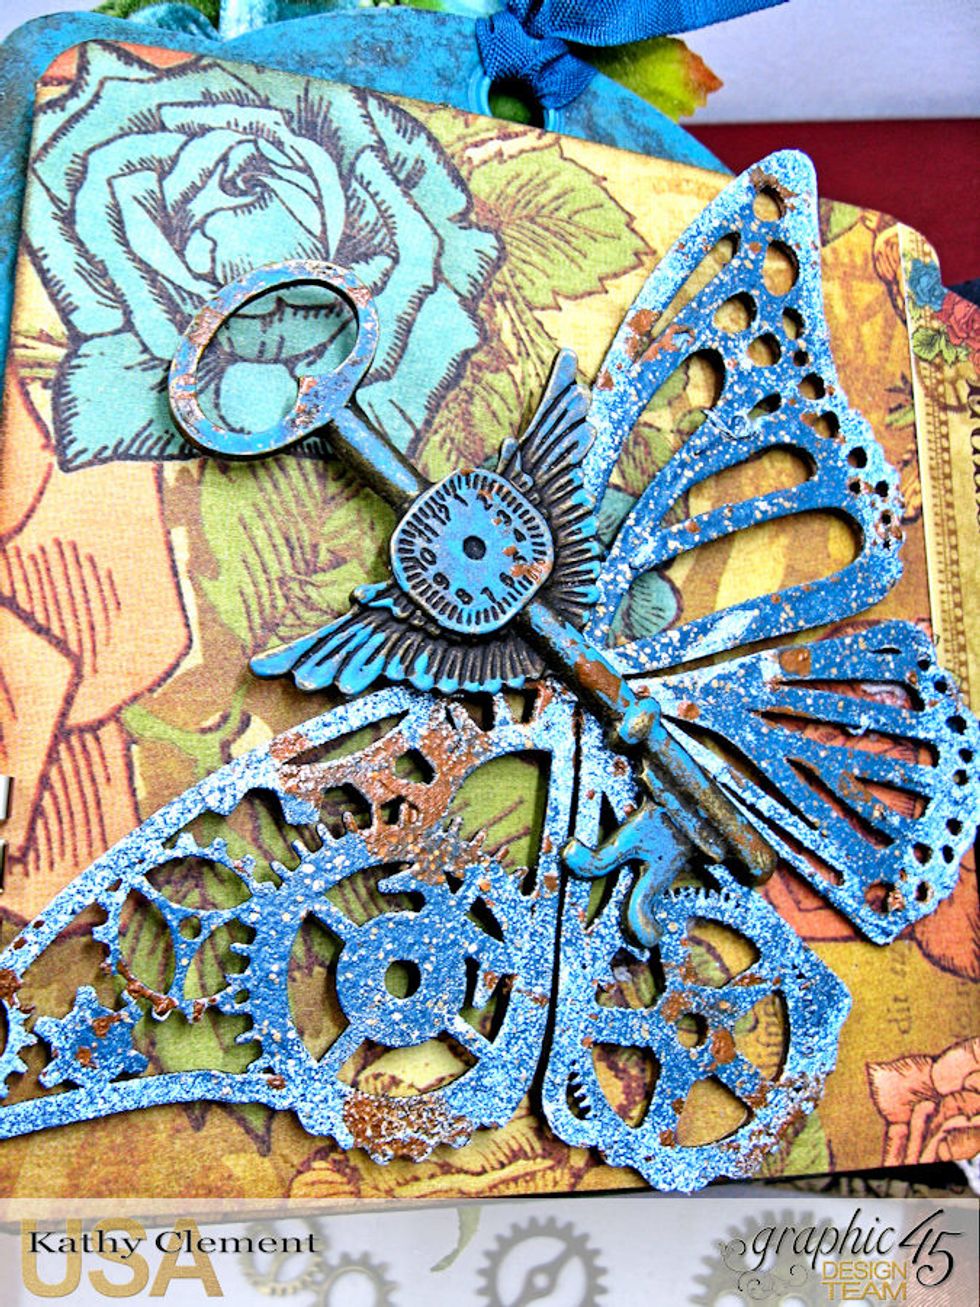
I used this same technique to alter this steampunk butterfly. First I painted, then I sprinkled Teal Embossing Enamel on the wet paint and heat set. Then I tapped the cooled enamel with copper paint
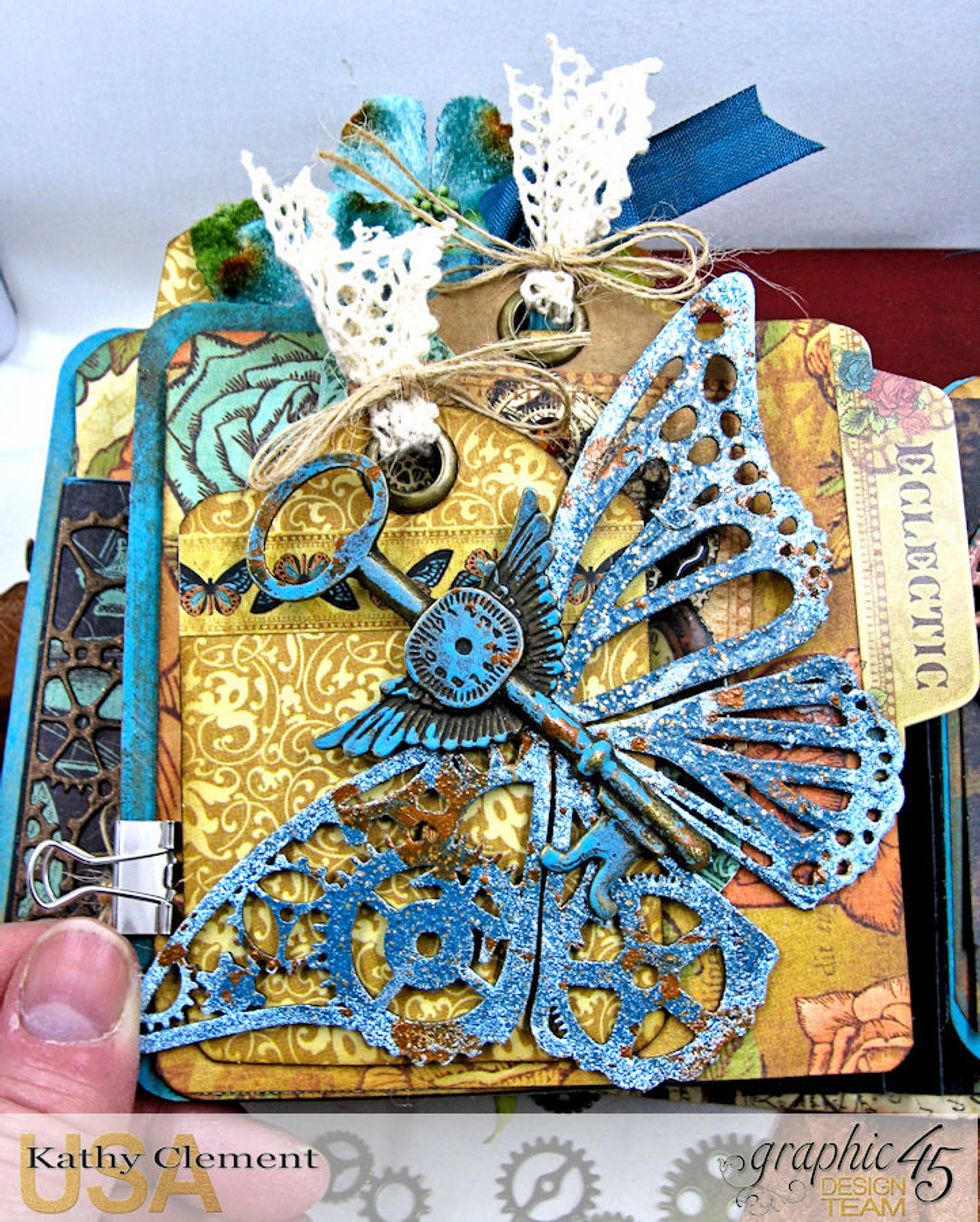
I added a steampunk key to the center of the body, then glued the base of the wings onto the tag to form a pocket for these ATC tags.
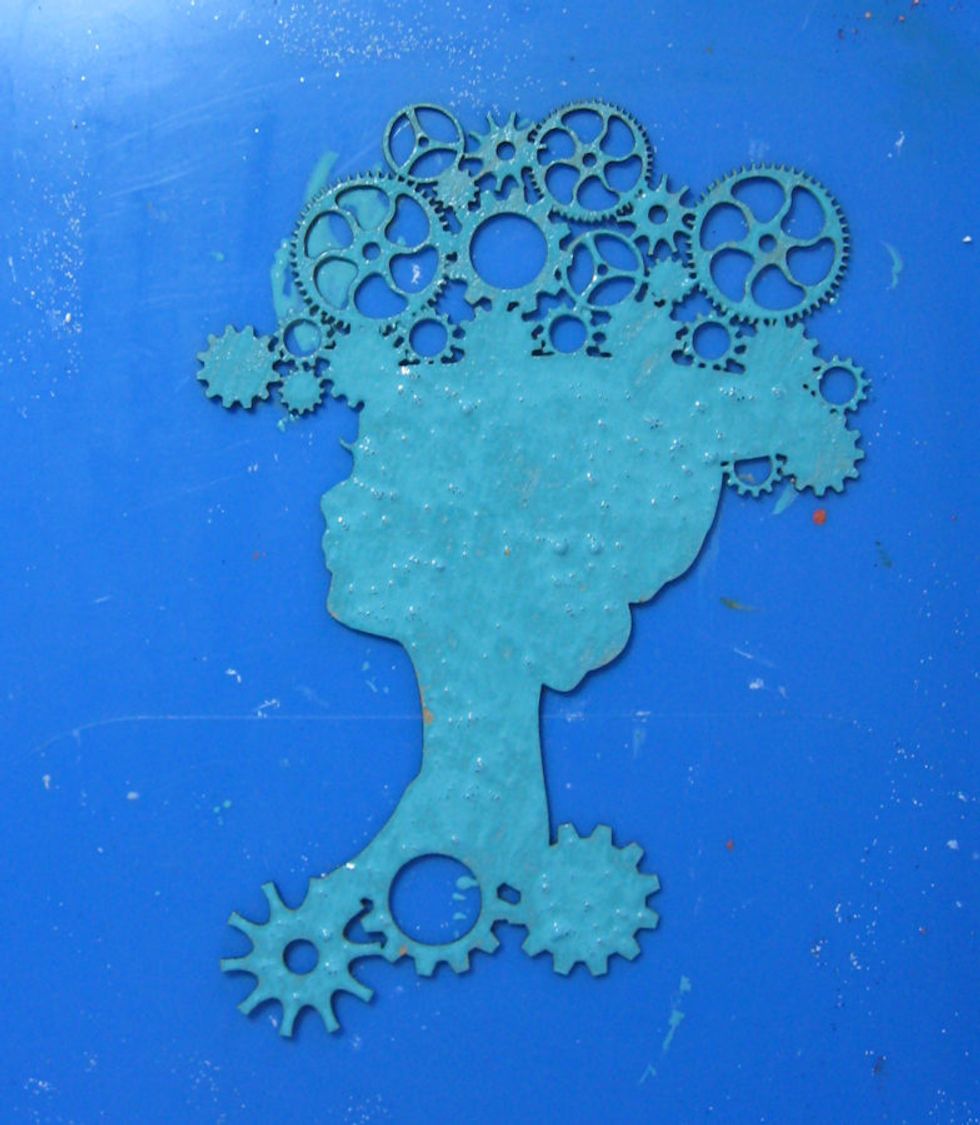
Paint the steampunk lady with Peacock Feathers Paint.

This time, while the paint is wet, sprinkle Metallic Copper EP over the gears and a little onto the body. You can achieve different effects by using various paints, powders and level of coverage.
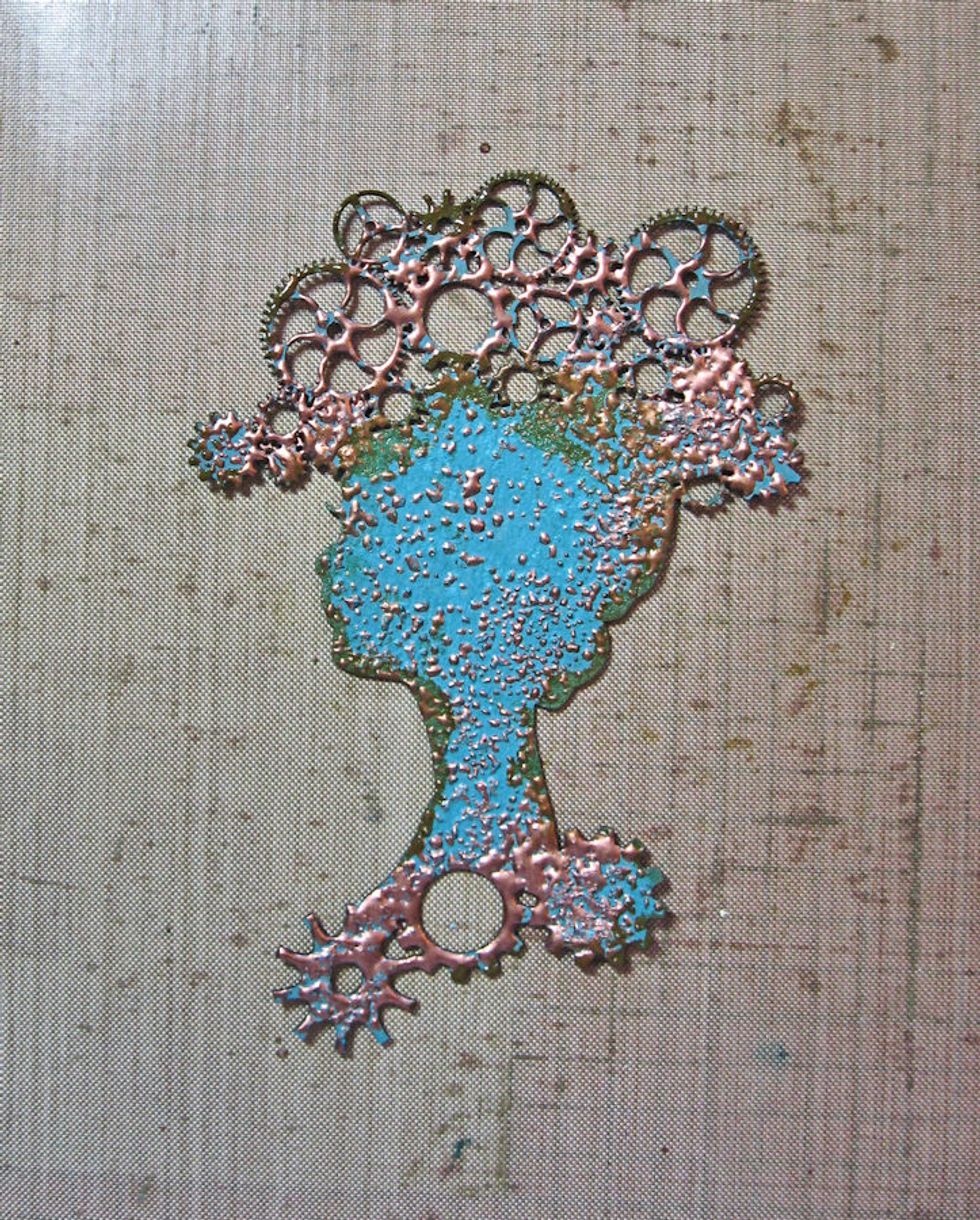
This is what the chip looks like after embossing. I then went back and used my finger to tap Gathered Twigs Paint around the edges to create a shadow effect.
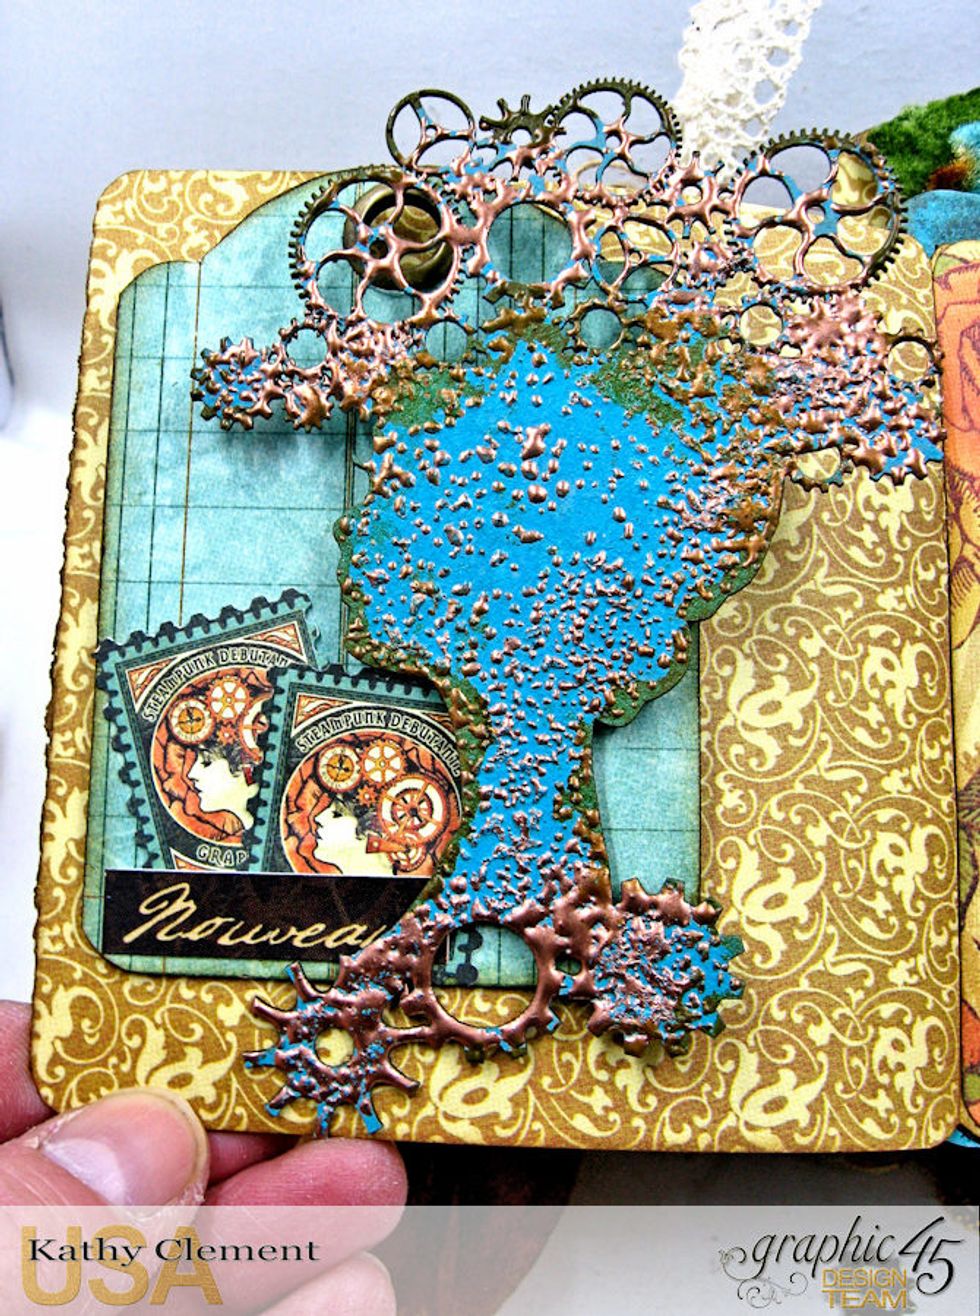
If you glue just the bottom edge to your tag, you have another fun chipboard pocket for ATC tags.
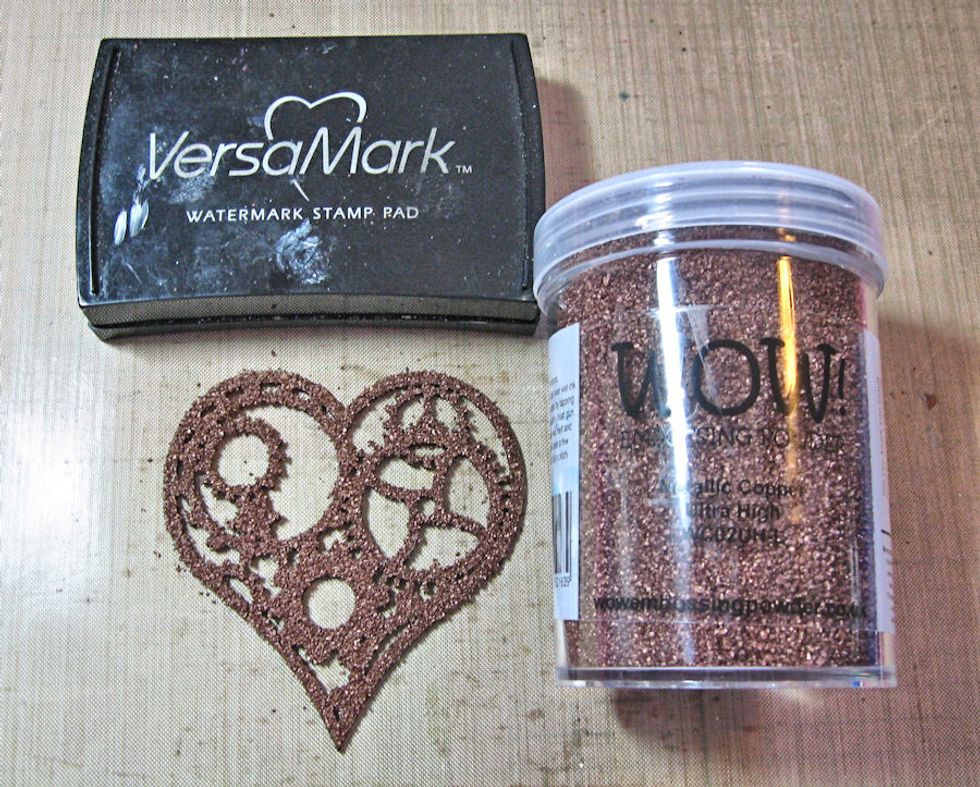
I wanted this heart to be very glossy, so I coated it with Versamark, then laid down a good coat of embossing powder.
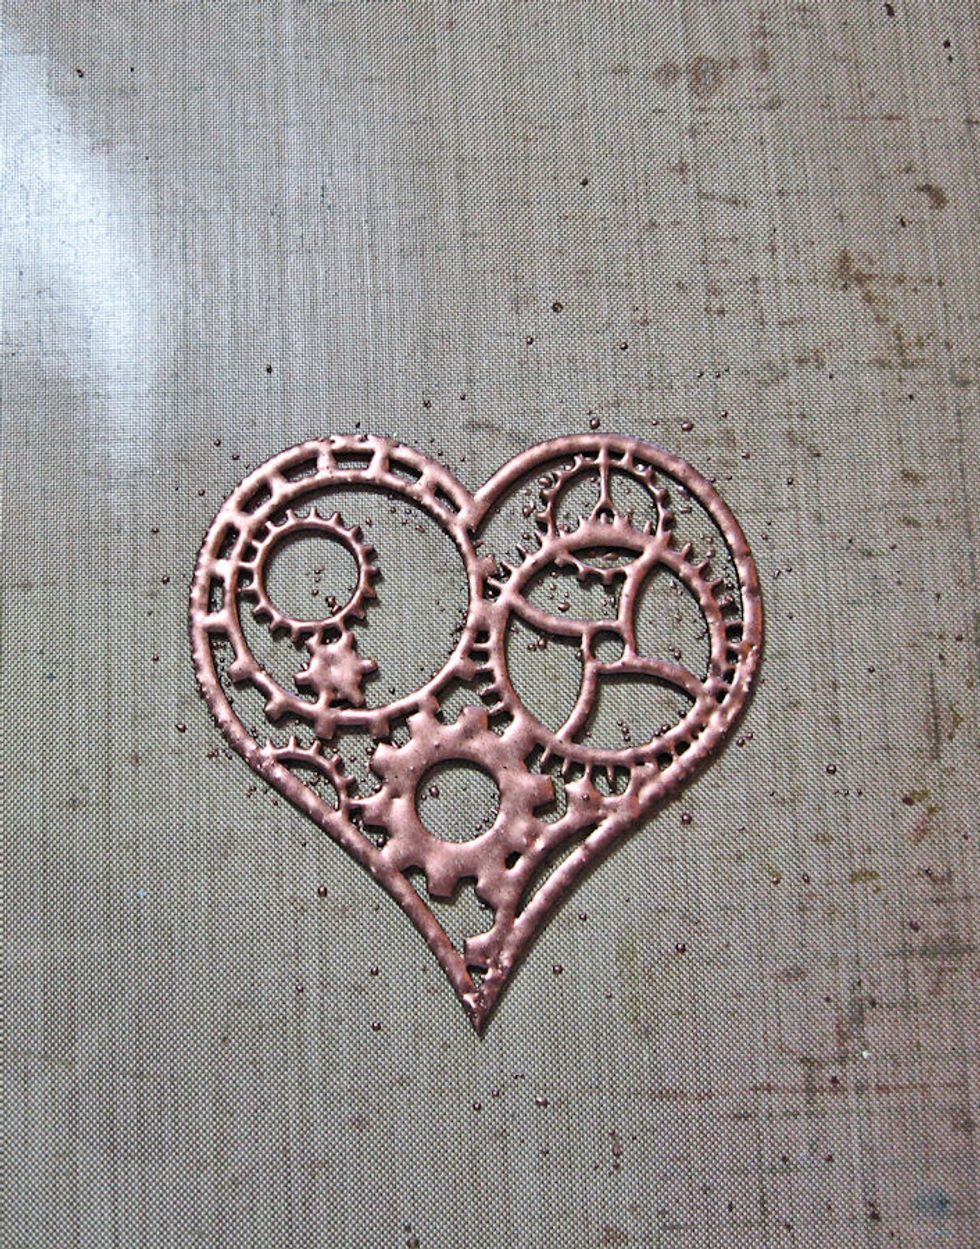
See how thick and glossy the finish is after heat embossing? Hold chipboard with tweezers to protect your fingers. It will emboss faster if it is not on a solid surface.
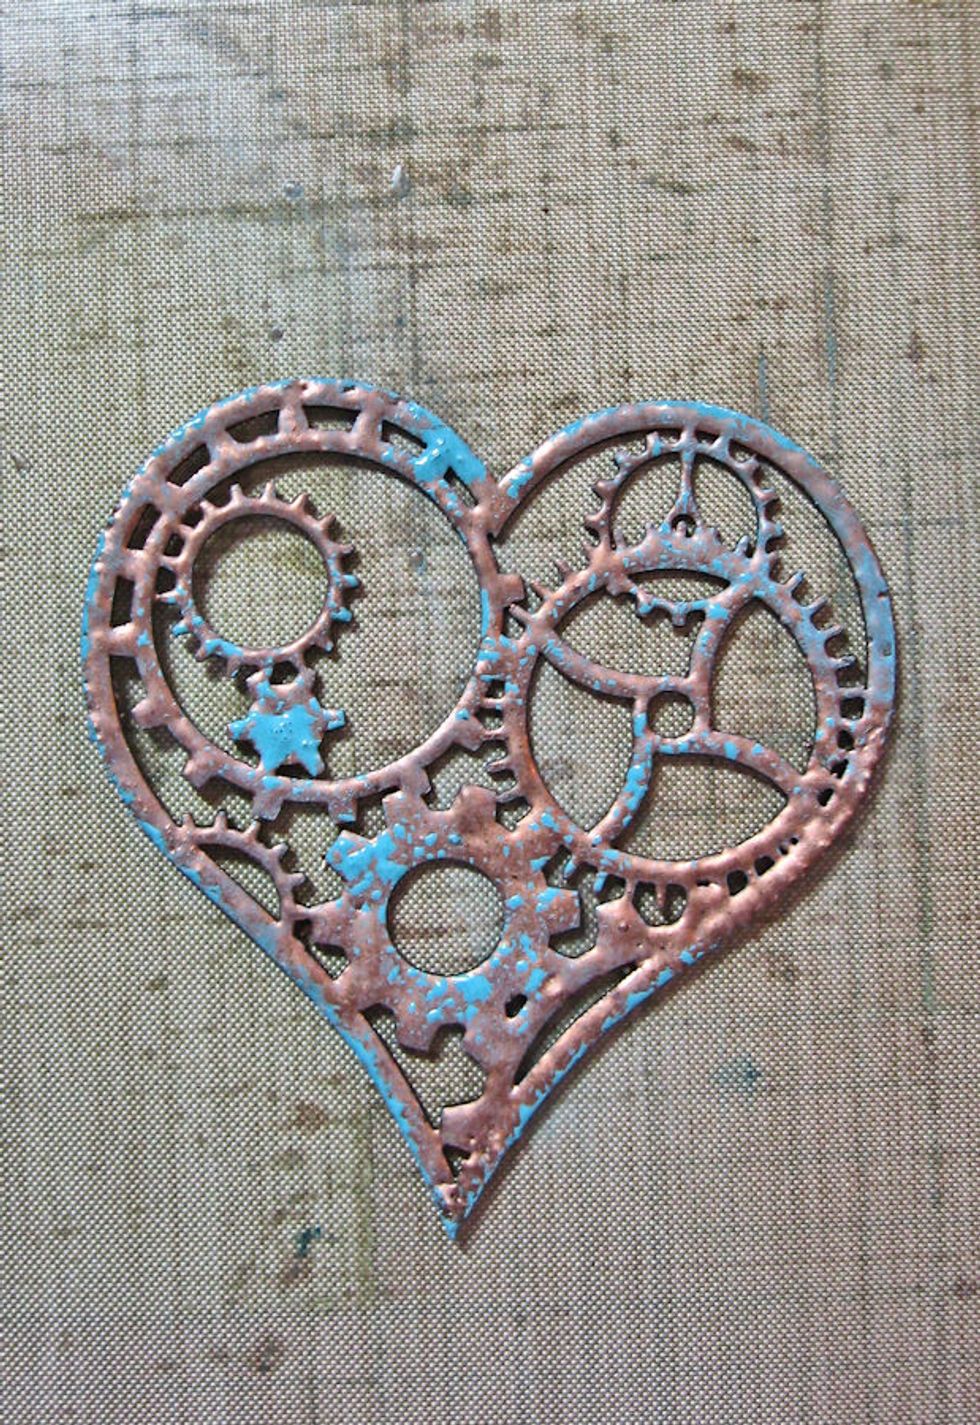
I decided I wanted to create a patina on the heart. To do this, I dipped my finger in a small amount of paint, tapped most of it off onto my work surface and then randomly tapped on the heart.
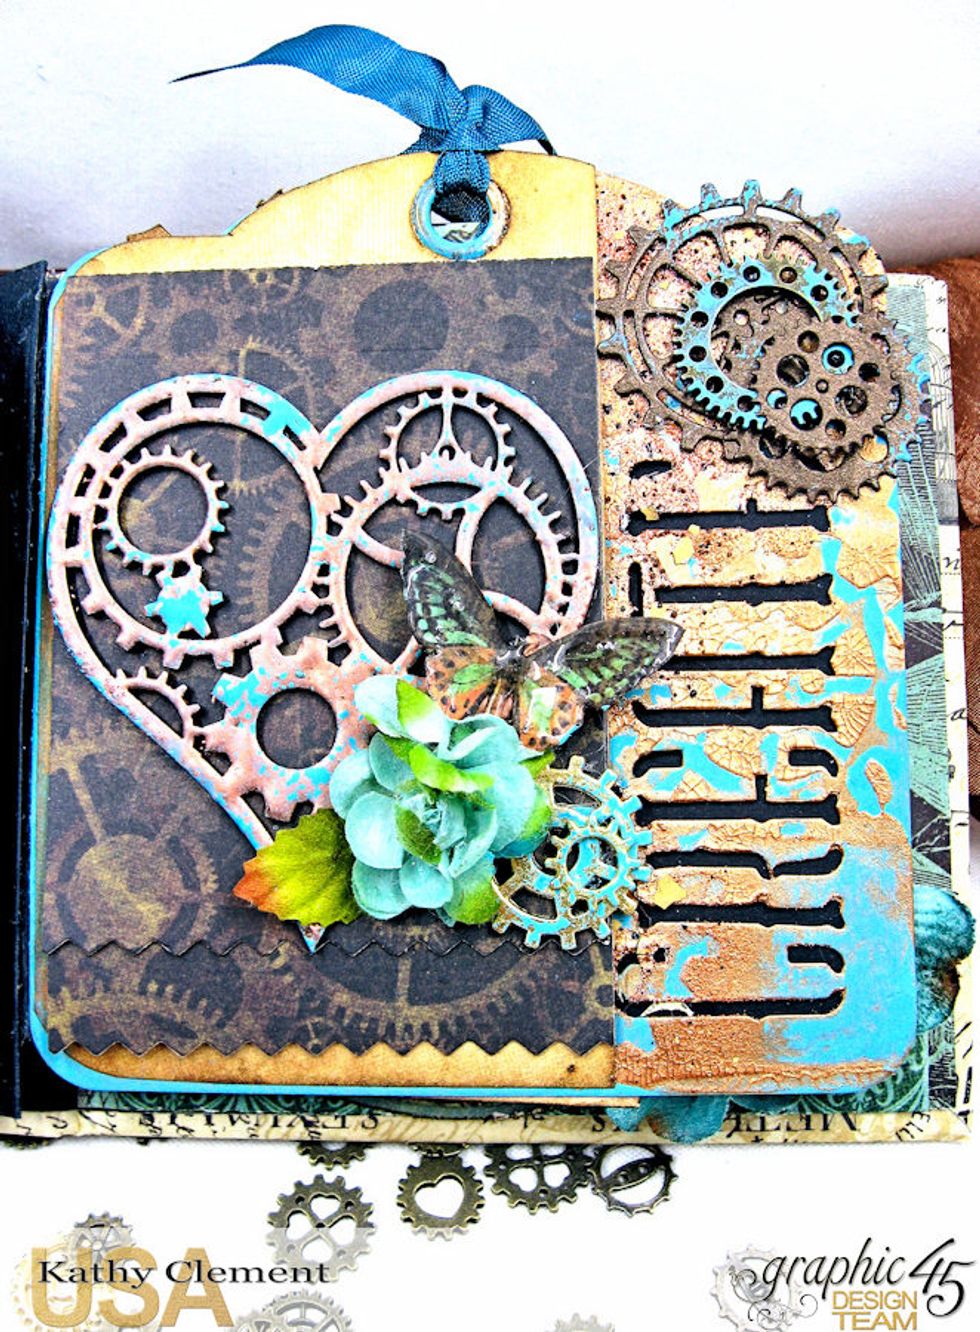
I used the heart to embellish the cover of this waterfall folio. You can also tap paint onto metal embellishments to give them an aged appearance like that on the gears in the upper right corner.....
.....and this key. I hope these fun techniques will help you add texture, dimension and fun to your own projects. Thanks for joining me!