The Conversation (0)
Sign Up
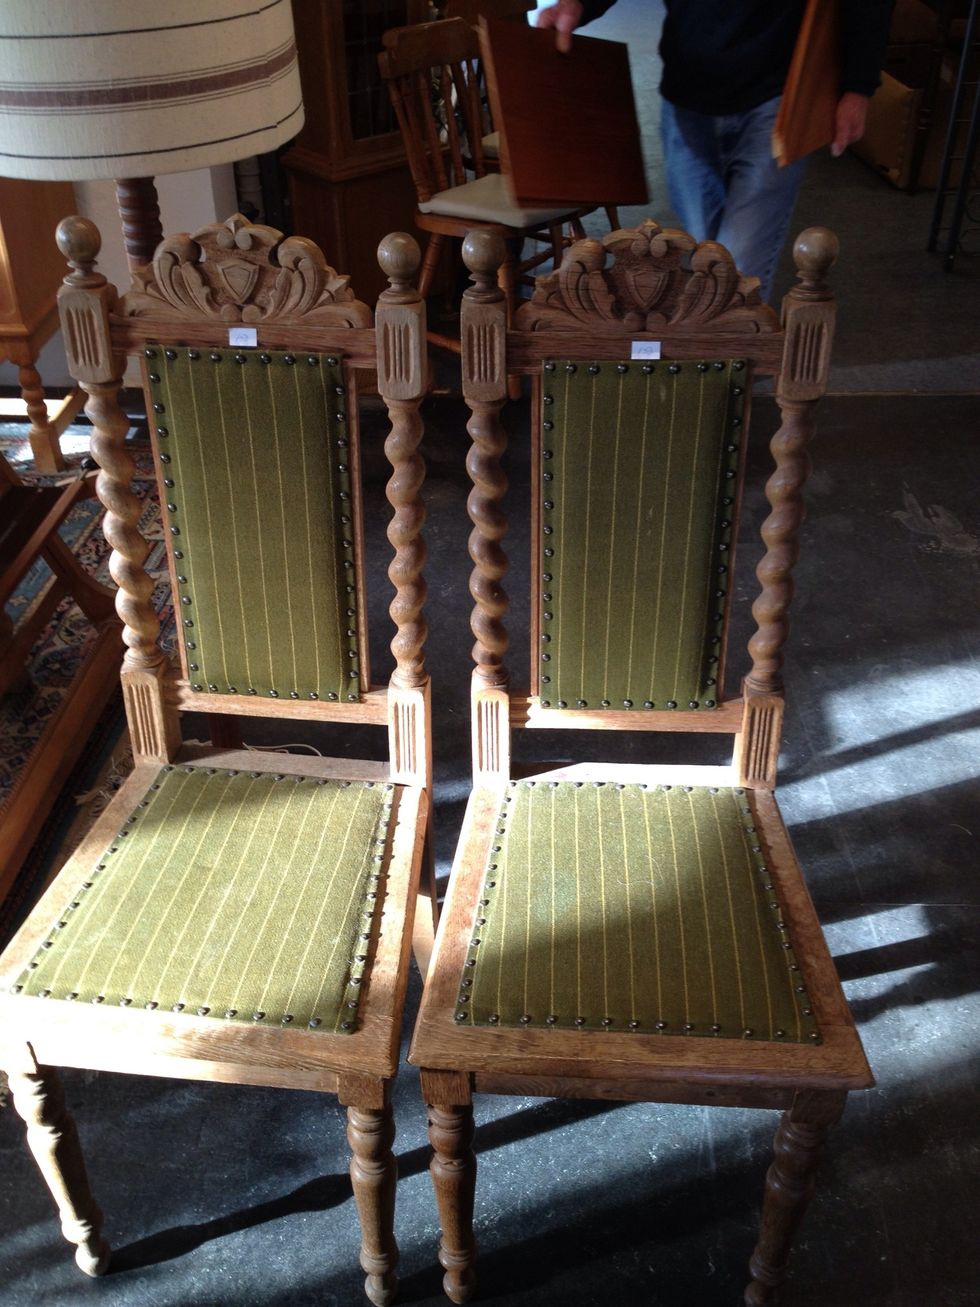
Maybe if you tried for a long time would you able to find fabric that was more ugly than this. The chairs are in good nick and the price is a steal. I'll try to update them. They deserves it.
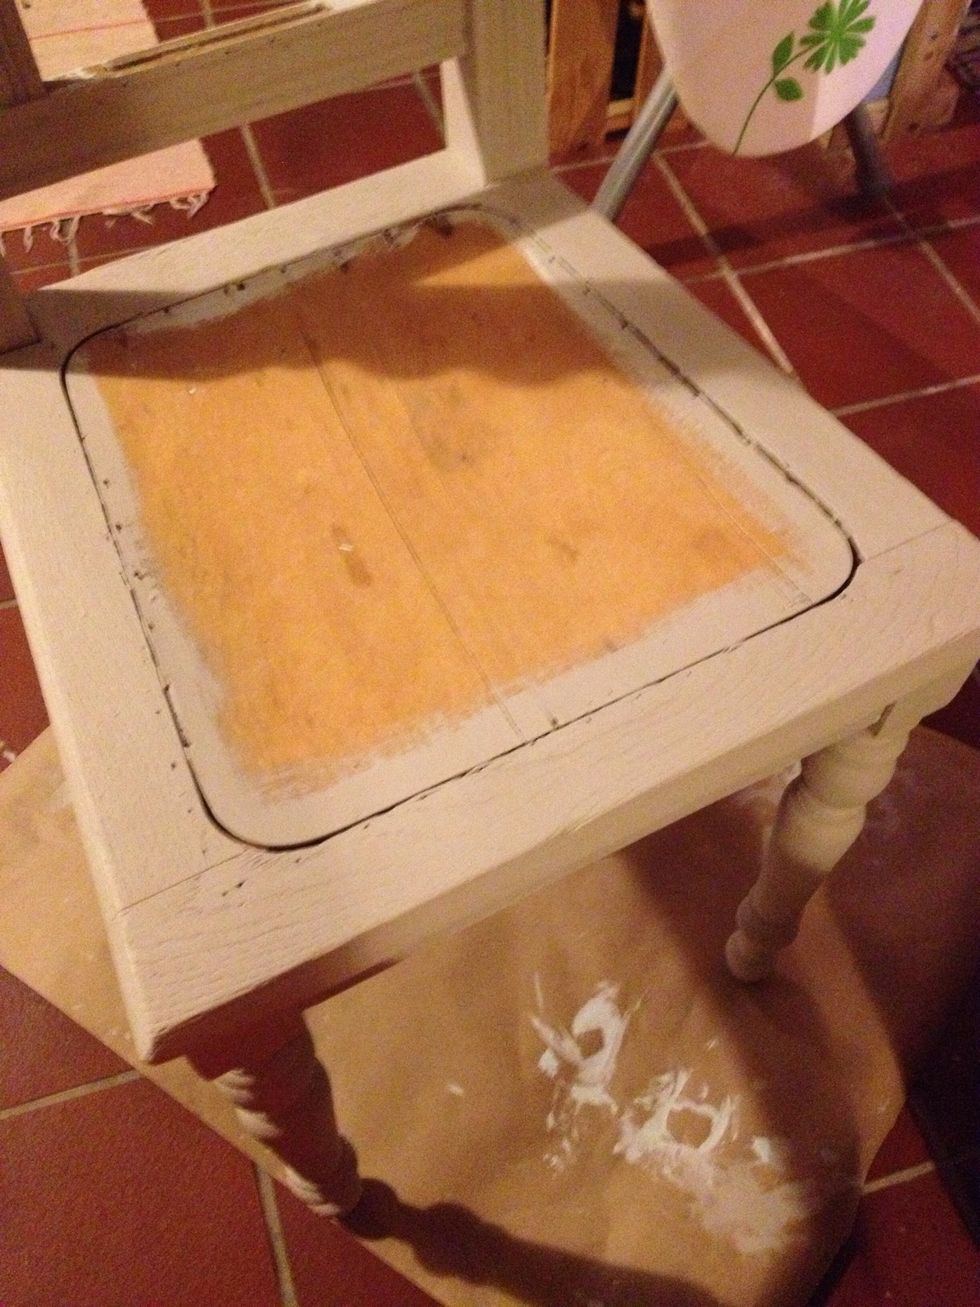
I took the fabric off and gave them a light sanding down before painting them with a primer. I coated them 2 times, first with white and then I added a bit of grey to the next coat of primer.
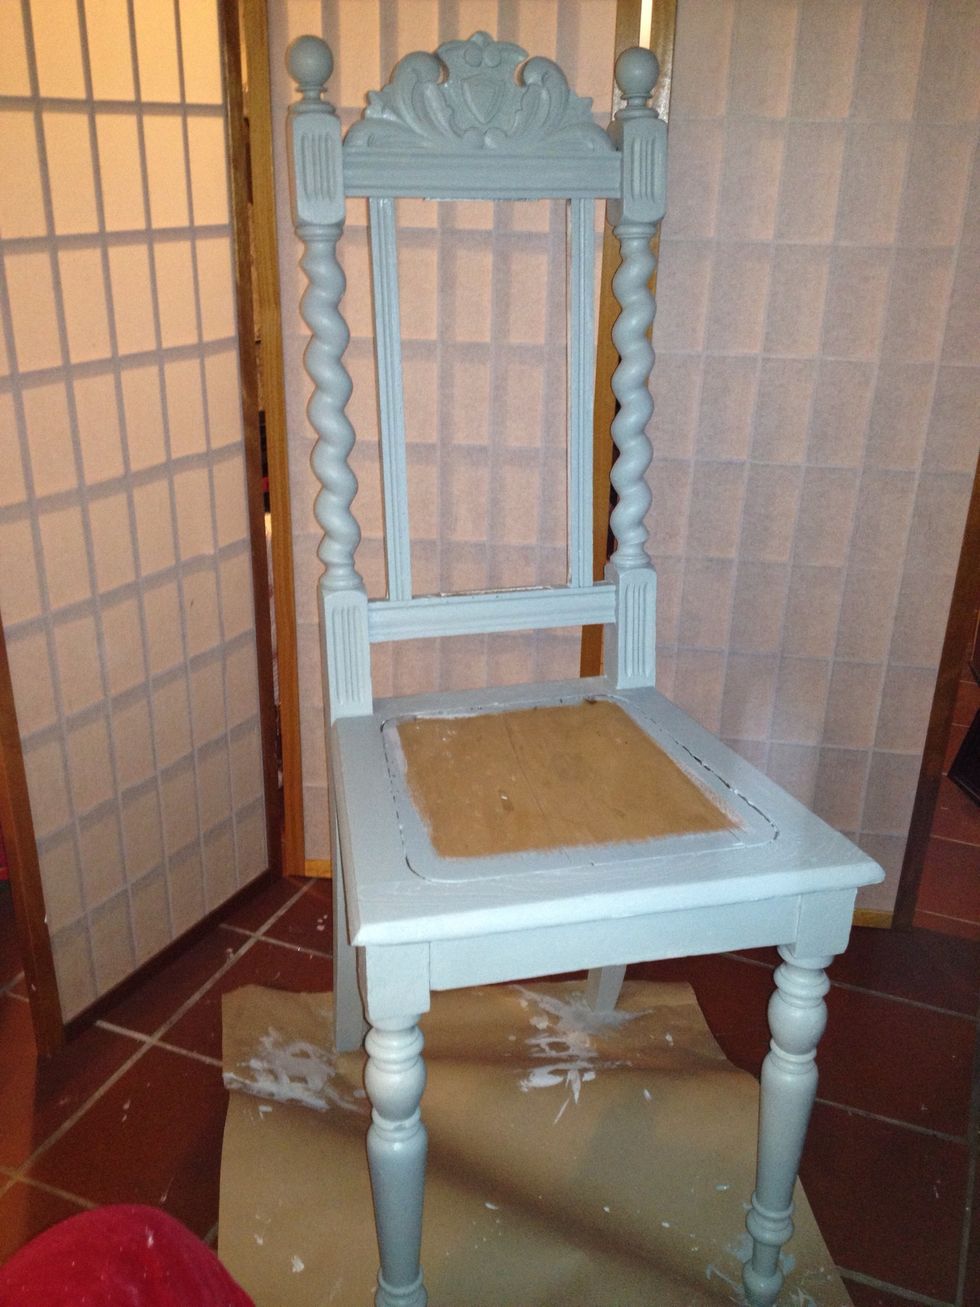
I made this colour by mixing the white top paint with grey and blue. When you mix your own colours make sure to mix enough as you will not be able to hit the exact same nuance again.
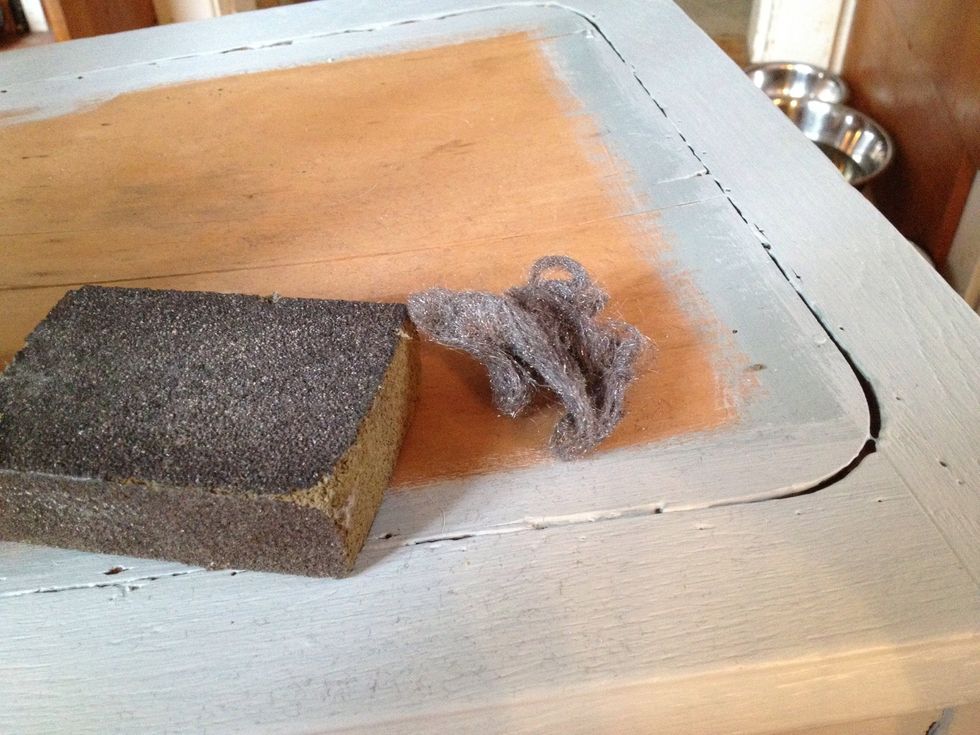
They looked too nice with their new colour so I wanted to distress them. I used sandpaper and steel wool. When distressing like this try to do it where natural wear would happen.
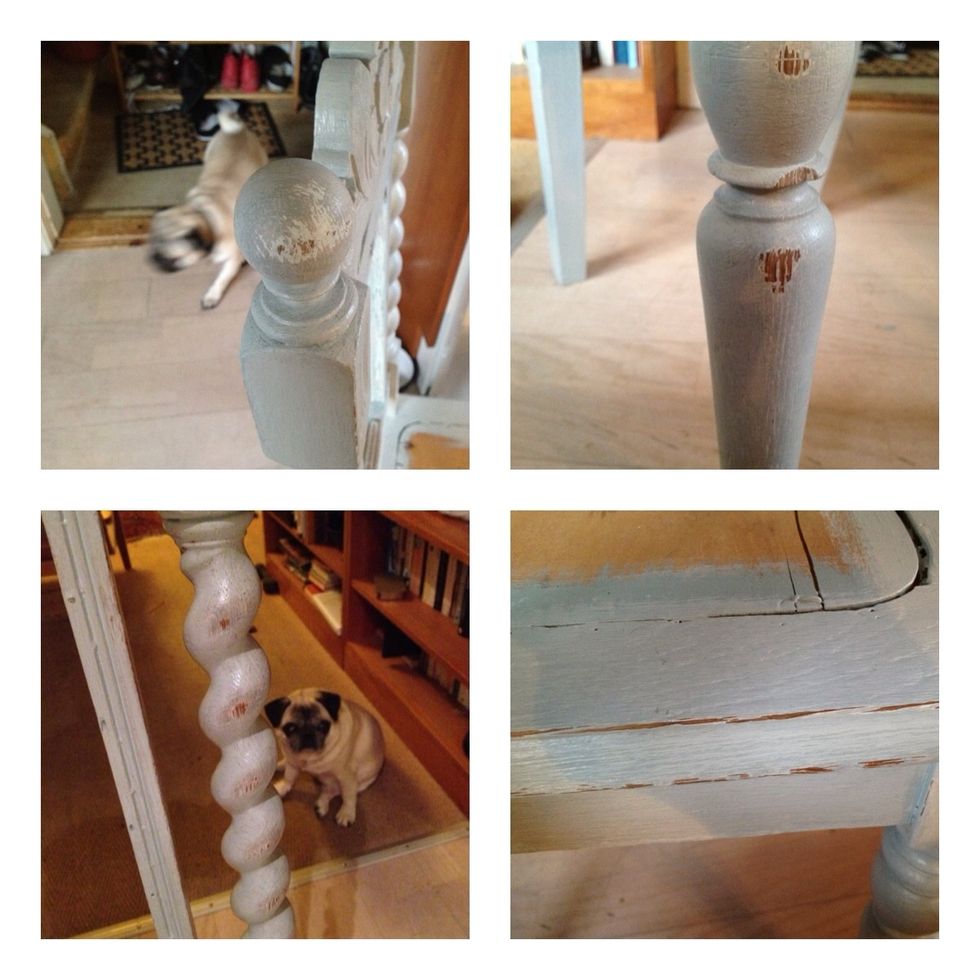
I sanded places where I imagined that natural wear would show up. The different colours of the primer did show
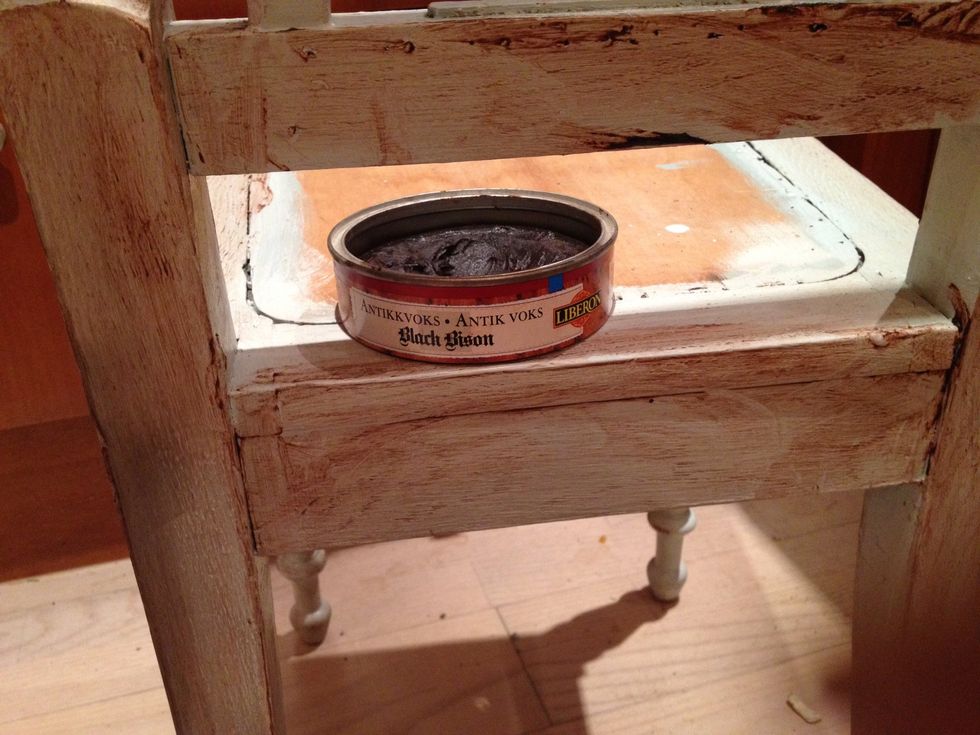
When I was happy with the distressing, the chair still looked too crisp if you know what I mean. So I used some antique wax I had from an other project.I applied with a lint free cloth
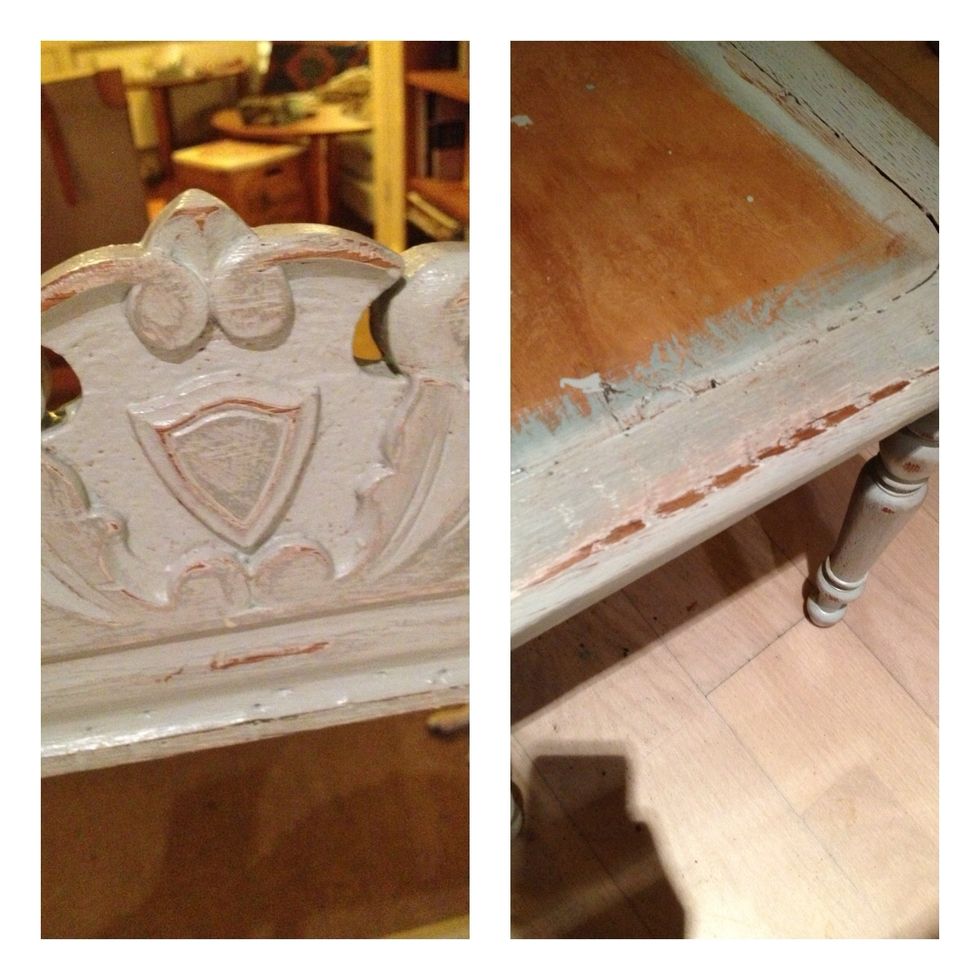
I rubbed the wax off immediately with another lint free cloth. I kept applying and rubbing off until I got the effect I wanted.
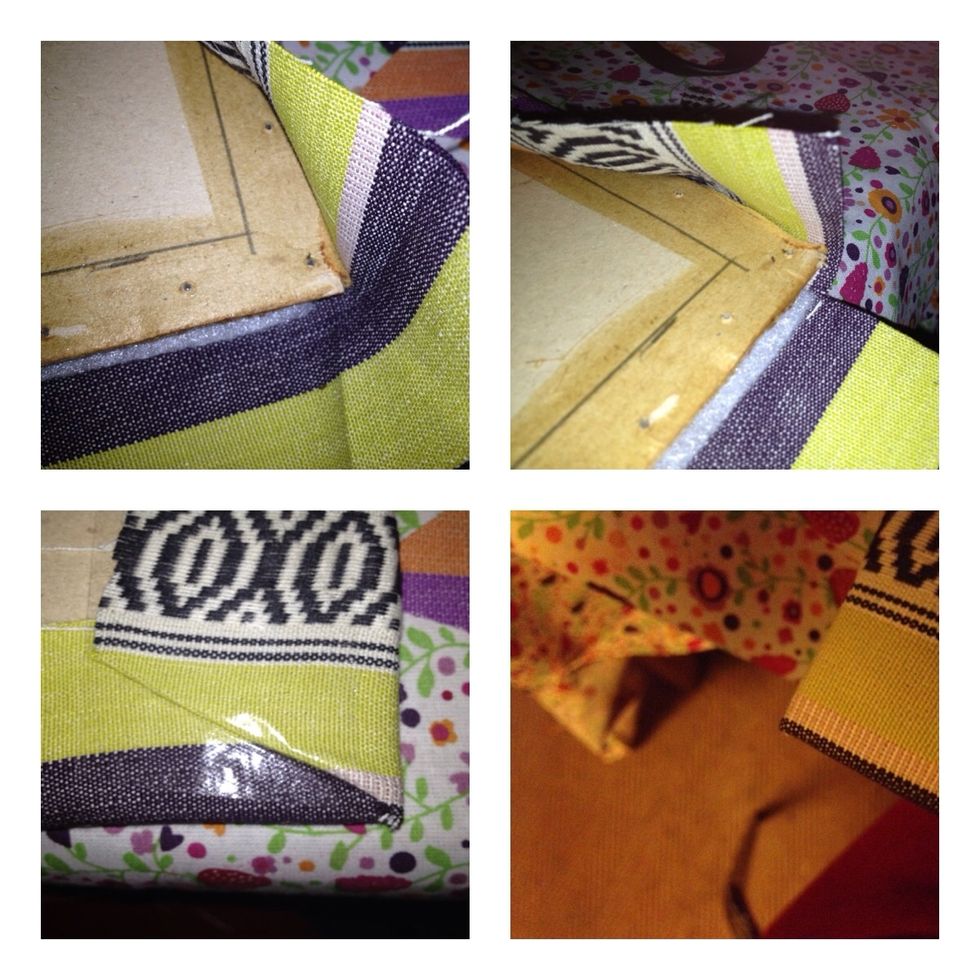
Now to the upholstering. I reused the carton from the seat and the back. I used tape to secure it to the backside. This is how to make corners.
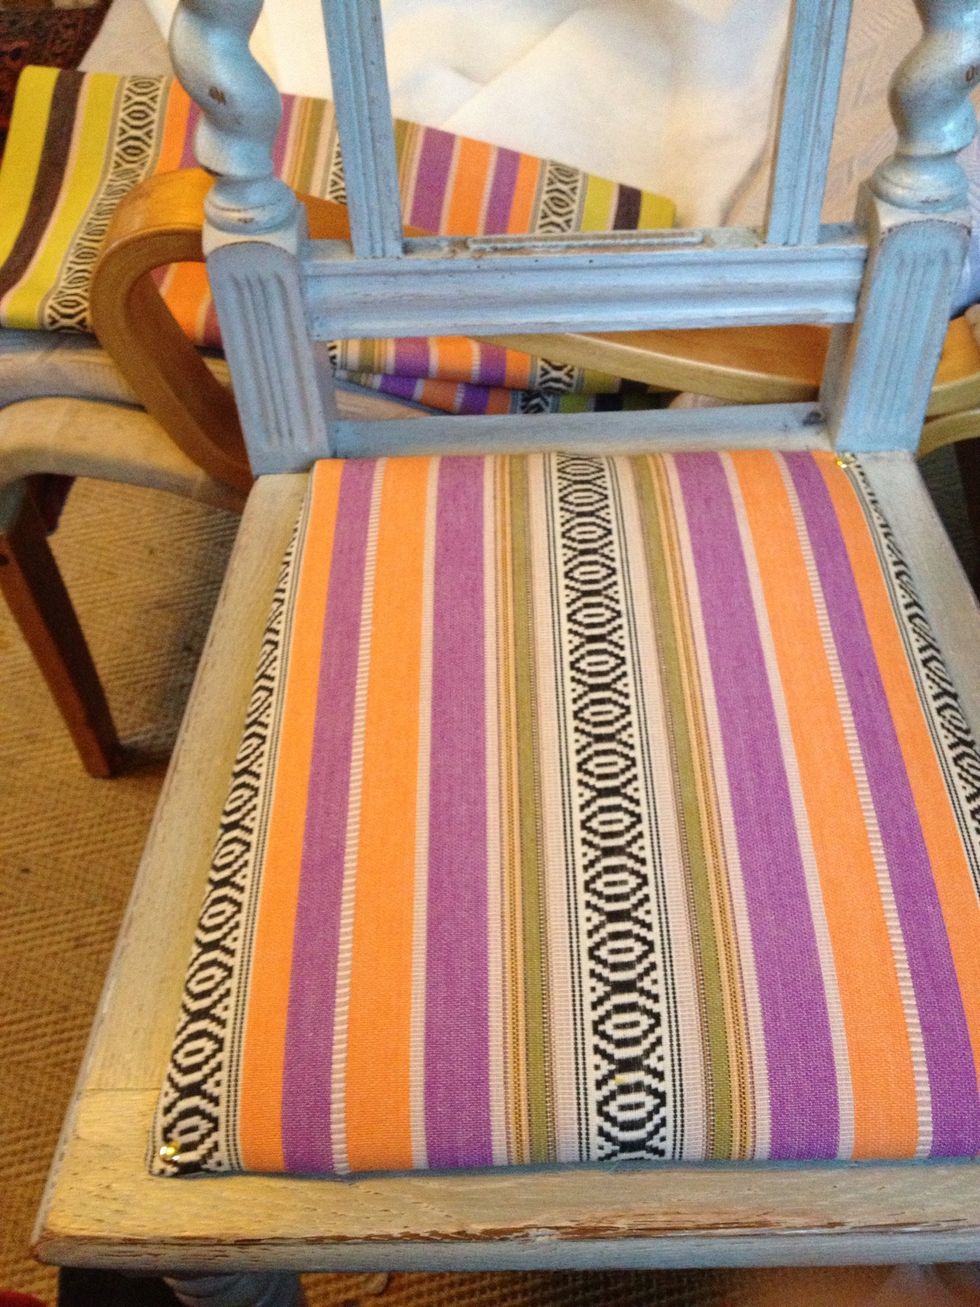
Start by tacking in diagonal corners. The fabric is made for deck chairs.
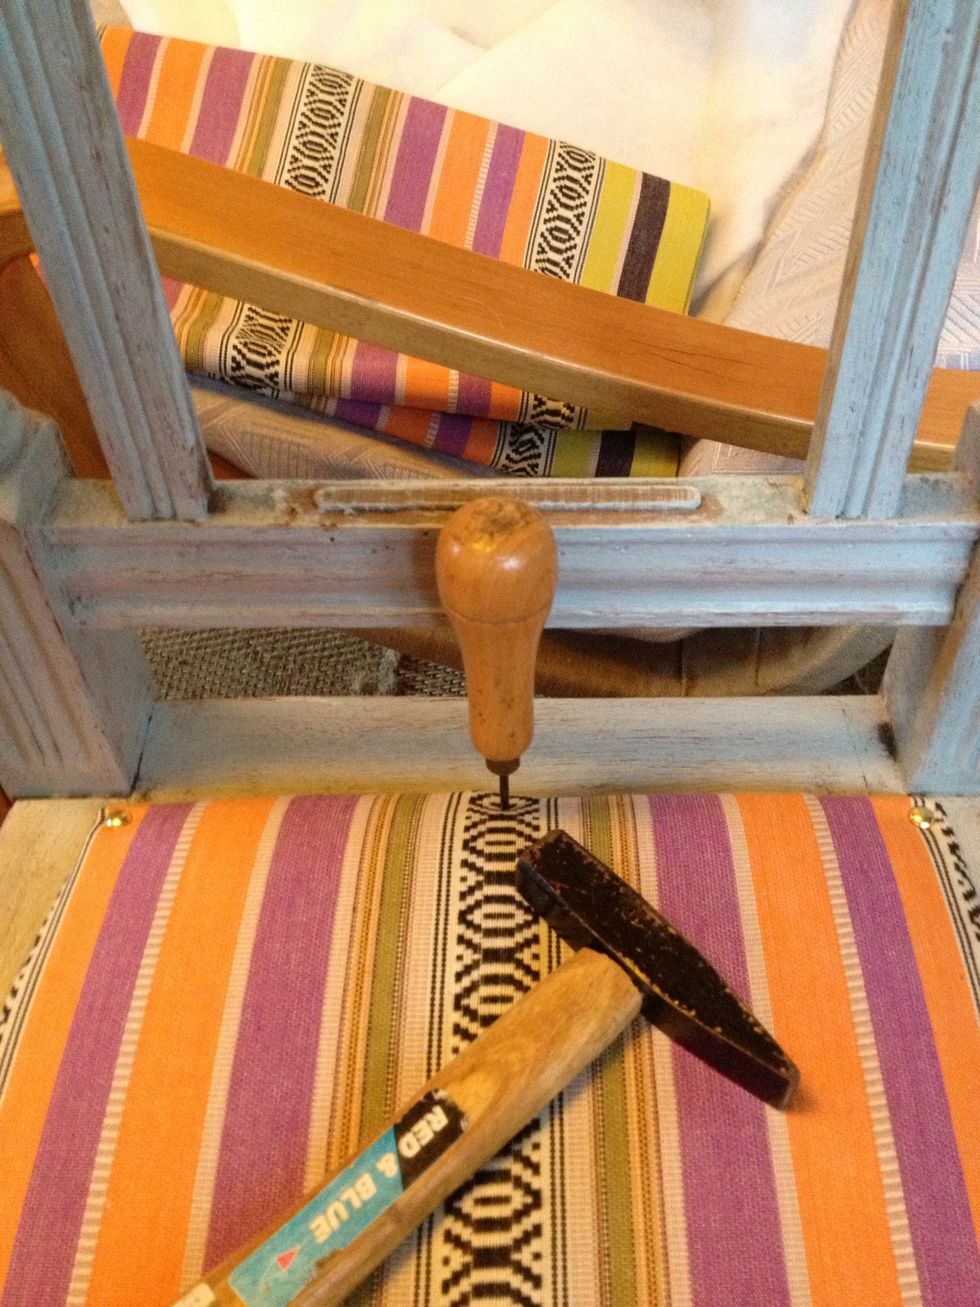
Because the chairs are made of oak I could not get the tack in without help. I hammered the drift thru the fabric and cardboard into the wood. That nailed it. 😝
My first attempt to distress furniture. I feel almost sad the project is done, because it gave me so much fun. Things learned: use gloves when using antique wax, my fingernails are now quiet antique.
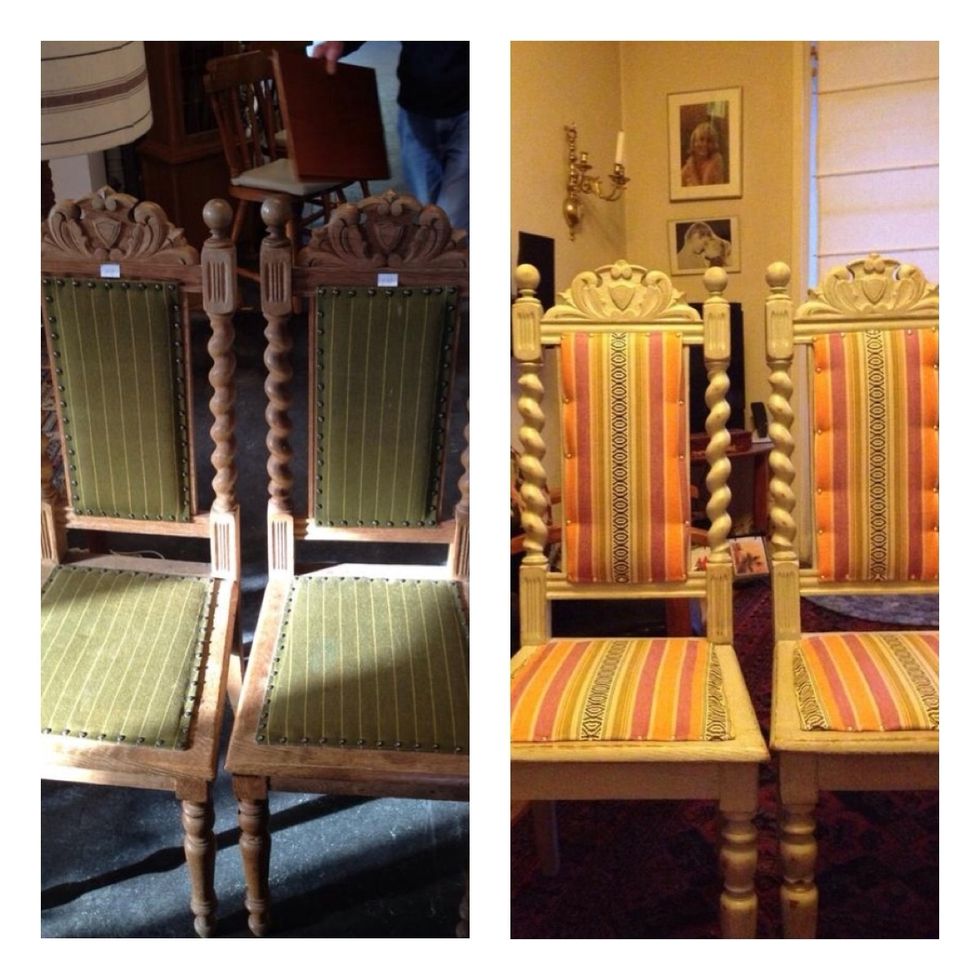
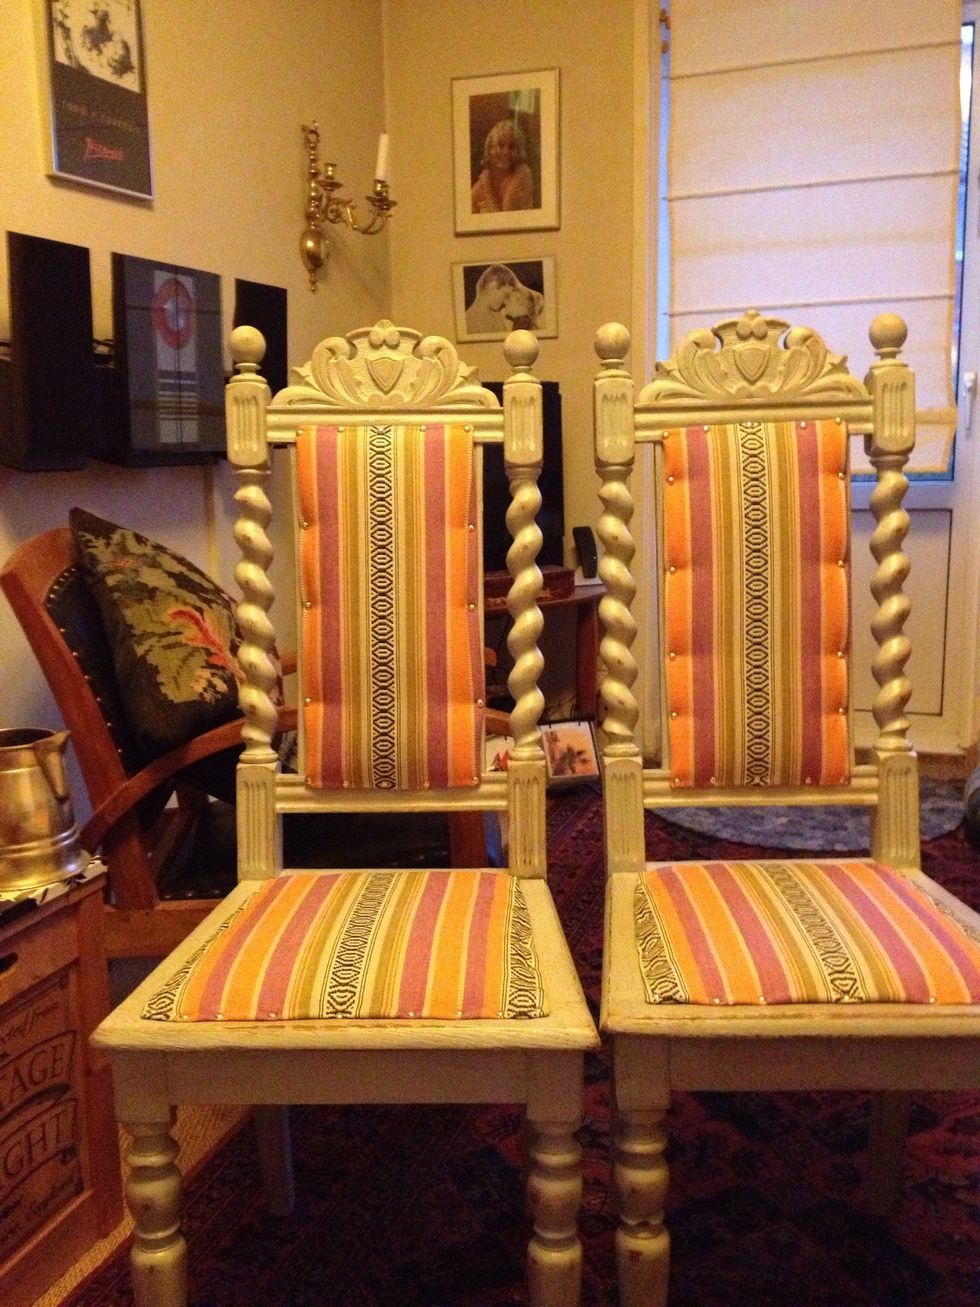
Before and after.