The Conversation (0)
Sign Up
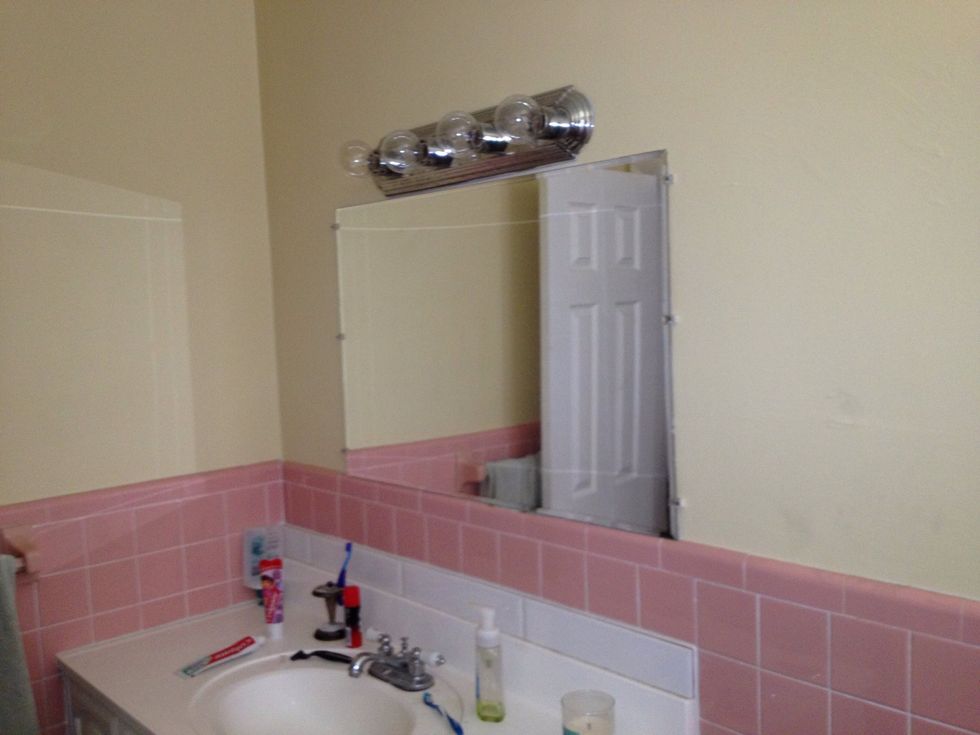
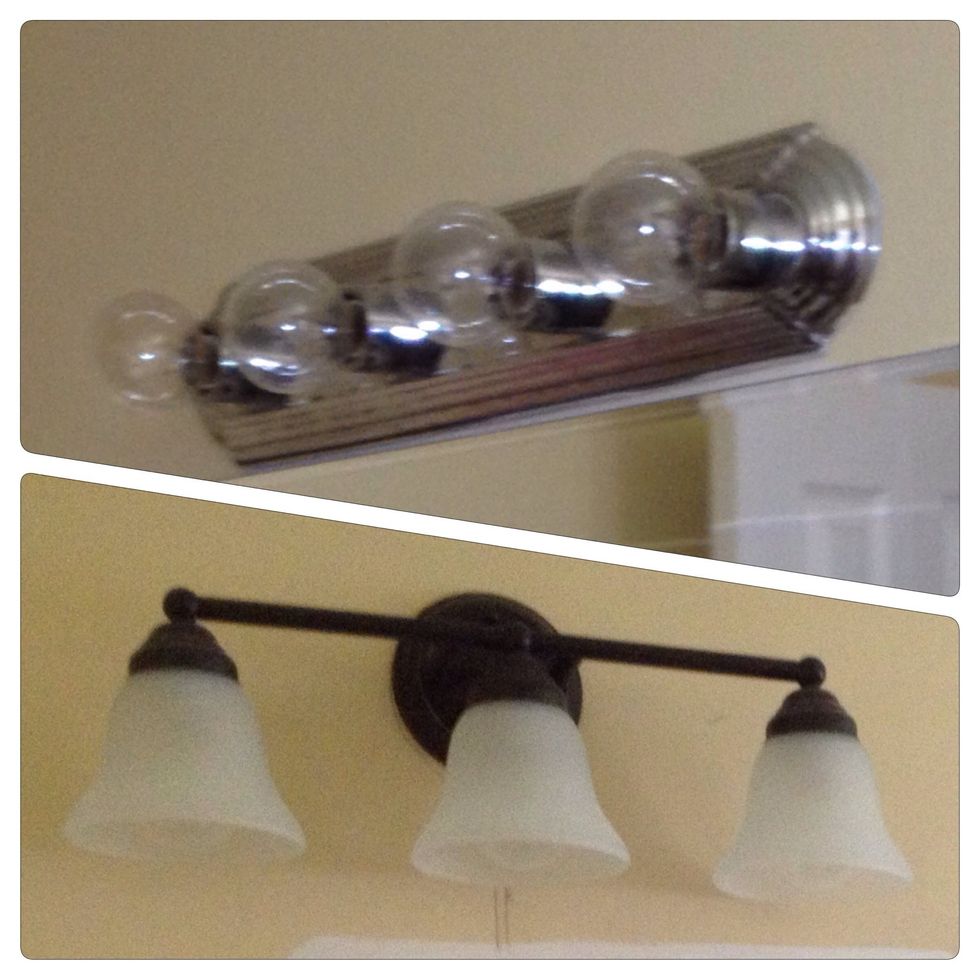
Original Bathroom with ugly mirror, lighting, pale yellow paint and pink tiles.
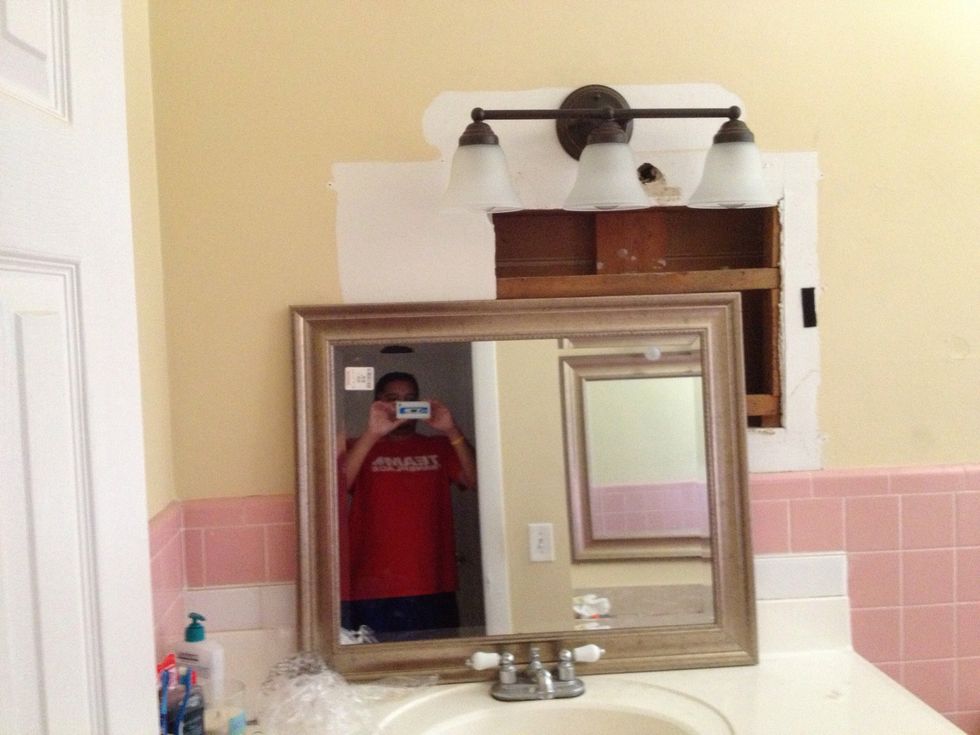
Take down the mirror first to see what's behind (measure it too). I regrettably went shopping first, then when I was ready to switch out the mirror I found a large gap that I needed to cover up.
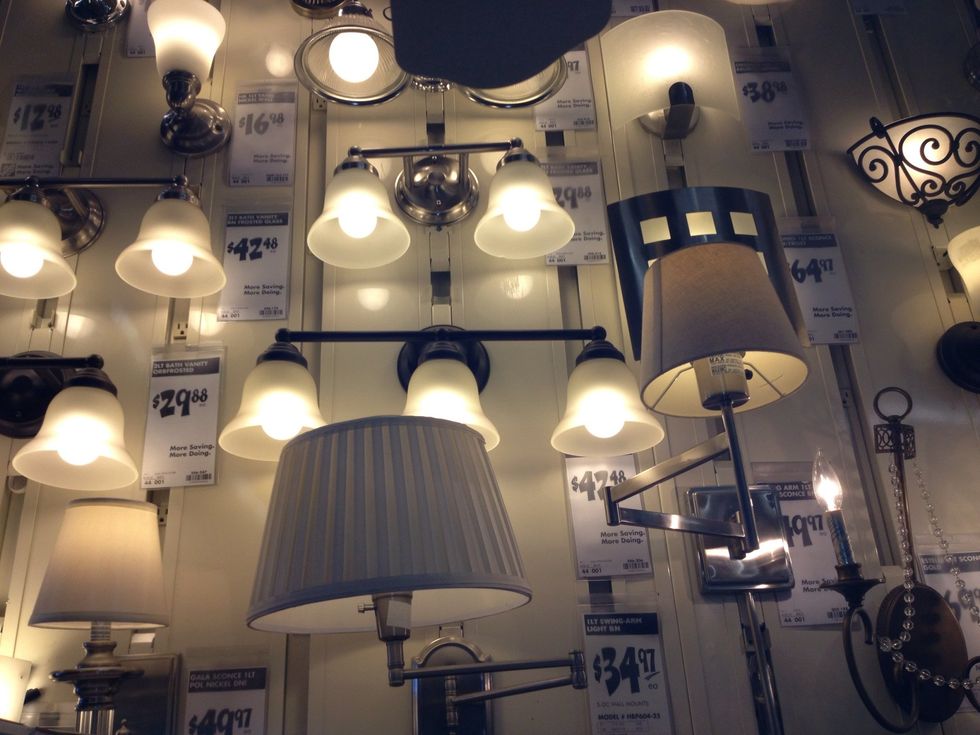
Shopping at Home Depot I found a light fixture for around $40 and they let me use a Lowe's coupon to get a discount off of the total price.

Went to Sherwin Williams to get Paint for the walls, figured a light brown (Barcelona Beige) looks a lot better against the ugly pink tiles than the original pale yellow paint that was on the walls.
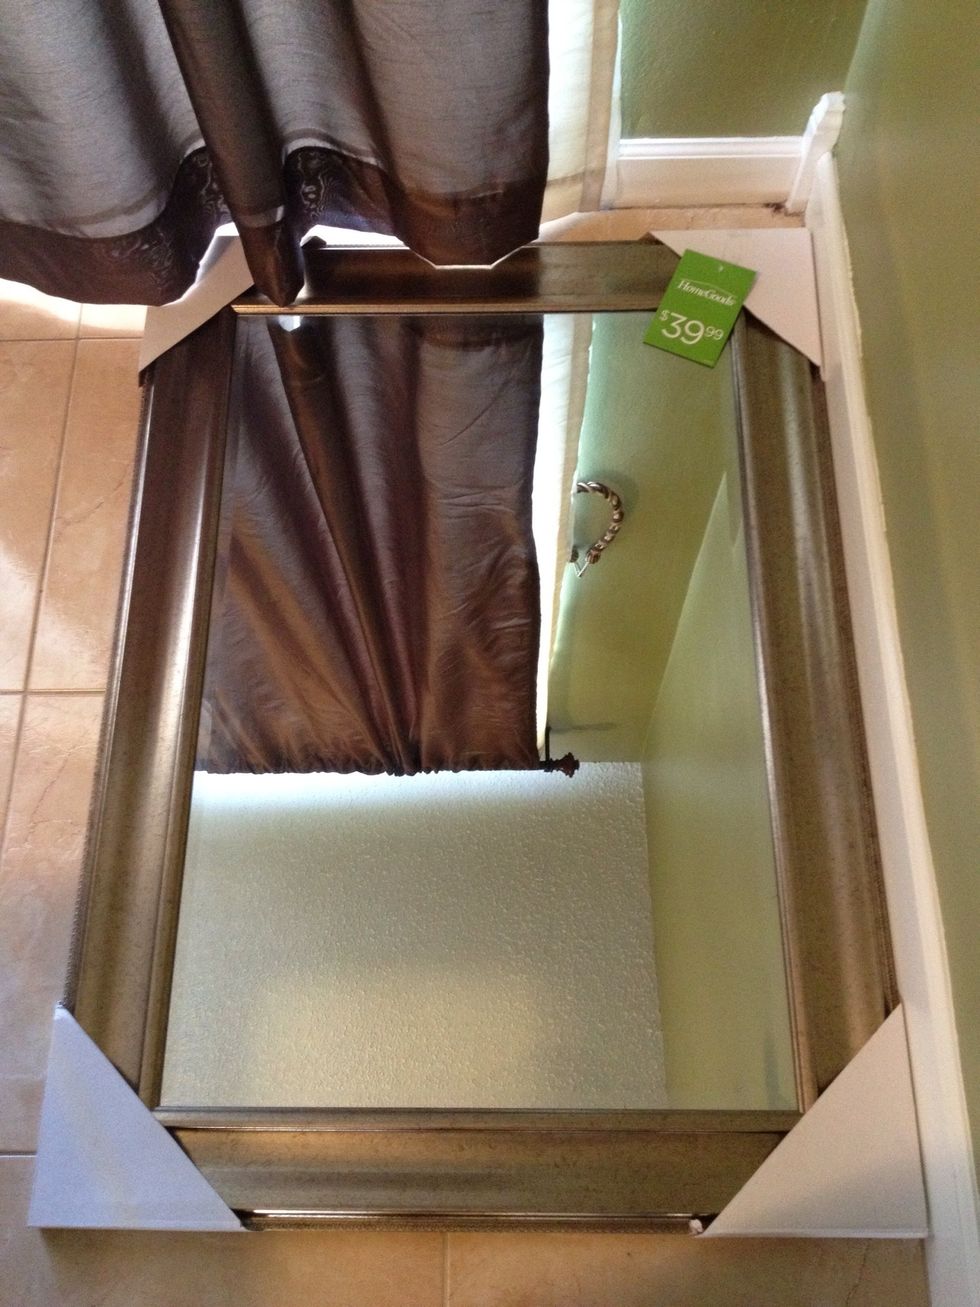
Found a big gold mirror at Home Goods for around $40.

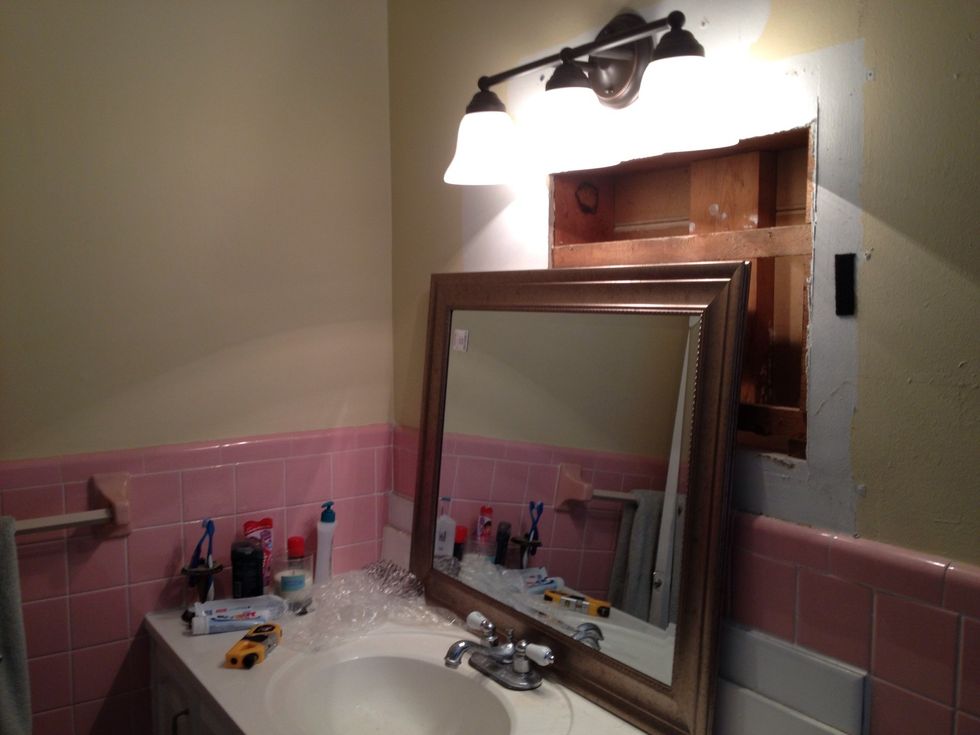
After taking down the old mirror, to put up the new mirror, I found this big old cut out. This caused problems, because I couldn't center the mirror where I wanted, because the gap would be visible.
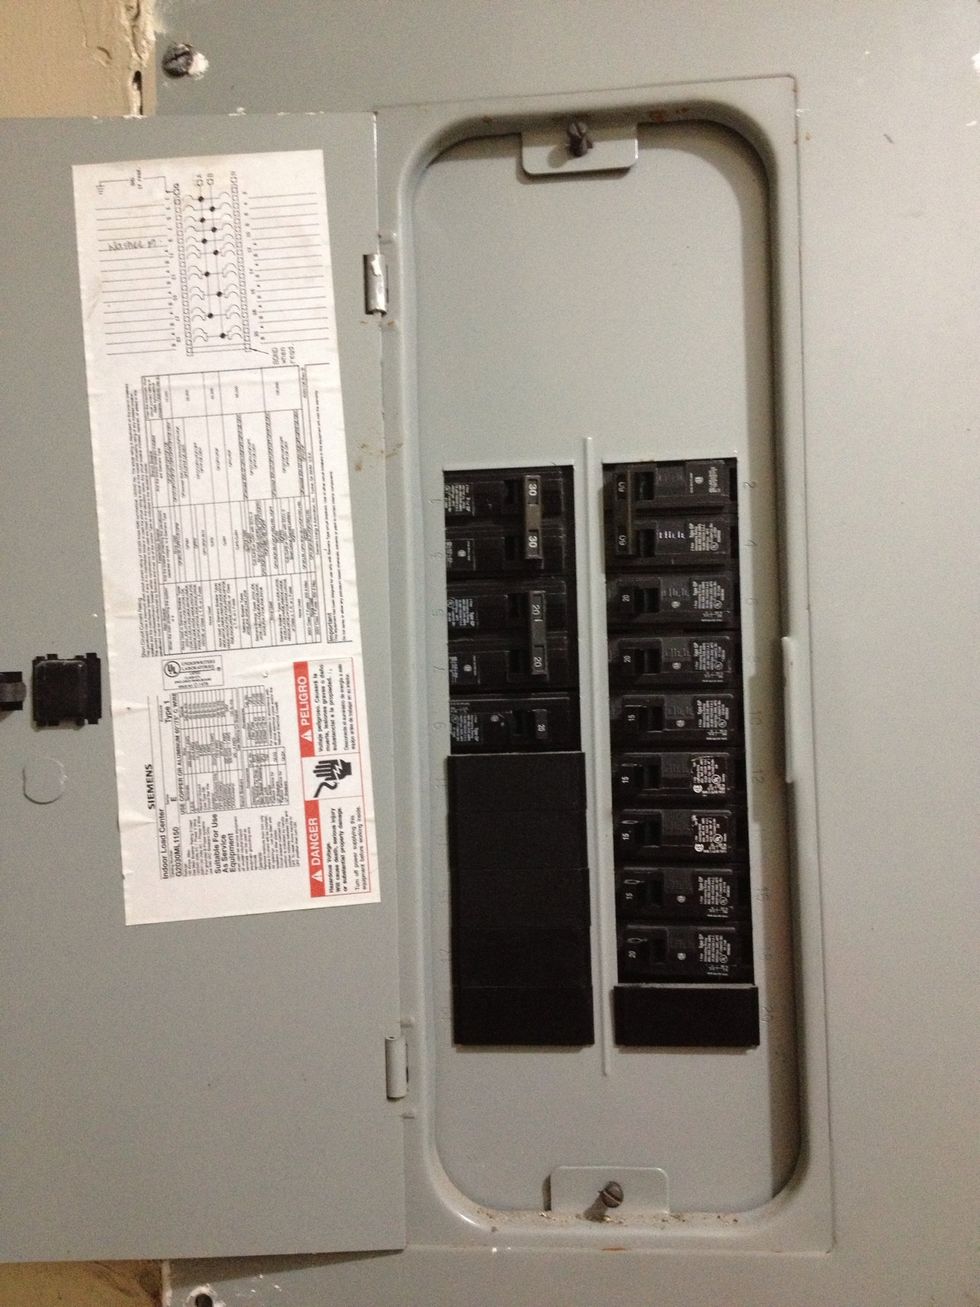
Since I couldn't put up the new mirror, I decided to go ahead and install the light fixture. First thing, make sure that the power is off. Your fuse box is probably in your garage or utility room.
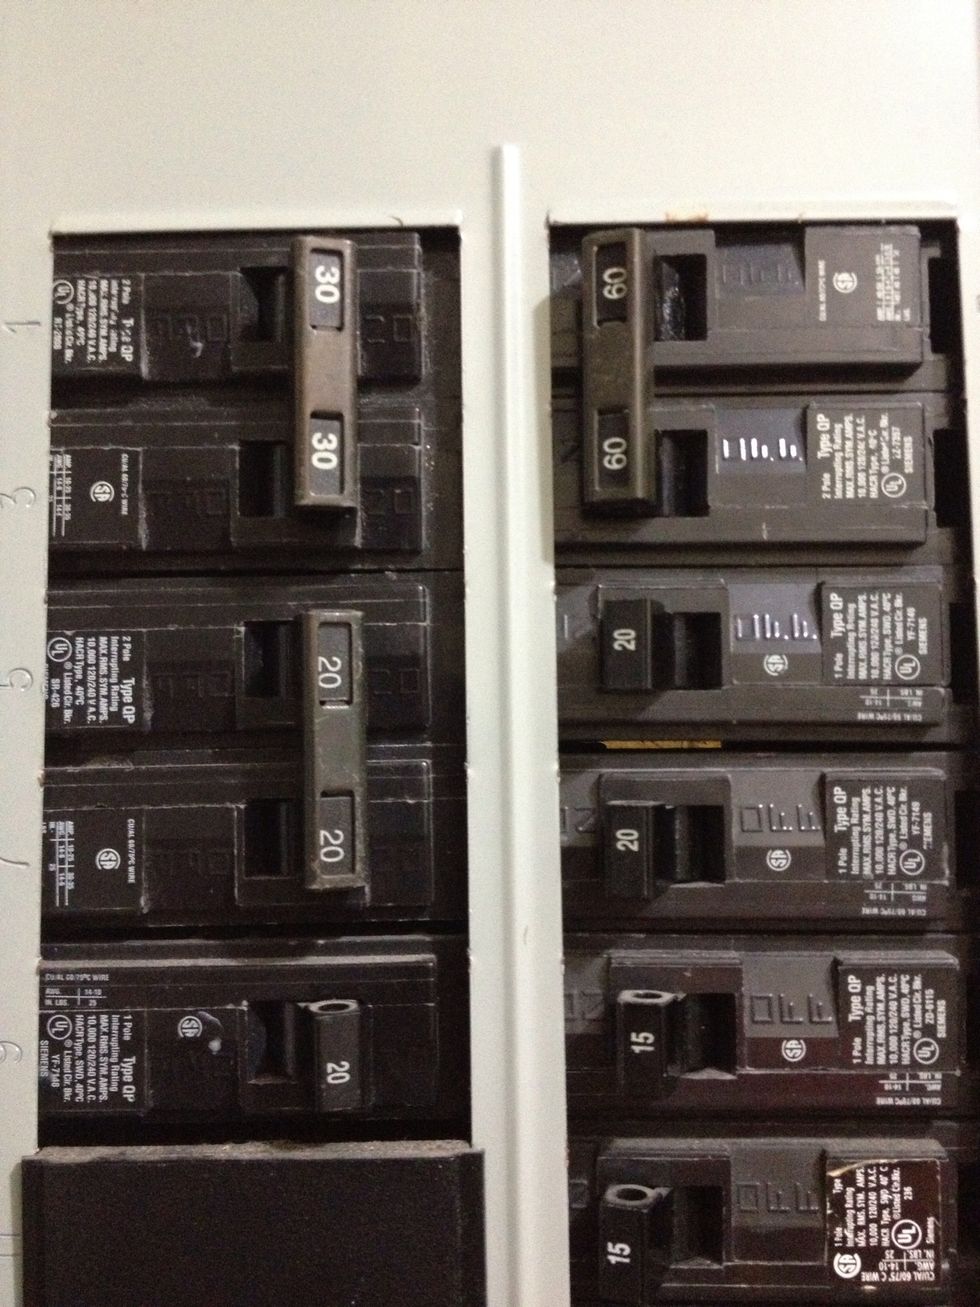
If your fuse box isn't labelled, you should turn on lights in each room then flip one switch in the fuse box at a time to figure out which switch controls which items in your house.
Have someone hold the fixture, while you unscrew it from the wall if the wires are too short for you to rest the fixture on the ground or cabinets. Everything is easier with an extra set of hands.
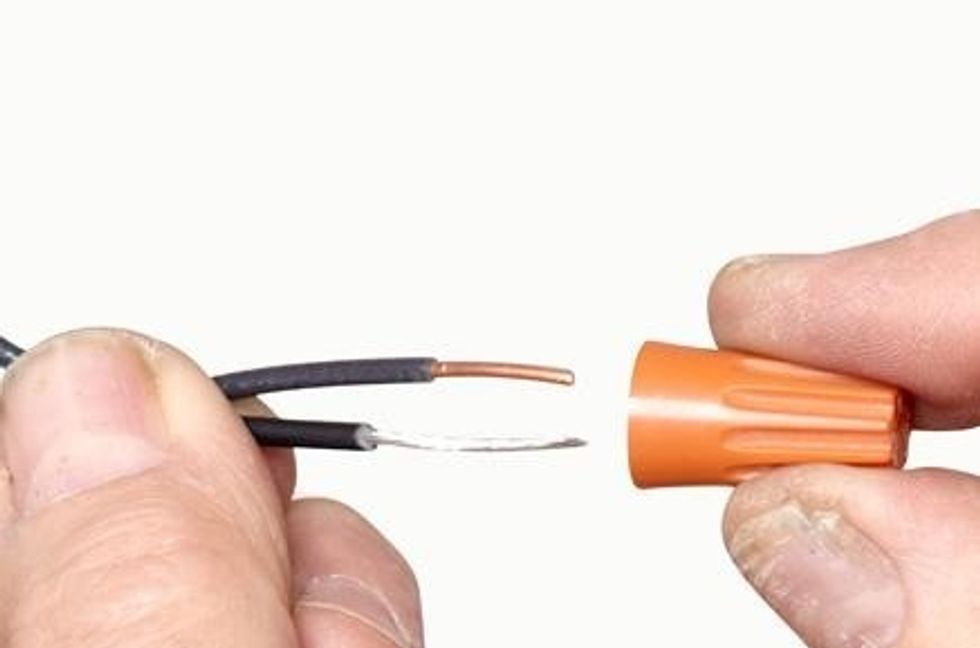
Untwist the old fixture's wires from the wire nut (wire cap) then attach the new fixture's wires to the cap with the wire from the wall.
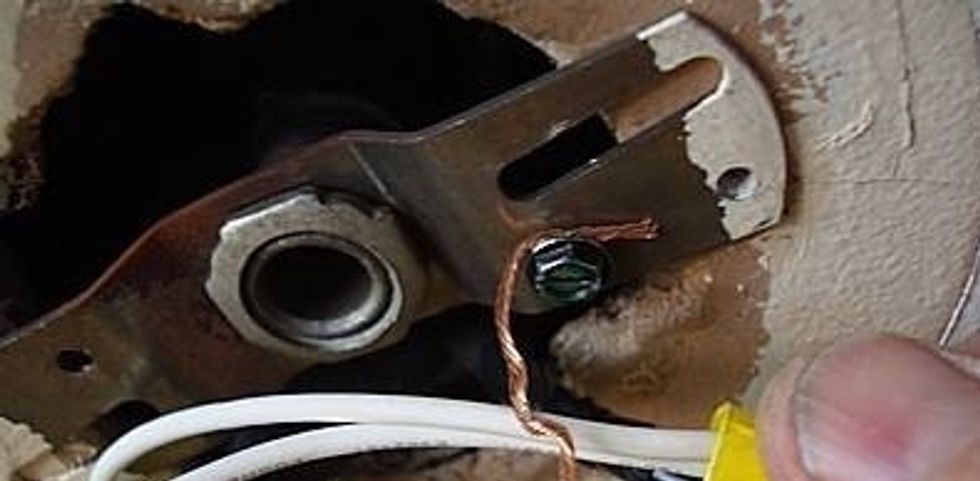
Attach the ground wire to the ground screw and then screw and mount the new light fixture onto the wall.
Go flip the switch in the fuse box, and then flip the light switch to make sure the light works.
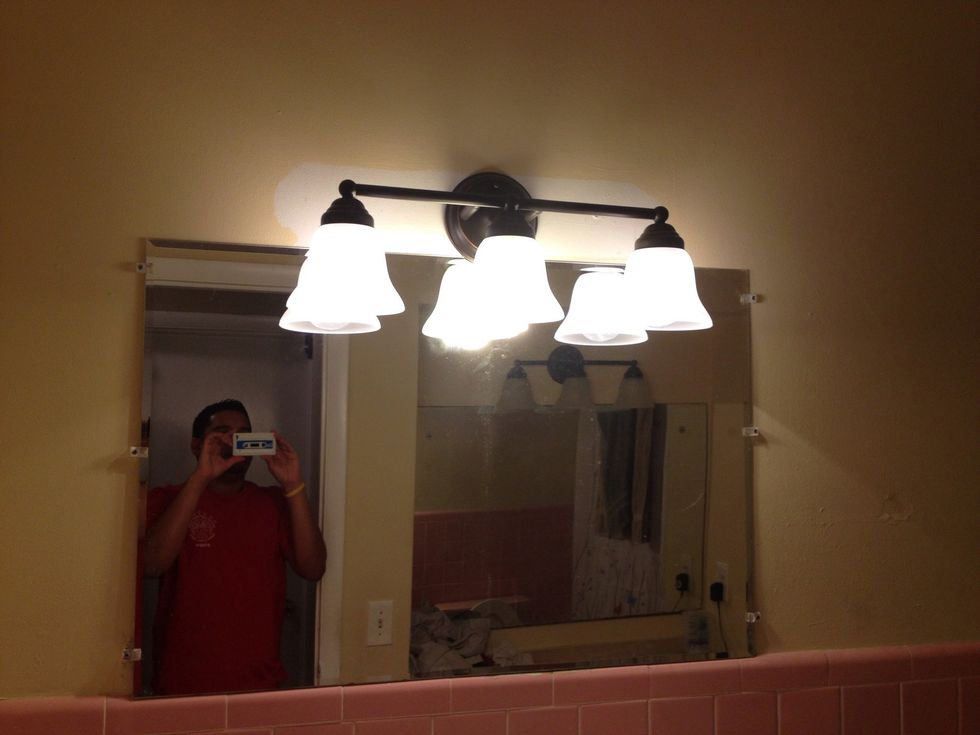
It works... however the problem is that I used the old light placement that was centered for the old mirror and not the new mirror's dimensions.

Before worrying about fixing the position of the light, I decided to fix the gap in the wall. I took a slab of Sheetrock and cut it to fit the gap, then drilled it into sturdy sections of the wall.
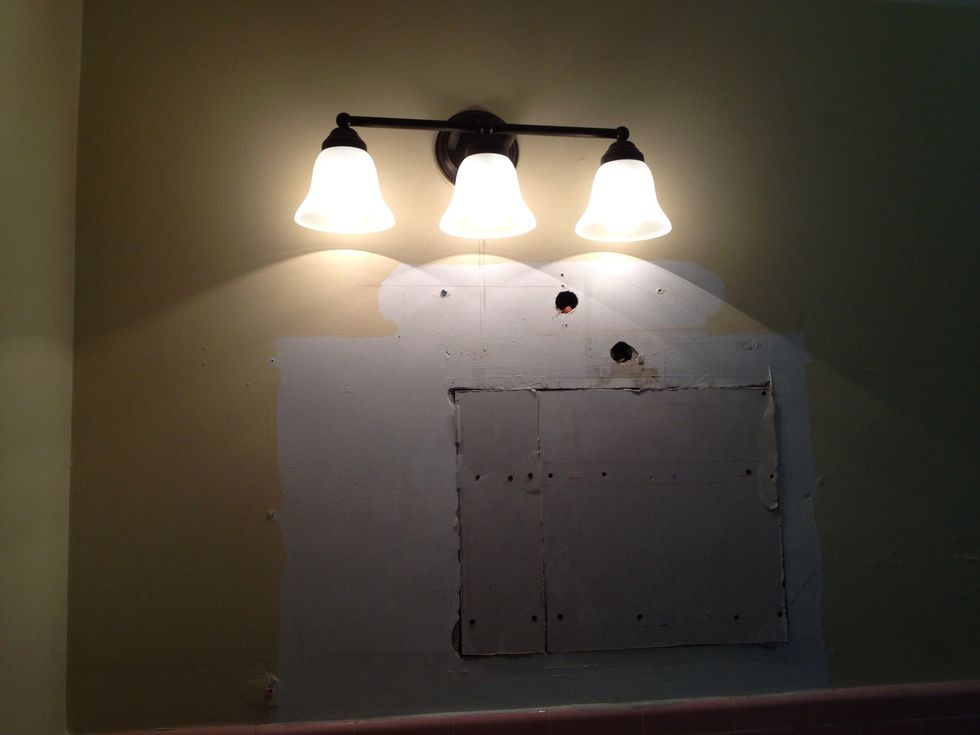
Since the gap was uneven, I had to chip away at parts of the sheet rock with a saw to make it lay flat. After that I drilled a hole to run the wires for the light above the center for the new mirror.
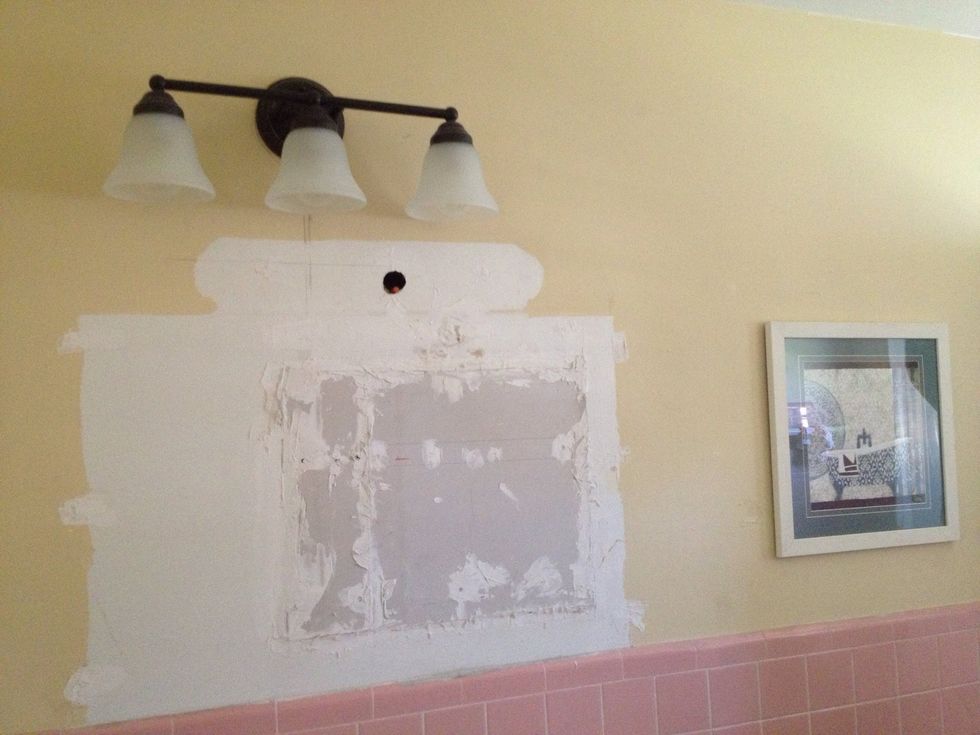
With the light fixture in the right spot, I covered the small gaps, between the sheetrock and the wall, with spackle. After letting it dry for some time, I sanded down the surface to make it even.

Time to paint. Cover the corners of the ceiling, that are adjacent to the walls, with blue painters tape so that you won't get paint on your ceiling.
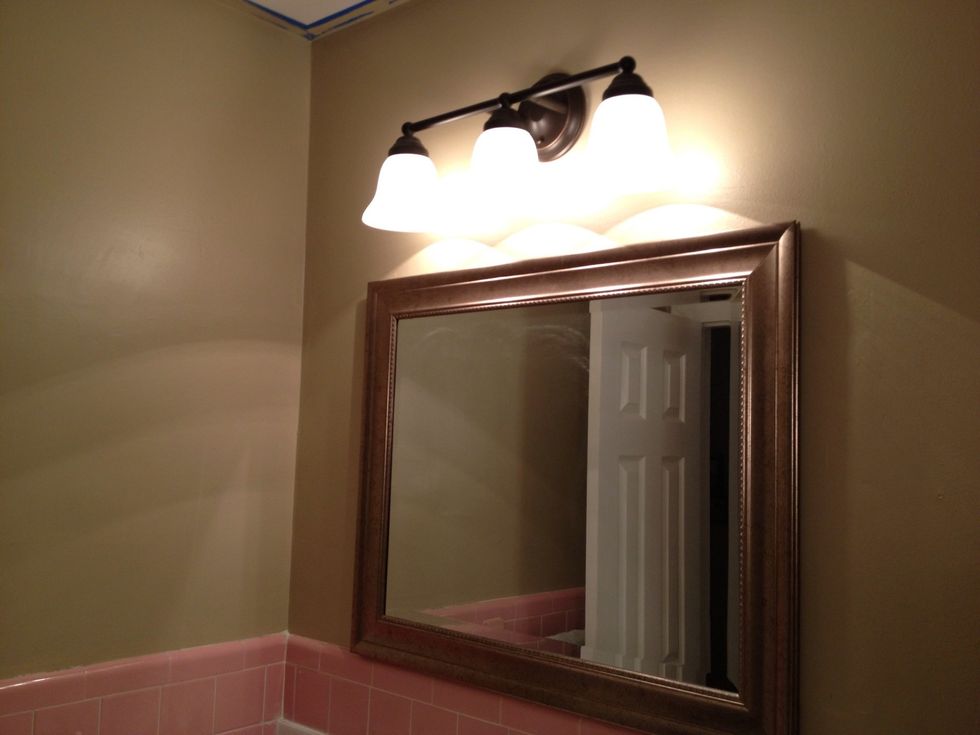
Apply two coats of paint with rollers and use brushes for the corners. Then you can mount the mirror like a you would mount a heavy picture frame or painting.
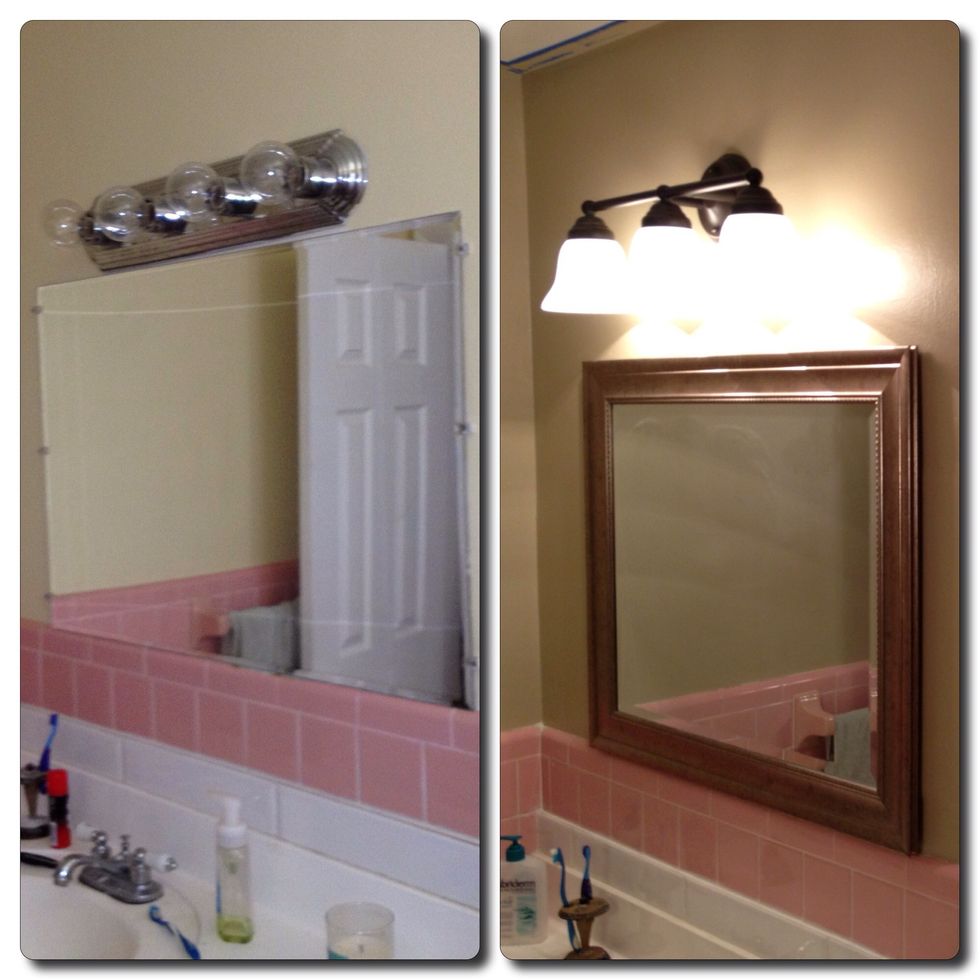
Here is a before and after picture of the project. I hope my first guide helps you with your future projects, and hopefully my next guide will be on how to replace a pink bathtub and bathroom tiles.