STEPS
TOOLS
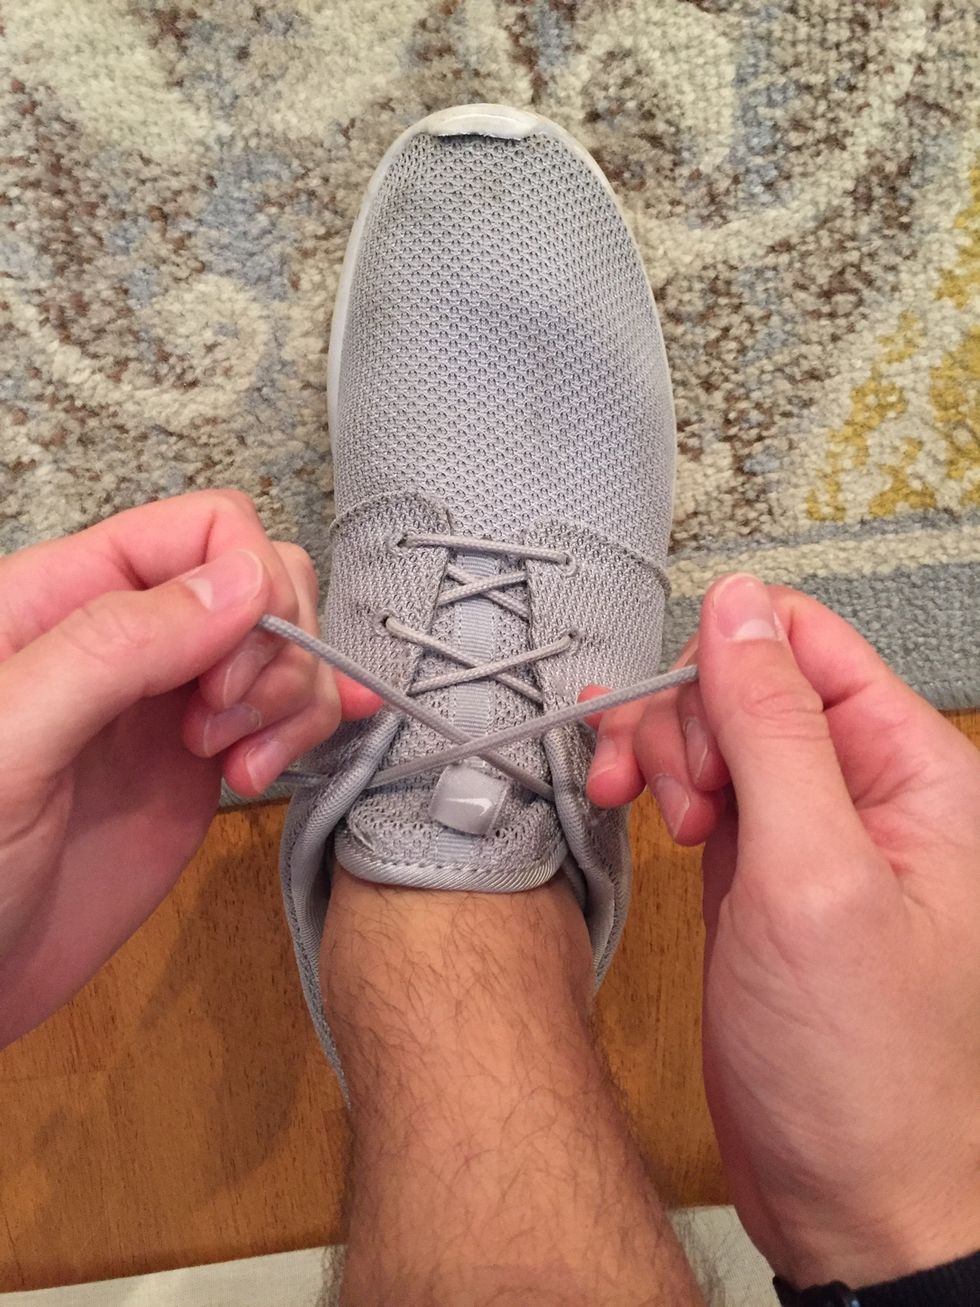
First, you want to tighten all of the laces by grabbing the second-to-top two strings and pulling them toward you without pulling the laces out of the holes
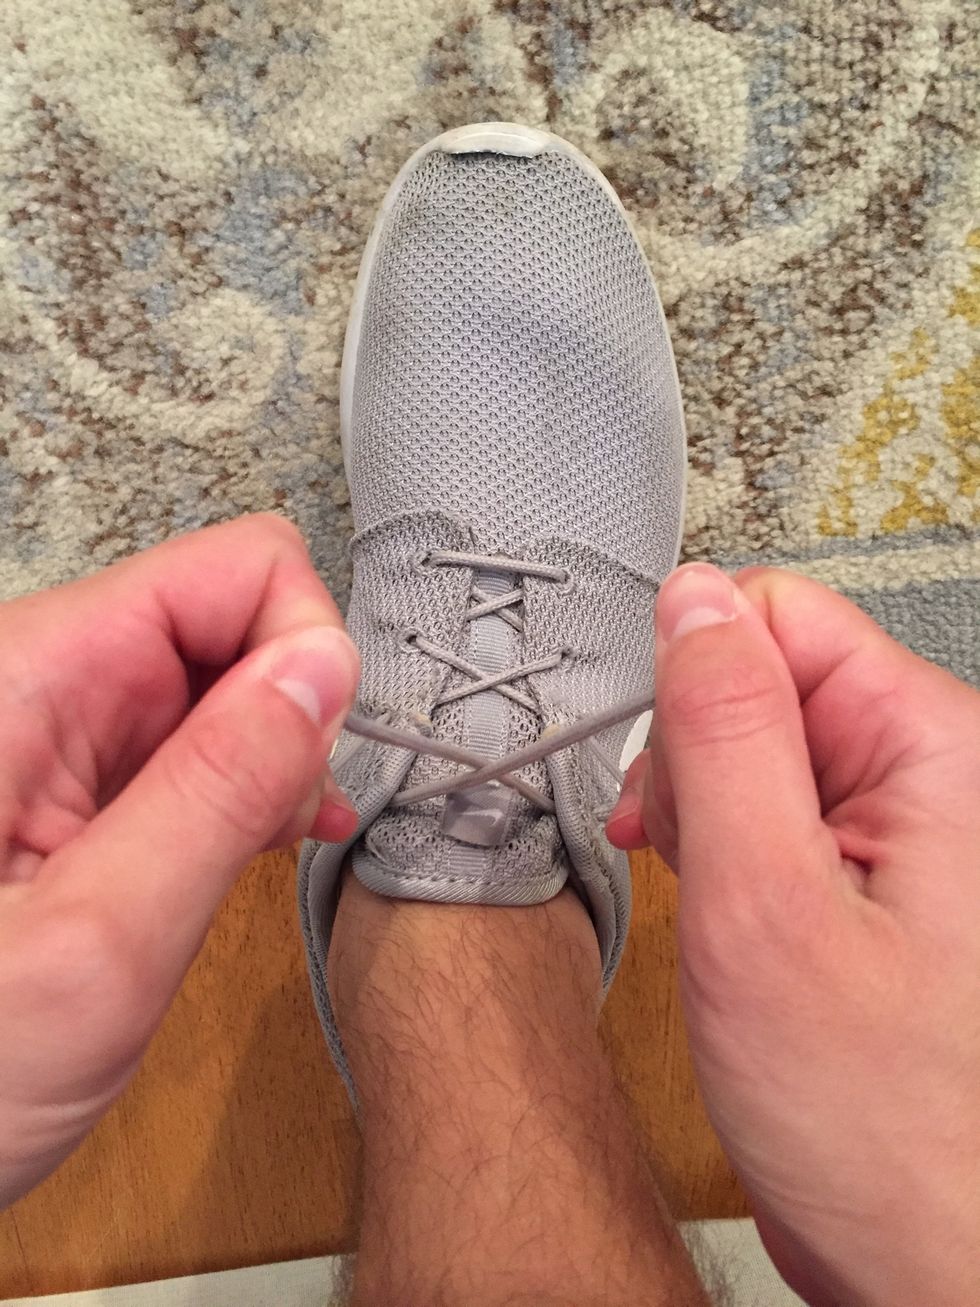
Make sure they are all pull tied and your foot is comfortable
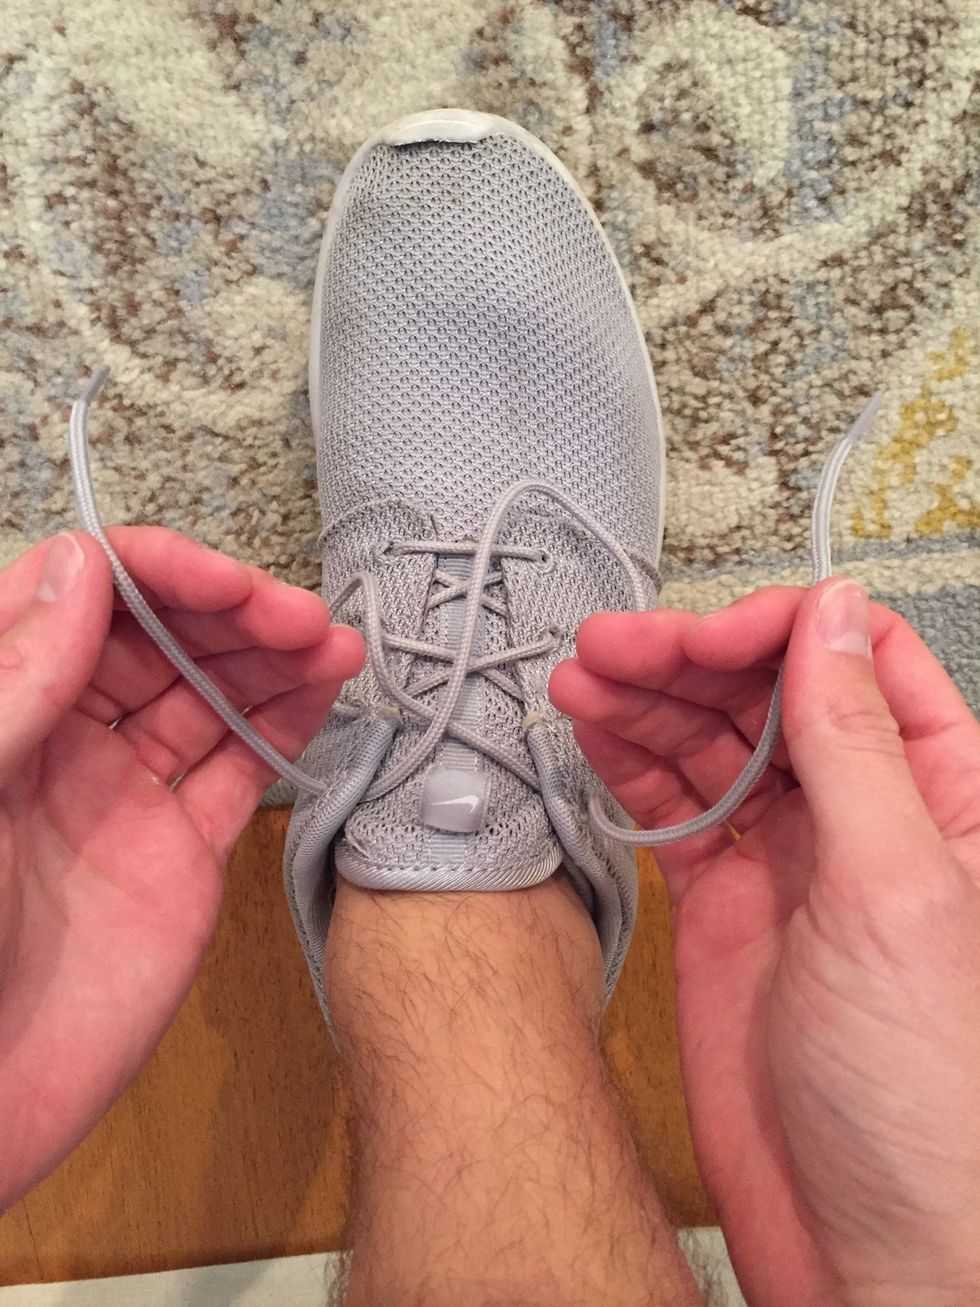
Next, grab the laces on each corresponding side
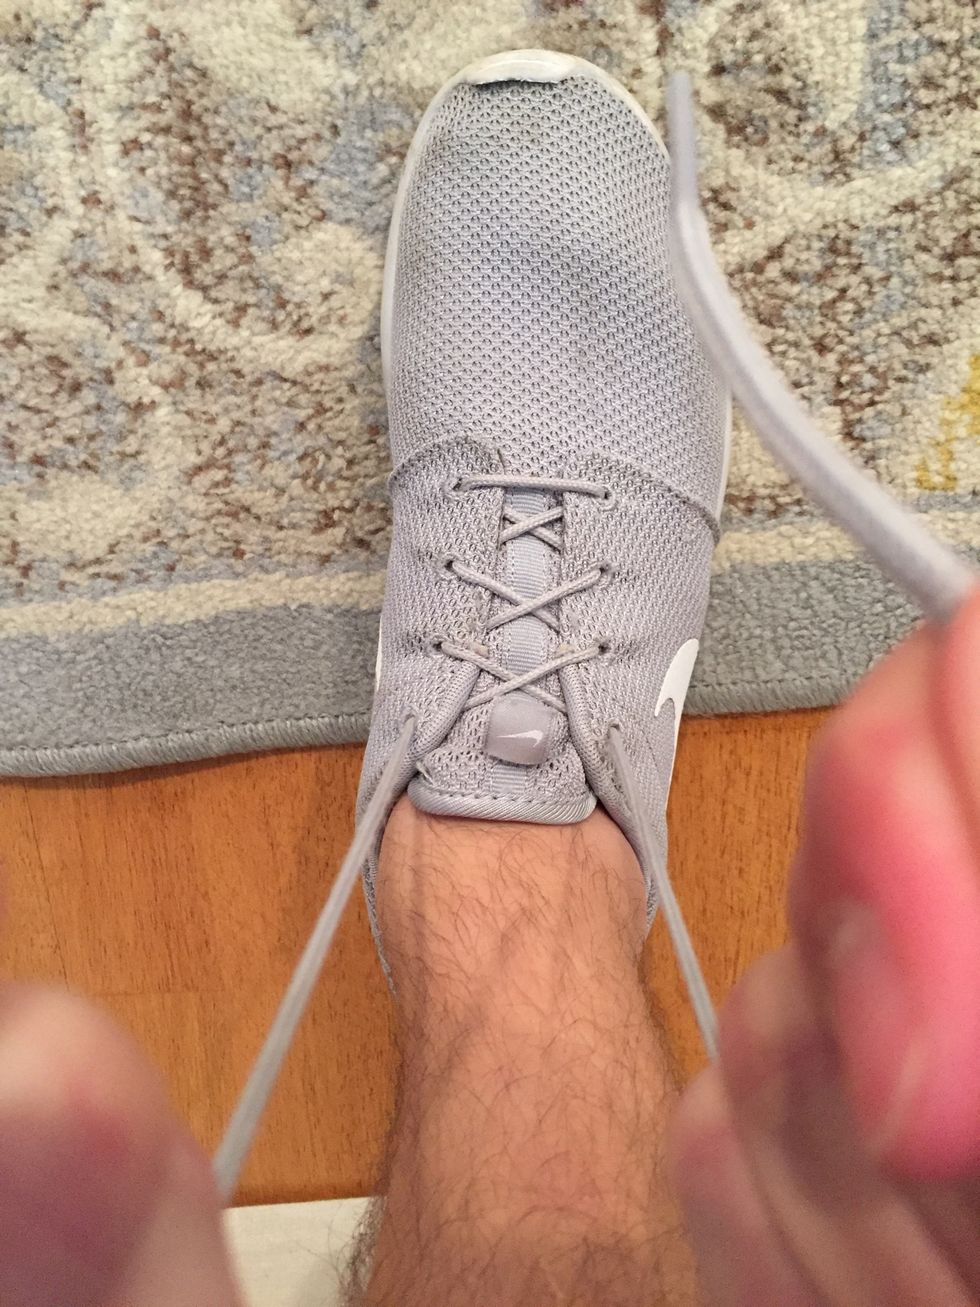
You want to pull these laces directly to you in order to make sure the laces are still tight
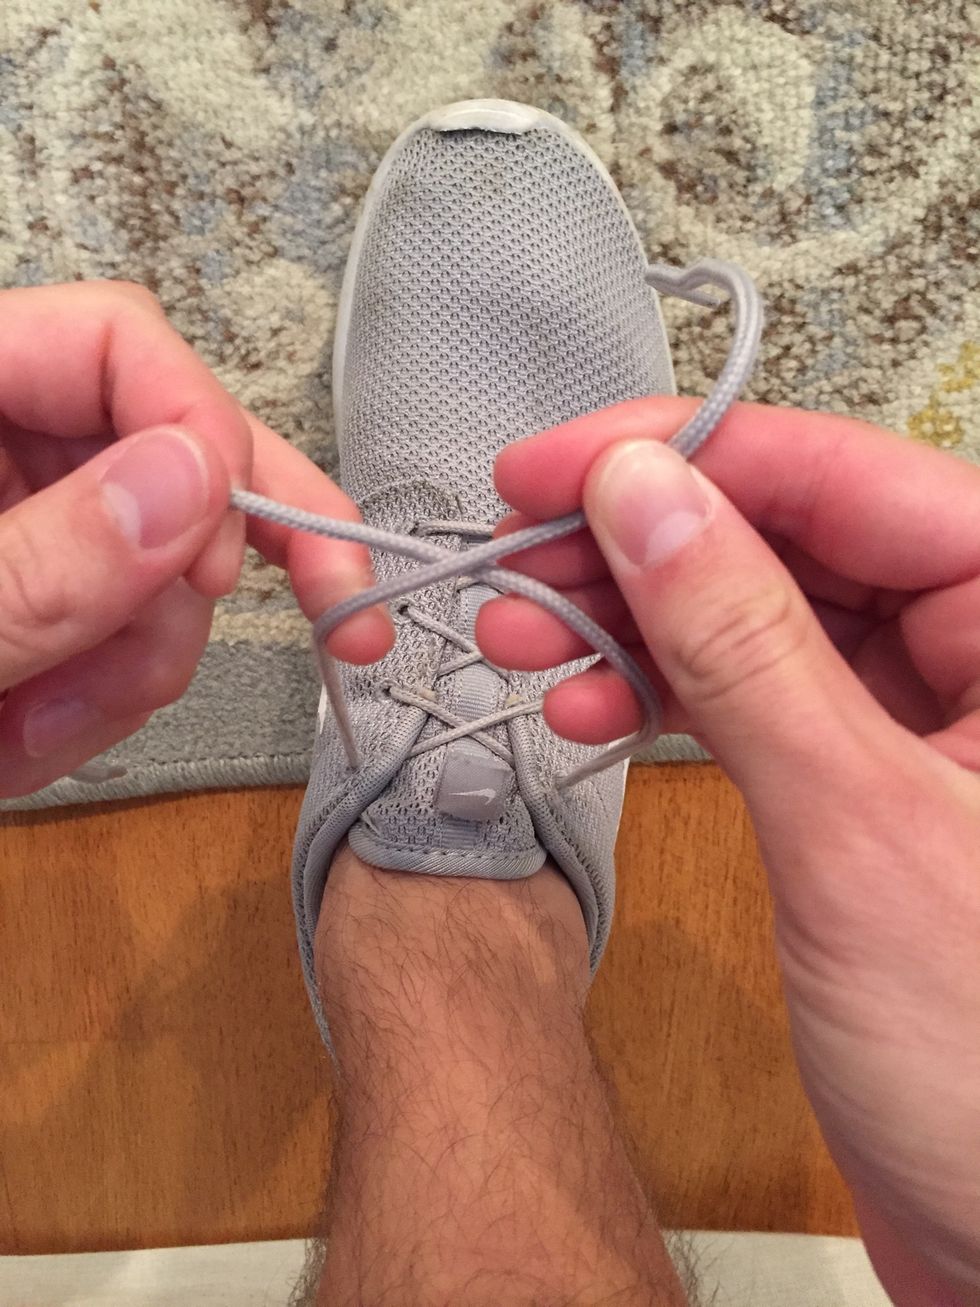
Next, cross over the laces while they are still tight, pulling directly toward you
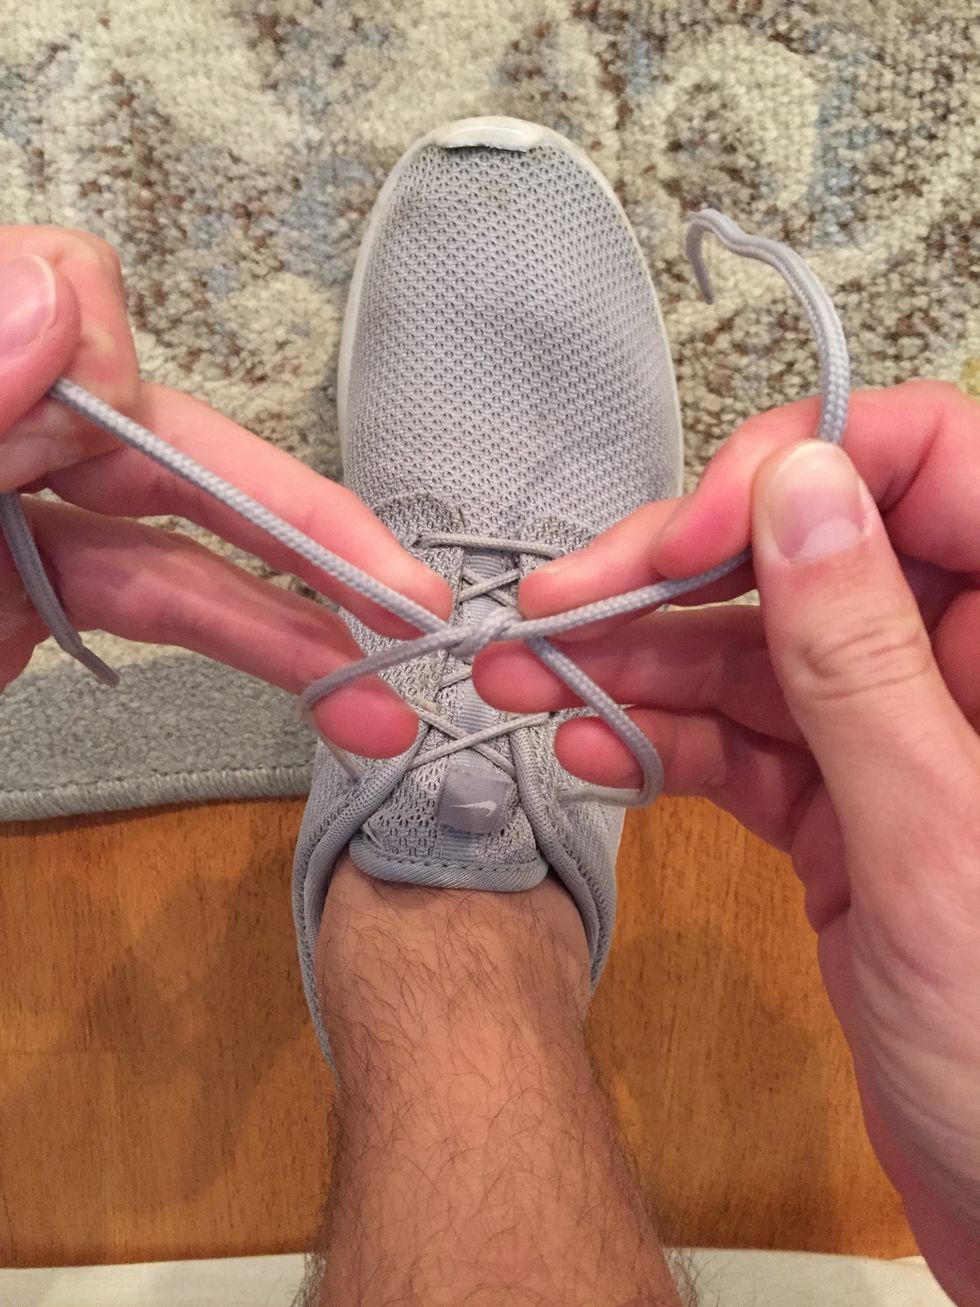
Once crossed, then take one lace and go under the other to make sure it looks like this
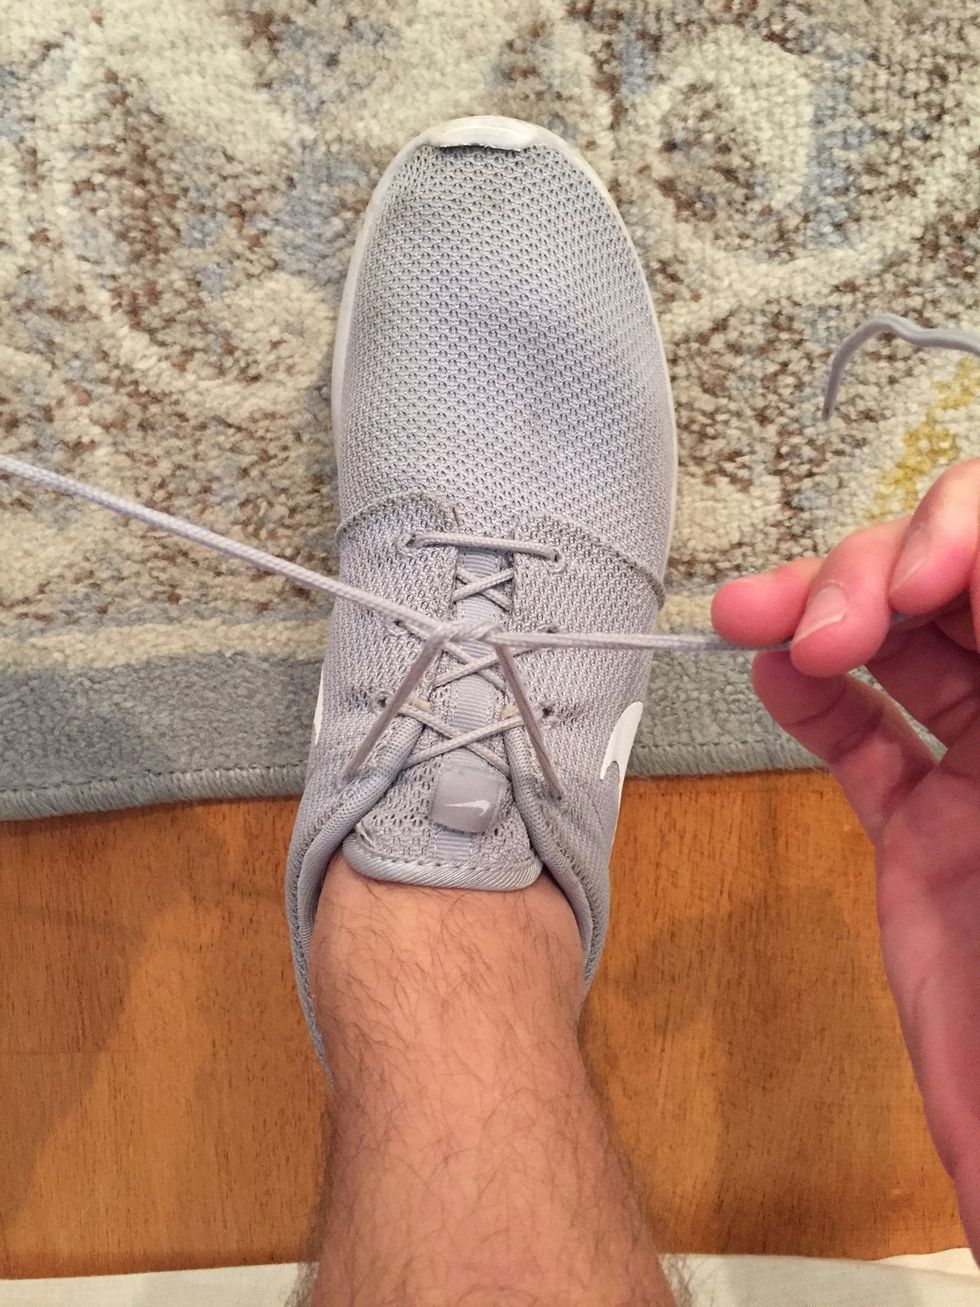
Then, pull the laces outward until the "crossed over" part of the laces touch the arch of your foot
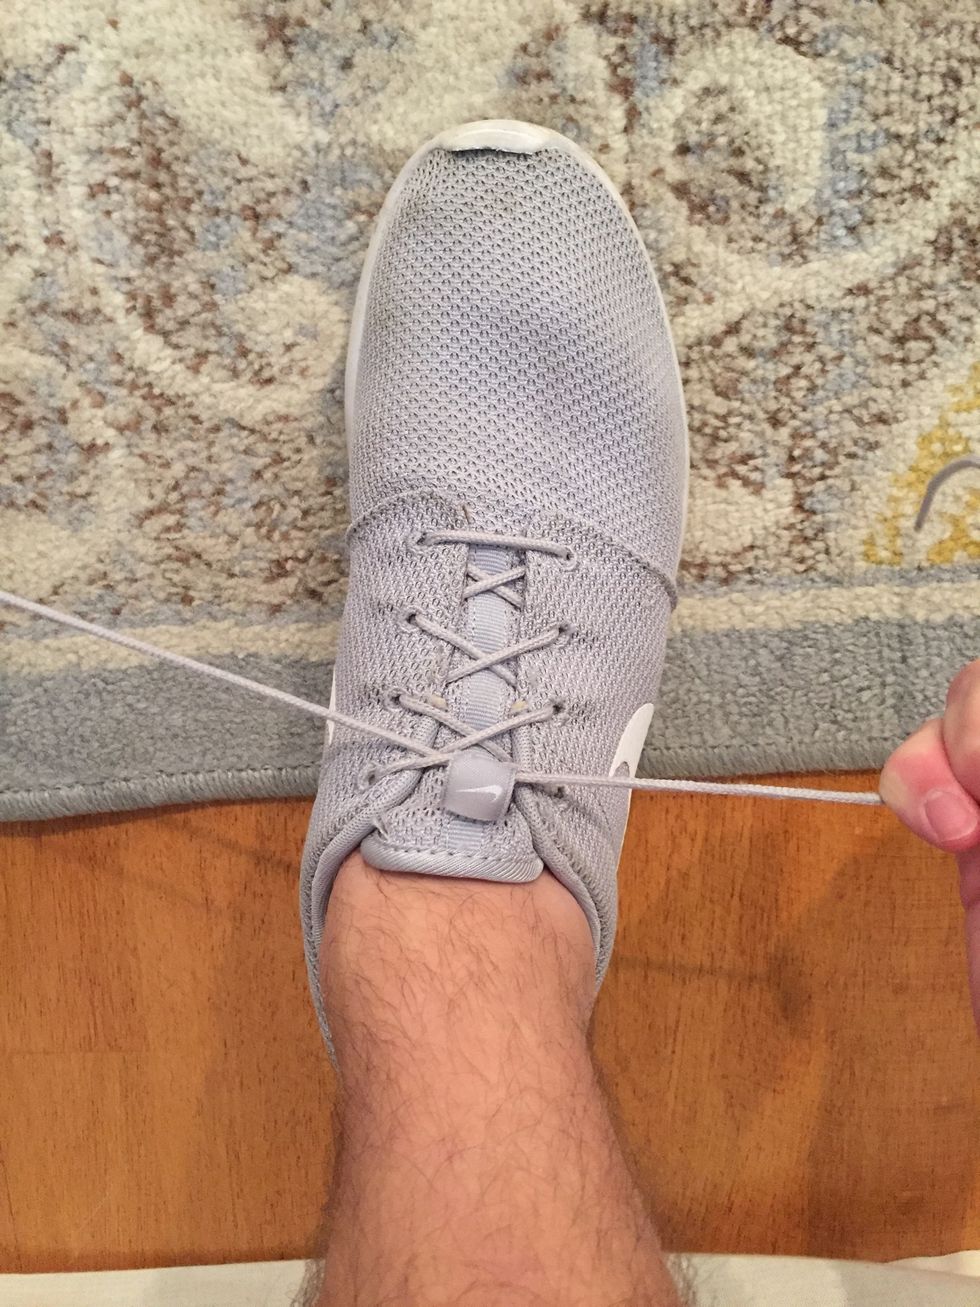
Make sure the "crossed over" part of the lace is tight up against your arch
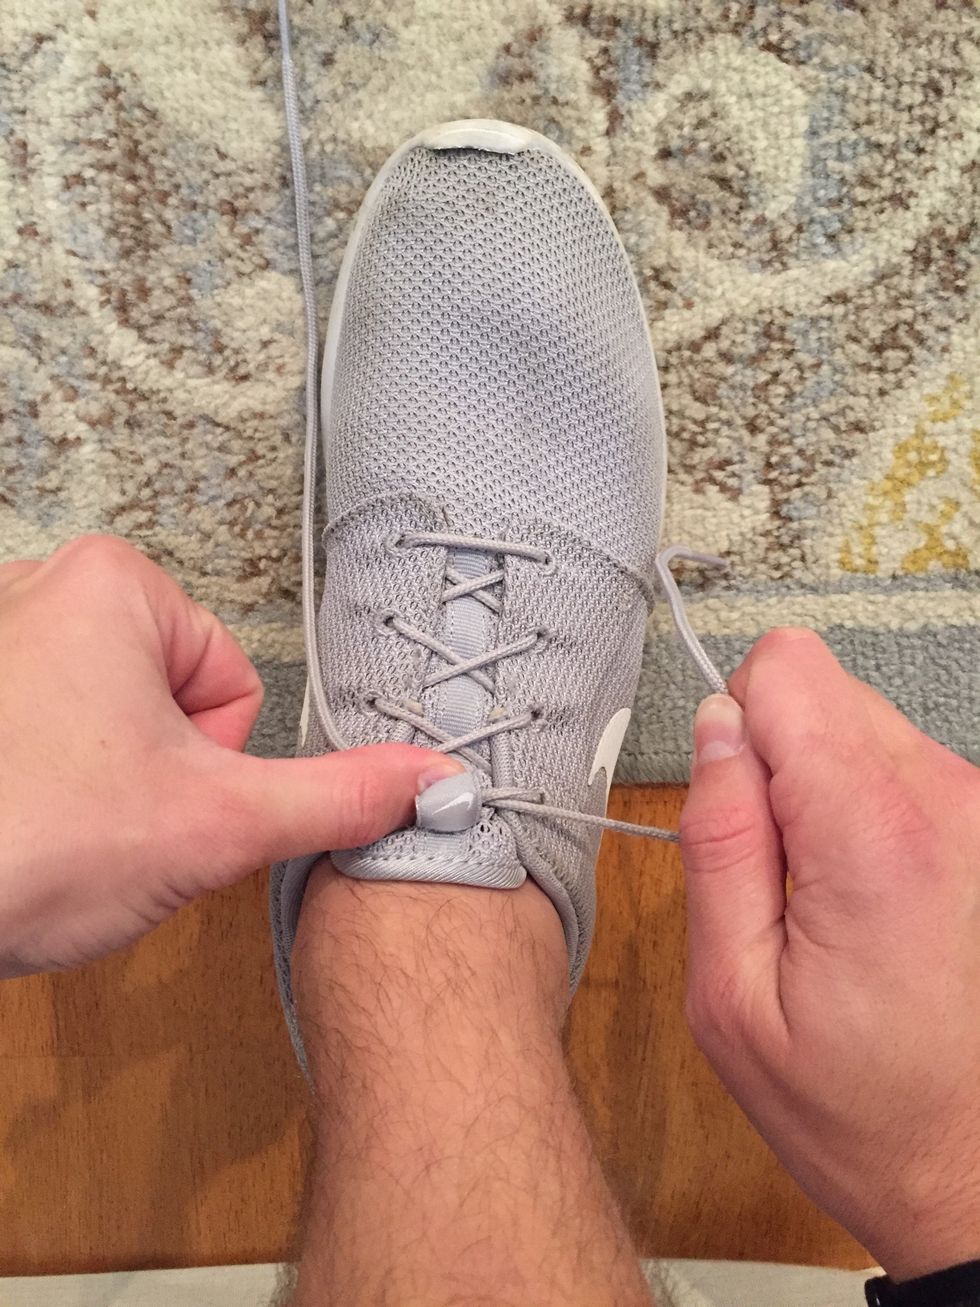
Now, place your thumb on the "crossed over" section in order to hold it in place to keep it tight
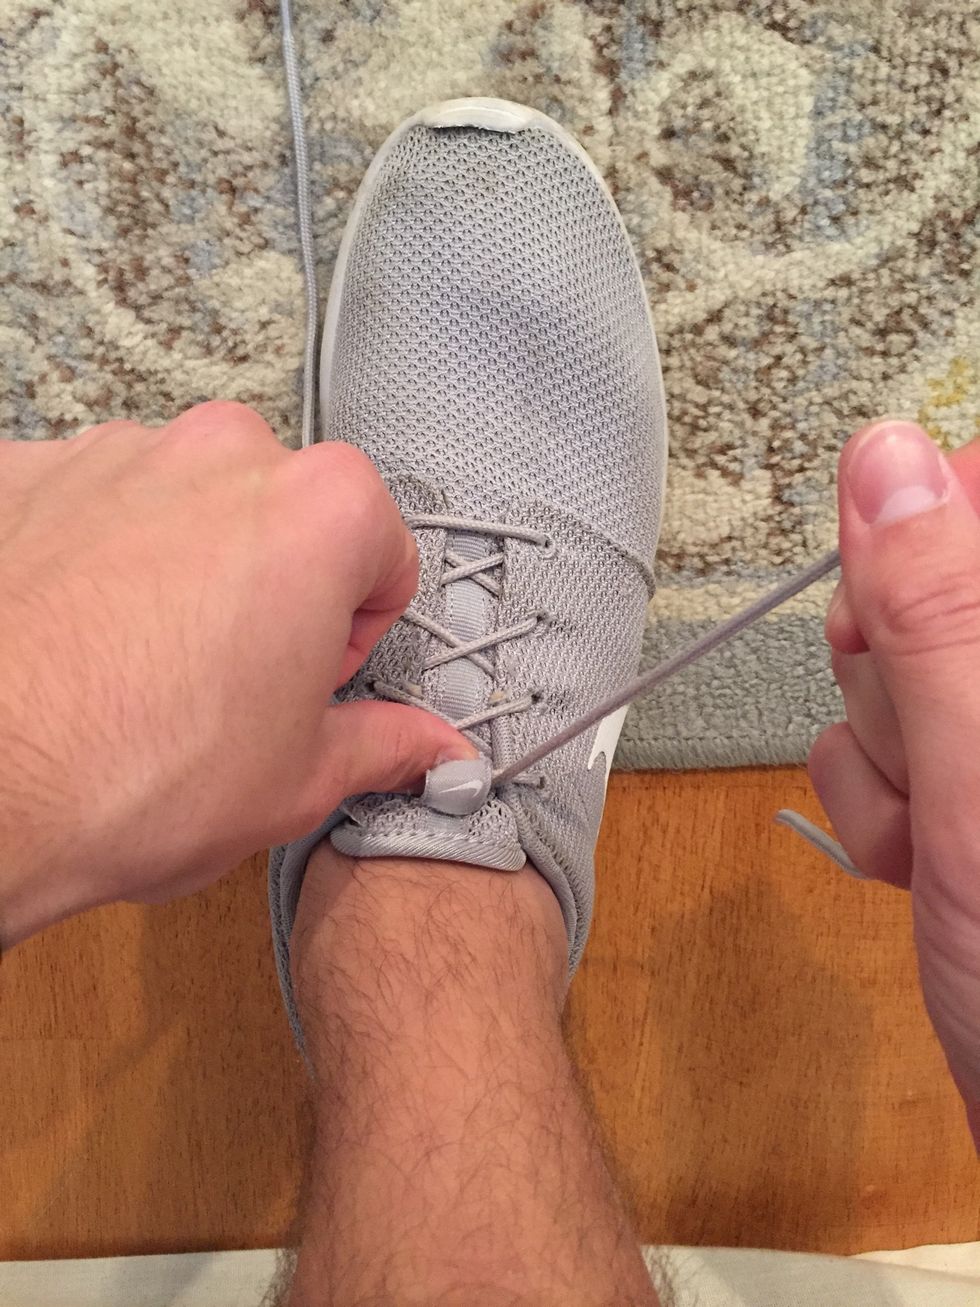
Now, with your right hand, begin to adjust your grip by letting some of the lace through your hands in order to prepare to make the "loop"
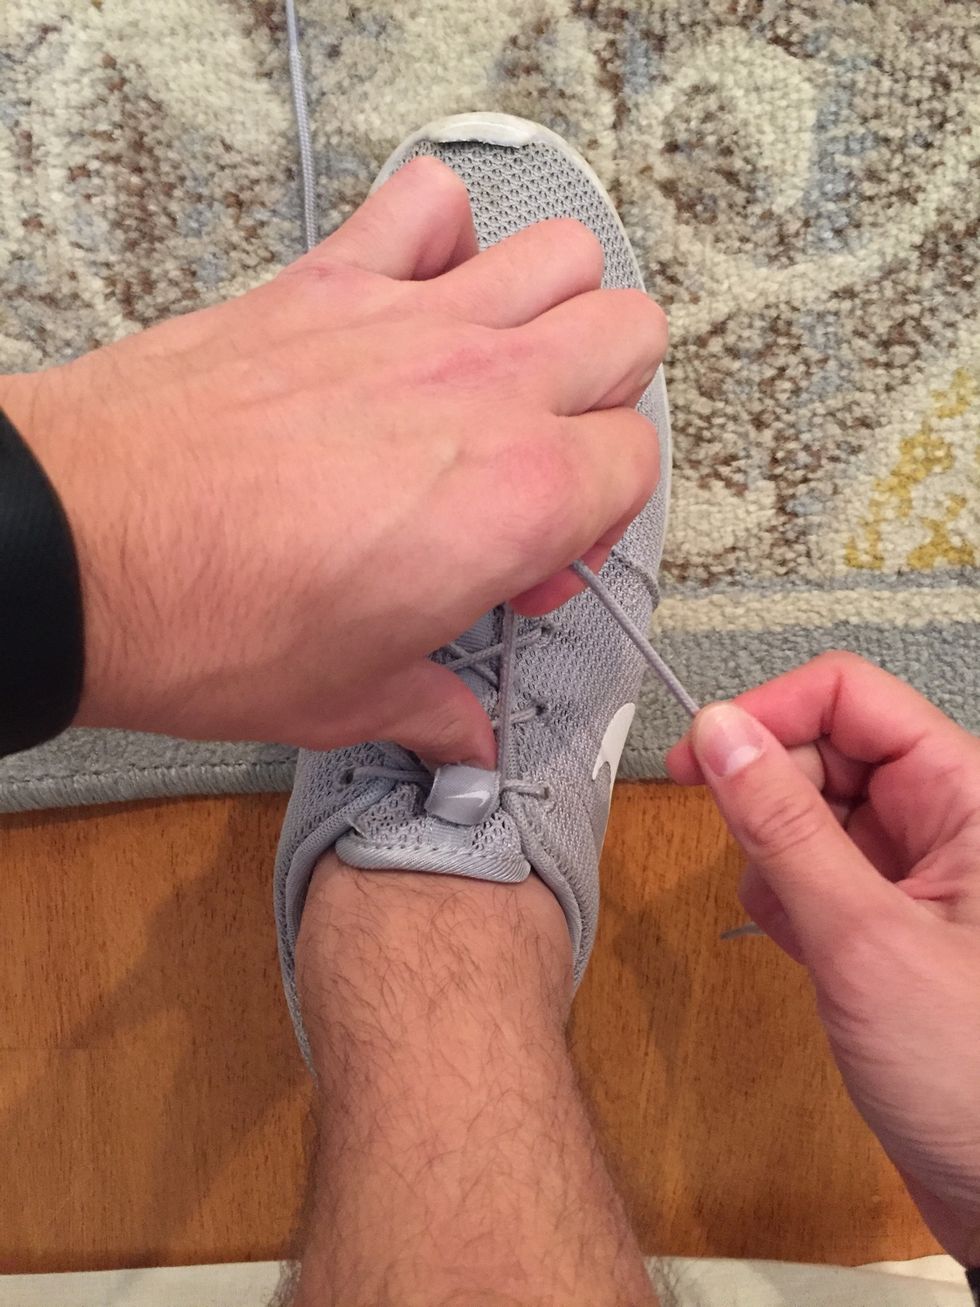
In order to make the "loop" use your left index finger to make a hook in order to double to lace over to begin to form the "loop"
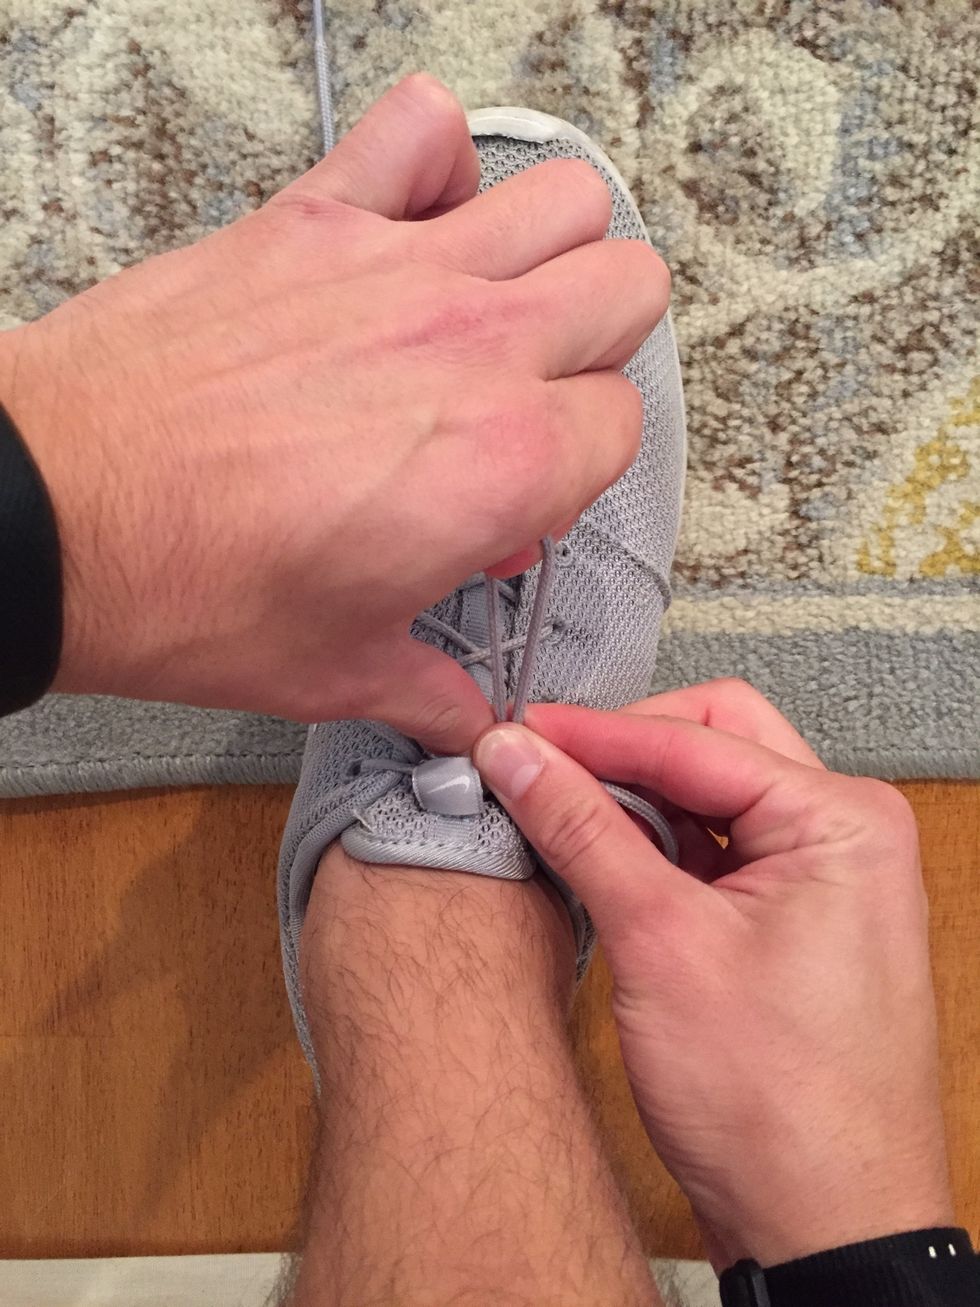
Now, pinch with your right thumb and index finger to hold the "loop" while your left then continues to hold the "crossed over" section of the laces
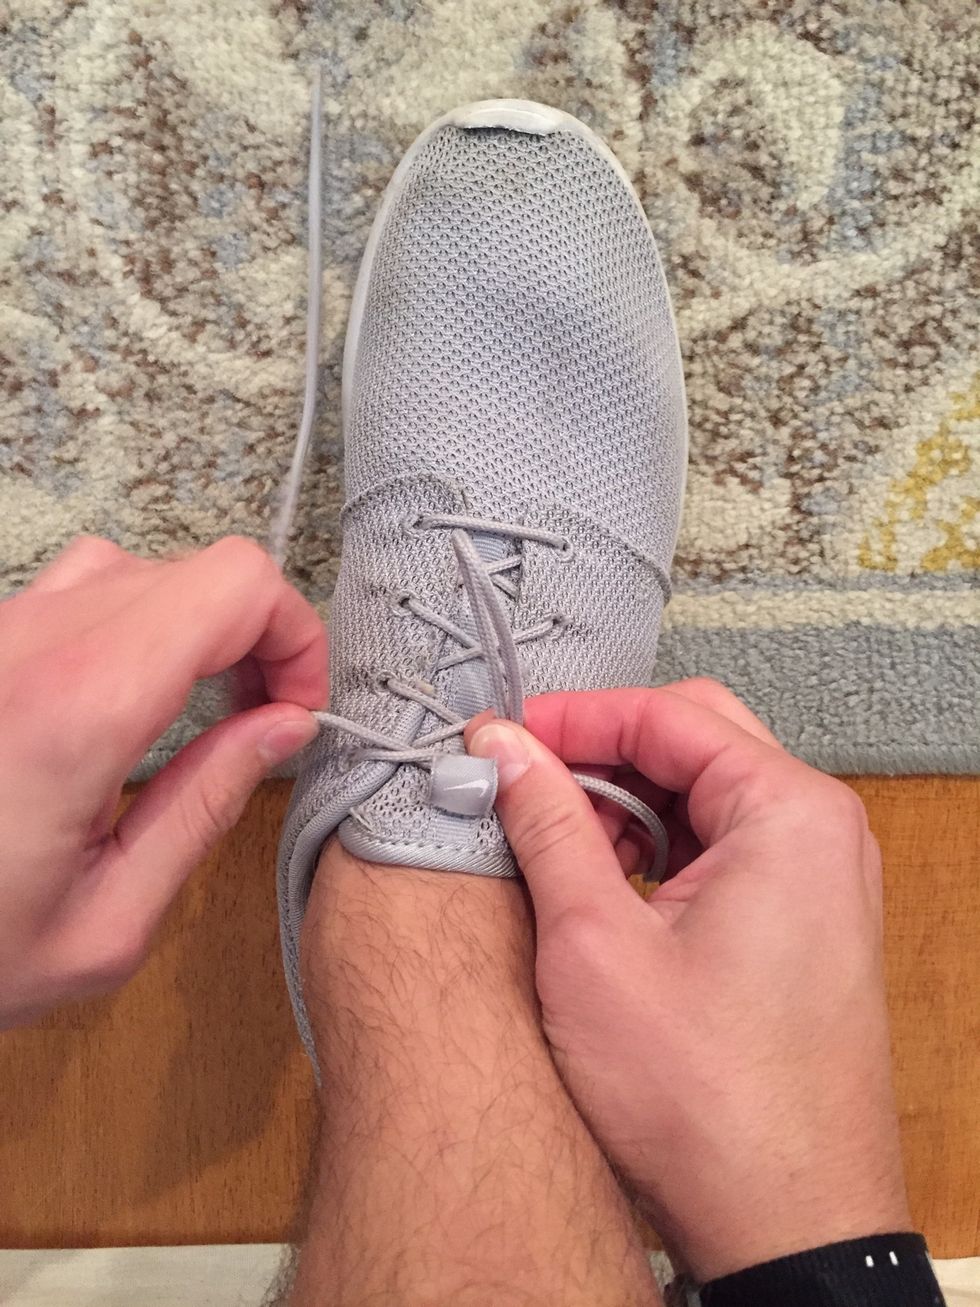
While you are pinching the "loop" hold down the "crossed over" section with the same two fingers. Begin to adjust your left hand in order to make the second "loop"
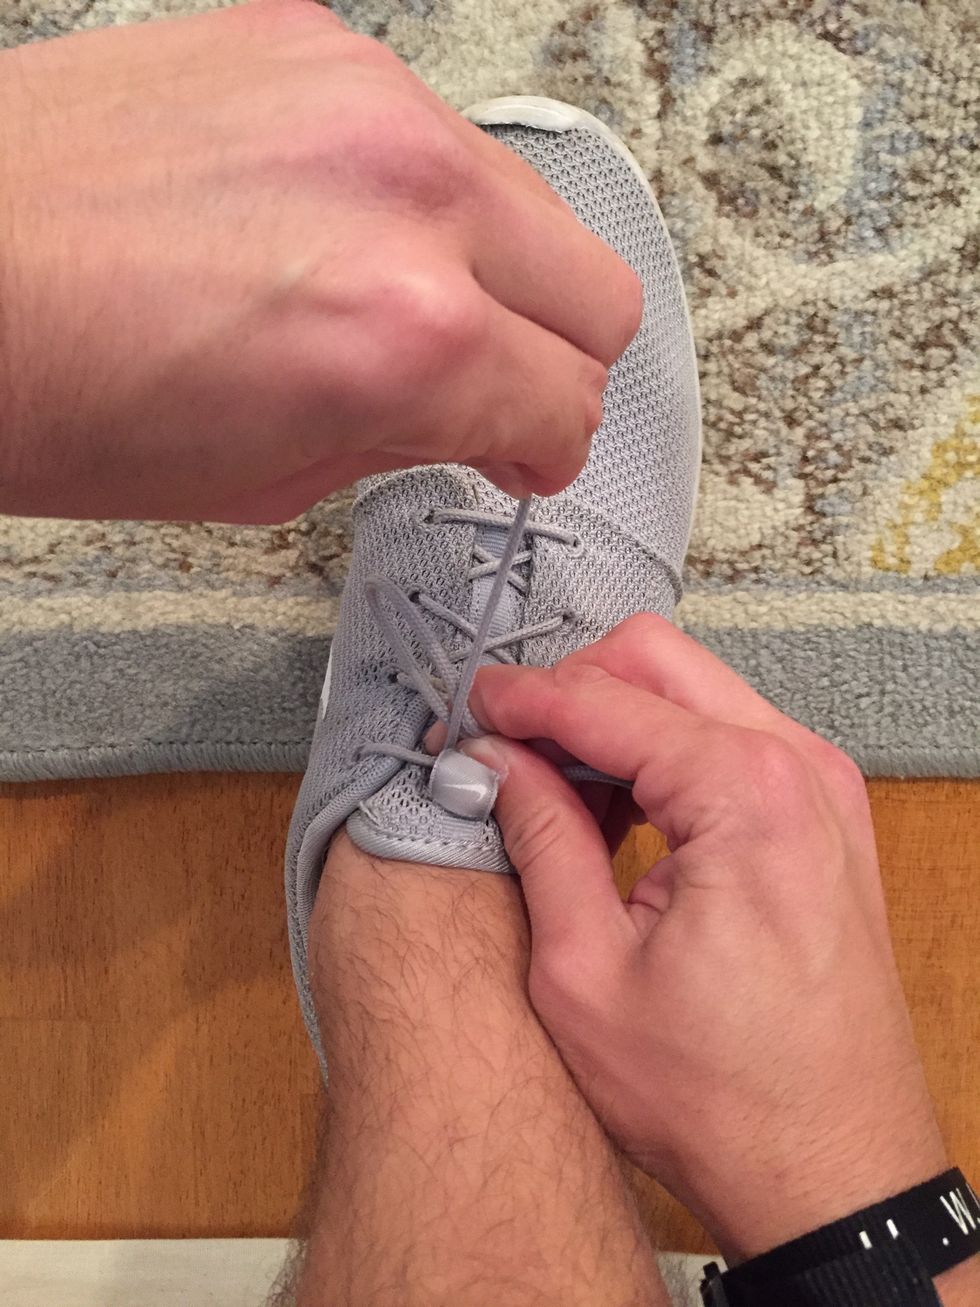
With your left hand, wrap the lace over the pinched "loop"
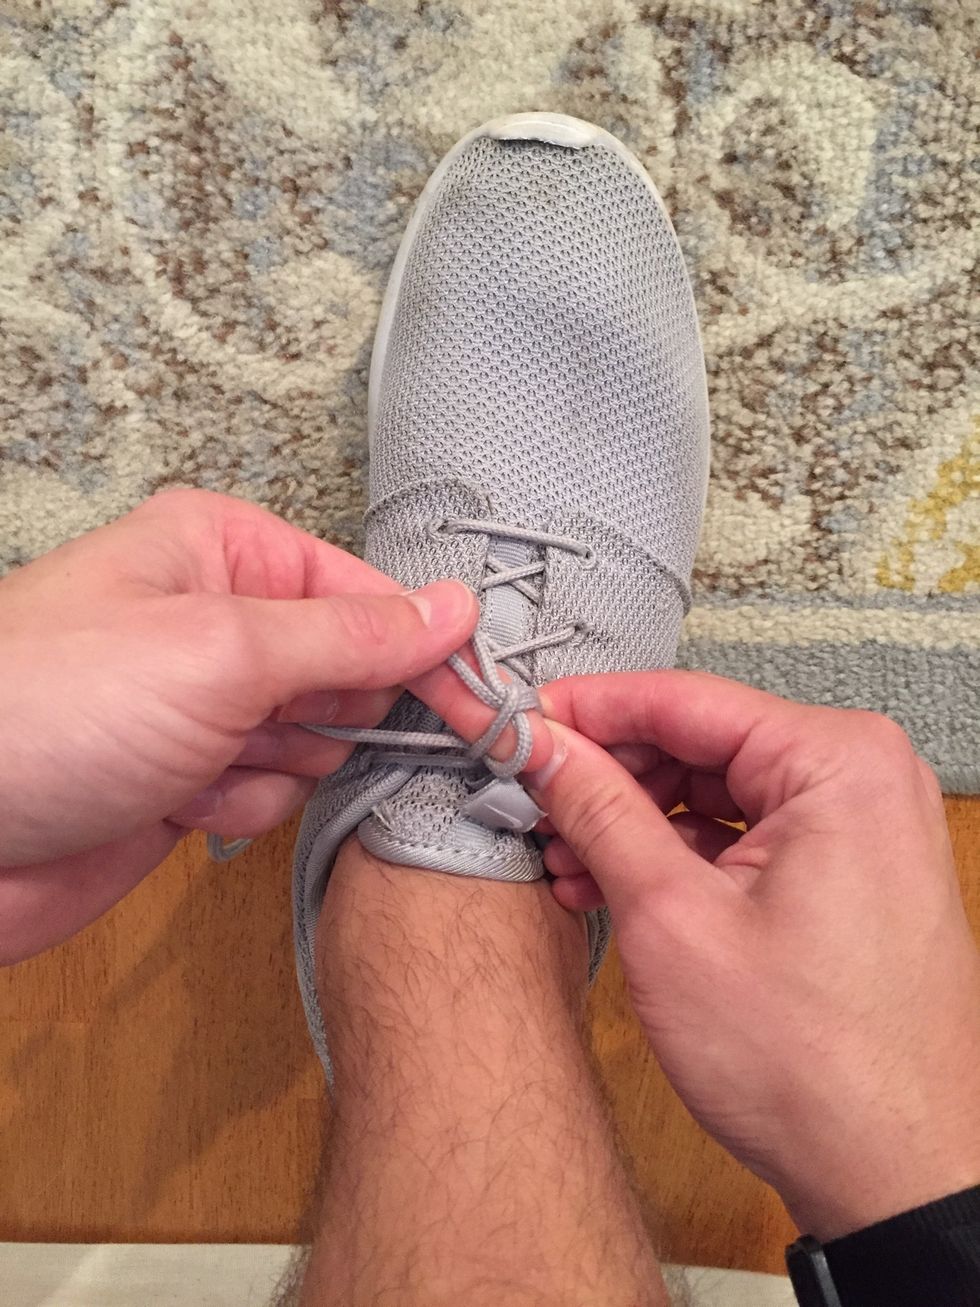
Once over, take the "loop" you just made and go under the pinched "loop". Still keep the pressure on the pinched "loop" and "crossed over" laces
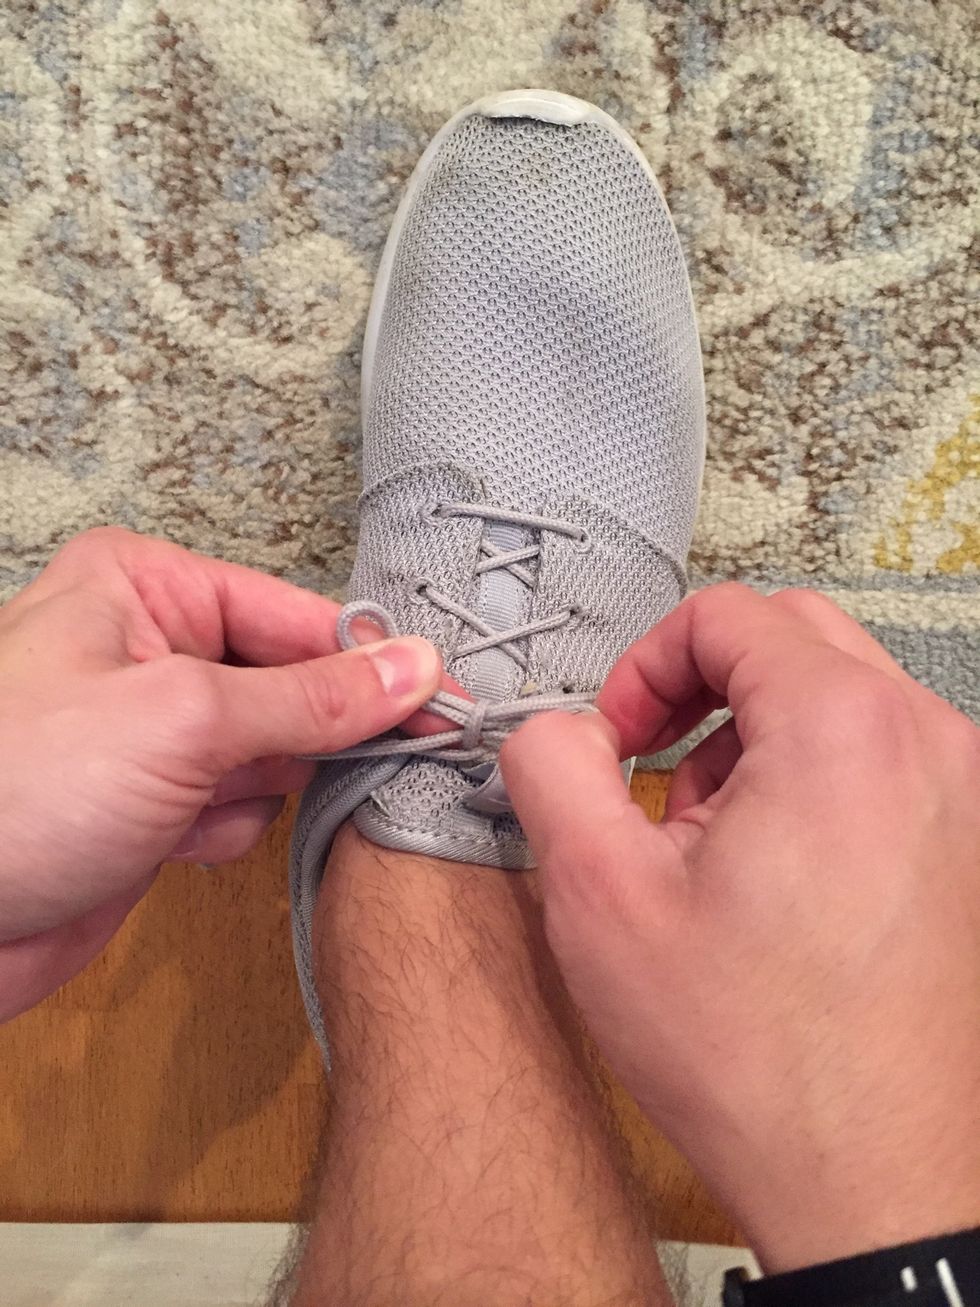
Now, pull on the ends of each "loop"
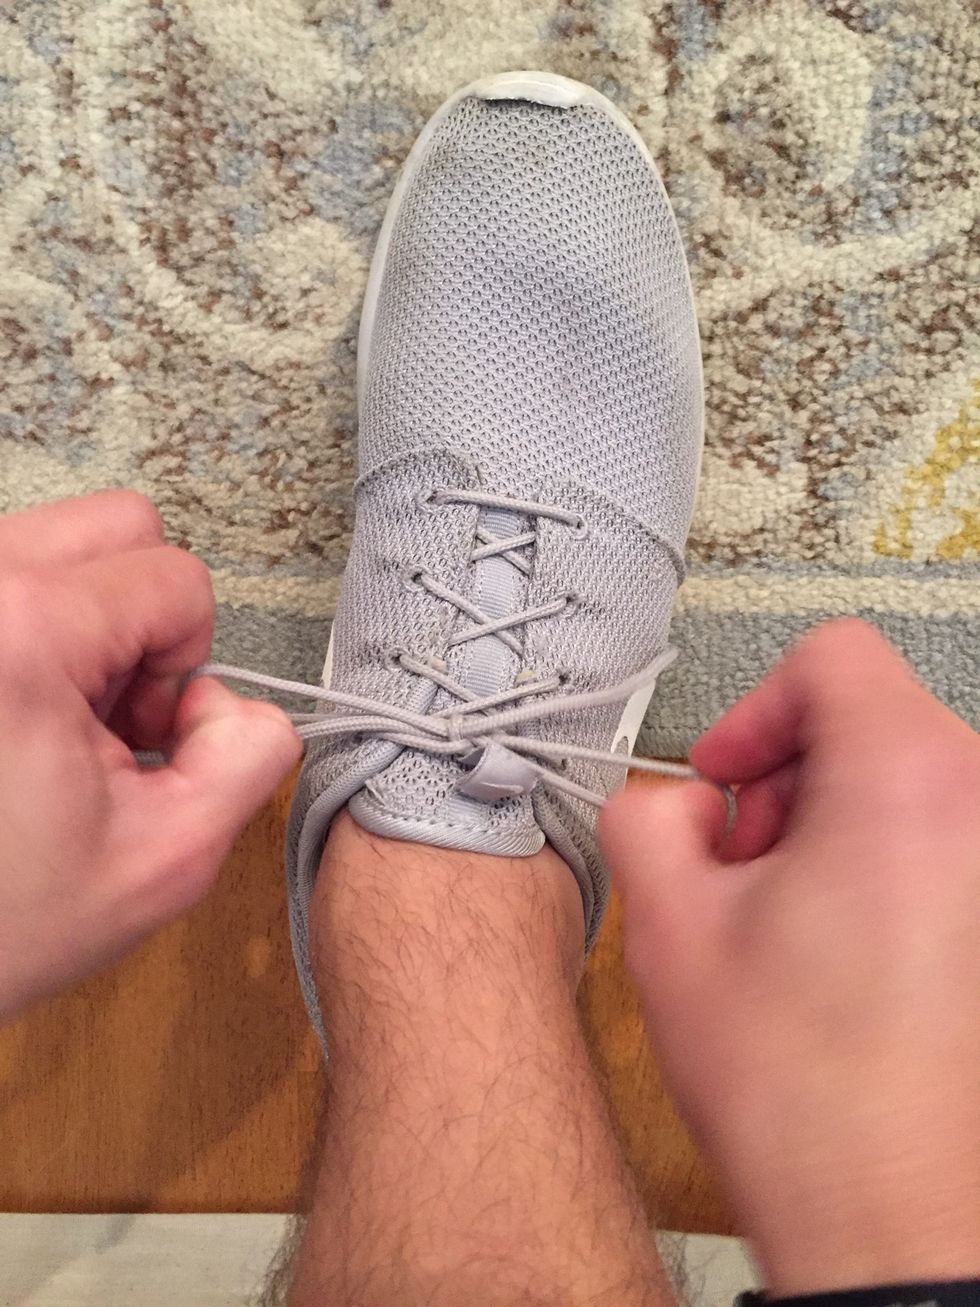
Pull both "loops" until they are tight on the arch of your foot
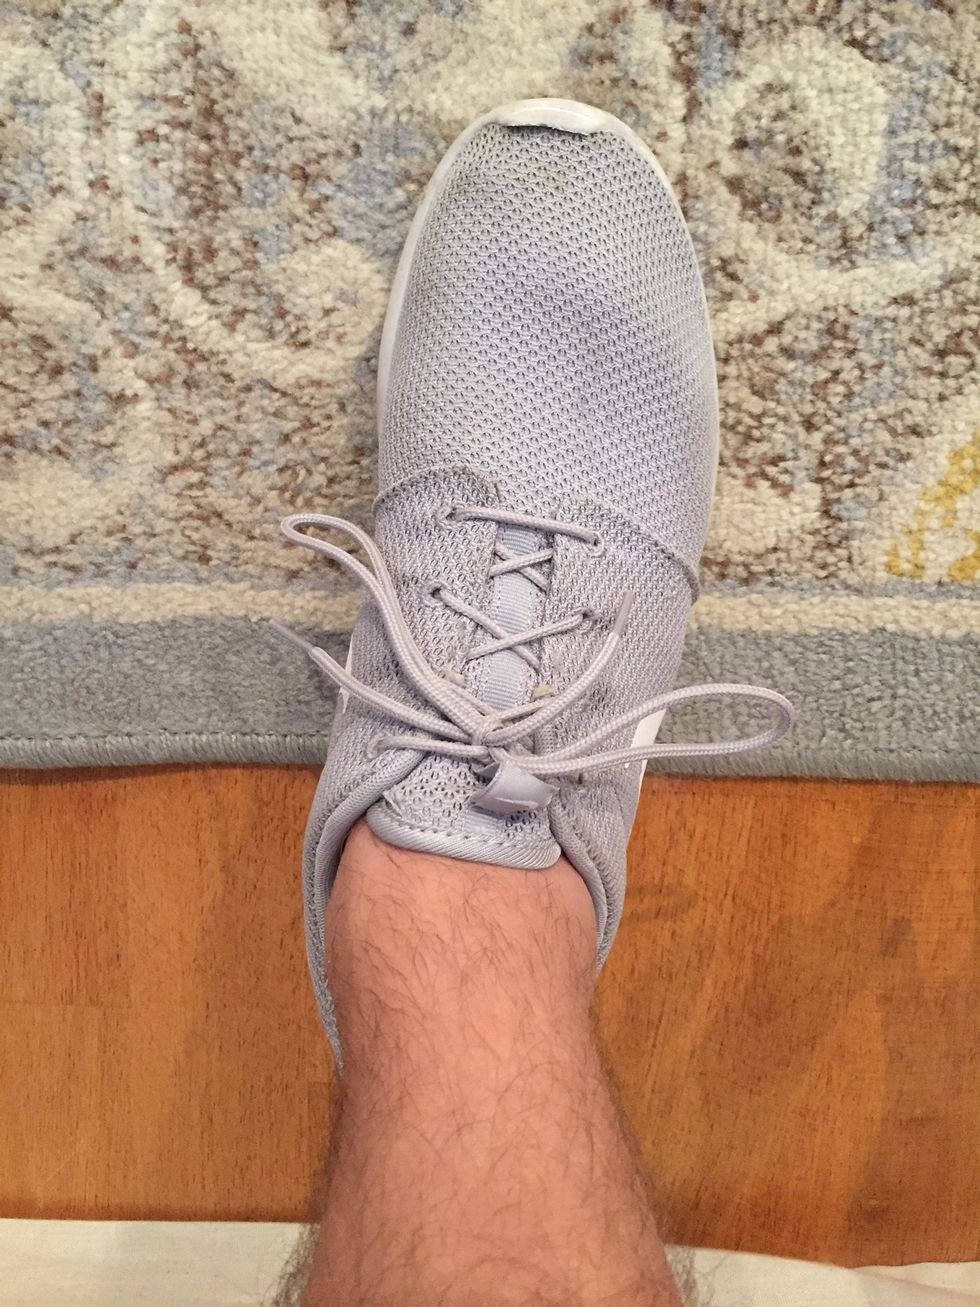
Congratulations! You have officially learned how to tie a shoe! Practice makes perfect so keep trying if you struggles to get it tight on your foot
The creator of this guide has not included tools
The Conversation (0)
Sign Up