The Conversation (0)
Sign Up
Hi, my name is Olly Lang. I want to show you a better way to take photos with your iPhone. The app I use isn't free, but it was worth buying as it has completely changed my mobile photography.
First you must access the app store and download ProCamera. (disclaimer: I have not been paid by ProCamera, or any of the associates, I just love good photography).
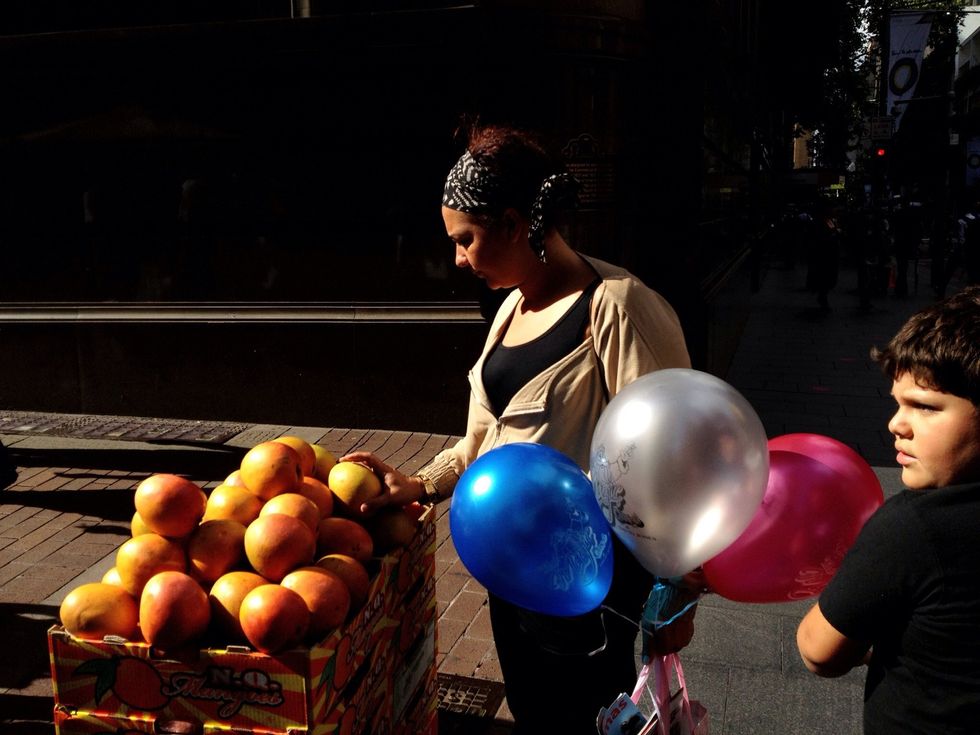
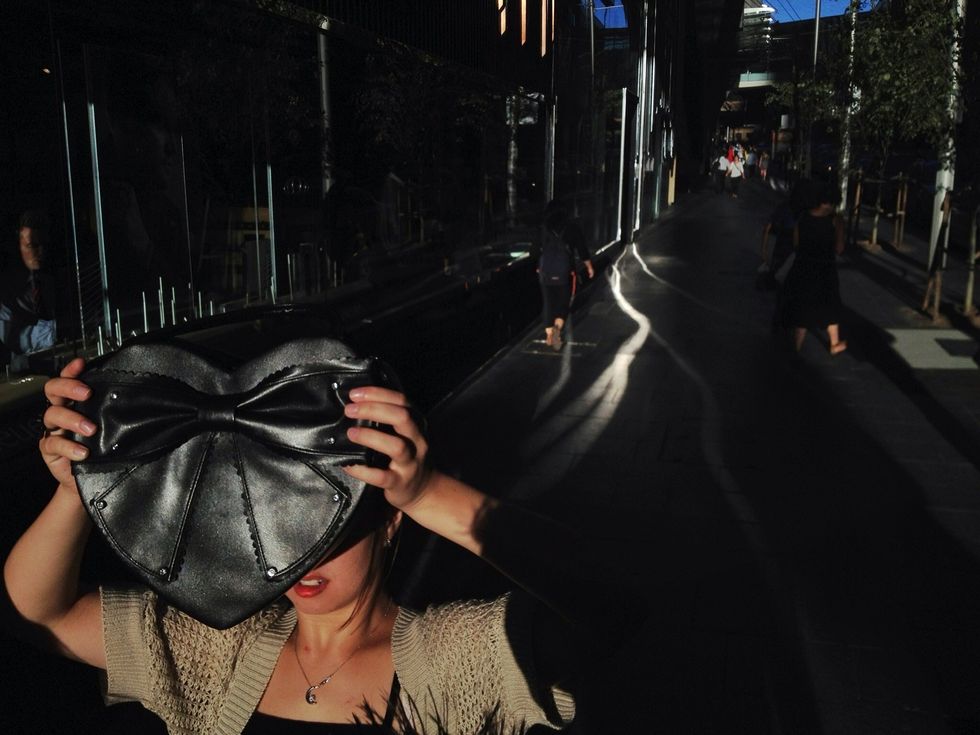
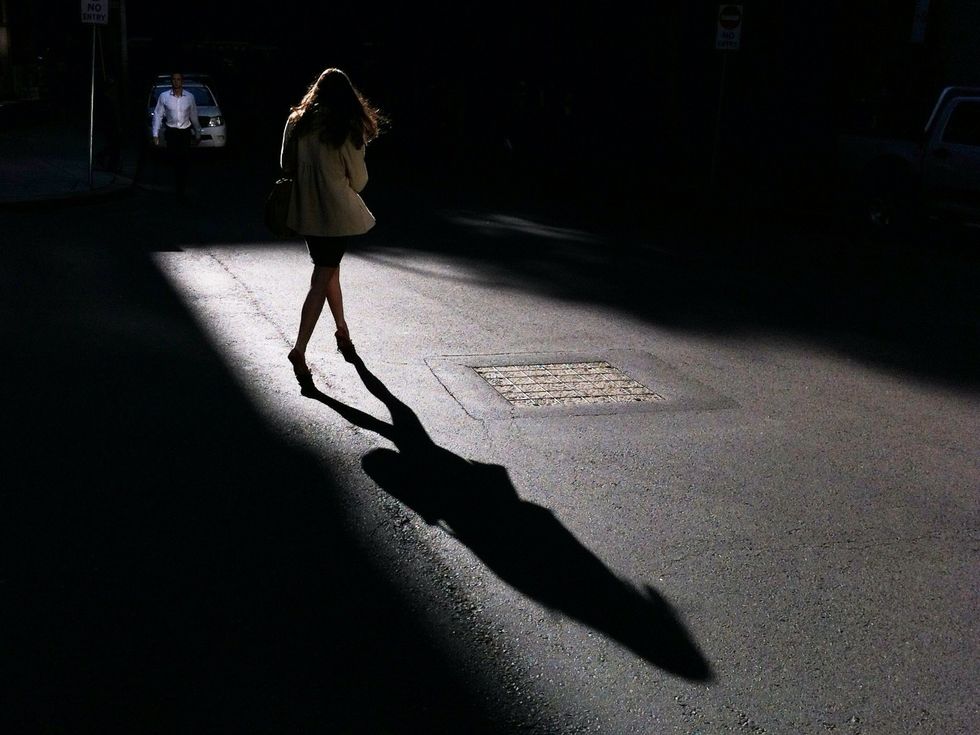
Before we start, here's some of my photos which I've taken with my iPhone. I took these images using the techniques and settings that I'm going to show you.
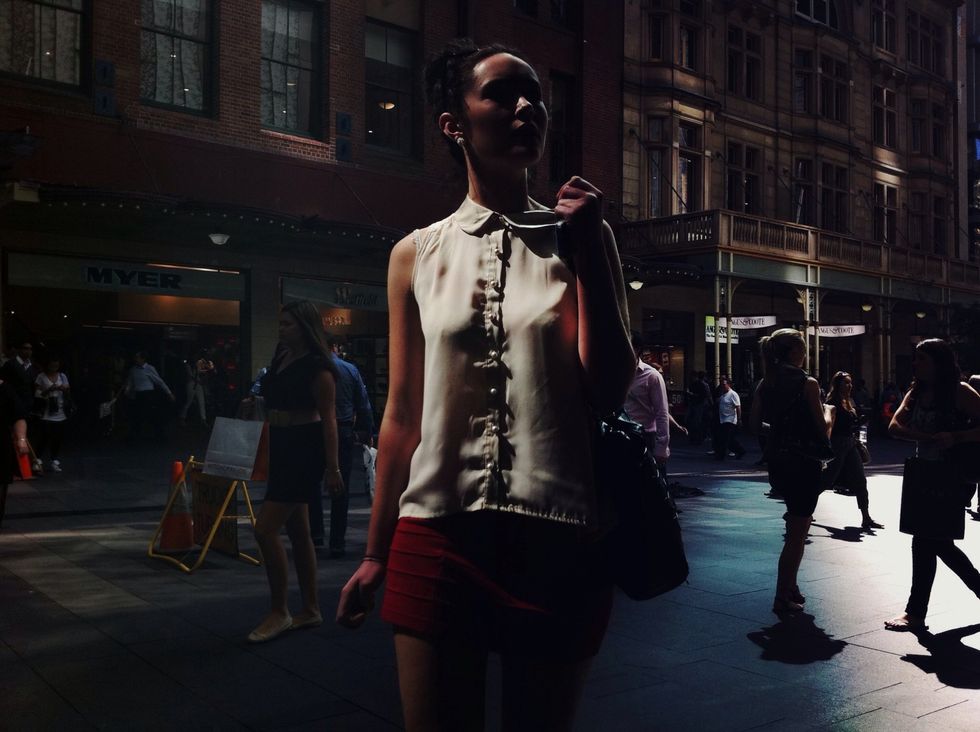
These techniques will help you learn how to best use the light in your photographs. (Image copyright Oliver Lang).
By locking exposure you prevent your iPhone images from being over-exposure when shooting in mixed lighting. (Image copyright Oliver Lang).
Combine these controls with the full screen shutter button to ensure you never miss those moments again! (Image copyright Oliver Lang).
I use ProCamera to take photos with my iPhone because it has a unique combination of settings. I often use other apps, but this one has the best combo. Let's get started now.
ProCamera is now ProCamera 7. Once you have downloaded ProCamera, open the app.
This is the opening ProCamera screen. Select the menu on the bottom right of the screen.
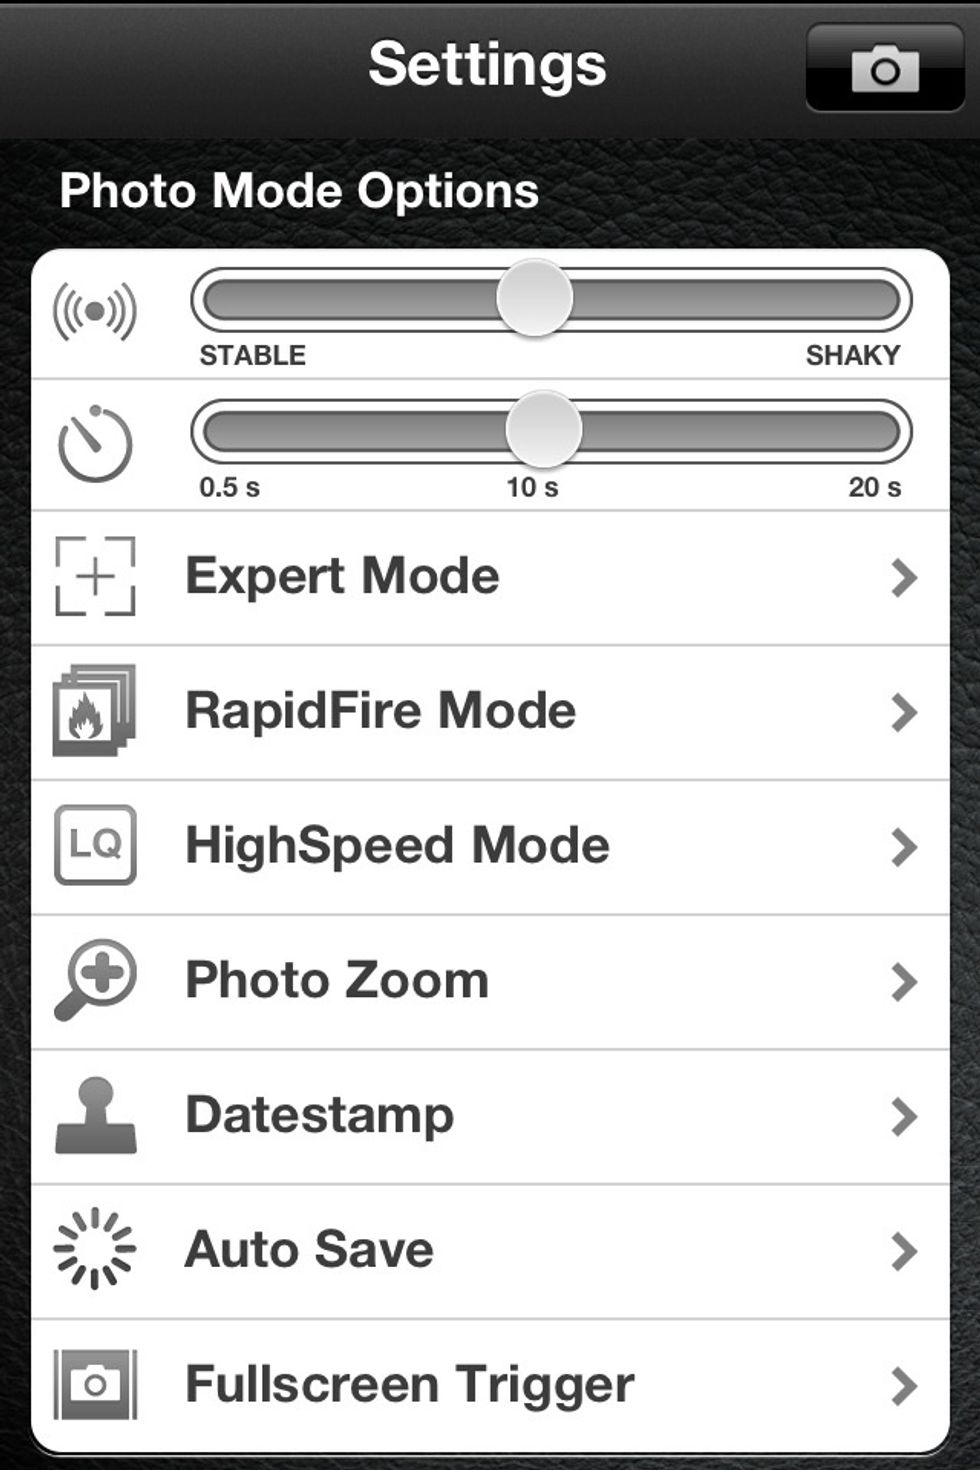
Select "Expert Mode" from the settings menu. This settings view is the old view.
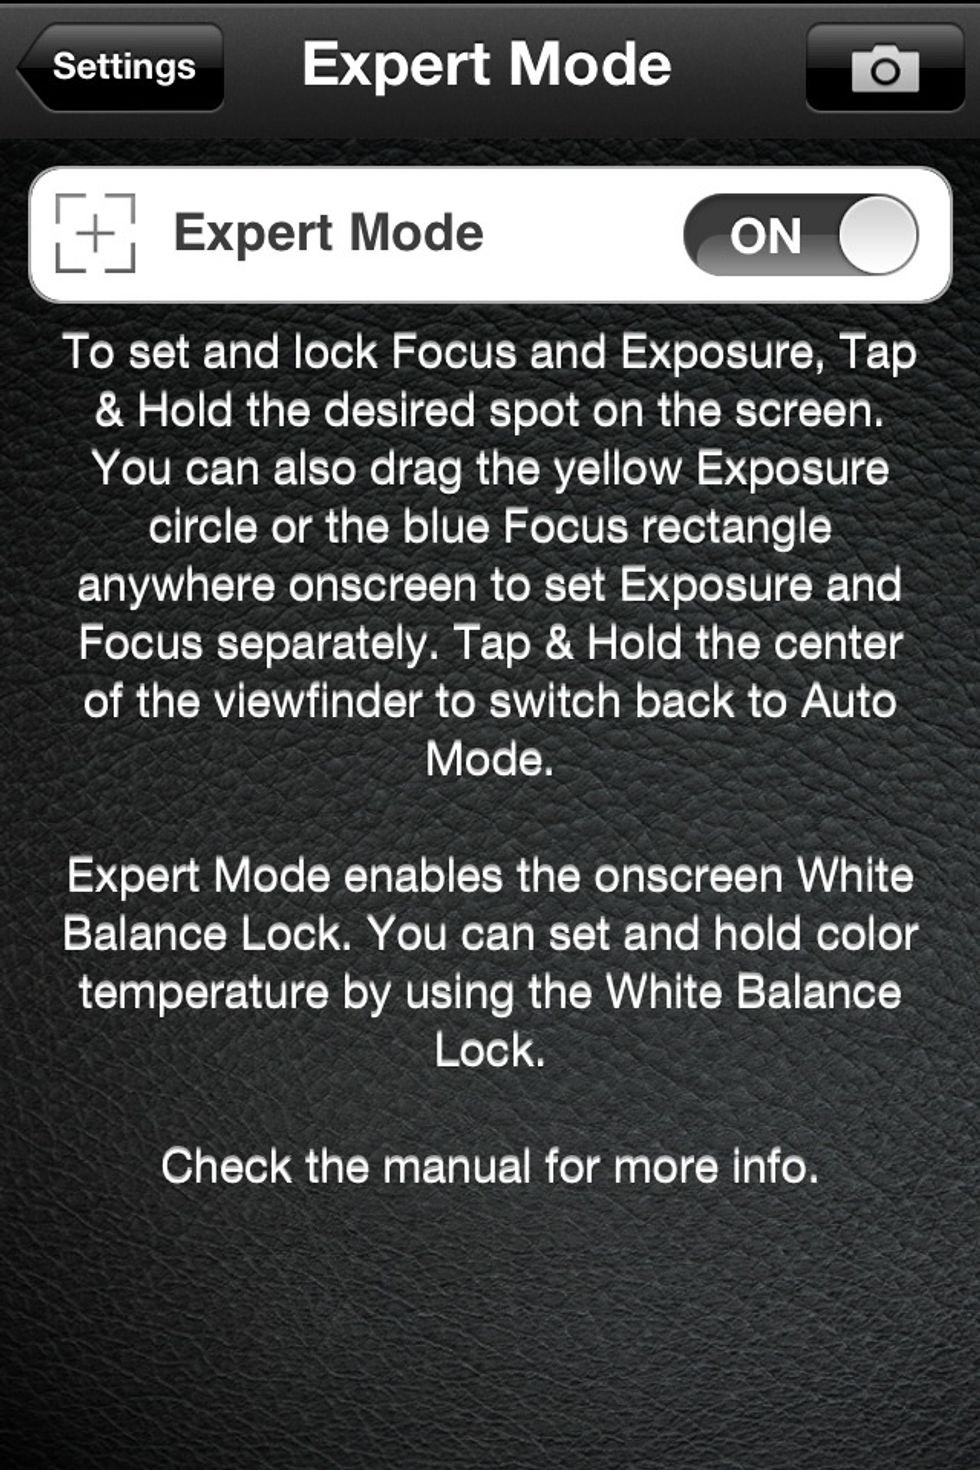
Turn "Expert Mode" ON. Return to the previous menu and select "Full Screen Trigger".
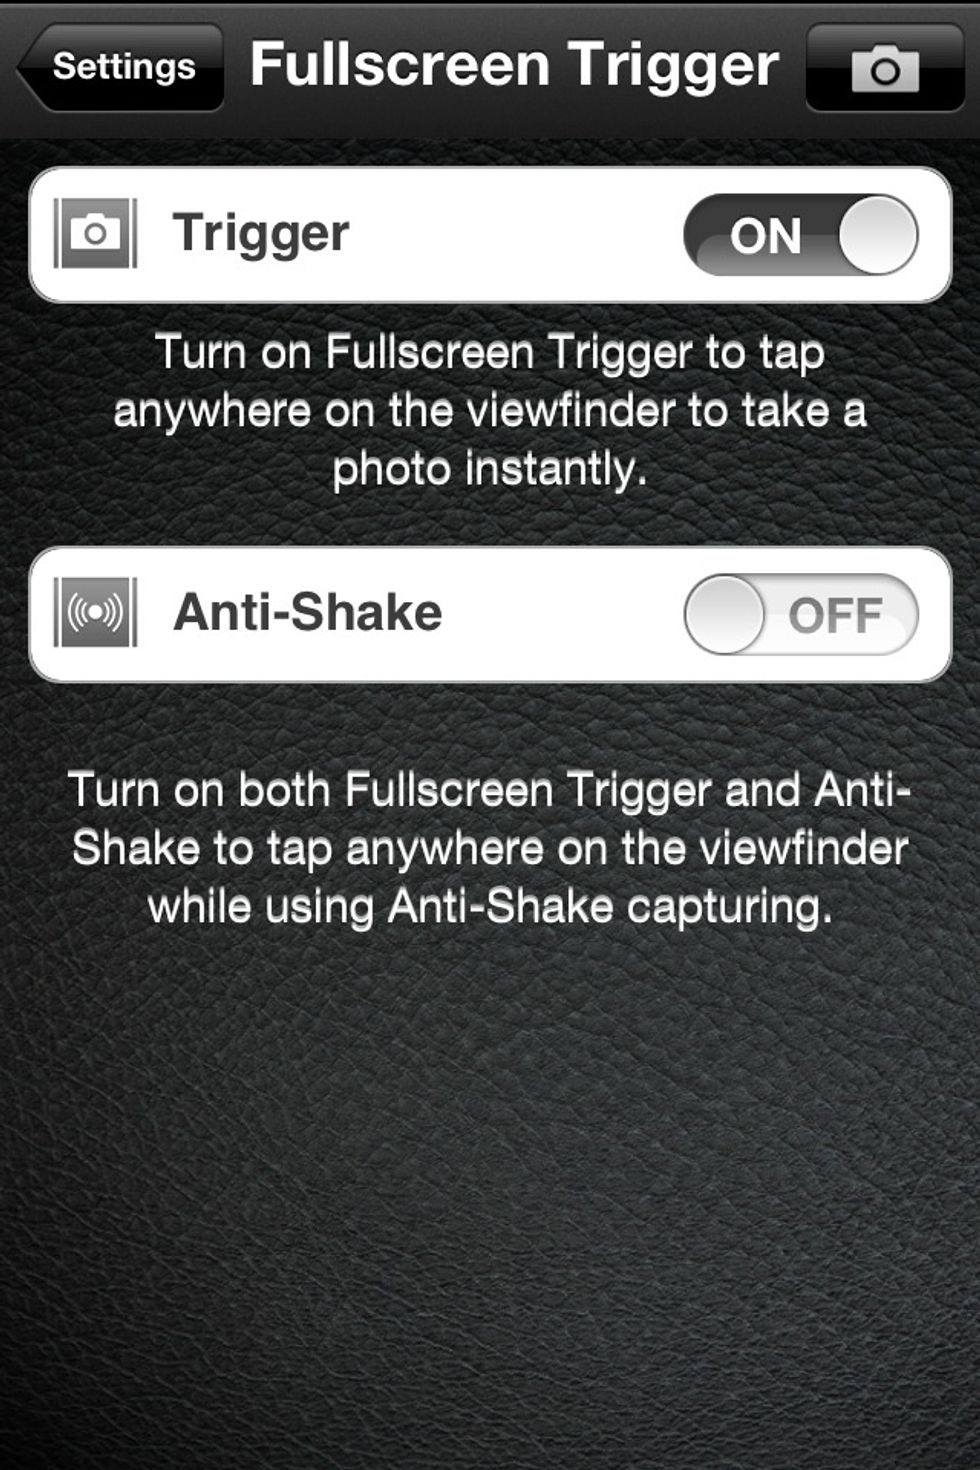
Turn the "Full Screen Trigger" ON and turn "Anti-Shake" OFF. You can turn it back on later if you like. Let's see how we use these setting now, exit back to the original ProCamera view.

This is the old version of the app. The guide is now over a year old, refer to the help in the app.

Select EXPERT MODE and close out of that menu by pressing somewhere else on the screen.
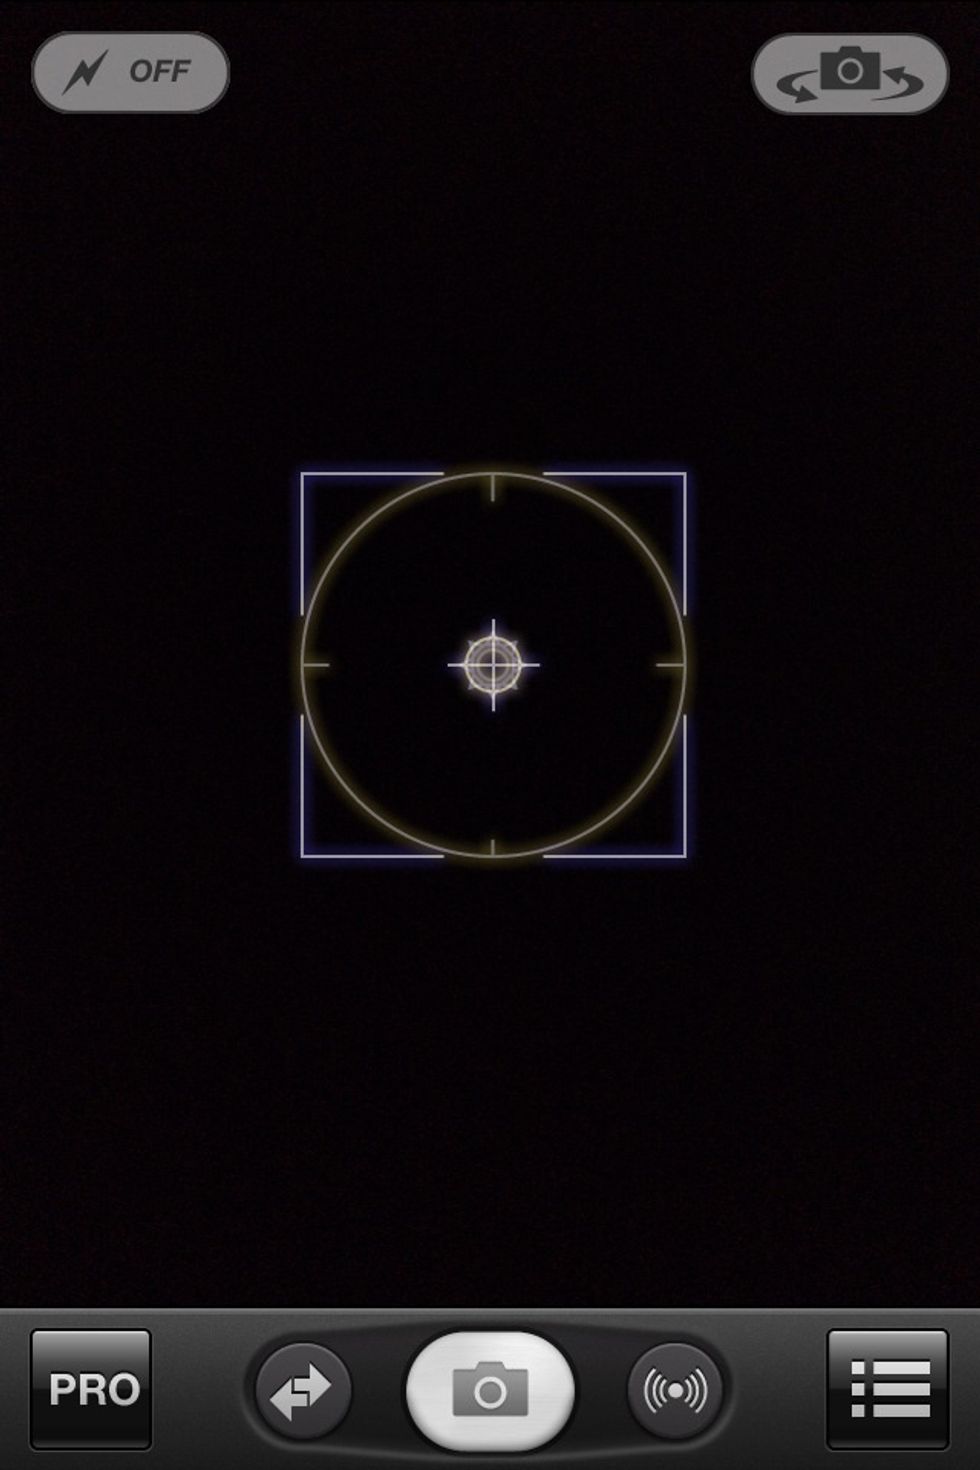
There are now two different coloured icons on the screen: CIRCLE (for controlling exposure) and SQUARE (for controlling focus).
You can separate the CIRCLE and the SQUARE with your fingers. When you release the icon it will blink briefly. When you release the icon, ProCamera will lock the exposure or focus at that point.
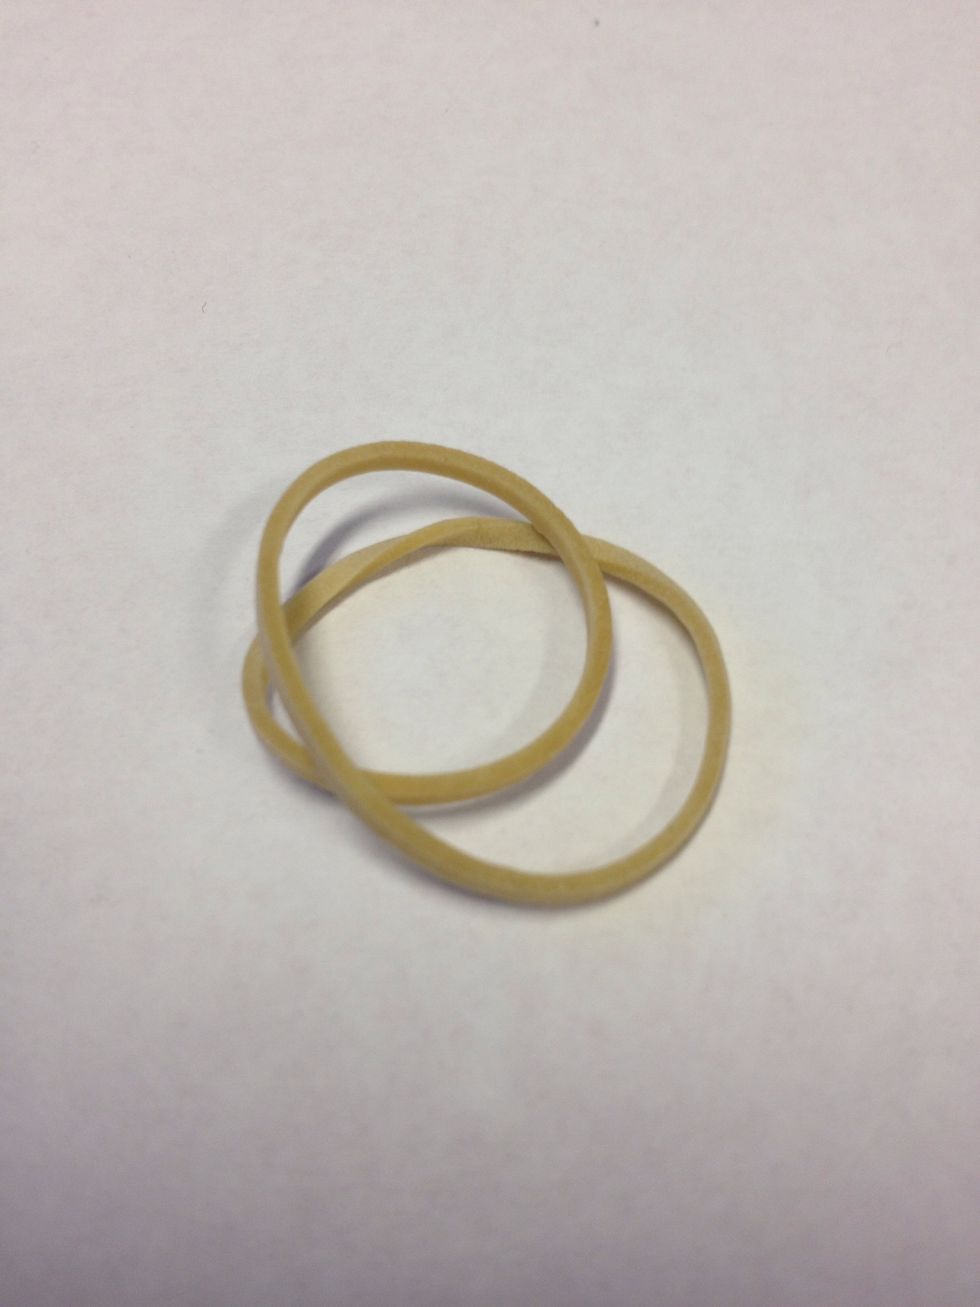
My assistant rubber band will demonstrate focus lock (yes, no expense has been spared).
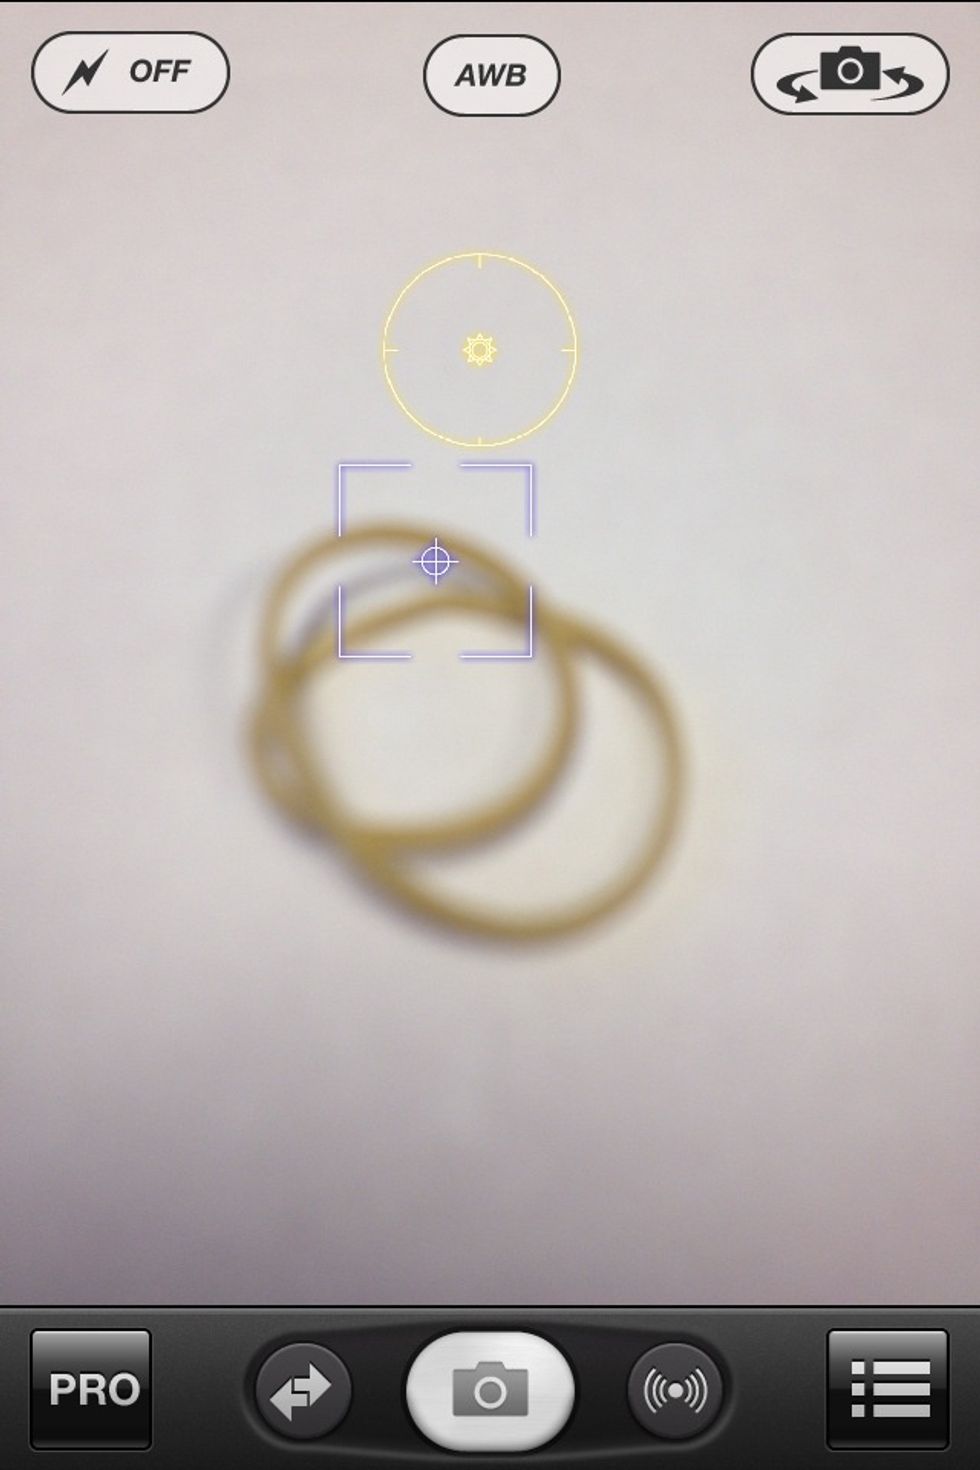
Here, the rubber band is out of focus (I have locked the focus on a far away object). We can make the iPhone focus by moving the SQUARE over the rubber band and releasing the icon.
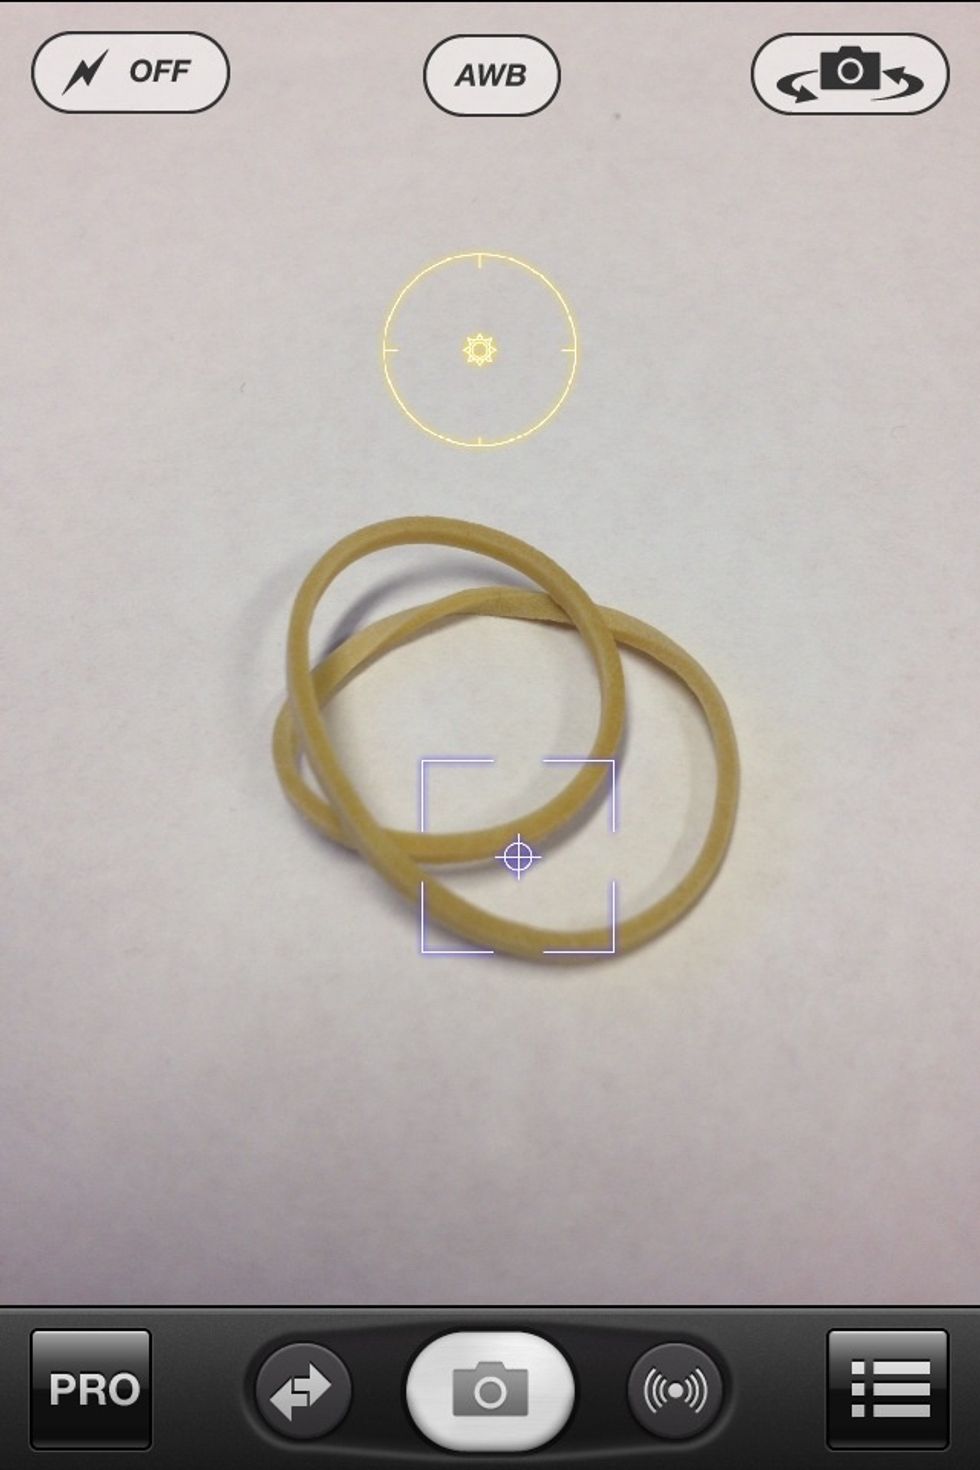
The focus is now locked at this point. We can now keep the focus at this point when shooting any other images. This saves time and allows you to choose what you want in focus in your shots.
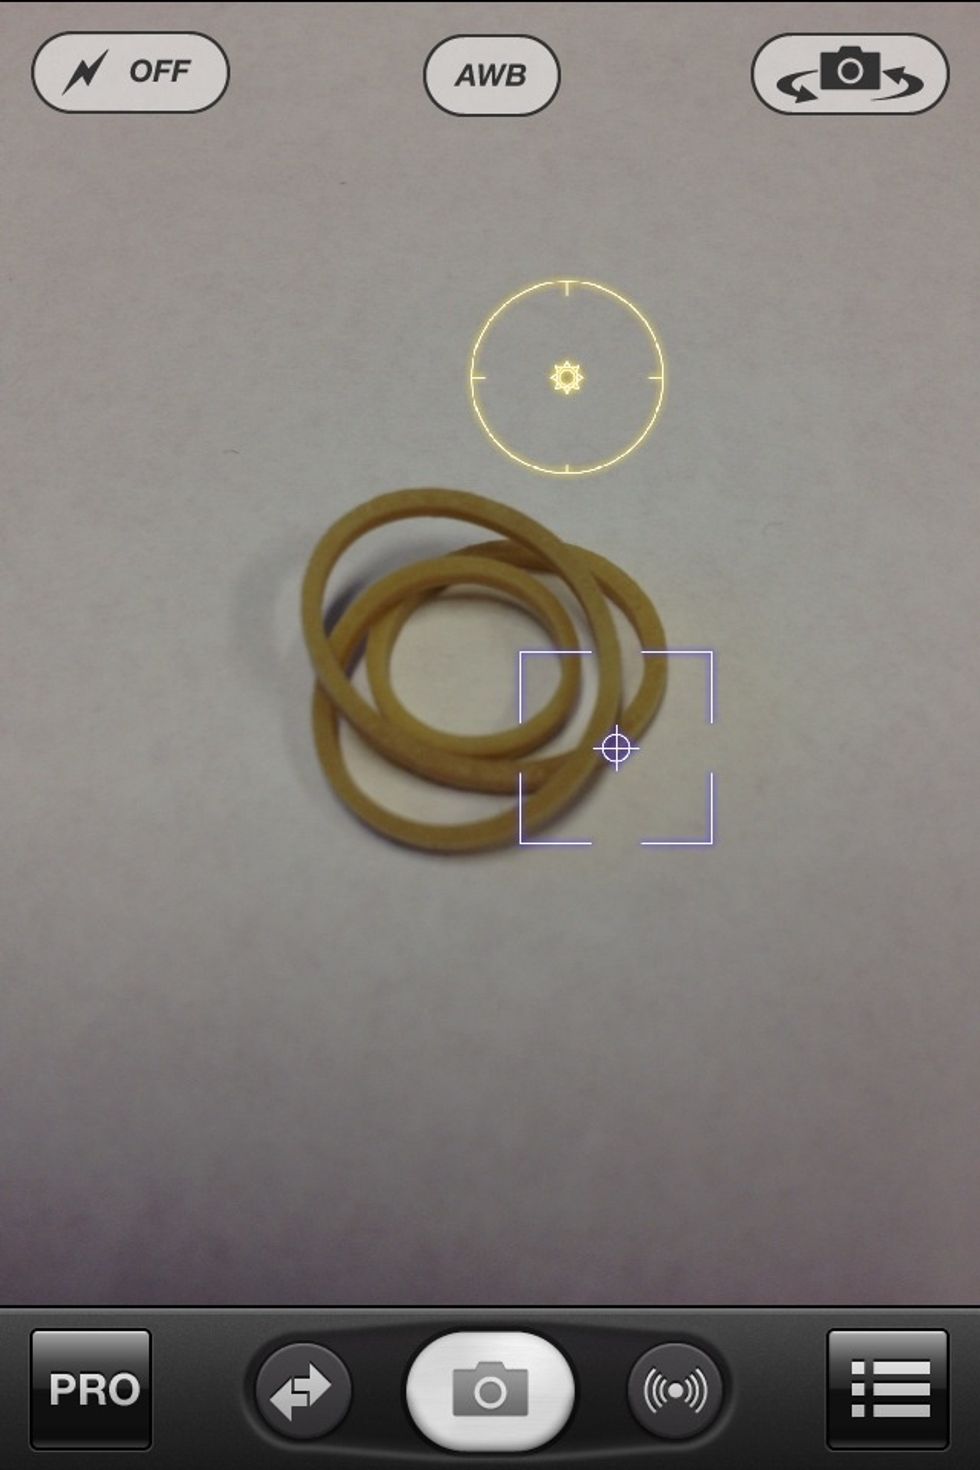
You can now lock exposure the same way that you did for focus.
Move the CIRCLE icon to lock the exposure on a bright light (to underexpose) and then repeat the locking procedure in a dark area (to overexpose). Remember, ProCamera locks when the icon is released.
Here you can see that the rubber band from before is correctly exposed. Next we will over expose the image by locking exposure on a dark area nearby.
Here the rubber band is over exposed as the exposure was locked on a much darker exposure. By pressing on the CIRCLE icon and re-setting exposure the image will be properly exposed.
To capture a dynamic image in mixed lighting, you can now expose for "highlights". To do this you lock your exposure so that you exposure is set on the brightest part of an image. Some examples:
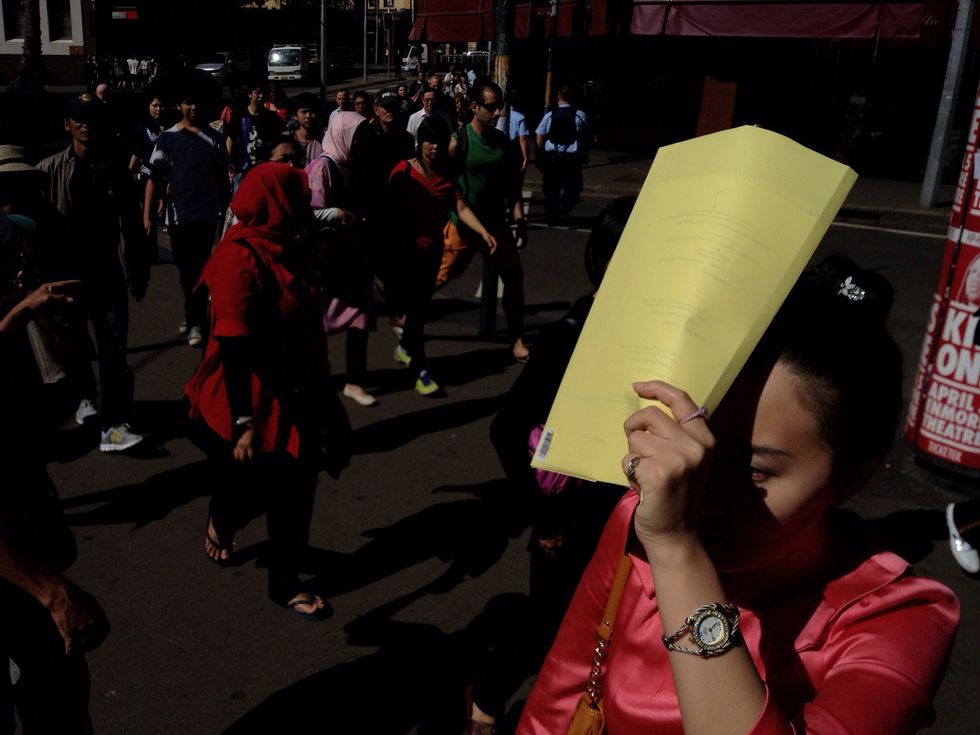
Here the exposure is locked so that the paper being held up against the sunlight is clearly visible and supports the composition of the image. (Image copyright Oliver Lang).
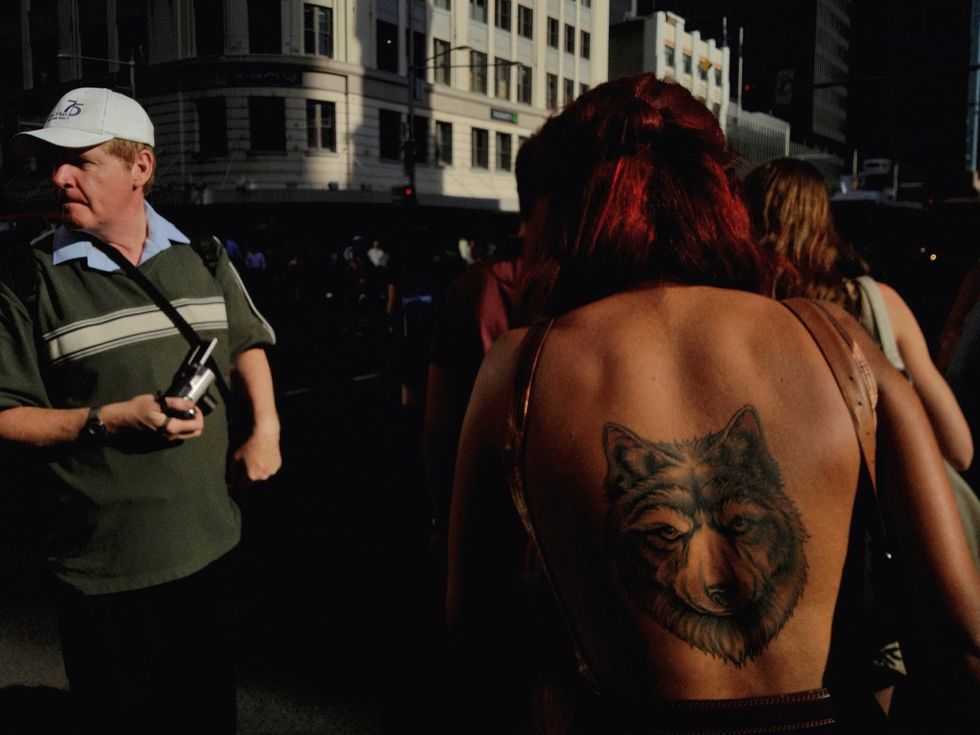
The exposure is locked so that the tattoo is isolated, which adds to the impact of the final image. The exposure was locked before the image was framed (Image copyright Oliver Lang).
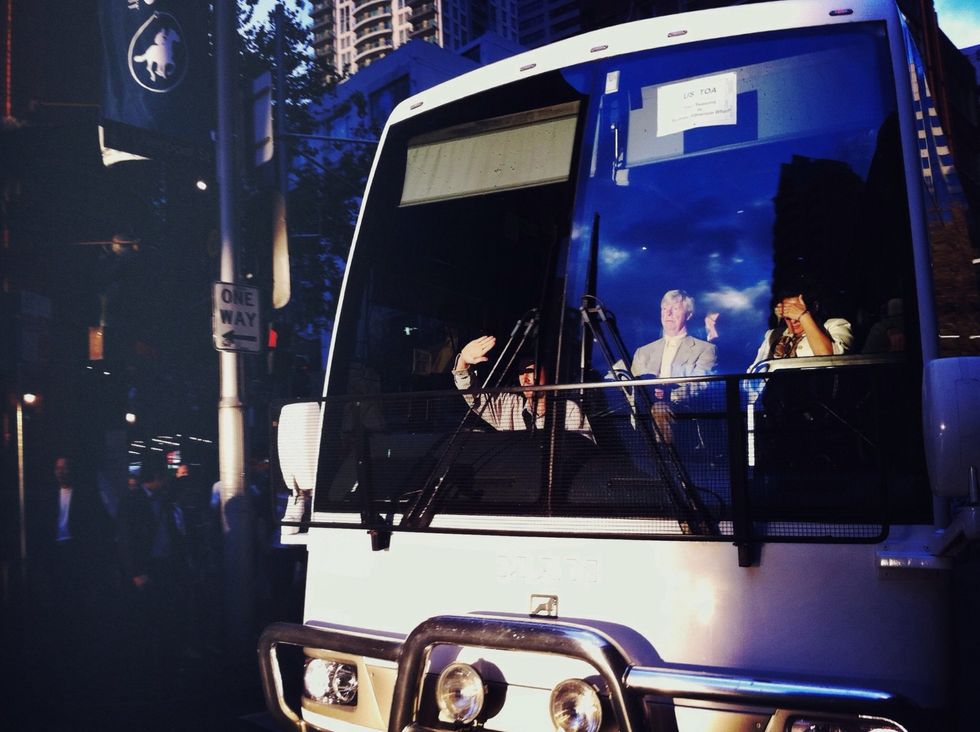
In this image the exposure is locked and the bus is not over exposed, and this helps us see the figure sitting in the light inside the bus. (Image copyright Oliver Lang).
Thanks again for using my iPhone photography Snap Guide! If you're interested in mobile photography, check out www.mobilephotogroup.com - or @themobilephoto on Instagram.
If you have any questions please contact me as @oggsie on Twitter or Instagram! (Image copyright Oliver Lang).