The Conversation (0)
Sign Up
First you need any iDevice named in the supplies section and the app Camera+, which actually is on sale for 0,99$ / 0,79€ and in my opinion one of the best photography apps for iOS.
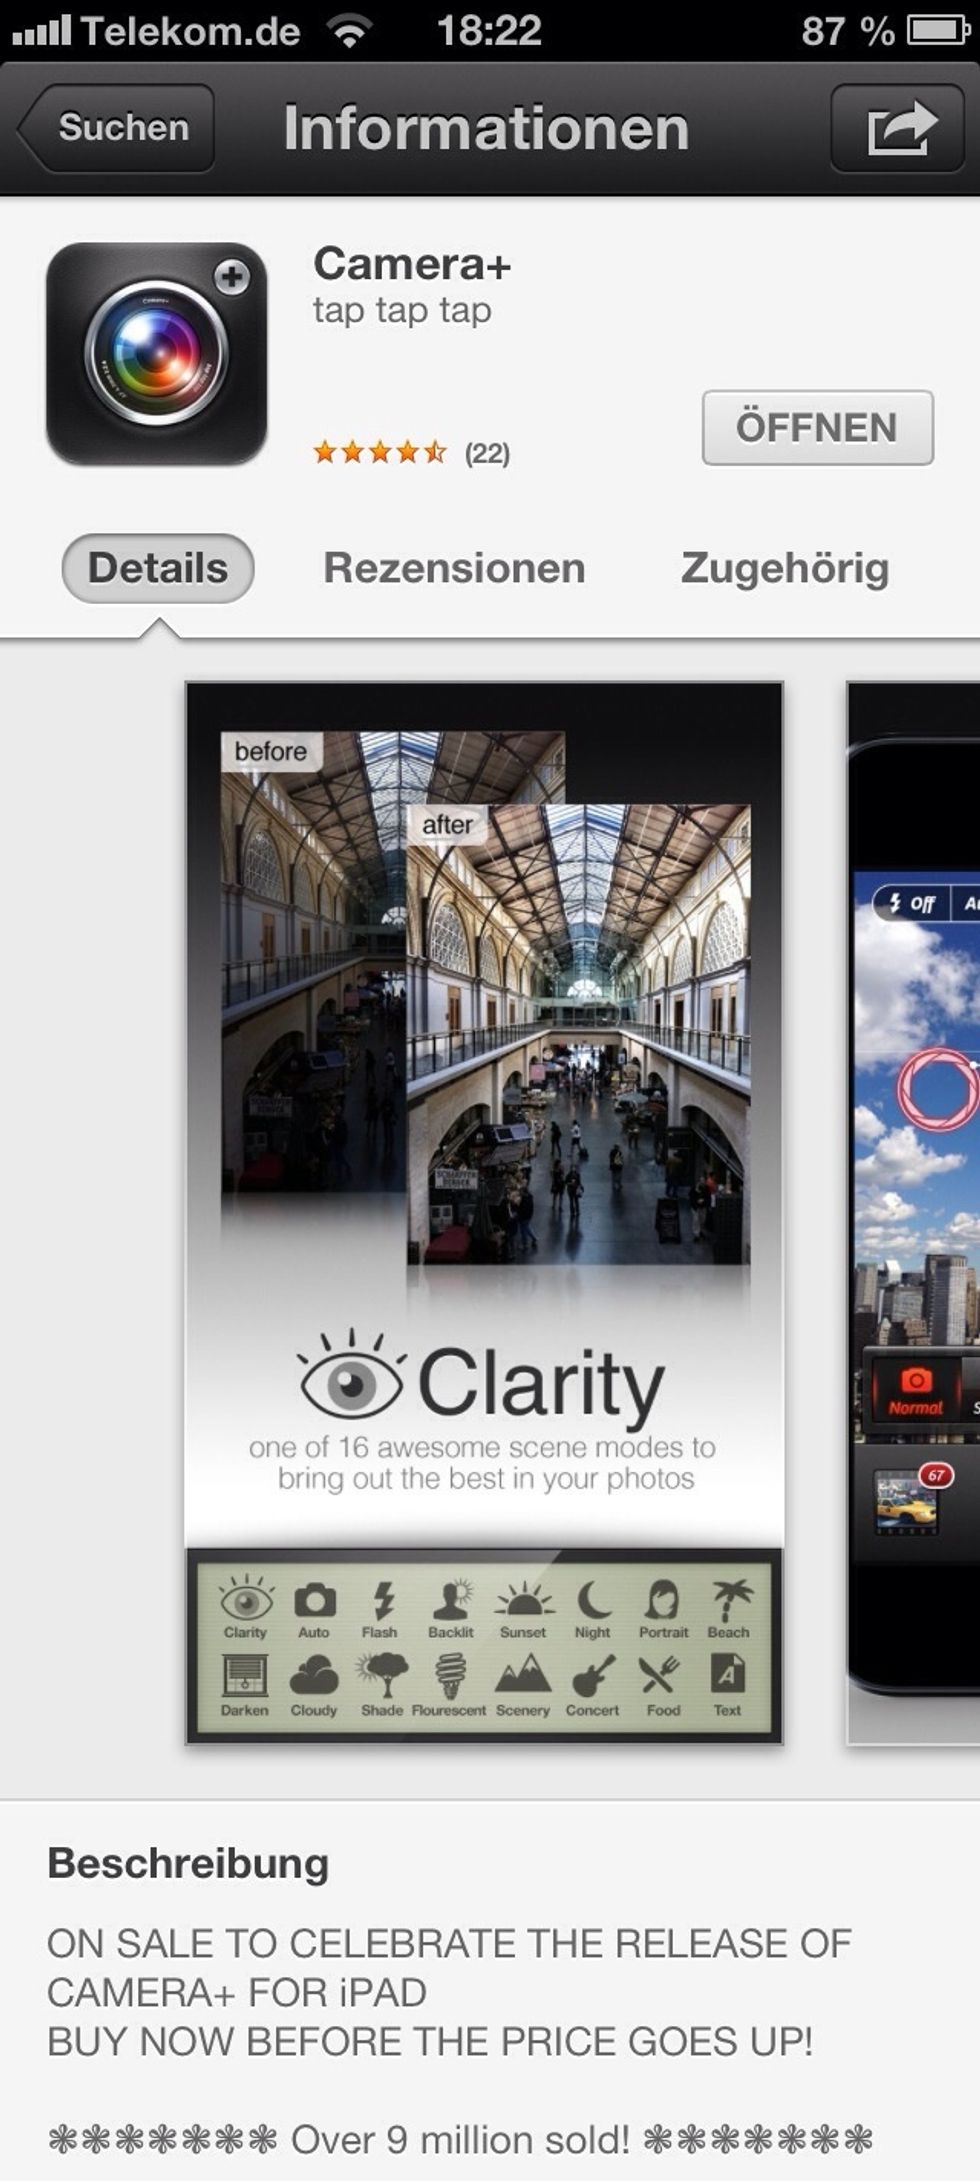
Search for "Camera+" in the AppStore to find out more!
Then just grab your iDevice (for me it's my iPhone) and take a nice photograph of anything you want :)
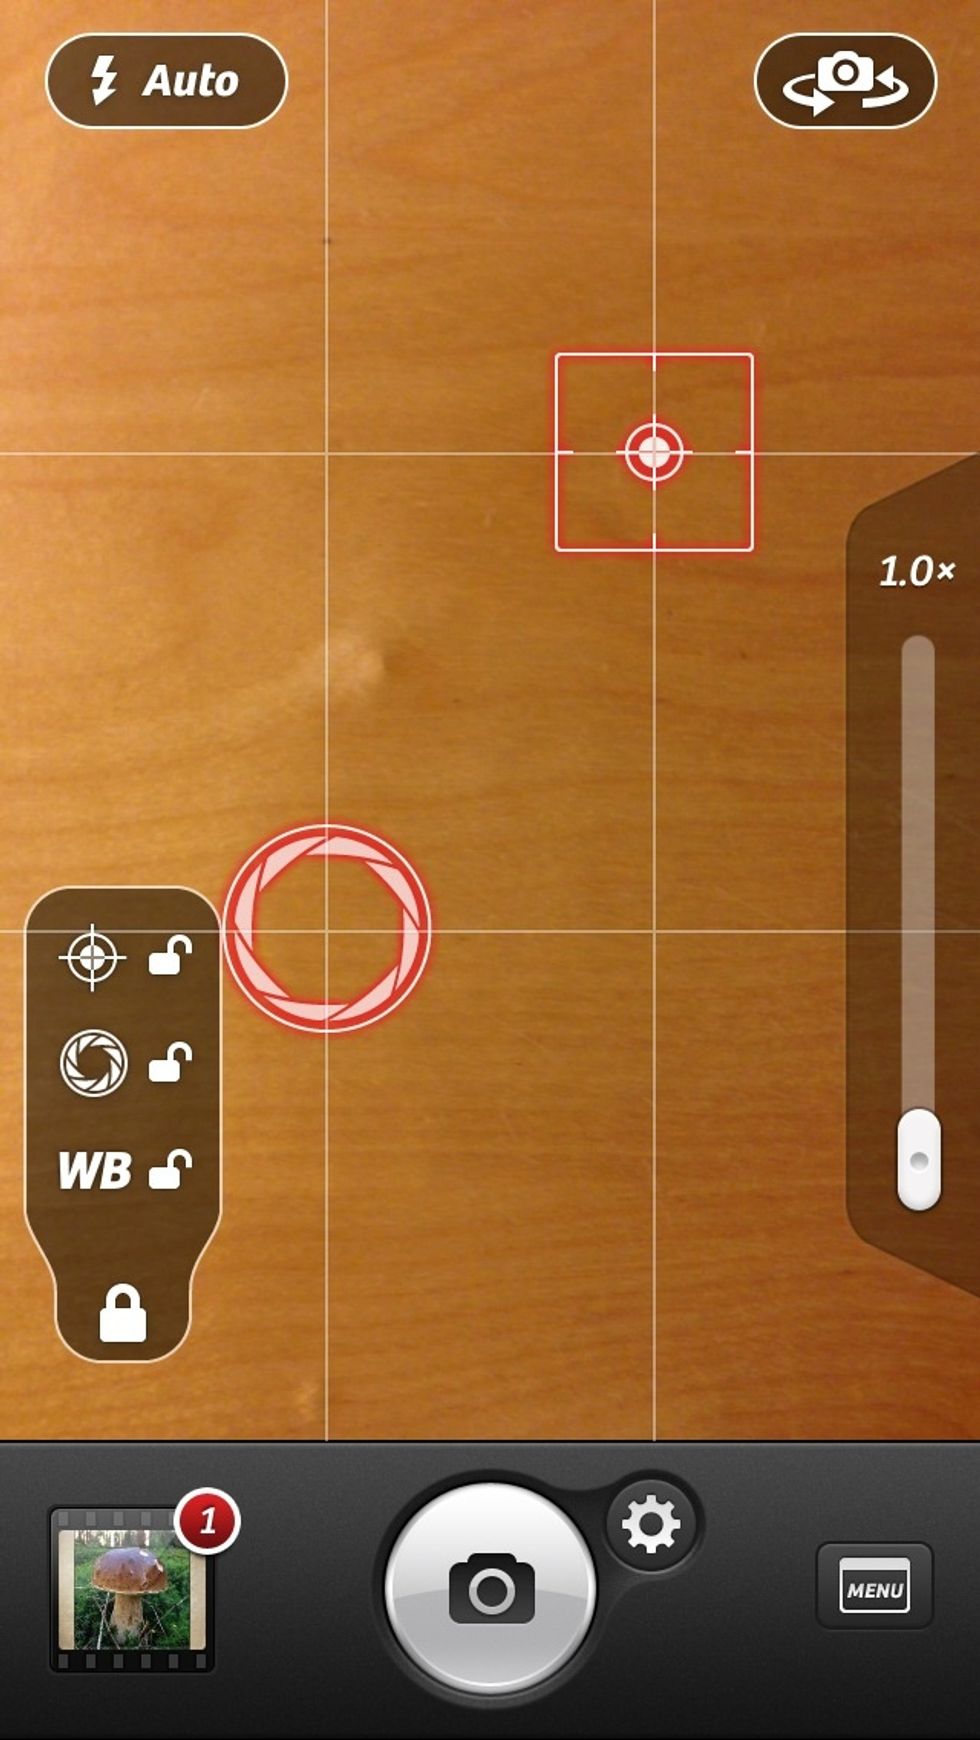
While taking a photo, tap the screen with one finger to put the focus at that point & with another to make the exposure-ring appear. You can now tap the lock to lock focus, exposure and white-balance!
You can also move both points (focus & exposure) by tapping and re-positioning them. To zoom, just use the small bar at the side. Tap the settings-cog to open up a menu of different shooting-modes!
This photo, if taken with Camera+, will be saved in the "Lightbox". You can also import photos into the Lightbox by tapping the upper right +

In the Lightbox tap on "Edit" for some more fun!
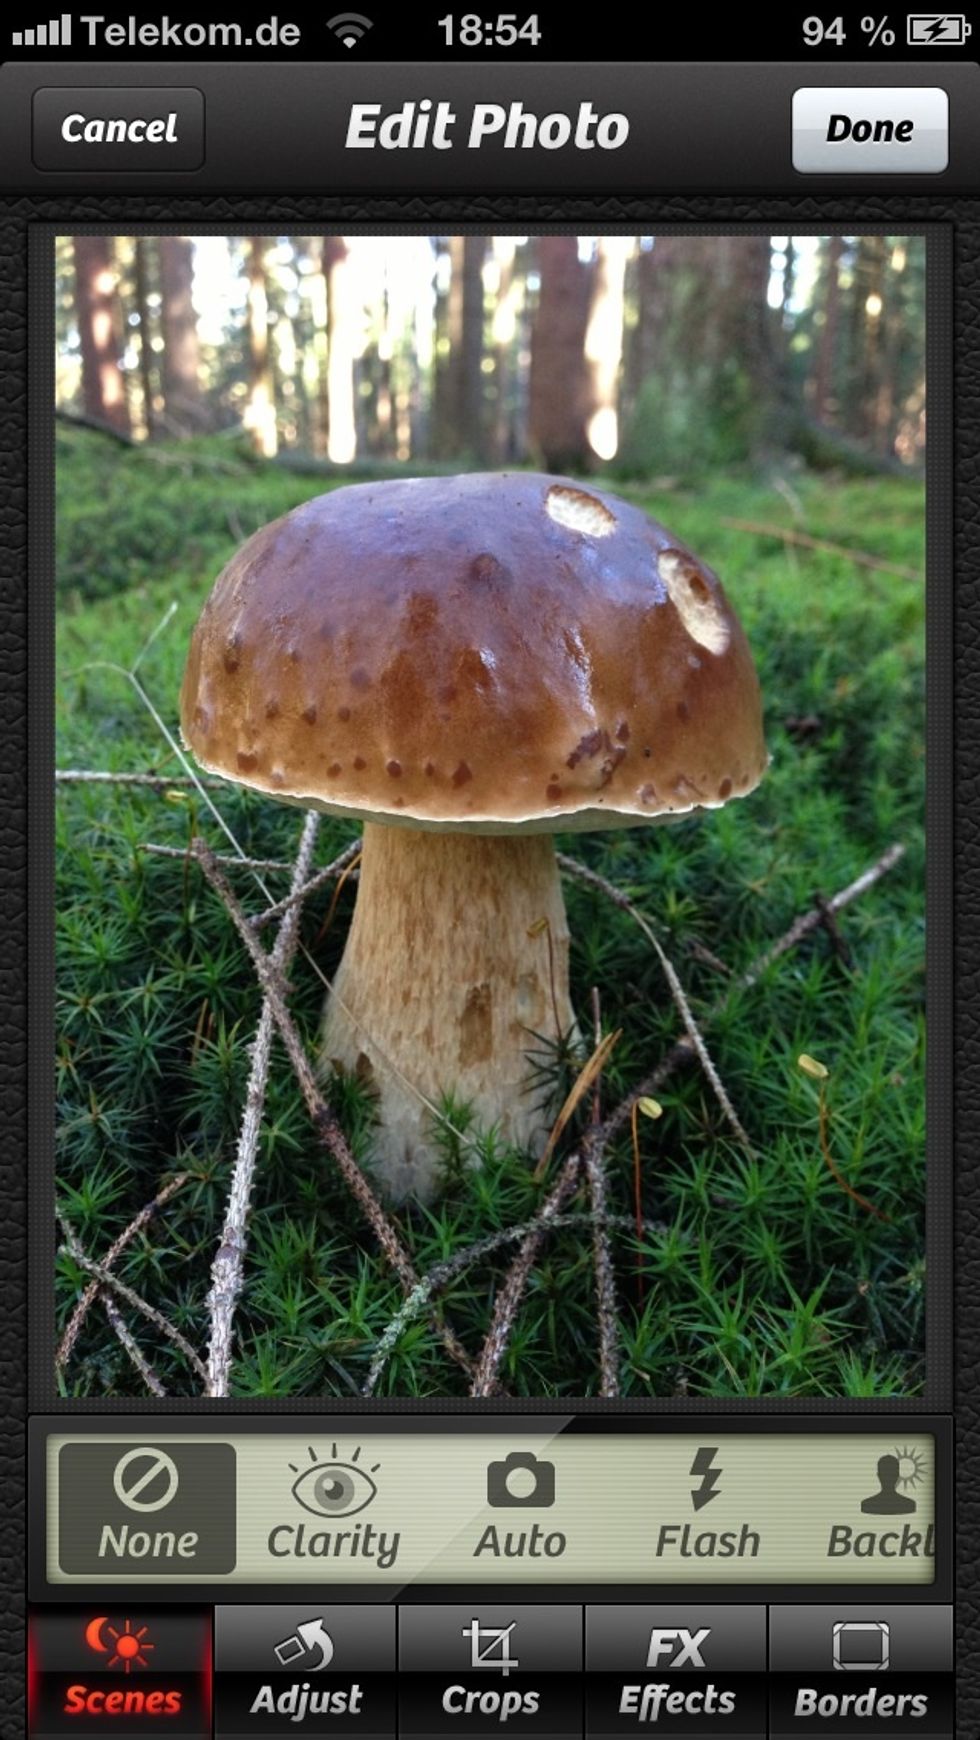
The first section appearing now is the "Scenes" section. There are some quite nice scenes like the amazing "Clarity" effect - try those for yourself! I'll use the "Auto(-adjust)" scene for now.
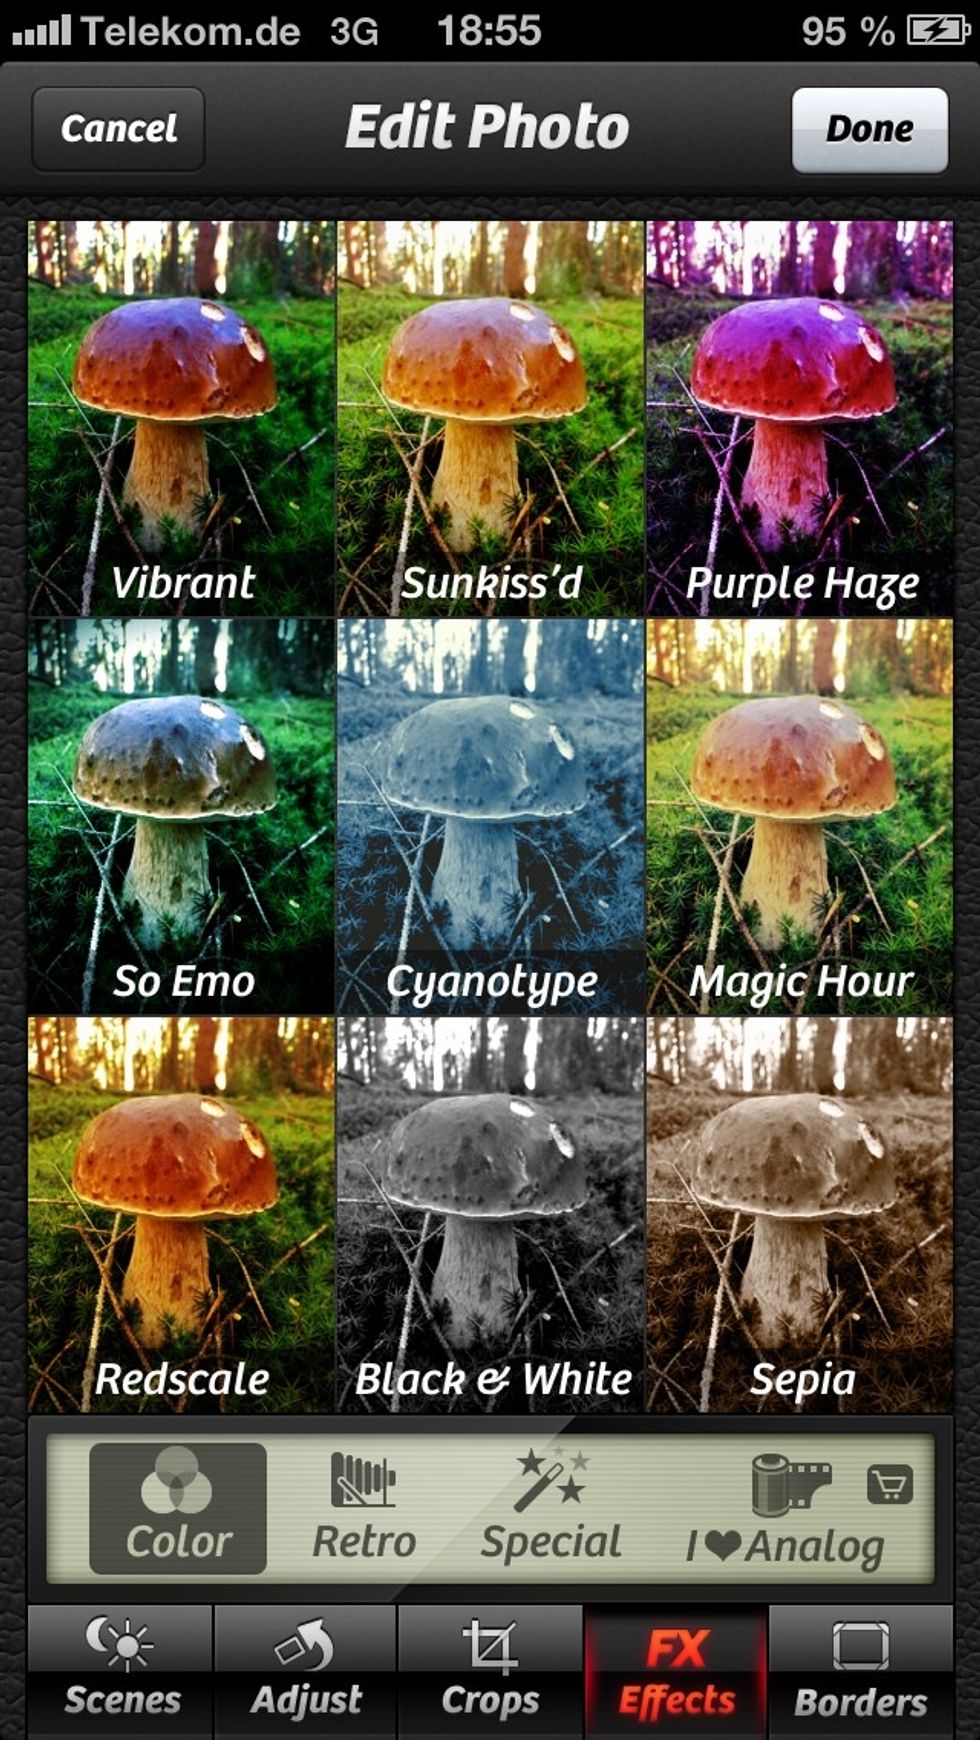
Next we'll have a look at the "Effects" section to add a nice summer-feel to this photograph. I chose the "Magic Hour" effect - one of the best, I think.

Let's set the intensity to about 65%, shall we?
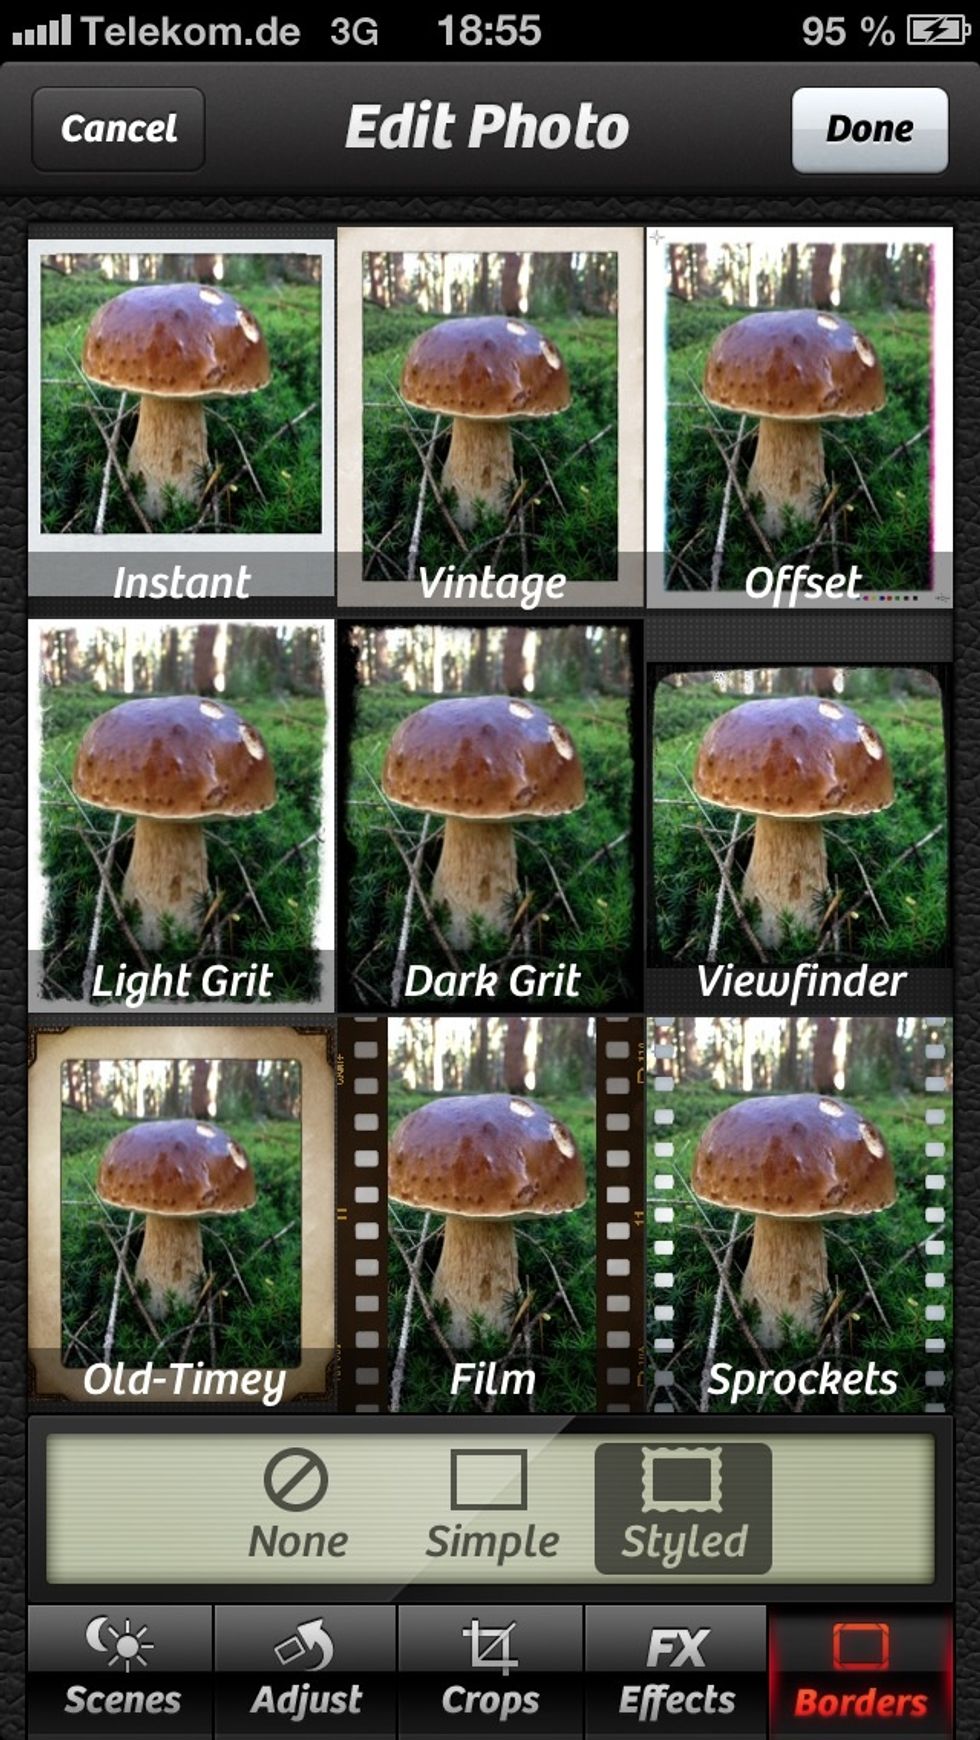
Last but not least we'll add a nice (styled) frame: the "Old-timey"!

Looks quite nice, doesn't it? And now a caption ~>

Yep. Then just tap the small checkmark in the upper right and after that tap "Done" to return to the Lightbox!

Finally you'll be able to share, save (Protip: tap & hold the "Save" to make this popup appear) it or to get some information about your photograph.

The final result is here! I hope this will help some of you to get closer to photography ;)
For some more information about the app itself, please visit http://campl.us :) Have fun and take some nice photographs!