The Conversation (0)
Sign Up
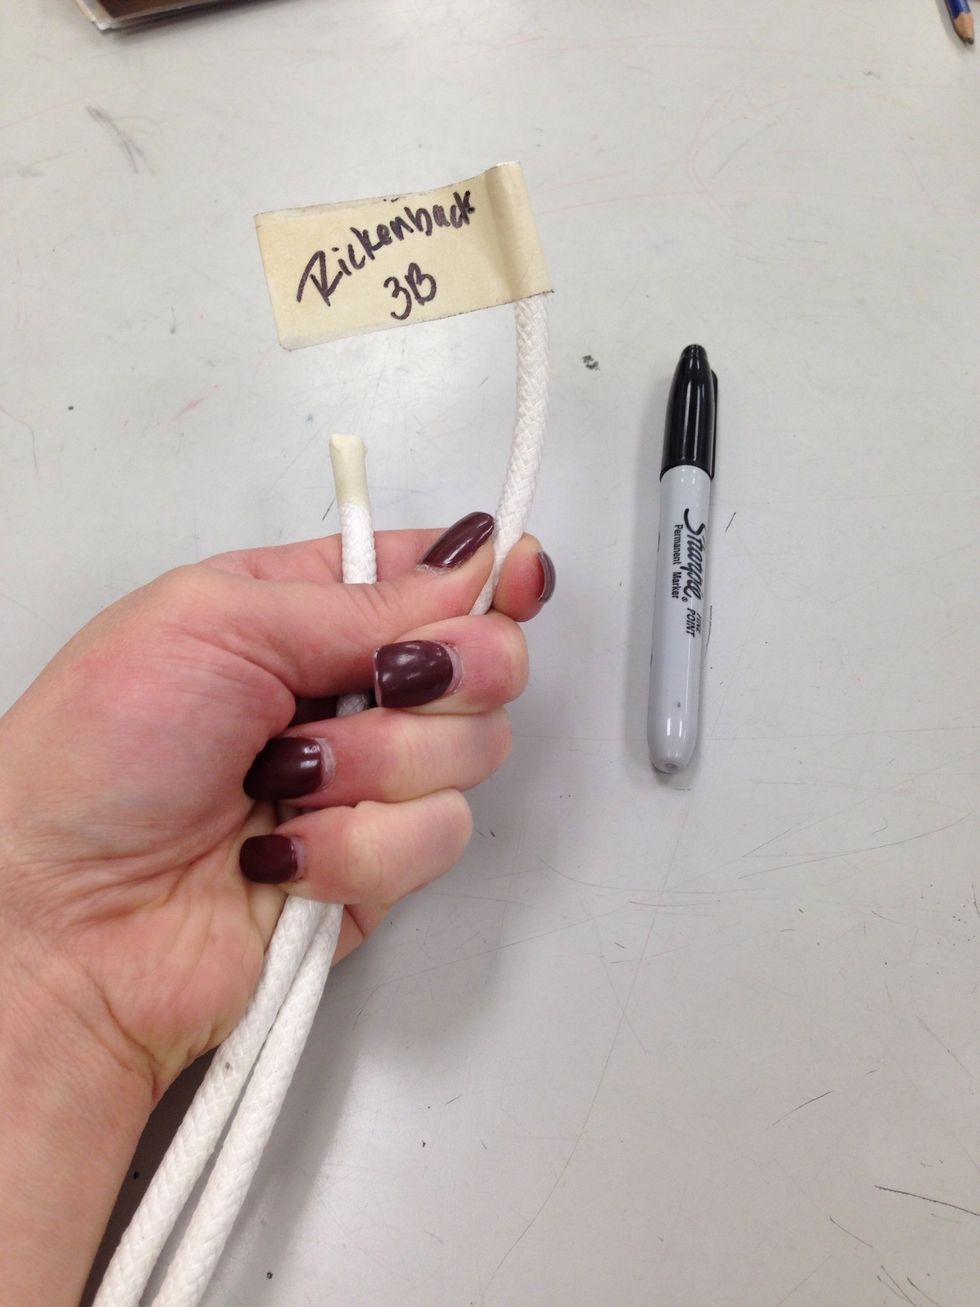
Cut coil to 4 feet of coil. Add a piece of tape around one end to create an aglet. Add a piece of tape to the other end and create a flag to label your basket with your name and class.

Using the scissors cut the aglet at an angle to make a point.
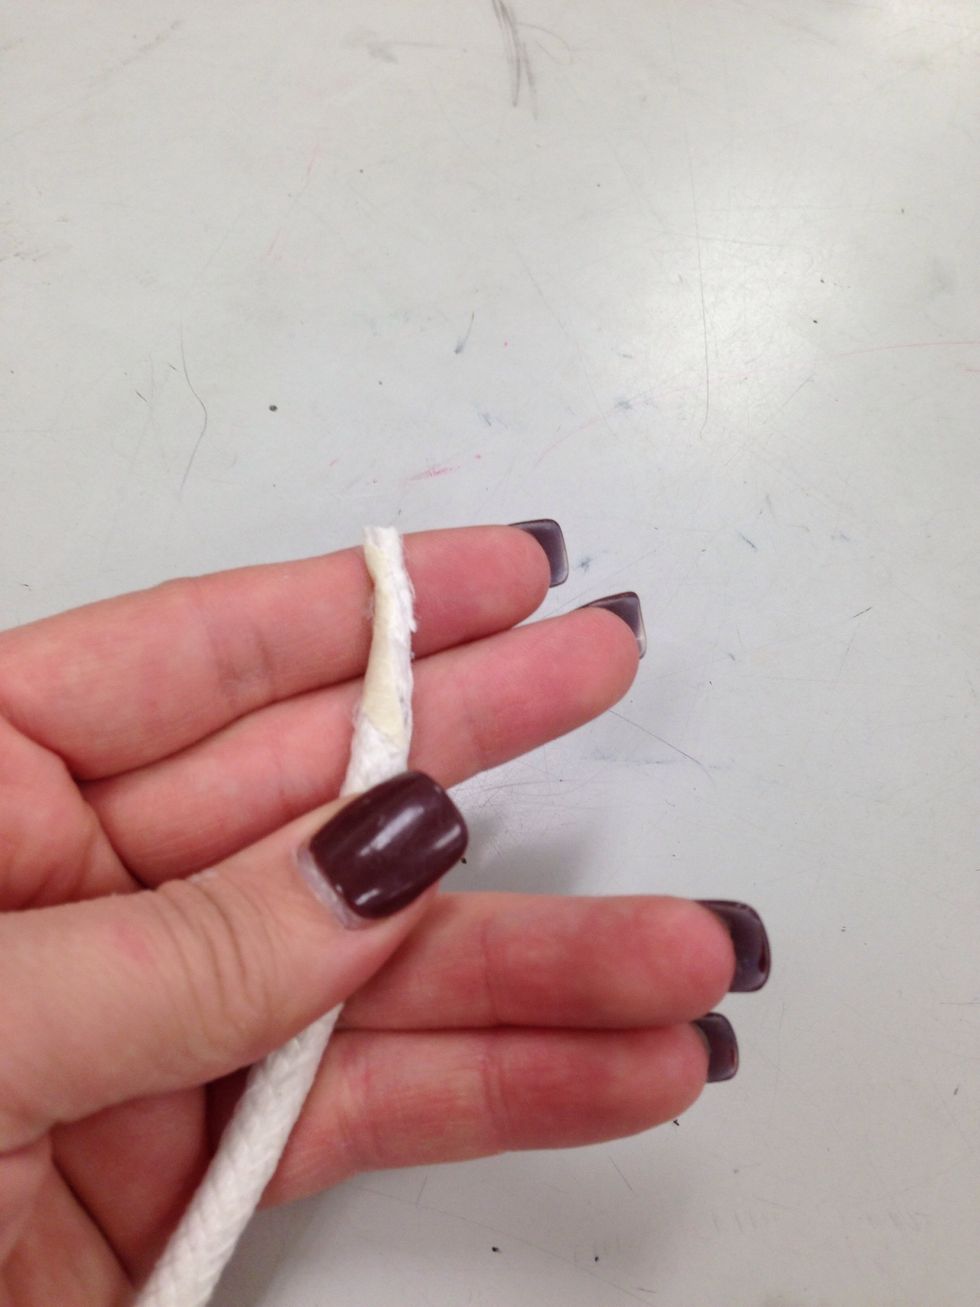
Example of the point.
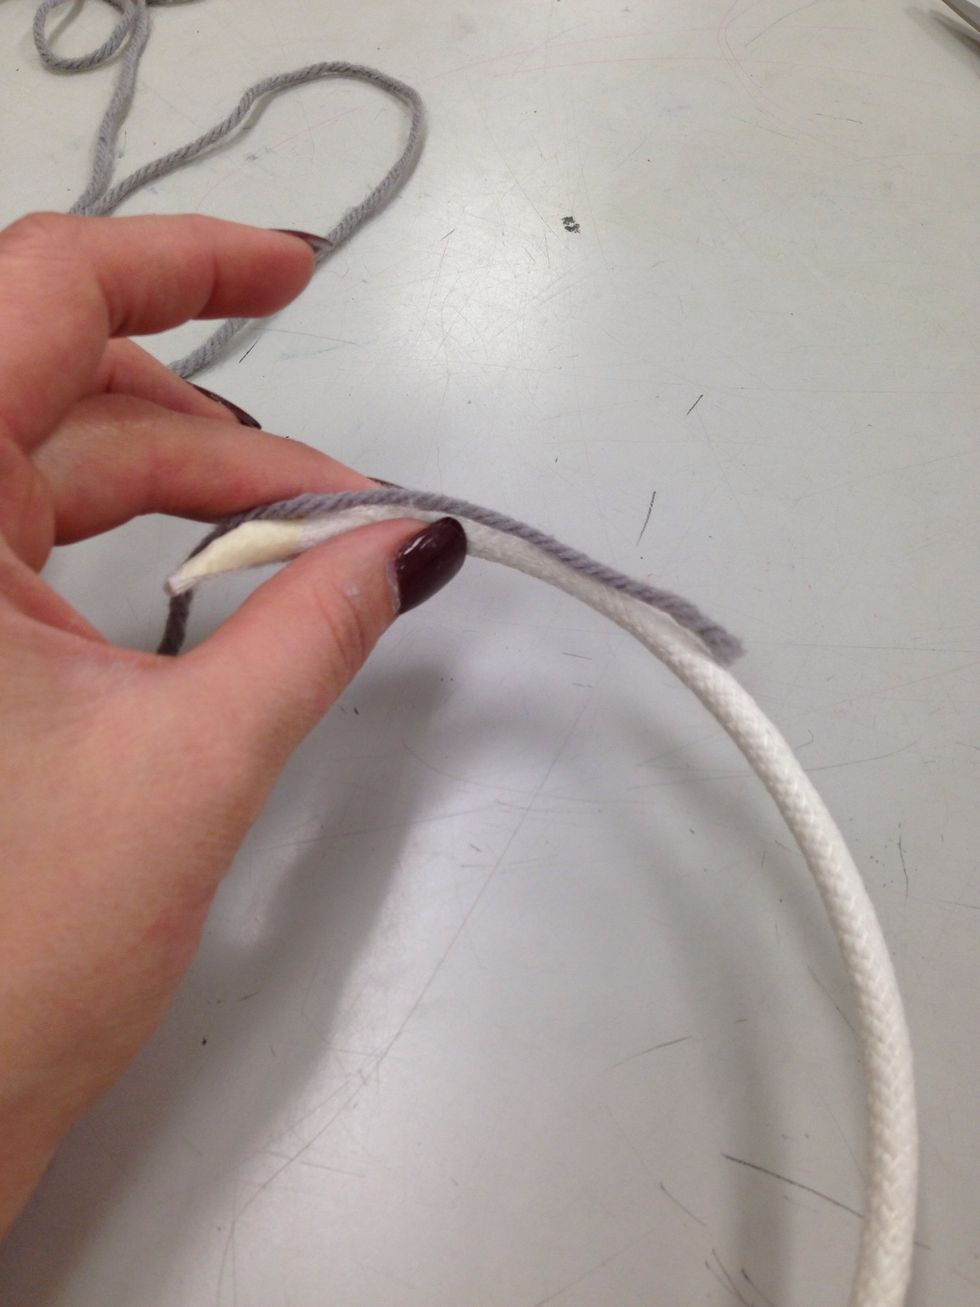
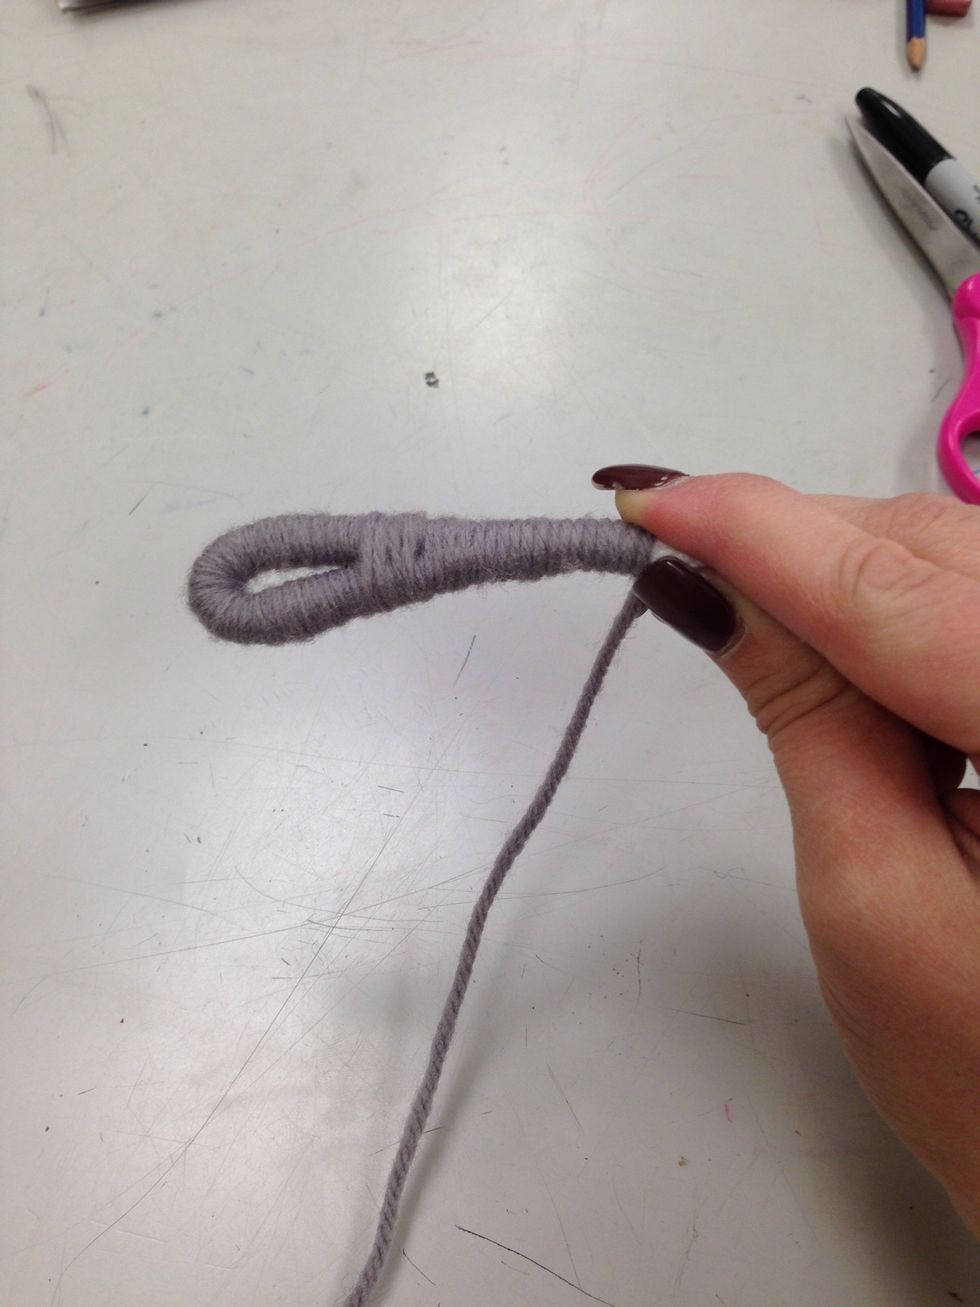
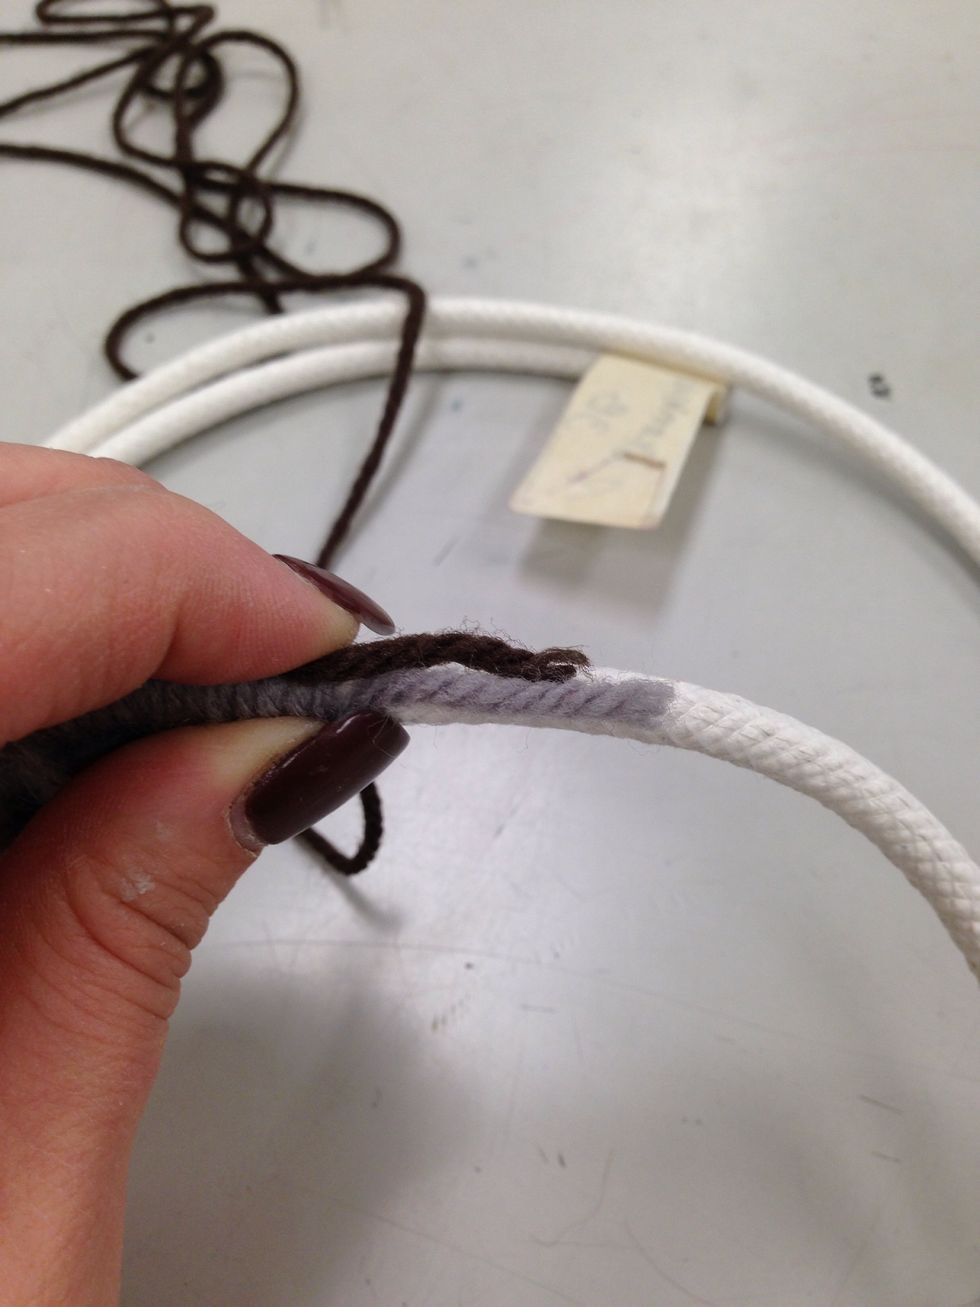
Lay the yarn end on the coil with about 2-3 inches overlapping the coil.

Begin wrapping the coil from where the cut aglet is till you run out of yarn to cover.
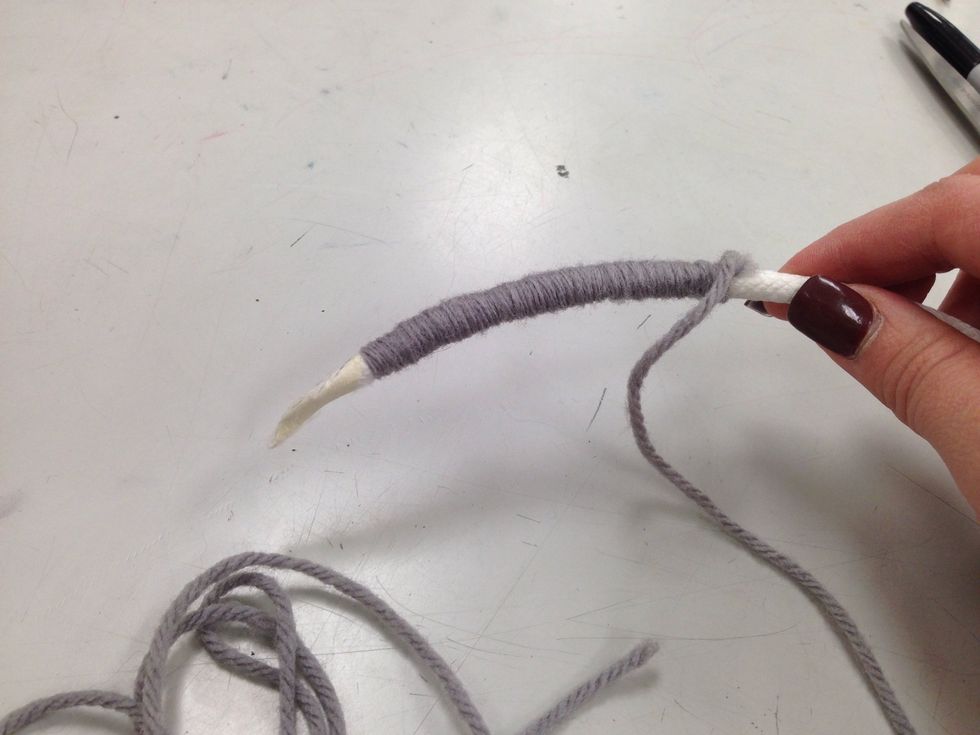
Yarn covered and coil covered.

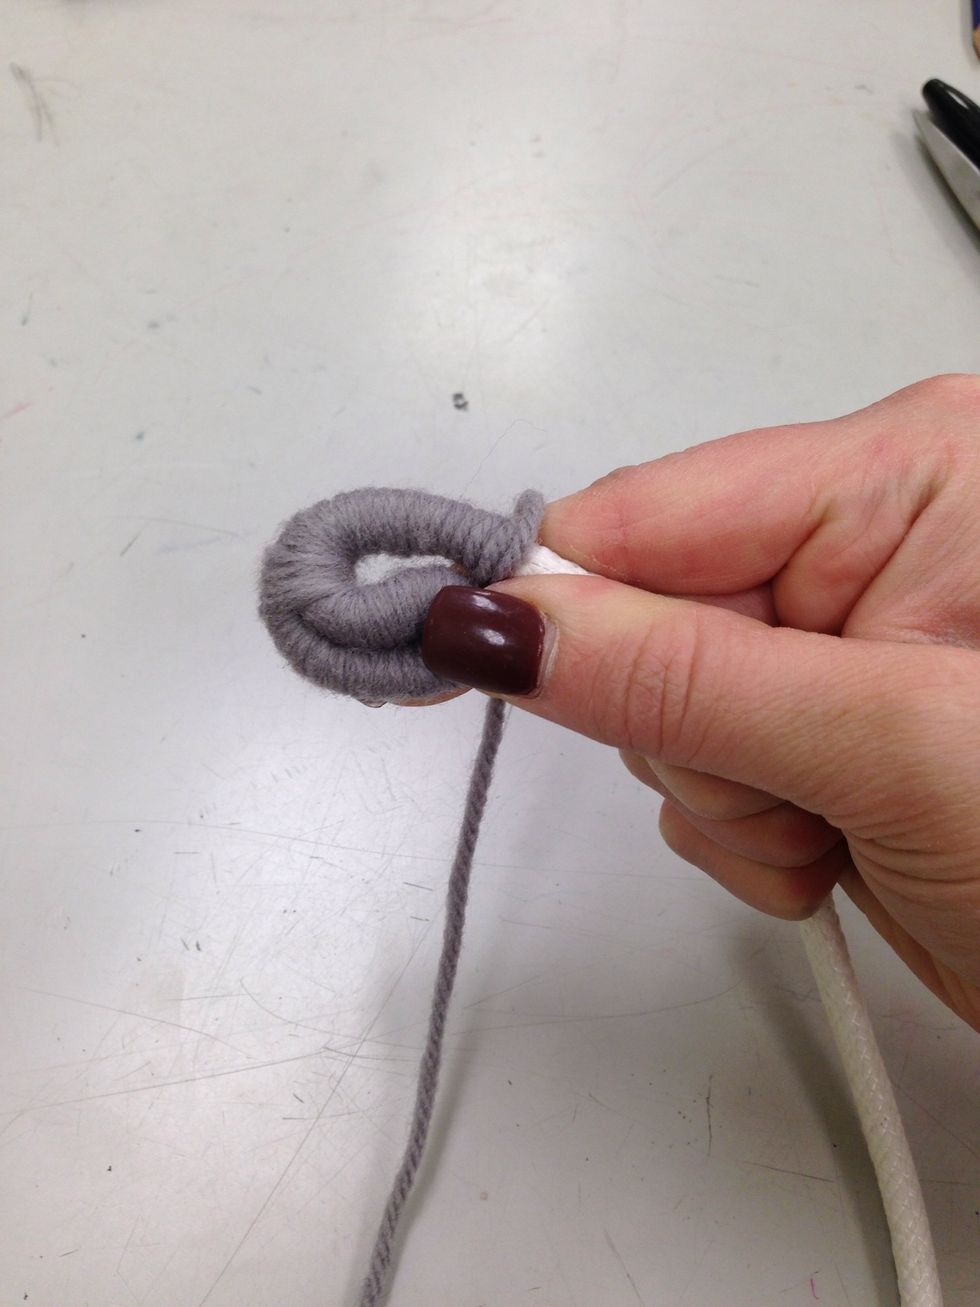
Bend it in half like a horse shoe.

Wrap the ends of the horse shoe together. Make sure to have more yarn remaining.
Continue to wrap till the angled aglet is fully wrapped and wrap a few extra times beyond the aglet.
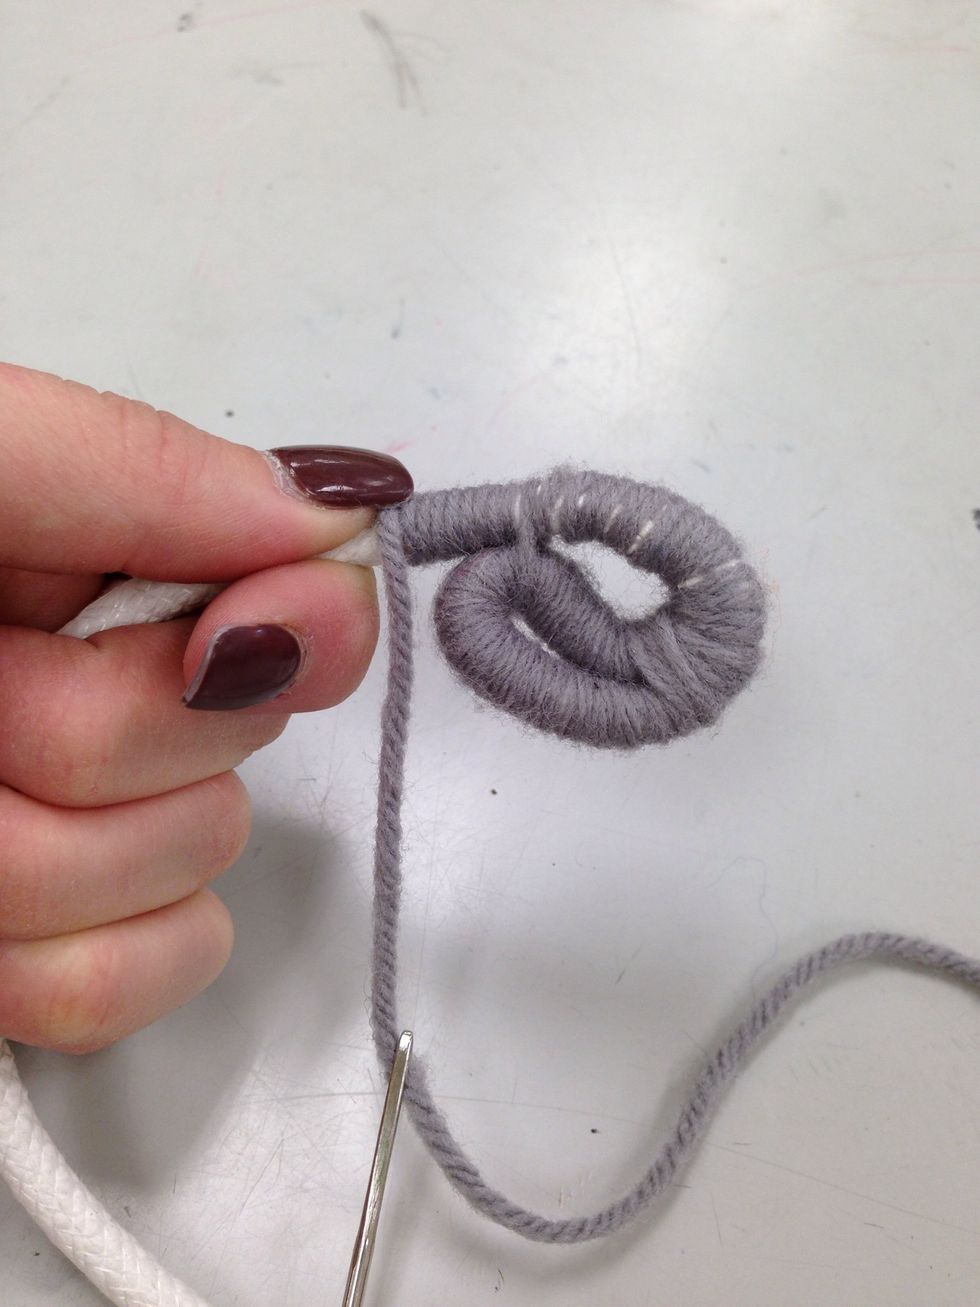
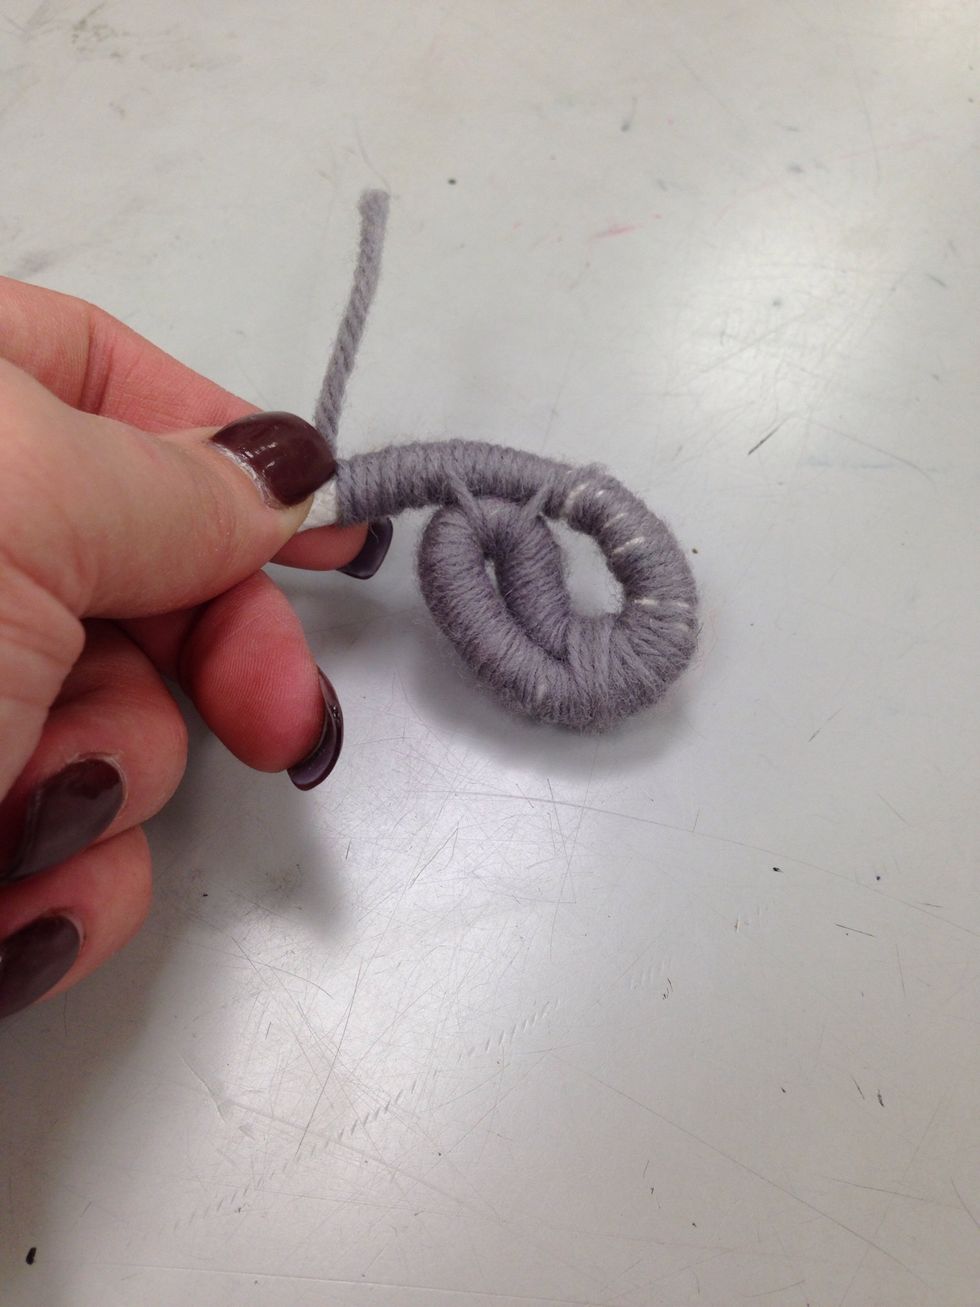
Bend the horse shoe around till it resembles a snail shell.

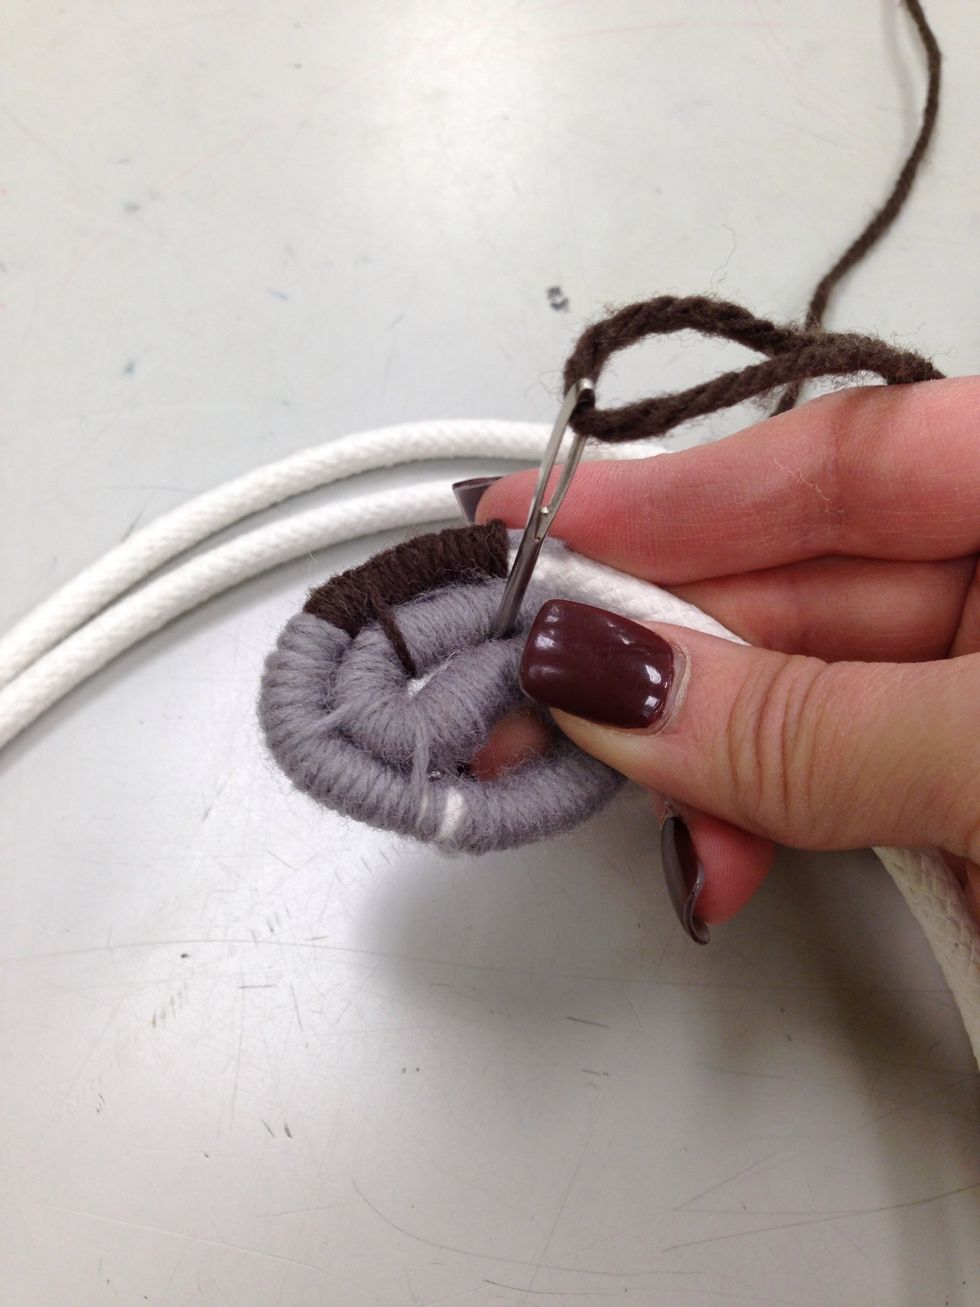
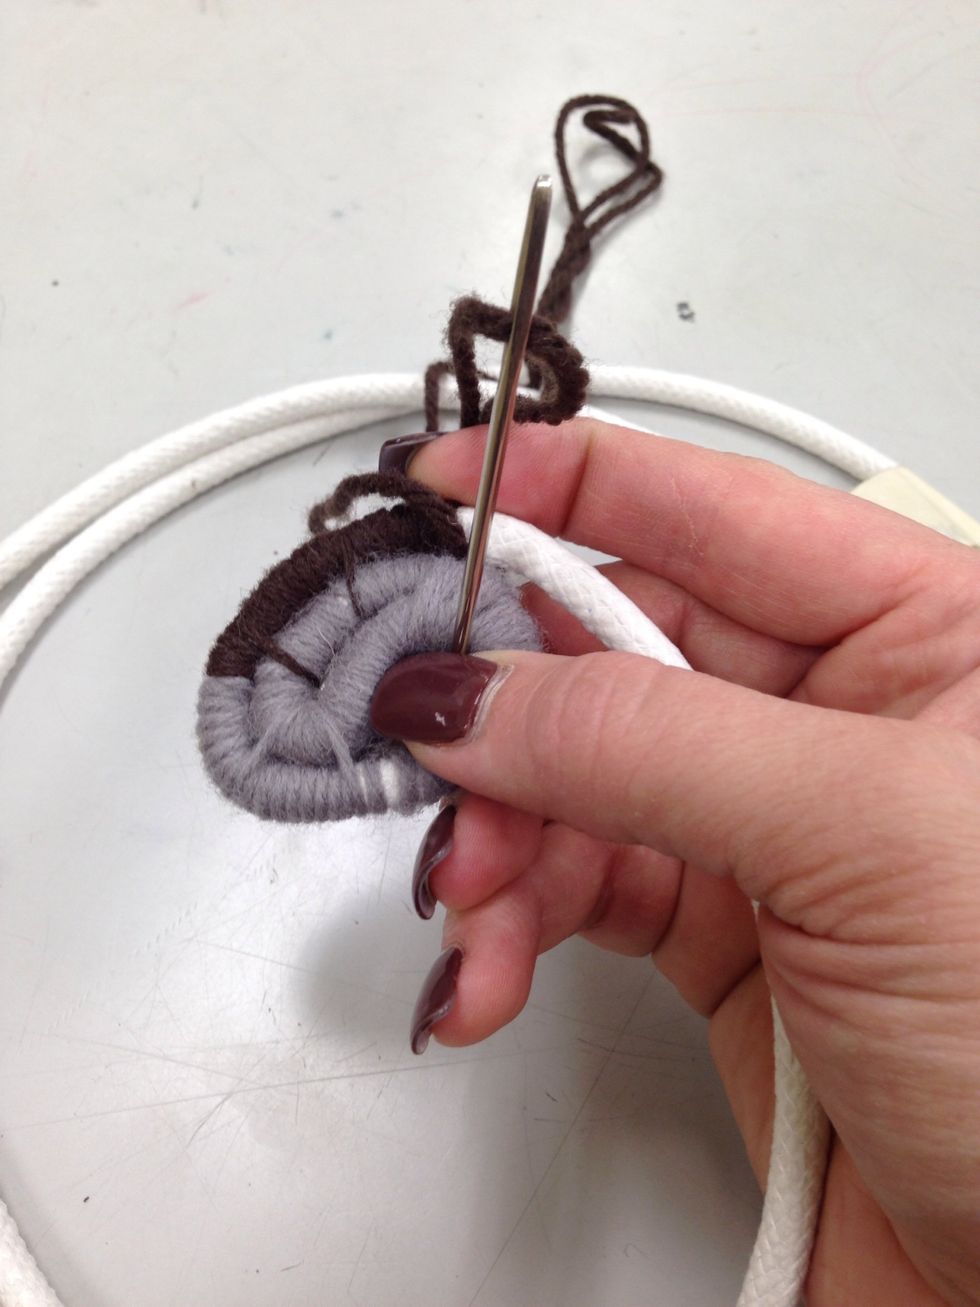
Time to put your needle on your yarn.

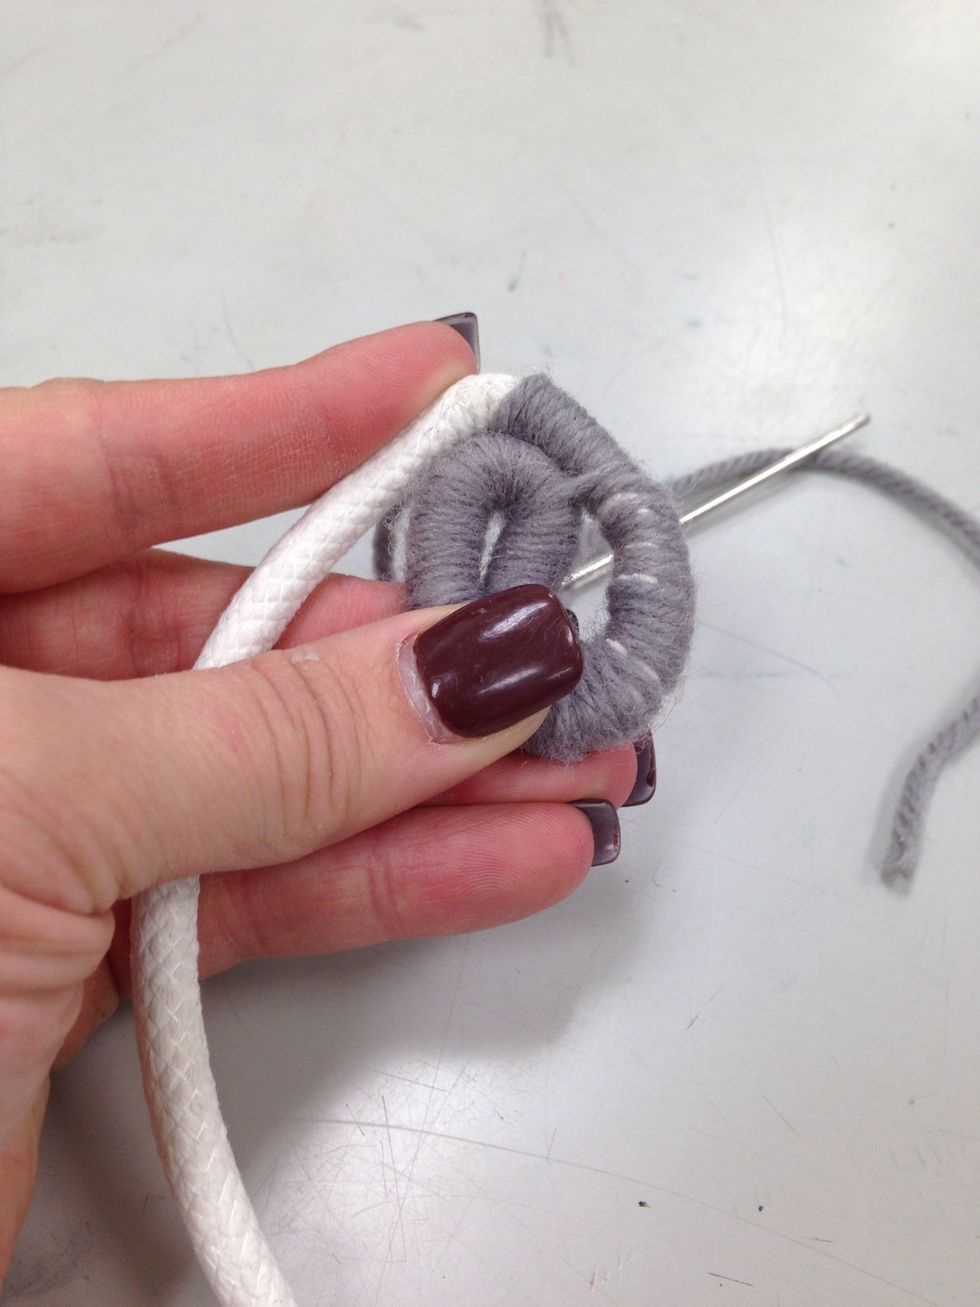
While holding the beginning of your basket tightly place your needle through the center hole and pull it through.

Make sure to pull tightly!
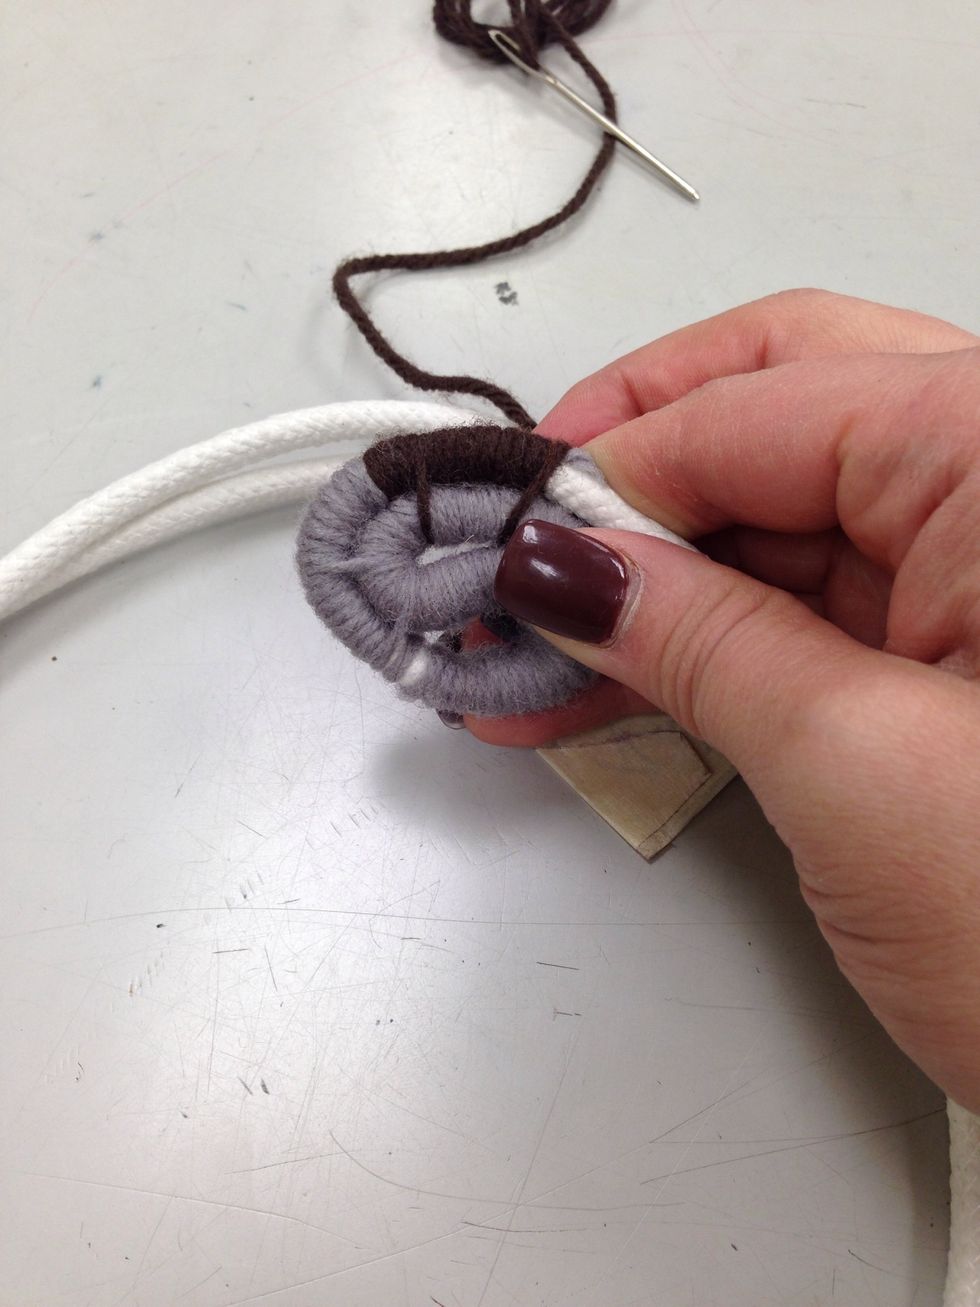
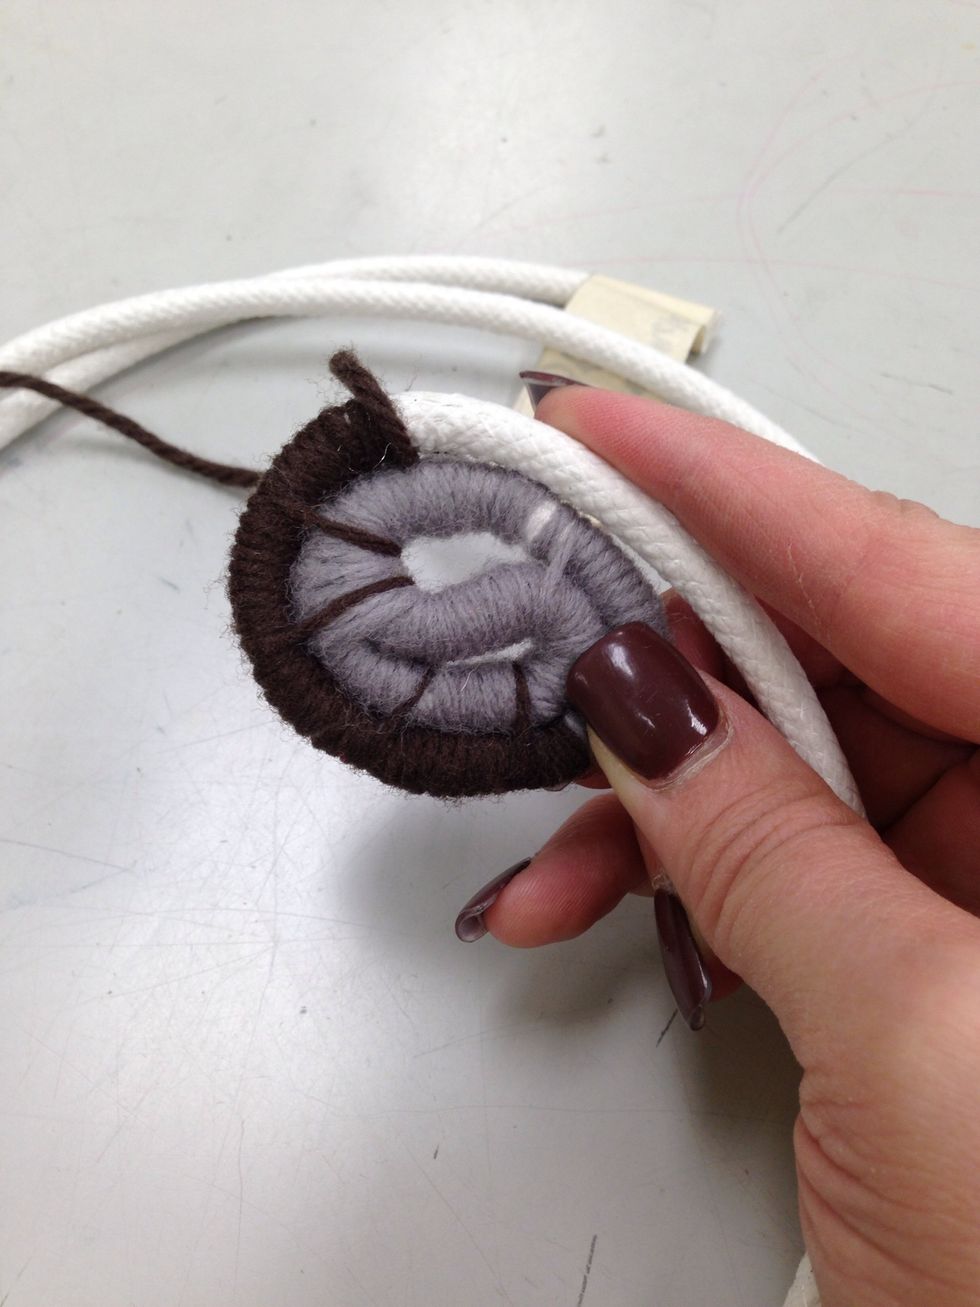
Now wrap only the exposed white coil with the yarn 8 times. (Number of wraps may change based on thickness of yarn).
After wrapping your coil 8 times bend it back to a snail shape.

Stitch through the center again.

Though we are stitching back to the center it helps for the future rows to think of it as stitching back on row.
Pull tight and wrap 8 more times.
If you still have yarn continue stitching back a row and adding 8 more wraps. To change colors or add more simply lay the end of the new piece next to the old one. Two tails next to each other.

Then wrap over both tails or ends of yarn the desired amount (in my case 3 wraps).
My 3 new wraps plus the 5 I already had make 8. So I stitch back one row and pull tight.
I continue wrapping 8 and stitching once till I am ready to make sides.
I also need to continue stitching back 1 row. Not back to the center. So when there is coil between my new row and the center I need to only stitch back 1 row.
Keep going till you reach the desired bottom size.
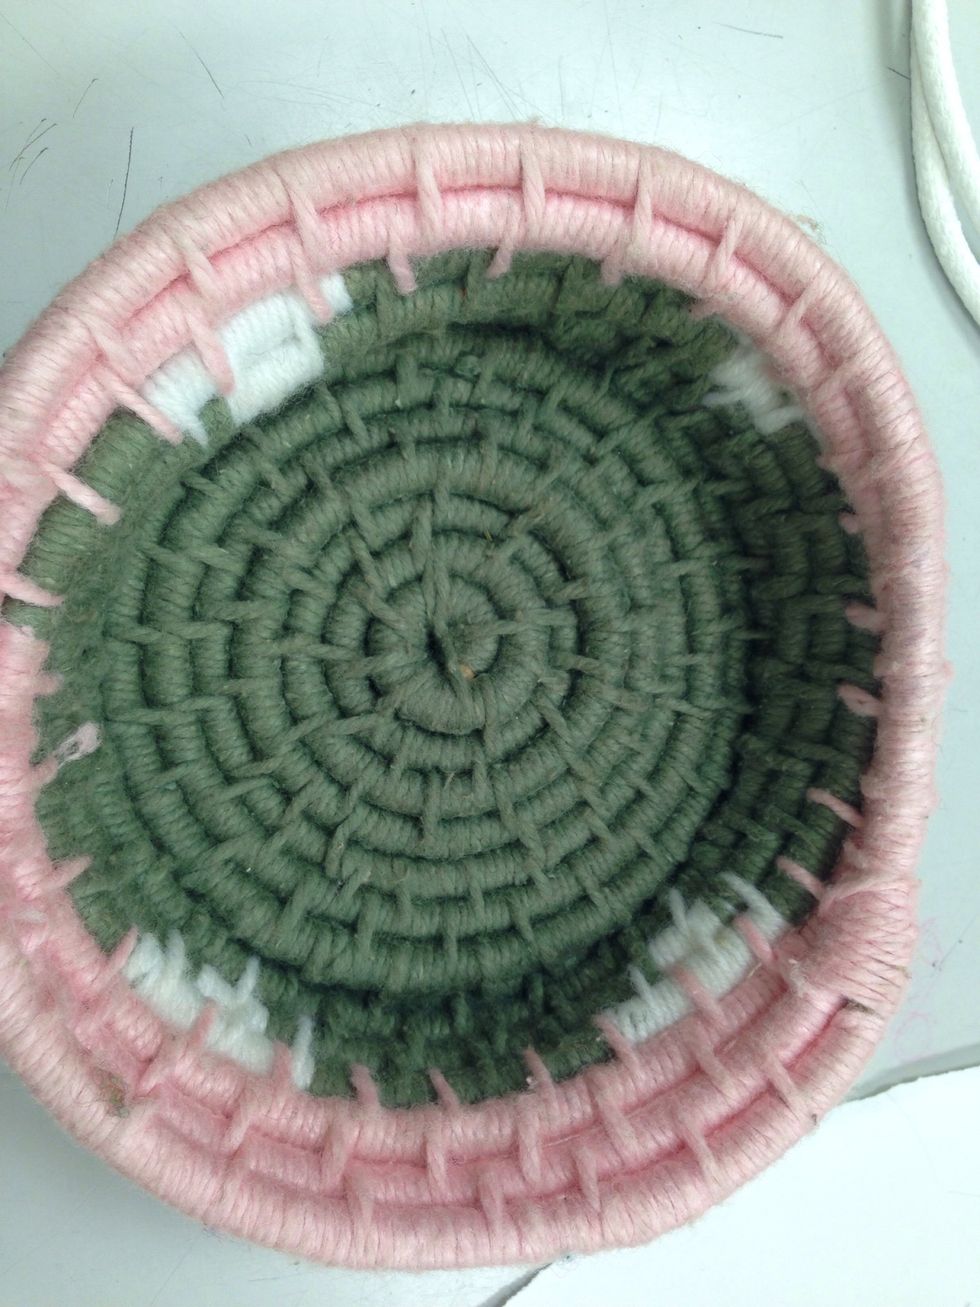
A finished example of a basket. While working you can added a pattern but you can also just choose to add a variety of colors and that continue a theme throughout your basket.