The Conversation (0)
Sign Up

This is what students see in eBackpack before their teachers set it up on the back end. Pretty confusing, especially for someone who is new to the iPad!
Follow these steps on your computer (not iPad) to set up your eBackpack at the beginning of each semester.
Go to nbisd.ebackpack.com. Log in with the same username / password you use on your school computer.
Click on the arrow by your name, then My Settings.

On the left, expand the Classes folder, then choose Show/Hide.
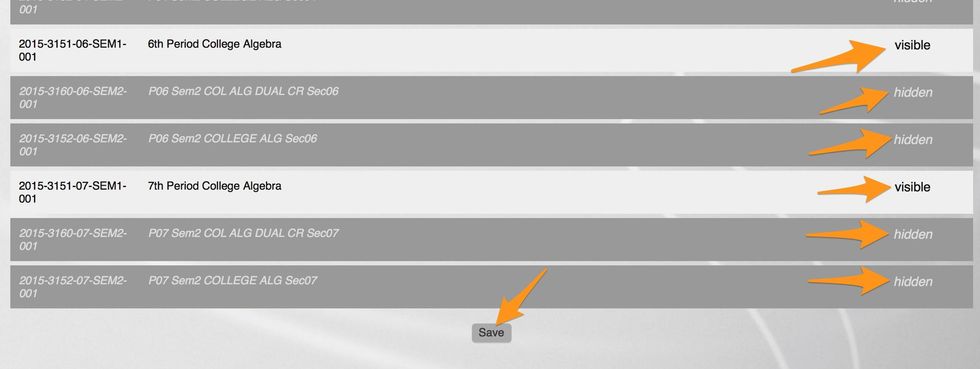
Click on Visible or Hidden to hide and show your classes. Hide all classes that are not from the current semester. Save.
Now it is time to give your courses student-friendly names and fair default turn-in times.
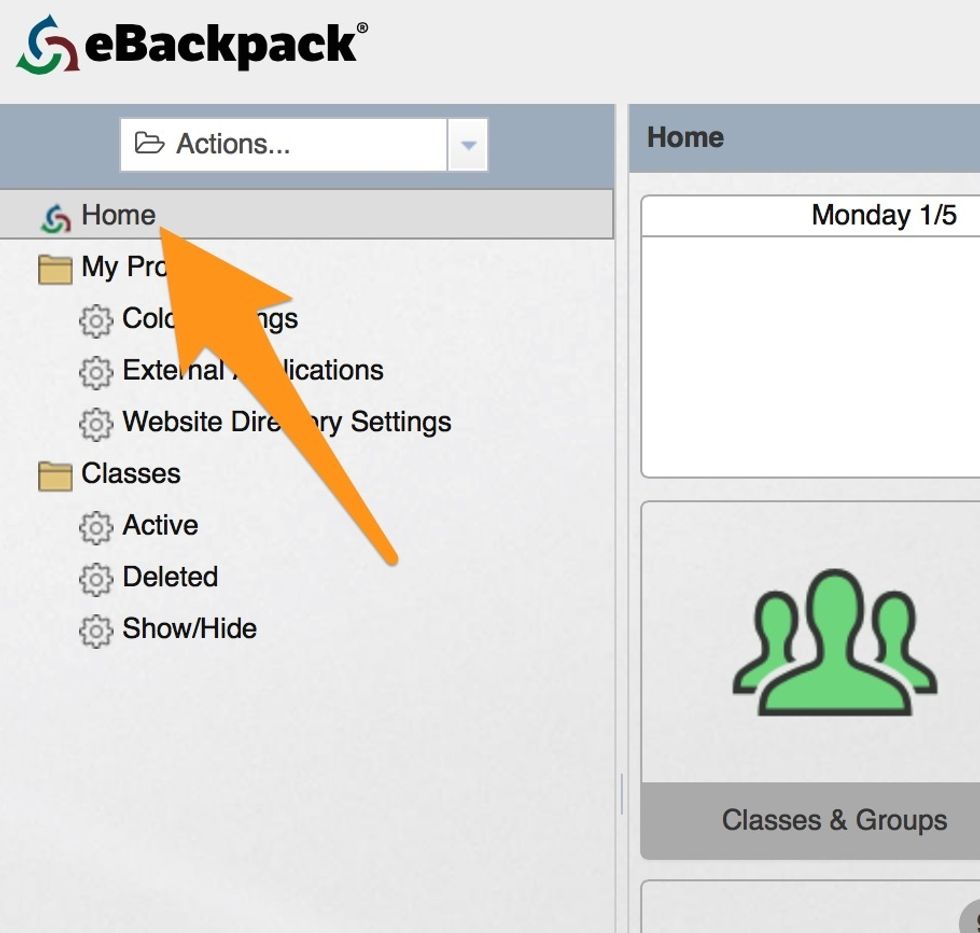
Click Home.
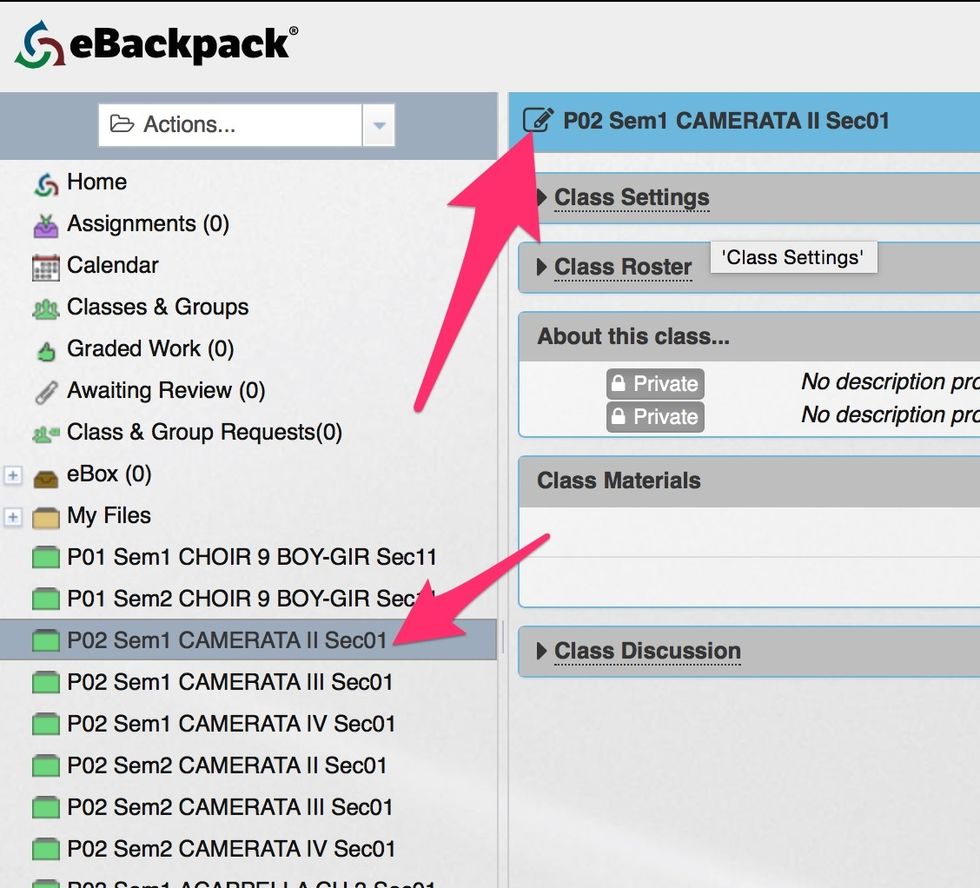
Select a course from the Menu on the left, then click the Edit button next to the course name.
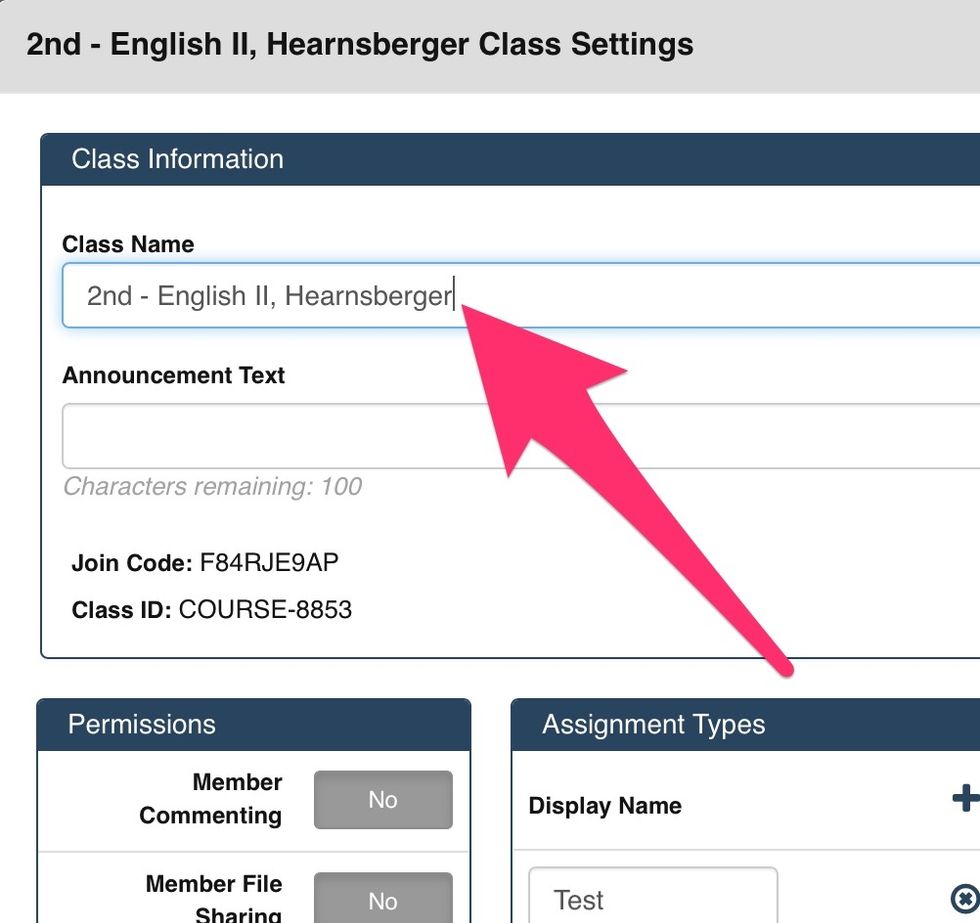
Rename it like this: Period - Class, Teacherlastname
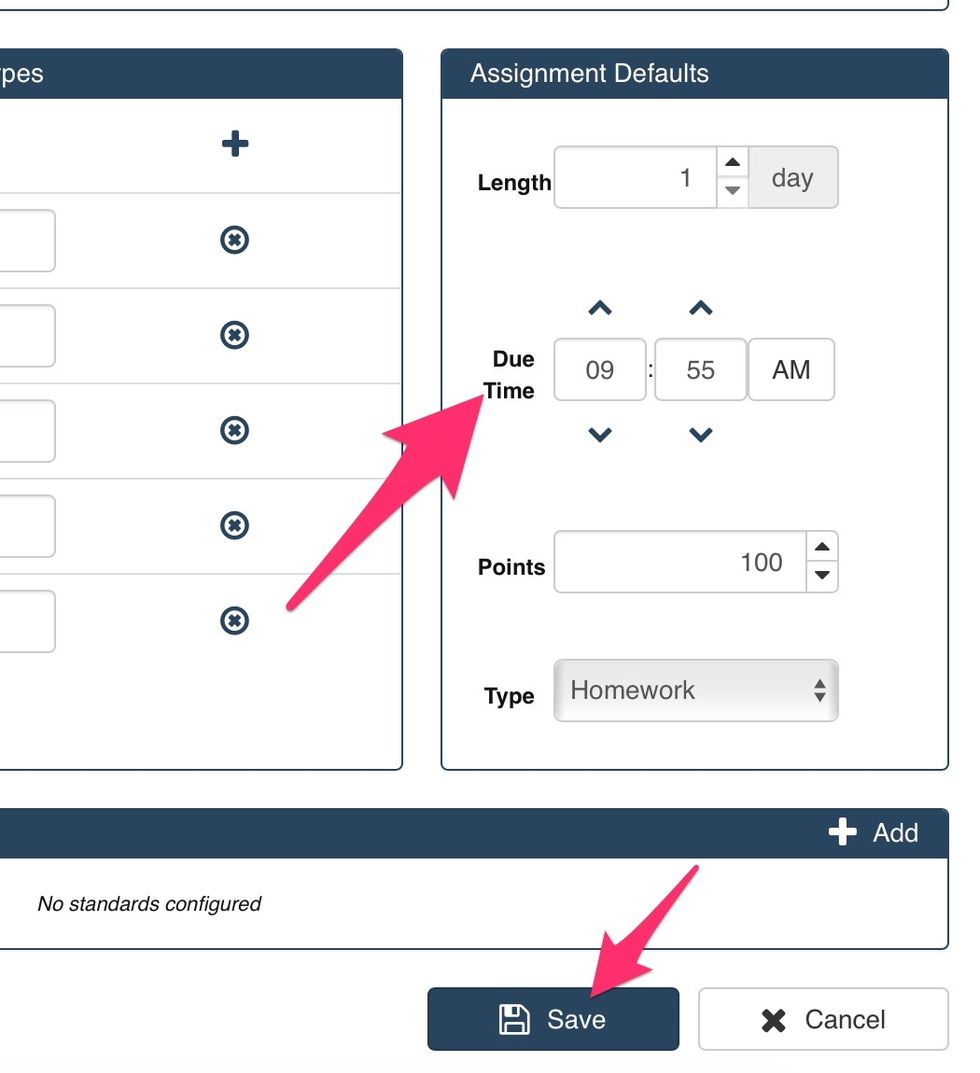
Make the default Due Time ten minutes after the beginning of class. Save. Repeat for each class.
If you have any questions, contact your Technology Curriculum Integration Specialist.