The Conversation (0)
Sign Up
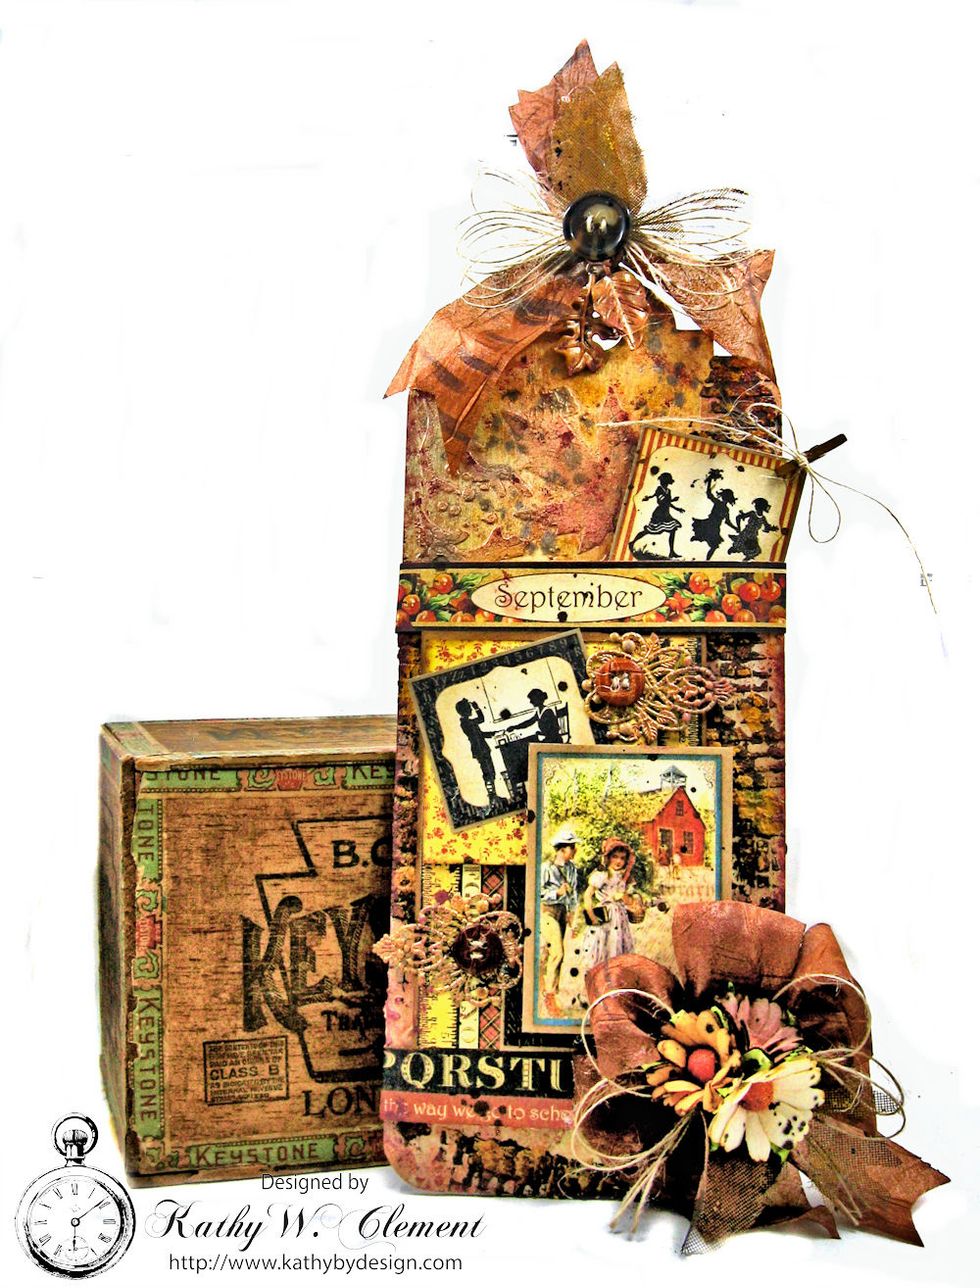
This super jumbo tag measures 5" wide x 11.75" tall. Creating the background layers is not difficult, but you do have to be patient and let the layers dry in between the steps.
I used a combination of Distress Inks, Sprays and Paints along with Prima Rust pastes, gesso and Crackle Texture paste in the background. Papers are Graphic 45's Place in Time September page.
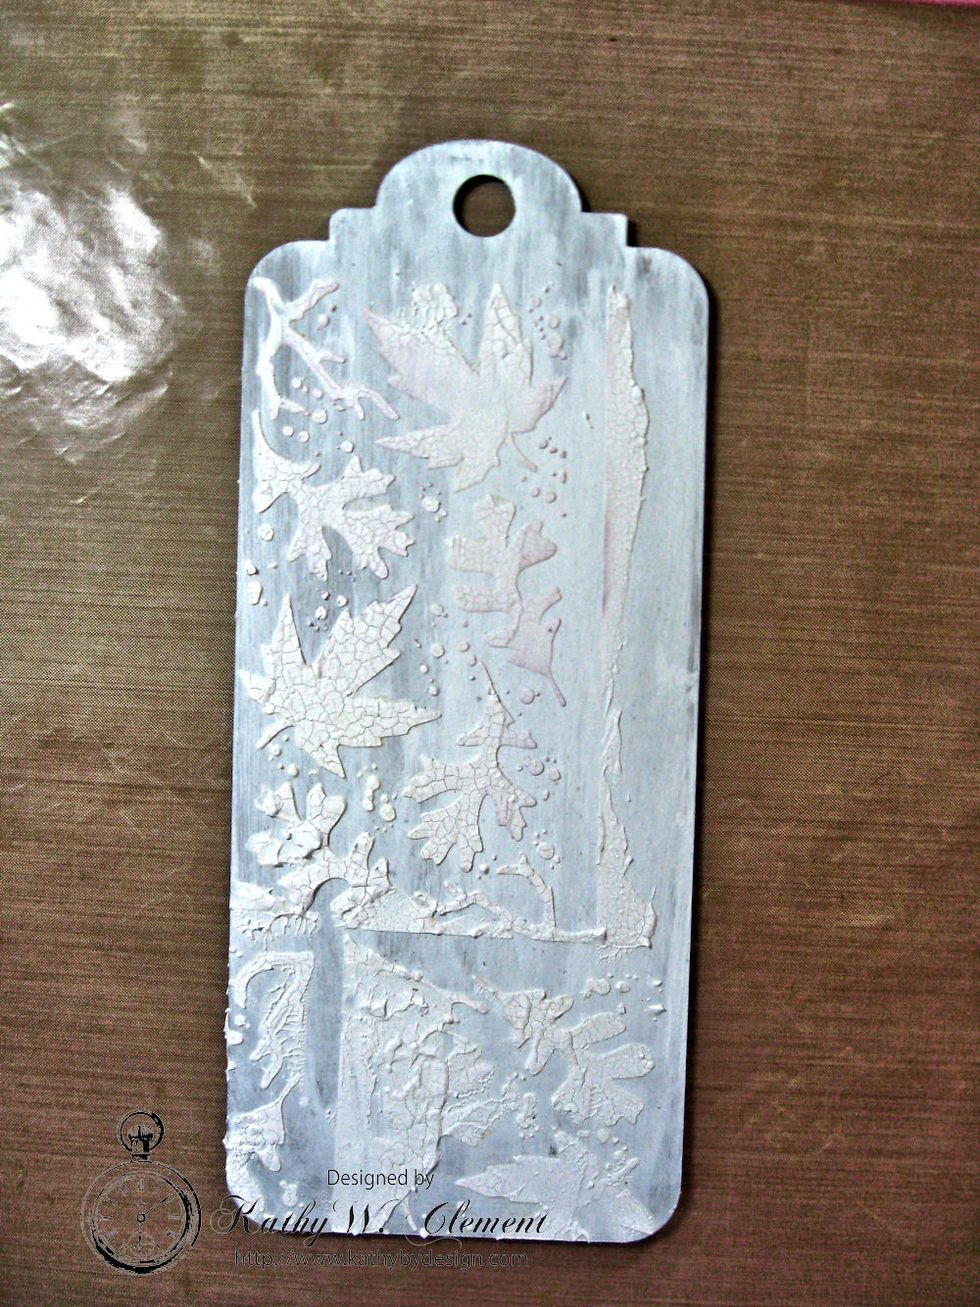
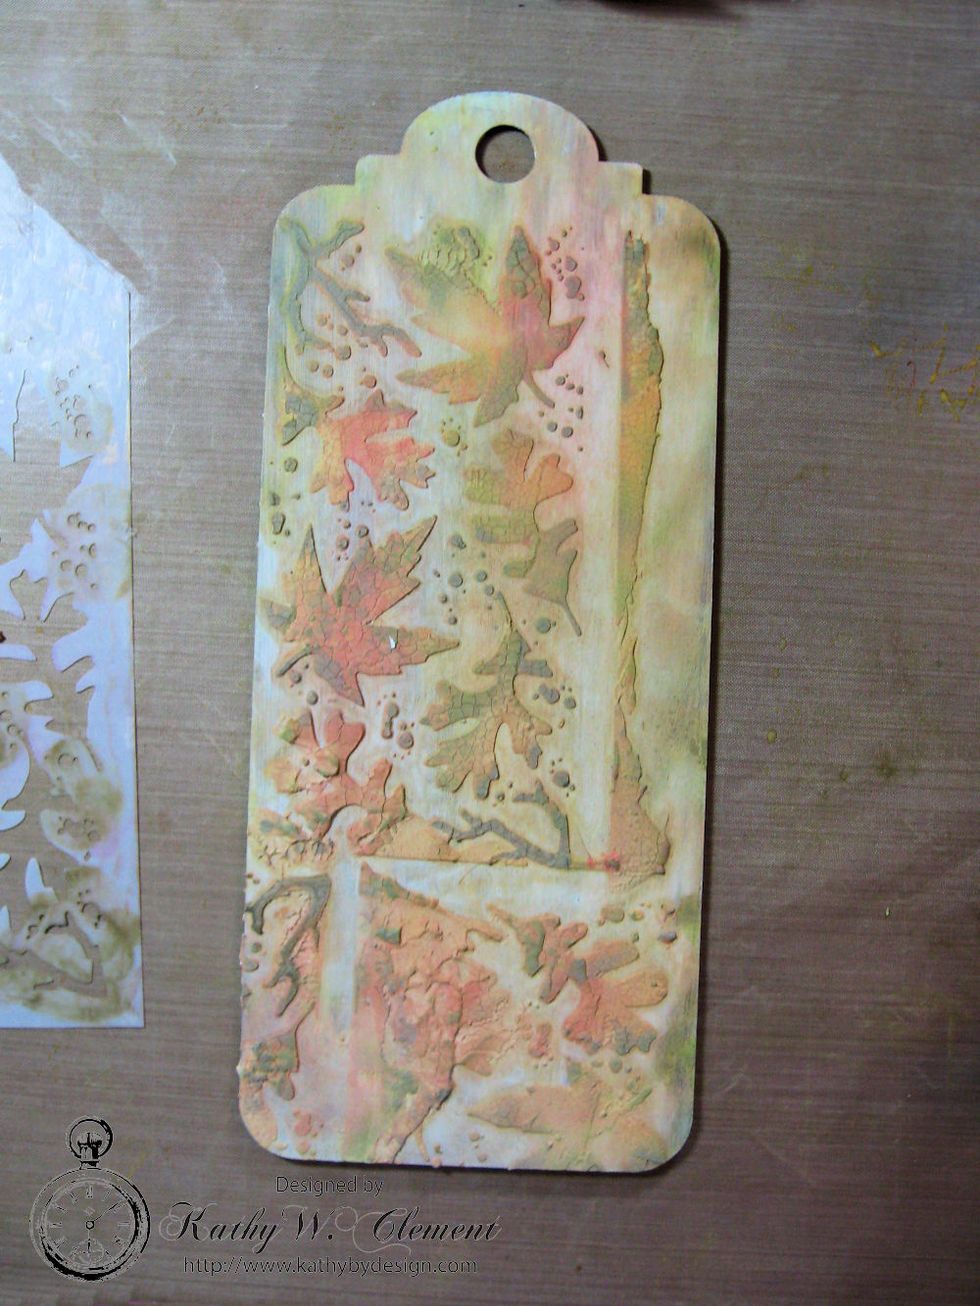
Begin by painting the tag with a layer of opaque white gesso. You can gently heat dry this, then add Crackle Texture Paste through the Autumn Layering Stencil. Let this dry several hours/overnight.
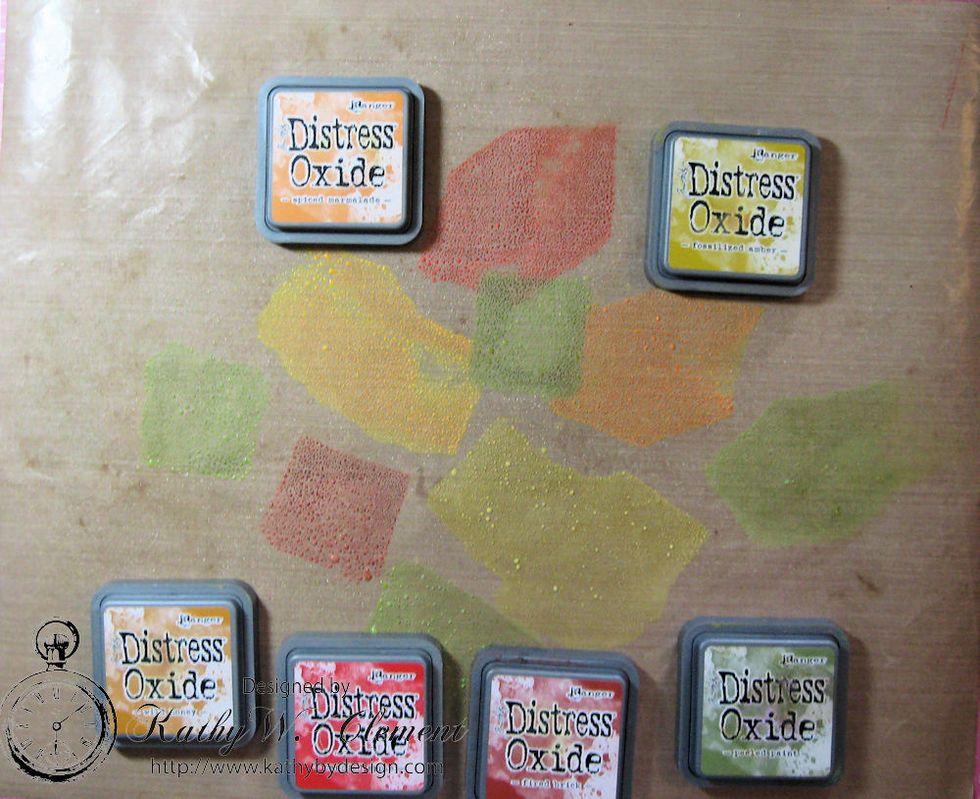
Next, smoosh several fall color Distress Oxide Inks onto a non-stick craft sheet. Spritz with water until little beads of water form.

Now, use a wide, fairly stiff bristled brush to pick up the color off the mat and brush over the tag. Dry between layers and repeat until you are happy with the way the tag looks.

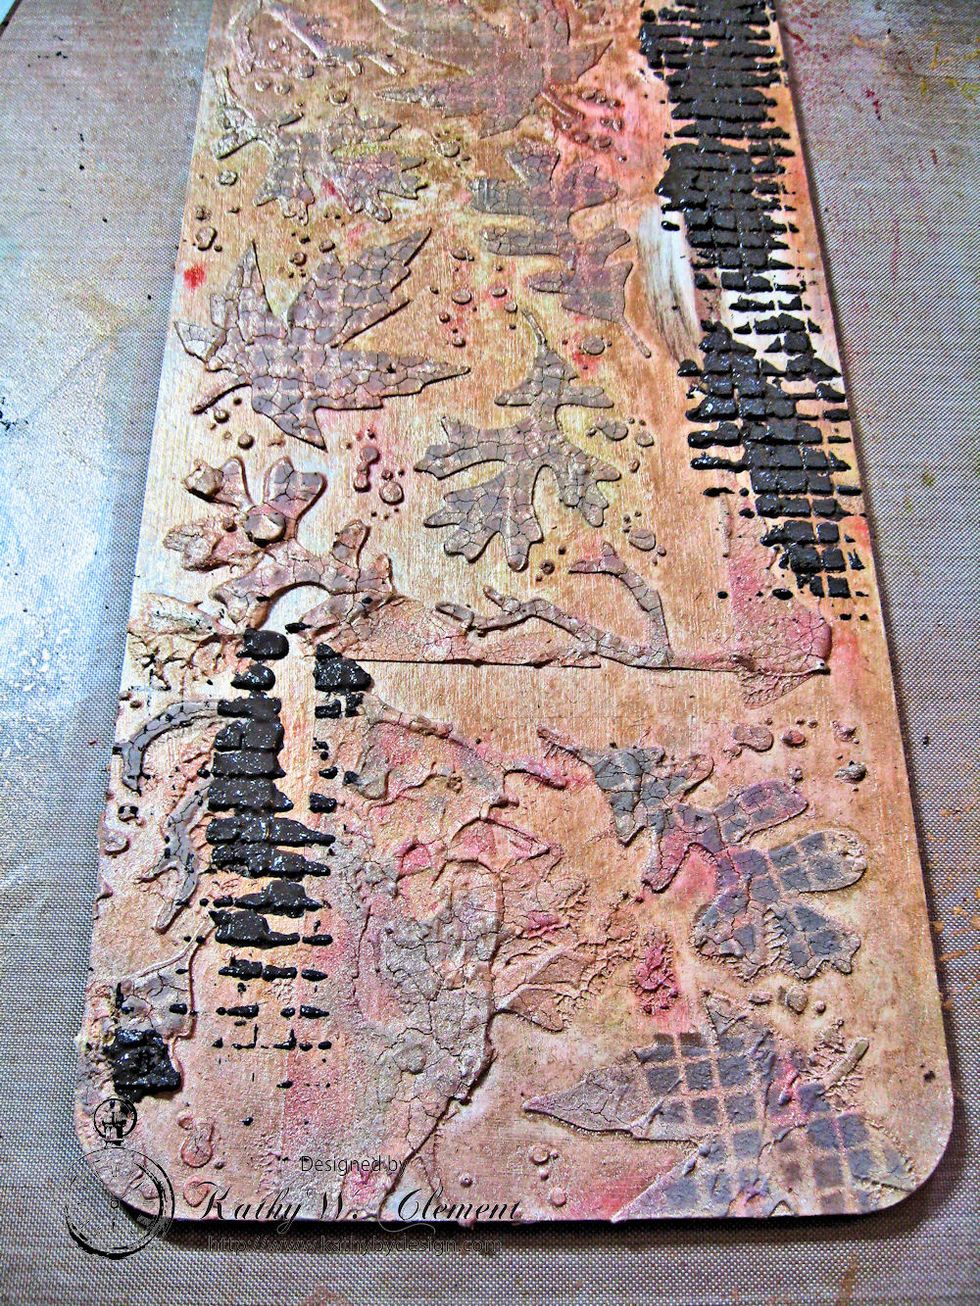
Now, lay the Autumn stencil back over the tag. Pounce in more ink with your brush. Then, slightly offset. Sponge on Gathered Twigs Distress Oxide Inks to create a shadow effect. Heat dry.
Your tag will look something like this at this stage.
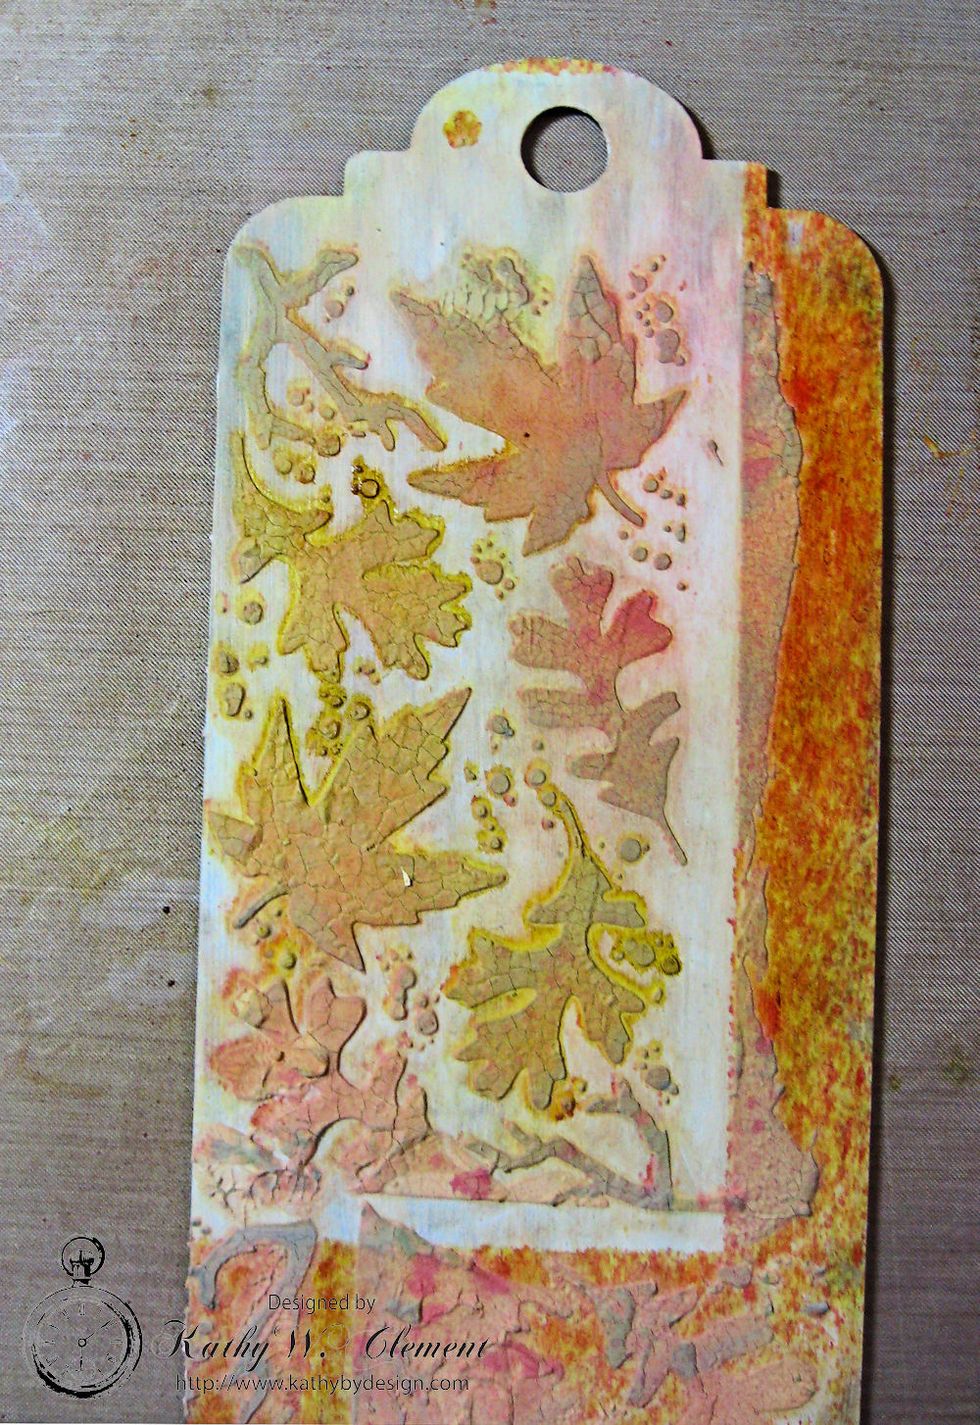
To add more vibrant color, I placed the stencil over the tag again, then spritzed with Distress Spray using Candied Apple, Carved Pumpkin, Fossilized Amber, and Twisted Citron. Heat Dry
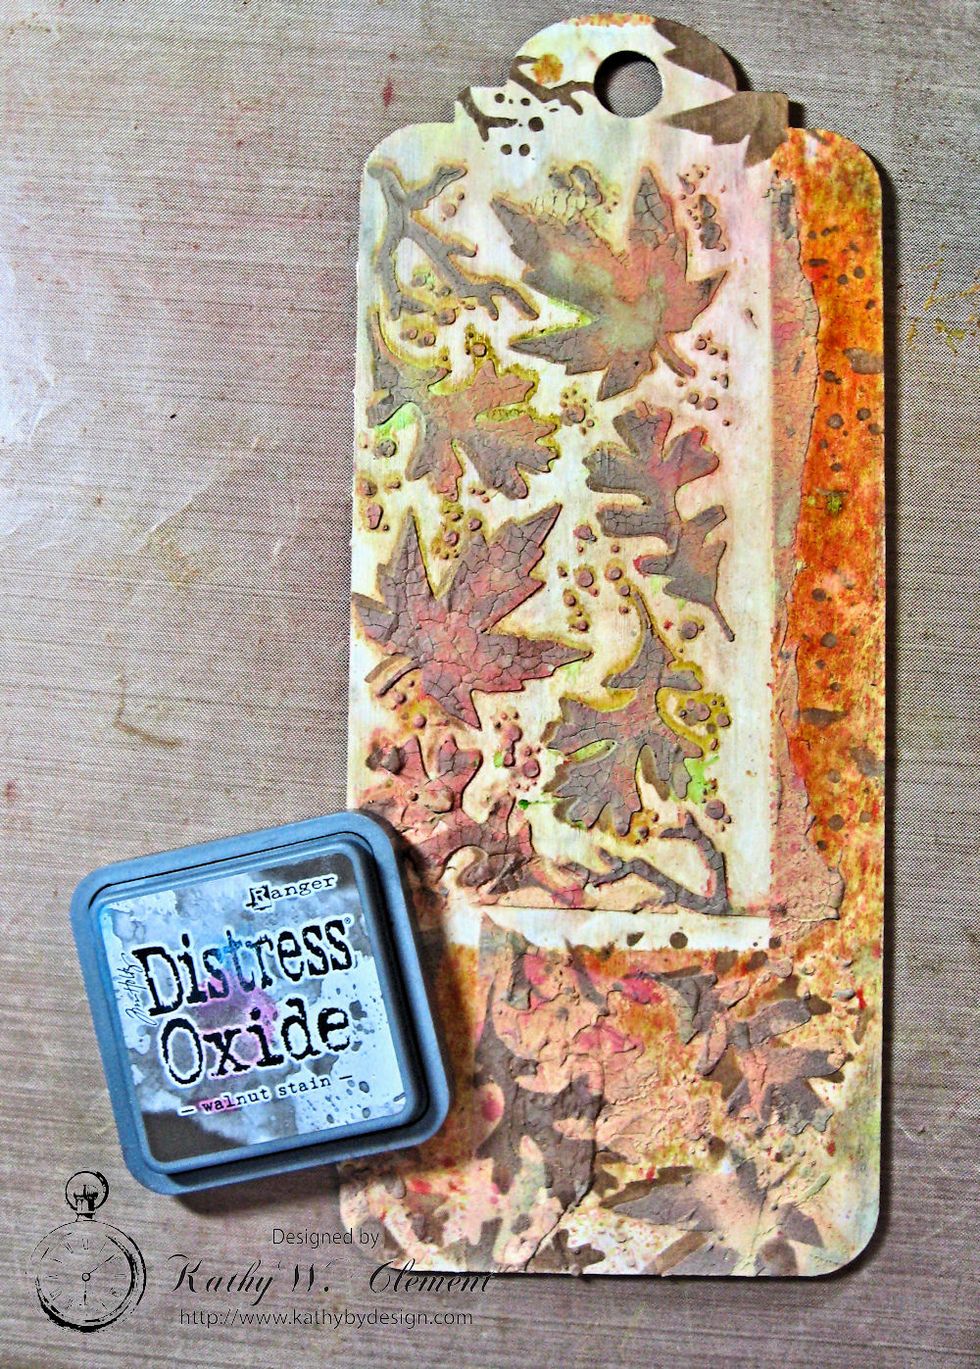
After cleaning and drying the stencil, I went back in with Walnut Stain Distress Oxide ink.
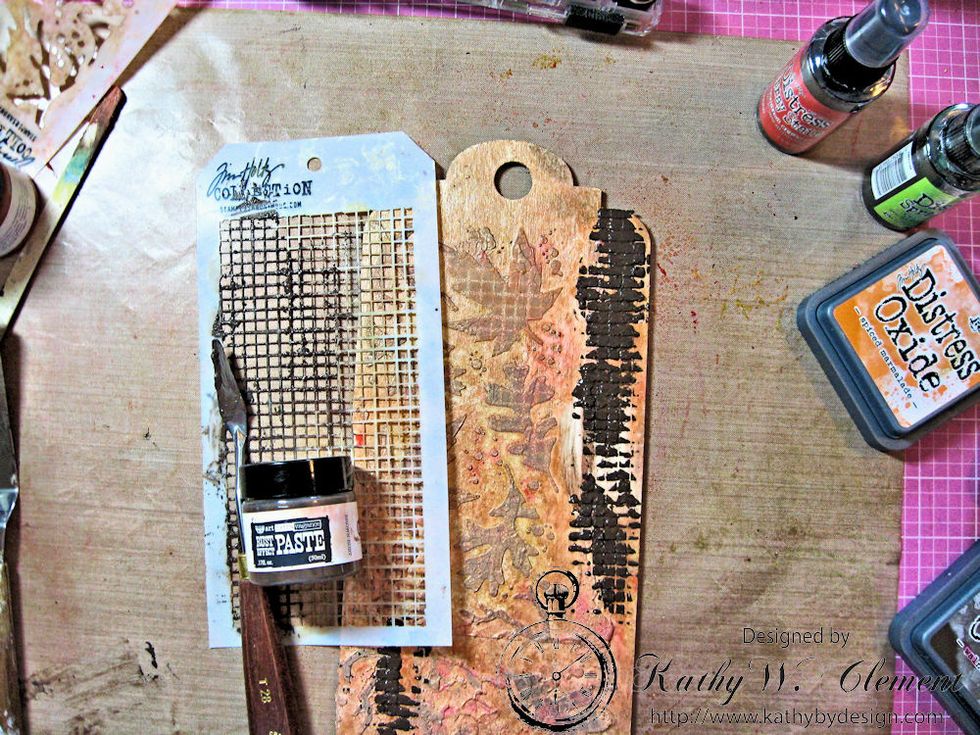
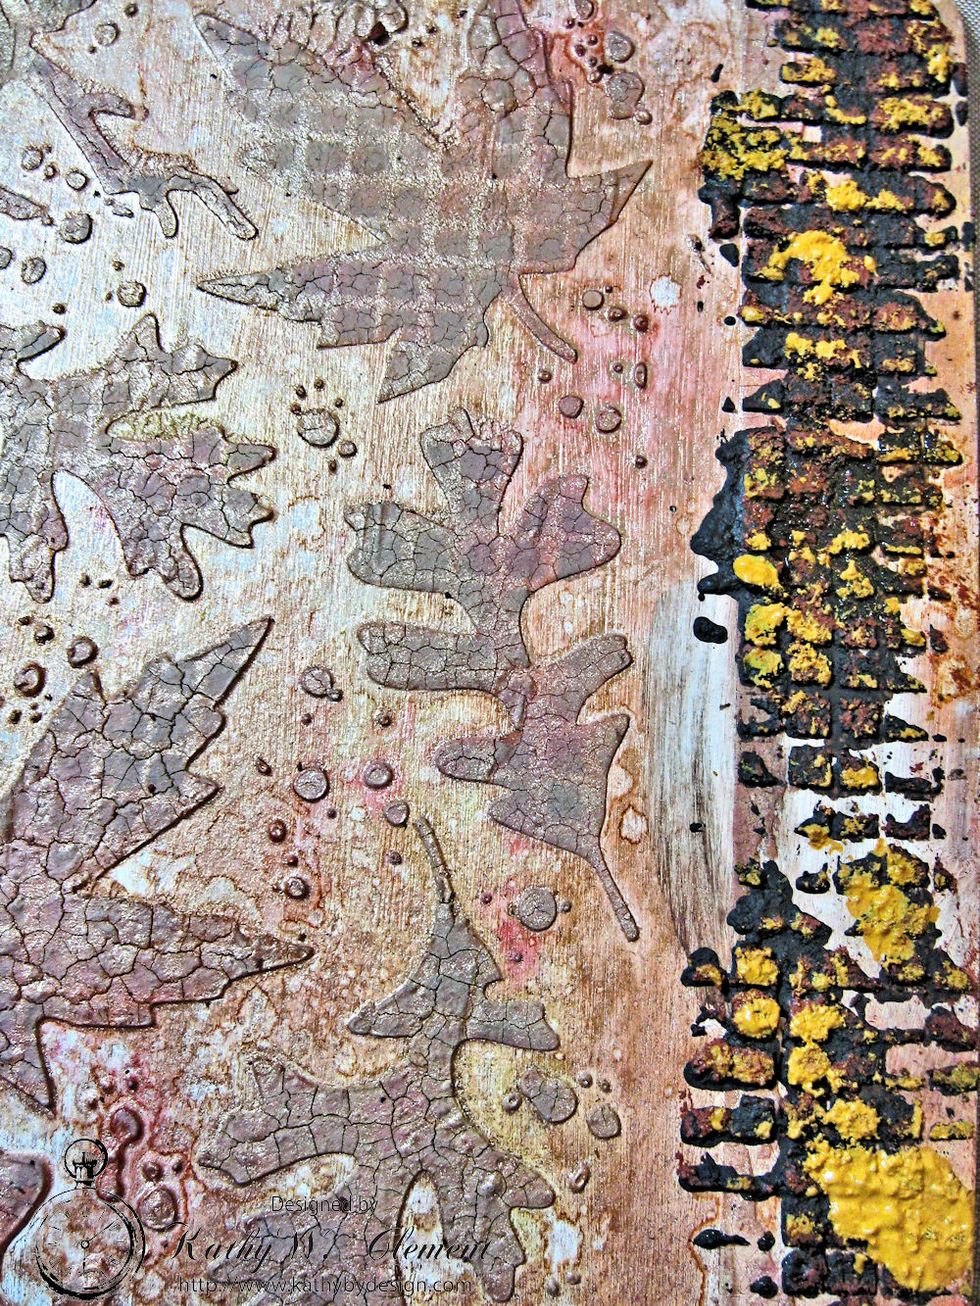
To add rustic texture, I sponged over the leaves with the Linen Stencil. Then I spread Prima Rust Paste randomly along the sides through the Linen Layering Stencil. Clean stencil immediately!

Let the rust paste dry completely. You can use a heat tool for this step. I also spritzed the tag with Antique Bronze Mica Spray at this point.
The mica spray adds a soft sheen to the tag, and it helps to move the Distress oxide inks around. I actually used a brush to help with this process. Just keep adding layers of color but dry between.
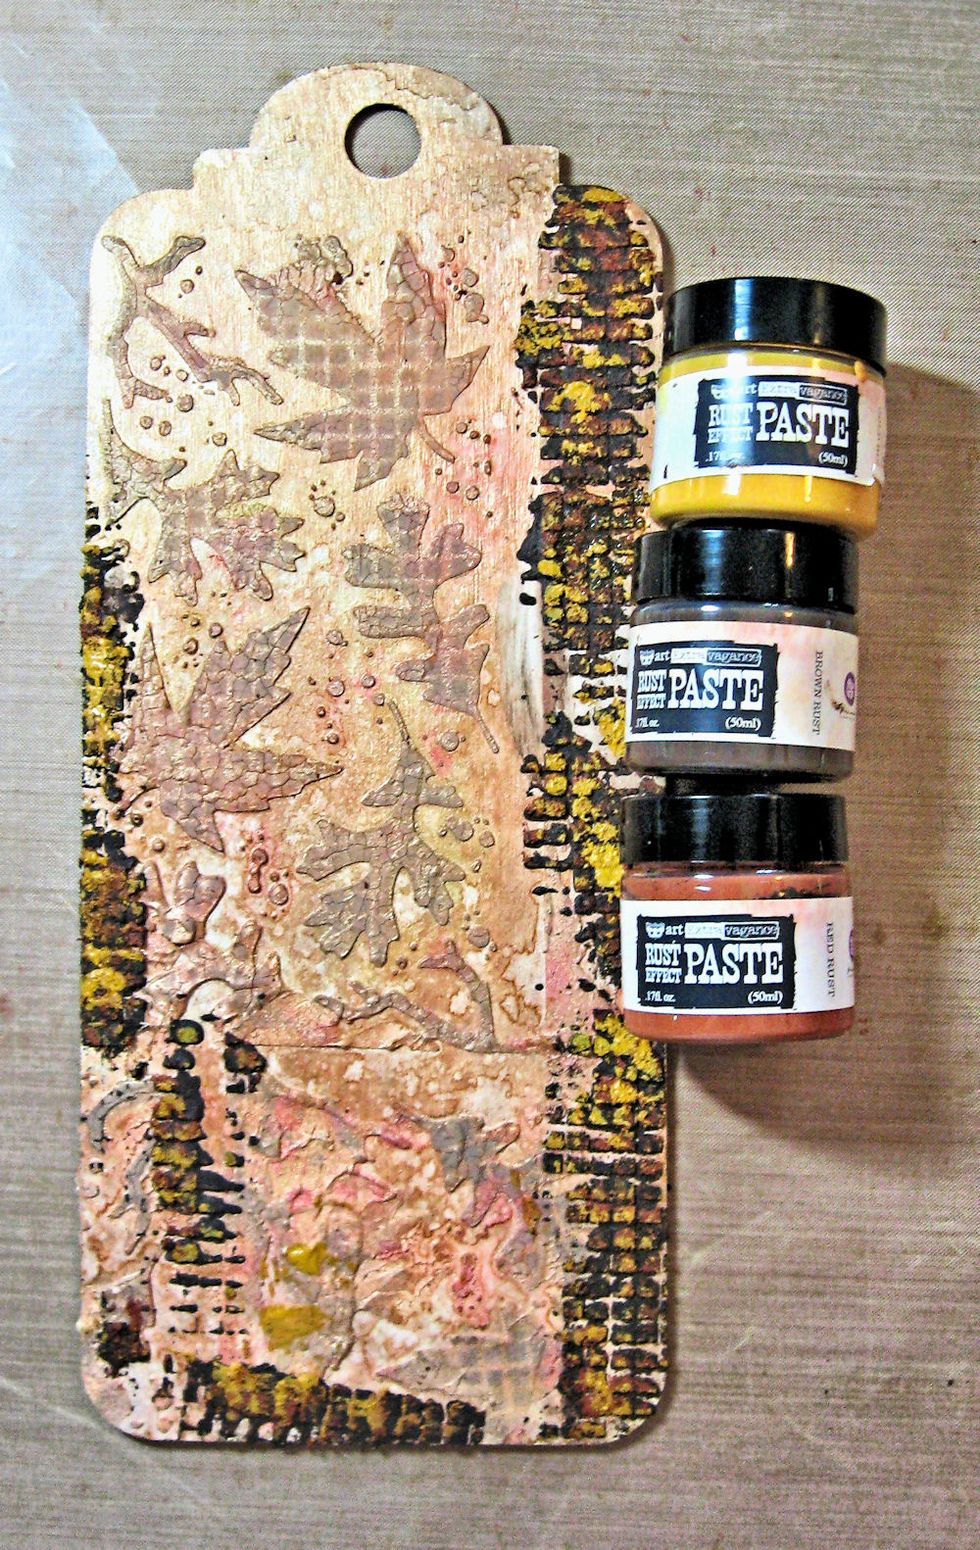
Next, I added the lighter shades of rust texture paste to the stenciled areas. This makes the rust look more realistic.
Dry each layer of rust paste between applications.
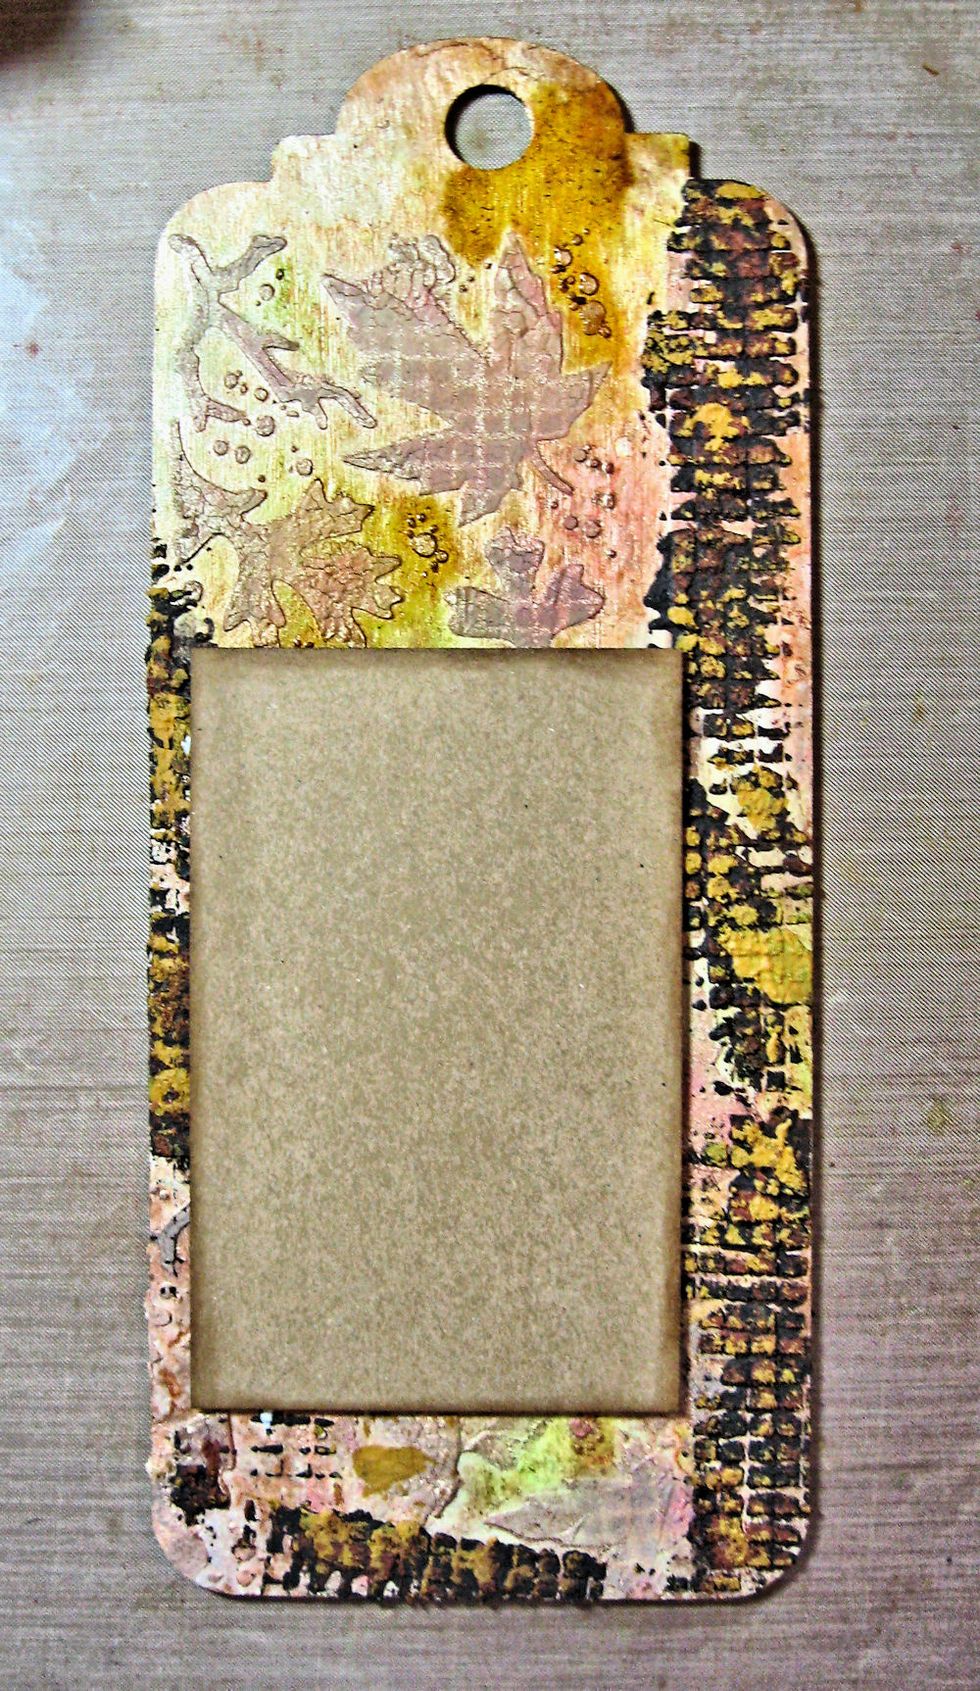
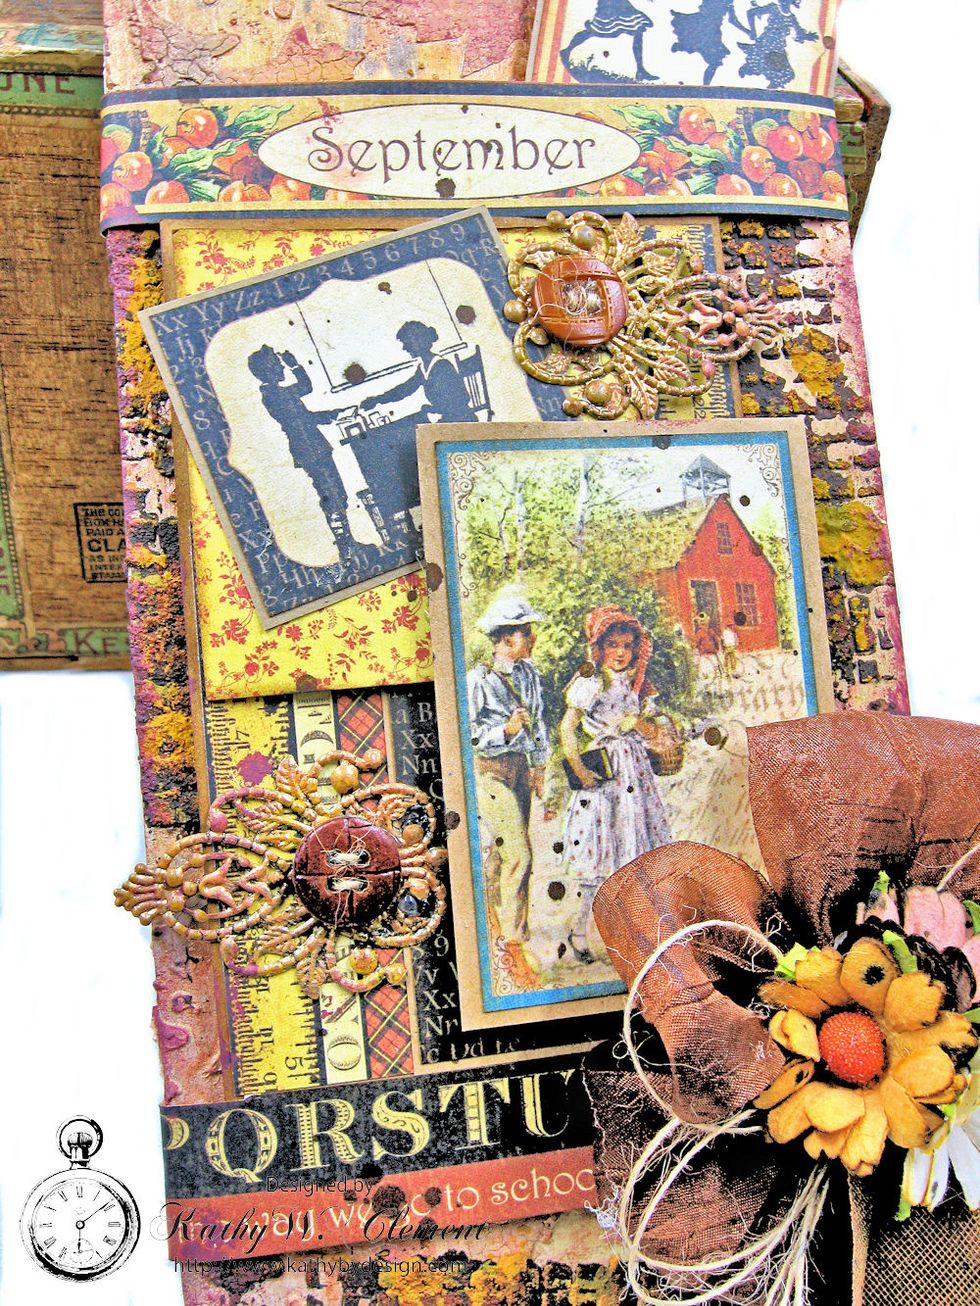
When you are happy with the colors, begin adding the paper layers. No two tags are exactly alike. The important thing to remember is to dry each layer of ink, stain or paint so you don't get mud.

I backed my paper layers with cut up shipping boxes to create extra depth and dimension.

Smaller layers are matted on kraft cardstock. Border pieces are attached with Scor-Tape.
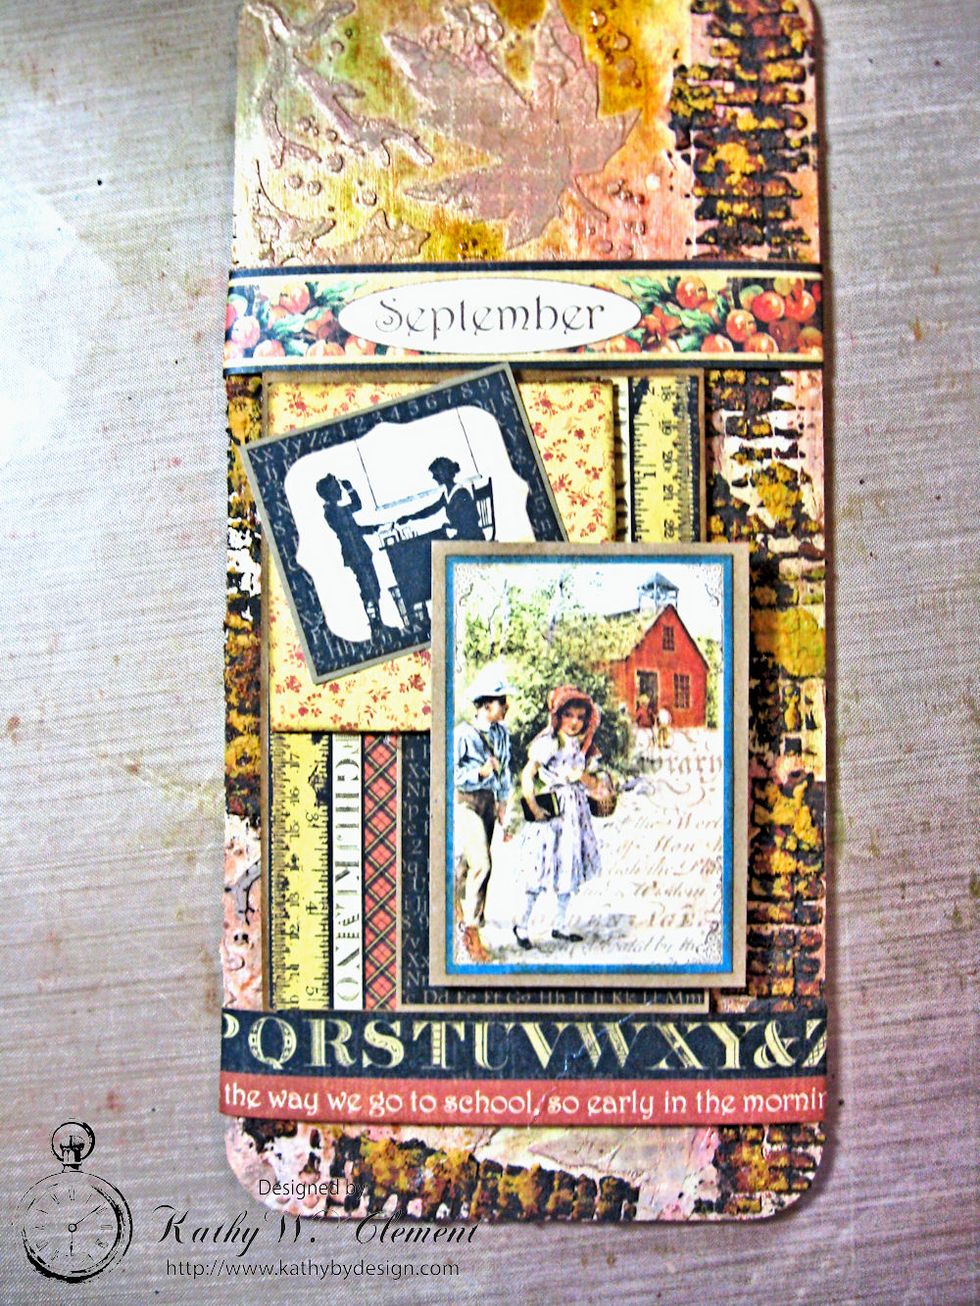
Then I added my focal images. Once again, these are backed with cut up shipping boxes. You can also use foam tabs.

Paint filigree metals with Distress Paint. Add vintage leather buttons,
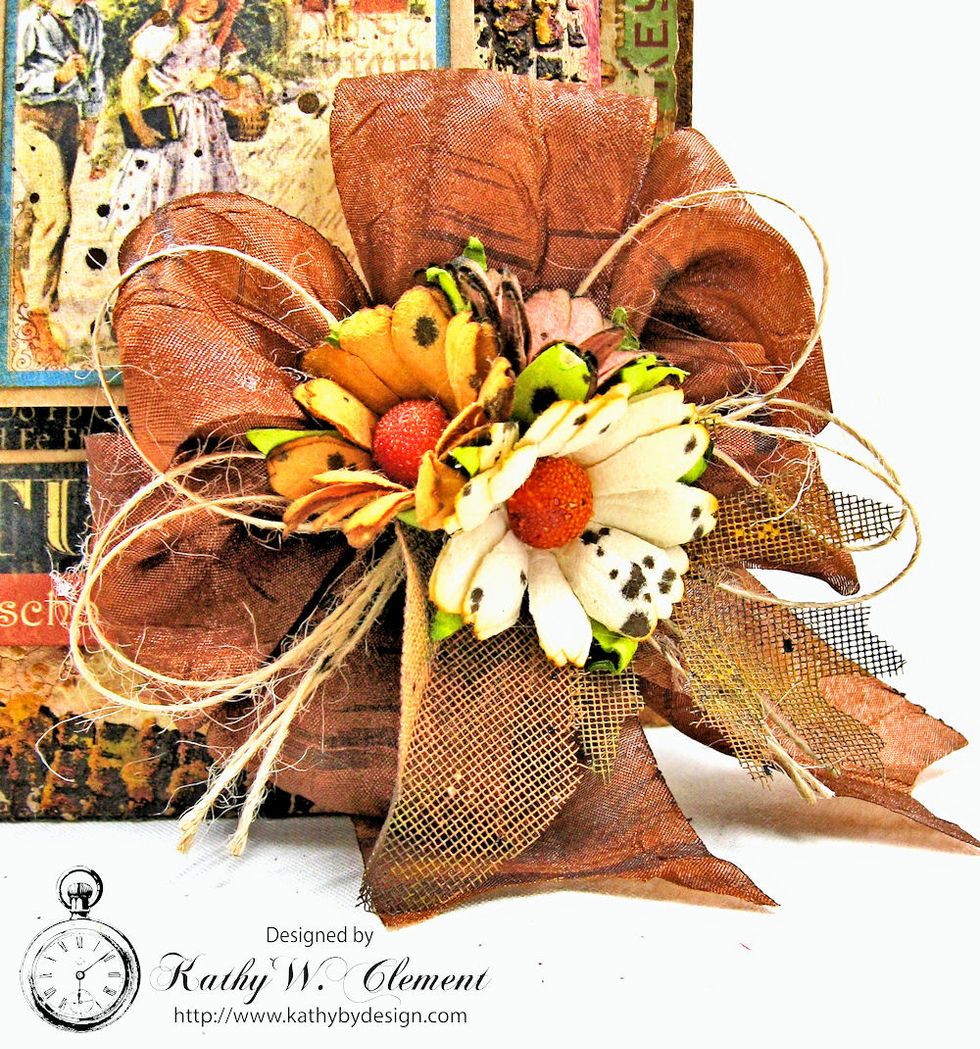
Die Cut Tattered Leaves from rusted mesh. Tap with Distress Paints. Add these to your bow cluster with Wild Orchid Crafts chrysanthemums, rust silky crush ribbon and burlap string.

Add more mesh leaves to the top of the tag along with painted metal leaf charms, vintage button and burlap string bow.

Spatter the tag with Ground Espresso Distress Stain.

Creating with mixed media is always an adventure. Relax, have fun and let your creativity flow. You can always cover up mistakes with gesso and start again. The most important thing is to have fun.