The Conversation (0)
Sign Up

Always start with a base coat. It will protect your nails from staining and help polish to adhere better!!
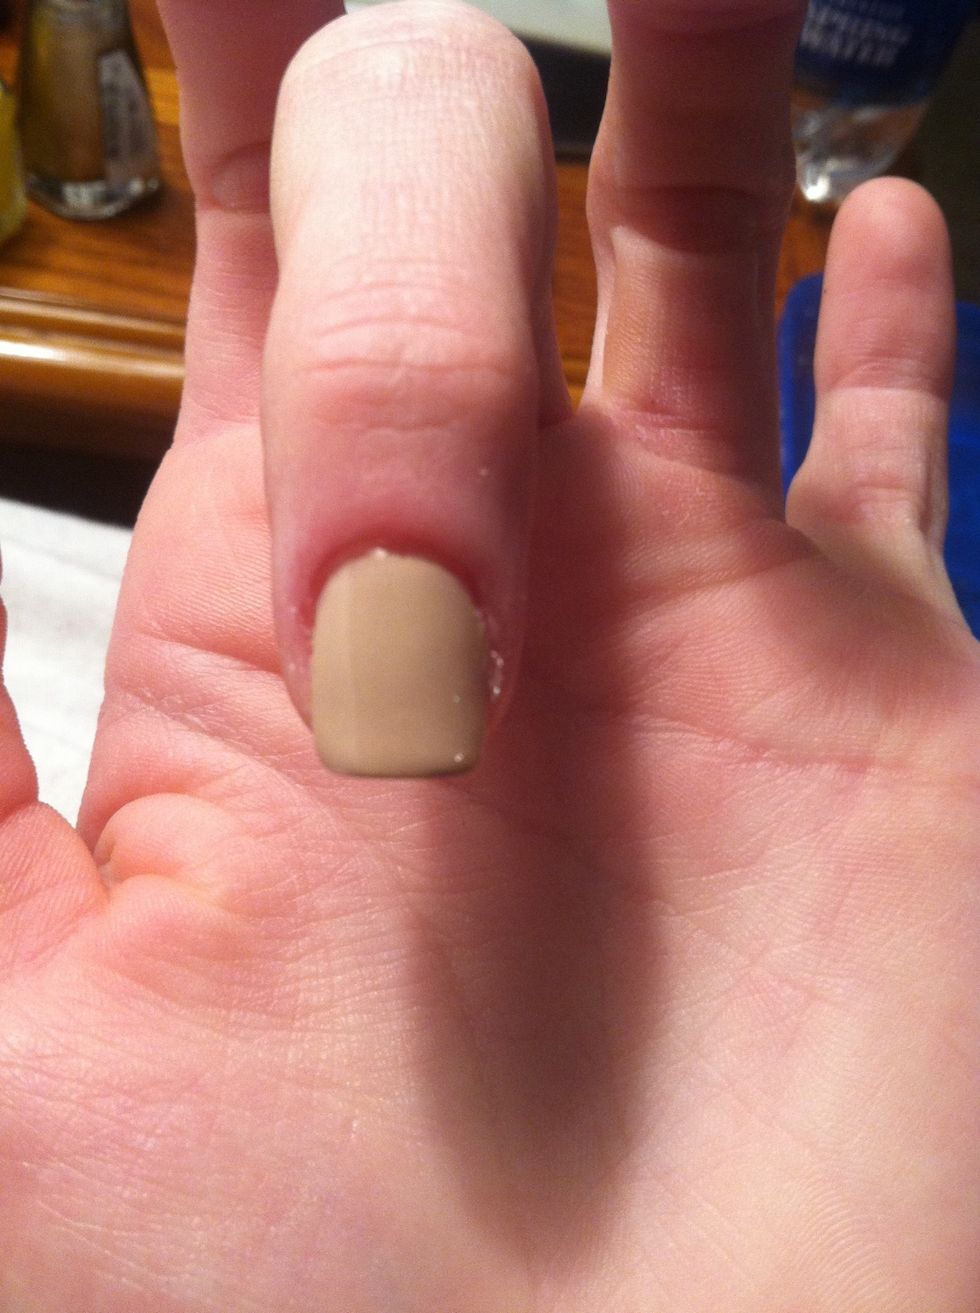
Paint your nails a base color. (I'm using Essie's Cocktails and Coconuts)
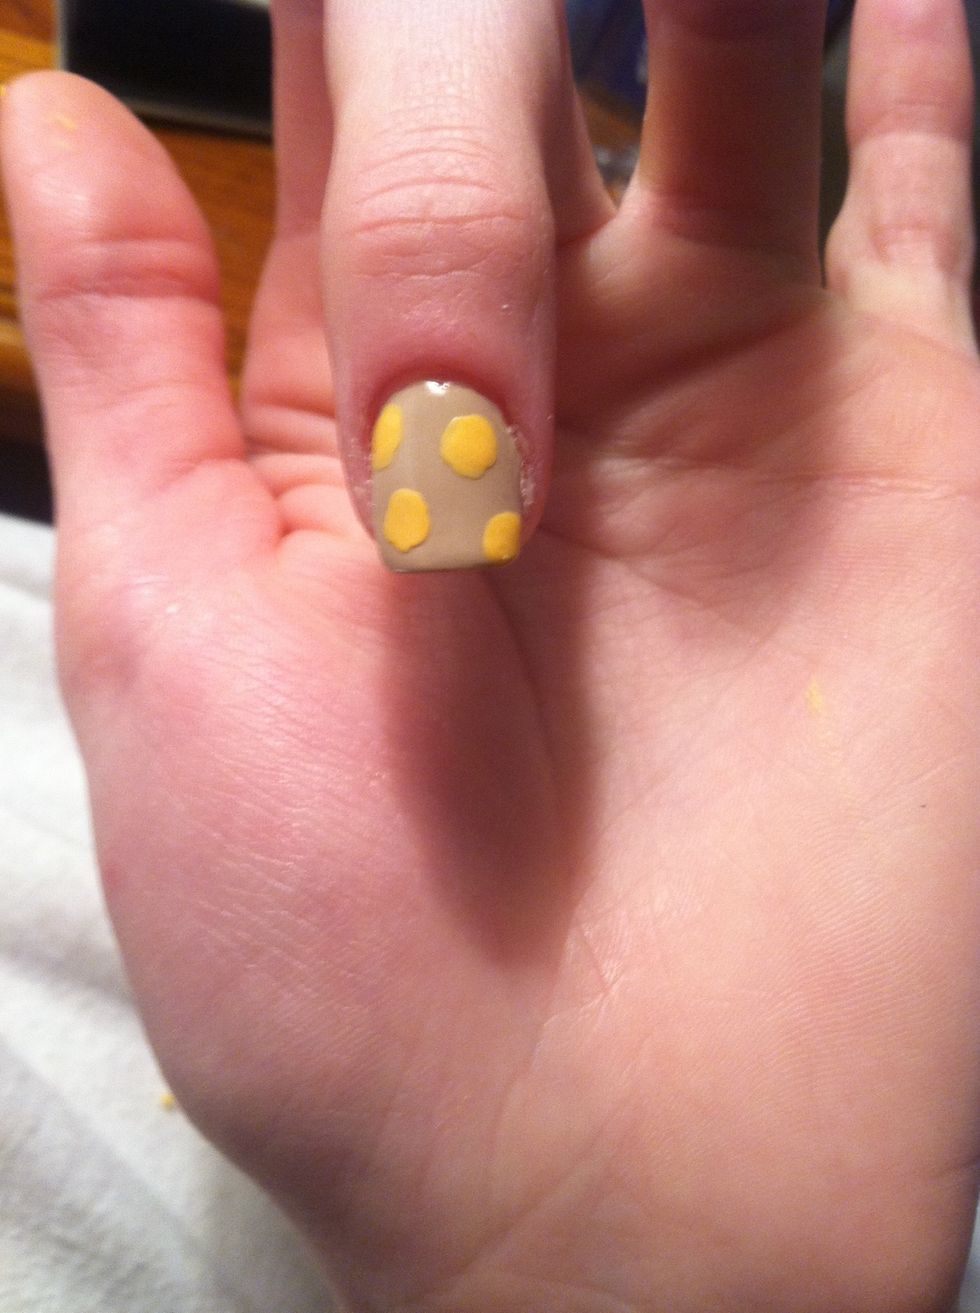
Using a dotting tool add some misshaped circles. (I'm using China Glaze's Metro Pollen-tin)
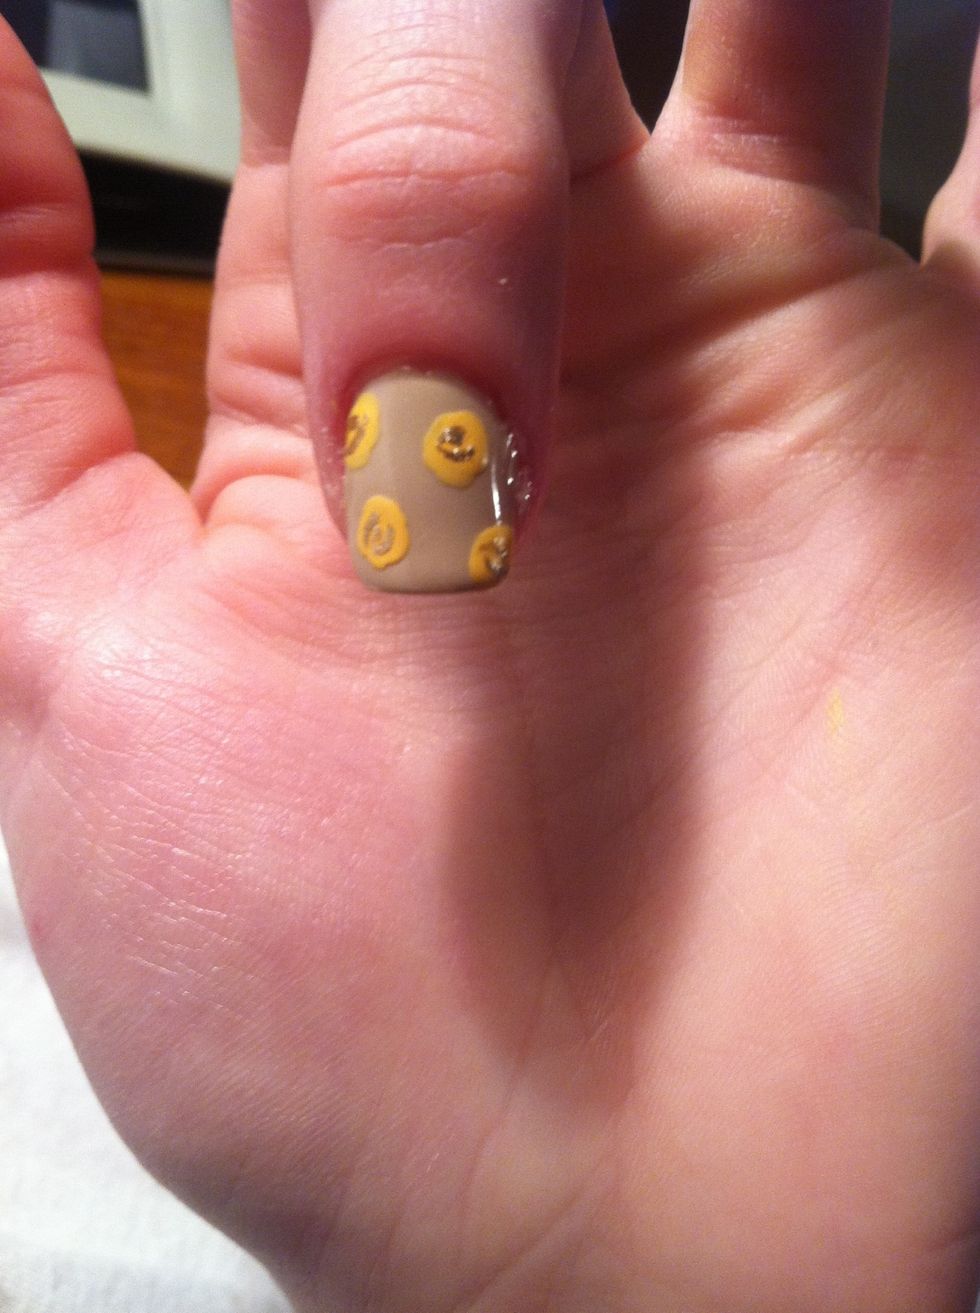
Using a small detail brush, add in some half circles and squiggles. (I'm using Sally Hansen Insta-Dri's Go For Gold)
Clean your brush and then add in some half circles and accents around your rose. (I'm using China Glaze's Strawberry Fields)

Cleaning your brush again, add in small triangles for leaves. (I'm using China Glaze's Re-fresh Mint)

Highlight your leaves with a darker green. (I'm using China Glaze's Holly Day)
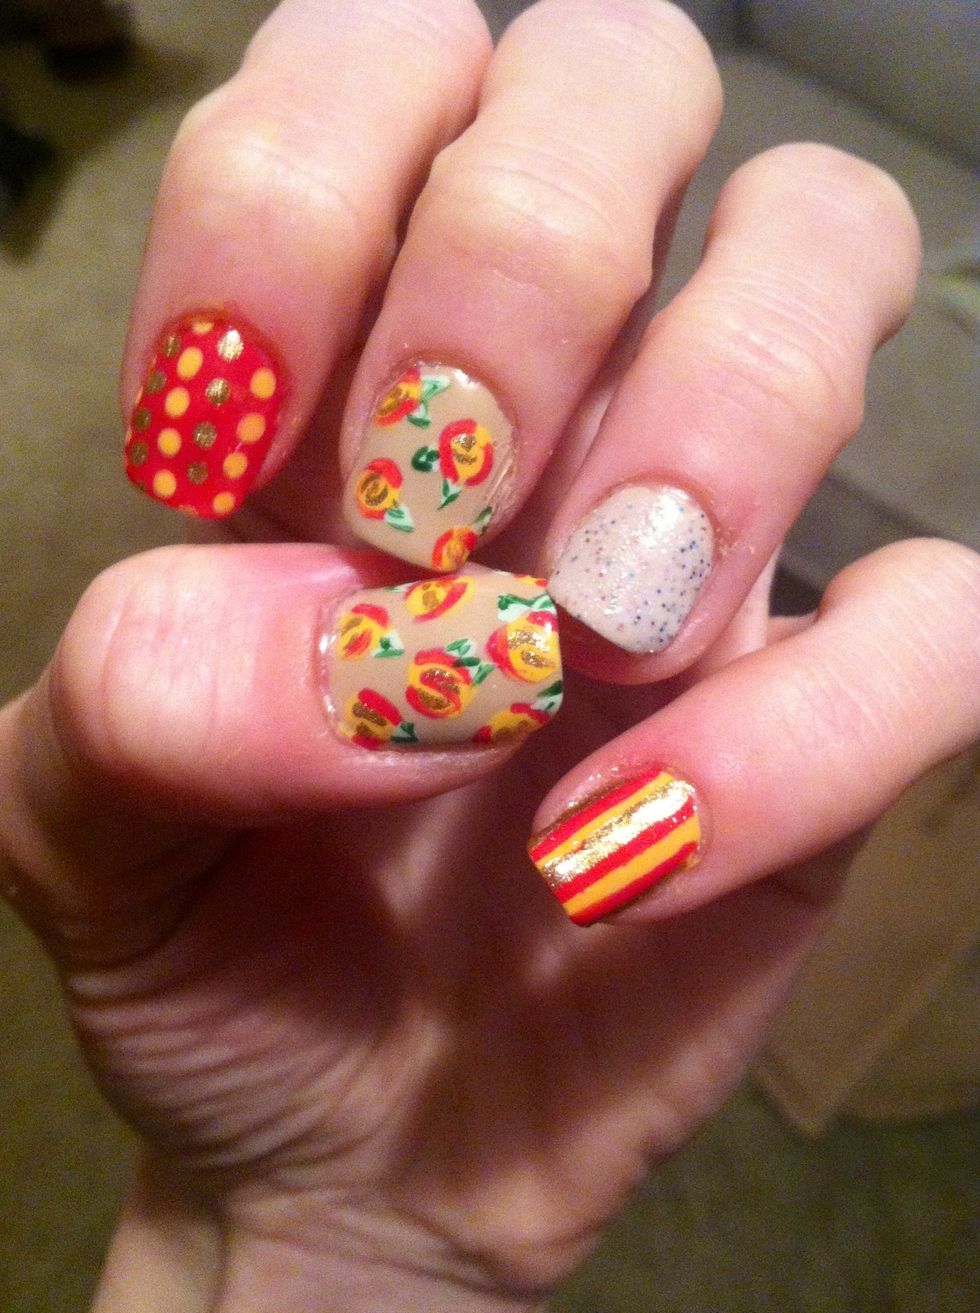
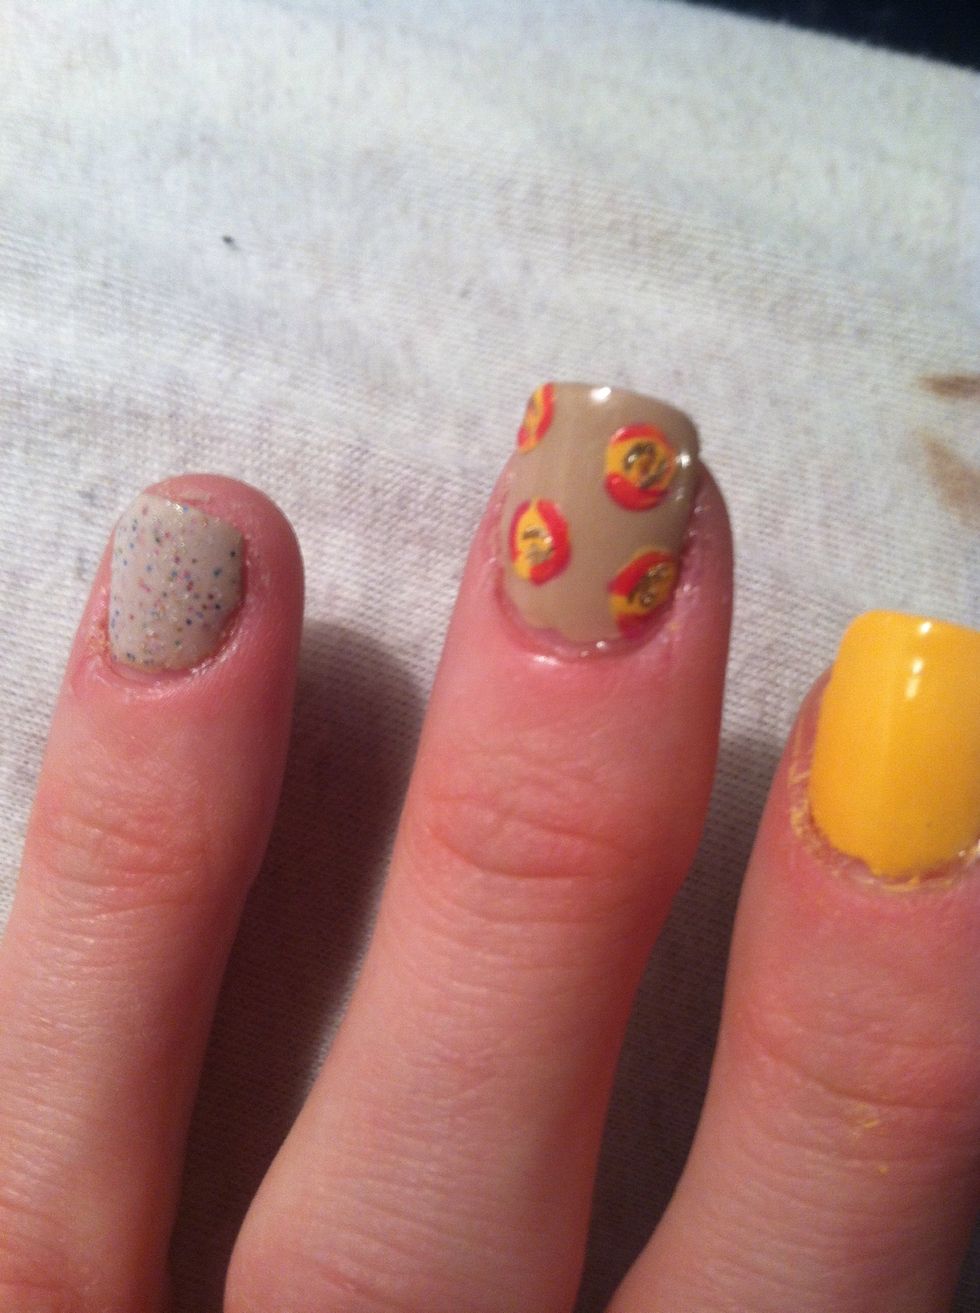
You can add in accent nails and create a skittlete as I've done here. I used all the colors mentioned earlier along with Sand Dolla Make Ya Holla by China Glaze on my ring finger.