The Conversation (3)
Tom09 Feb, 2021
Sign Up
Do you have an outlet that doesn't work anymore? Or maybe the vacuum cleaner won't stay plugged in because the plug keeps falling out? Then you need to put on your electrician's hat and get to work!
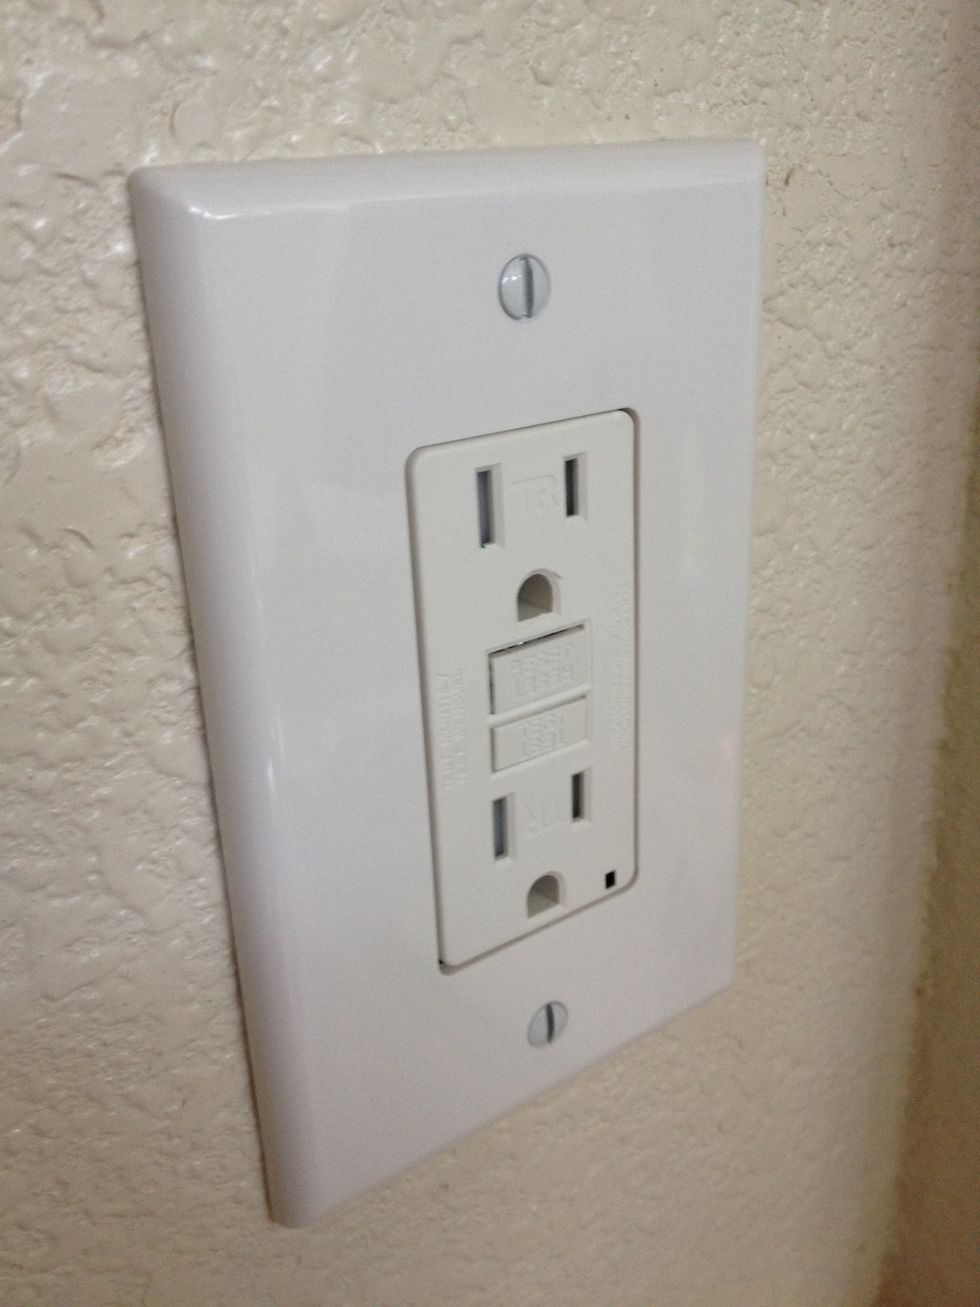
Here's the finished product - bright, shiny, and fully functional. Now let's backup and see how I did it...
**DISCLAIMER** - electrical work can be dangerous if done improperly. Before working on any electrical circuit make sure that you flip the breaker on your main electrical panel and kill the power.
According to some data from 2010, about 65 people died in the US last year from electrical home improvement projects. If you don't know what you're doing, don't do the work.
As mentioned in the comments at the end of this guide, it is important to understand local codes and make sure you comply, in addition to confirming you won't affect your homeowners insurance.
If you don't know which breaker powers the specific outlet you'll be working on, you can flip the main service breaker for the whole panel. Be aware that this will cut power to your whole house.
Most main service breakers are listed at 100, 200, 300 or more amps while individual breakers for plugs and lights are typically around 15 - 20 amps.
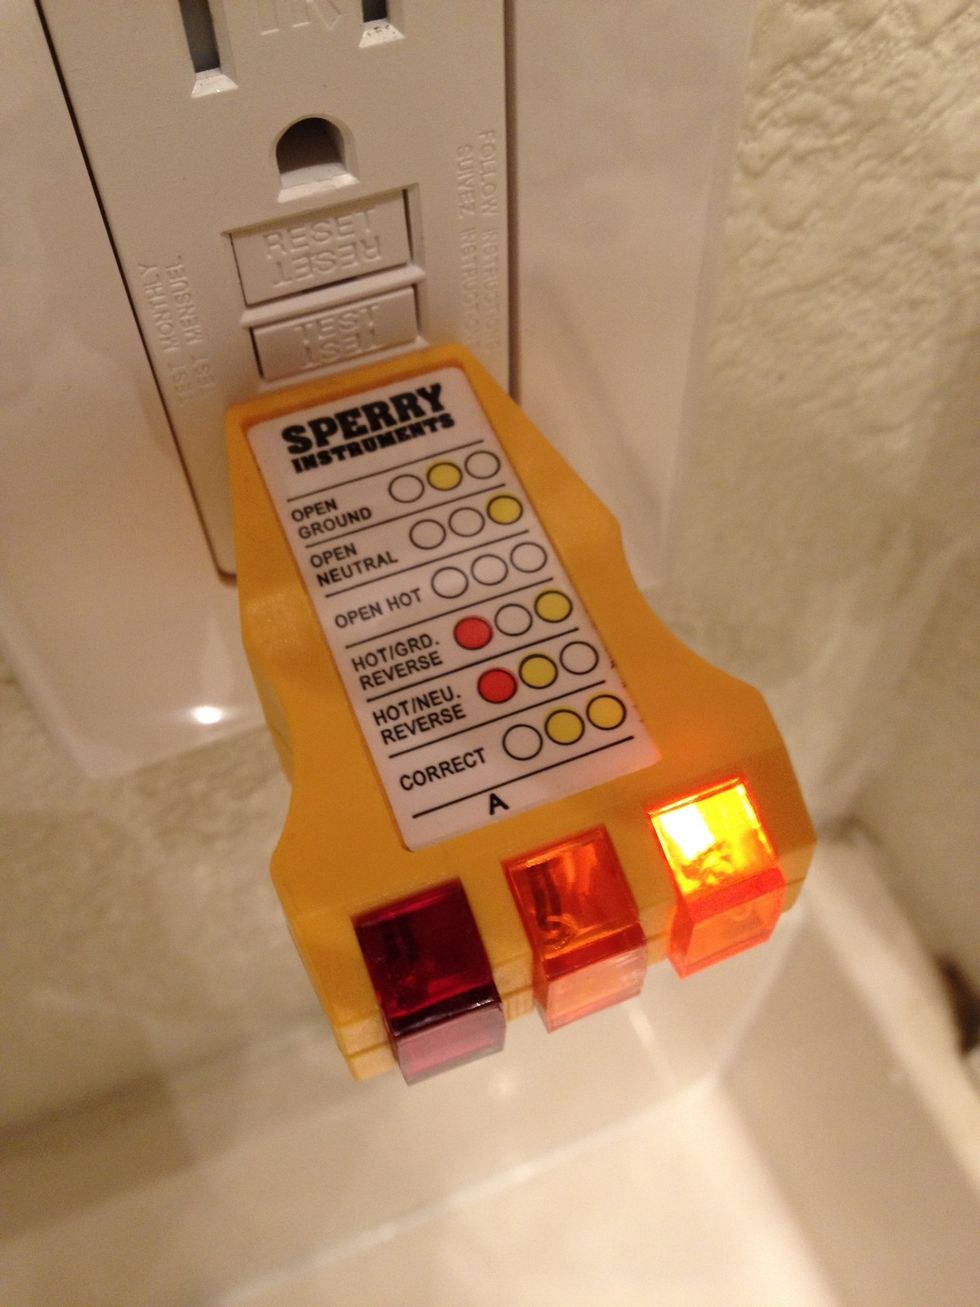
First, plug in your outlet tester to see if there's any power to the plug. If any of the orange lights come on, don't start touching wires. Turn off the breaker at the main electrical panel.
No lights, no power - now we can get busy. There were lights on the tester and then, after I flipped the breaker, the lights went off, so I am very comfortable that there is no power to this outlet.
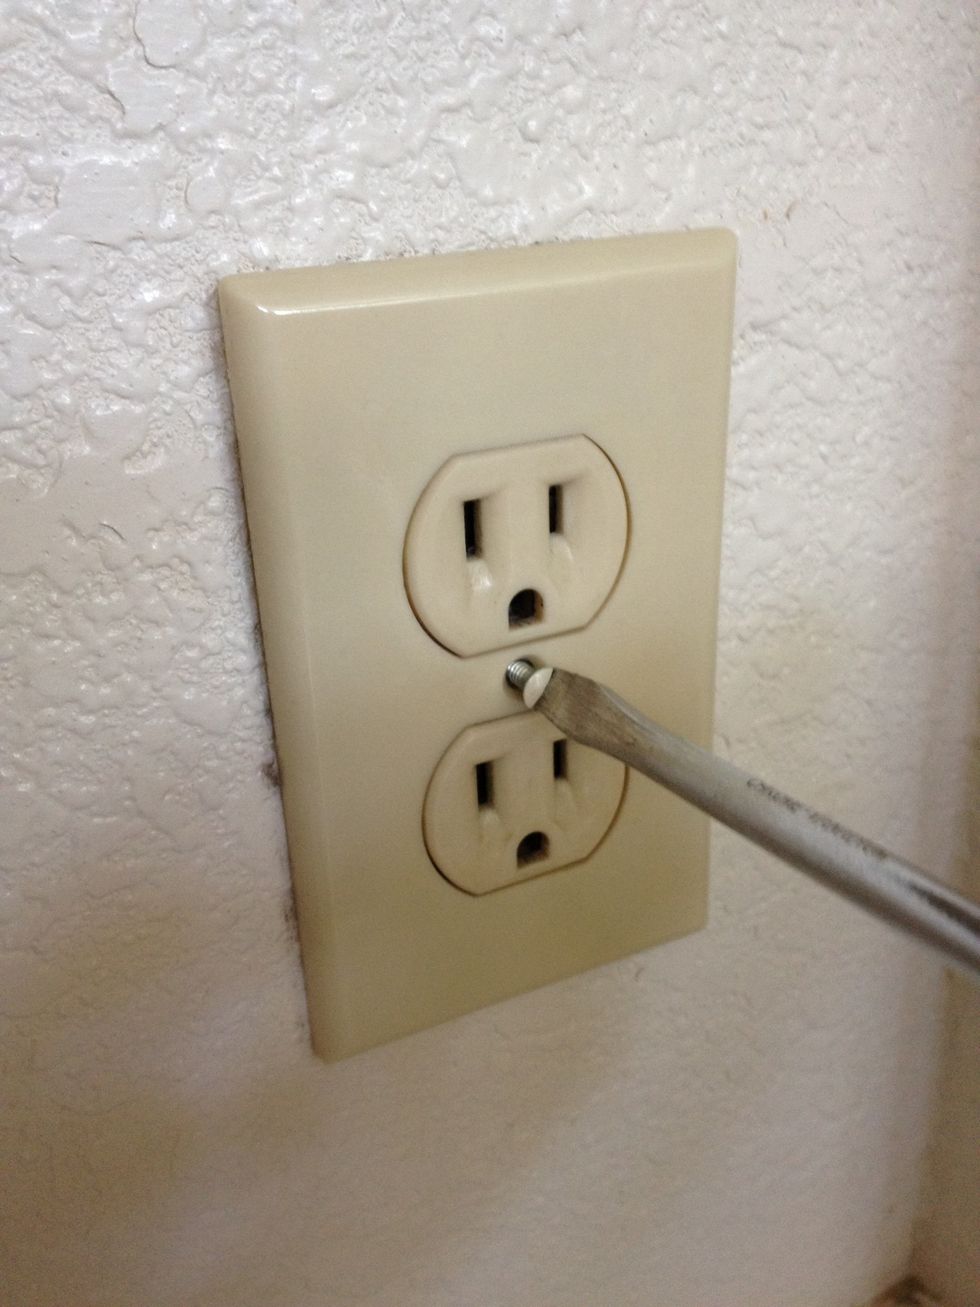
First use the flathead screwdriver to remove the receptacle's cover plate. You'll notice I refer to this electrical device as a receptacle, plug, or outlet - the terms are pretty interchangeable.
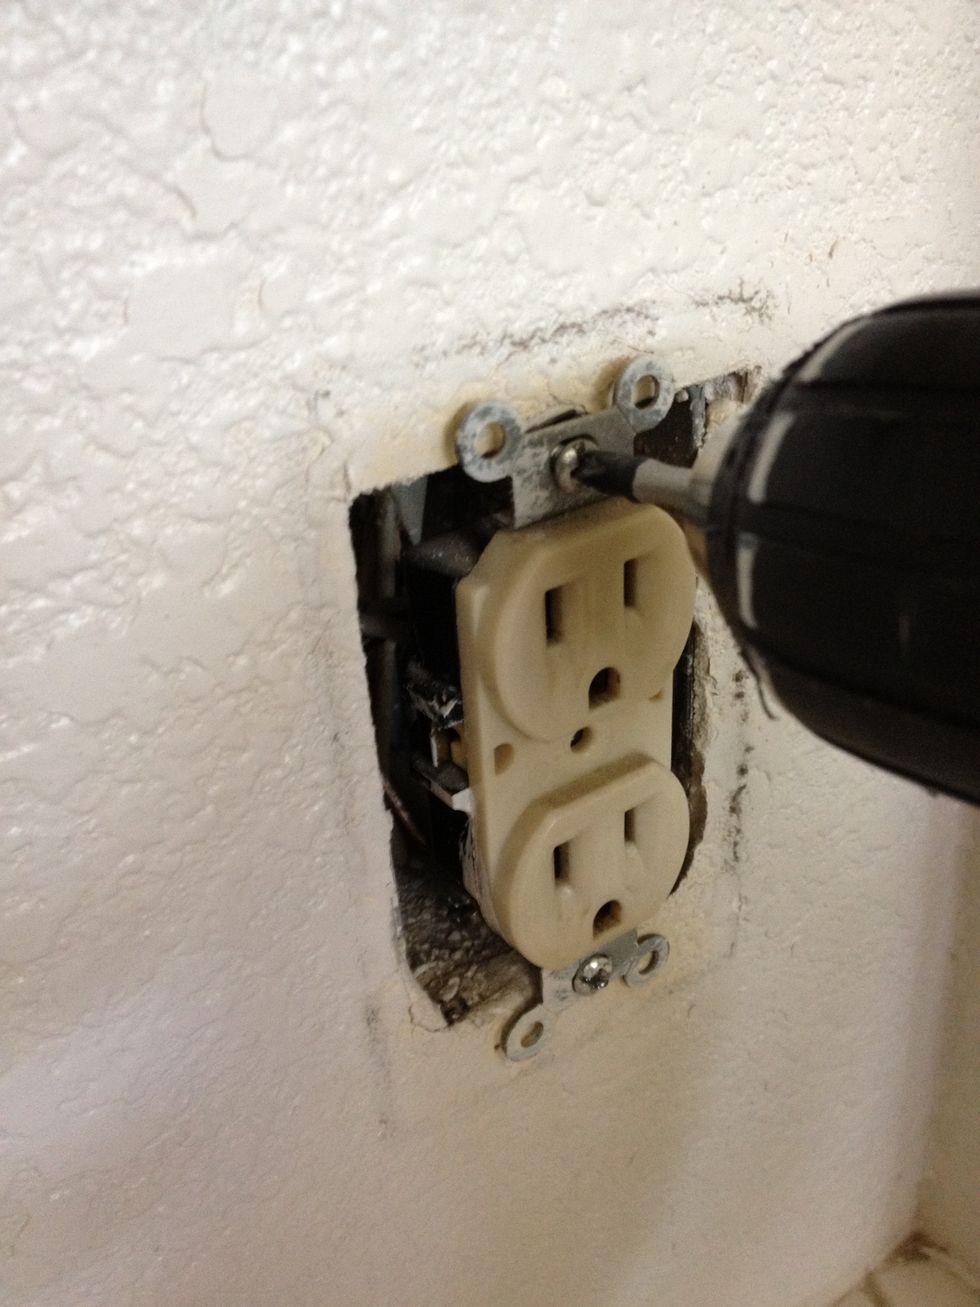
Use a Phillips screwdriver (hand or drill powered based on your personal preference) to remove the screws that hold the outlet to the junction box (the J-box is where all the wires come in).
Remove both top and bottom screws.
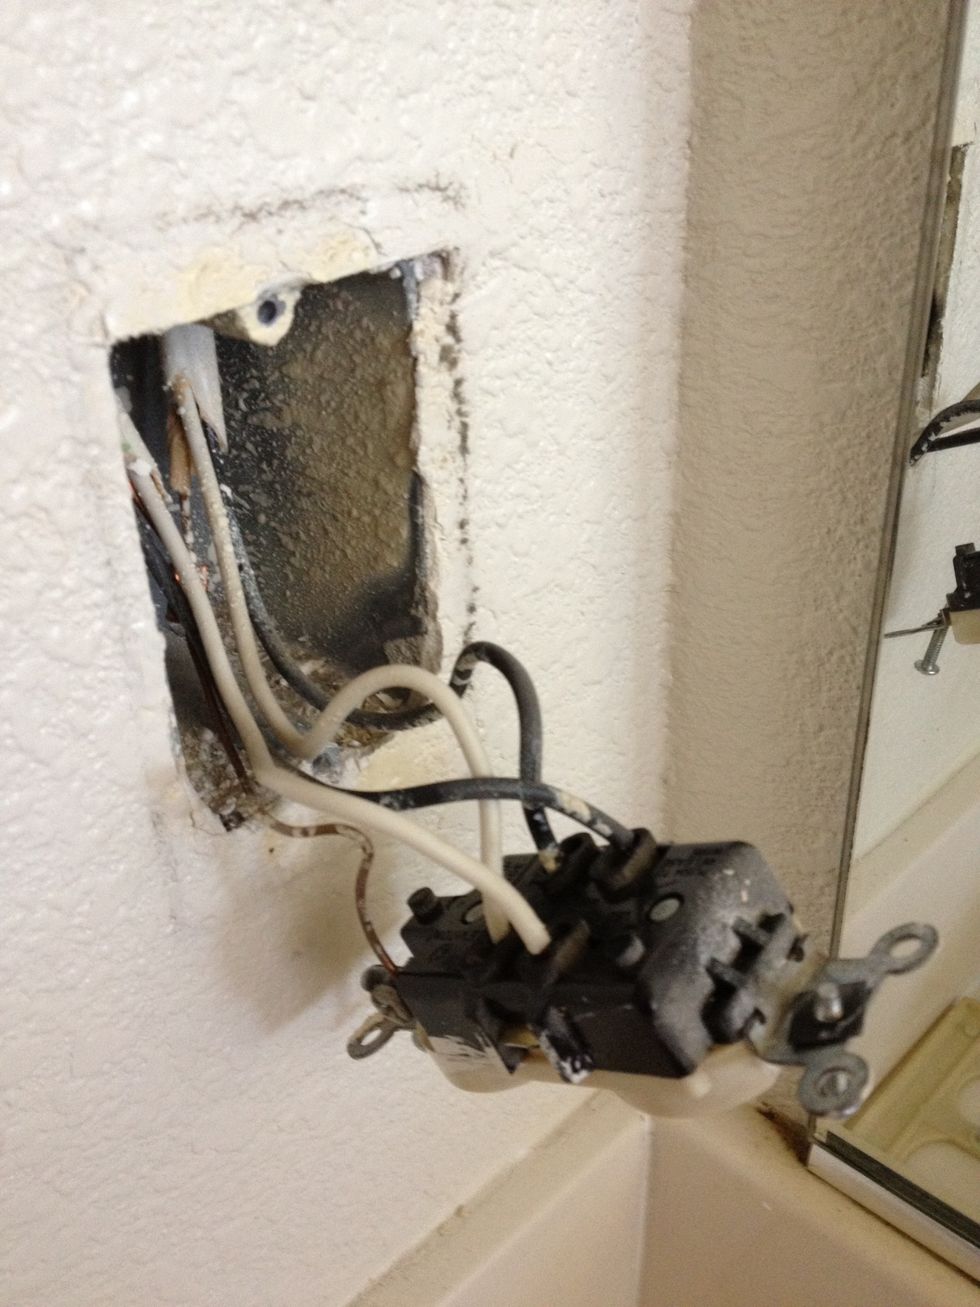
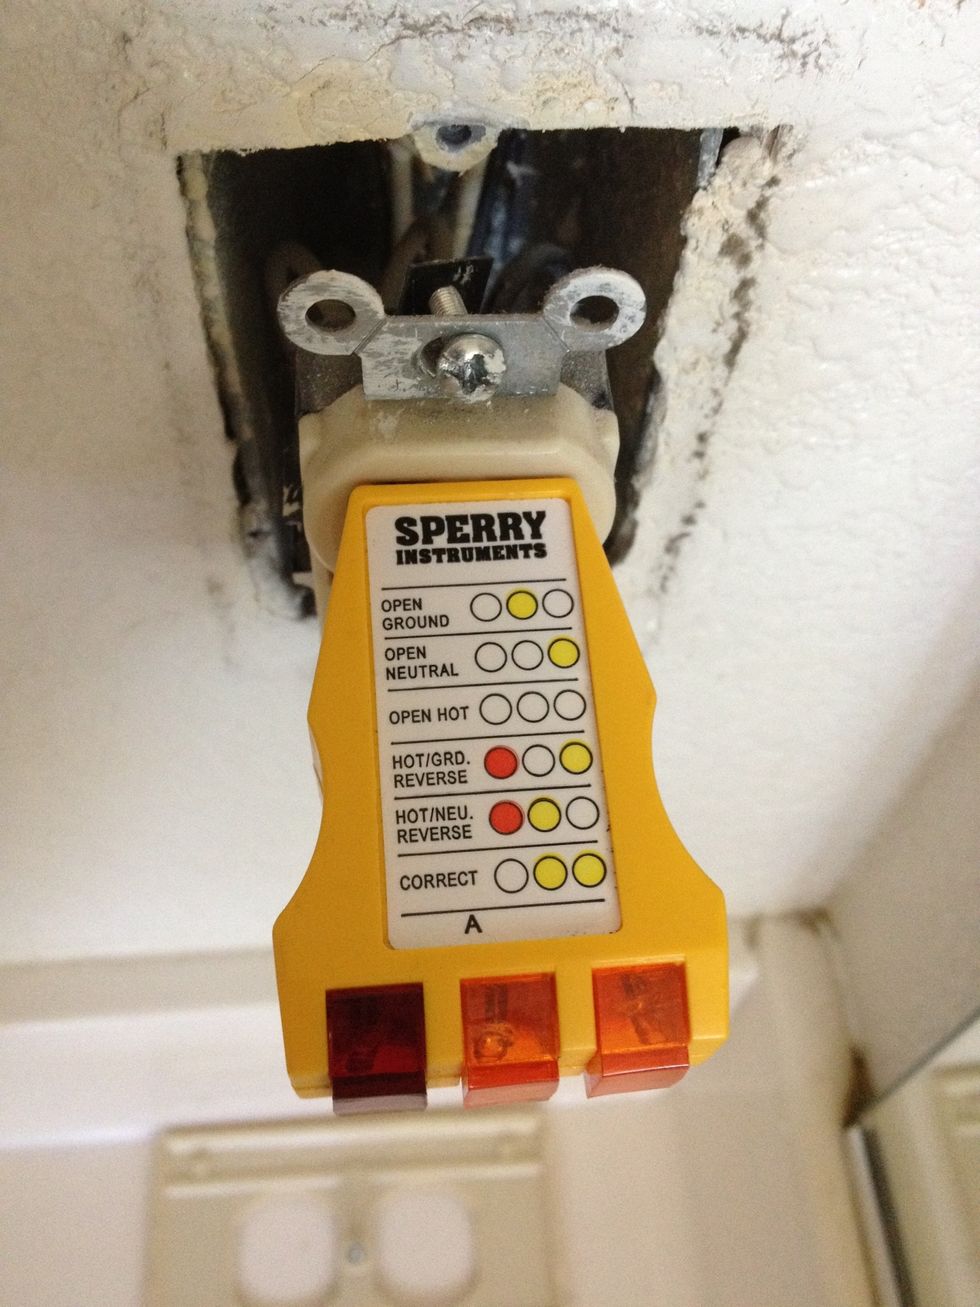
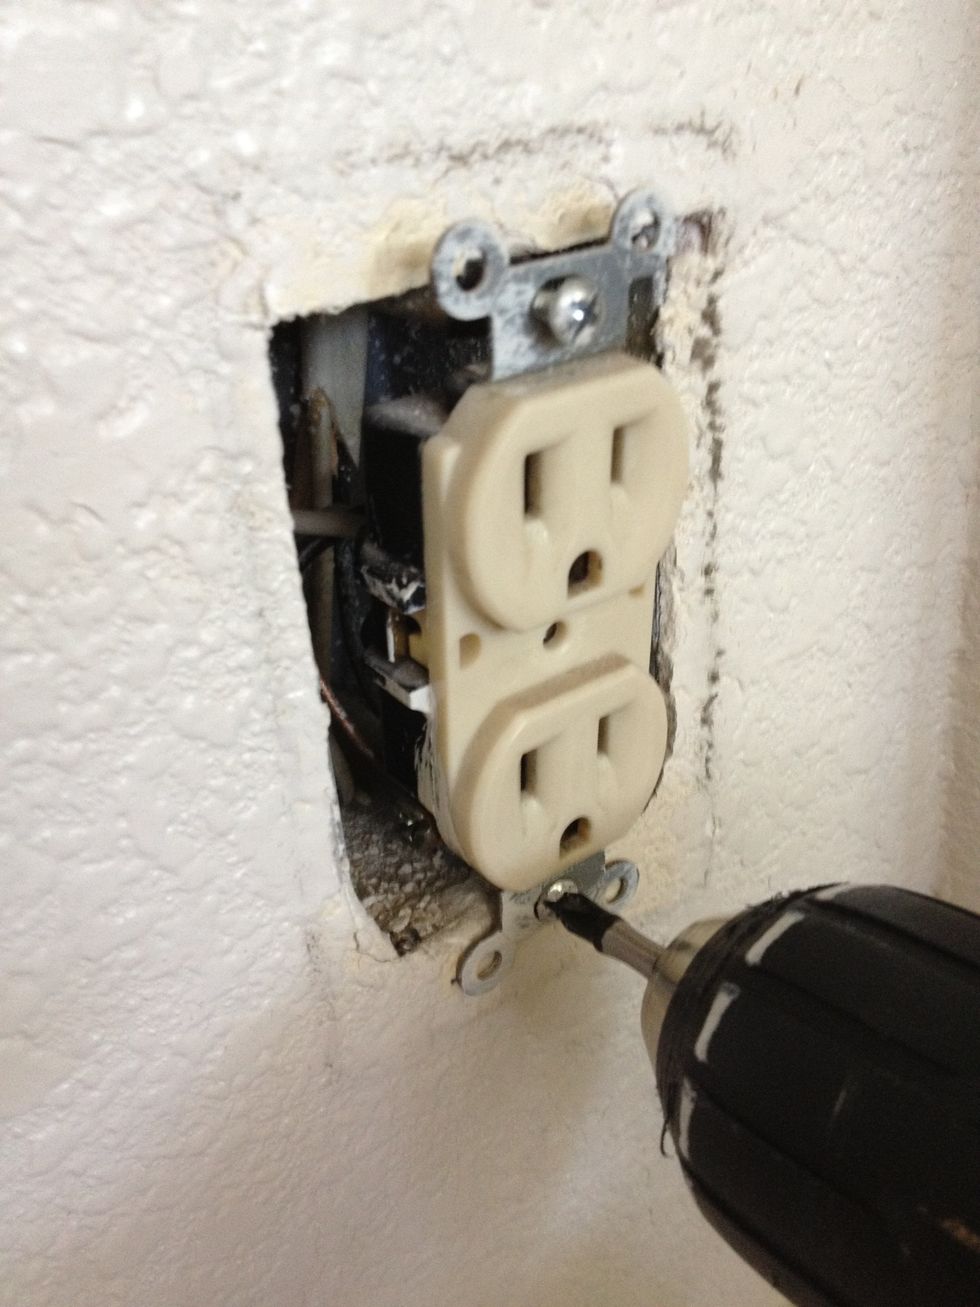
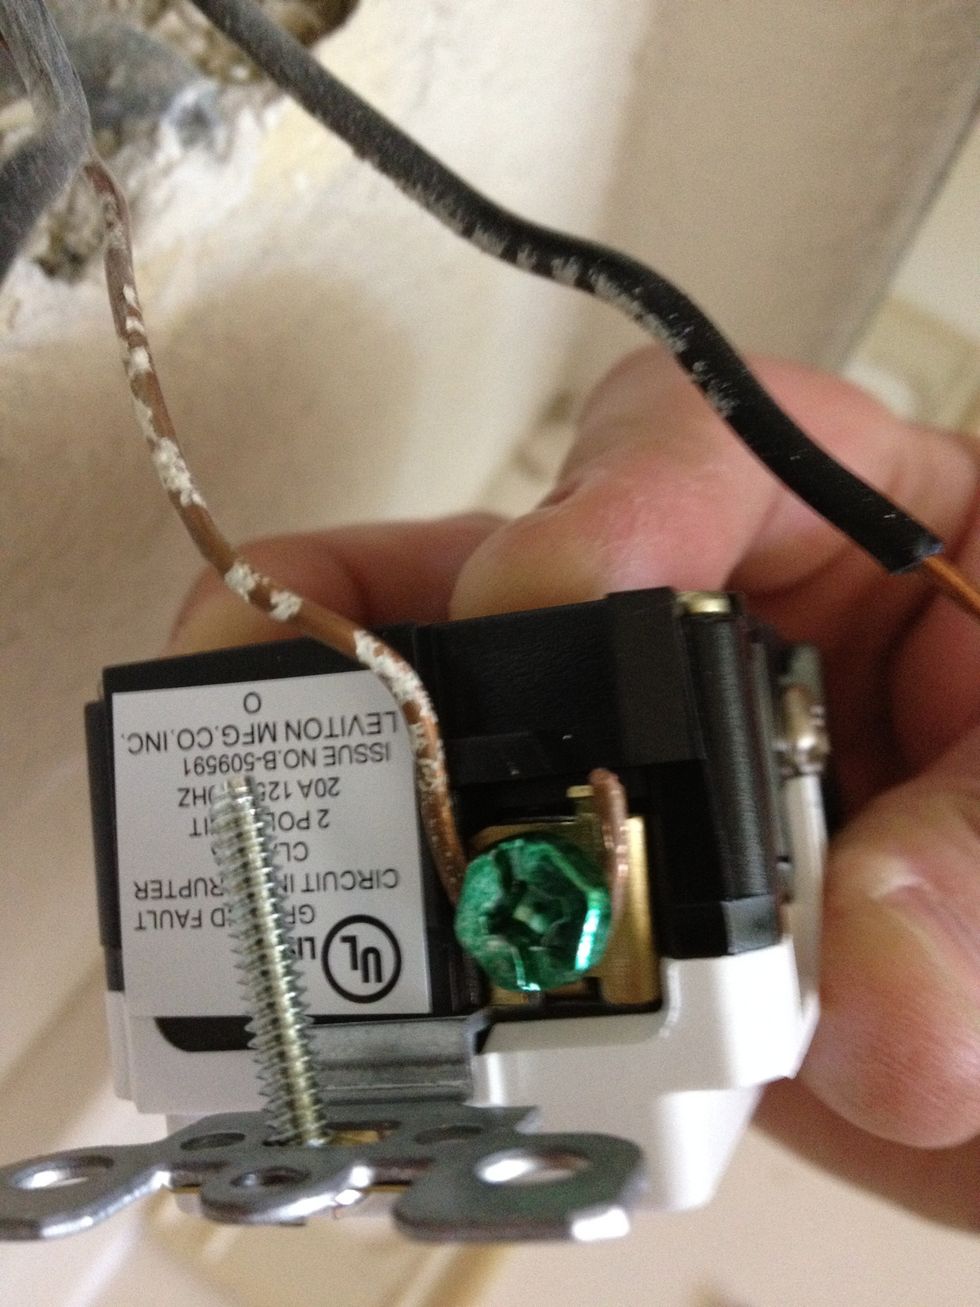
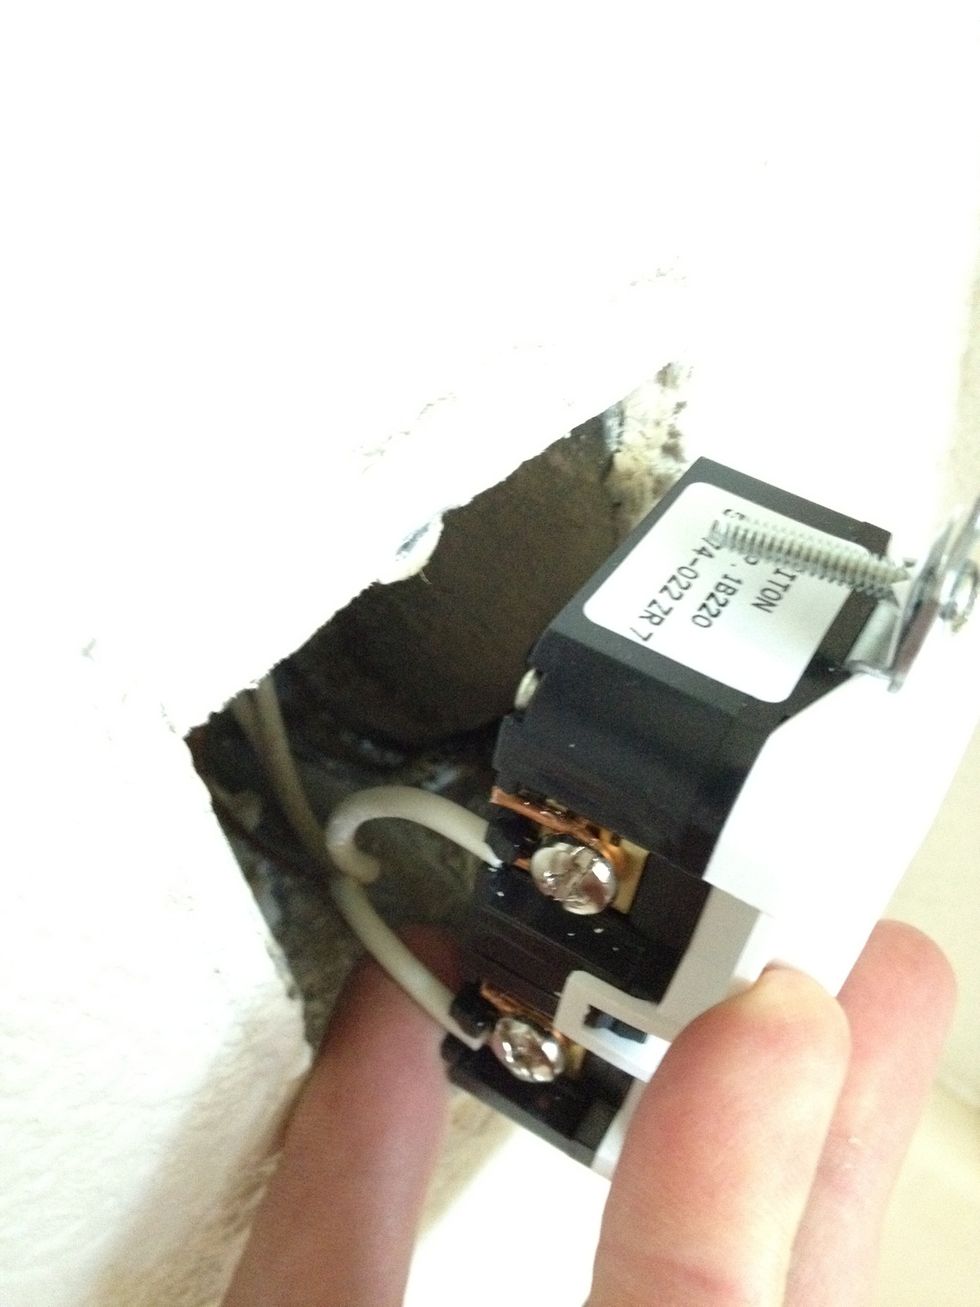
Pull the entire outlet away from the J-box to reveal the backside where the wires are. This specific plug's J-box has 5 wires: 2 black, 2 white, and 1 bare copper ground wire.
I'm lazy so I take my needlenose pliers and just cut the wires at the outlet instead of taking the time to unscrew and remove them.
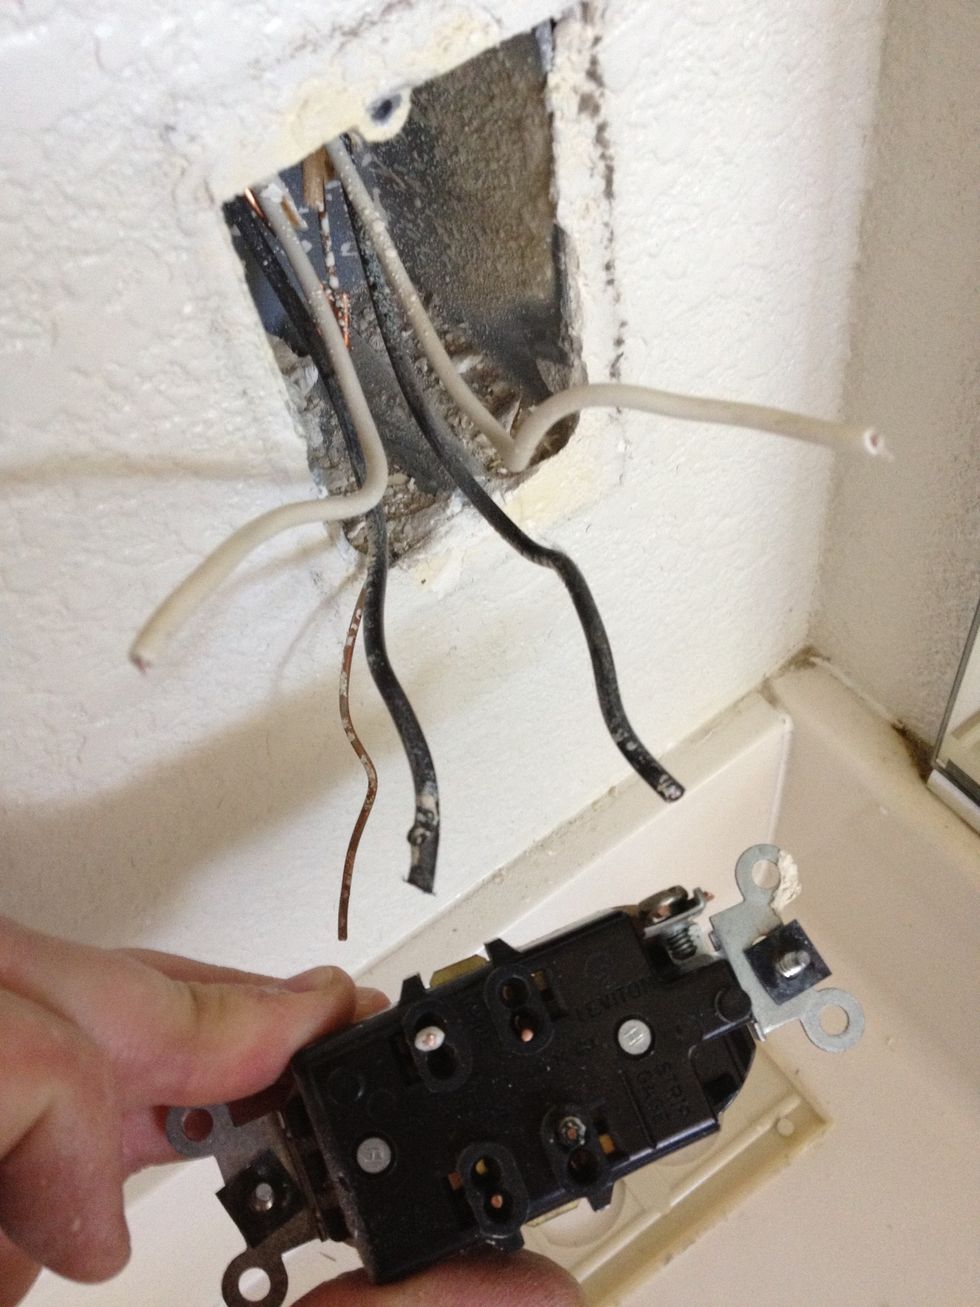
Once you cut all the wires you can discard your old outlet. A "typical" outlet will only have 1 black, 1 white, and 1 bare ground wire. Since this one has more, it means it is part of a "series".
A "series" means there are 2 or more outlets powered by the same wiring and circuit. The other set of black and white wires goes to the next outlet down the line and that's how it gets its power.

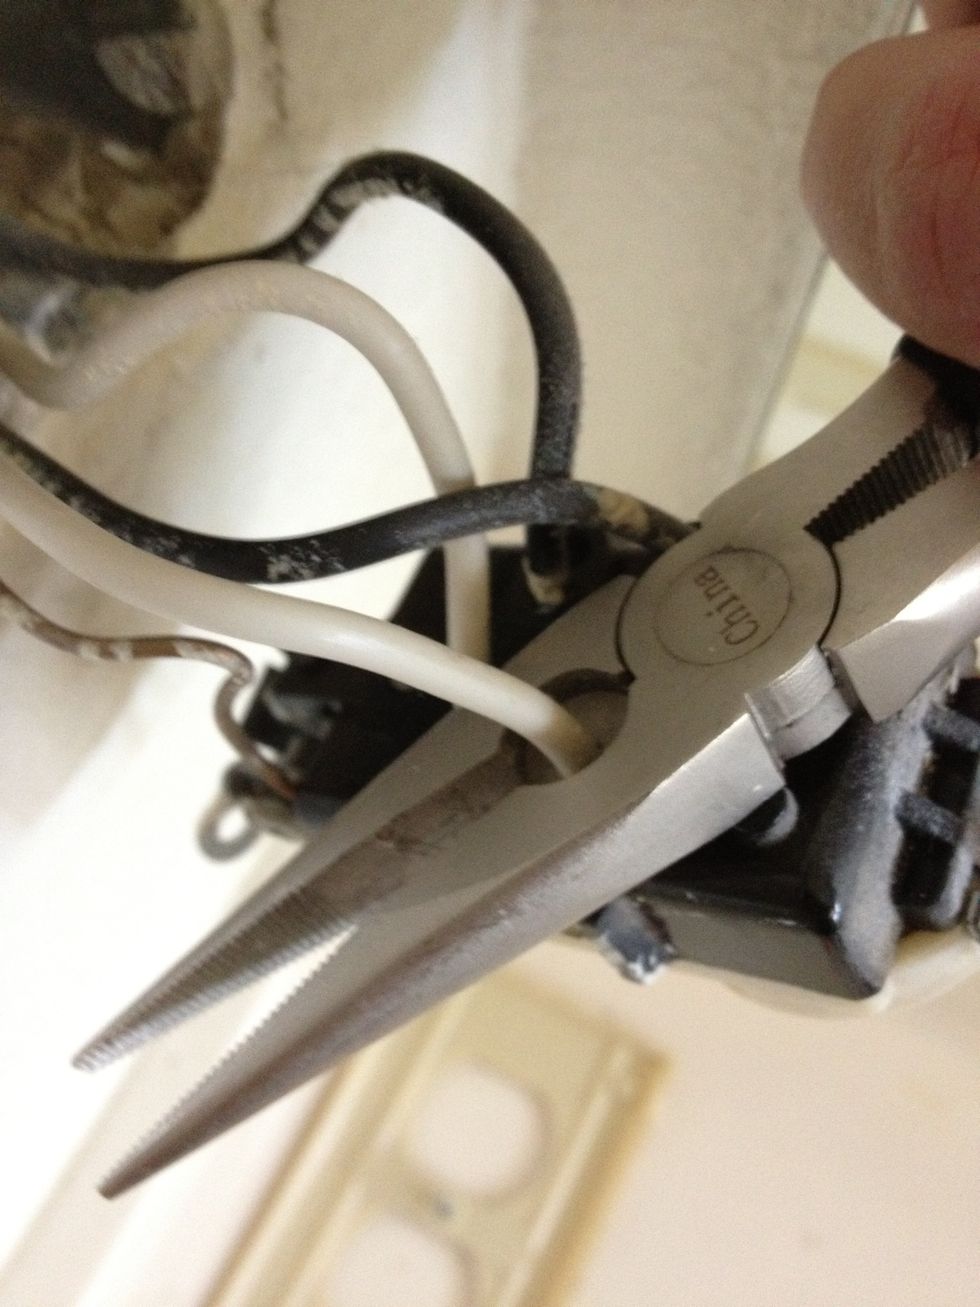
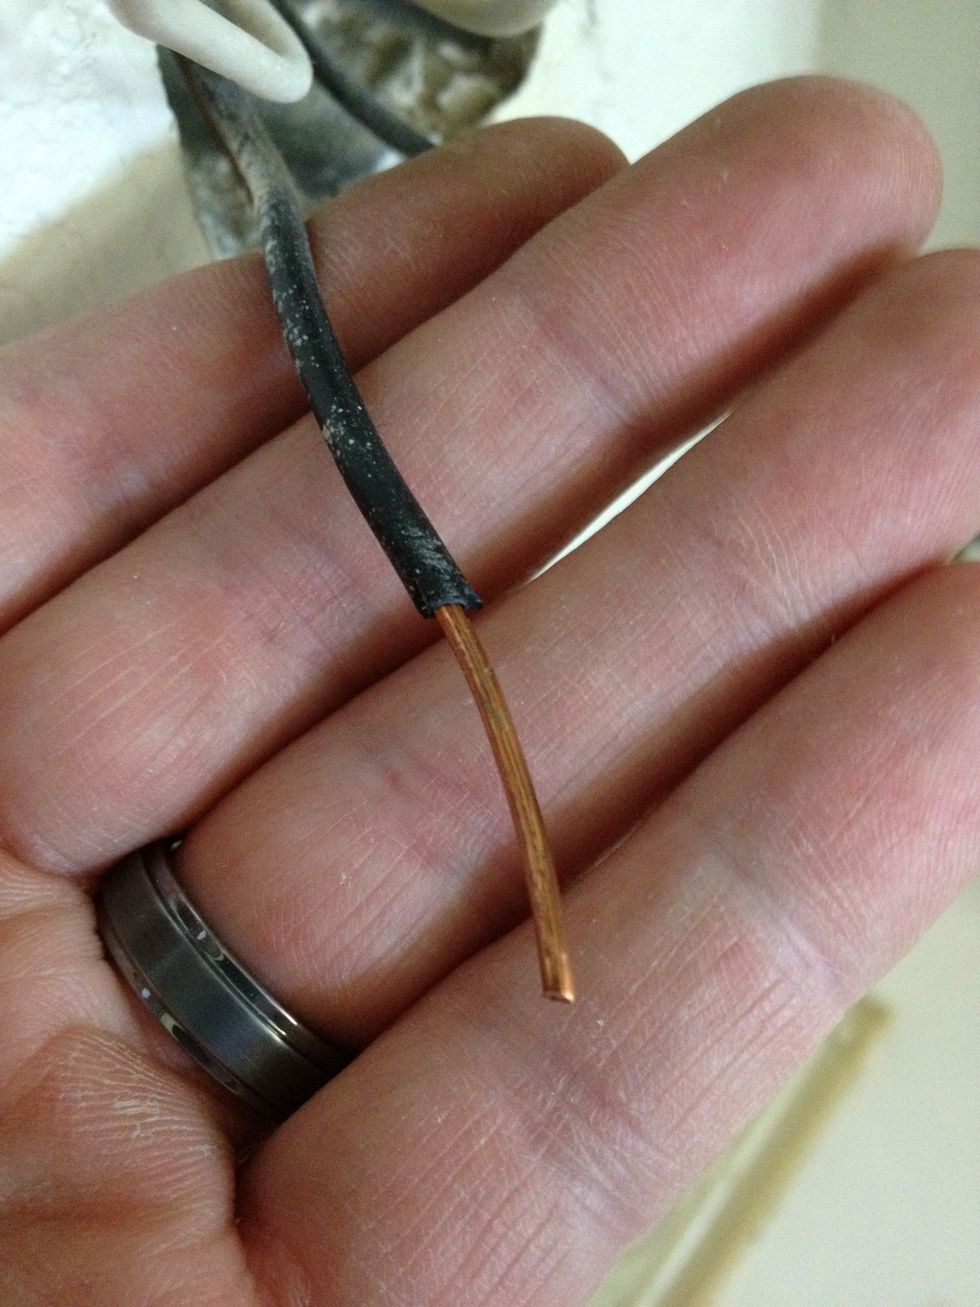
Since I clipped the wires when I removed the old receptacle I need to re-expose the bare copper wire to make a clean connection to the new outlet. I use the wire strippers to remove the insulation.
The wires are actually 14 gauge (which is a reference to their thickness) but I'm using the 12 gauge stripper to expose the copper. Up to you.
Perfecto!
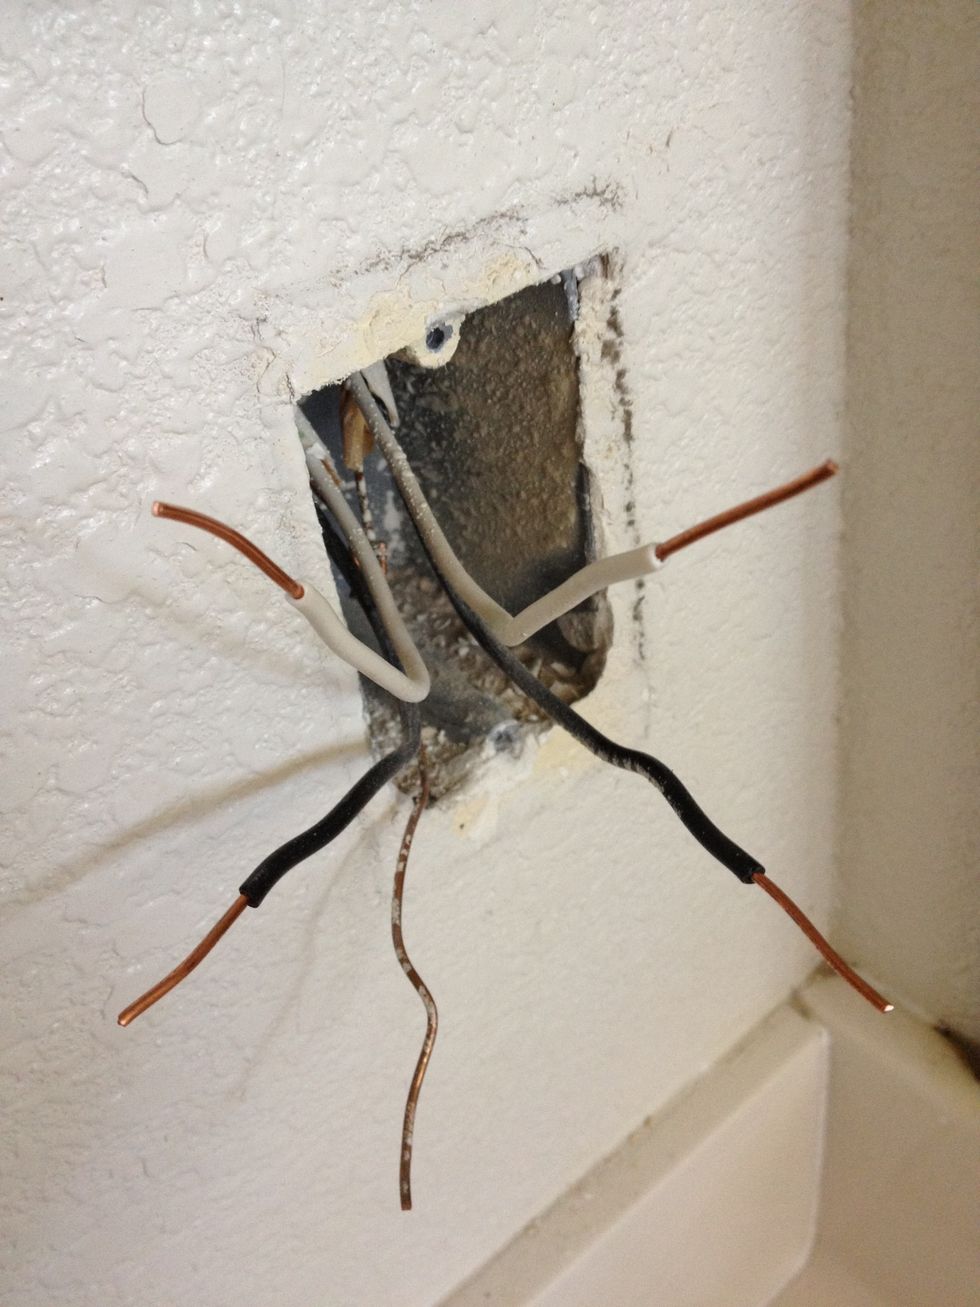
Do the same stripping for all 4 insulated wires. The copper grounding wire is already bare so you're good to go.

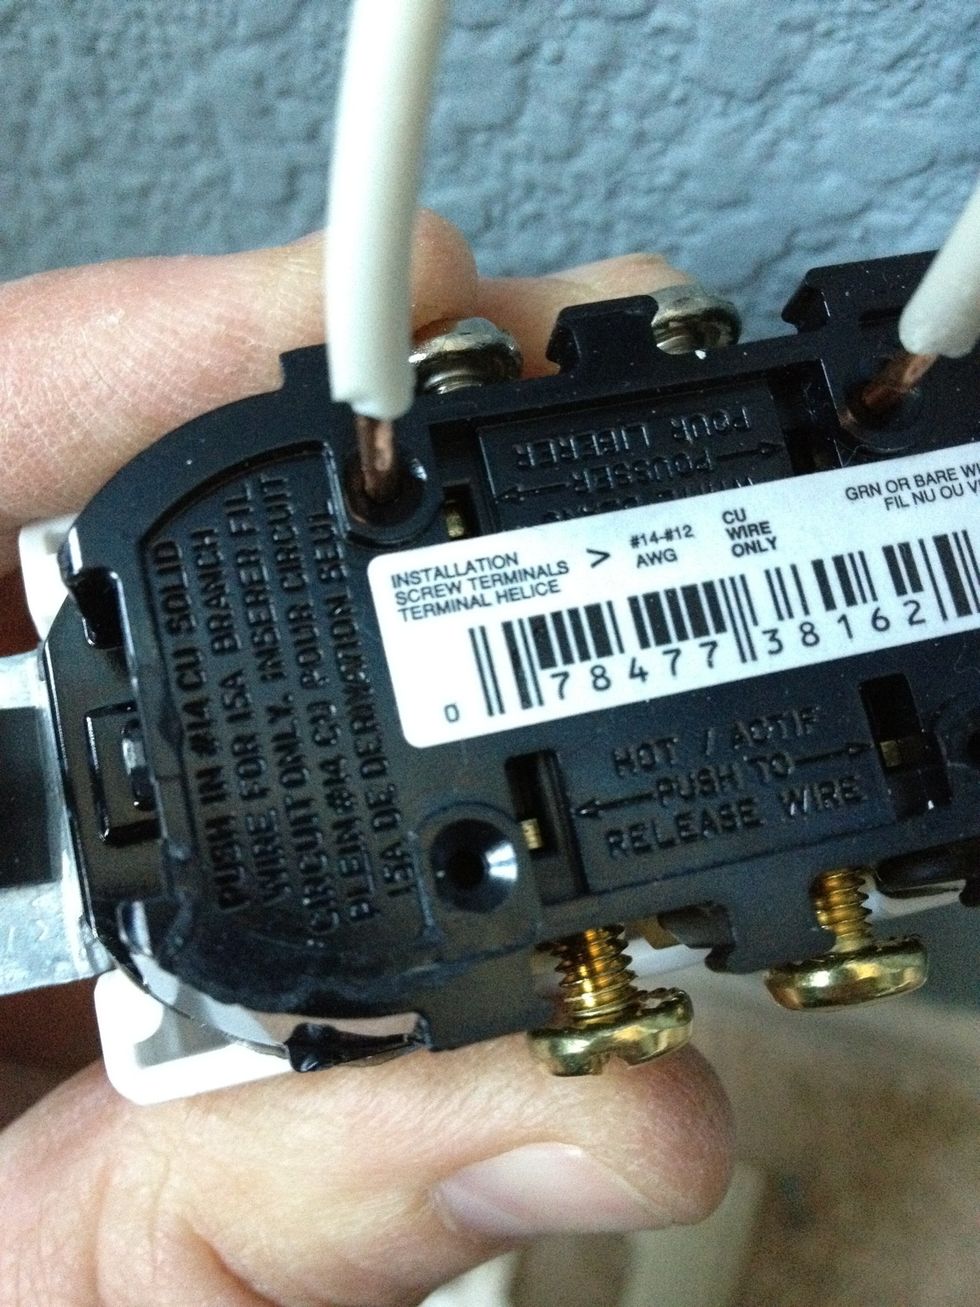
The back of the new outlet. There are 2 connection screws for our wires on each side. A total of 4. How fortuitous that we have 4 wires! The ground wire connects to the green screw at the bottom.
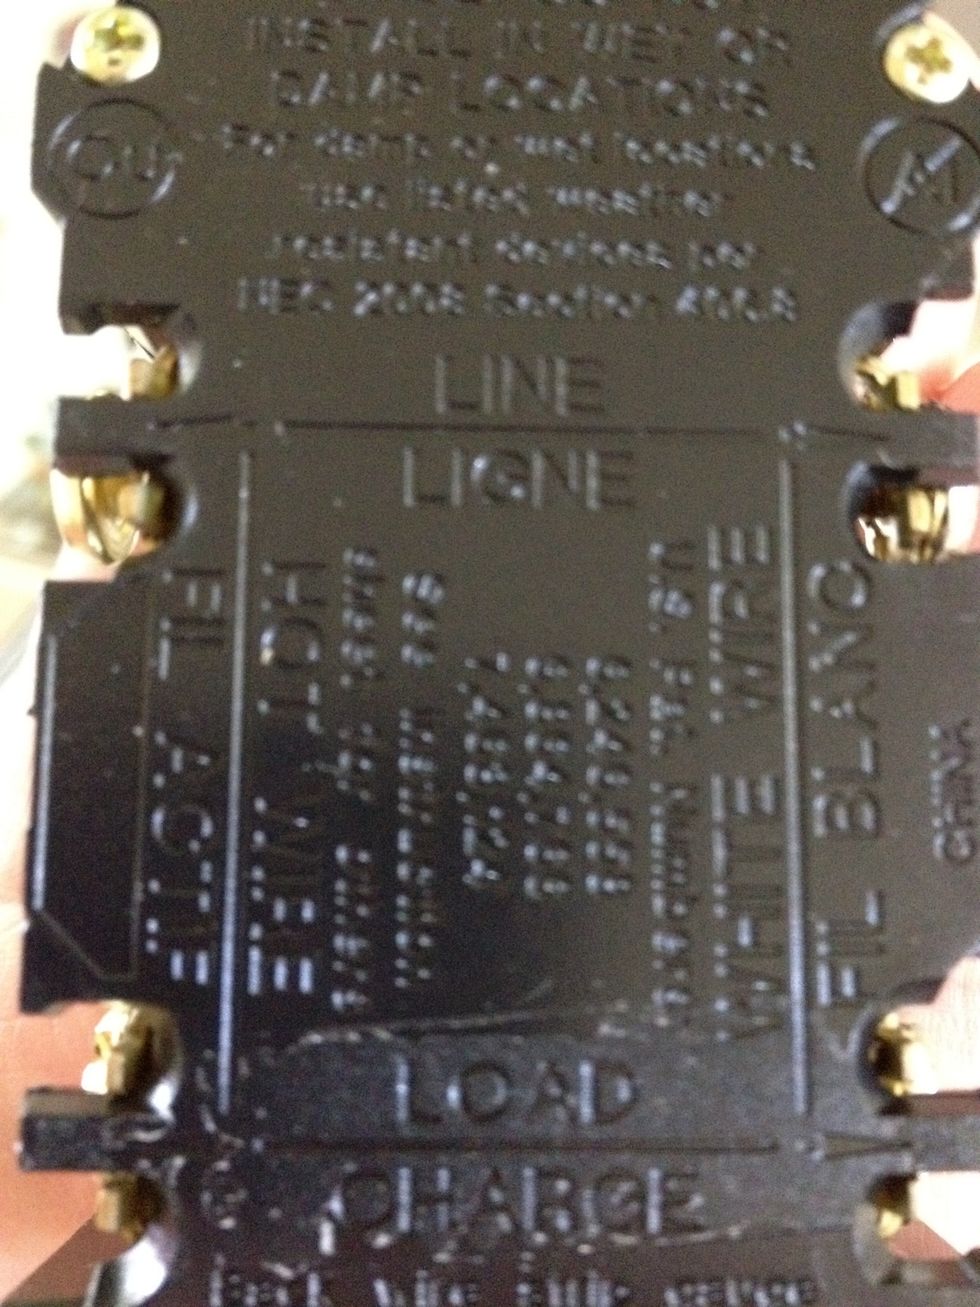
A little hard to read, but the left side says "hot wire" and the right side says "white wire". We'll put the black wires on the hot side and the white wires on the left side.
First connect the ground wire to the green screw at the bottom of the outlet. Wrap it around the screw and the tighten to lock the wire in place.
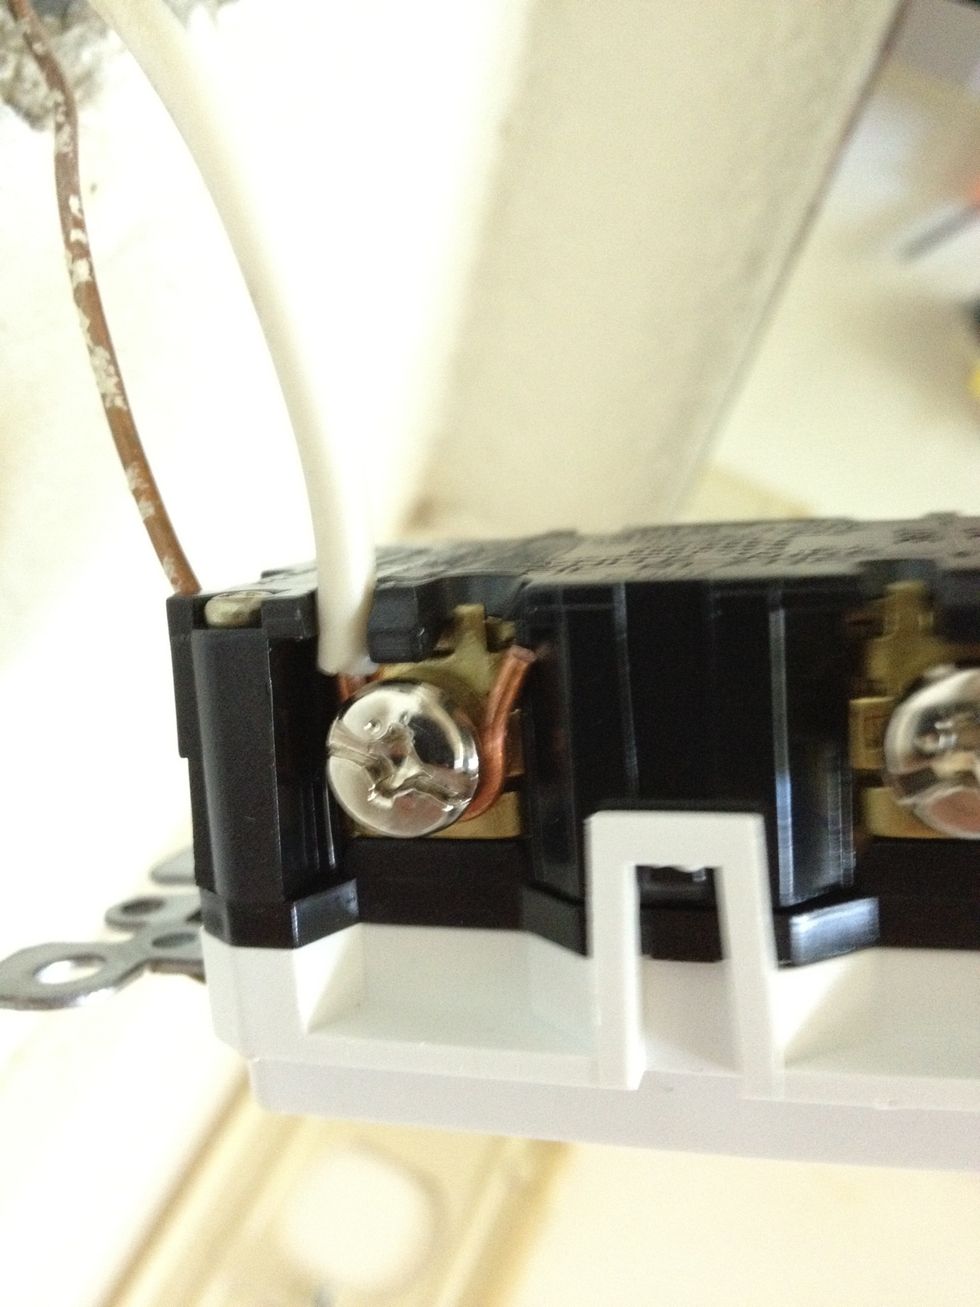
Then start attaching your white wires. If you look in the J-box you'll notice that the wires come together in pairs - a black and a white together and another black and white together.
Make sure the black wire you put on the bottom is the "pair" that goes with the white wire you put on the bottom on the other side. They're meant to be together so let's keep them that way!
All 5 wires attached - well done!
You kinda have to stuff the wires back in the J-box to get the outlet to fit back in there correctly. You shouldn't be able to mess anything up so just squish it all in there until it fits.
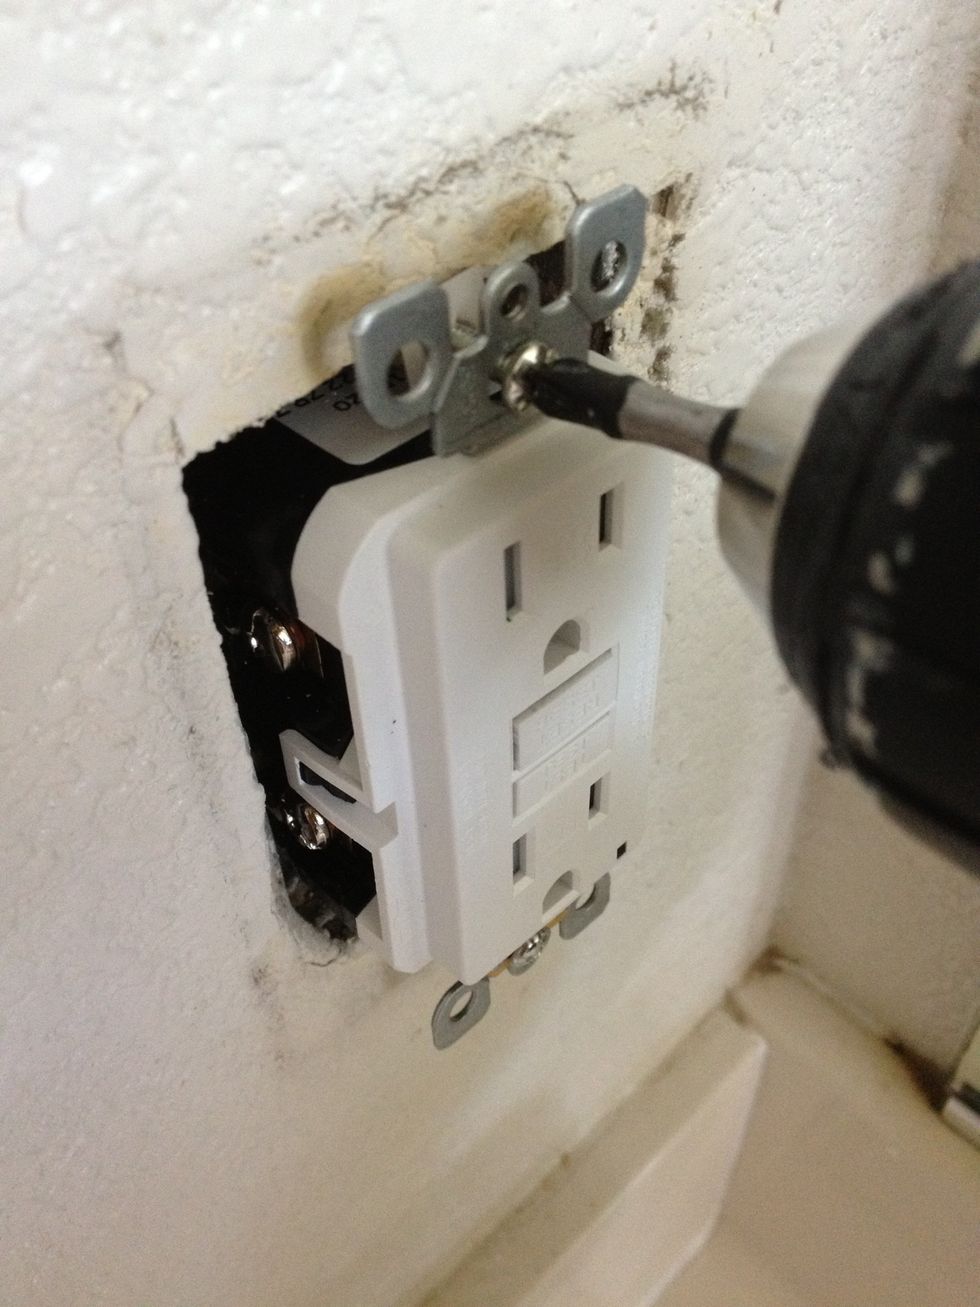
Then use your Phillips screwdriver to anchor the outlet to the J-box, both top and bottom.
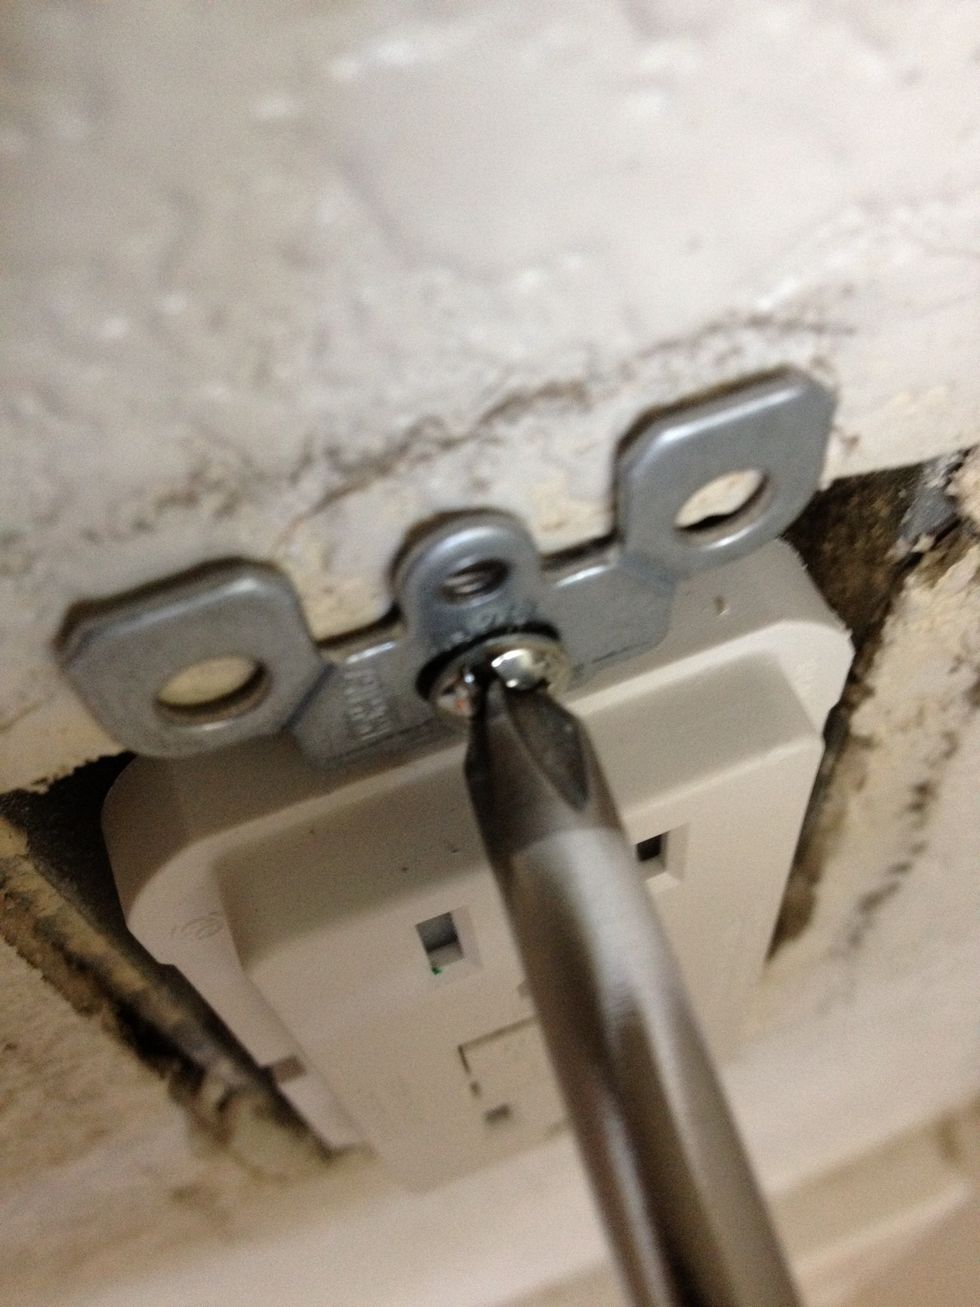
You'll want to get the metal frame of the outlet right up to the drywall or J-box otherwise it will move around easily and feel unsupported. Try and get the outlet as straight and level as possible.
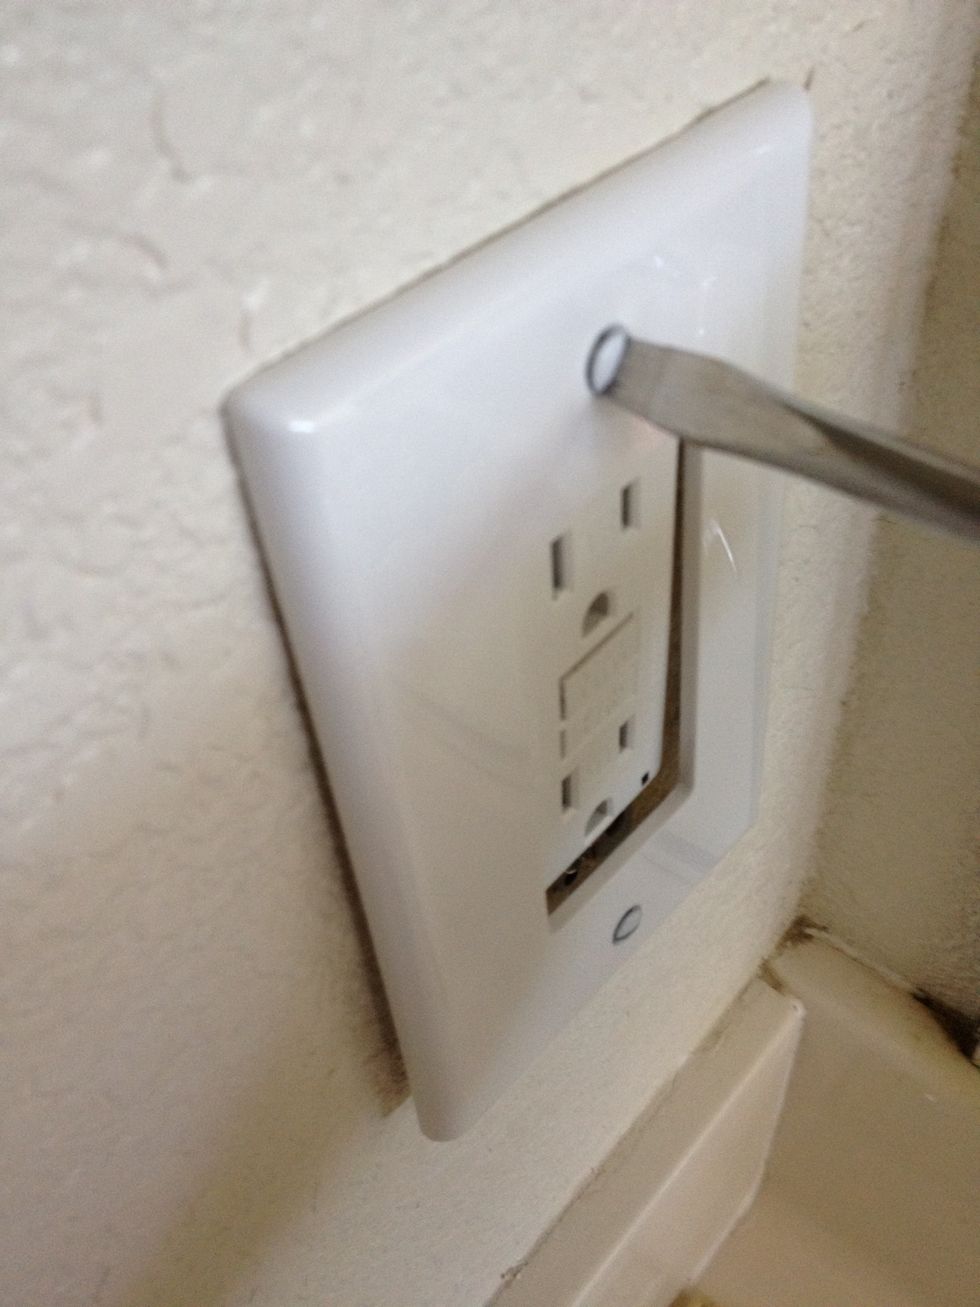
Now attach the new cover plate. Try and flush out the outlet and the cover plate as you screw it on so there is no change in plane between the two - this is a nice clean look.

There you have it! No need to over tighten the screws on the cover plate. They will warp the cover plate which is undesirable. Also, I made sure the slots in the screws pointed North/South. Classy.
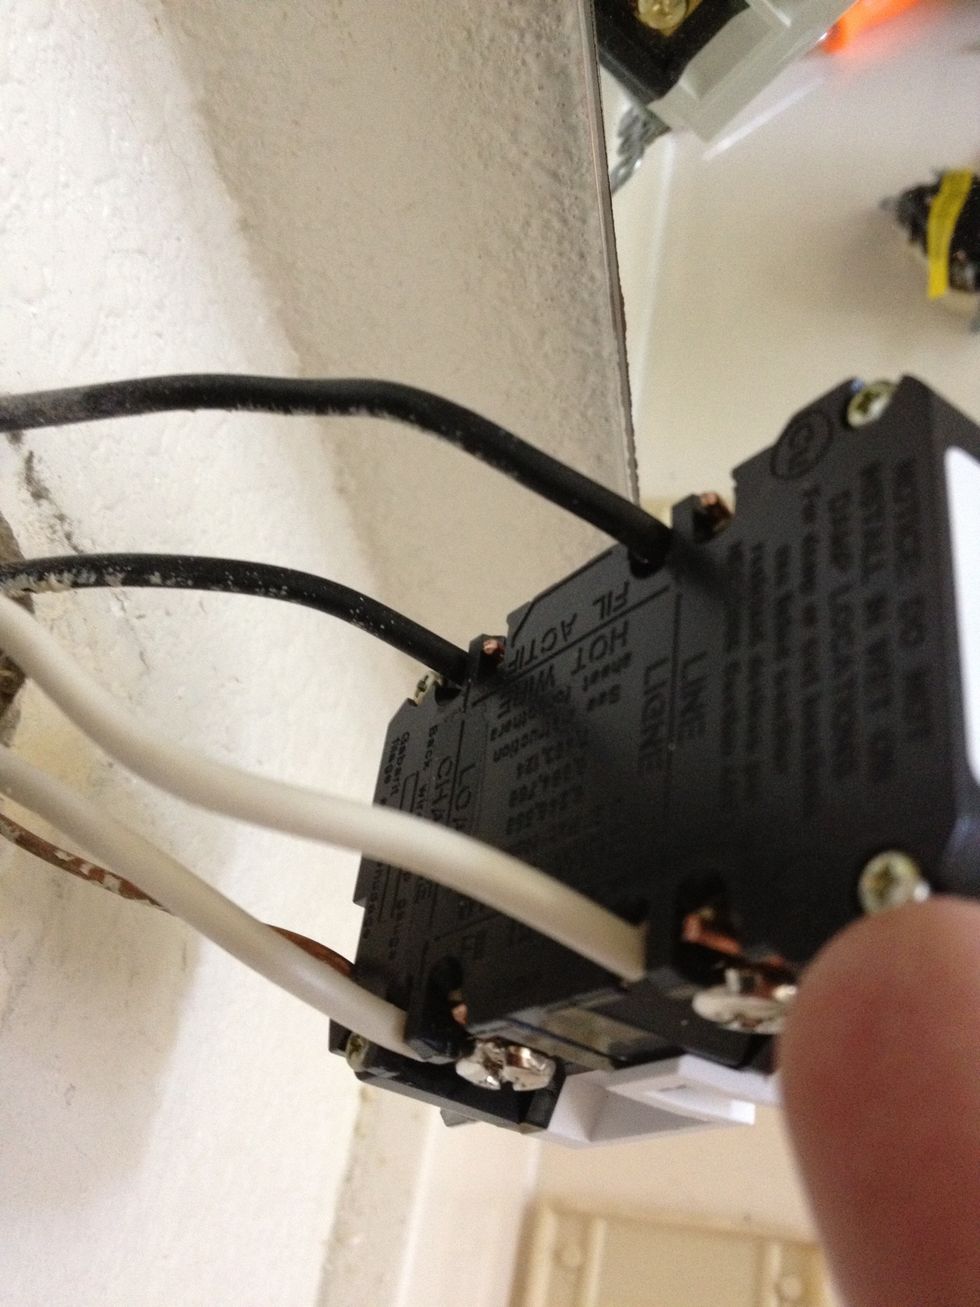
You may have noticed the outlet I installed was a GFCI receptacle which means it protects you from ground faults (voltage imbalances). The installation required using the screw studs on the side.
This is a standard outlet with a "quickwire" feature where you can stick the stripped wire directly into a little hole where it makes good contact with the conductors. This is awesome and really easy.
If you haven't done so already, go back to your main electrical panel and flip the breaker back on. Plug in a lamp to the outlet and turn it on and off making sure it works correctly. Fingers crossed!
If there's a problem and it doesn't work correctly, most likely you've just crossed up a wire or haven't connected something tightly enough. Turn the power back off and take another look at your work.
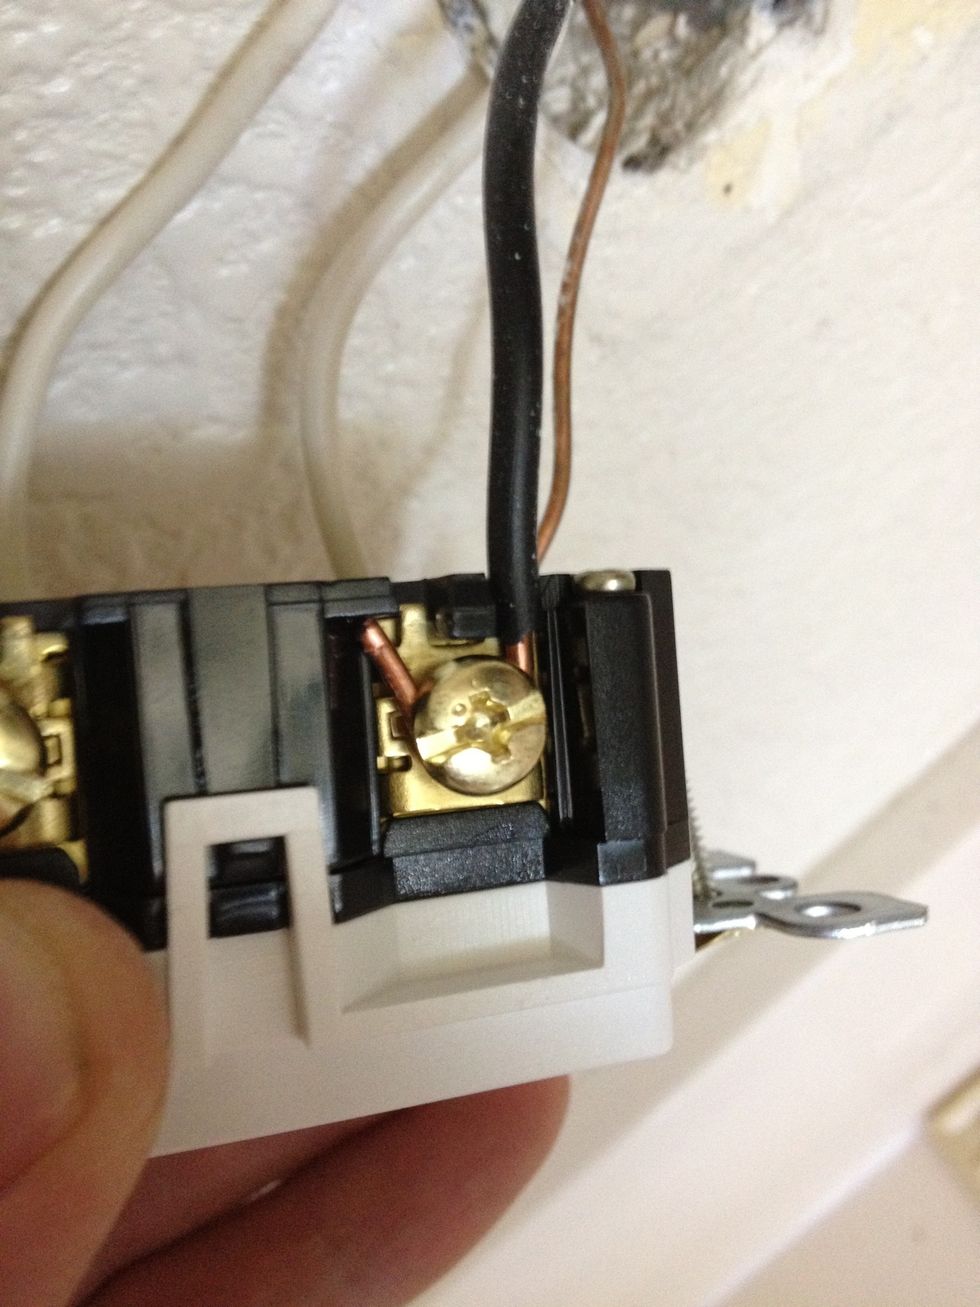
I had a problem when I installed this outlet since it was GFCI. The top screws where the wires connect is where the main AC "hot" power needs to go. Since there was another outlet on the circuit...
...I accidentally put THOSE wires at the top instead of the bottom where you install the wires for plugs in the series. To fix it I switched the black/white bottom wires to the top - it worked great.
The directions that came with the GFCI outlet were clear enough to explain this fix - I'm a big believer in following the directions, especially when it comes to electrical work.
Good luck to you in all of your home improvement efforts!