The Conversation (0)
Sign Up
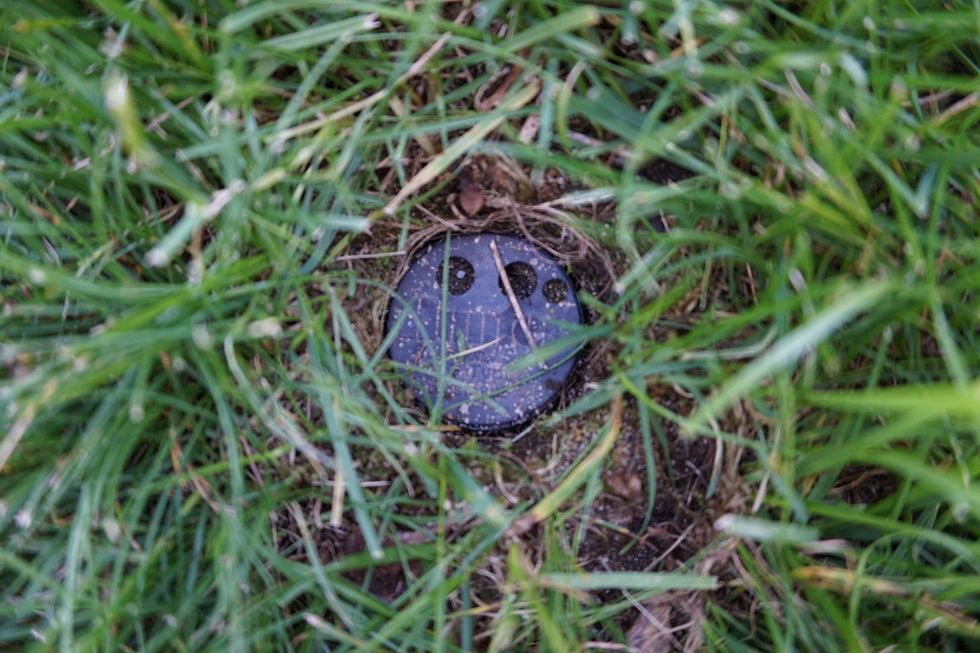
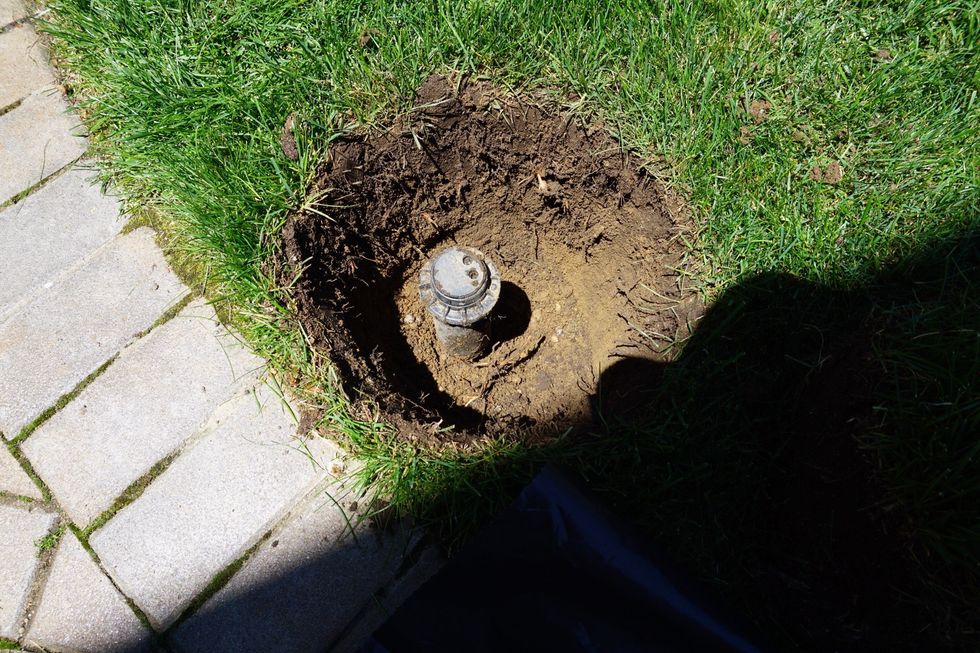
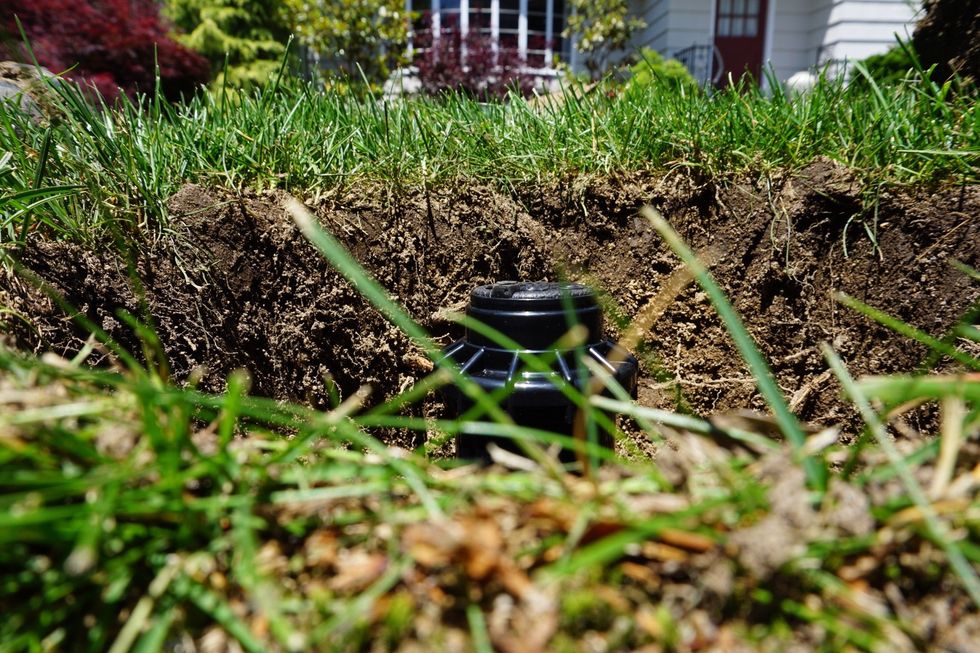
Locate sprinkler head needing to be changed. Mine leaks and won't rotate anymore.
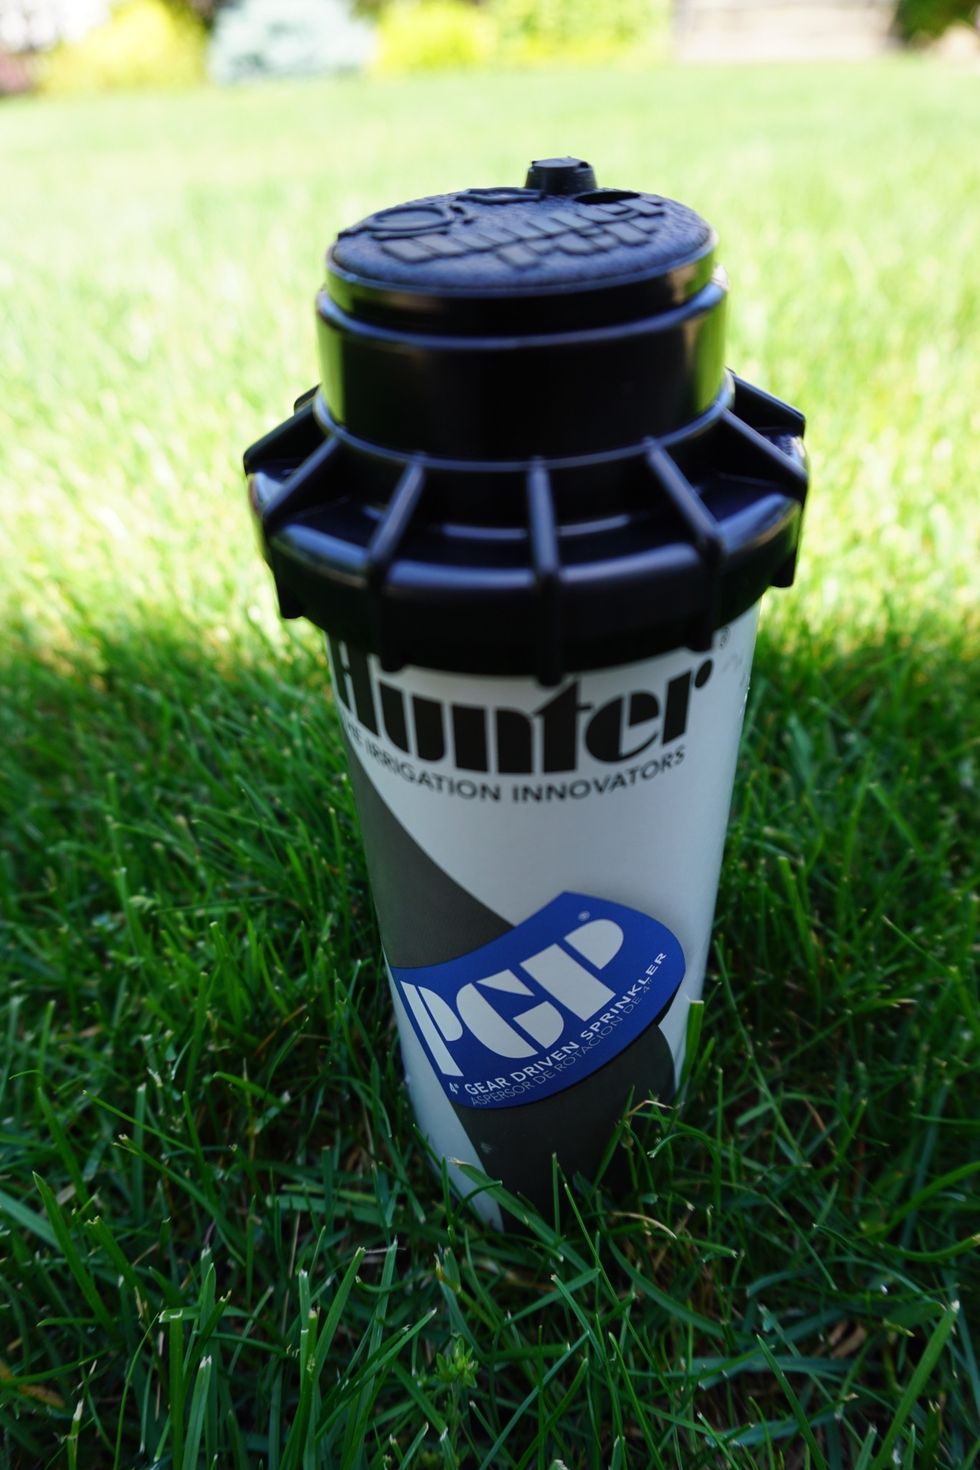
I'm replacing a rotor meant for covering large areas of lawn (Hunter PGP). Generally speaking, replacing other types of heads follow a similar format.
First, what size pipe you are working with? Most homes deal with 1/2 inch fittings or 3/4 inch fittings. In this case, I knew mine was 3/4 before digging. You may need to dig yours up first.
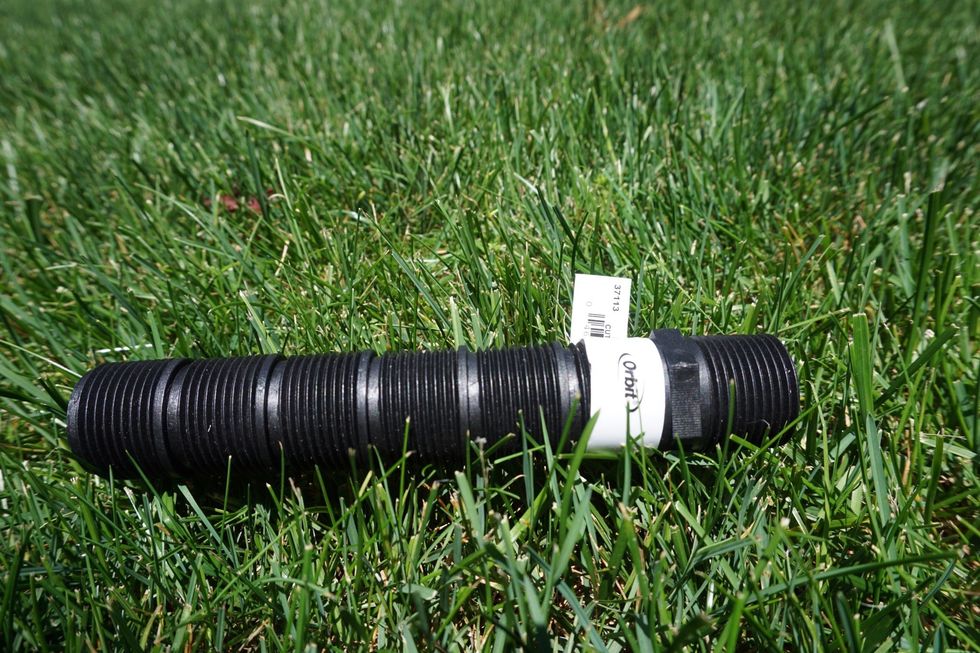
Digging the head up first makes the most sense to figure out all the parts you need. My lawn has grown thick since this head was installed, so I need to raise it up using this variable "nipple."
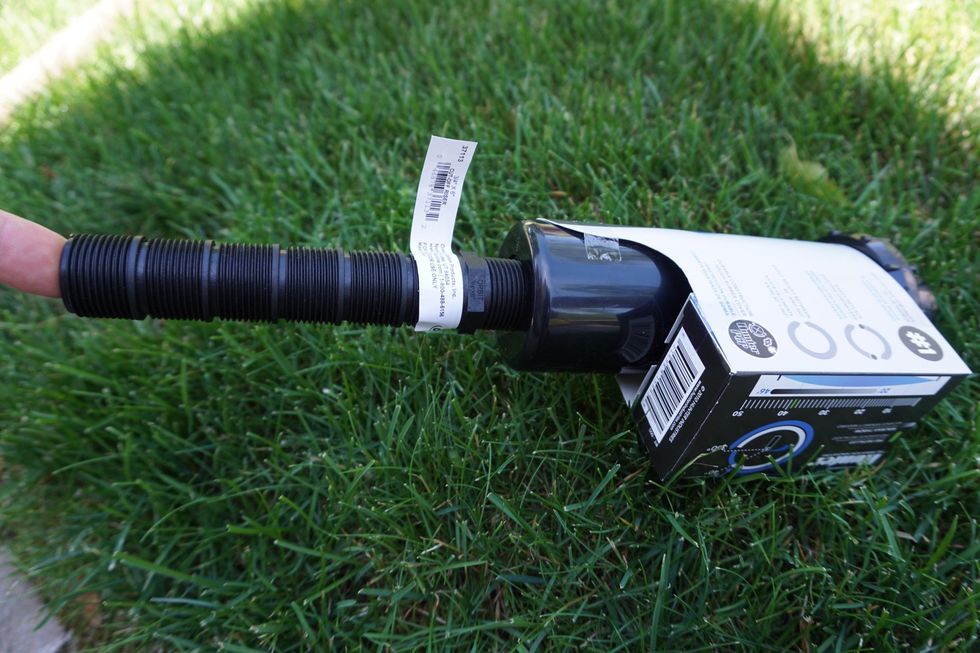
It attaches to the bottom of the head, and I can adjust the height by cutting along one of the slots.
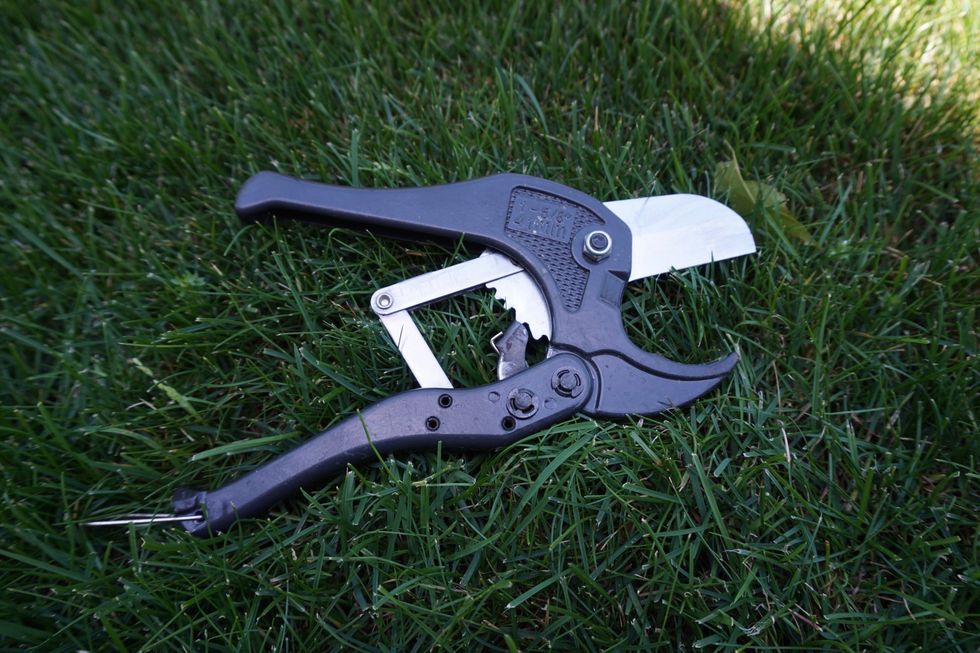
Cutting is made easy with a PVC pipe cutter. Worth the 12 bucks. Makes clean, straight, fast cuts, no burrs to gum up your sprinklers.

As you cut slightly rotate the pipe to let the blade slice in to the plastic - just like you would drag a knife across steak. Once the blade begins to sink, just ratchet it down until you are through.
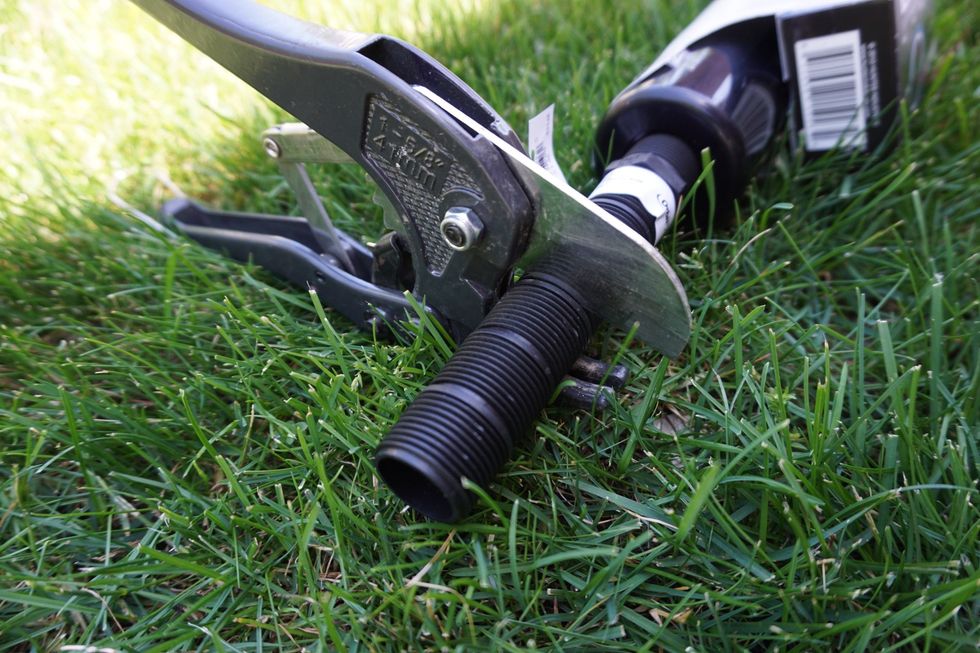
Note I am cutting in between the threads in the vacant slots.
Work the shovel around the head until you complete a full circle. Remember, your pipes are down there so be careful not to stab them with your shovel. The pipes here are deep, yours may be shallow.

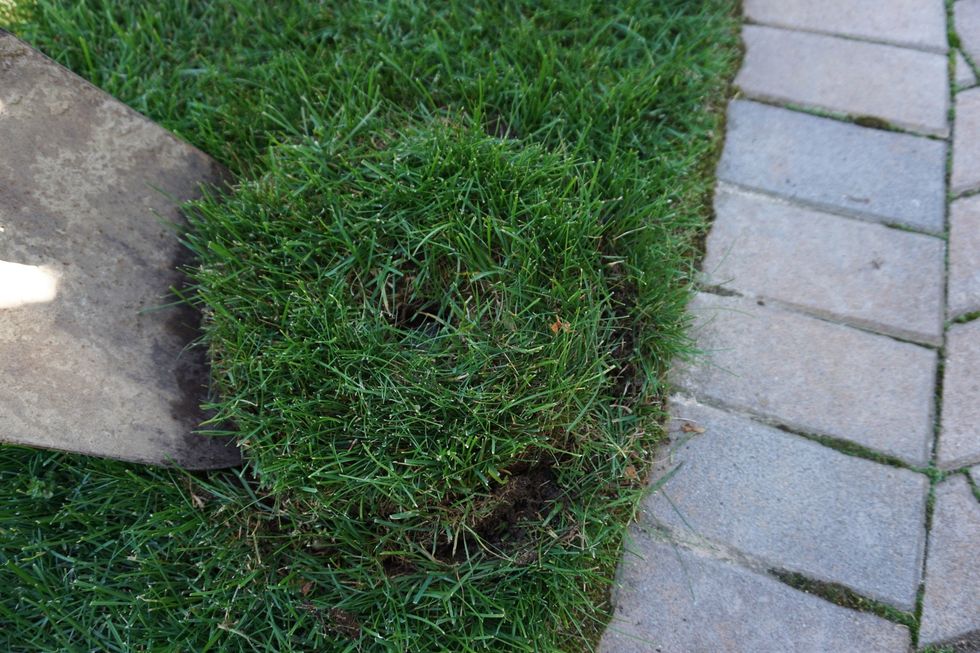
Use the shovel as a lever to pop the grass up. Once loose, you can grab it like you would someone's hair and pull it up out of the hole.

Do yourself a favor and pile the remaining dirt on a garbage bag. It's clean and easy to pour it back in the hole later. No broom required!
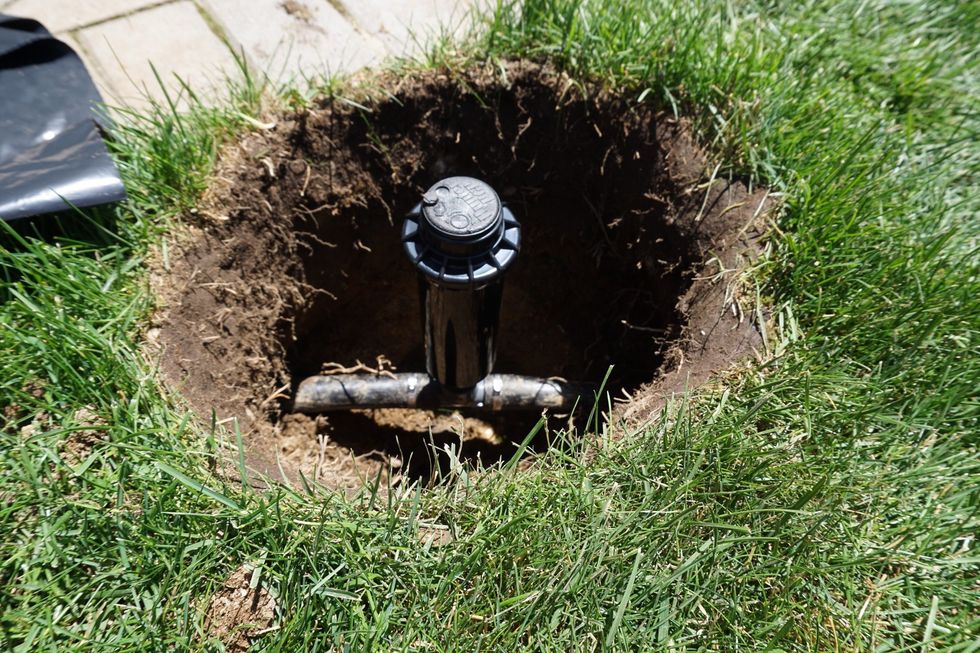
Hard to tell, but this is about 10 inches and still no pipes yet! Keep digging.
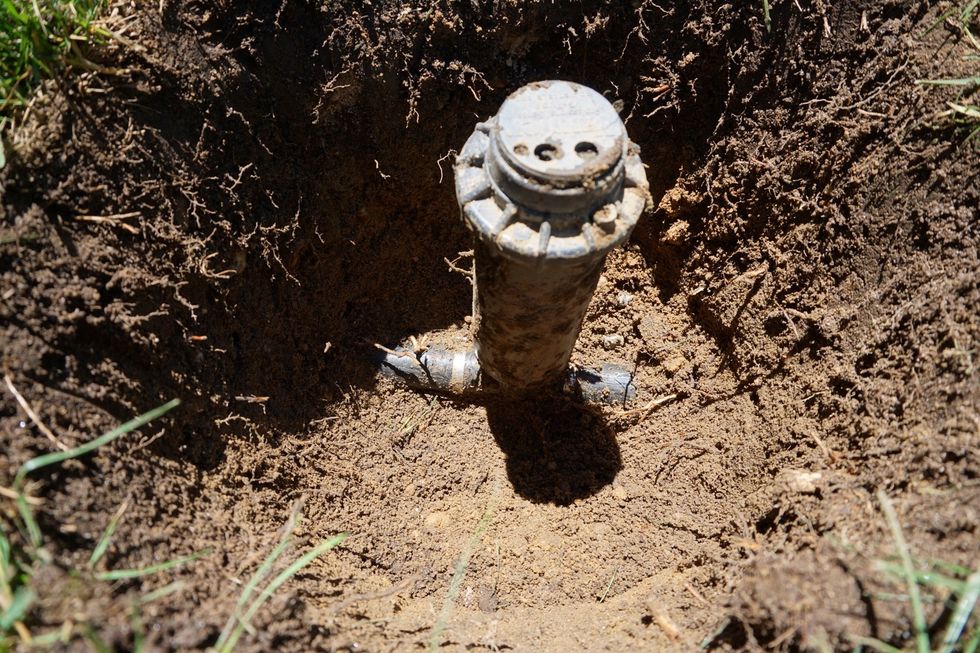
Eureka! Pipes. Mine are 1 inch, but yours may be 3/4 or 1/2 inch. If you dig first, this is important - run this zone to check for other leaks. The fitting my head was connected to was cracked!
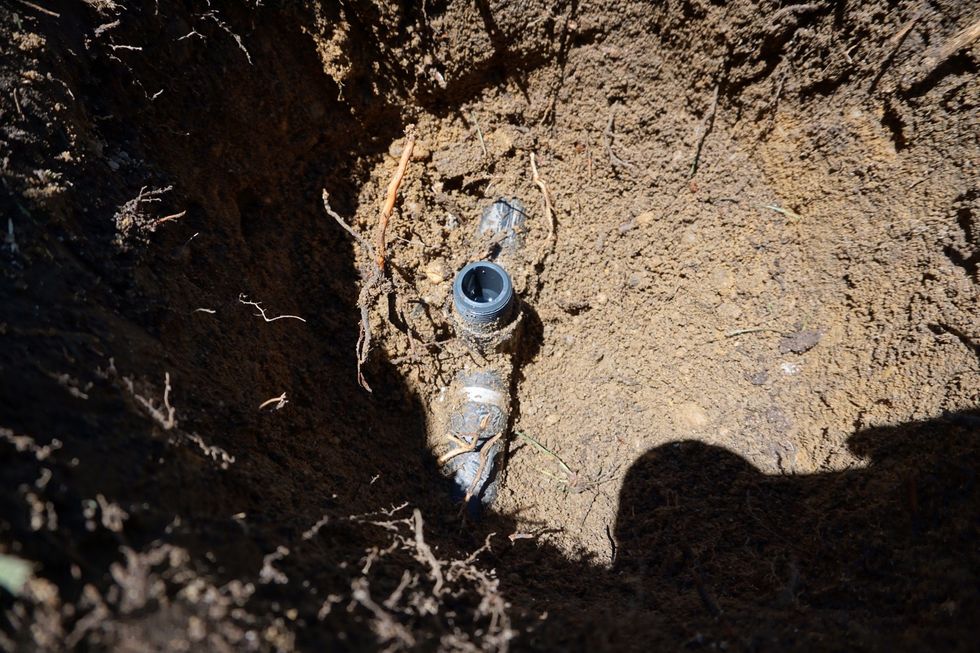
That gray fitting directly connected to the head. It was cracked and it needed to be replaced. I wouldn't know this until I dug the hole, tested the zone and checked it. Let's pretend it's OK.
Be very careful not to let dirt get in to the fitting. It could block the heads from getting enough water. You can take the heads apart and flush the lines, so it's not the end of the world.

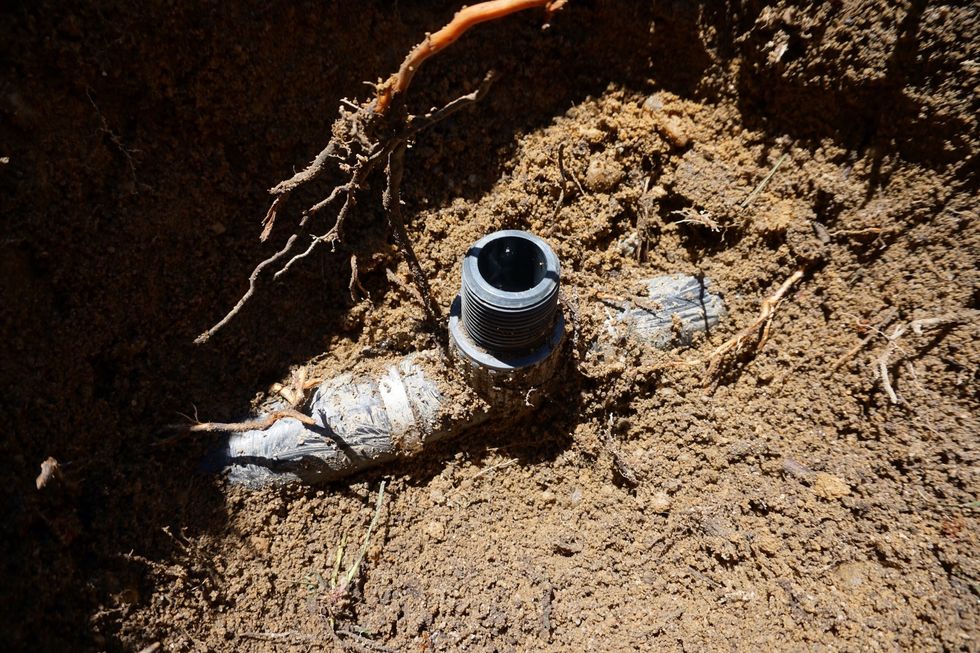
Just in case you wanted to keep the male fitting, here is how to adjust the height of the head, if needed. That white fitting is a PVC coupling, and the black part is that adj. nipple from earlier.
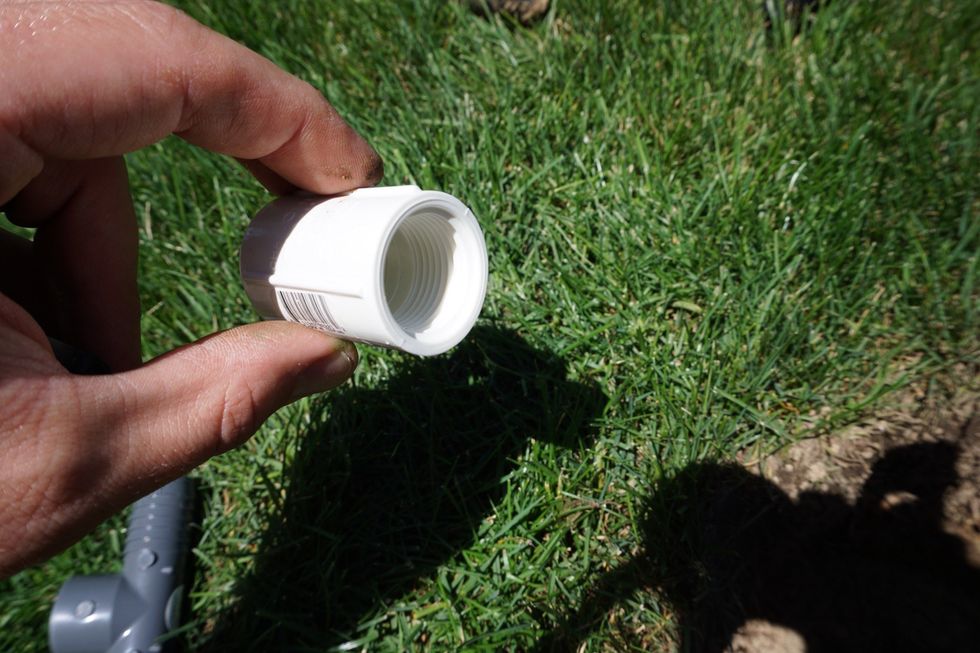
Here is the PVC coupling. Note the threads. In the store, there are also ones that are smooth - make sure you get the right one or you will be making another trip! Also double check the diameter!
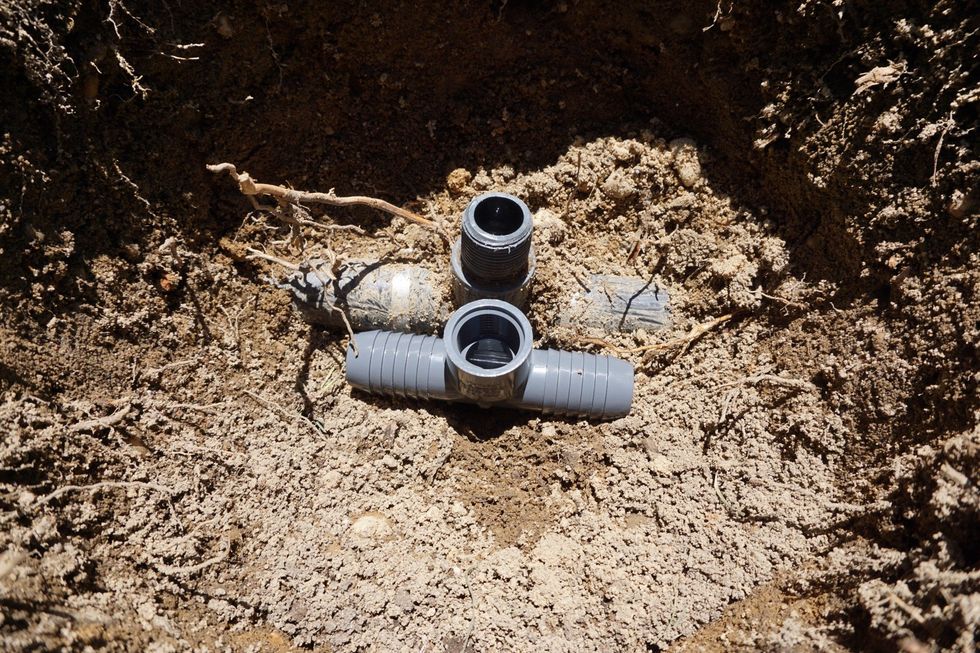
When unscrewing the head, yours could have looked like this other fitting. Top one is male, lower one is female. Since mine is cracked, I need to replace it. I will be changing it to the female.

These clamps keep the pipes attached to the barbed part of the fitting. One per joint is sufficient. The yellow handled tool is a crimper. It crimps the stainless steel bands for a tight seal.
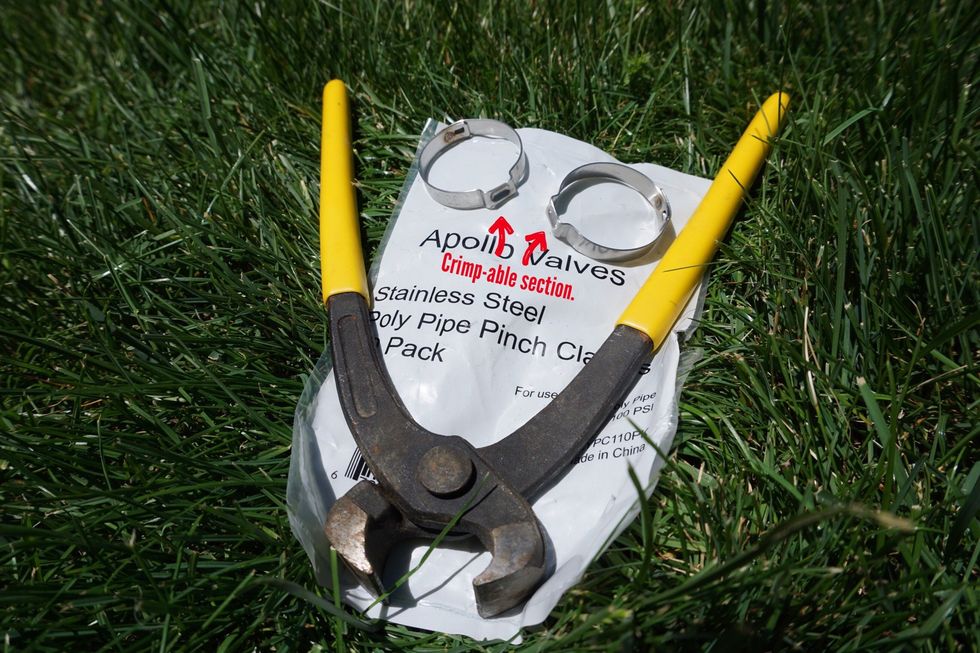
The tool is cheap, around 7-10 bucks. You can also use a tile nipper or screw nipper if you have either. They look the same.

To get this fitting out you will need to expand the hole along the pipes to give yourself and the pipes some wiggle room. Remove/loosen straps now as described.
Next, try to wiggle the fitting out. THIS IS HARD. A better way is trying to cut the fitting in half using the pipe cutting tool shown earlier, or a sawzall with a metal blade (fine teeth.) ---->
Pull the 2 pieces of the fitting out of the pipes using your big boy strength. Don't worry, you'll be dirty by now. Cursing/yelling helps. Twisting or turning the pieces out works best.---->
IMPORTANT: remember to slide the steel crimp straps on to the pipes, one for each side BEFORE putting in new fitting. If you forget this, you may cry uncontrollably. Now push in new fitting.
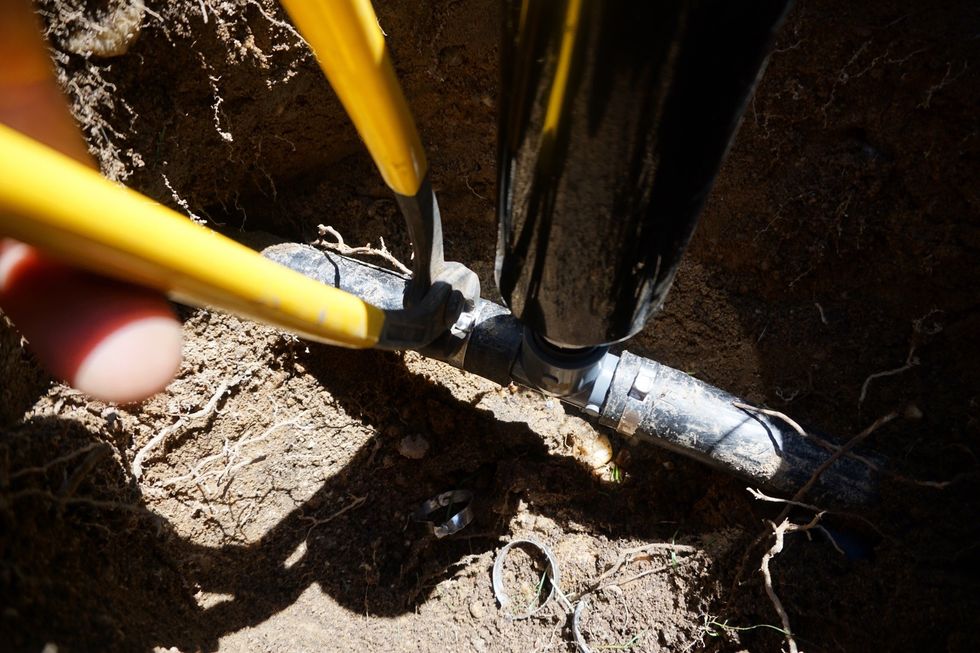
Slide the steel clamp rings in place as seen and use the tool to clamp the rings tight.
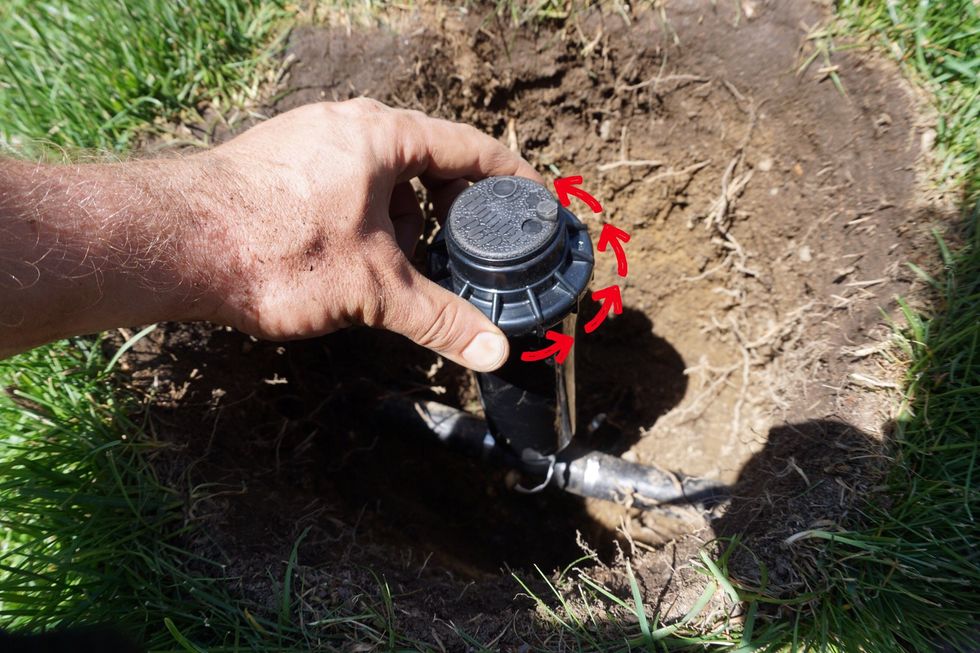
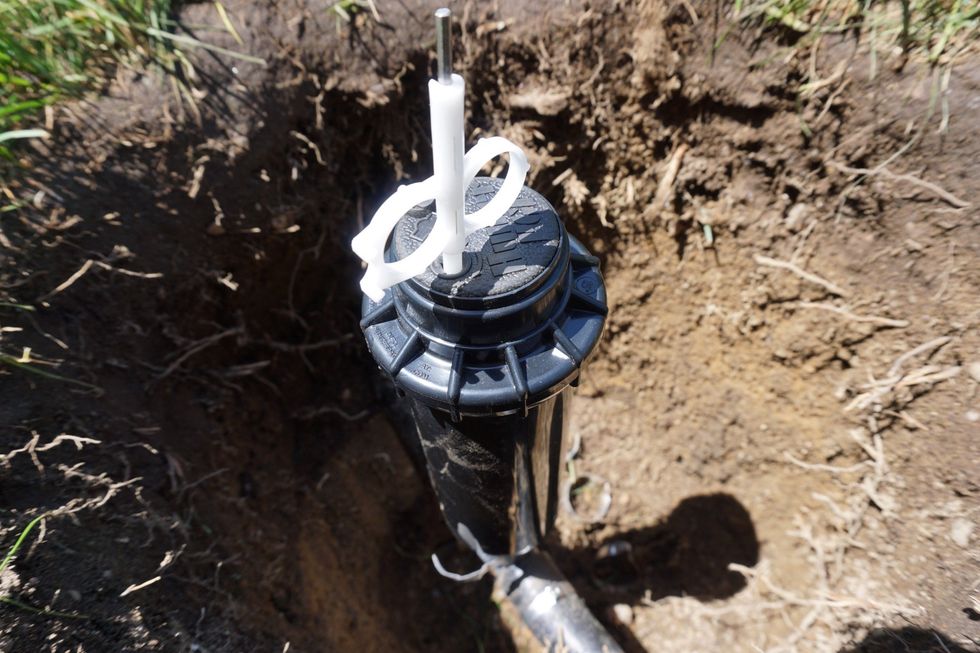
As mentioned earlier, the grass/soil grew above the previous head so I need to raise it. Here is the view of how low it is.
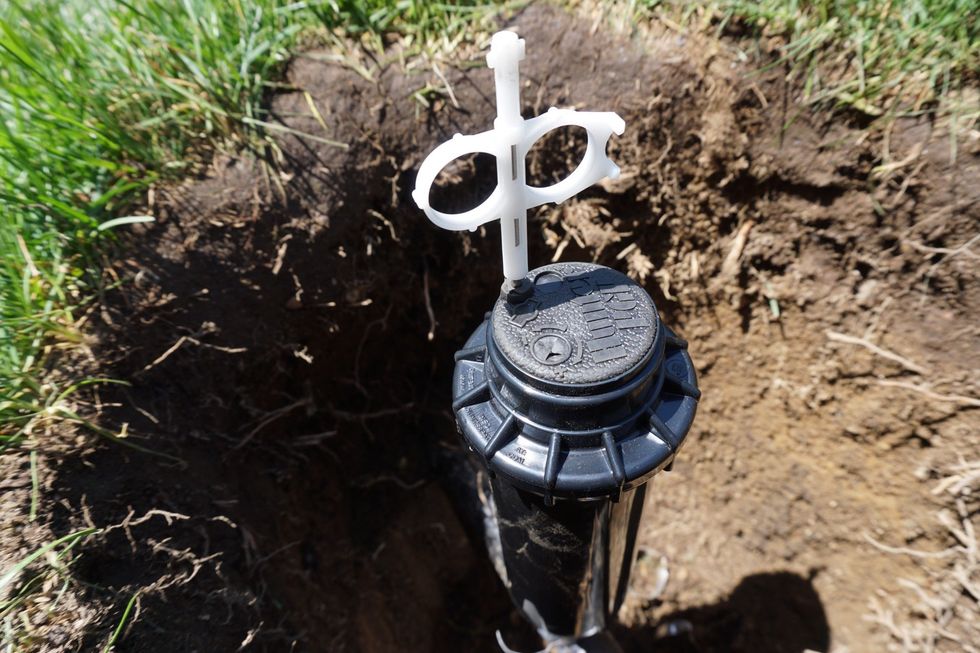
New rotor adjusted for height using the cut-able "nipple." Make sure the rotor is plumb with the terrain.

Turn the top ring shown clockwise until it clicks, that is the furthest to the "right" it will go. This is how you determine where the sprinkler head will stop. Orbit/Hunter brands work this way.
If you got dirt in the fitting, unscrew this ring and pull out guts to flush out lines. You may also want to do this to all heads down stream of your work on that zone (Turn on zone for 5 seconds.)
The little black arrow denotes the water stream. It's time to align that arrow to aim to the furthest right (clockwise) you need it to go and stop. We will also do this by unscrewing the guts.
This is what it looks like after unscrewing. The gear teeth will help you set the precise angle you want the arrow and water stream to stop at when going clockwise sweeping to your right.
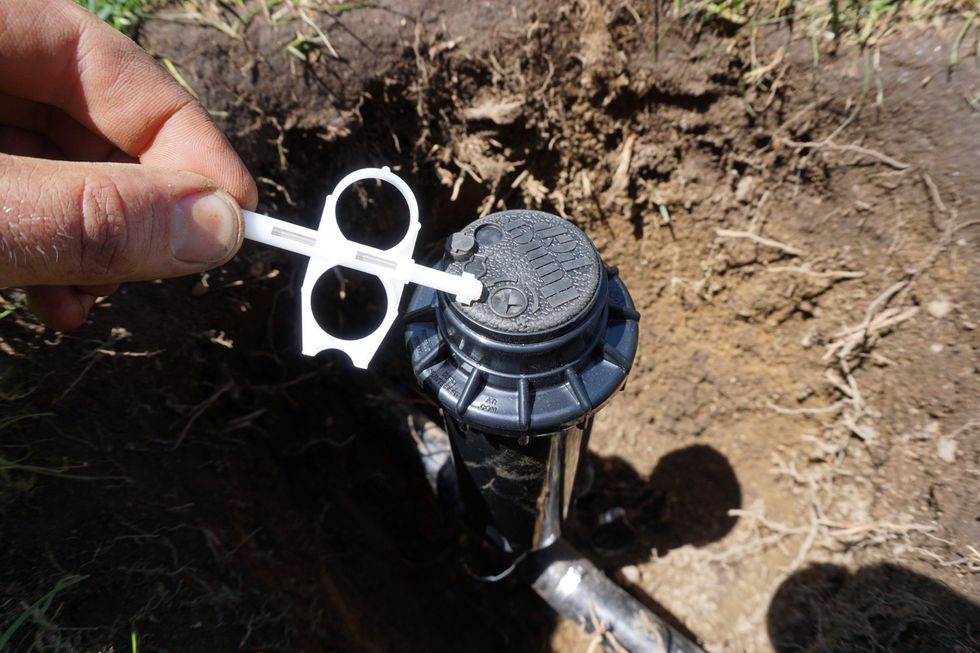
To adjust where it stops as it sweeps to your left, or counter clockwise, you will use this "key" that comes with the rotor. You will stick it into the covered hole as shown on the next page.
You will turn this key clockwise to increase the sweep on the left, or counter clockwise to decrease the sweep to the left. Think of it this way - you are setting the stop point off to your left.
Flip the key over for the arc/throw adjustment side. You stick it in the arrow and turning clockwise shortens/widens the spray, while counterclockwise increases the distance and narrows the spray.

Before dumping in all the dirt, take some with your hands and pack it as good as you can, or else it all won't fit back in the hole! This also prevents the head from moving and shifting over time.

See, the plastic bag is a great tip! Just pick up the corners and dump it in! Adjust the dirt to accommodate the shape of the grass toupee you made earlier. Drop that on top - DONE. Easy peasy.
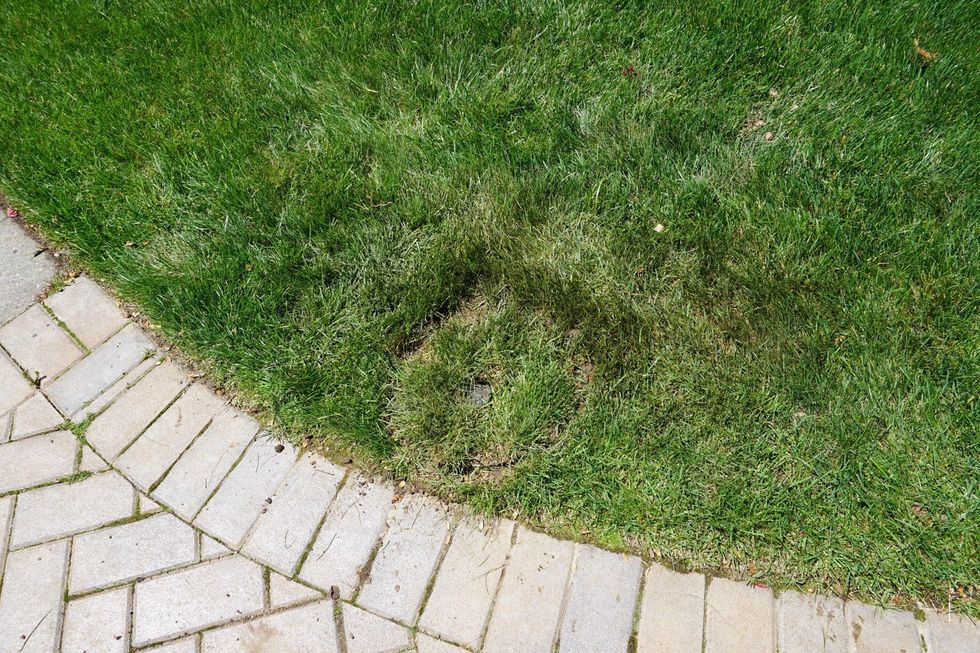
And there you have it. Perhaps it is worth having lawn guys do it for you? You won't know until you try! Congrats on tackling this project. Hope this helps!