The Conversation (0)
Sign Up
With the scanner connected and turned on, right-click on the ScanSnap icon in the Taskbar of Windows. (It is a small blue icon with the letter S). Select "Check consumable supplies" from the menu.
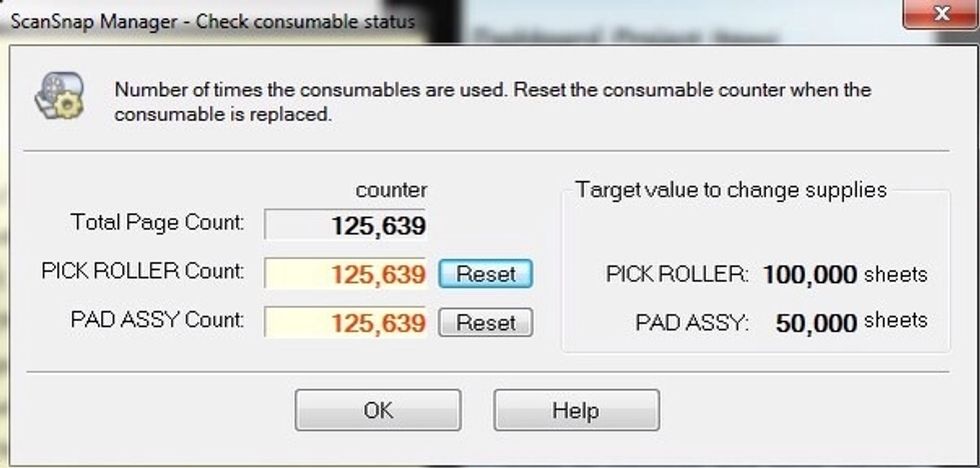
Check the counters to see if the consumable parts are close to or over the recommended limits. If that is the case then replacing these key parts will most likely restore proper paper loading.

Order a ScanAid rebuild kit for ScanSnap S1500 (Available from Amazon). It comes with the parts and cleaning materials necessary to finish the job.
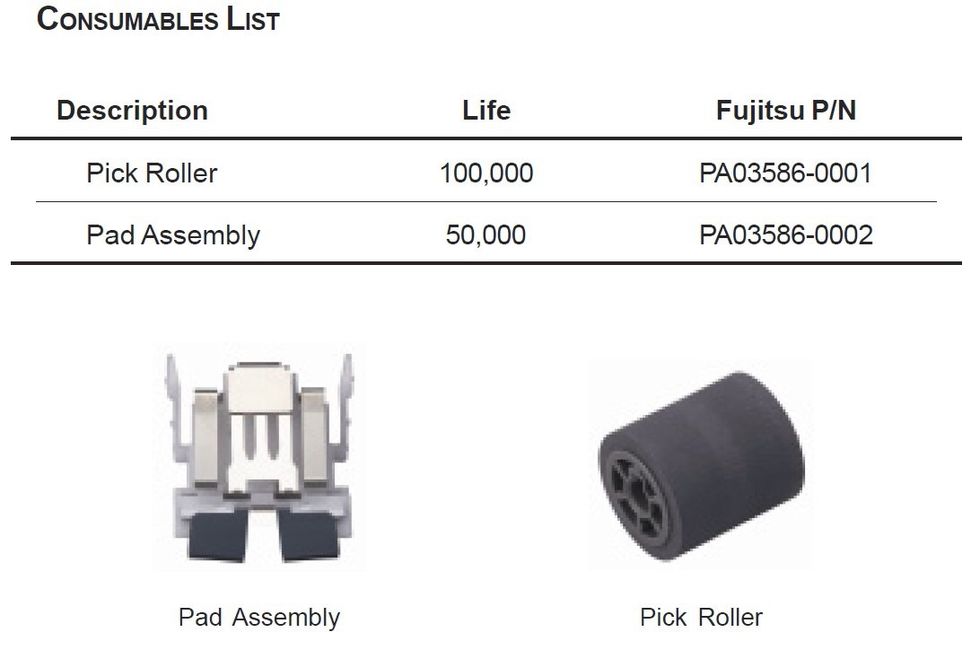
Once you receive the kit, make sure the following parts are in the kit before proceeding.
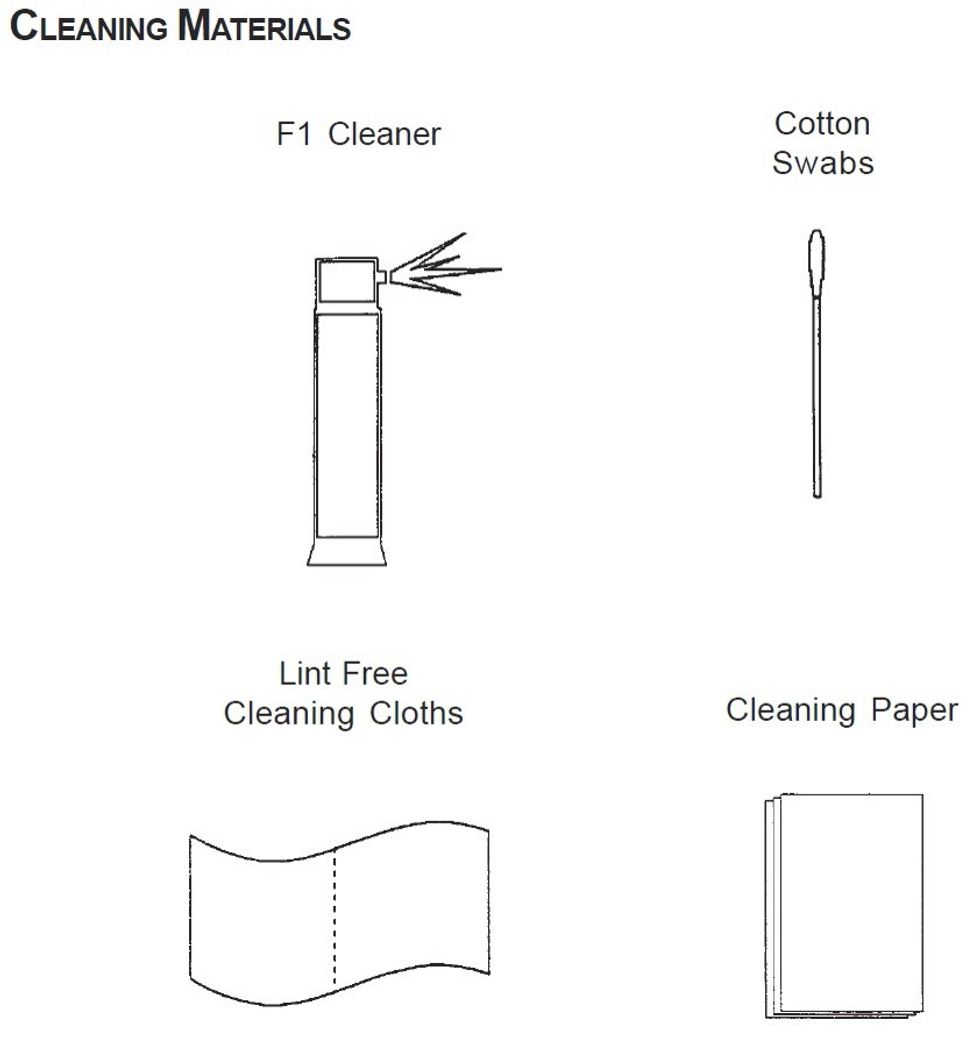
The kit should also come with these cleaning supplies which are crucial for the rebuild and maintaining good operation going forward.
Unplug the USB cable and power from the scanner before doing any of the following steps. This is critical for your safety and not to damage the device.
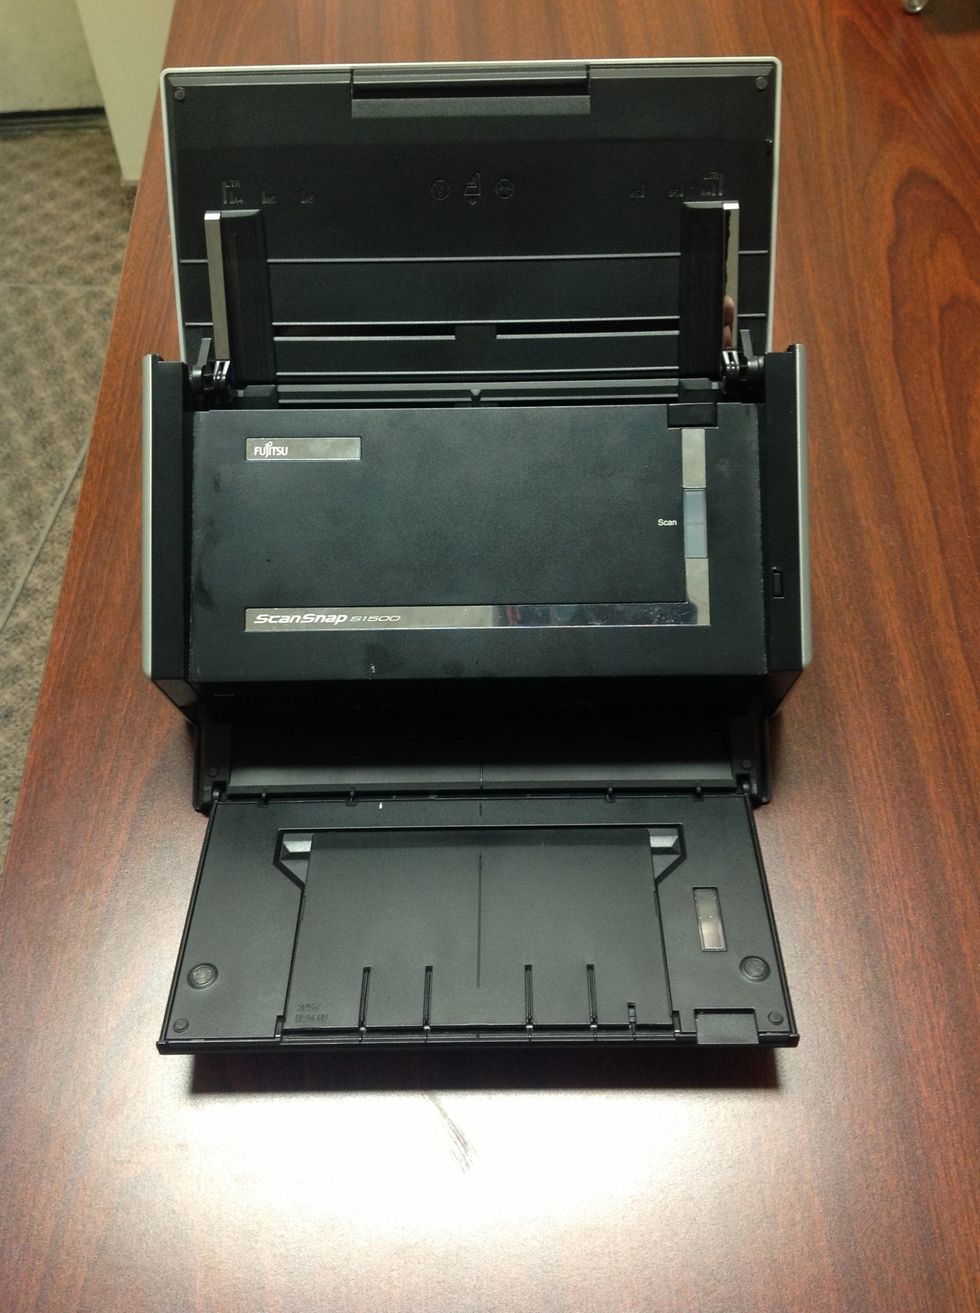
Before beginning the rebuild make sure you have a flat clean work surface large enough to accommodate the scanner and the materials. Good lighting is also essential.
General cleaning of the inside of the scanner is necessary during the rebuild. However, caution must be used and the cleaner should be sprayed on to the wipes and q-tips, not directly into the device.
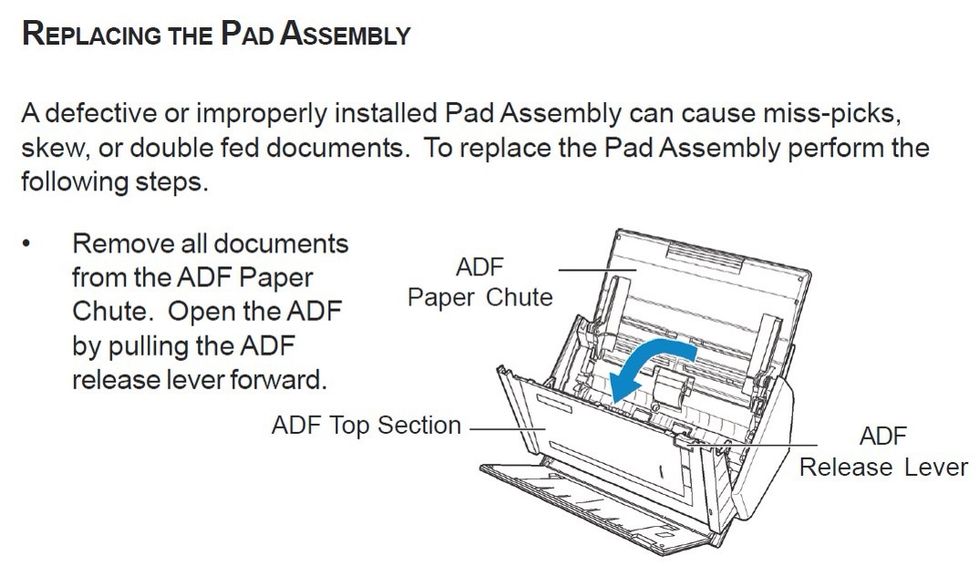
Start with replacing the pad assembly as shown in steps 7 thru 10. Note: the kit comes with two pad assemblies since they are replaced every 50,000 sheets. Save the 2nd pad assy for future use.
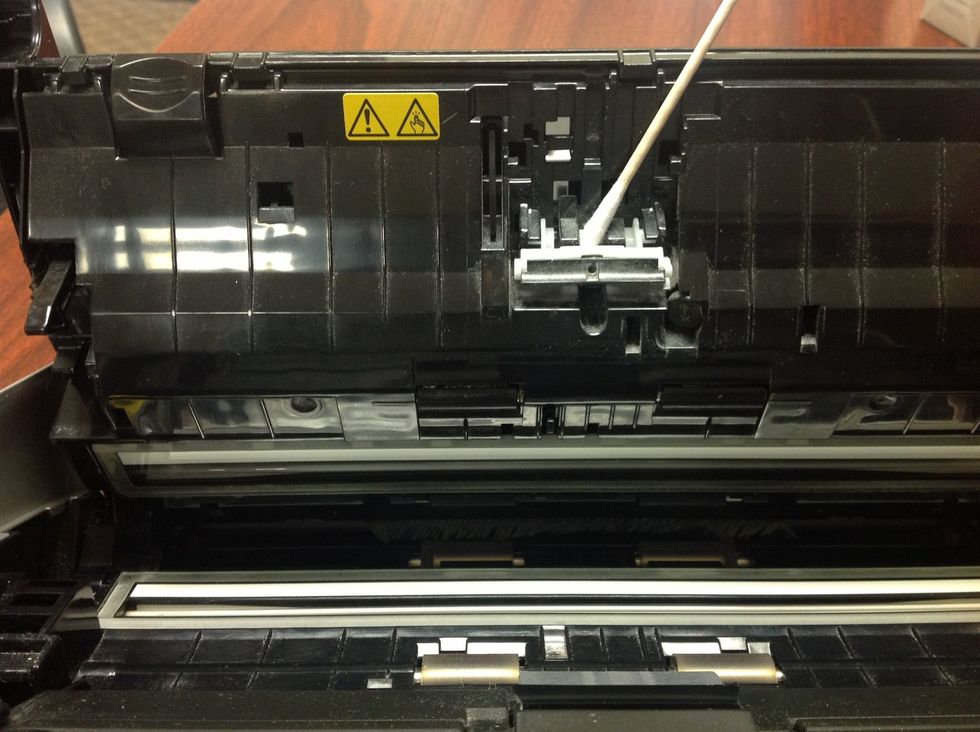
Make sure to thoroughly clean the area where the pad assembly was removed with the supplied cotton tipped applicators and the spray cleaner. The provided small wipes are also helpful.
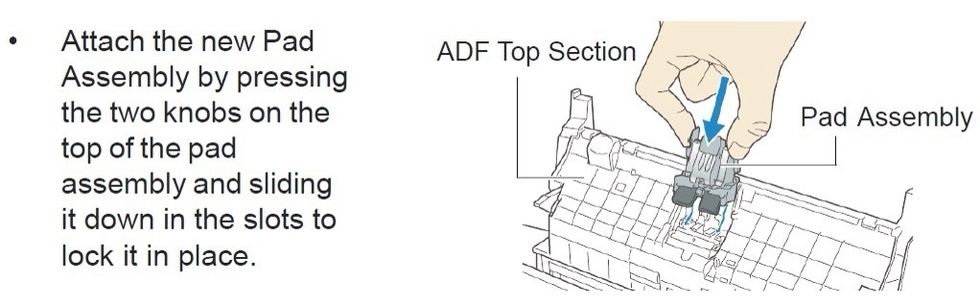
Install the new pad assembly as shown here.
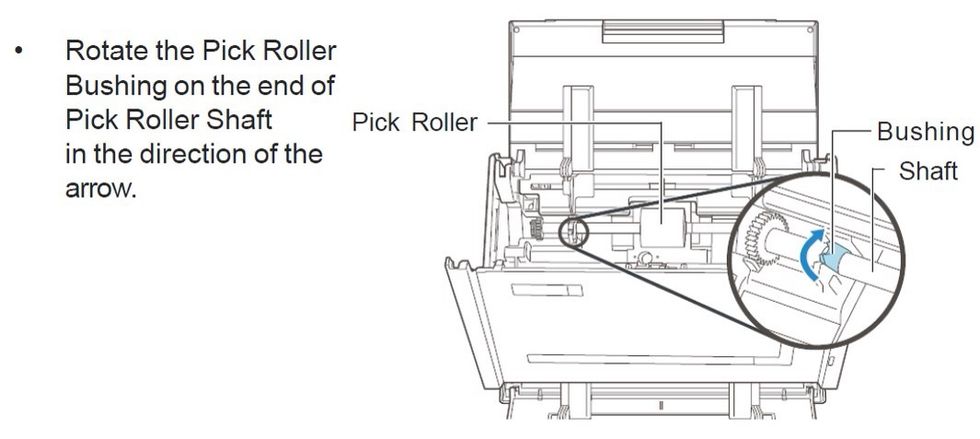
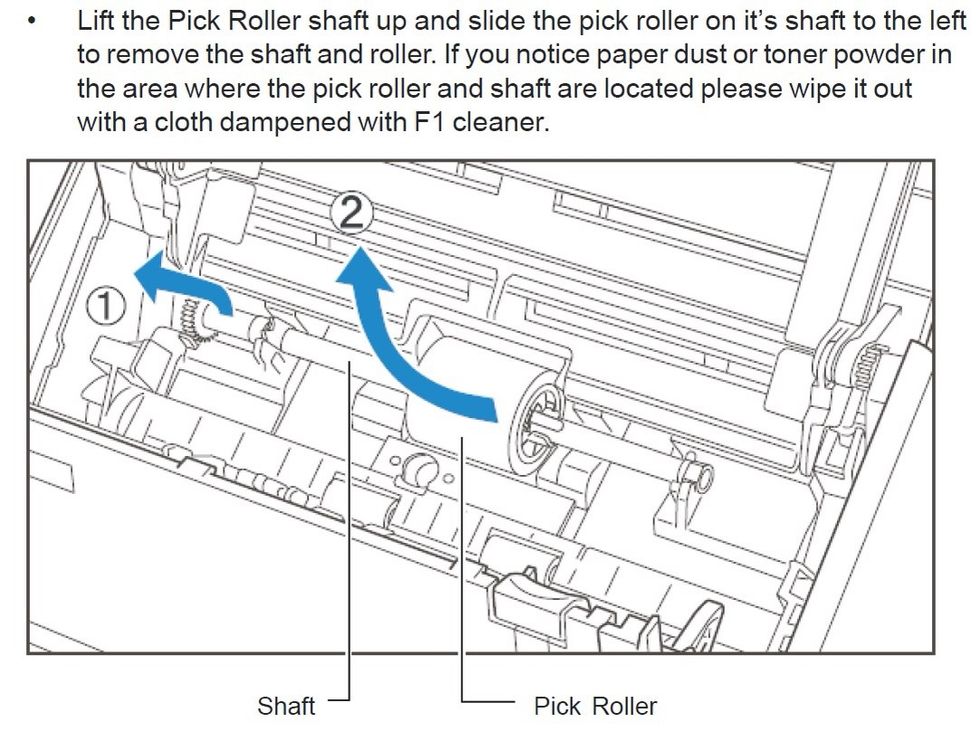
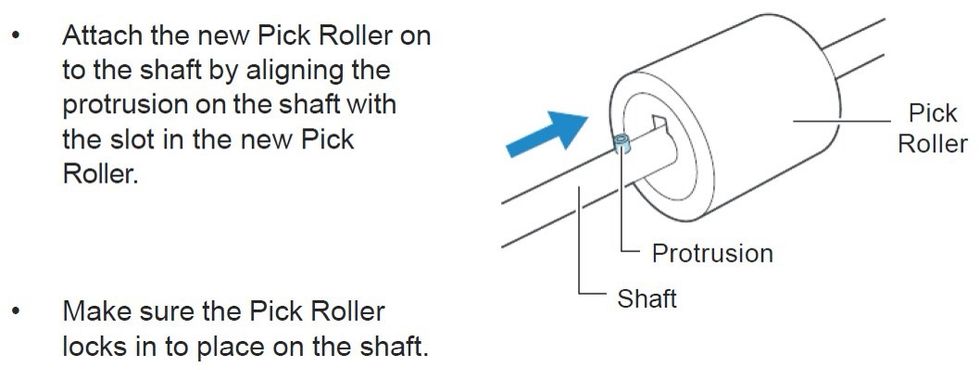
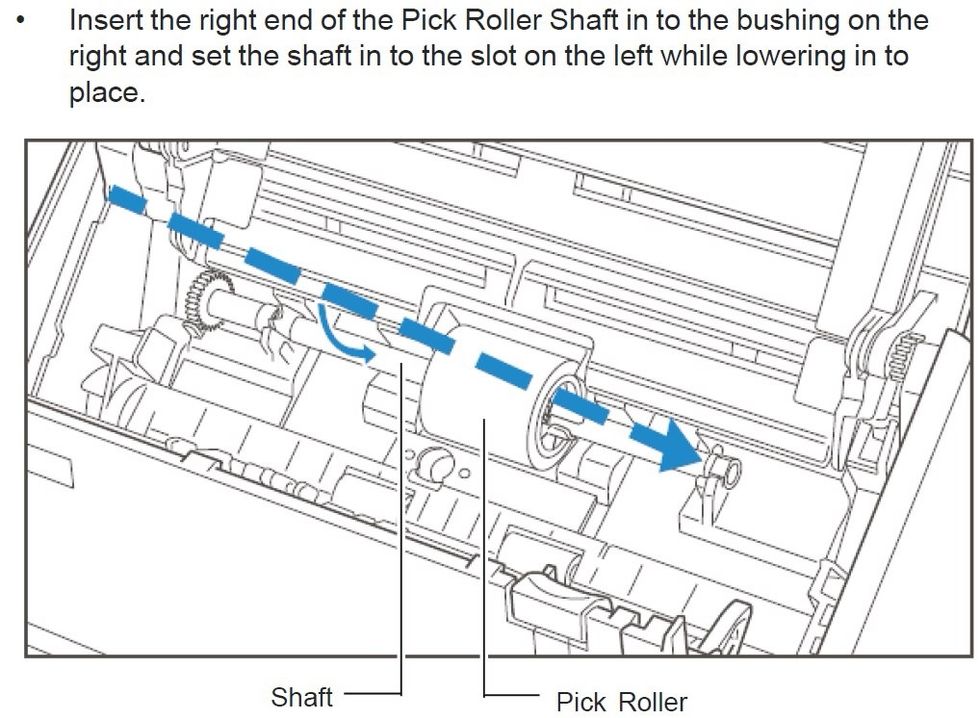
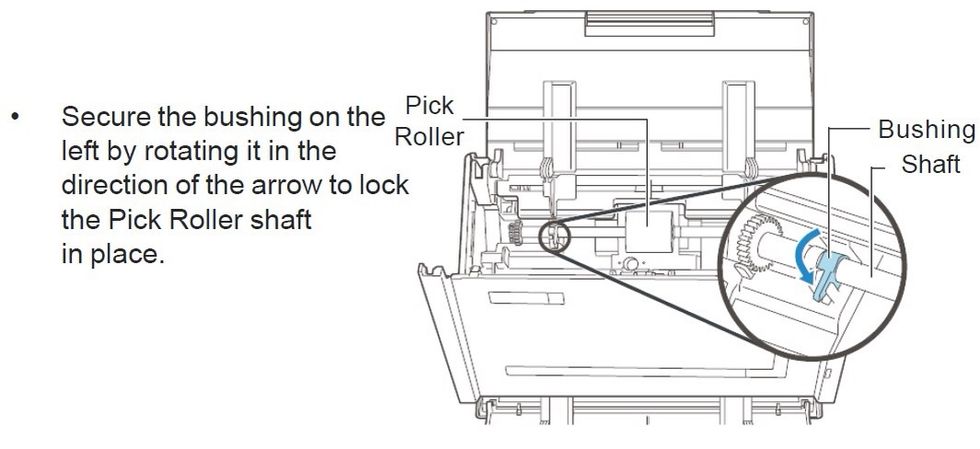
Next, replace the pick roller as shown in the next several steps. Follow the diagrams.
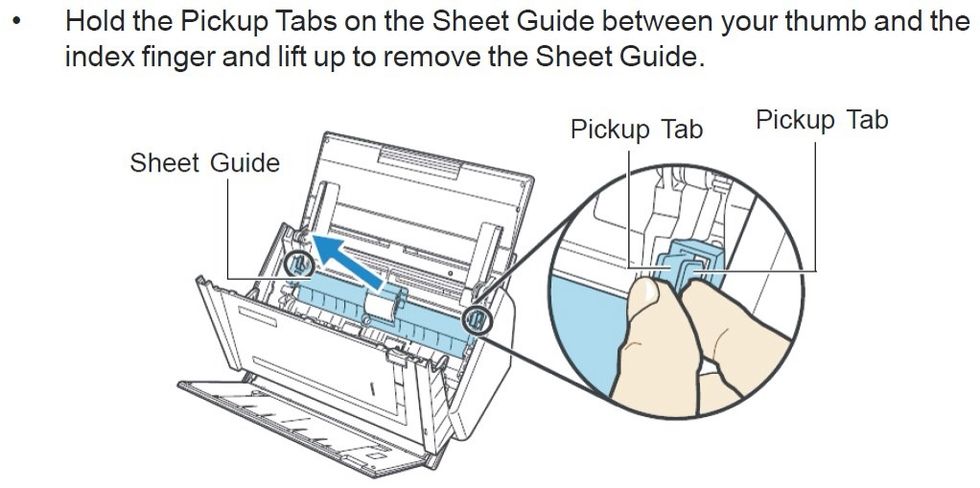
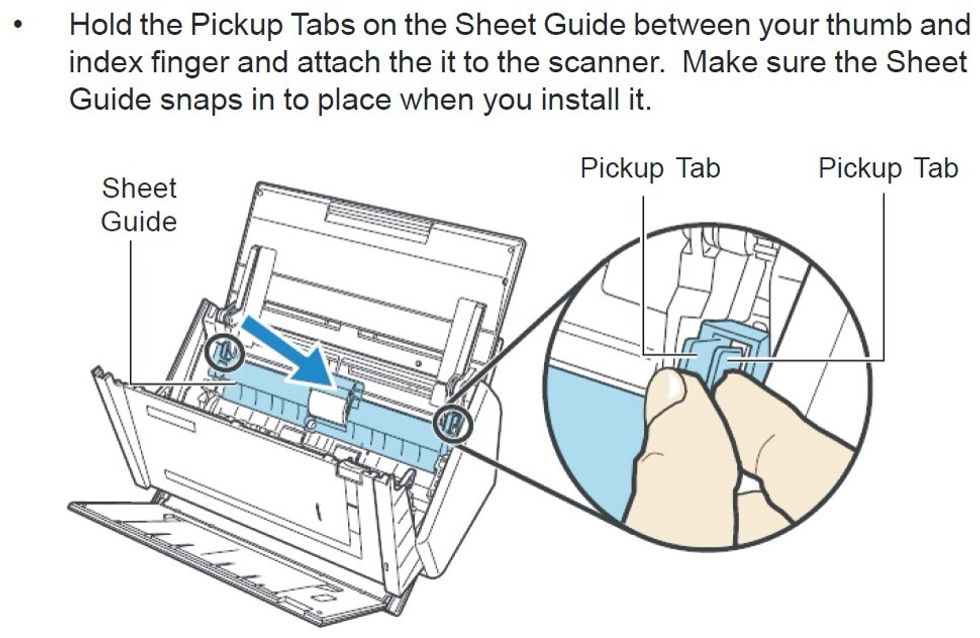
Make sure to wipe down the sheet guide thoroughly (after removal) with the supplied wipes and cleaner.
Wipe down the inside of the scanner very well to remove as much paper dust as possible. The supplied wipes, q-tips and cleaner will do a good job.
Make sure to clean the shaft with the supplied cleaner before placing new roller.

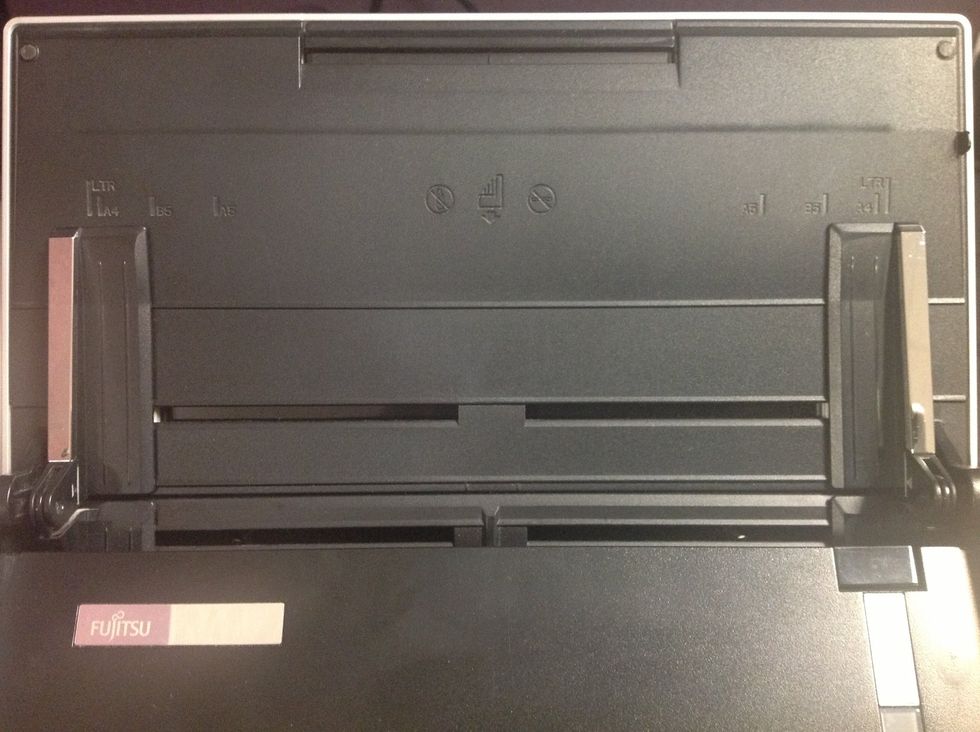
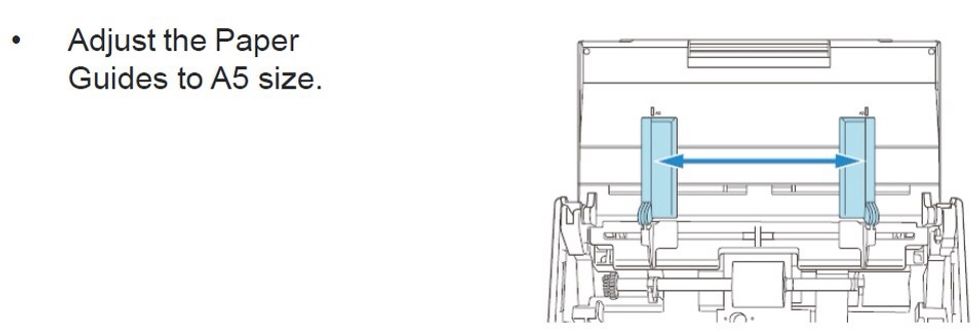
Reset the paper guides to LTR or whatever size documents you normally scan before proceeding.
Wipe down the outside of the scanner to remove any paper dust or particles using the supplied wipes and cleaner.
Reconnect the scanner to your computer and plug the power back in as well.
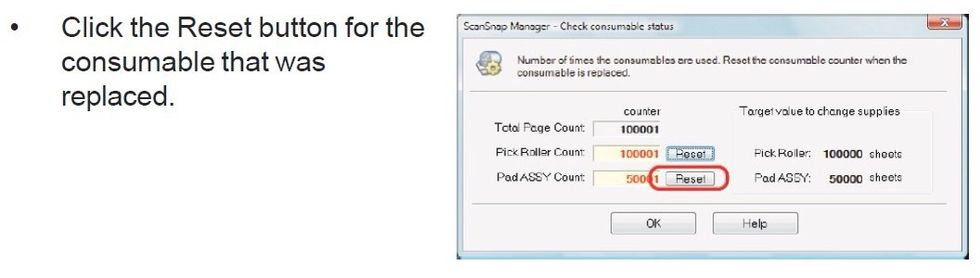
Reset the consumable counters by going back into the software as in step 1 and this time clicking the Reset button next to each part.
Perform a test scan to ensure that everything is working well. The scanner should once again pick paper without jamming or missing sheets.