The Conversation (0)
Sign Up
First of all you'll need to take the typewriter apart. Carefully remove all the screws/nuts/bolts and any other fasteners. Keep them safely to one side and in the order they were removed if needed.
Lay down some old newspaper & place the panels of the typewriter onto them. Using the sandpaper, bring back the paint work to a matte finish, removing all glossy paint so that it is chalky to touch.
Use masking tape to cover any badges/logos/stickers. Place two layers of tape over each of them to ensure no colour gets onto them. You can scalpel them into perfect shape, or use a knife. Be careful!

I wanted to turn my yellow typewriter in to a pastel pink one & used rust-oleum Candy Pink. I'd recommend larger cans of primer and clear coat than I used to give really good coverage & more coats.
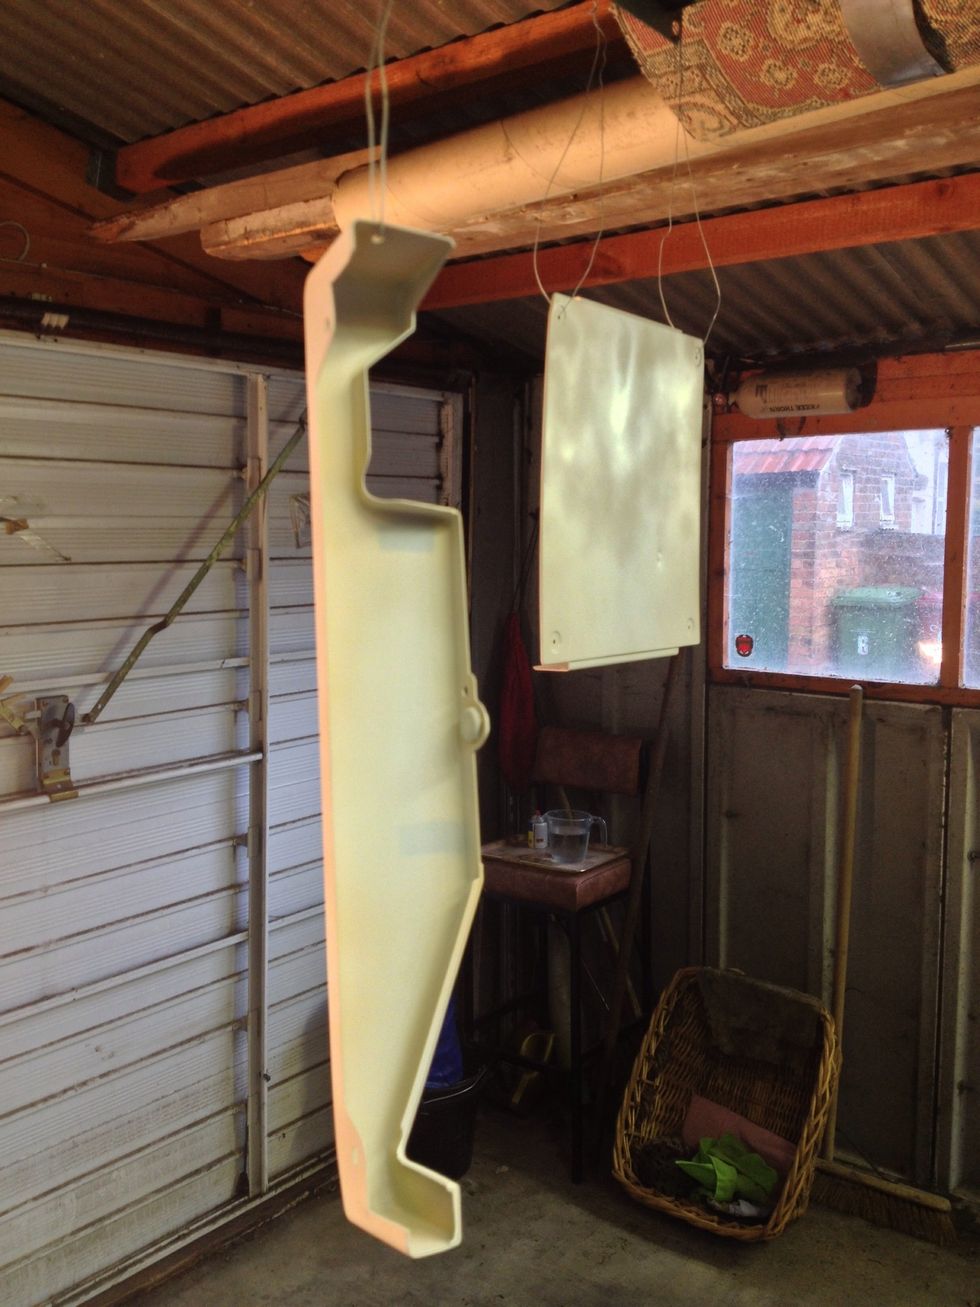
Using an old wire hanger or something you can bend, hang the panels up in a well ventilated area for spraying. I did mine in our garage, but cover or remove any cars for the duration!

This is my top panel hanging up after it's first coat of white primer. It's best to place the can in a jug of warm water for a little while first before spraying. Follow the instructions on the can.
After your first coat of primer, allow a minimum of 30 minutes in between the second coat, ideally 60 minutes. Repeat for a 3rd time if you need another coat to cover the old colour.
Once your panels are covered in primer and you're happy that there are no traces of the old colour, allow them a good hour to dry completely, 2 hours if you have the patience (or manufacturers guide).

Here are my top and bottom panels after two coats in the new colour. I could have given them a 3rd for extra colour, but it came out crisp and covered brilliantly with two anyway.
Once your new colour is applied and completely dry, you can begin applying your clear coat. Two or three coats should protect your new colour and prevent scratching.
Once you're happy that the panels are completely dry, you can remove the masking tape carefully to expose the logos and badges again.
Now to get excited! Begin reassembling the typewriter and all the screws. I bought some new rubber washers for the feet to keep it raised so as to stop the bottom scratching on the table.
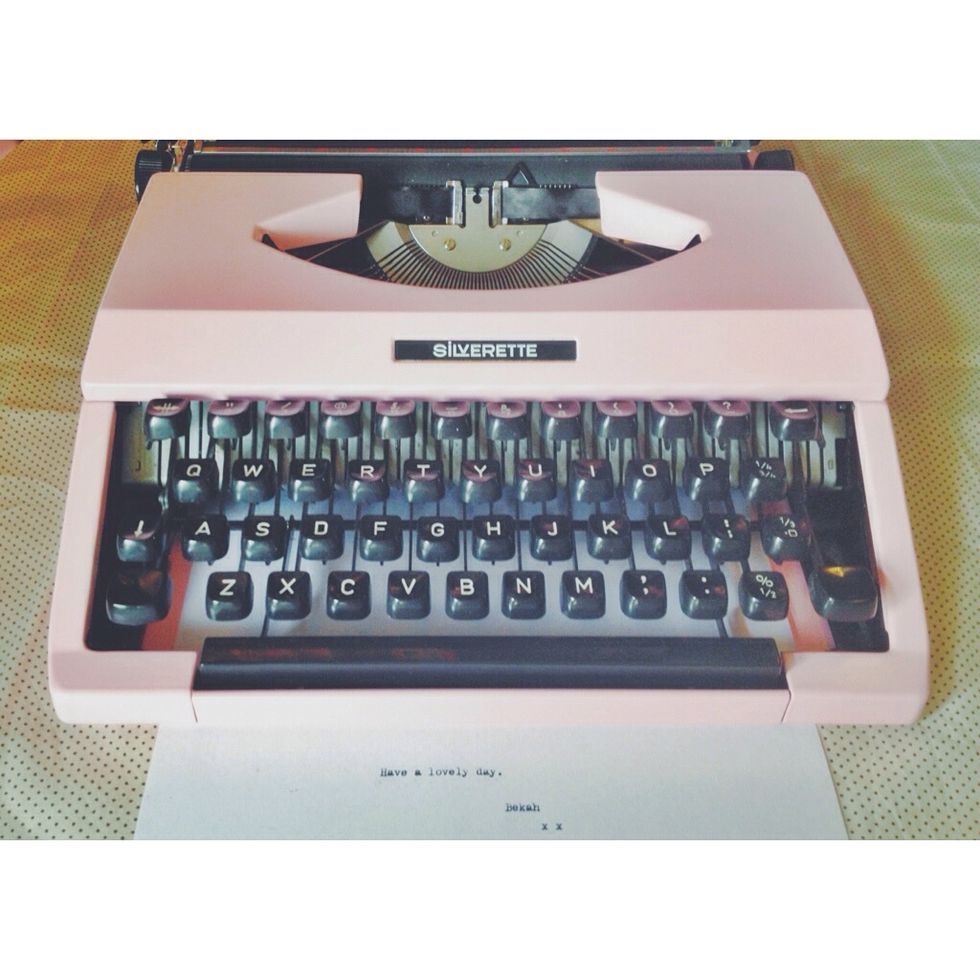
Ta-da! Here she is, fitted with a new ribbon and ready to go! I hope you have the same success and enjoy your revamped typewriter for years to come! :o)