How to operate an oxy-acetylene cutting torch
I am a Welder/Fabricator by trade. In this article, you will learn the basics of setting up, using and extinguishing an Oxy-Acetylene Cutting Torch.
1456
STEPS
TOOLS

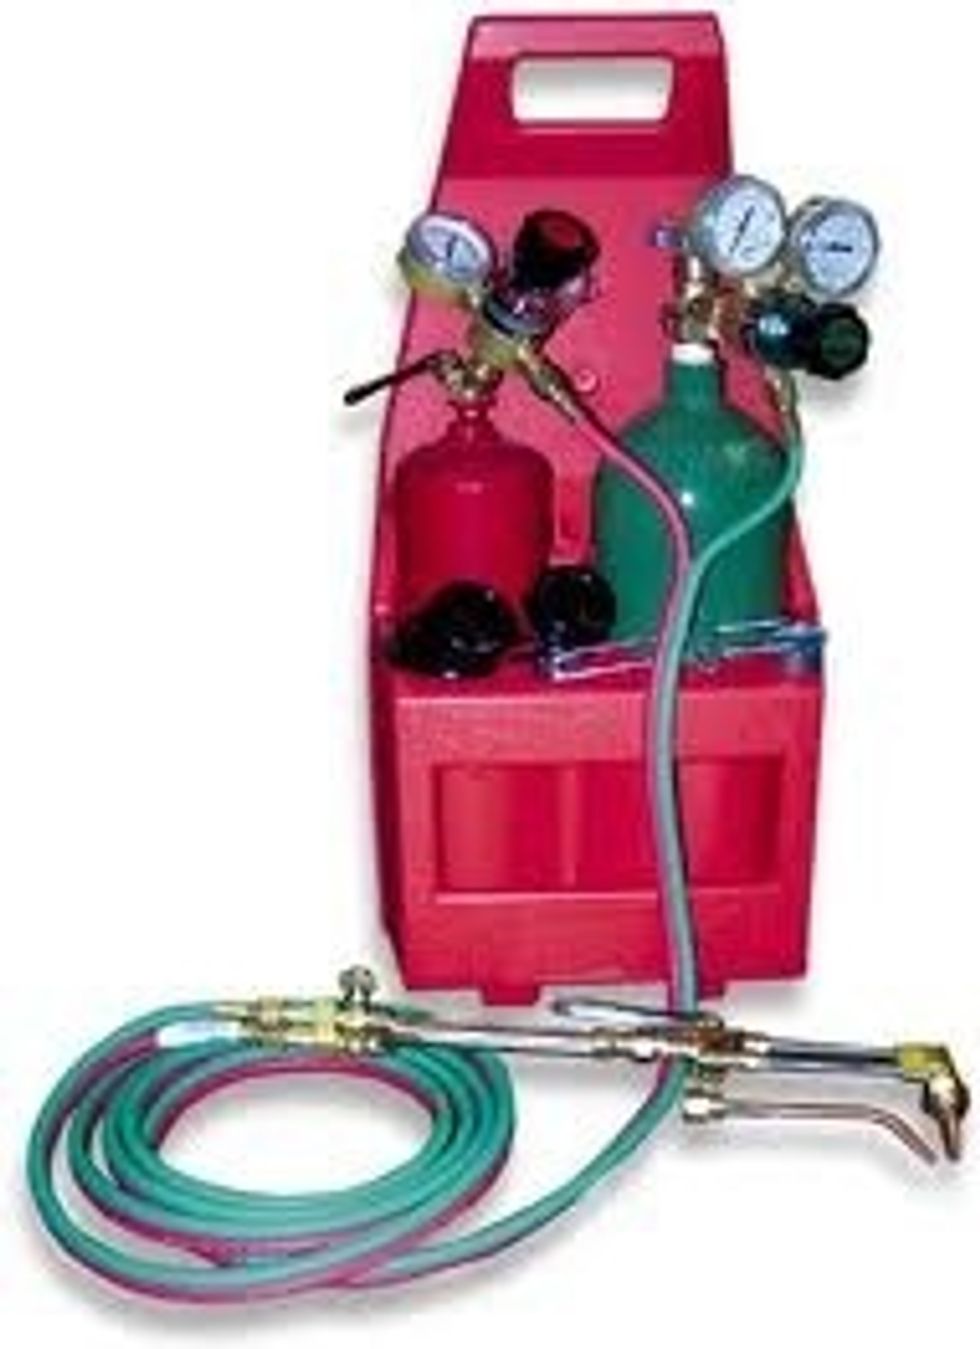
Portable Oxy-Acetylene Kit
Before starting you should inspect your Torch, Gas Hoses and Regulator Valves for any damage. *The RED HOSE=Acetylene, GREEN HOSE=Oxygen*
Next you should check the valves for any residual pressure. If there is or isn't, you should still purge your torch as an extra precaution.
Now open both cylinders valves (No specific order) but only open the Acetylene tank about a 1/2 turn, the Oxygen should be opened all the way.
After opening both Valves you must adjust the proper pressure for each tank. In order to do so, you must tighten the Regulator Adjusting-Screw. OXYGEN=15-30 PSI ACETYLENE=5-8 PSI *NO GREATER*
Now to properly set the torch. Assuming your using a "Dual-Guarded Torch" First, you must open the BOTTOM Oxygen knob all the way. Secondly, open the Acetylene knob about a 1/4 Turn.
Now before lighting the torch, make sure your hands and body are properly protected. Tilt the torch away from you pointing down, hold the striker at least 2" away from the tip and flick the striker.
Now that the torch is lit and assuming you followed all the last steps, the flame coming from the torch should be producing soot. Simply open the Acetylene knob more until you have a roaring flame.
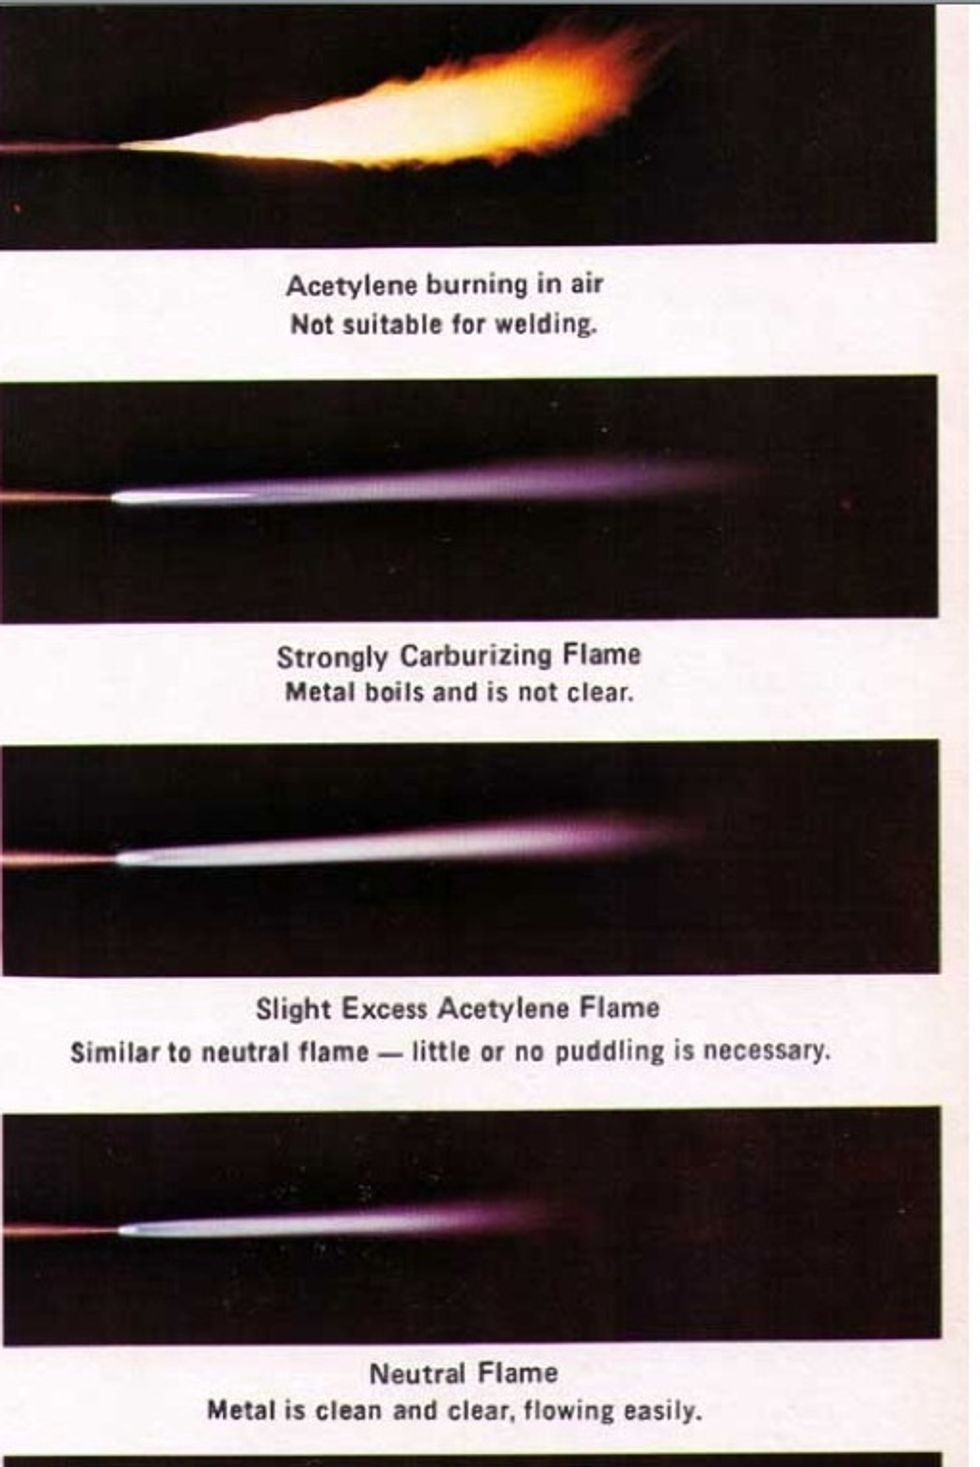
Now begin to open the TOP Oxygen knob until you achieve a "Neutral Flame". Press the "Oxygen Blast Trigger" while adjusting the knob to have a Better distinction of what flame you'll be working with.

Lastly, to shut down. First close the Acetylene knob all the way until the flame is extinguished.

Basic diagram that you can refer too.
- 1.0 Tinted Face Shield
- 1.0 Pair of Leather Gloves
- 1.0 Striker
- 1.0 PPE(Personal Protective Equipment)
- 1.0 Tip cleaner
- 1.0 Oxy-Fuel Kit