The Conversation (0)
Sign Up
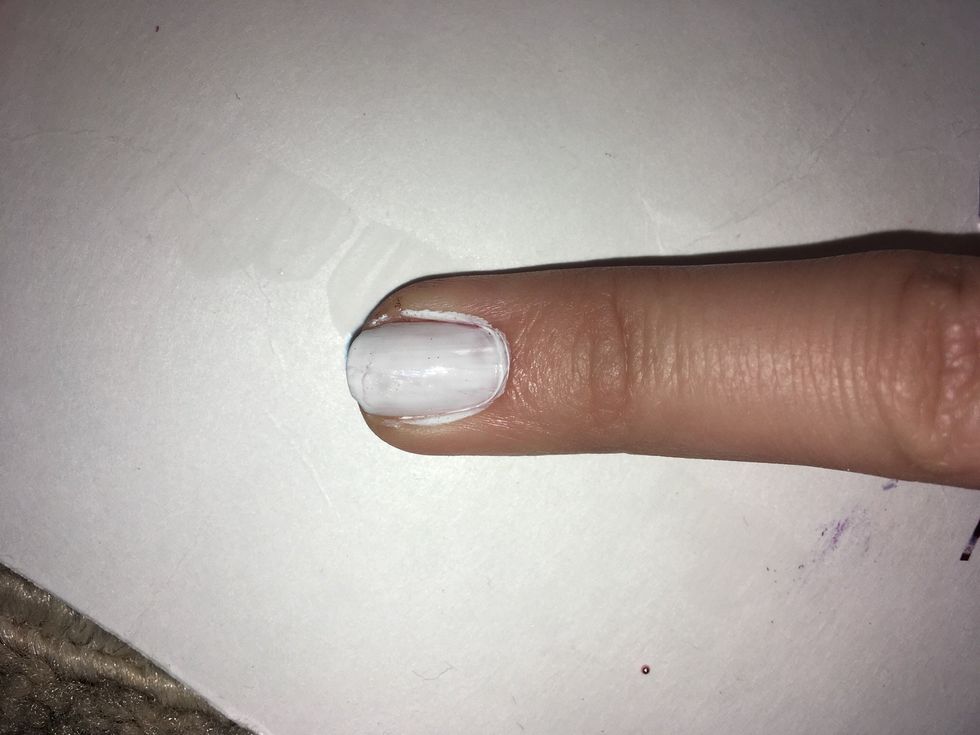
1. paint base coat of white on nails
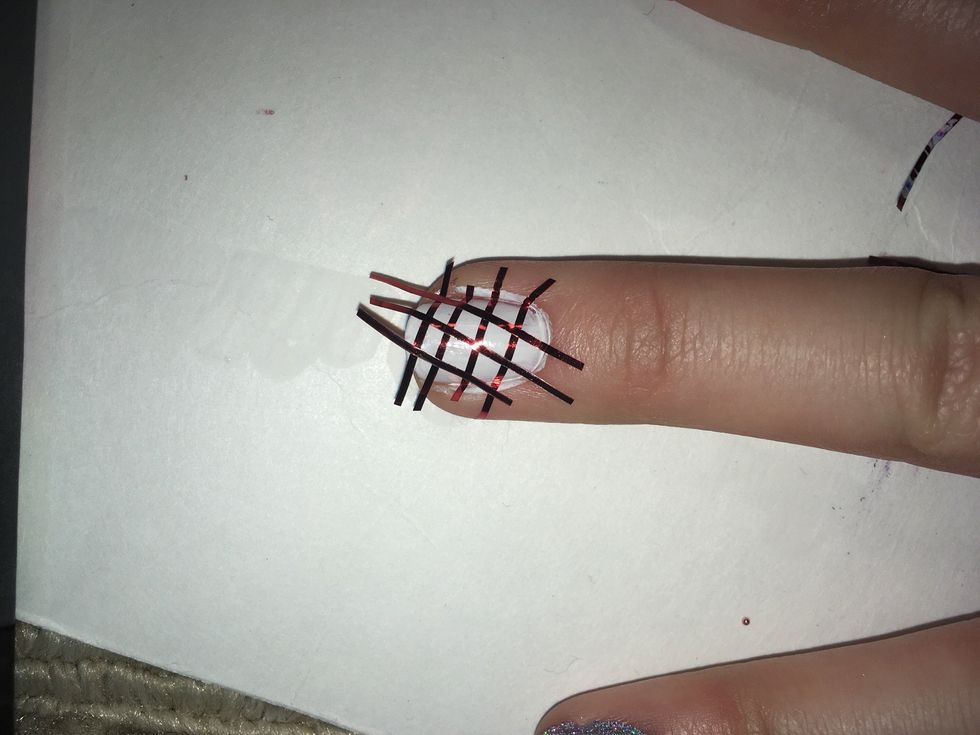
2. Use nail tape and create a pattern on your nail

3. Color with sharpie on a plastic surface, so that the ink does not get absorbed into it. (I used a cut up water bottle)

4. Using rubbing alcohol and a paint brush, dip the paint brush into the rubbing alcohol and then onto your colors of sharpie, this will make the ink more watery and create a water color effect
Tip: when using rubbing alcohol with ink, the more you use, the lighter the color will be. And you may want to use different brushes so the colours don’t get all mixed together.
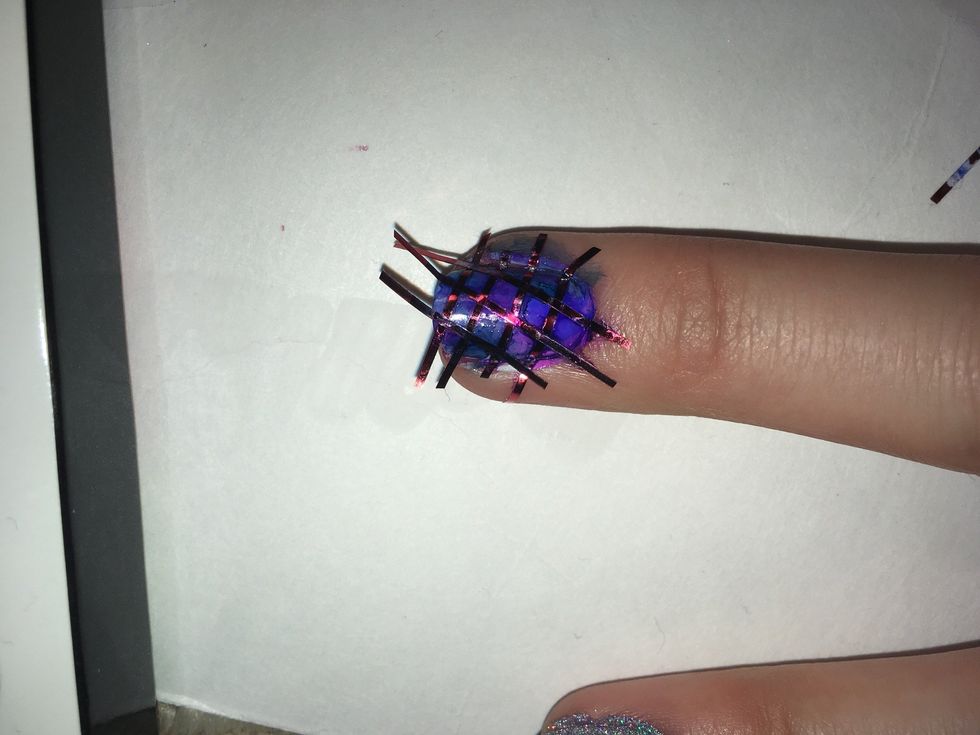
5. Dab brush onto nail in random ways mixing the colors until you get the desired look.

6. Take off the nail tape and touch up any areas you might want to fix And you’re done!!!