The Conversation (0)
Sign Up
EXPOSURE relates to the density of the picture you capture - how bright or dark it is - it is a measurement of the amount of LIGHT that has been captured. It is measured in STOPS of LEVELS.

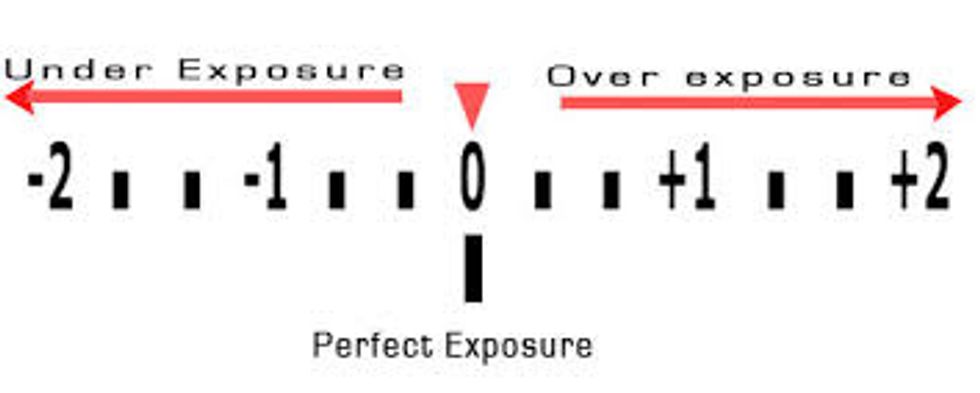
For example, here the same picture is broken into three different exposures. At the top of the page is the exposure meter reading. Each number on the meter represents one stop of difference.

Negative numbered stops represent less light being recorded in the image; positive numbers represent more light being recorded; zero is what the camera thinks is correct.
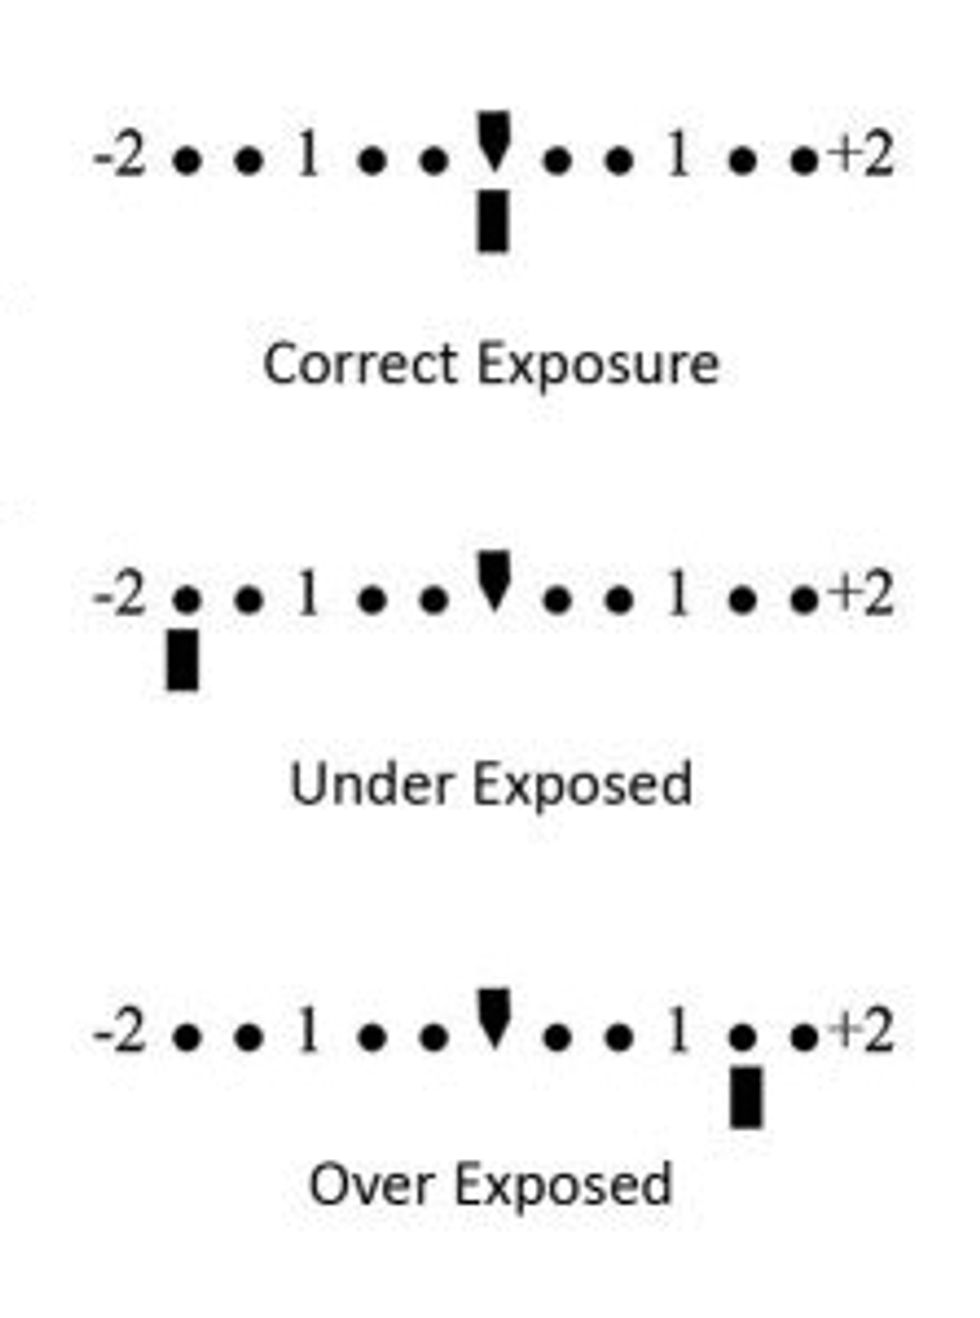
"Correct" is never correct...it is just close to what we see. Negatives have less light, are darker and we call them UNDEREXPOSED; Positive have more light, are brighter and called OVEREXPOSED.
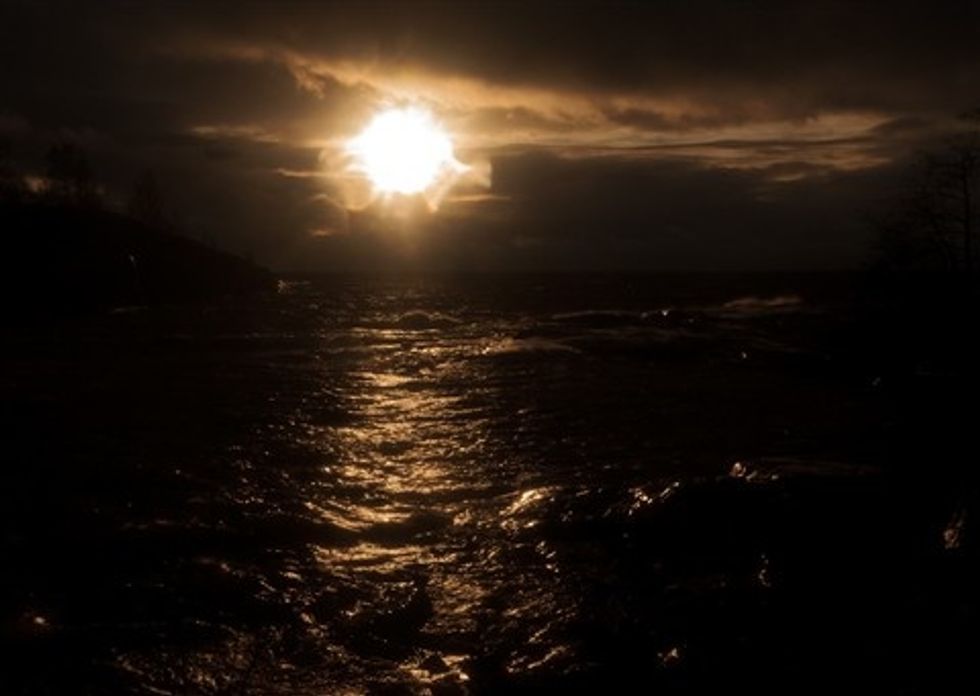
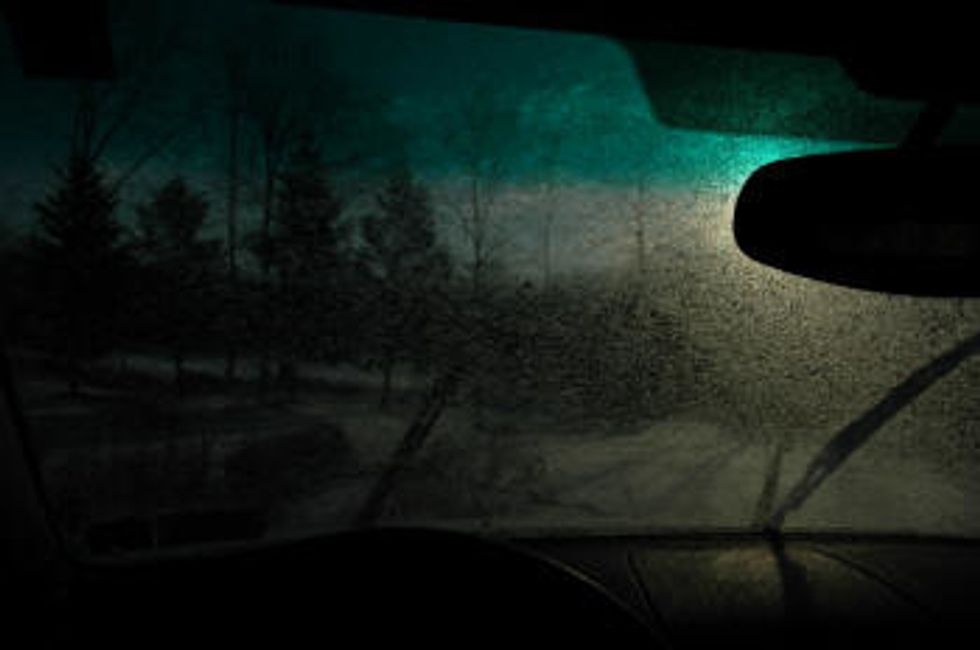
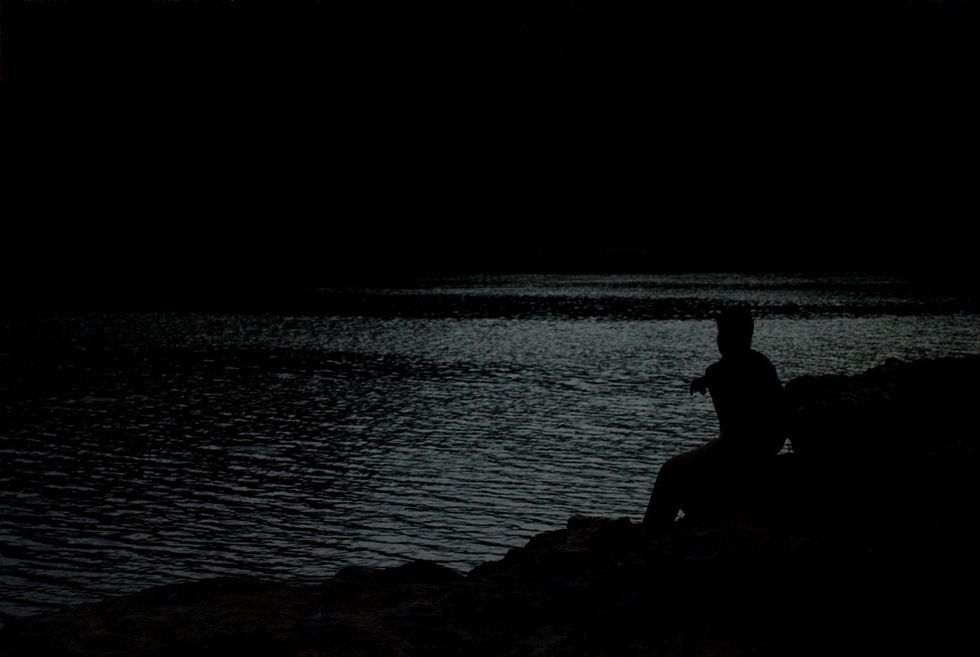
You can underexpose an image to create artistic effects or to capture DETAILS that would be too bright (called BLOWN OUT) in very bright images. The sun would be too bright and blow-out details here.
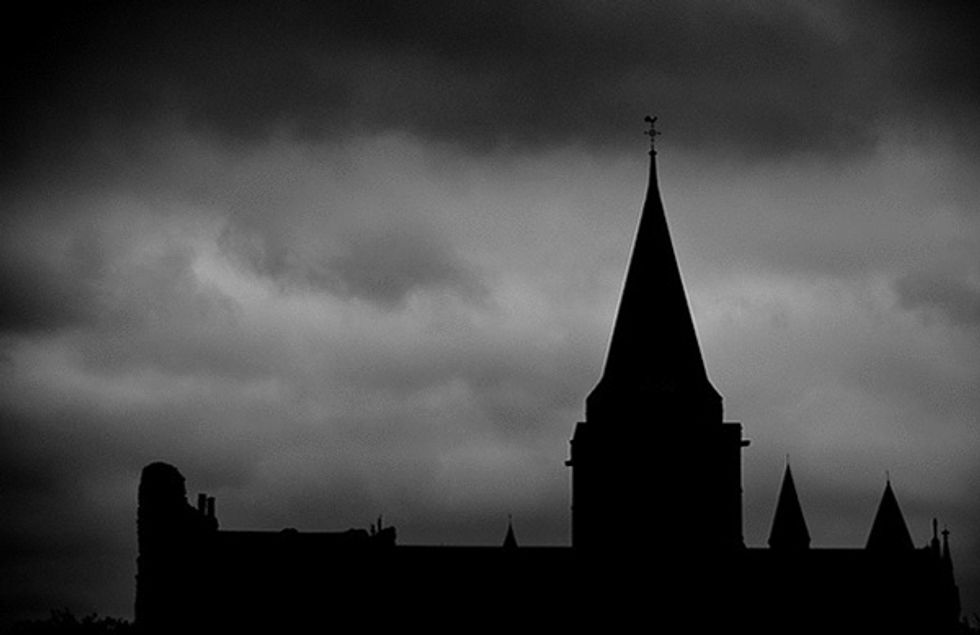
It can also be used to create intense moods of darkness.

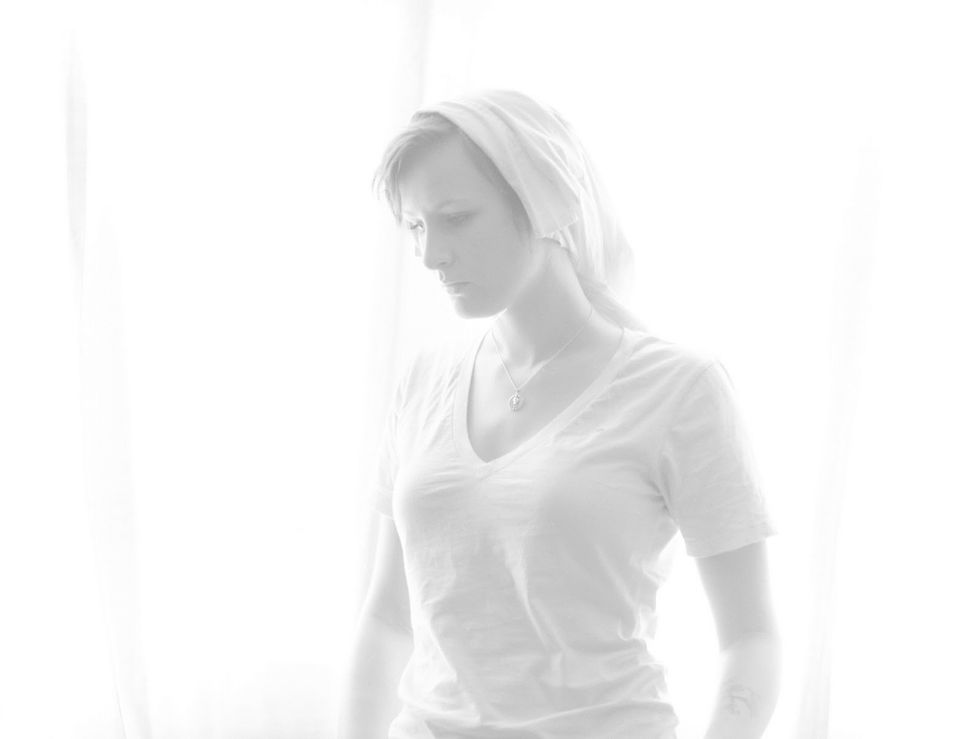
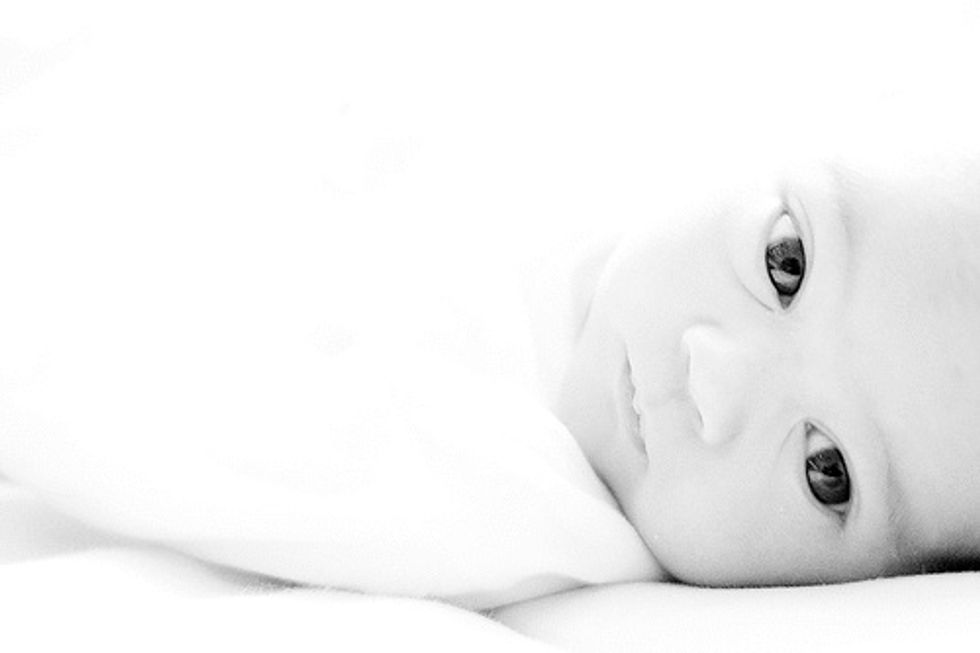
OVEREXPOSING can also be used for the same artistic reasons or to shift focus to specific areas. It will blow-out detail, focussing the image on shapes, value and contrast. This is called HIGH KEY.

Where underexposing creates a lot of darkness/black in images, overexposing creates more lightness/white. Obviously, each contributes to the composition of the image heavily.
So, how do you control the exposure? There are three main controls of light that you can capture: TIME, AMOUNT, SENSITIVITY. Each of these three will change how much light get captured in an image.
TIME: how long you take the picture will influence how much light you capture. The LONGER/SLOWER the exposure time, the more OVEREXPOSED; the SHORTER/FASTER the exposure time, the more UNDEREXPOSED.
Shutter speed's measured in SECONDS/FRACTIONS OF SECONDS (a second is marked with a " and will look like: 1", 1.5", 10"; fractions of seconds are marked 1/2, 1/4, 1/250 etc...). Remember it's TIME.
LONGER/SLOWER time = OVEREXPOSED/BRIGHTER images
SHORTER/FASTER time = UNDEREXPOSED/DARKER images
The time of the exposure is called the SHUTTER SPEED of the image (so named because it is the speed/time that the shutter opens and closes on the camera allowing light in and blocking it out.
The AMOUNT of light that is let into the camera determines exposure also. If a lot of light is let into the camera at once, the image will be overexposed; if not much light, it will be underexposed.
A SMALL AMOUNT of light being let into the camera = UNDEREXPOSER/DARKER images.
A LARGE AMOUNT of light being let into the camera = OVEREXPOSURE/BRIGHTER images
Light enters the camera through the lens and then through a hole that you can change the size in the camera. This is called APERTURE. Aperture controls the amount of light coming into the camera.
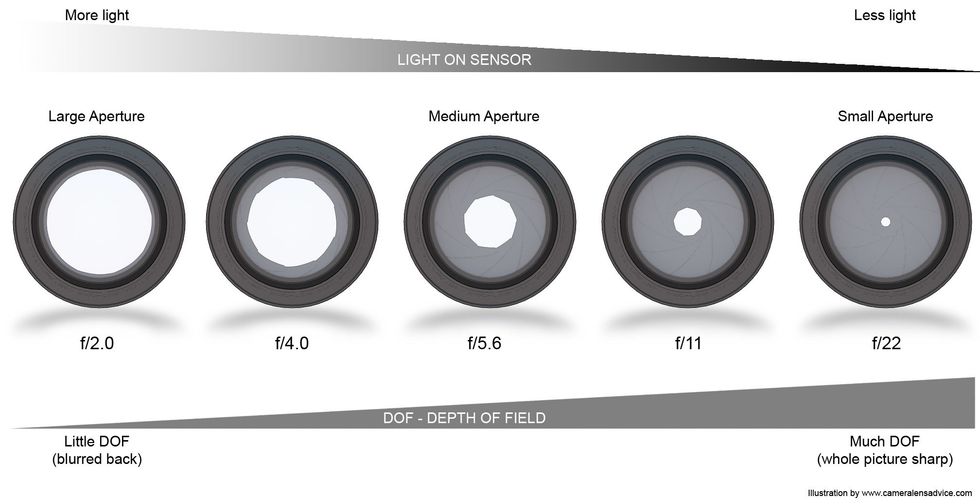
Apertures are also measured in fractions (the F has a one as well) so the smaller the fraction the smaller the hole. We call these F-STOPS.

SMALLER APERTURES = UNDEREXPOSURE/DARKER IMAGES; LARGER APERTURES = OVEREXPSURE/BRIGHTER IMAGES.
Lastly, there is how sensitive you make the camera/film to light. This has to do with how quickly the machine/film can read/understand the light. More sensitive, brighter; less sensitive, darker.
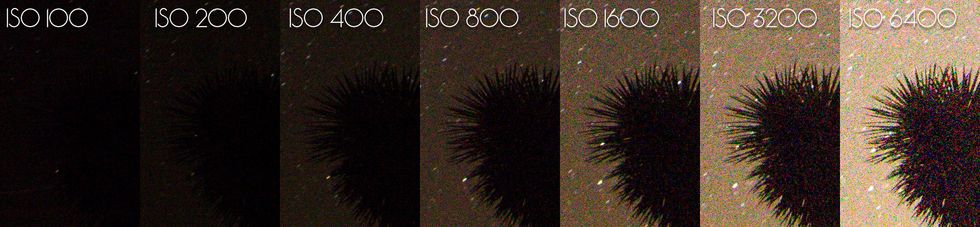
ISO is measured in doubling values (usually starting with 100). Each time it doubles the sensitivity doubles.
To expose an image you FIRST set ISO for the space and leave it alone. Then you work with SHUTTER SPEED AND APERTURE. In Film work you will not use shutter speed often and only deal with apertures.
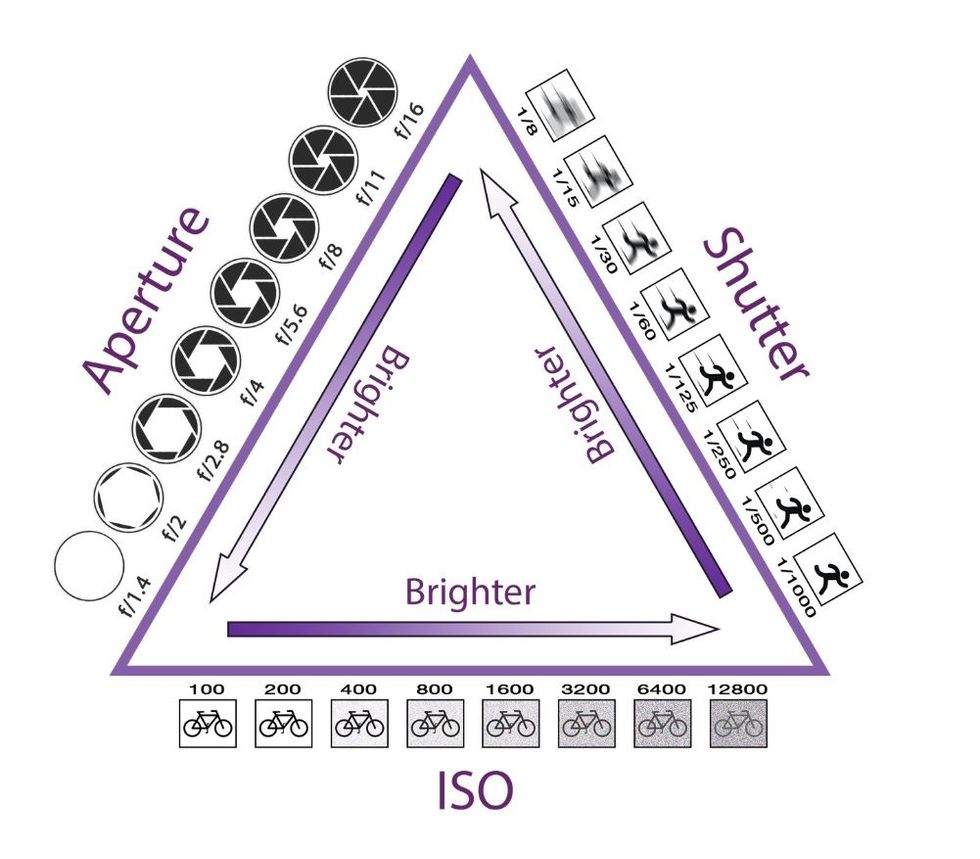
When they put together they become the EXPOSURE TRIANGLE and in manual control you will use ALL THREE to change your exposures.
The meter's to help you, but judge the image by eye. You're the artist; it just helps find the range of correct settings. To activate, point the camera your subject + tap the shutter release.