The Conversation (0)
Sign Up
In this quick guide we will show you how to manage grids and blocks in CS Cart version 4.
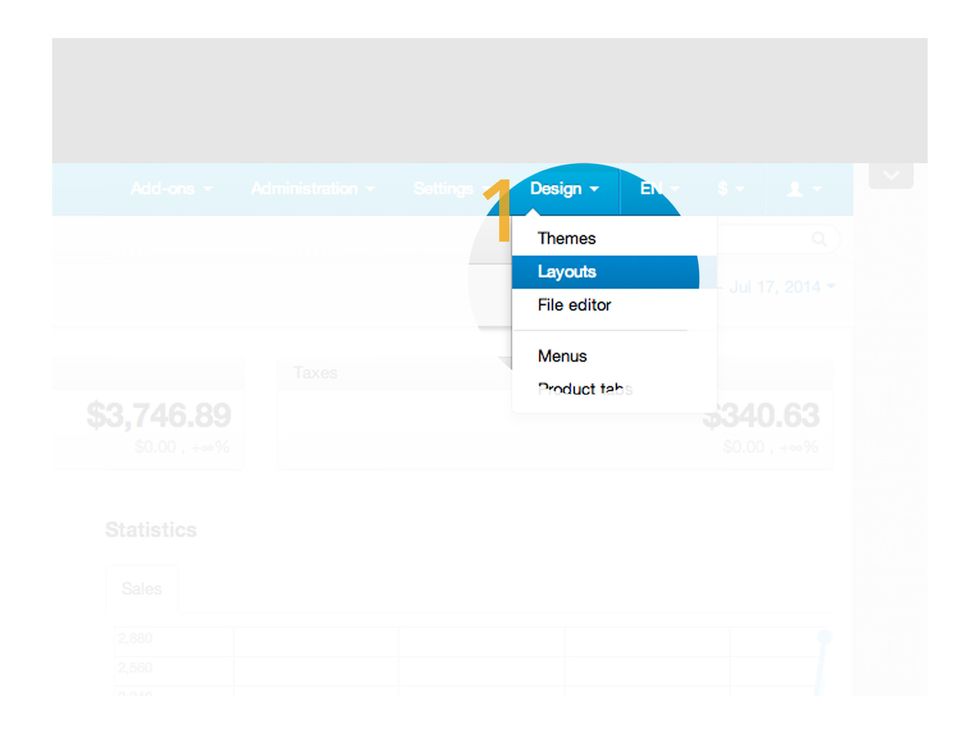
To access grids and blocks, navigate over to the drop down 'Design' tab on the top right hand side of your screen. Then from here select 'Layouts'.
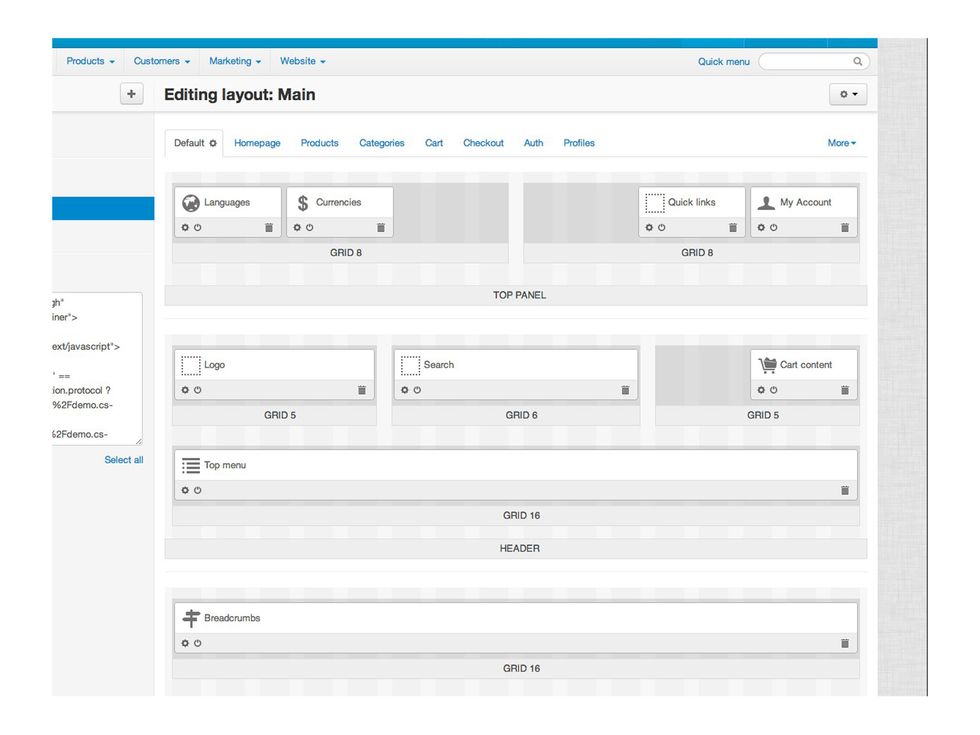
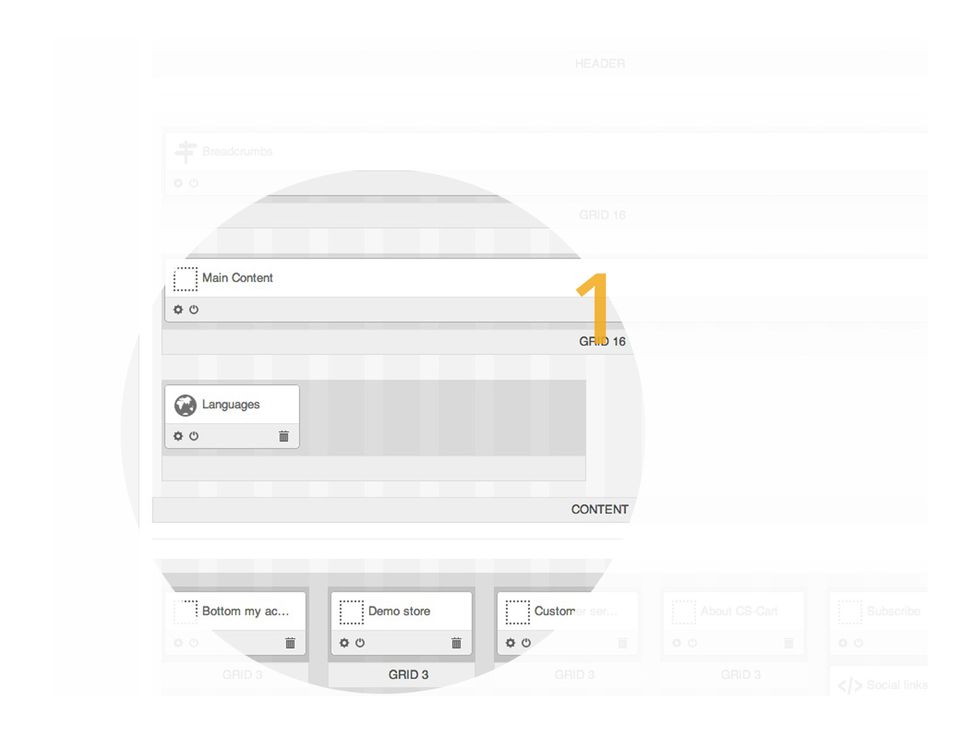
You will then be presented with the layout page which contain the blocks and grids. A block is an element to your website, such as the search bar, where a grid is used to layout the page.
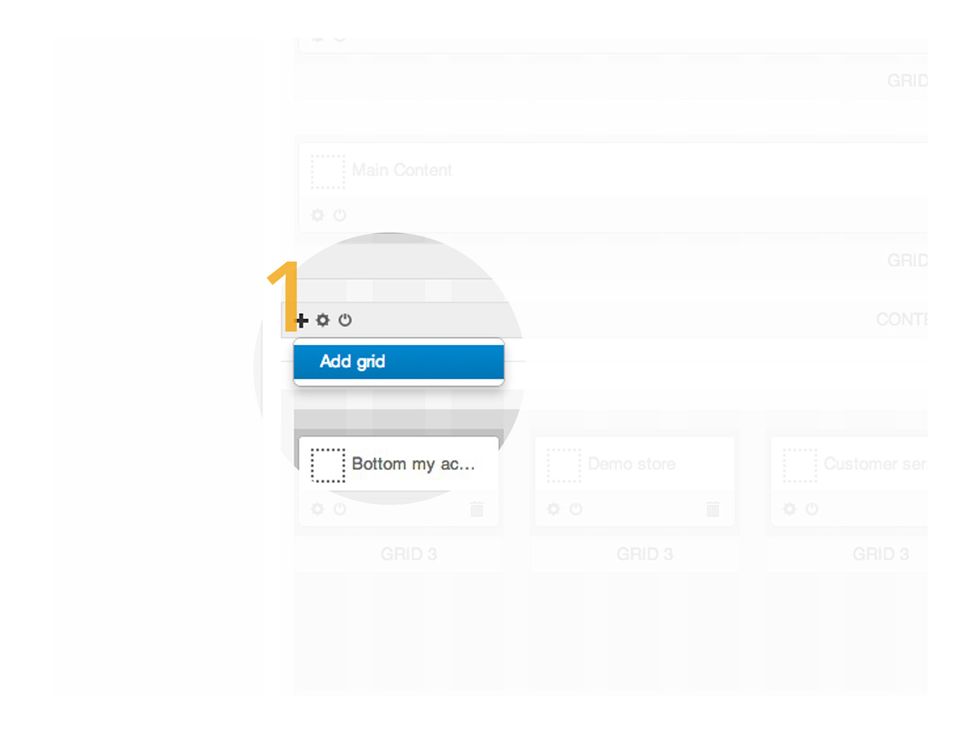
Let's start by creating a grid. The grid sets the structure of the page, and contains your blocks. Select where you would like to place the grid and click the 'Plus' icon, then 'Add Grid'.
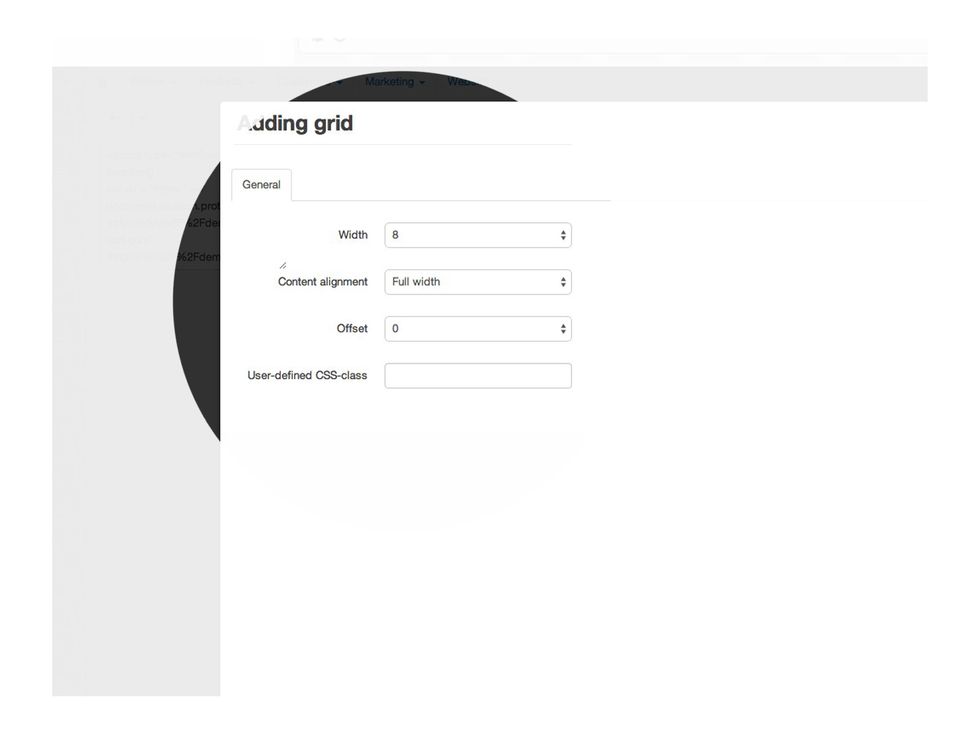
Grids are built using 'Columns' . This means that you can make grids that stretch the full width of the page, or have multiple columns. Select the size of your grid then press 'Create' at the bottom.
Now we have created a grid, we can begin filling the grid with blocks or child grid sections. Note: Once you create a grid it cannot be moved like a block.
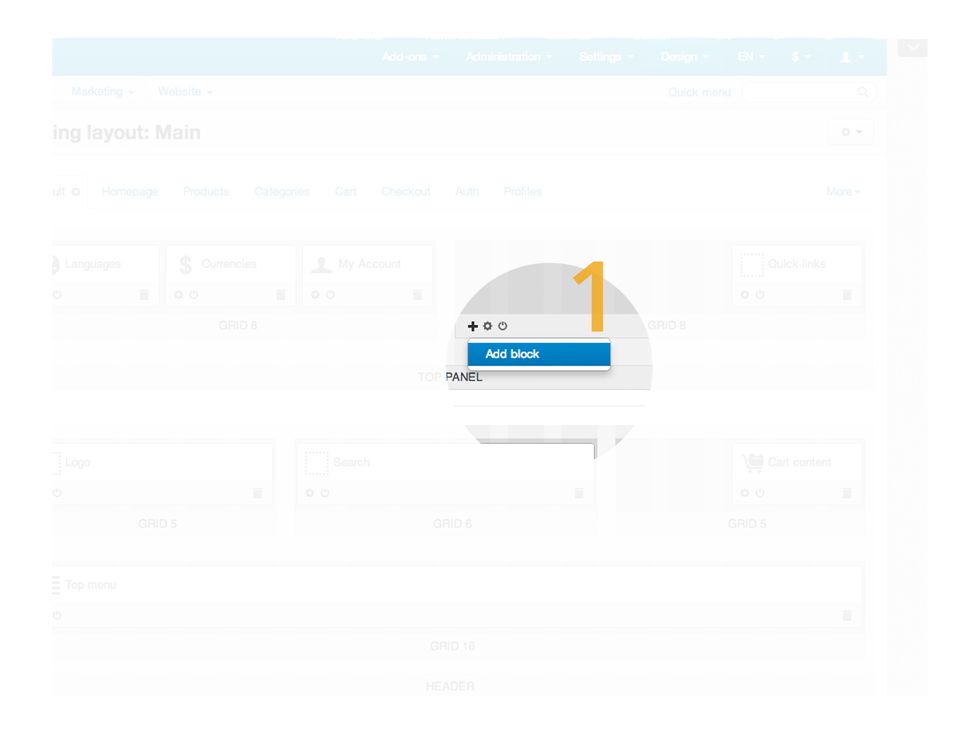
Next, we will take a look at adding a block. To do this, find which grid you would like your block to sit in. Once selected scroll over the little 'Plus' button and click, and then 'Add Block'.
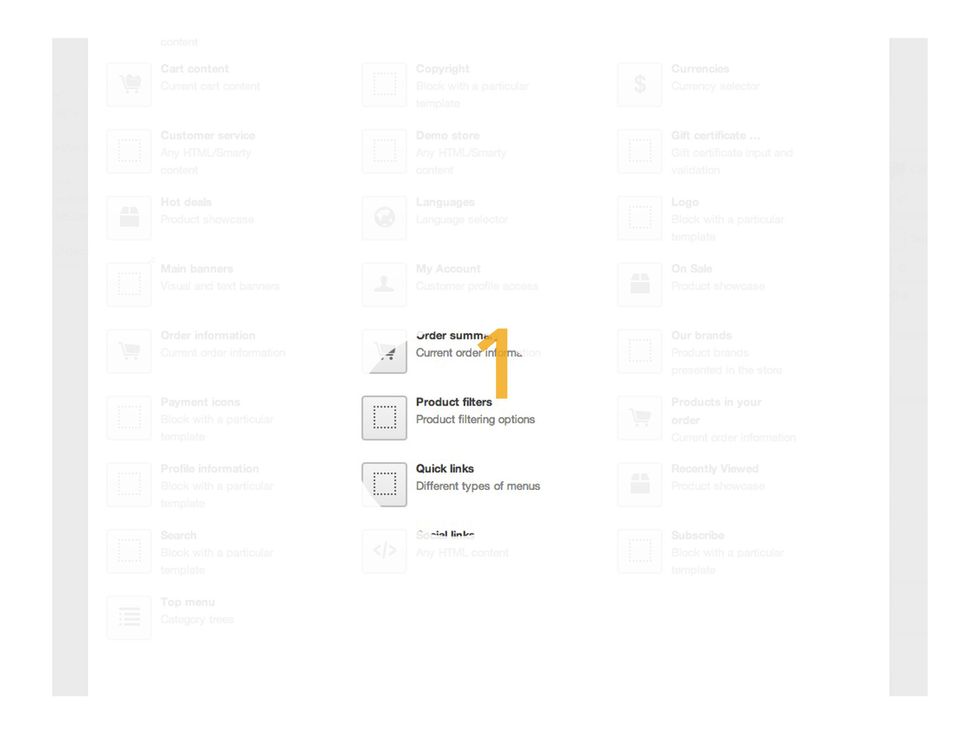
You will then be given a range of different blocks that you can choose from for your website. For our website we will be selecting 'Product Filters', simply click on the block you want to add.
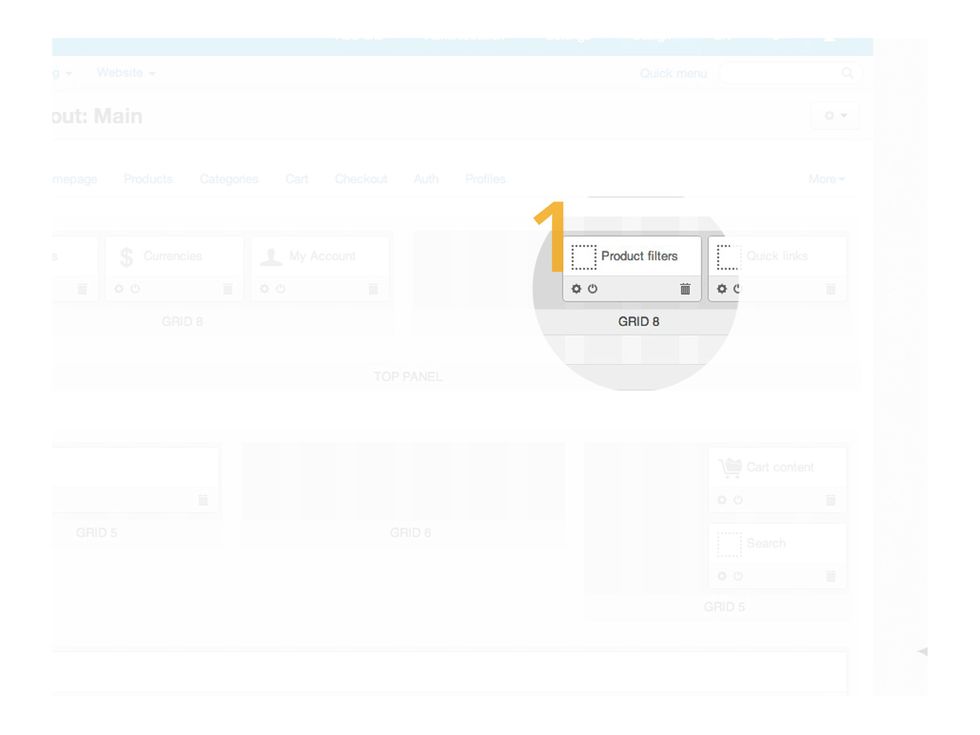
And you done! It is that simple. From here you can move your blocks around by holding click on them and move your mouse around until you find where you would like it to go...

... but remember the size of your grid and the amount of blocks you have inside it will change the size of your blocks.
Now if you have a block that you would like to keep but hide, simple scroll over the little 'Power Icon'. This can switch your blocks from Active to Inactive. Just click the little icon...
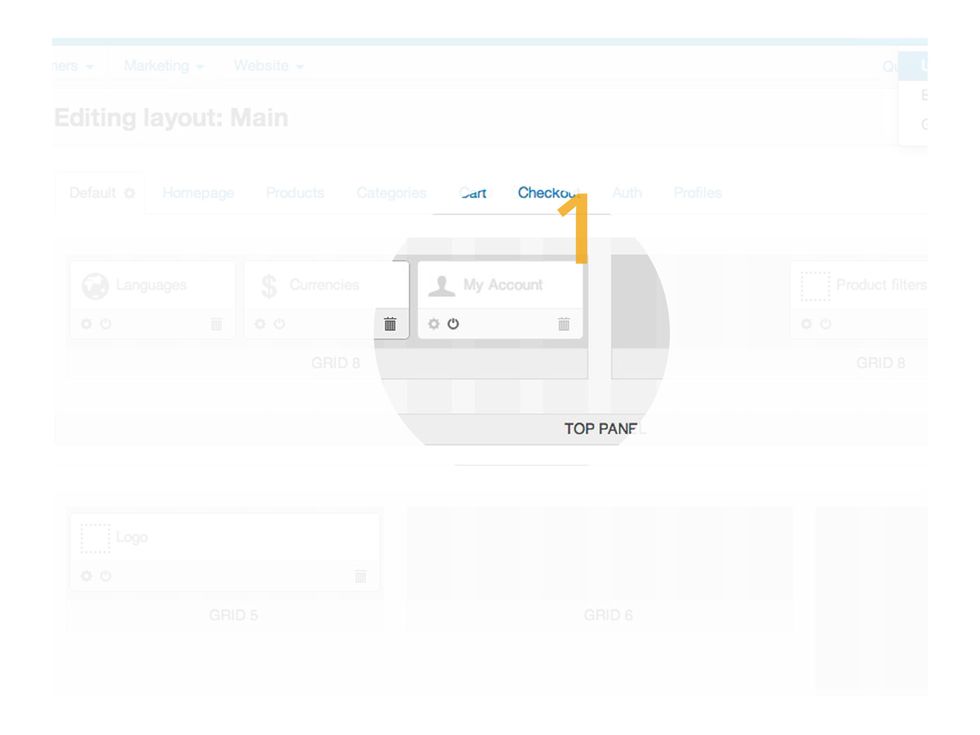
... and your block becomes inactive. This means that you can create blocks, which you might not need to use all the time, and not worry about deleting them.
If you have a block or grid that you no longer want or need, just scroll over the little 'Trash Can' icon. Click the icon.
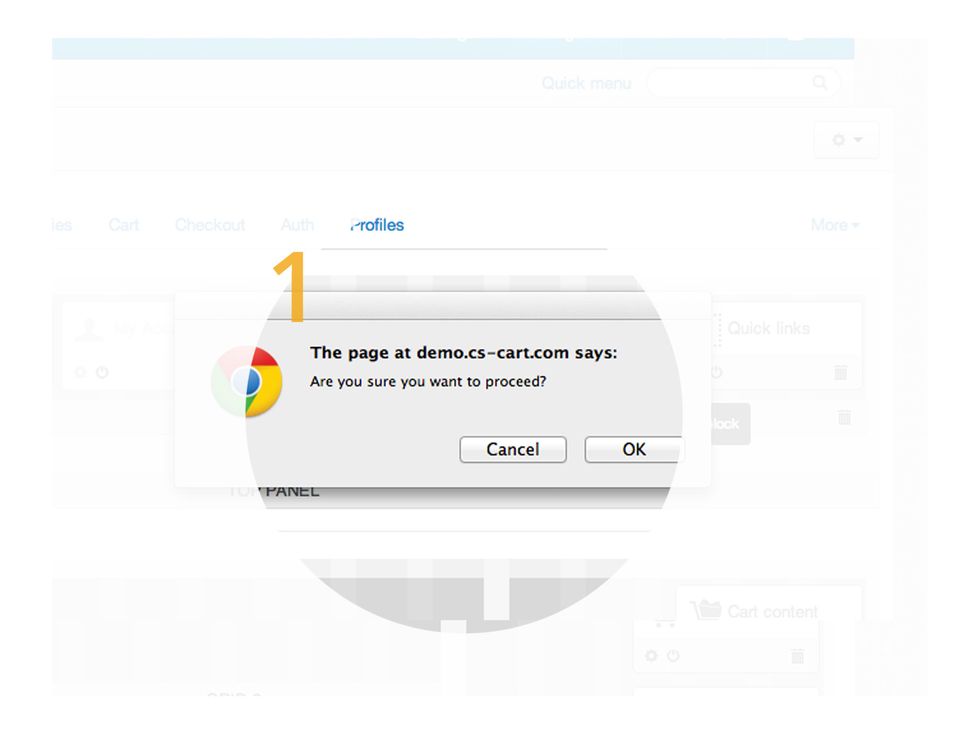
Now depending on your internet browser this may change a little. For us a little pop up in google chrome is asking us if we would like to continue as once we click OK it cannot be undone. Select OK
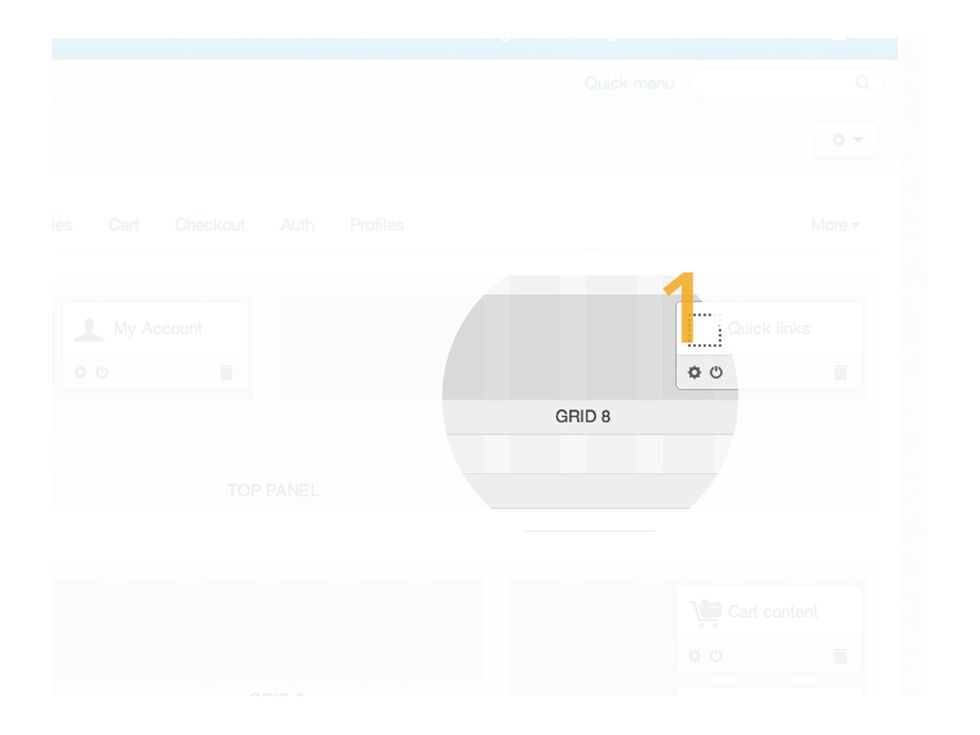
And thats it. Your block or grid will no longer be on your layout dashboard.

This SnapGuide was brought to you by www.csl-web.com