The Conversation (0)
Sign Up
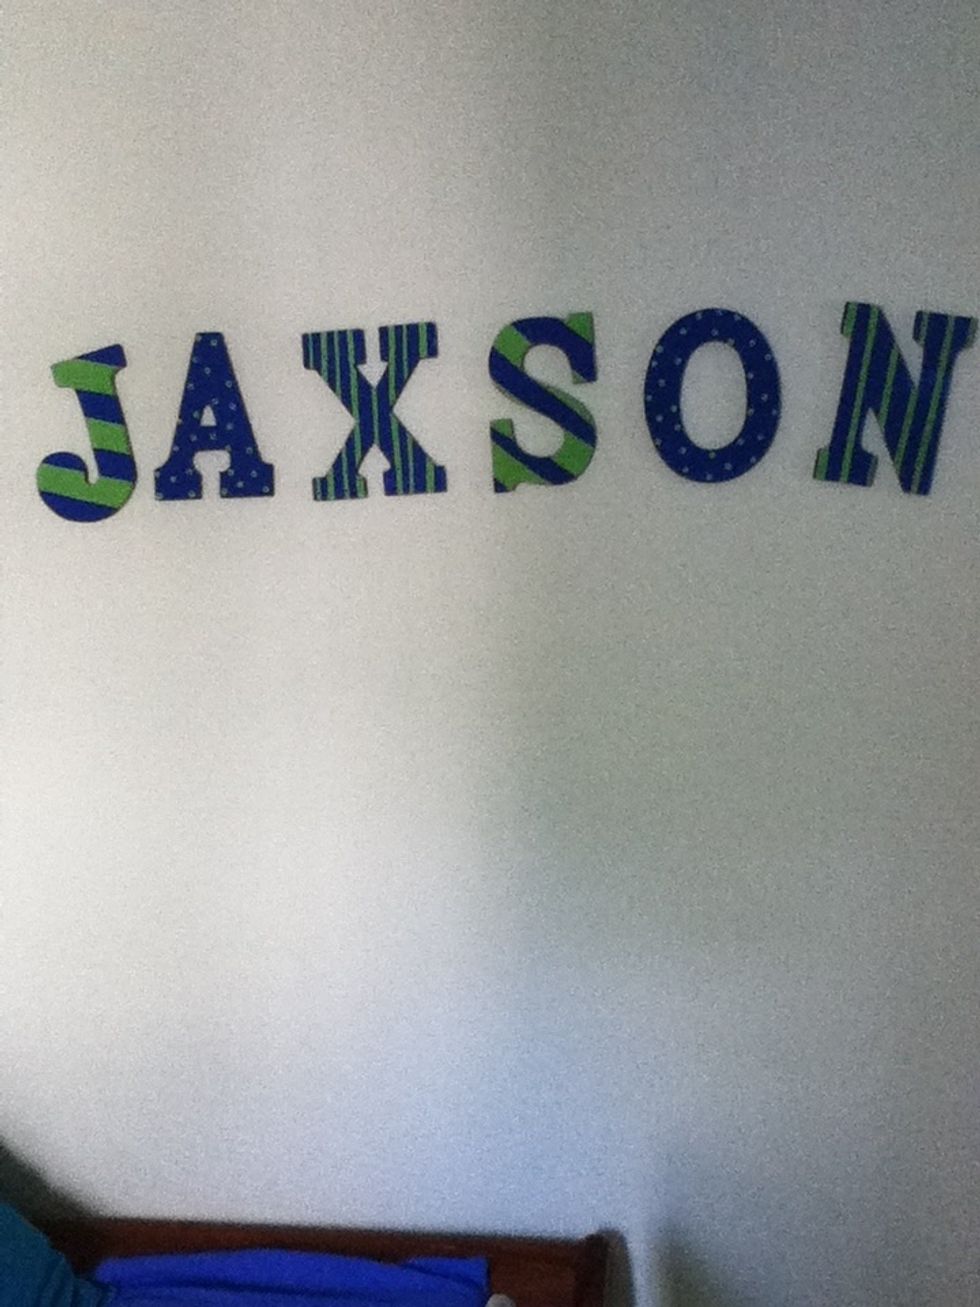
Paint each letter's front and sides applying two coats of your background color of choice.
Let dry overnight
Add designs of your choice to each letter. I did stripes and dots.
To do stripes you may freehand or apply scotch tape to guide you. If using tape be extremely careful when peeling off so you don't scuff your basecoat.
To apply dots use the end of your brushes handle to dip in the paint and then press onto your letter. Do not push too hard or the handle will leave a dry spot in the middle of your dot
Allow about 30 minutes for your design to dry then add a second coat if desired.
Allow the letters to dry overnight.
Now you're ready to hang!
Draw an arched line on your wall with a pencil at desired level using a piece of yarn or string and tape
Tape the string to the wall in an arch shape. Next, trace a line above the string using it as a guide.
Make pencil marks on your arched line about 2 in apart or depending on your letters' thickness 3 in may be necessary.
Now hammer small nails to hold your letters to the wall.
You 're all set to hang your letters! Hang your letters to spell a child 's name or last name as a decorative wall piece. :) enjoy your finished art !