The Conversation (0)
Sign Up

Please read all directions before starting! Collect your supplies.
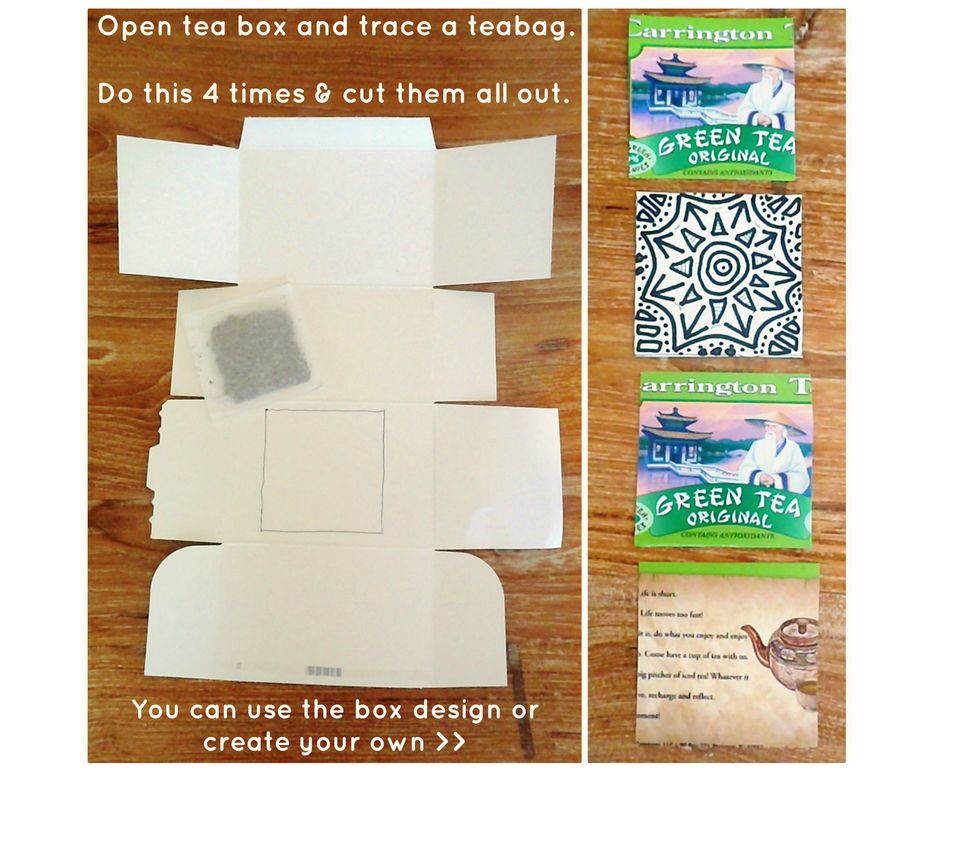
Gently open the box that the tea bags came in. If you do not have the box, any piece of thin cardboard will work. Trace a tea bag onto the cardboard four times and cut out the four squares.
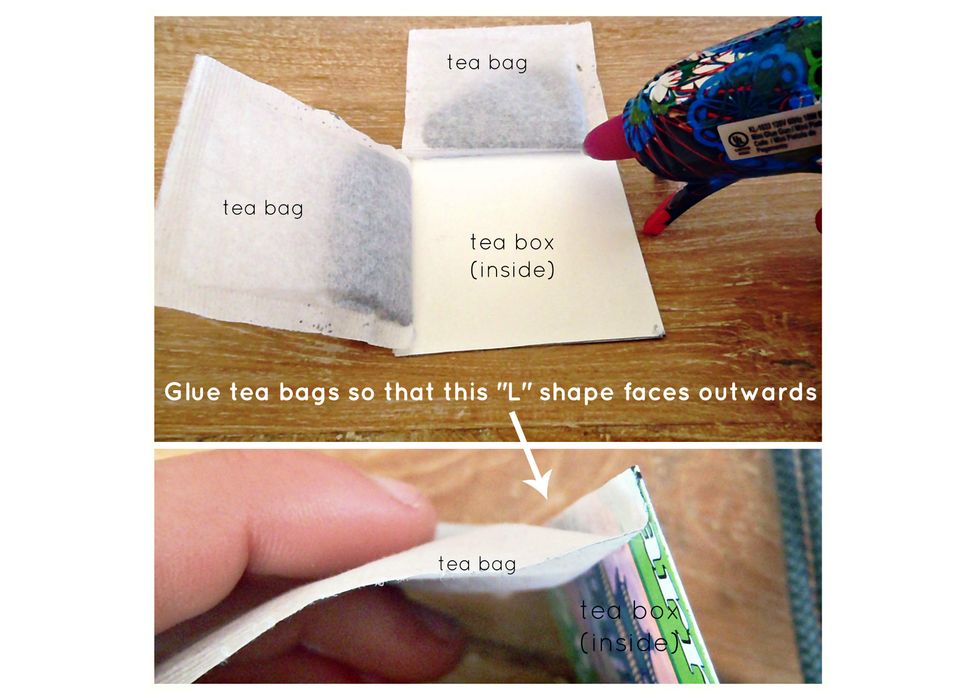
Fold the very edge of a teabag and glue the edge to one side of the square. Do this to each side of the square. The "L" shape will face outwards.
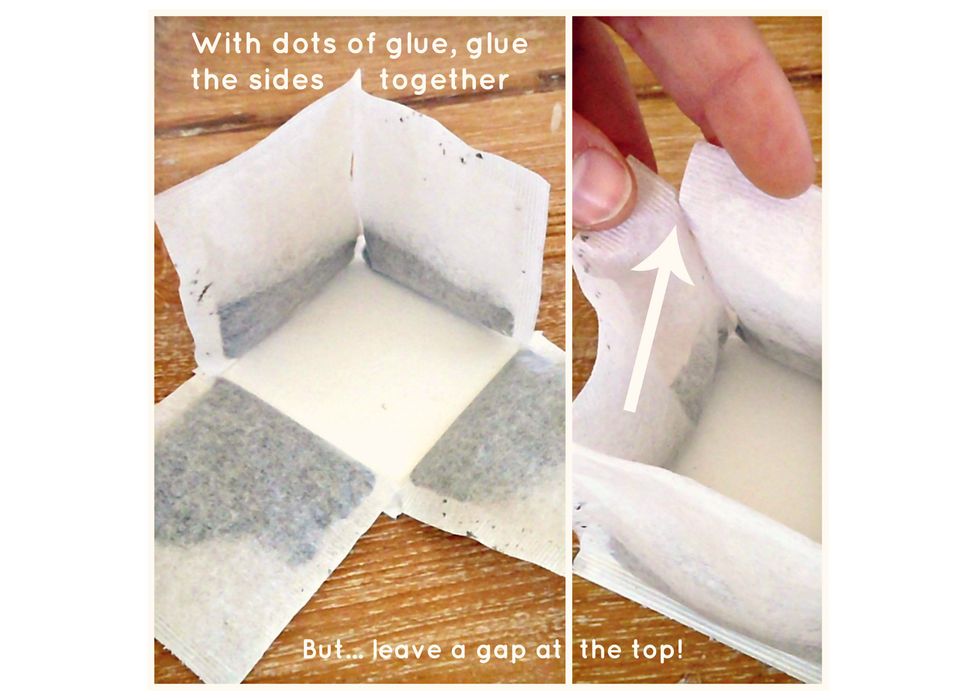
Hold the sides up and secure them with dots of hot glue to form a box shape. Pinch to secure. Be sure to leave a gap before the top, about a quarter of an inch.
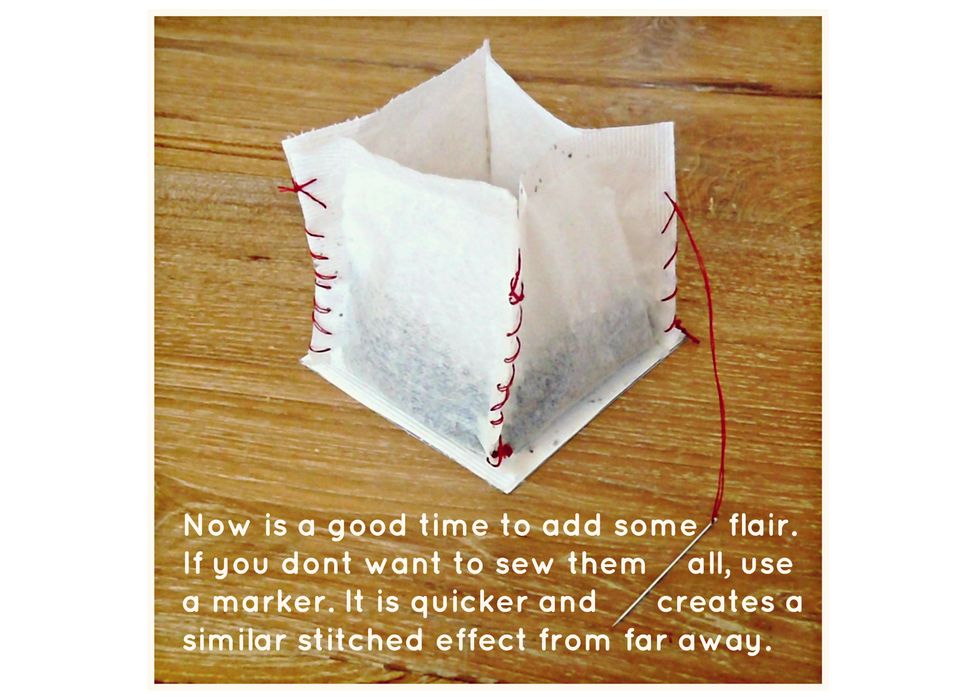
Now is a good time to add some flair... I used a loose whip stitch & a blanket stitch for my lanterns. You can also use a marker to create a similar effect if you do not want to sew all of the edges.
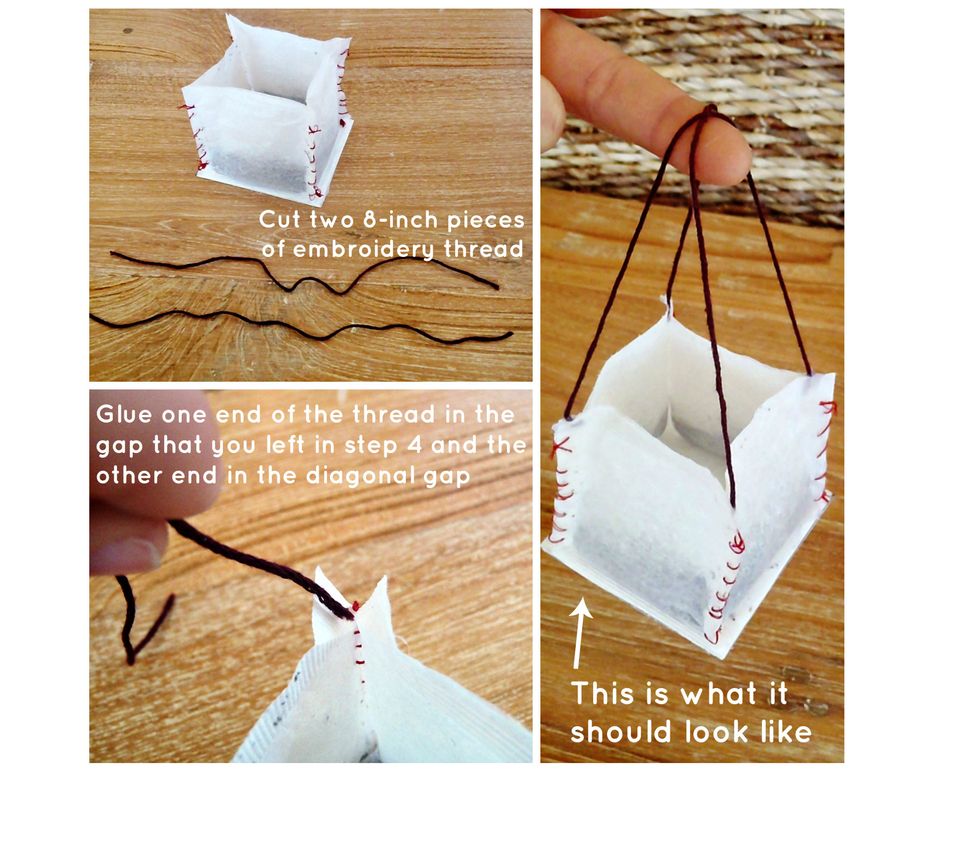
Cut two 8-inch pieces of embroidery thread. With the first piece, hot glue one end to a corner gap and the other end to its diagonal gap. Pinch to secure. Repeat for the other corners.
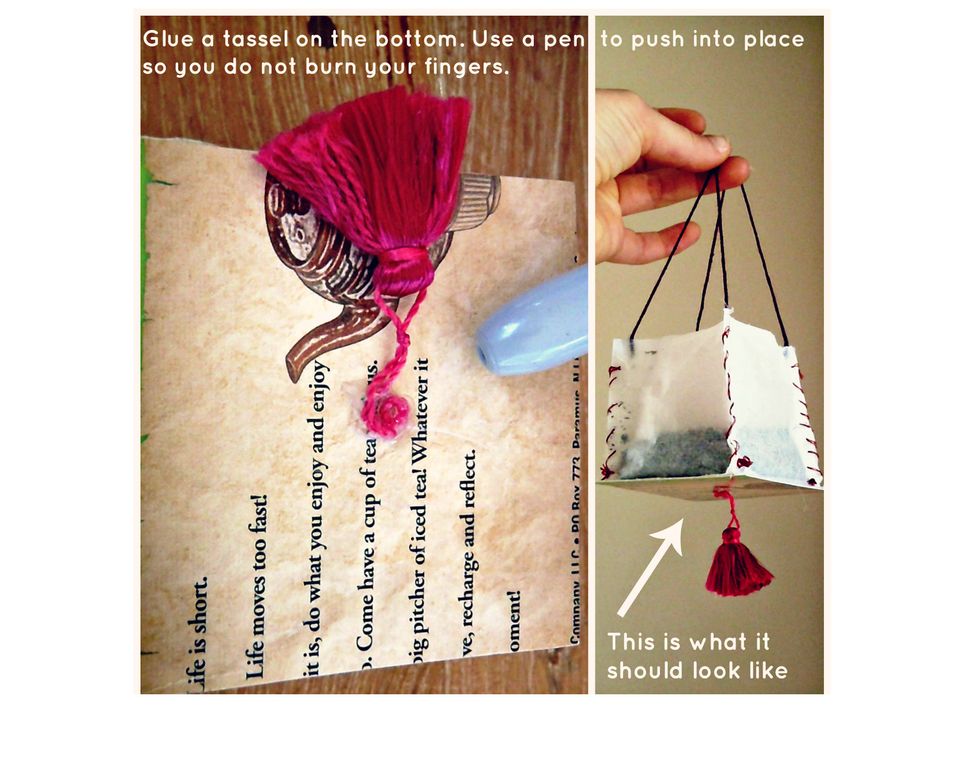
Flip the lantern over and find the center of the square. Hot glue a tassel to the center. Push the tassel securely into place with the end of a pen so you do not burn your fingers.

Repeat steps 2-7 to make three more lanterns. Place a tea light in each lantern.
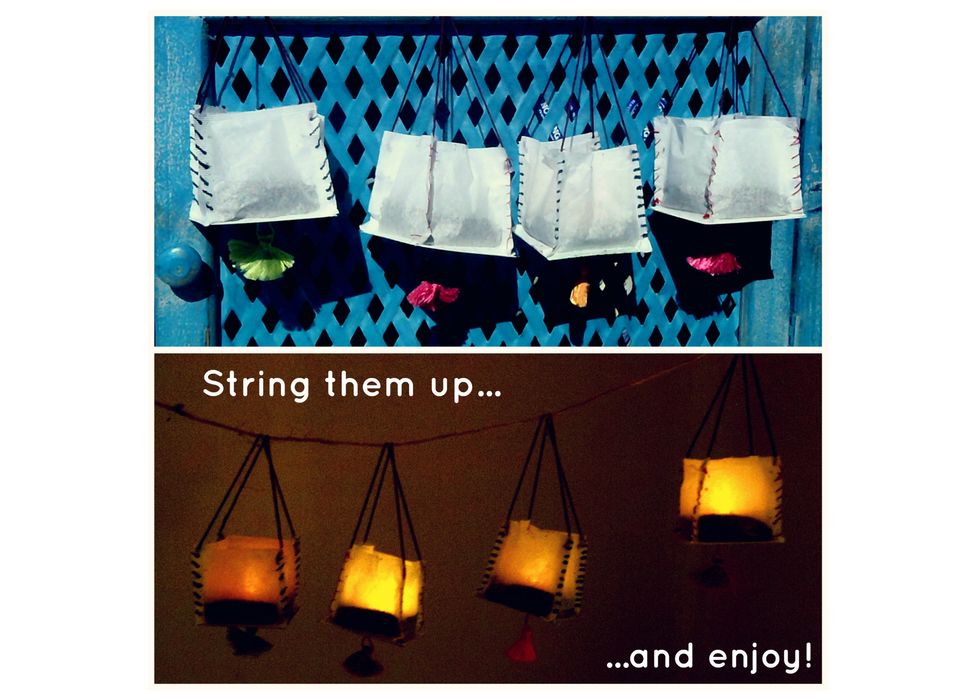
String them up and enjoy! Remember to turn the tea lights off when you are done using them.