The Conversation (0)
Sign Up
My Etsy shop is now live! Feel free to visit: shoplaceandlumber.etsy.com to order a custom piece
I'm making this tutorial because I almost didn't try this idea out! I found little to no support for the idea of reverse staining a design with fine details, but it worked out amazingly :) Try it out!
Decide how large you want your art to be and disassemble enough pallet wood for it. Cut your wood to the length you want. I cut everything to an equal length and staggered the boards.
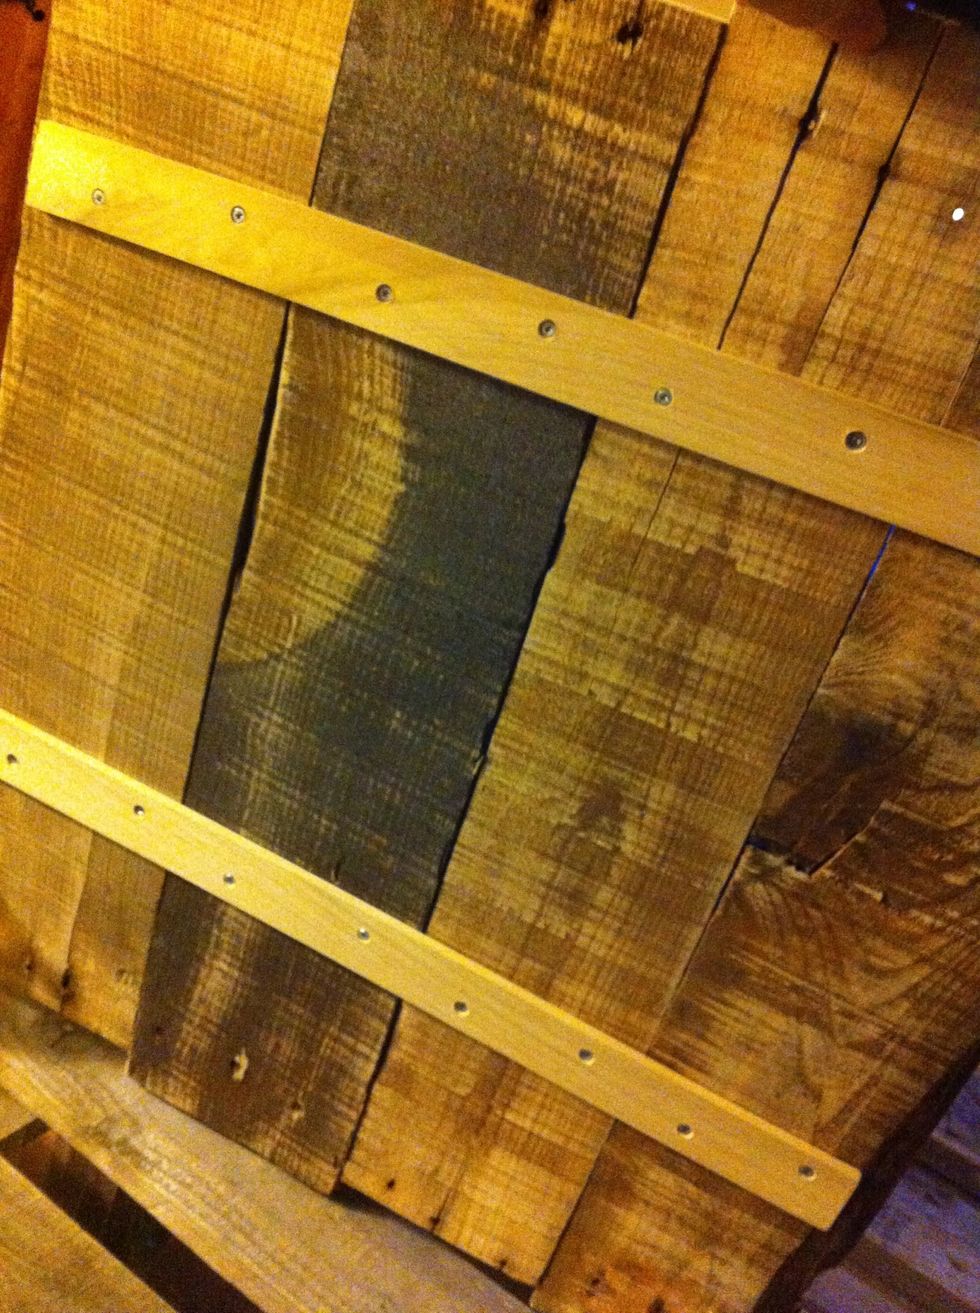
Sand down your boards and decide how you want them to look (consider knots, notches and cracks). Cut the wood you are strapping the boards together with and drill the holes, screw everything together
I used Adobe illustrator to customize my pattern on the computer, but you can buy vinyl decals that might work just as well and make your life way easier! (Custom involved a LOT of cutting)
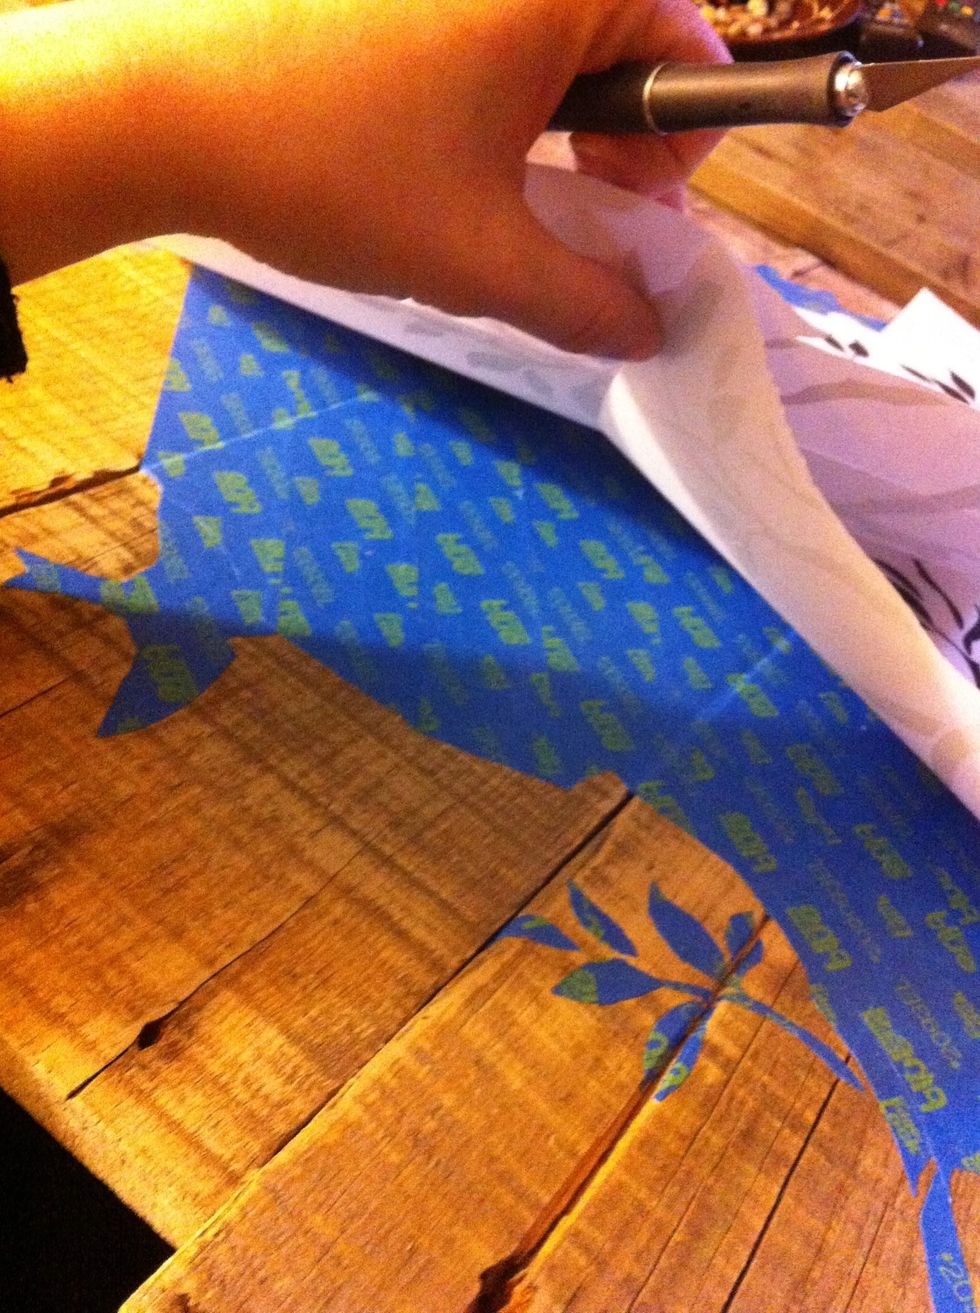
Lay down strips of painters tape, slightly overlapping to make a custom pattern – or use an adhesive stencil (even easier!)

If you dont have a stencil you will have to make one like me. I customized a pattern and printed it out on a few 11x17 pieces of paper, taped them down and just freehand cut them out with an x-acto
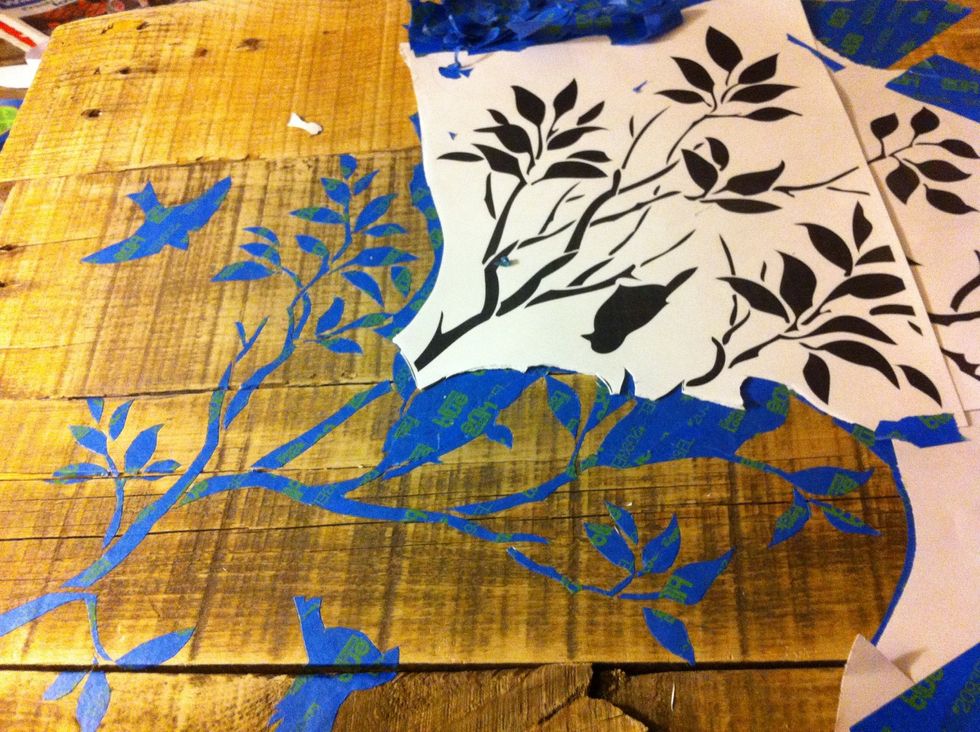
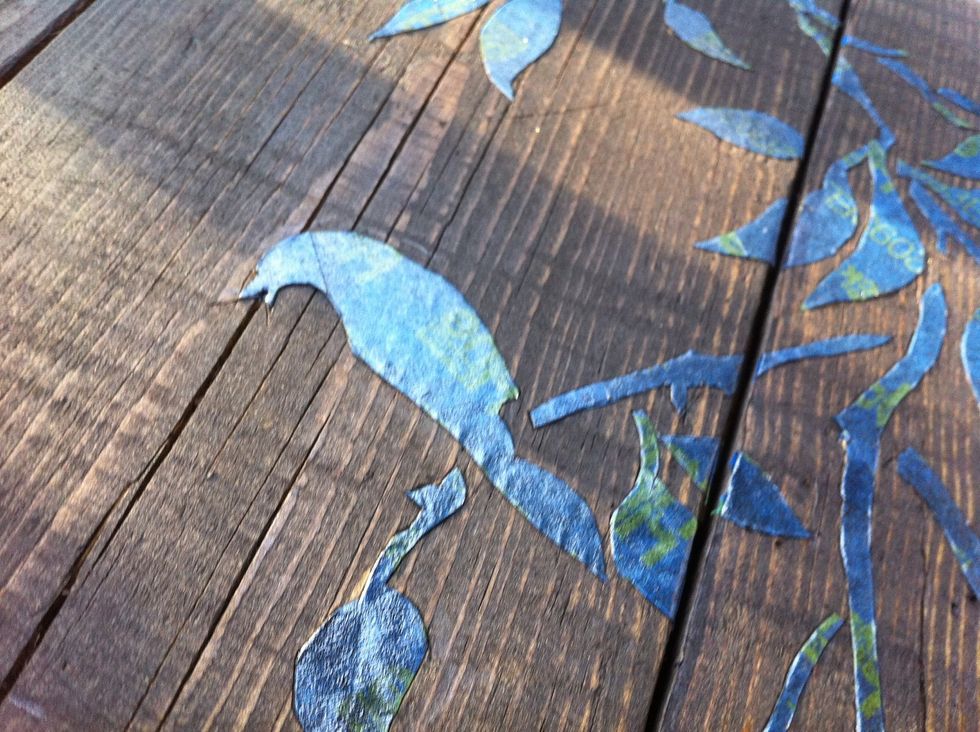
Cut out your stencil, peeling up the surrounding tape as you go. Its easier to see what you're doing. Make sure to burnish the stencil edges well so stain can't get under.

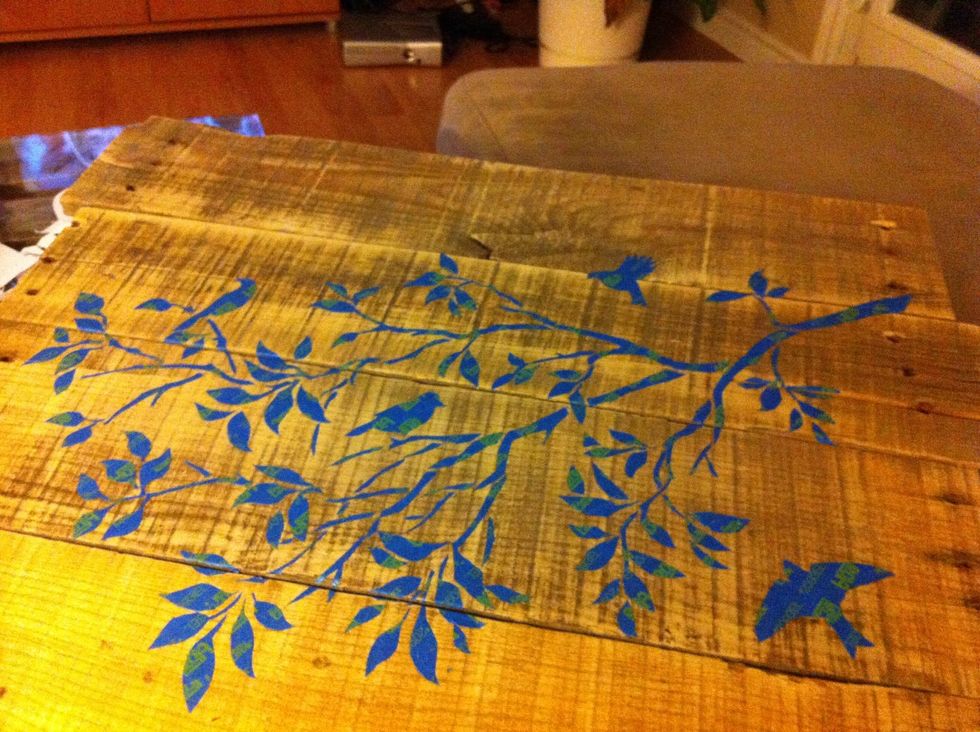
Boards with stencil, ready for me to apply the pre-stain (which evens out the stain color). You should stain within a few hours of applying pre-stain. Pre-stain only takes 15 mins or so to soak in.
Boards with pre-stain. IBalled up a strip of ripped t-shirt, and just dabbed the pre-stain and stain around the stencilled areas so there would be less chance of it sneaking under the adhesive.

Board with one coat of stain. Same thing here, I rubbed it into the areas with no stencil and around the edges but lightly dabbed the cloth over the stencil
Close up of board with stain
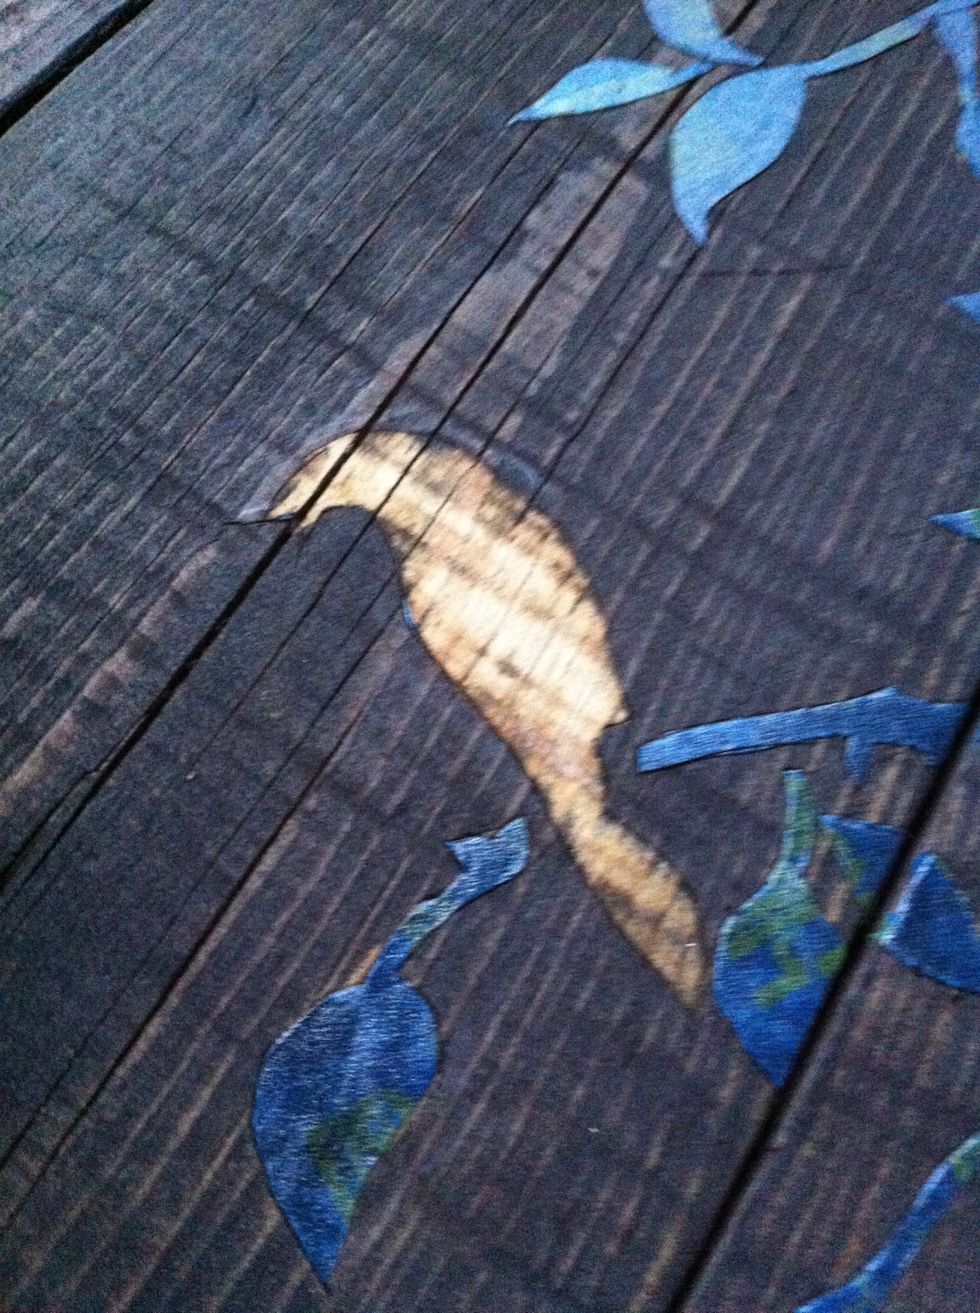
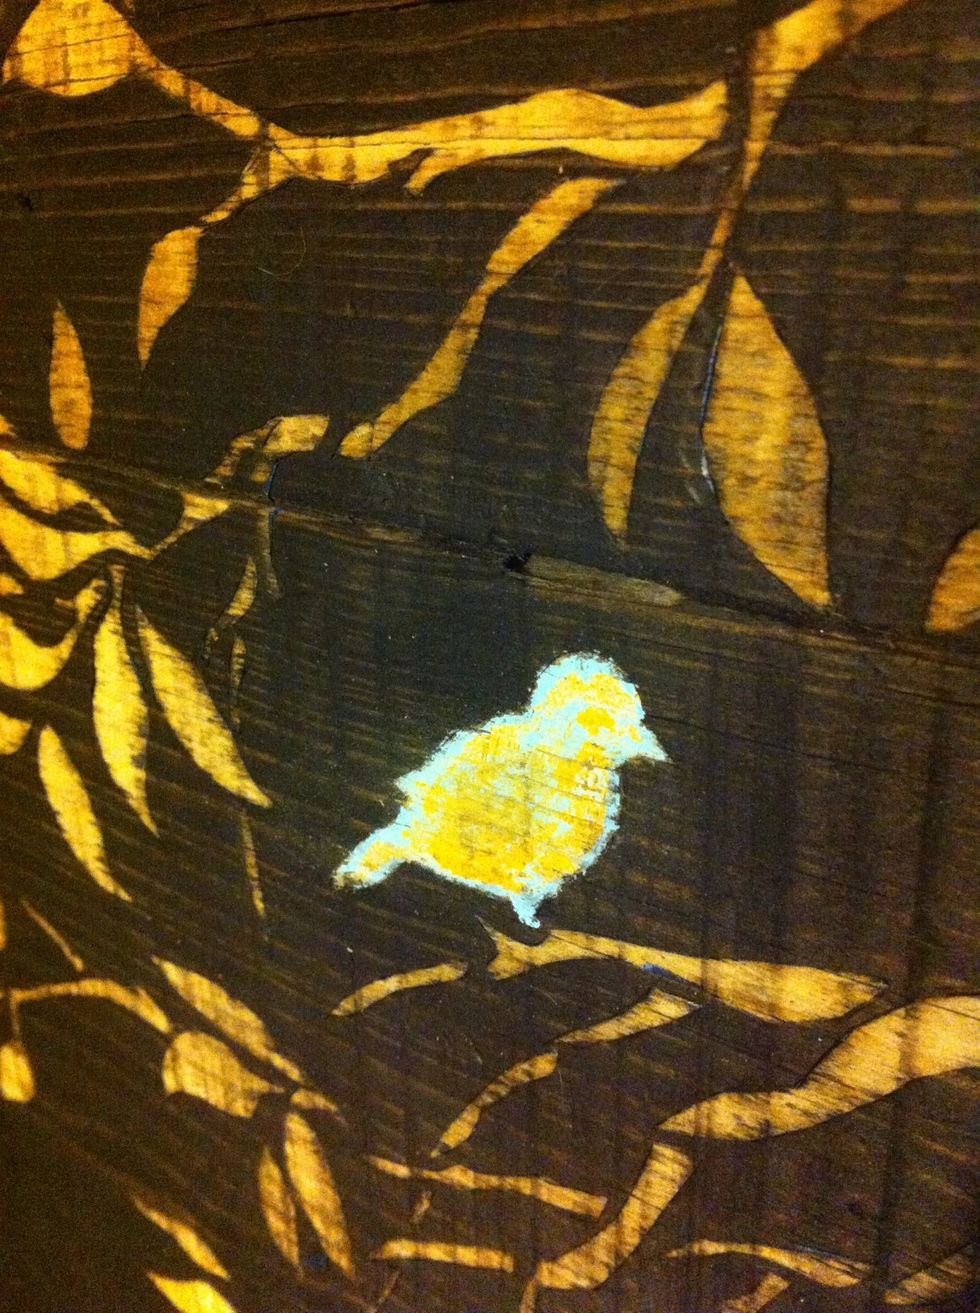
First glimpse of whether or not it actually worked. Yup it did!
If you like how dark your stain looks peel off your stencil. Pity it cant be reused but the adhesive likely wouldn't be sticky enough.
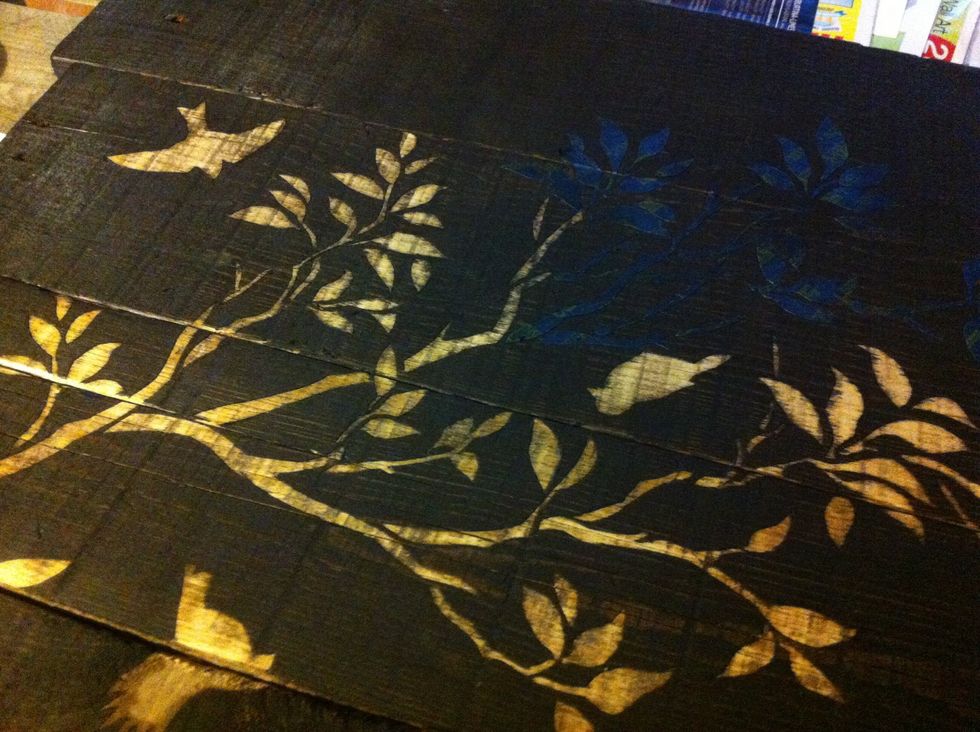
Almost finished! You could stop here, spray the protective coat and be done, I opted for a pop of color as well.

I did one layer of the birds a creamsicle orange, but with the dark stain it looked too halloweeny. So I sanded it away and loved the rustic look that worked with this style of art!
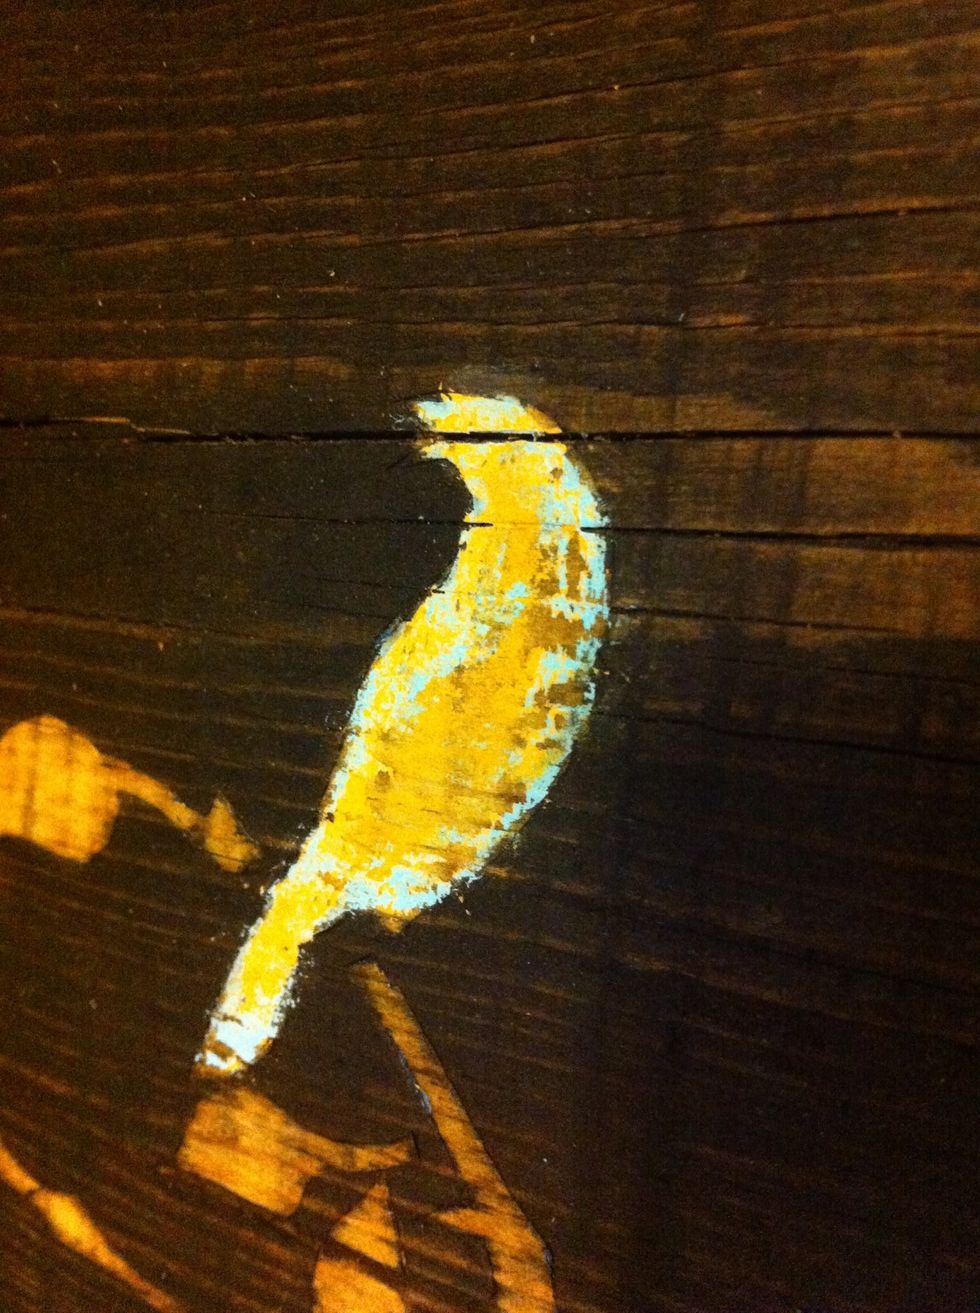
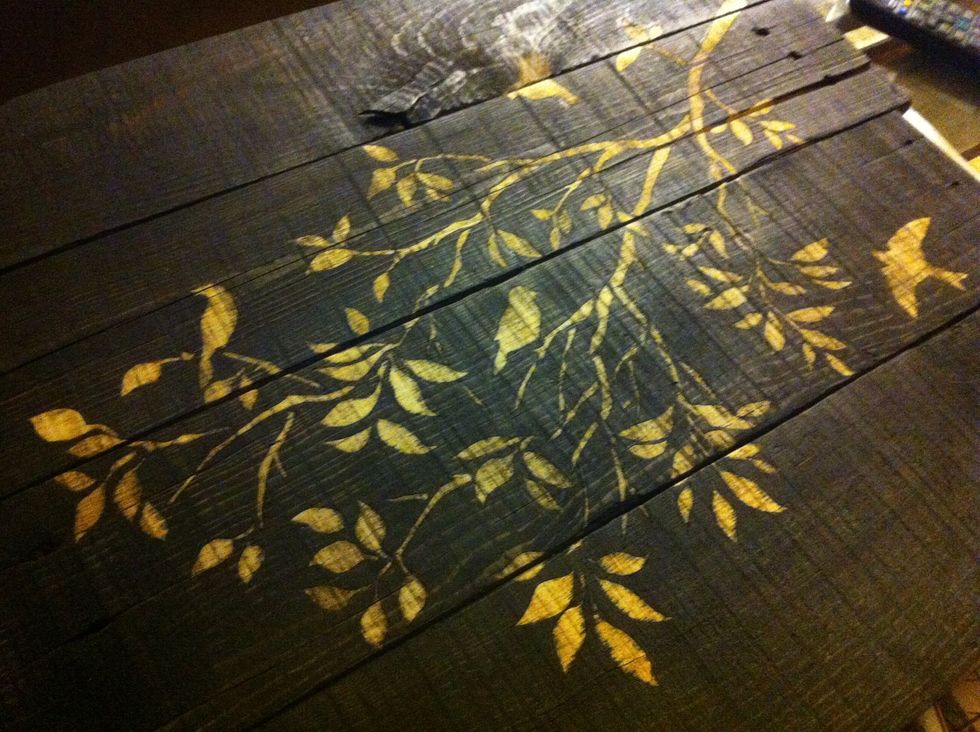
I painted a baby blue over top to give it an old layered paint look and when it dried enough scraped most of that away too, just leaving it around the edges and a bit in the middle.
Love it!
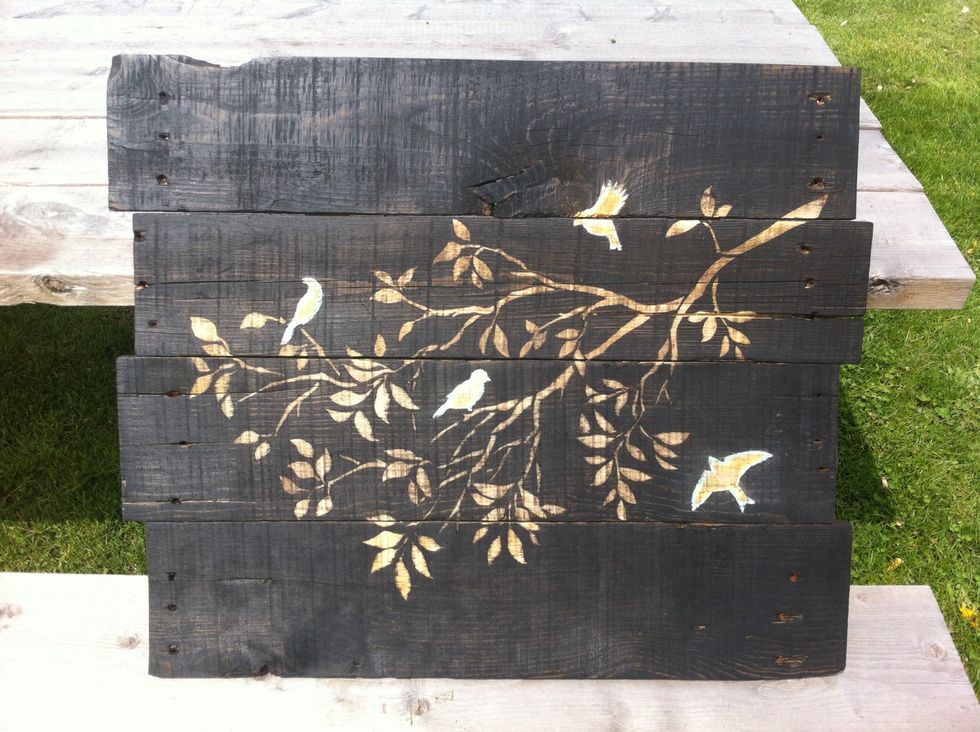
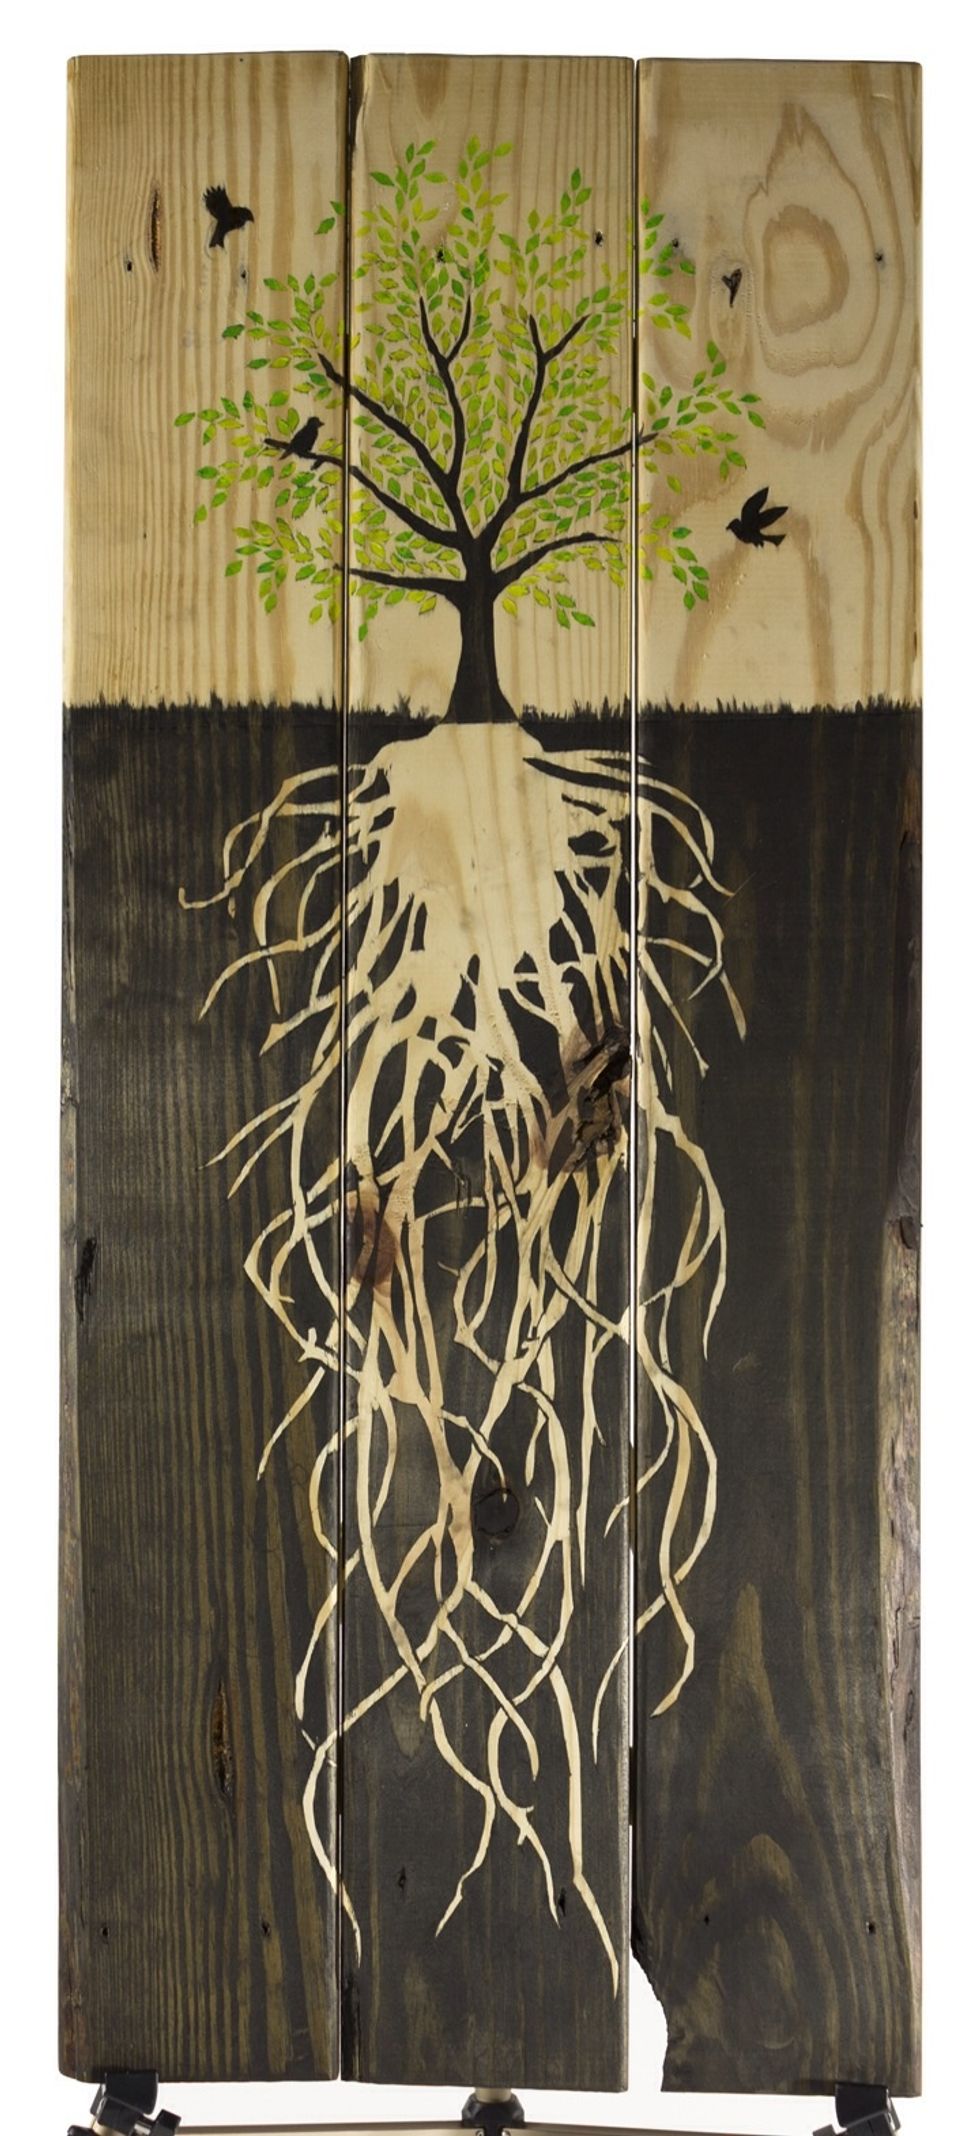
Finished wood art, with a few light coats of the matte polyurethane on top. This is more true to the color than the other indoor images which I didn't white balance. Oops :-/
When it was all finished and dry I screwed two eyelets into sturdy areas of the boards on the back and twisted the picture wire. Now it's ready to hang!
I made this one as a birthday gift for a friend, and will definitely be making another! Hope you have fun making your own! Good luck :)
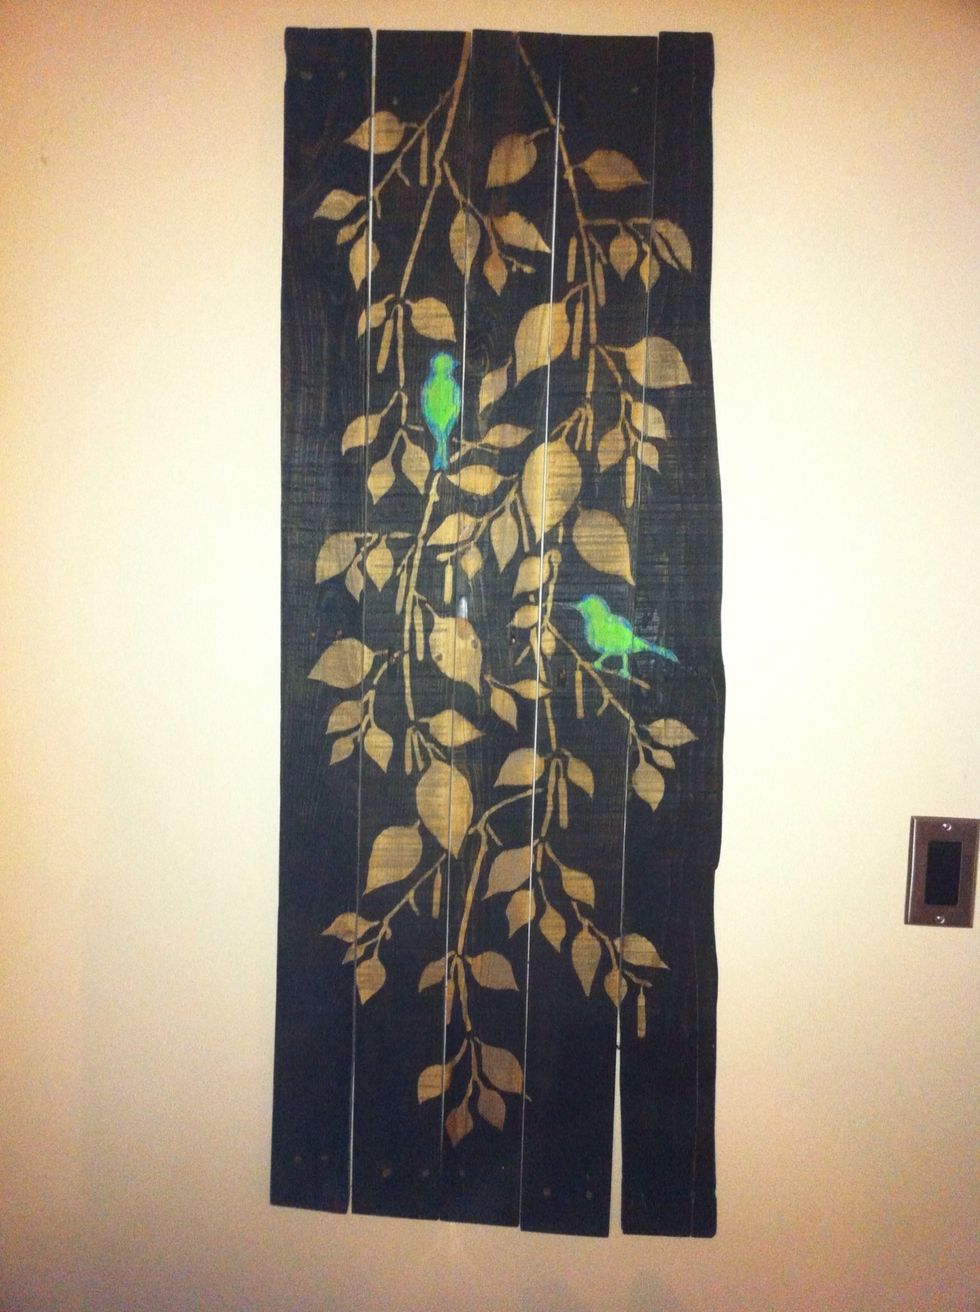
Here's an update to the guide! Another piece that I made for myself this time (custom size of course to fit a specific place in my home) :)

not quite as rustic as the painted birds last time but I mixed the colors of acrylic paint to these specific tones that my bf and i agreed would be bright and cheerful when we looked at it.
Another piece that I made for a charity auction at my work. I tried a bit of a different look this time, the wood of this pallet was great quality but i think I prefer the grimier wood!
For the "Roots" piece, I saturated a small craft brush with the stain and intentionally let it bleed up the wood grain to get the grass-like line
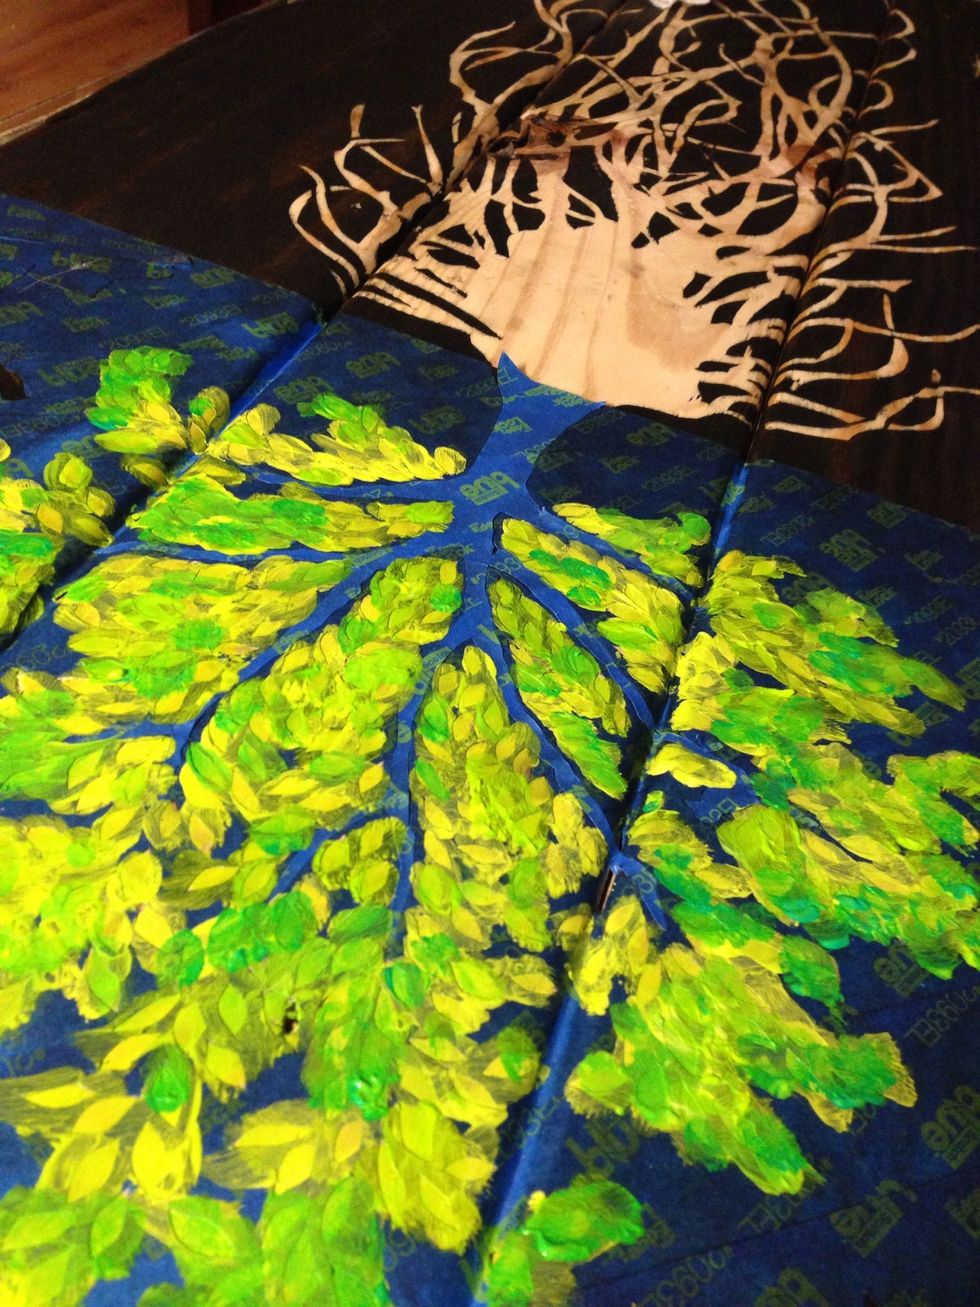
I also added an extra step in: I didn't peel off the leaves before staining. I waited for the stain to dry, put the trunk portion of tape back on, peeled off the leaves and painted on top
Thanks for reading! Please visit shoplaceandlumber.etsy.com to request a custom piece