The Conversation (0)
Sign Up
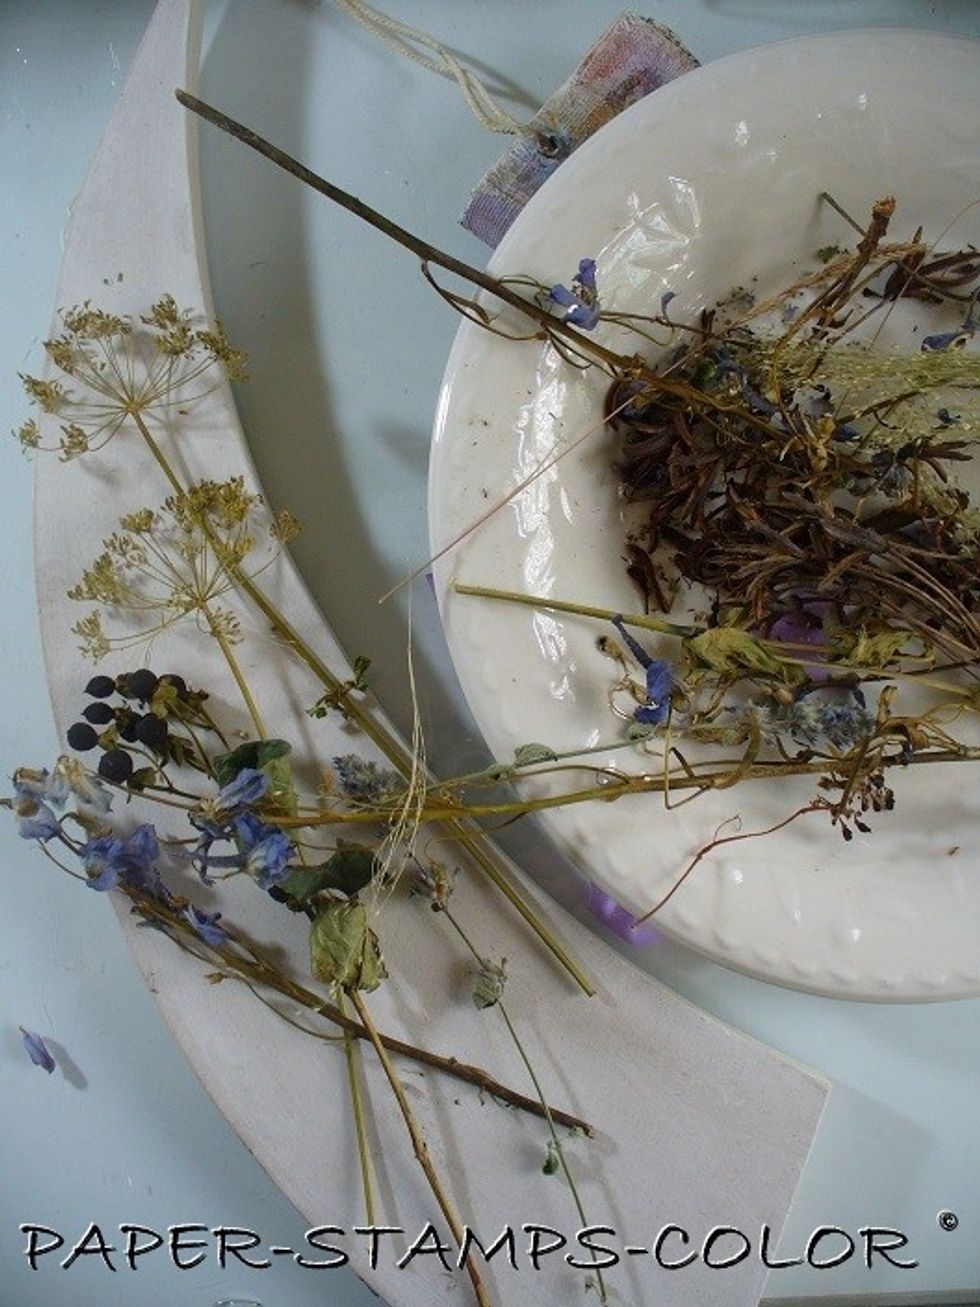
Gather yourself some dried flowers ....
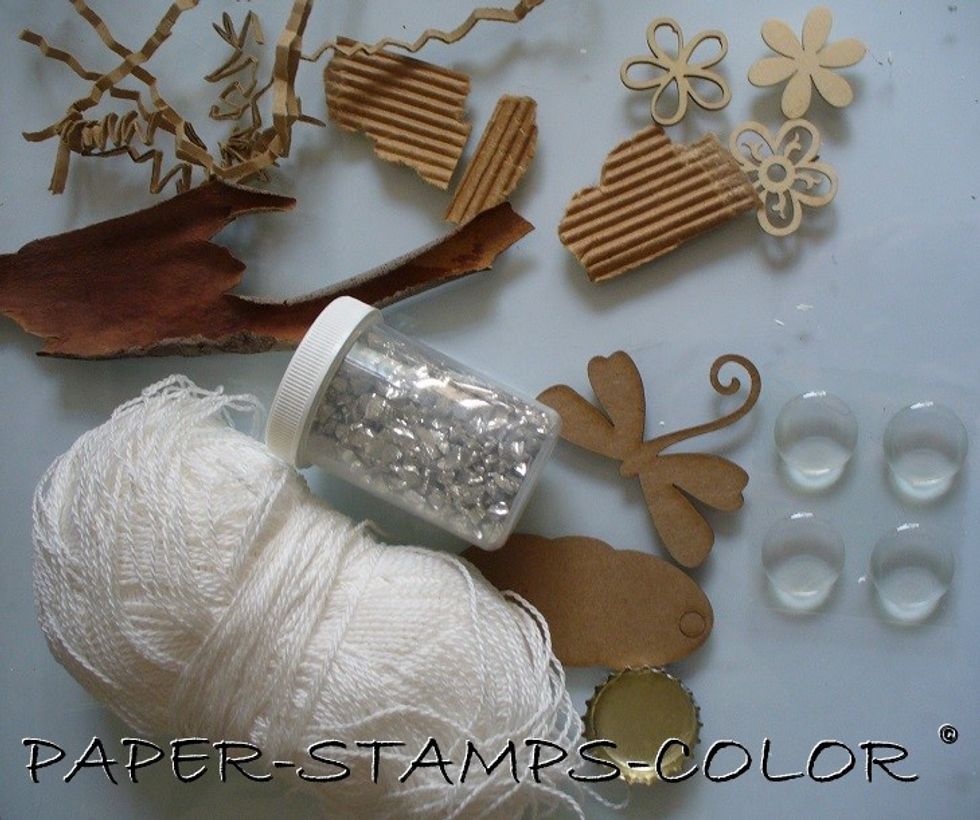
...and any other product you'd like to add to your collage. You might end up not using all of it, though.
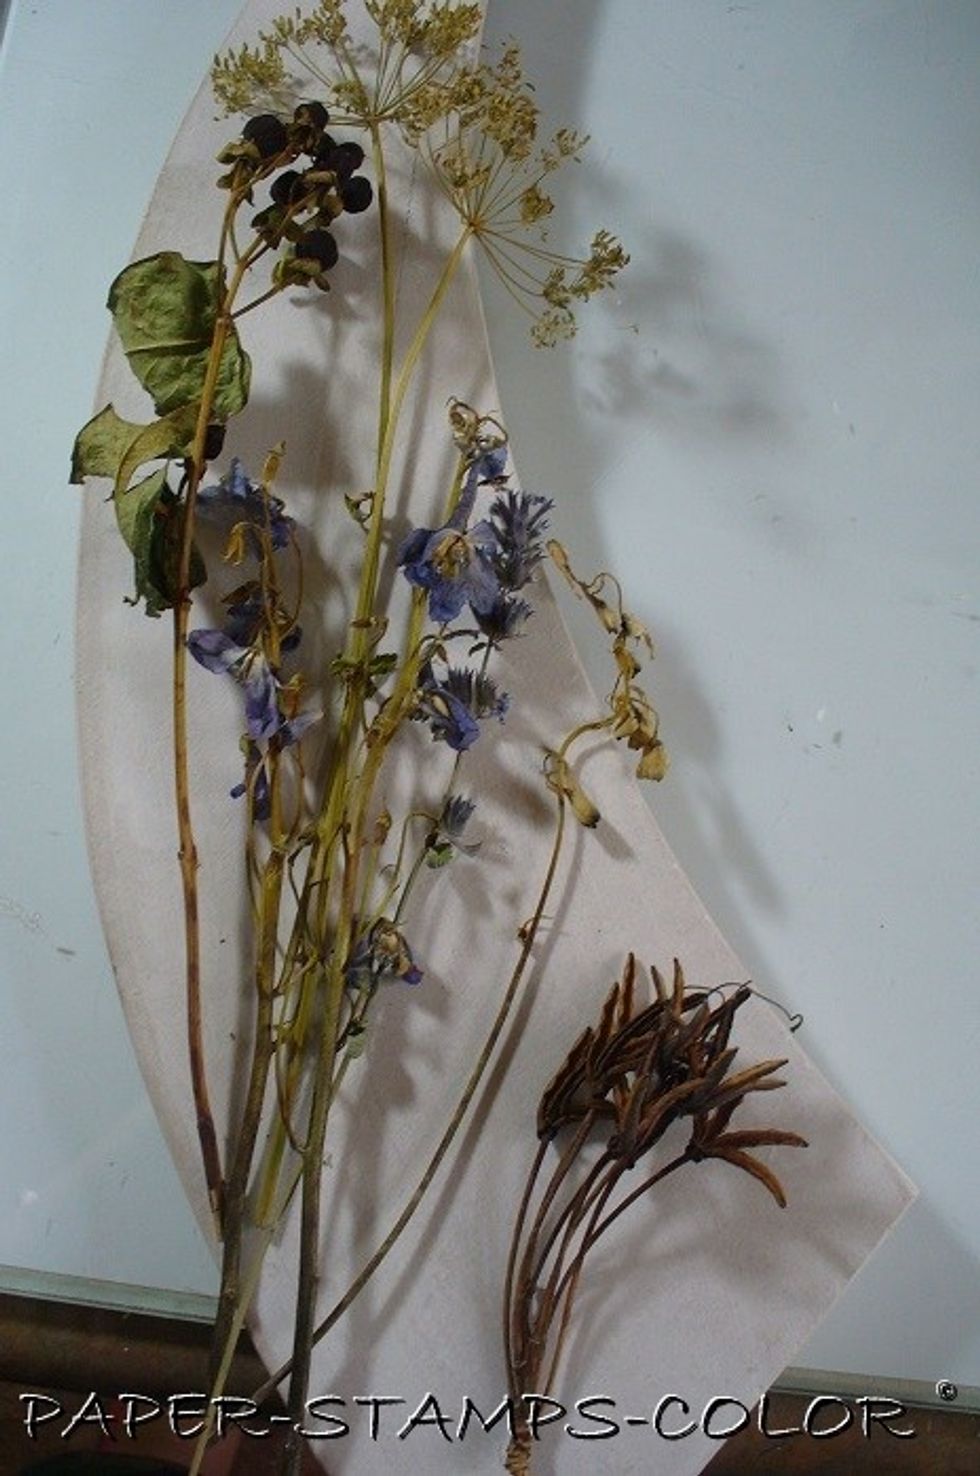
I primed a leftover piece of MDF with gesso and decide to use it for this project. First try and visualise what you'd like to achieve, and which dried flowers to use.
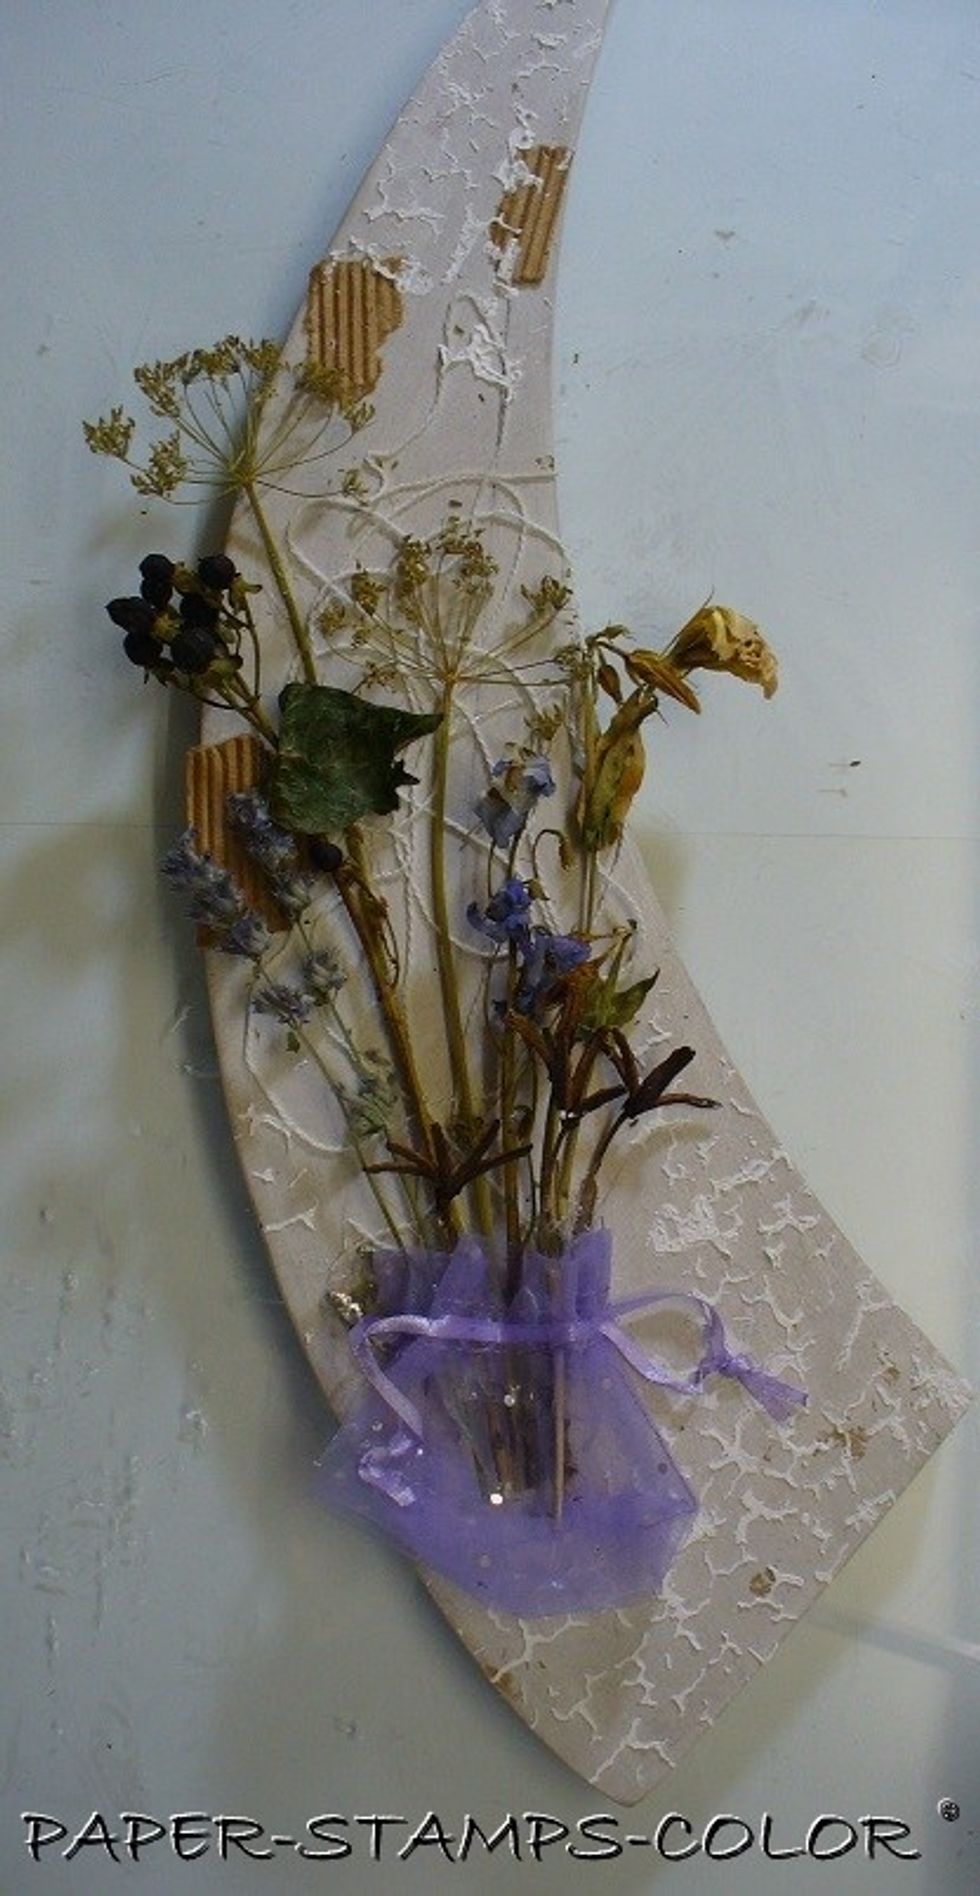
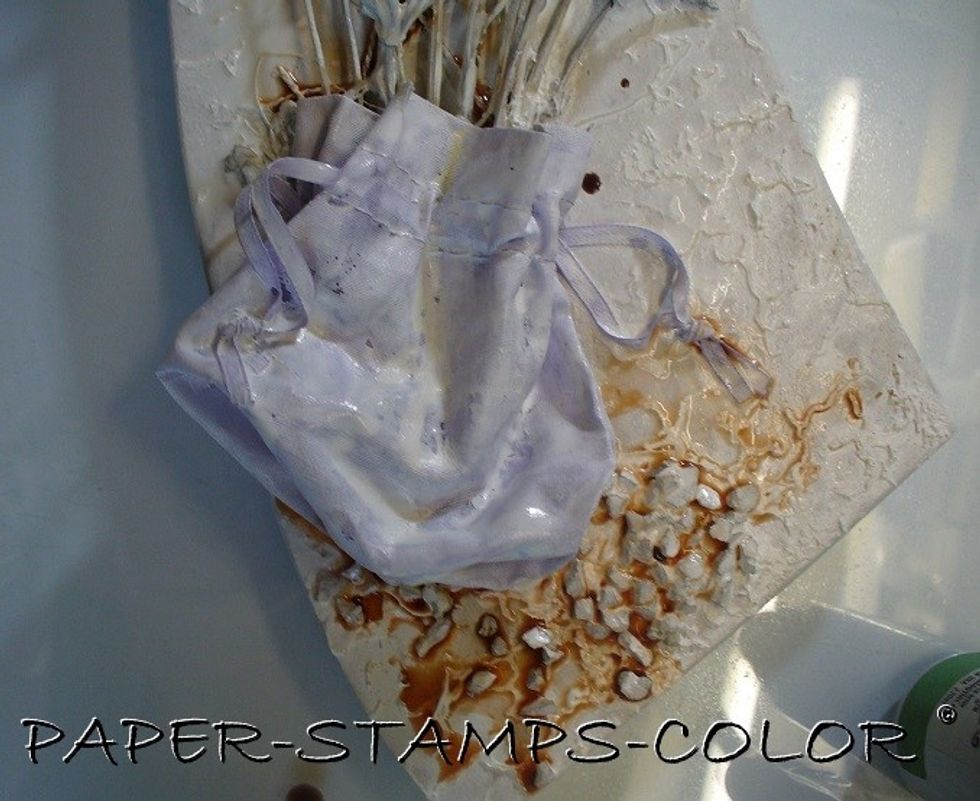
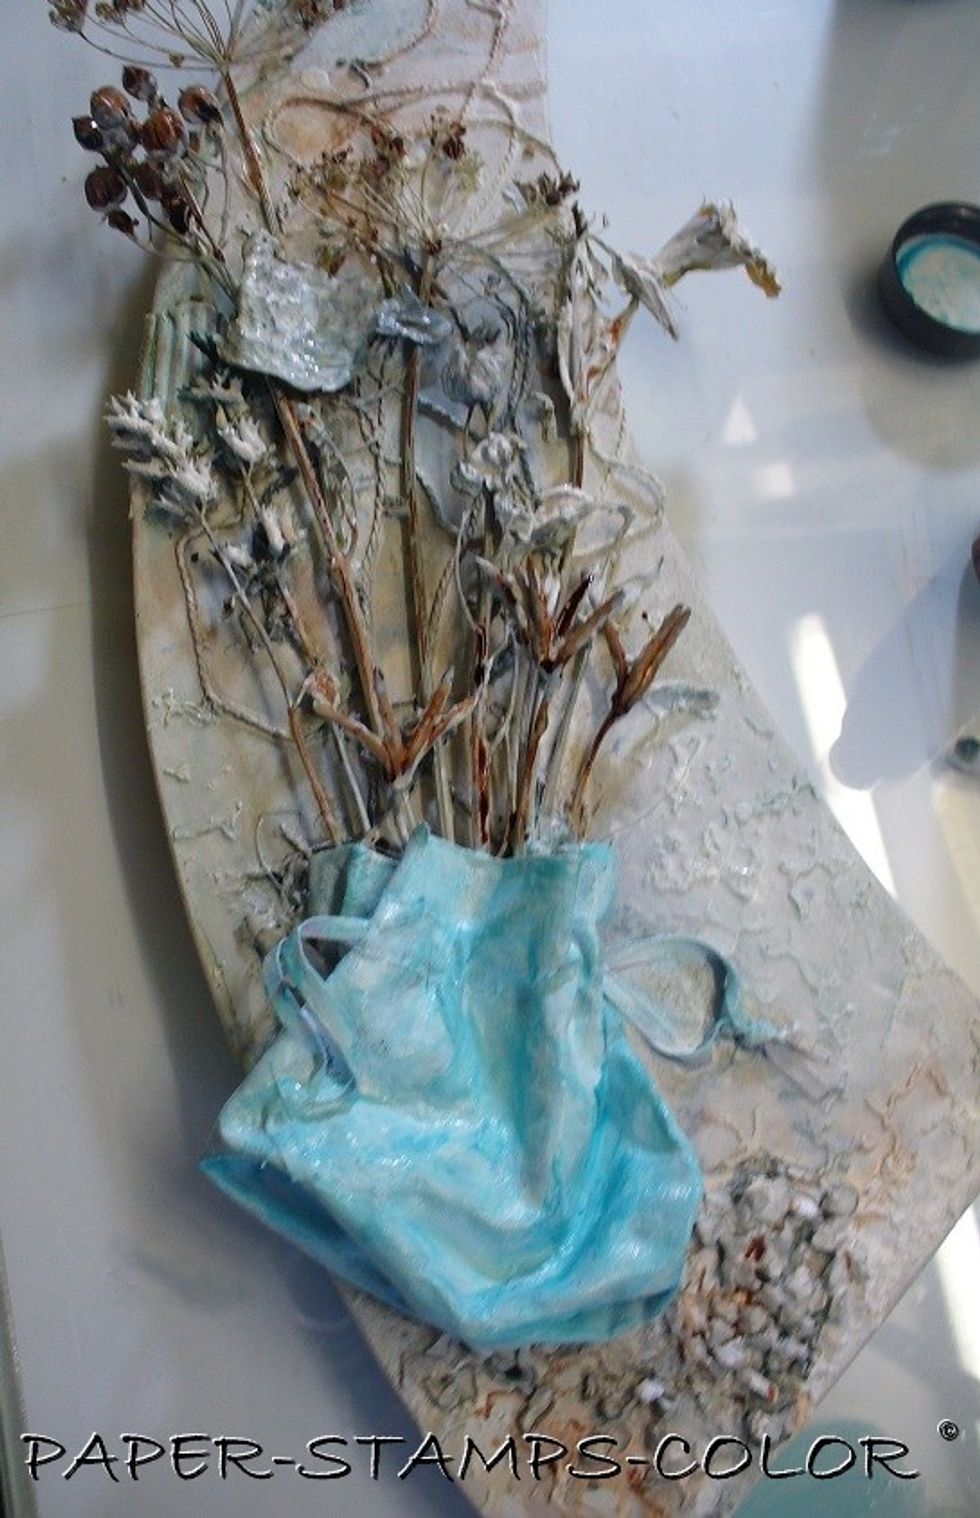
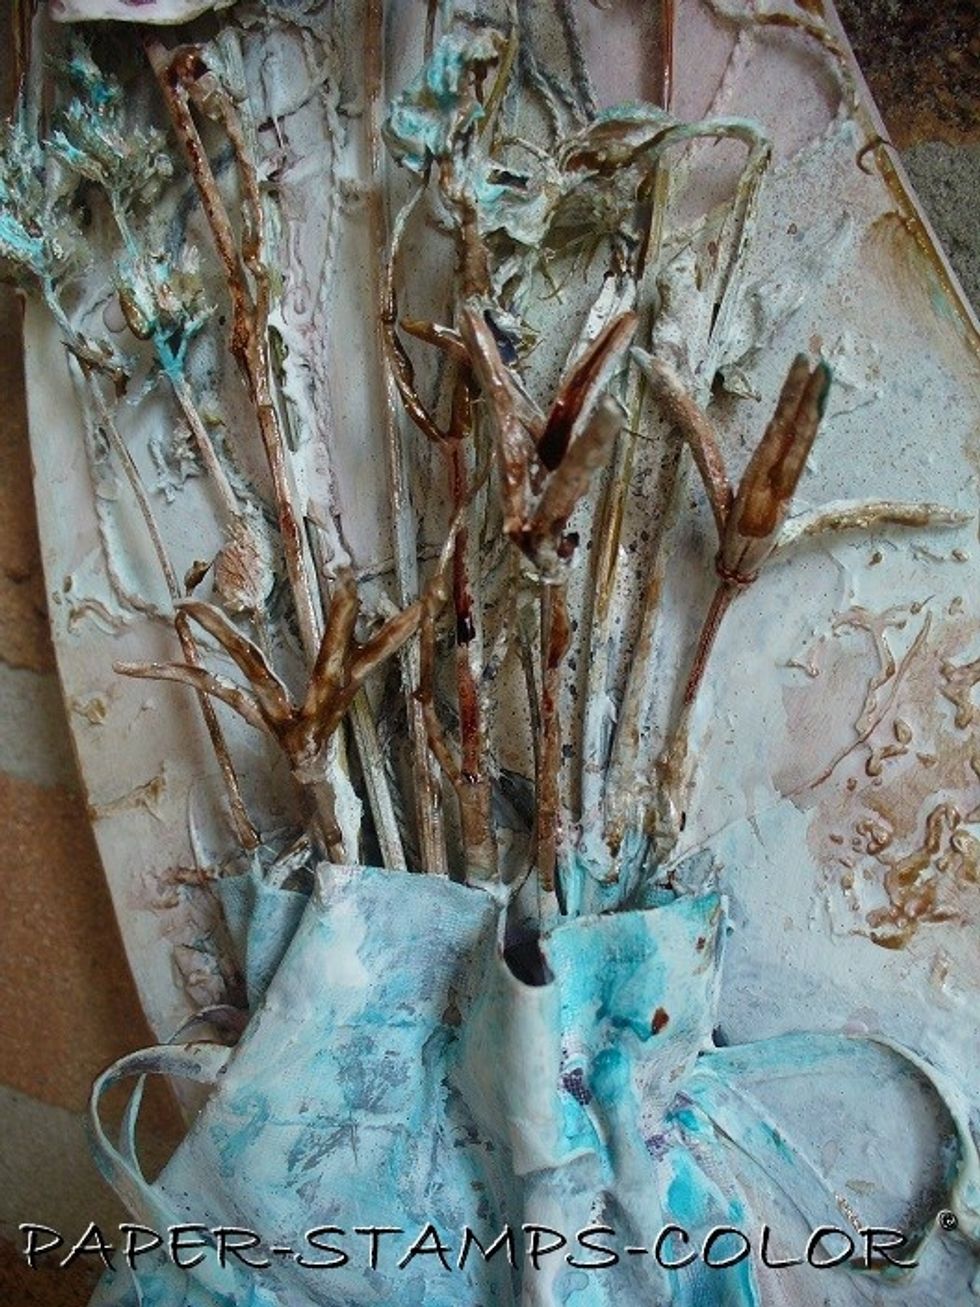
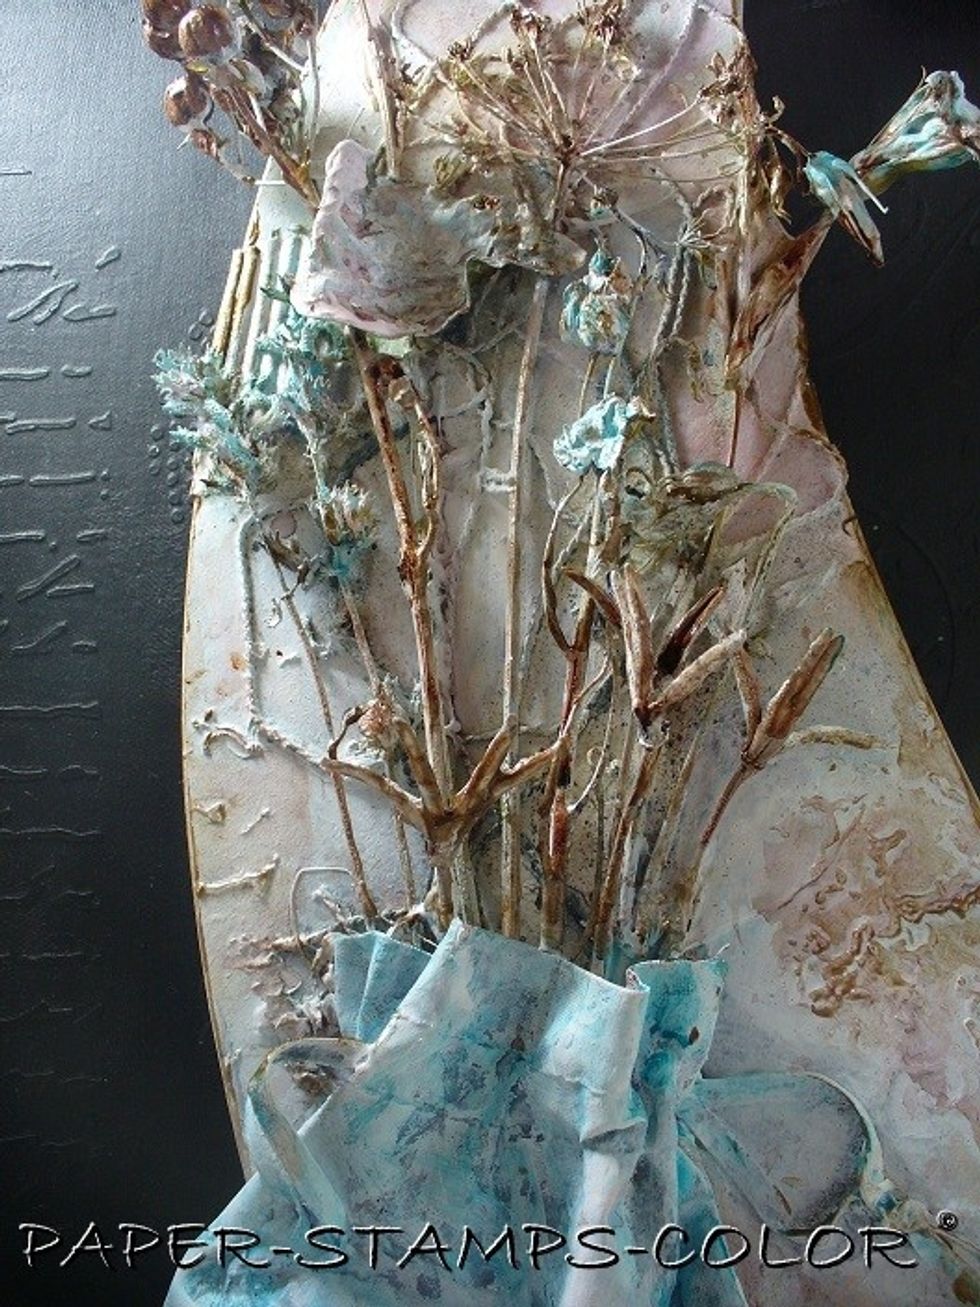
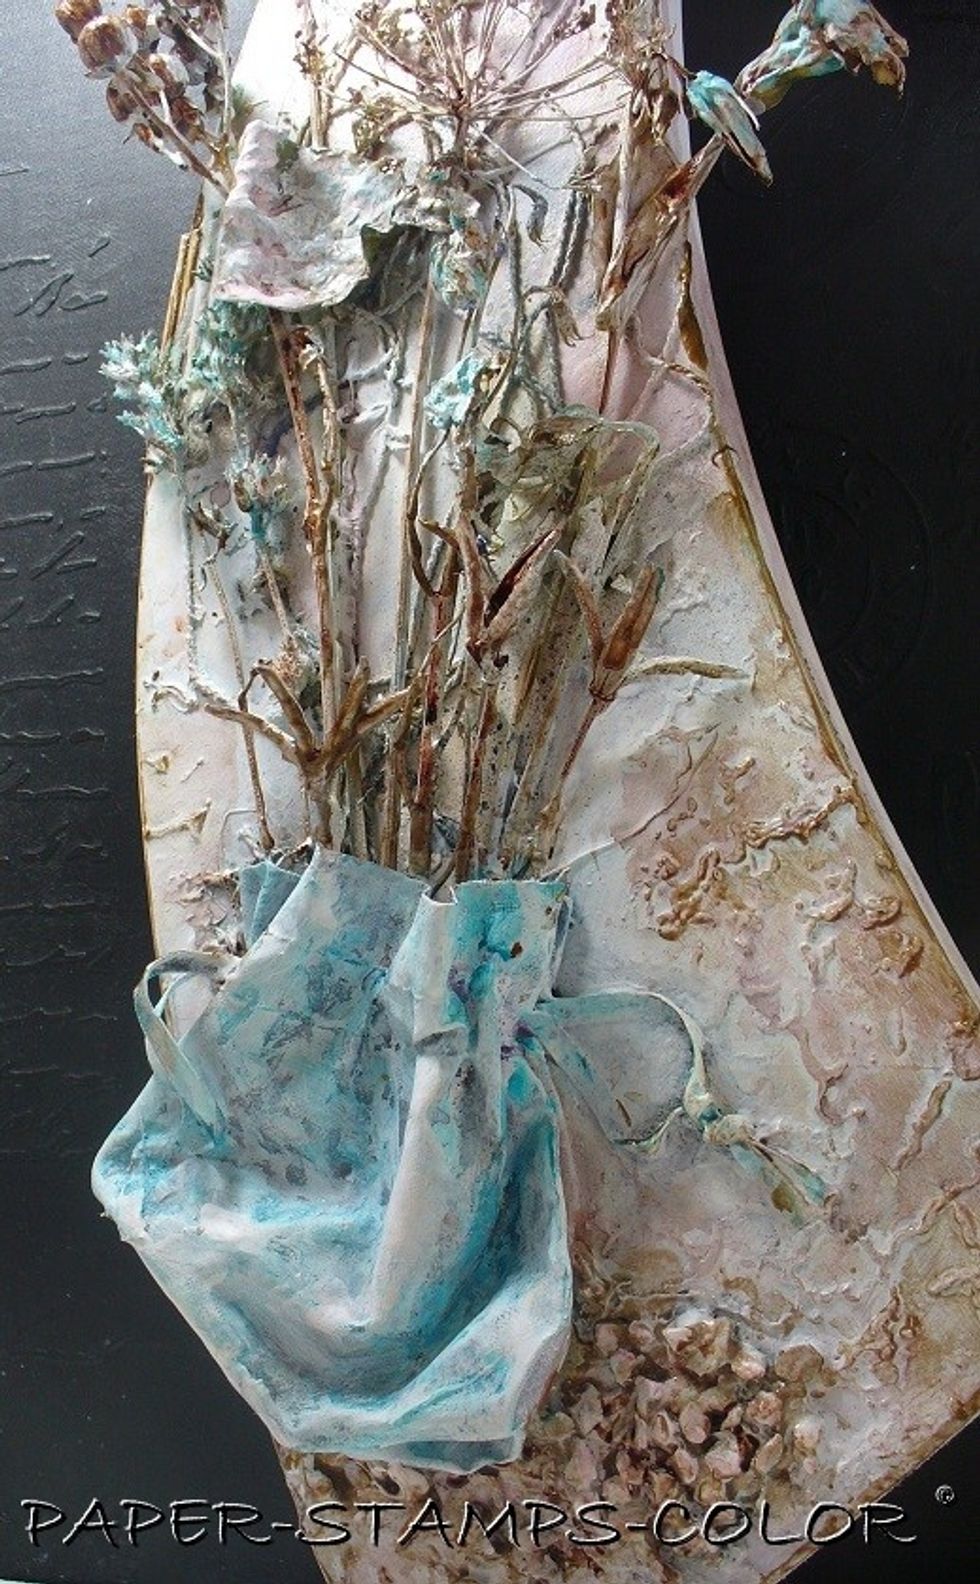
I added yarn, pieces of corrugated cardboard, a 'bag' from my stash to hold the stems. Assemble everything with hot glue. Add structure paste with the Cracked Stencil to add ineterest.
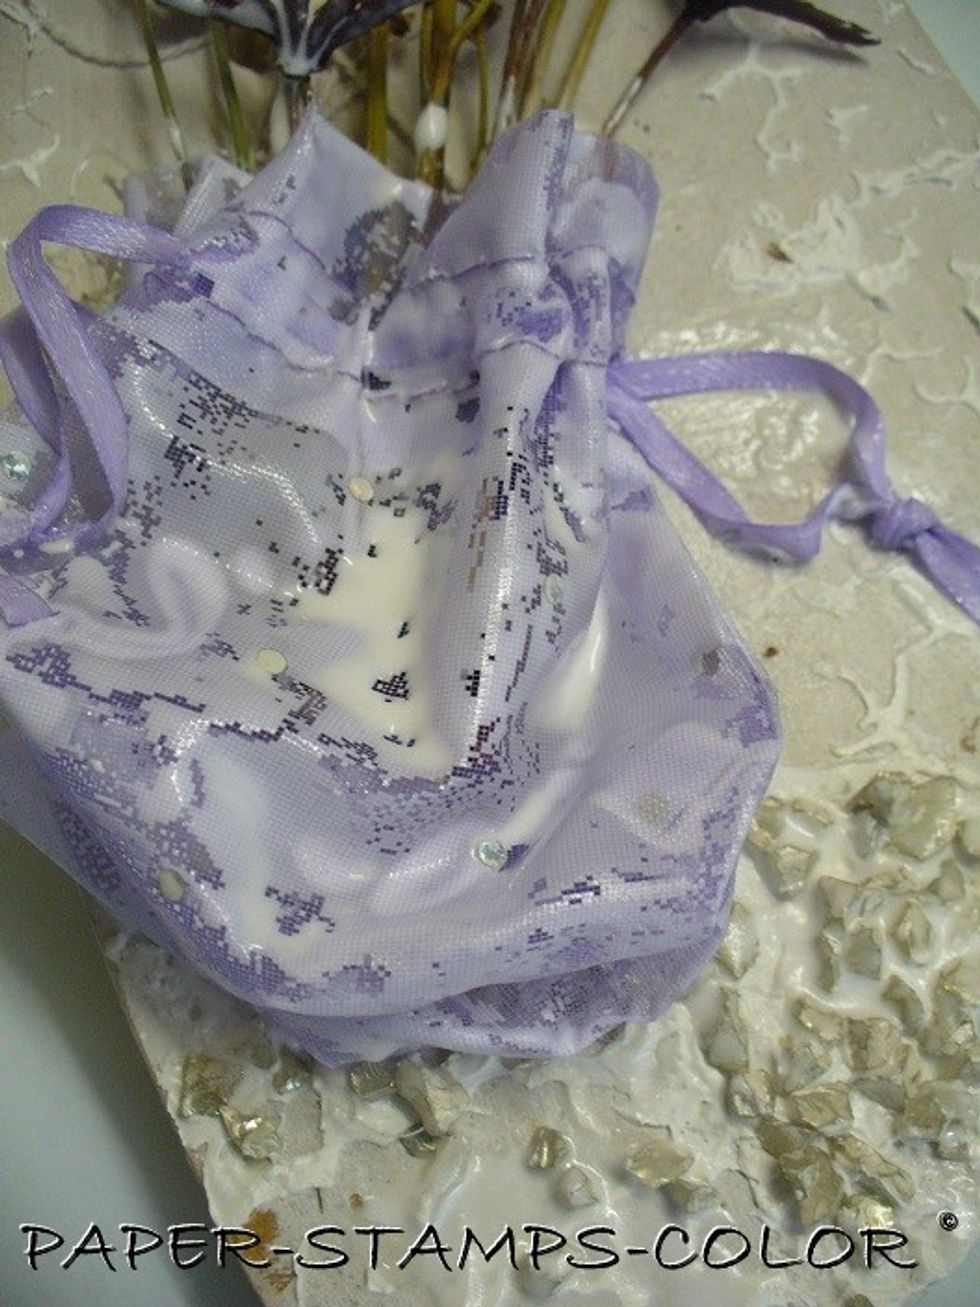
To harden the 'bag', paint it with a mixture of white glue, gesso and water. You might want to do multiple layers, drying it inbetween each layer.
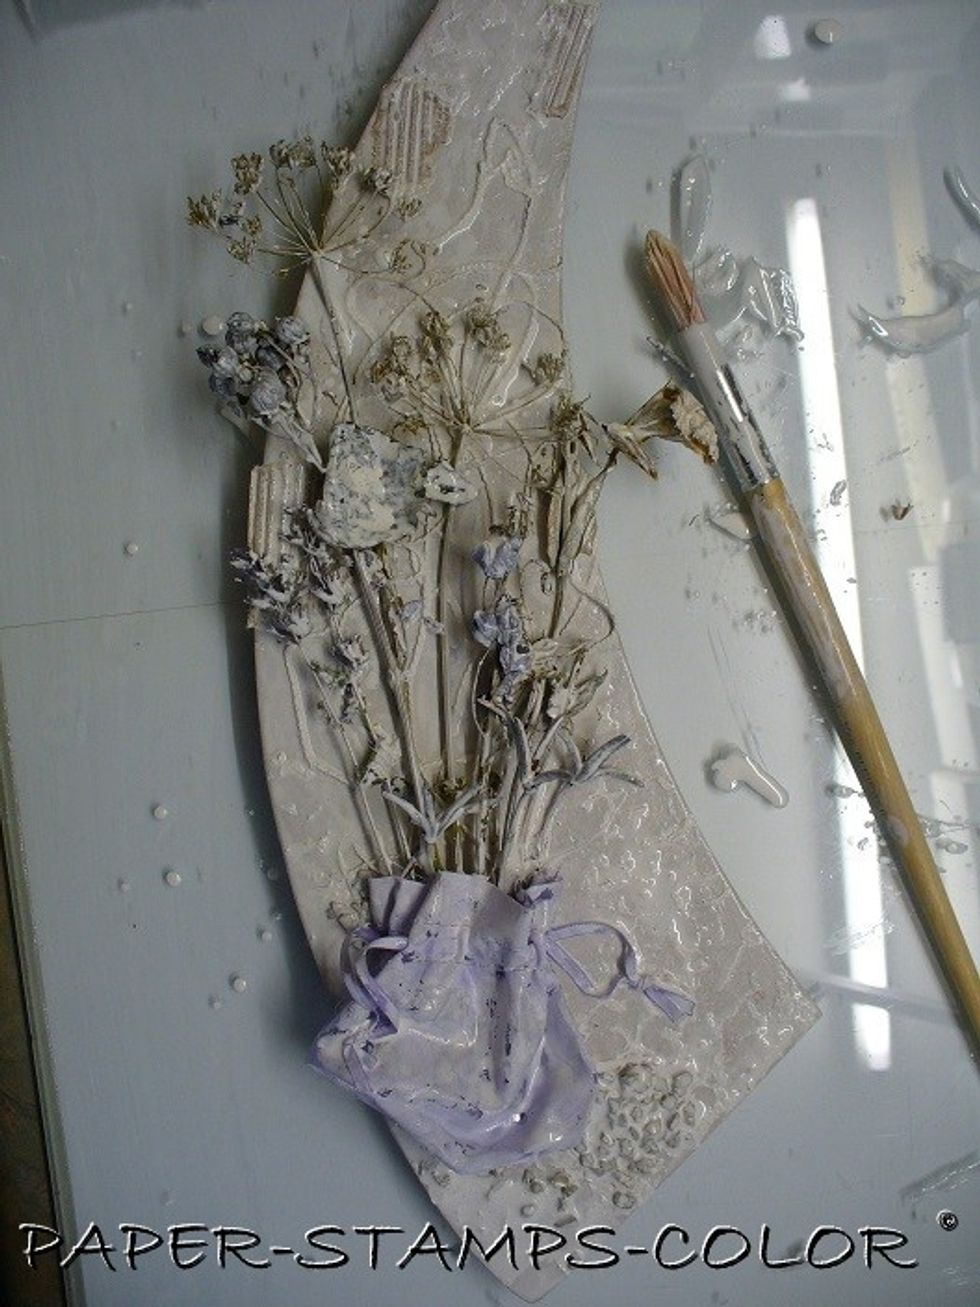
Cover the whole of the project with this mixture, or use just watered-down gesso.
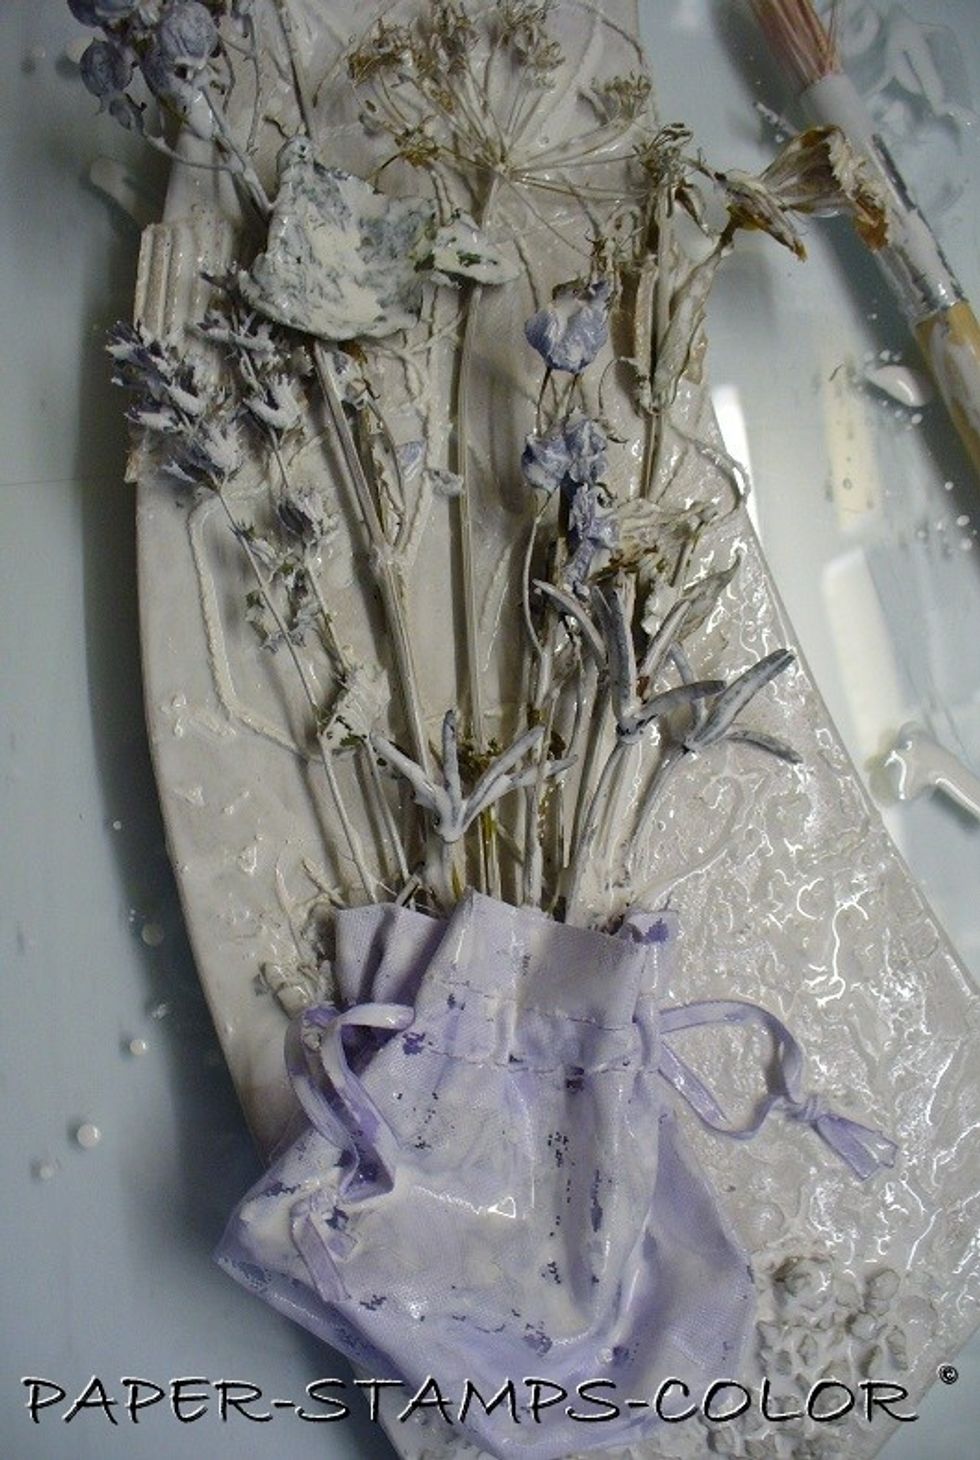
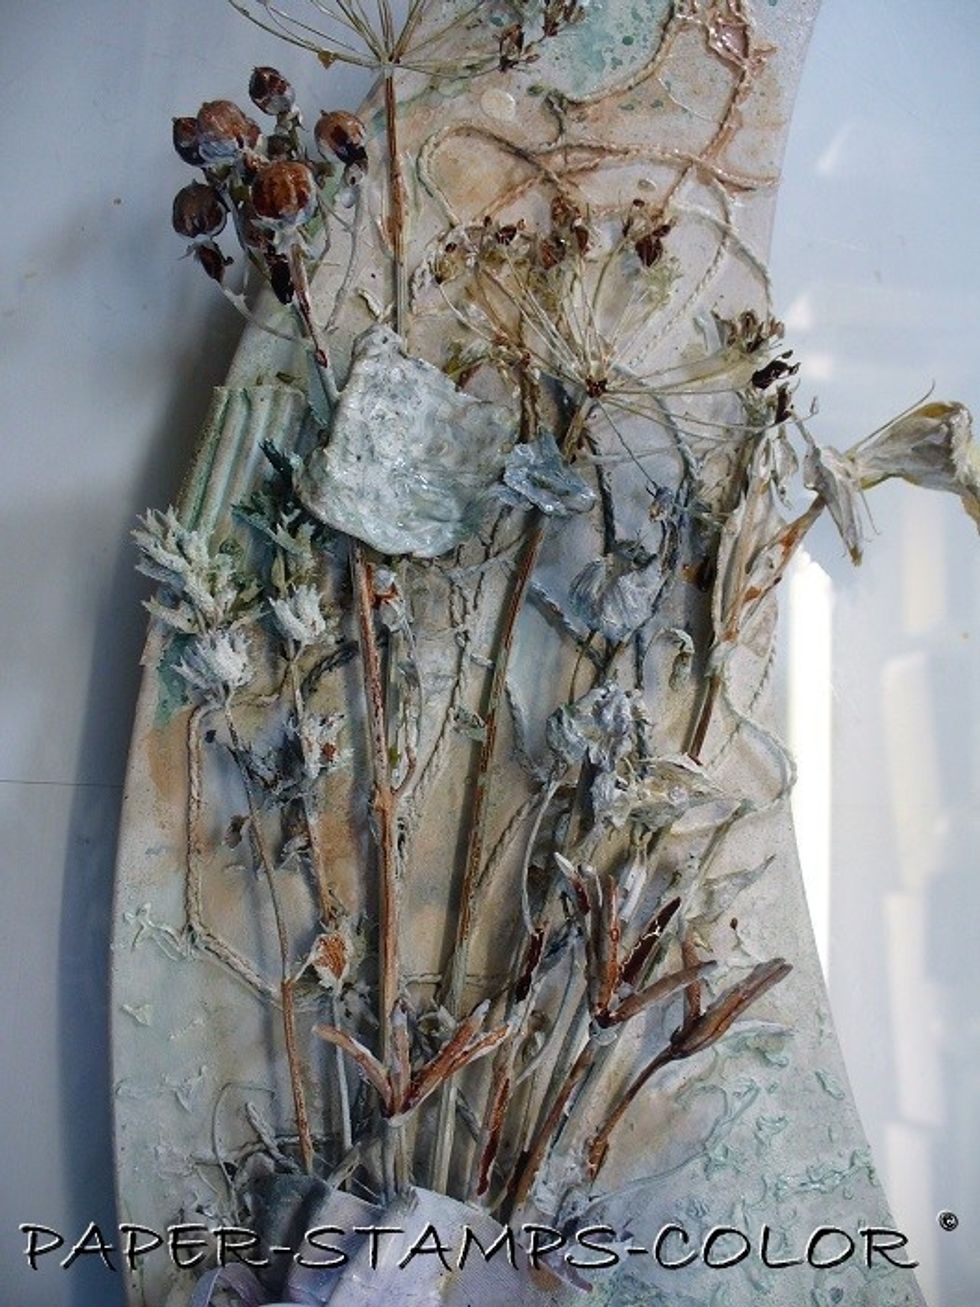
Add a second layer of gesso when dry. A close up of the project so far....
NOW for the coloring... I had to think about that... and started with a safe one... drops of Decadent Minx in the background....
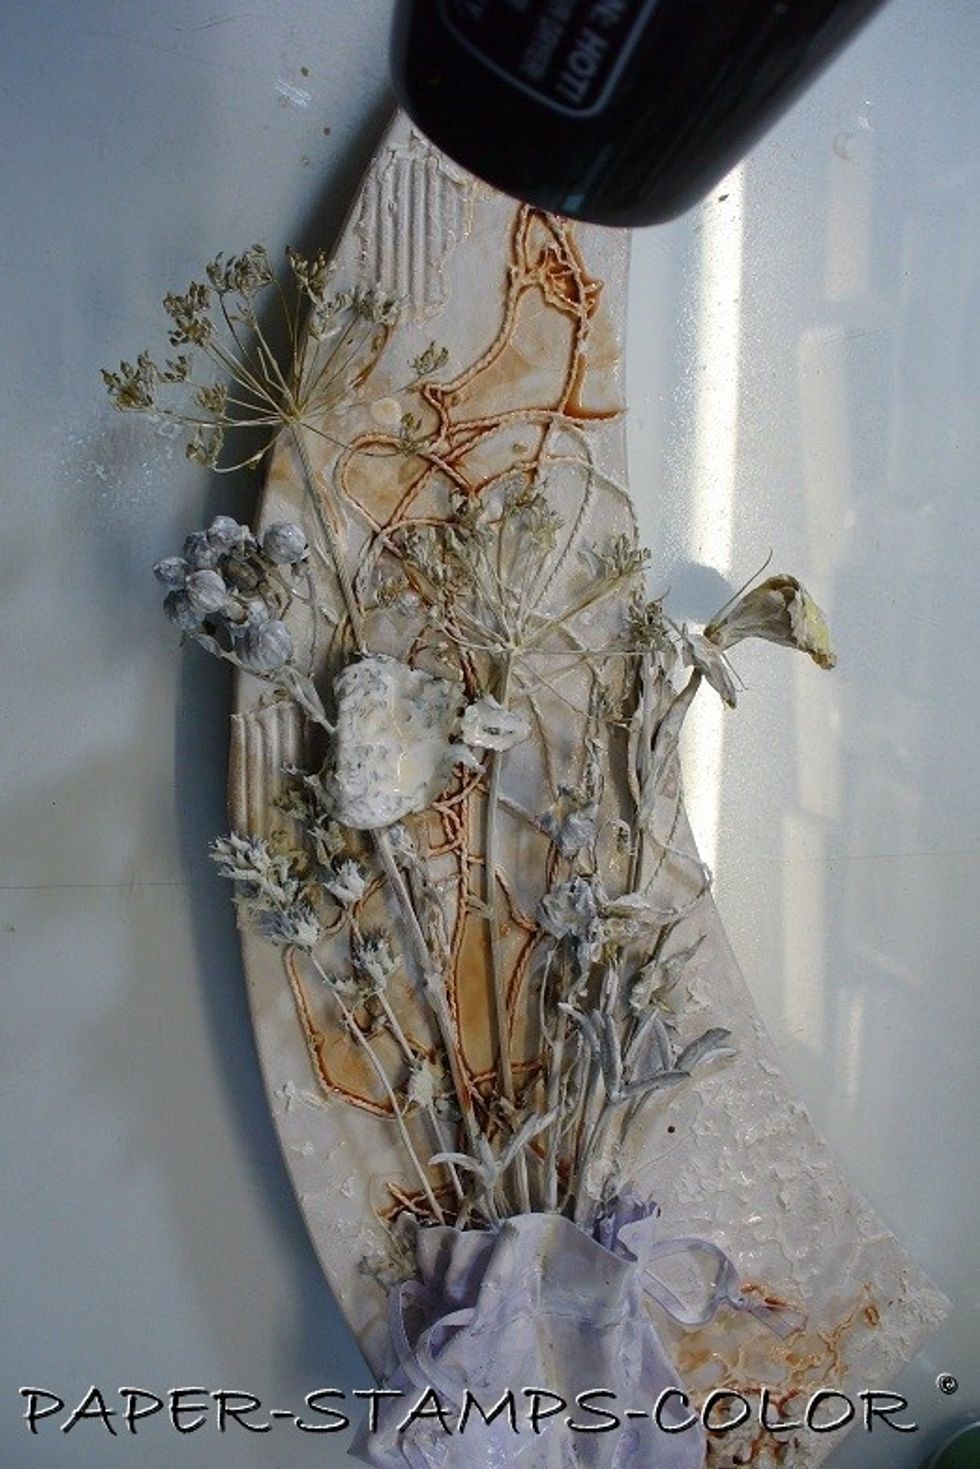
...which were misted with water to make it run, and dried with a heat tool.
A close-up of the yummy color between the 'stones' .. which will be the base for the 'bag' to sit on.
I decided to add some Clover Colorations Spray, but regretted it immediately... it's a gorgeous color, but not what I wanted for this project.
BUT I just kept going... Add Decadent Minx Shimmering inks to the stems and berries with its pipette. Just drag the color over it. Leave to dry.
It's time to just sit back and decide how to continue.

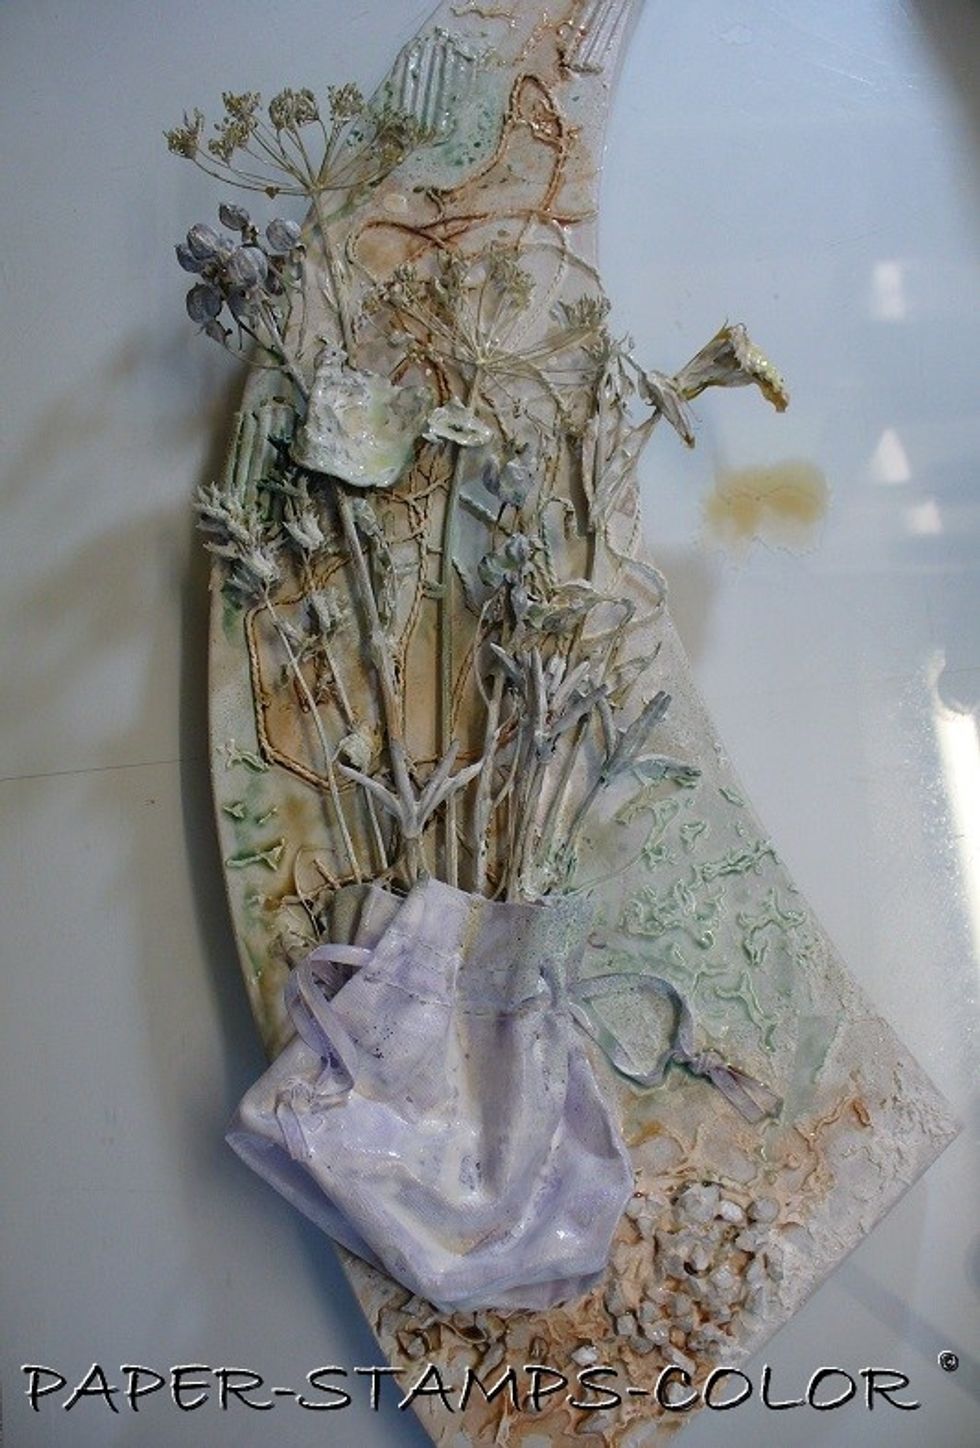
I decided to go for a greenish blue for the 'bag' and the flowers for some added color, which is the Velvet Fiji. I watered it down first....
... and colored the baggy with it. Am I happy? No.... too bright .. not shabby enough.
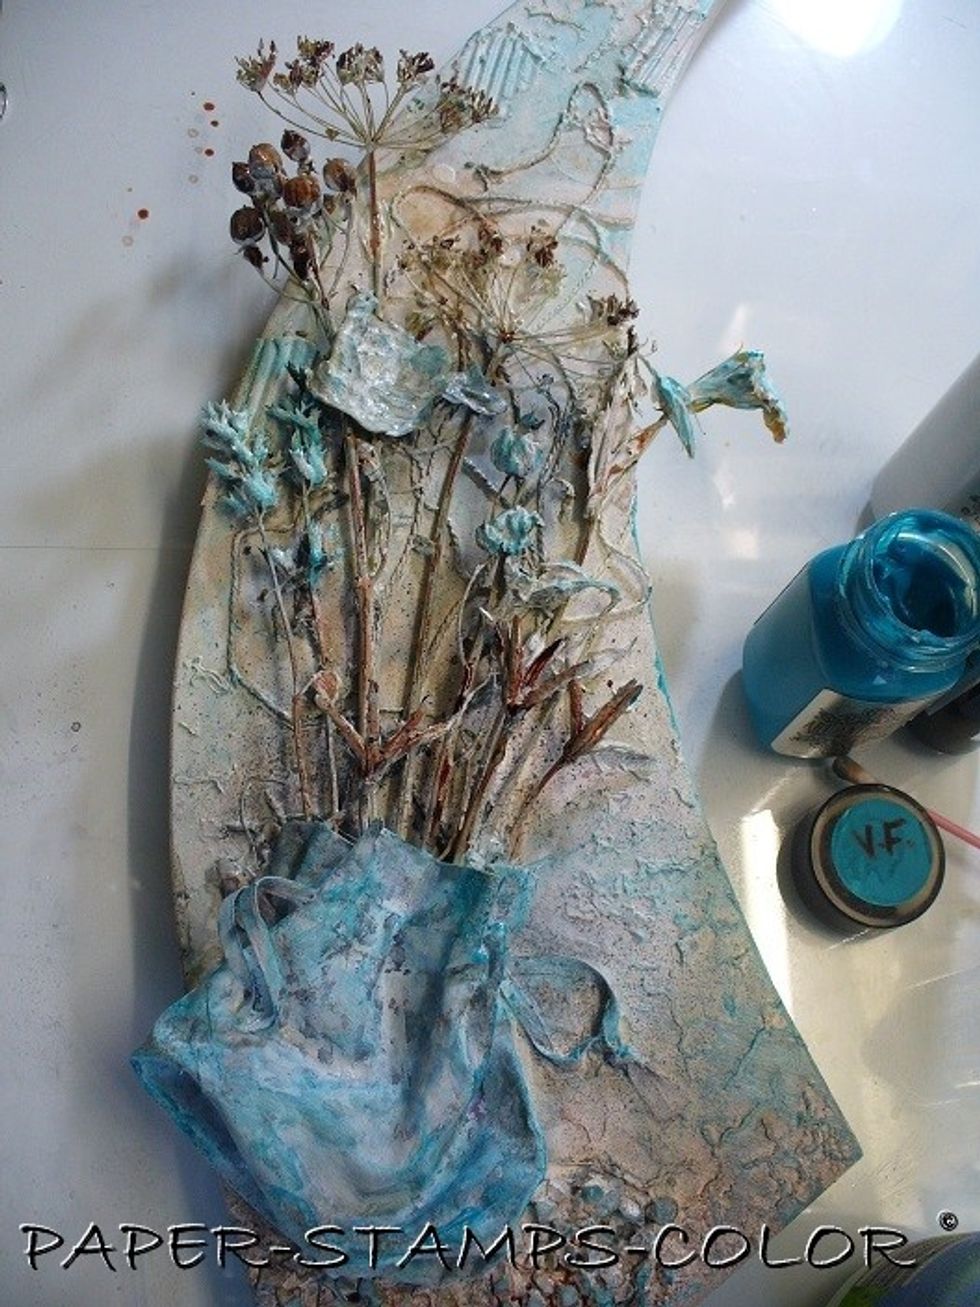
I kept going! I also colored the flowers with it. I toned the blue down by dabbing some white paint over it with my finger. I also added some blue to the background, rubbing it on with my finger.
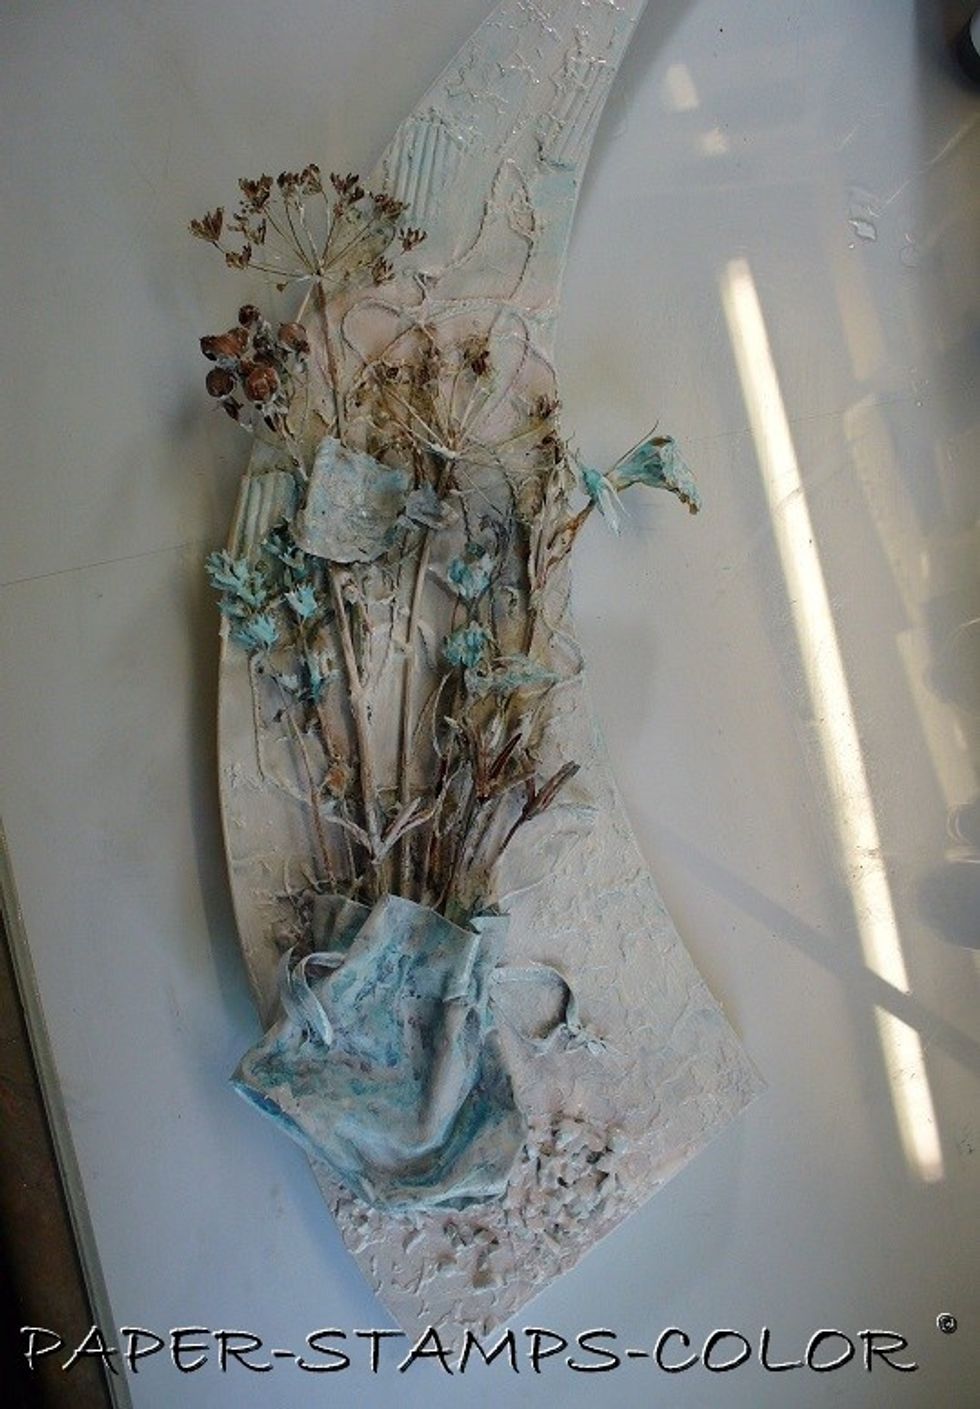
At this stage I decided to mute the colors in the background by ... yes... just adding white watered-down paint over it with a brush. The colors are still peeping through... yes .. that looks better!
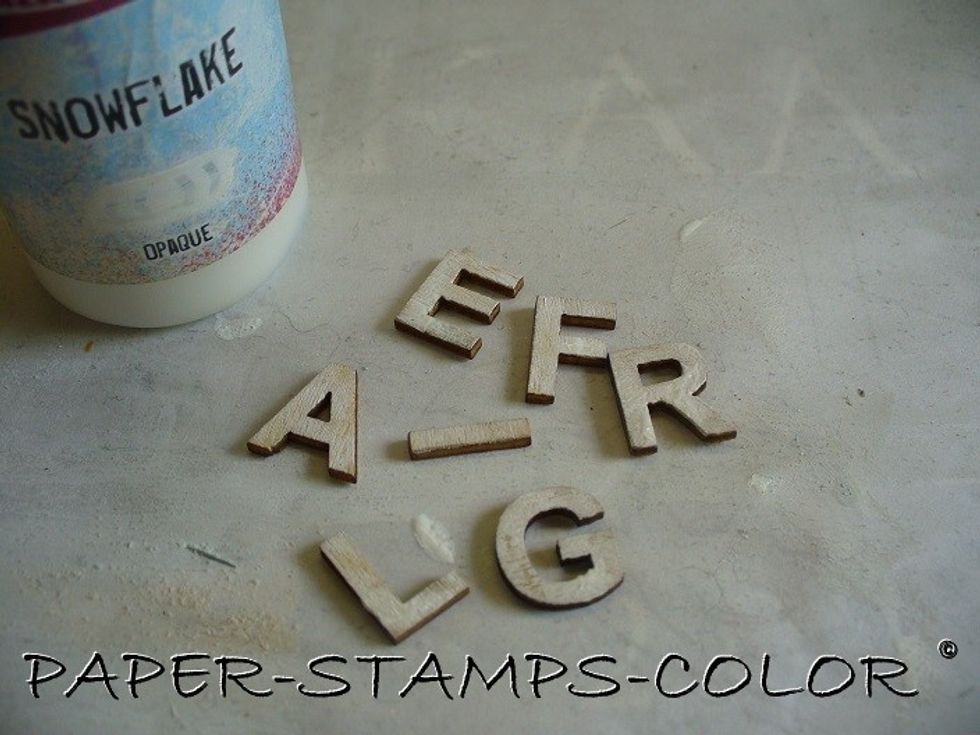
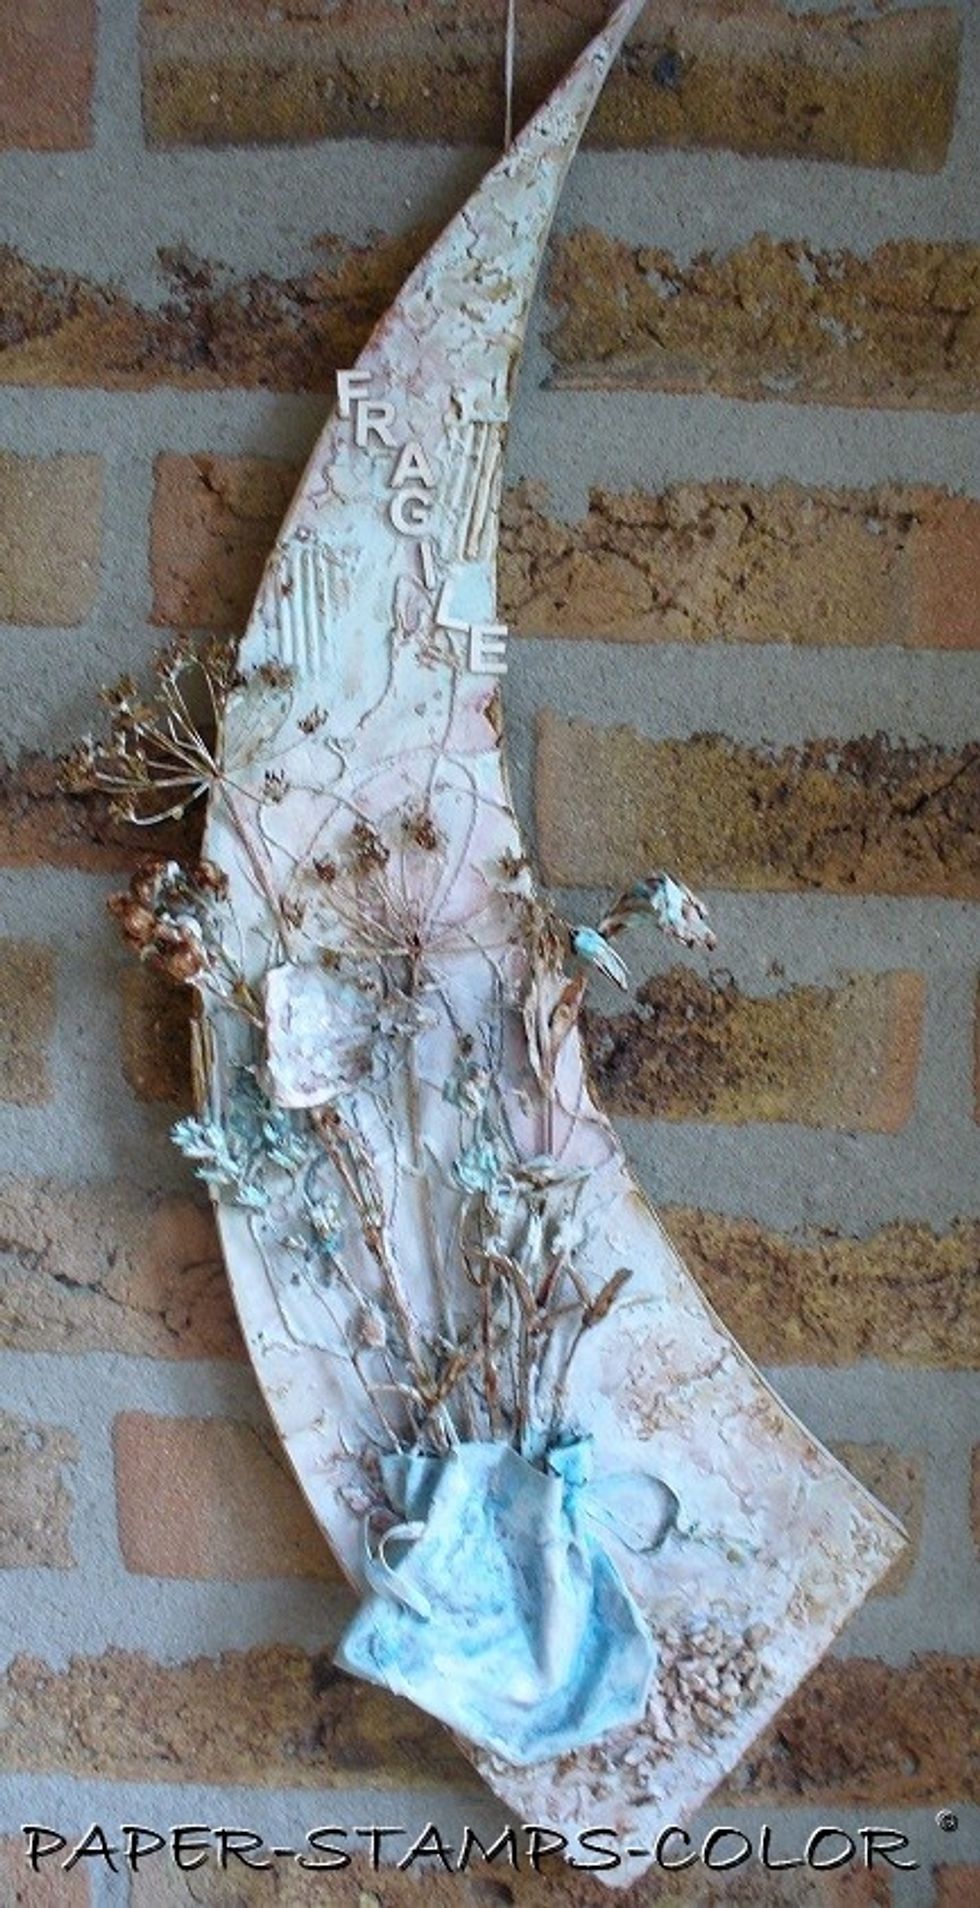
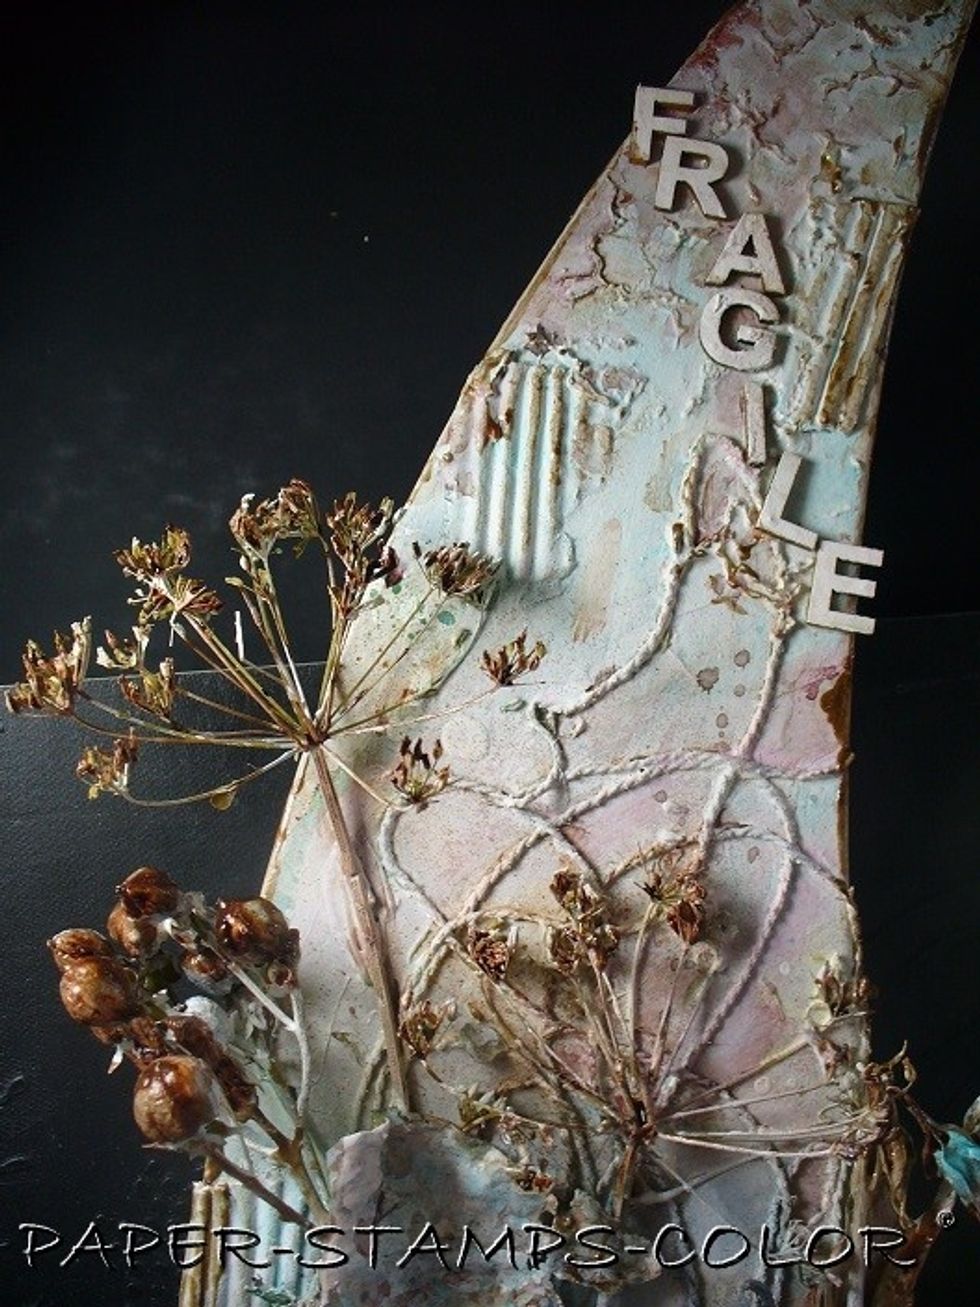
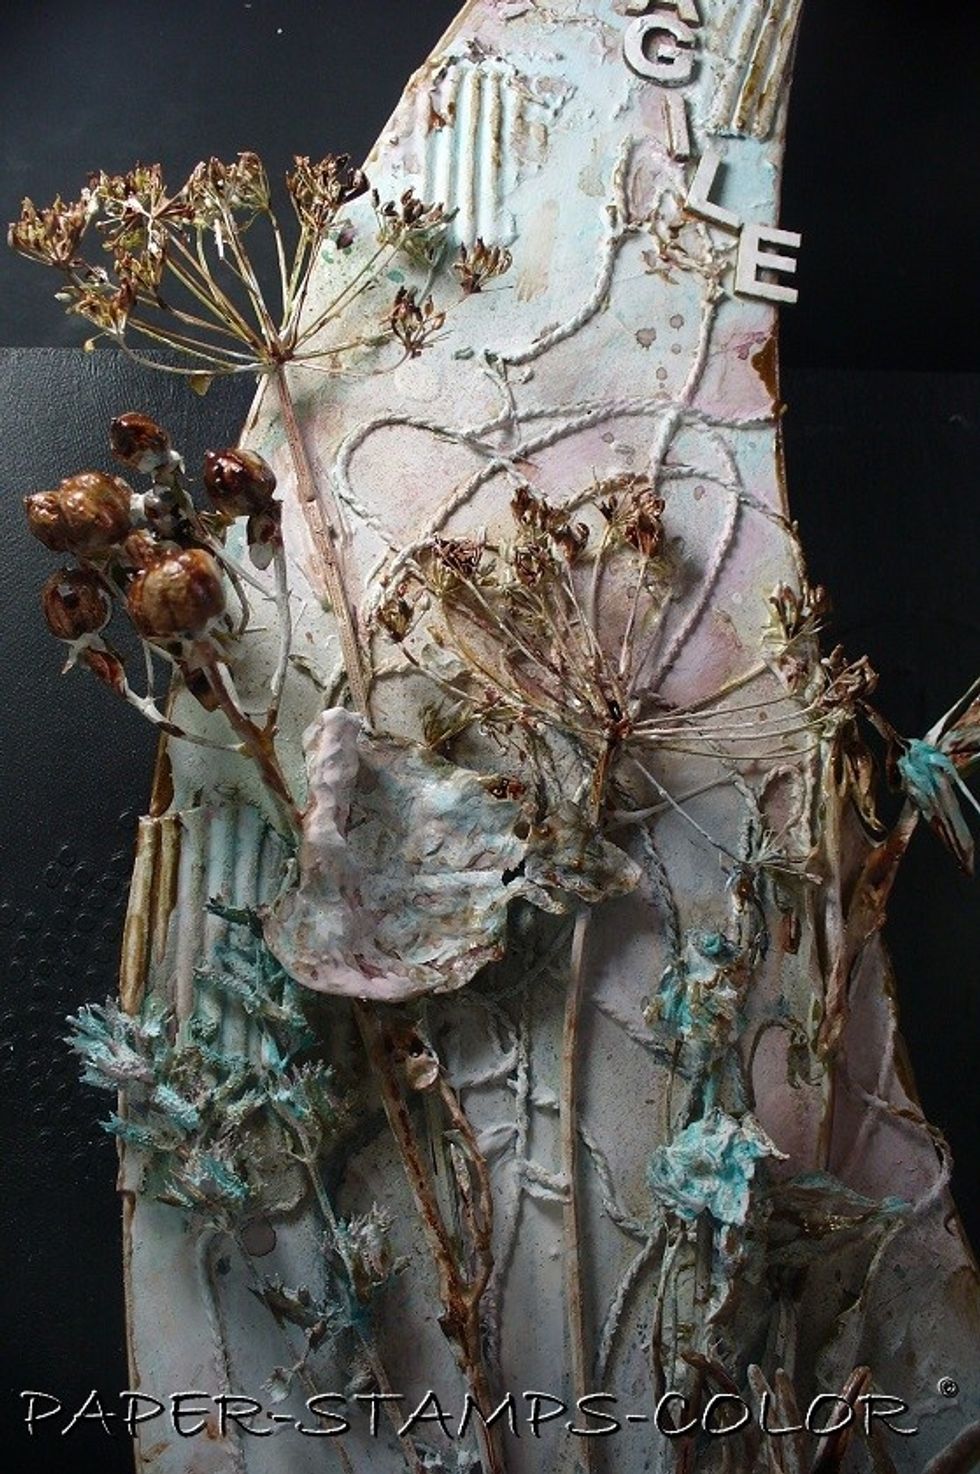
I decided to add a title.. to fill up the space at the top.. What word can you make of this ? YES.. F R A G I L E.. that's what my creation is about!
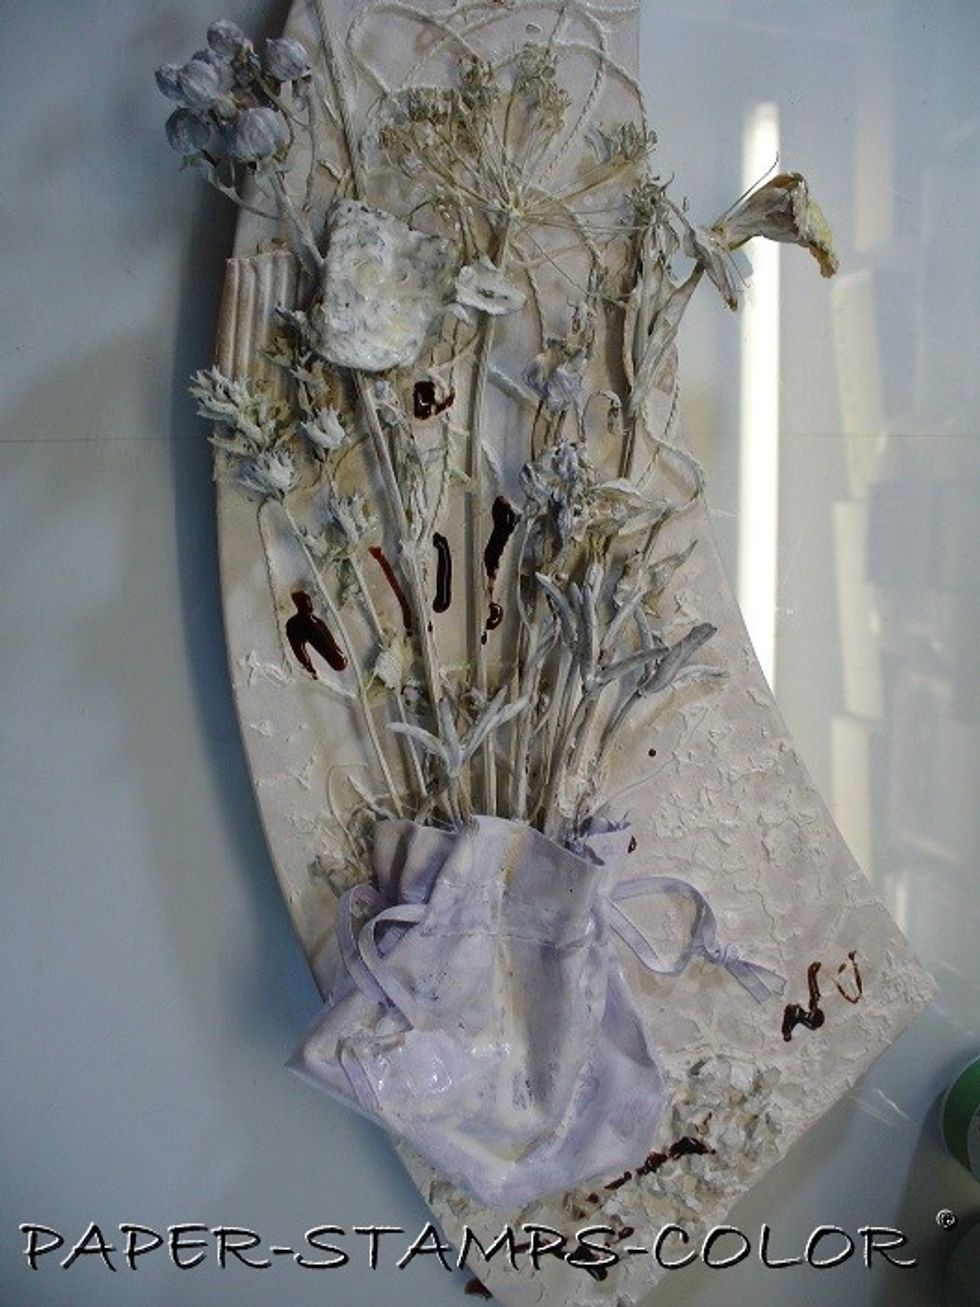
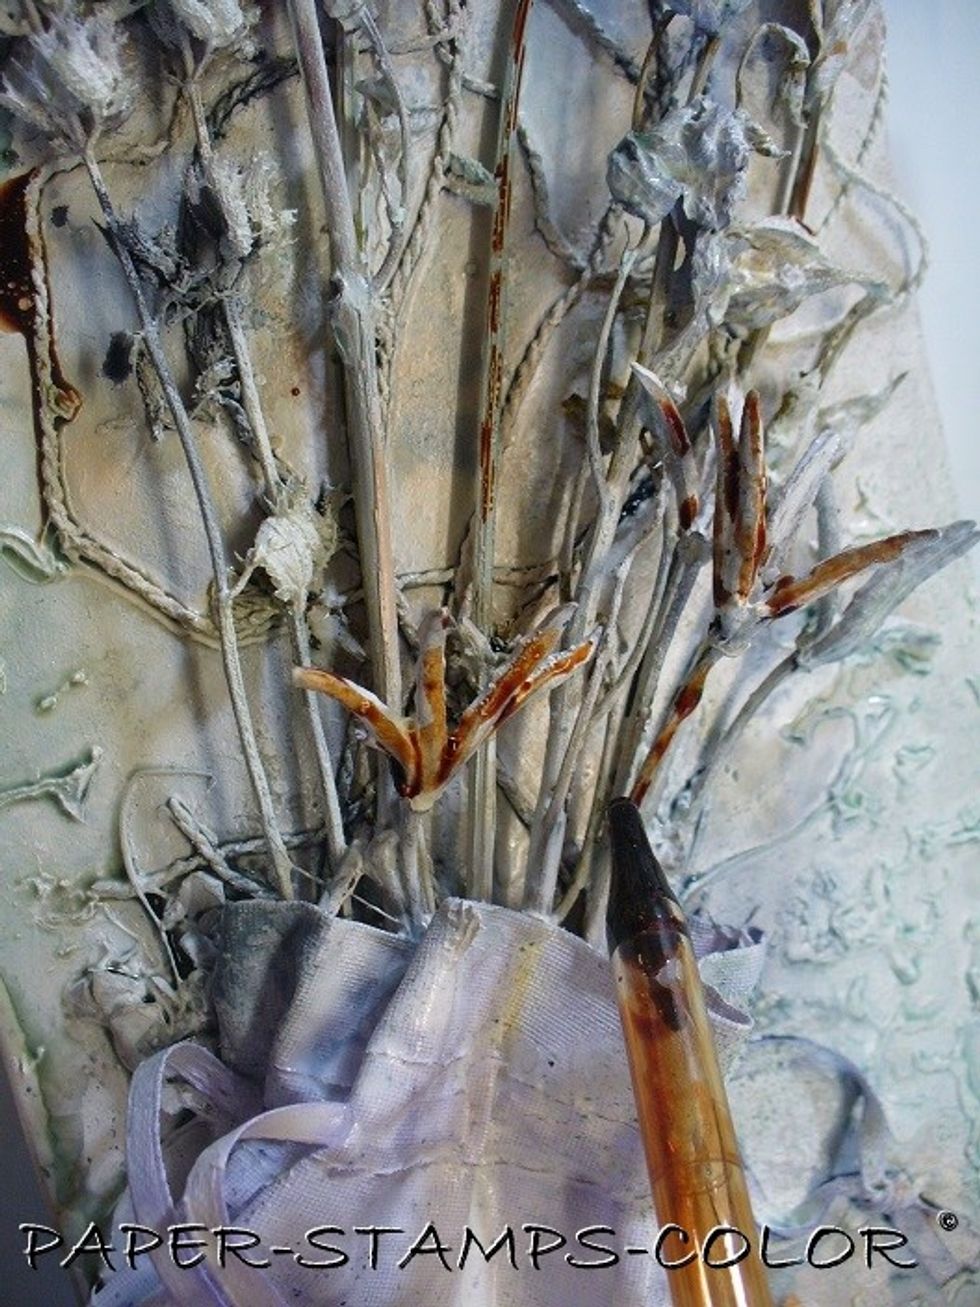
After assembling the letters, I added Sorbet Chocolate to parts of the stems and flowers, and the edges of the project, and between the 'stones' at the bottom, and also added it to the cracks.
To get some more contrast I added touches of white paint here and there... with my fingers! .... and some Sedona Colorations spray to the background.. a beautiful reddish brown.
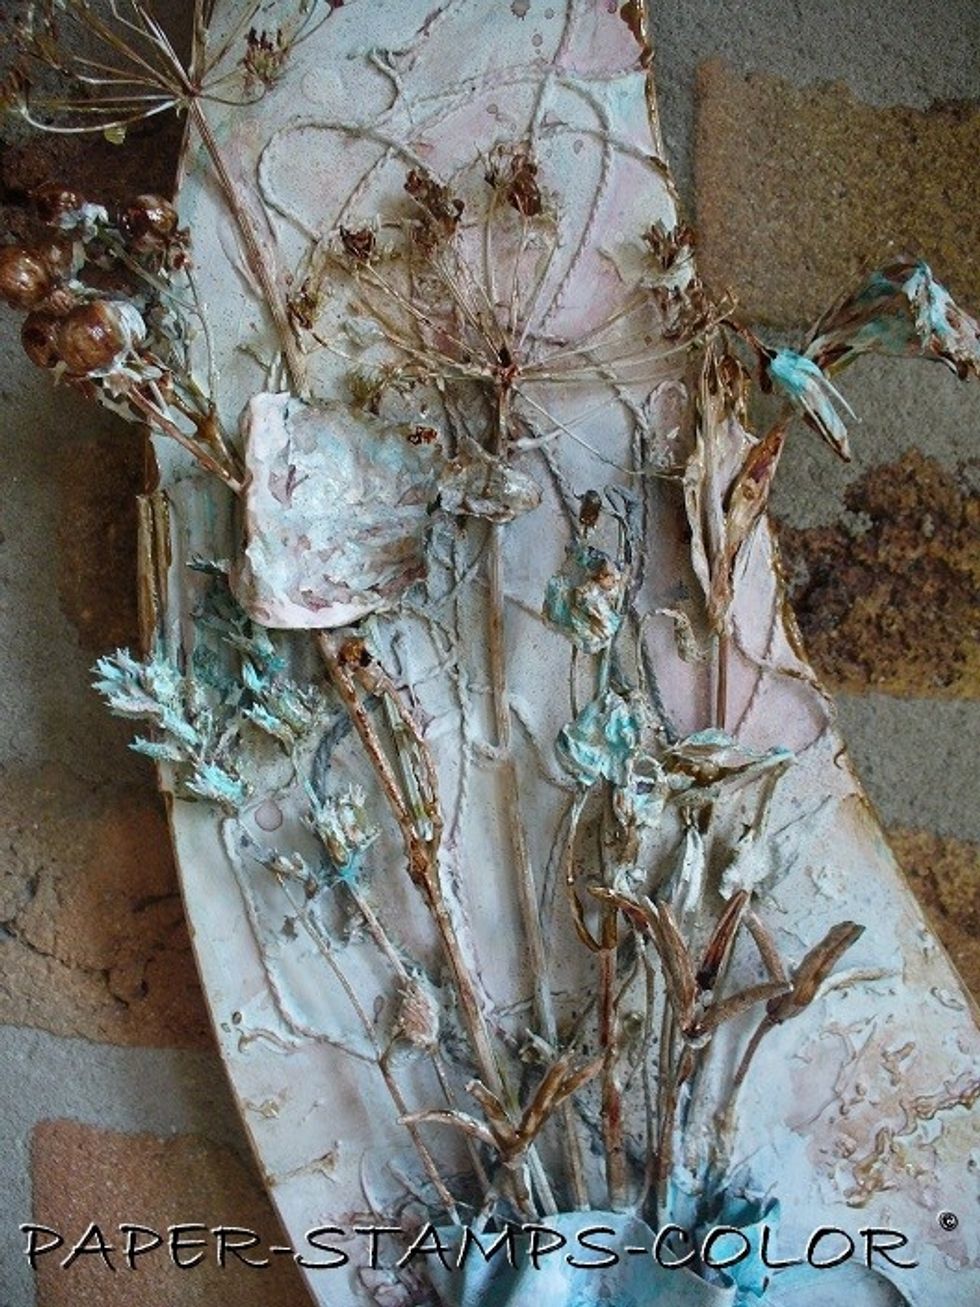
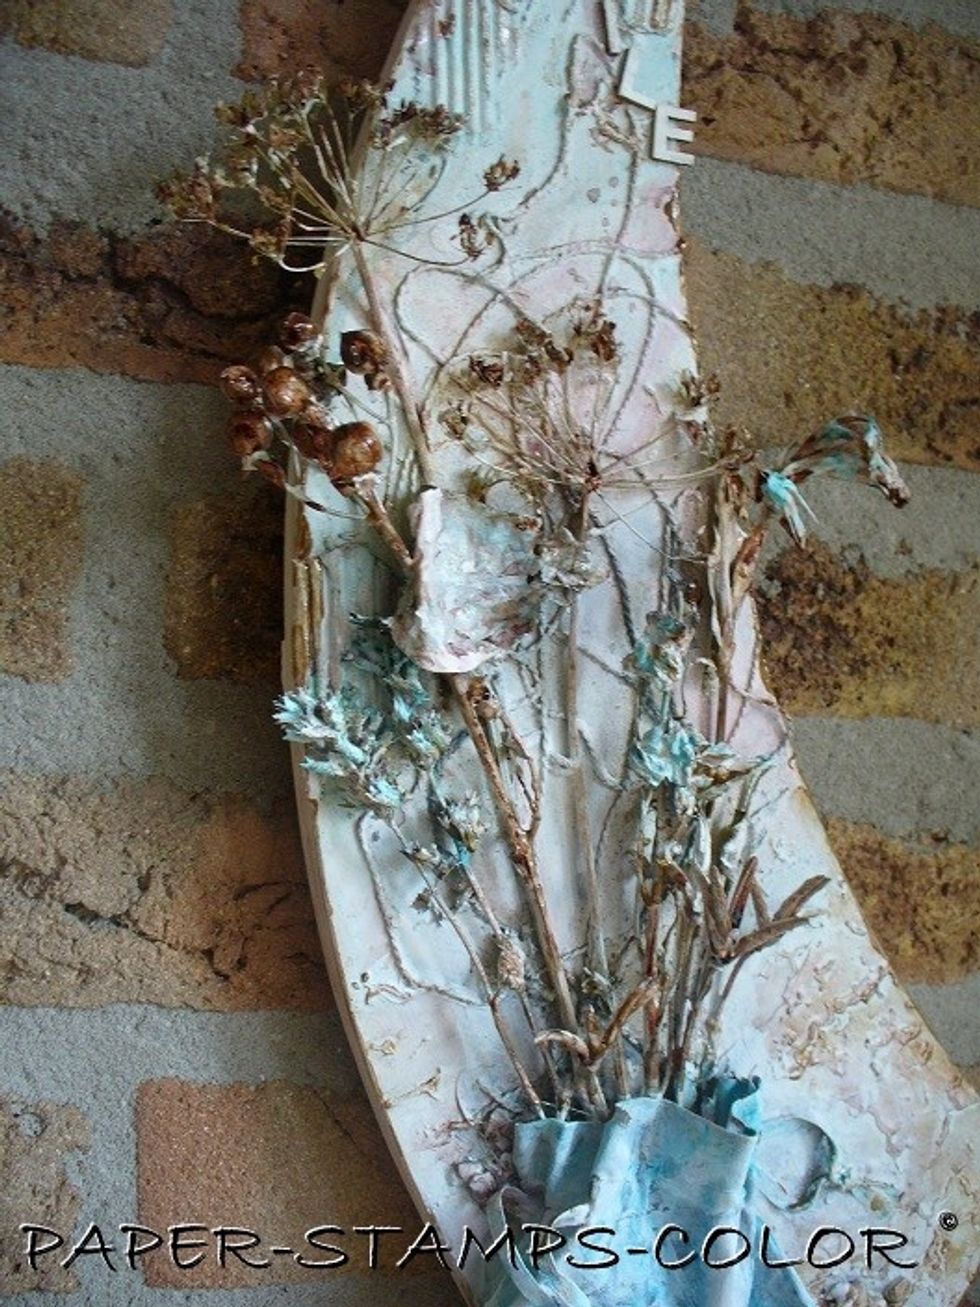
A close-up of the yummy colors.
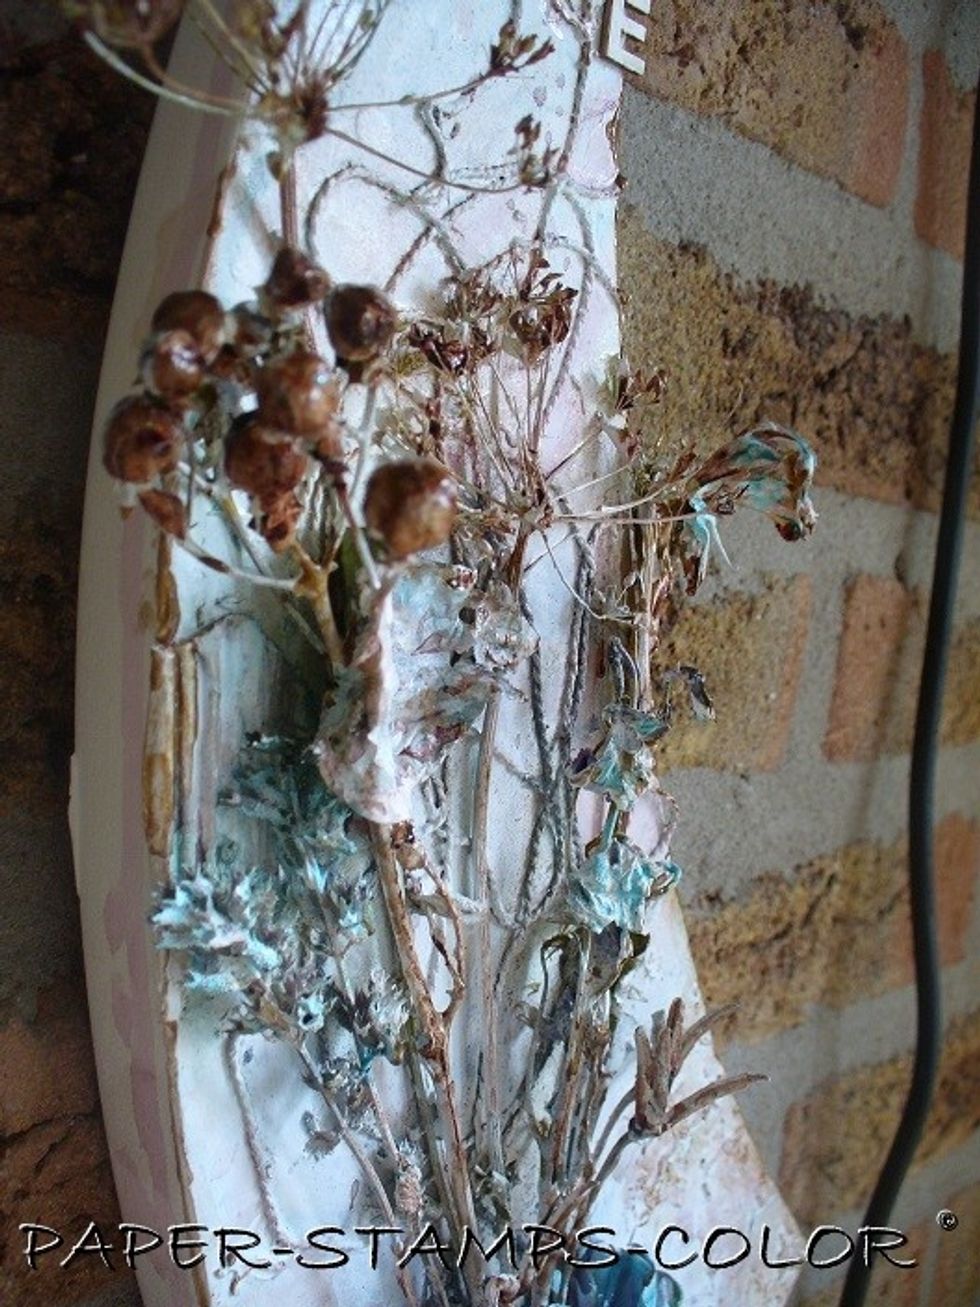
LOVE those seedheads... They were colored with Decadent Minx and a touch of Sorbet Chocolate.
LOVE the effect from the Decadent Minx and Chocolate Sorbet on the stems and seedheads here.
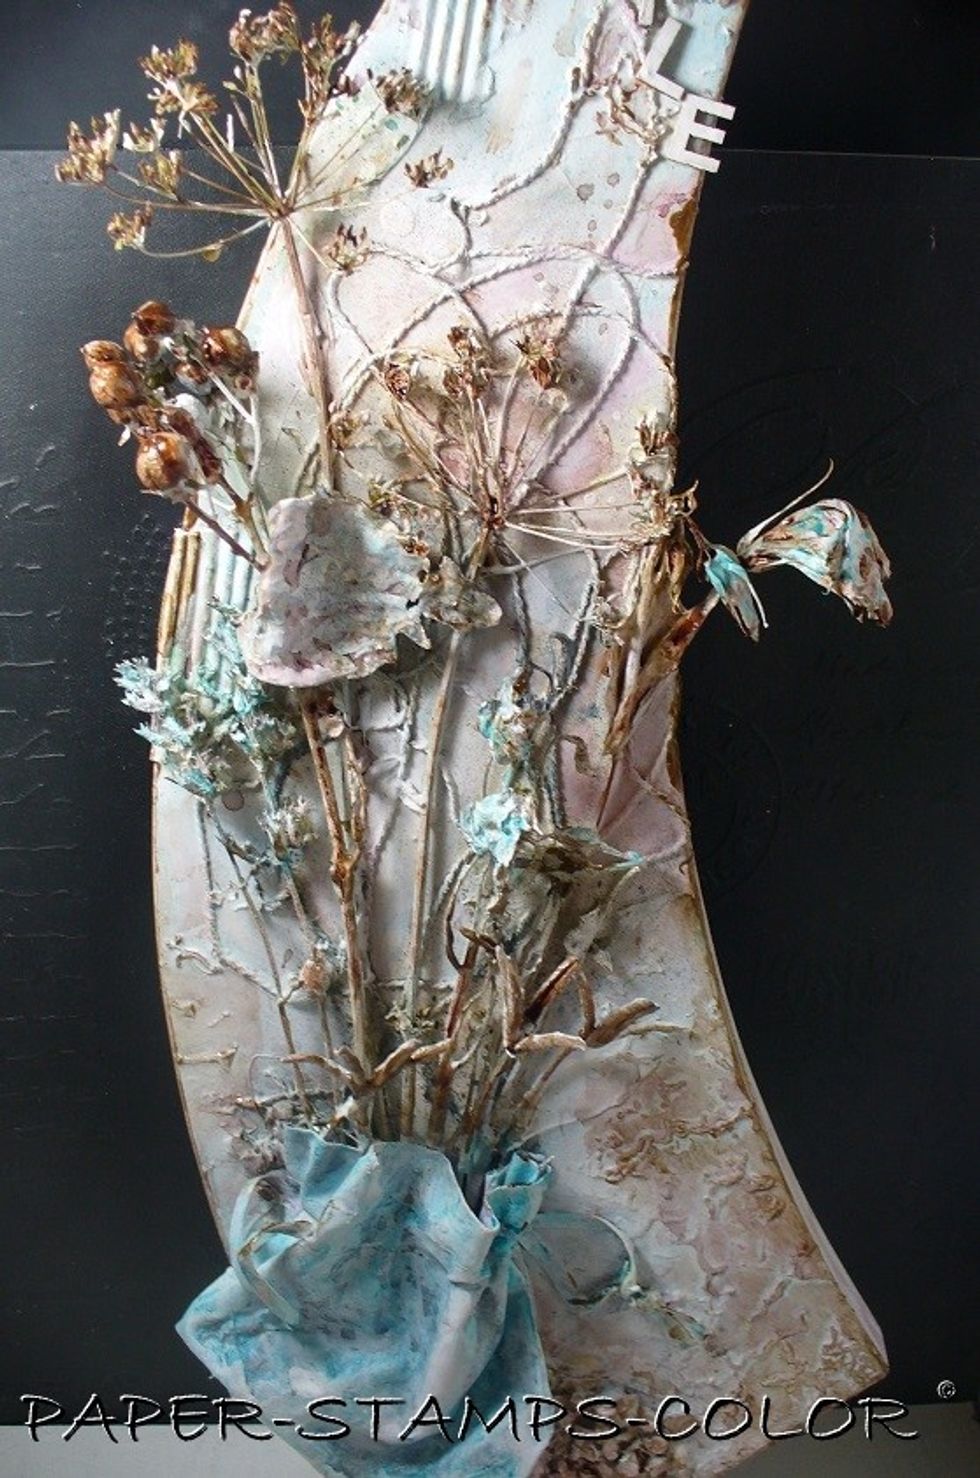
Another picture of the finished project, with some light from the left, to get more depth.
It sure is fragile!
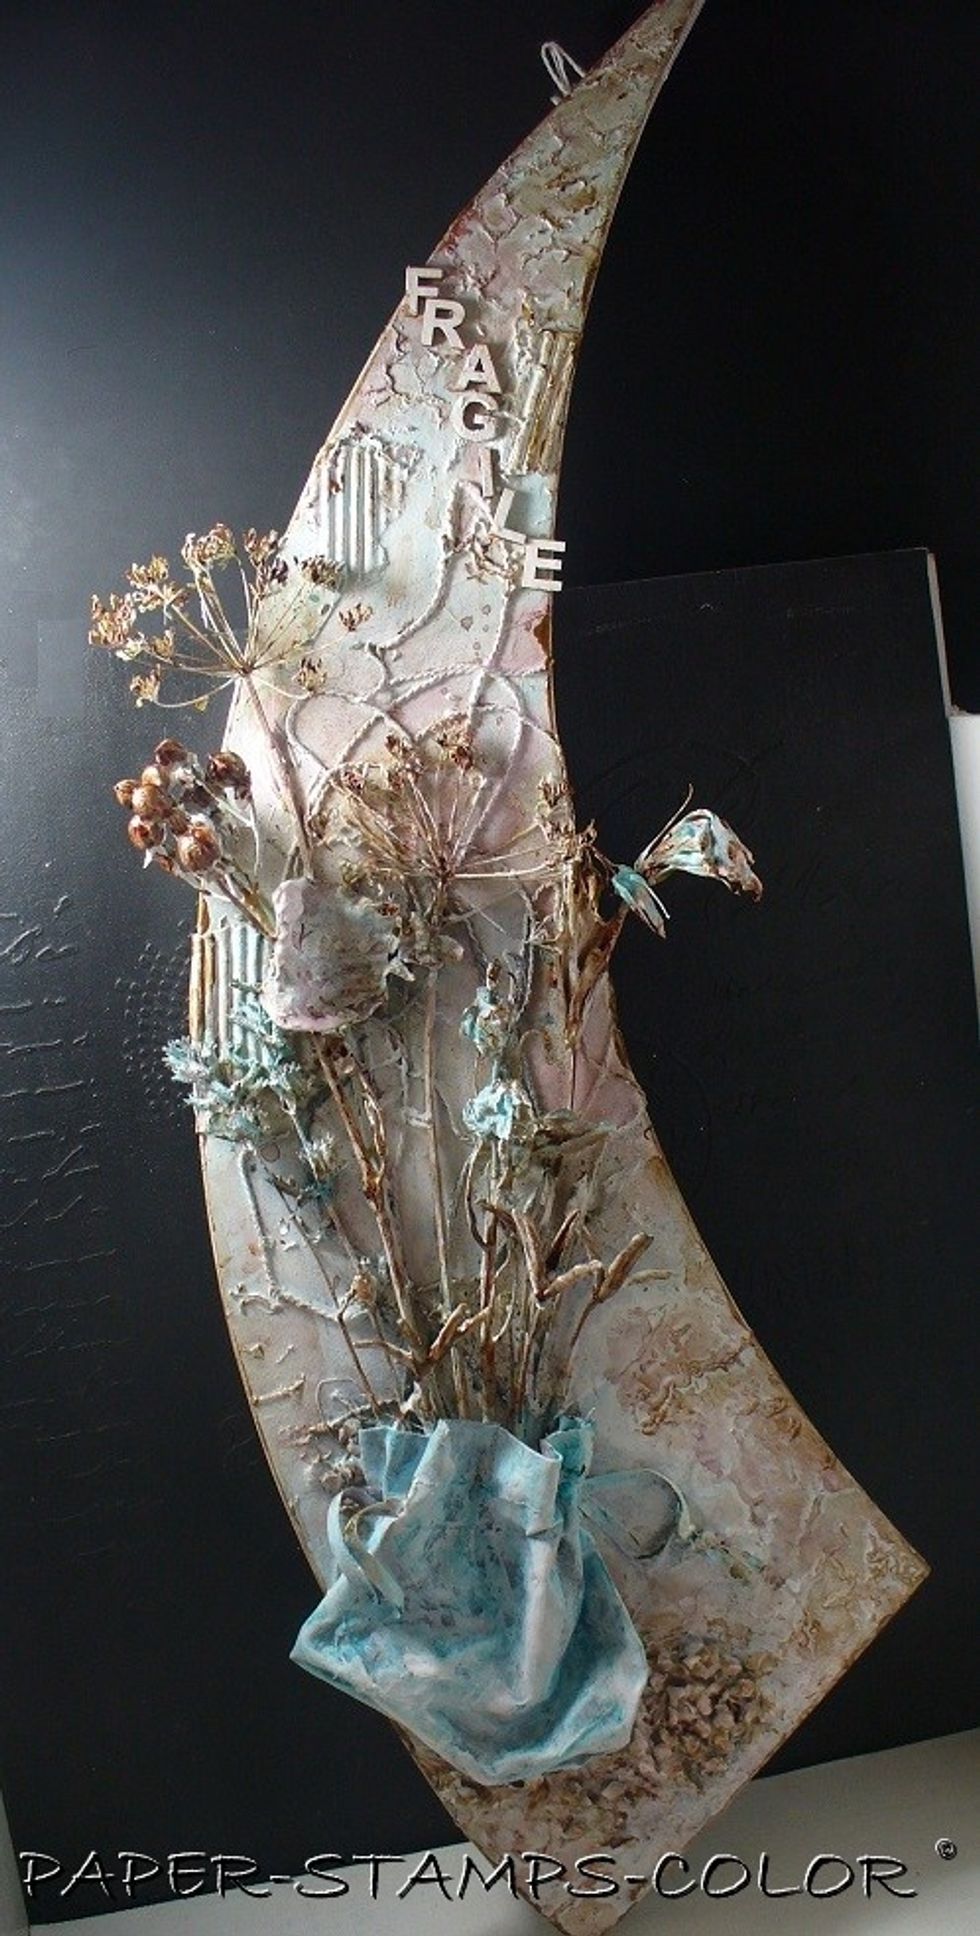
The whole project.
.. another close-up.
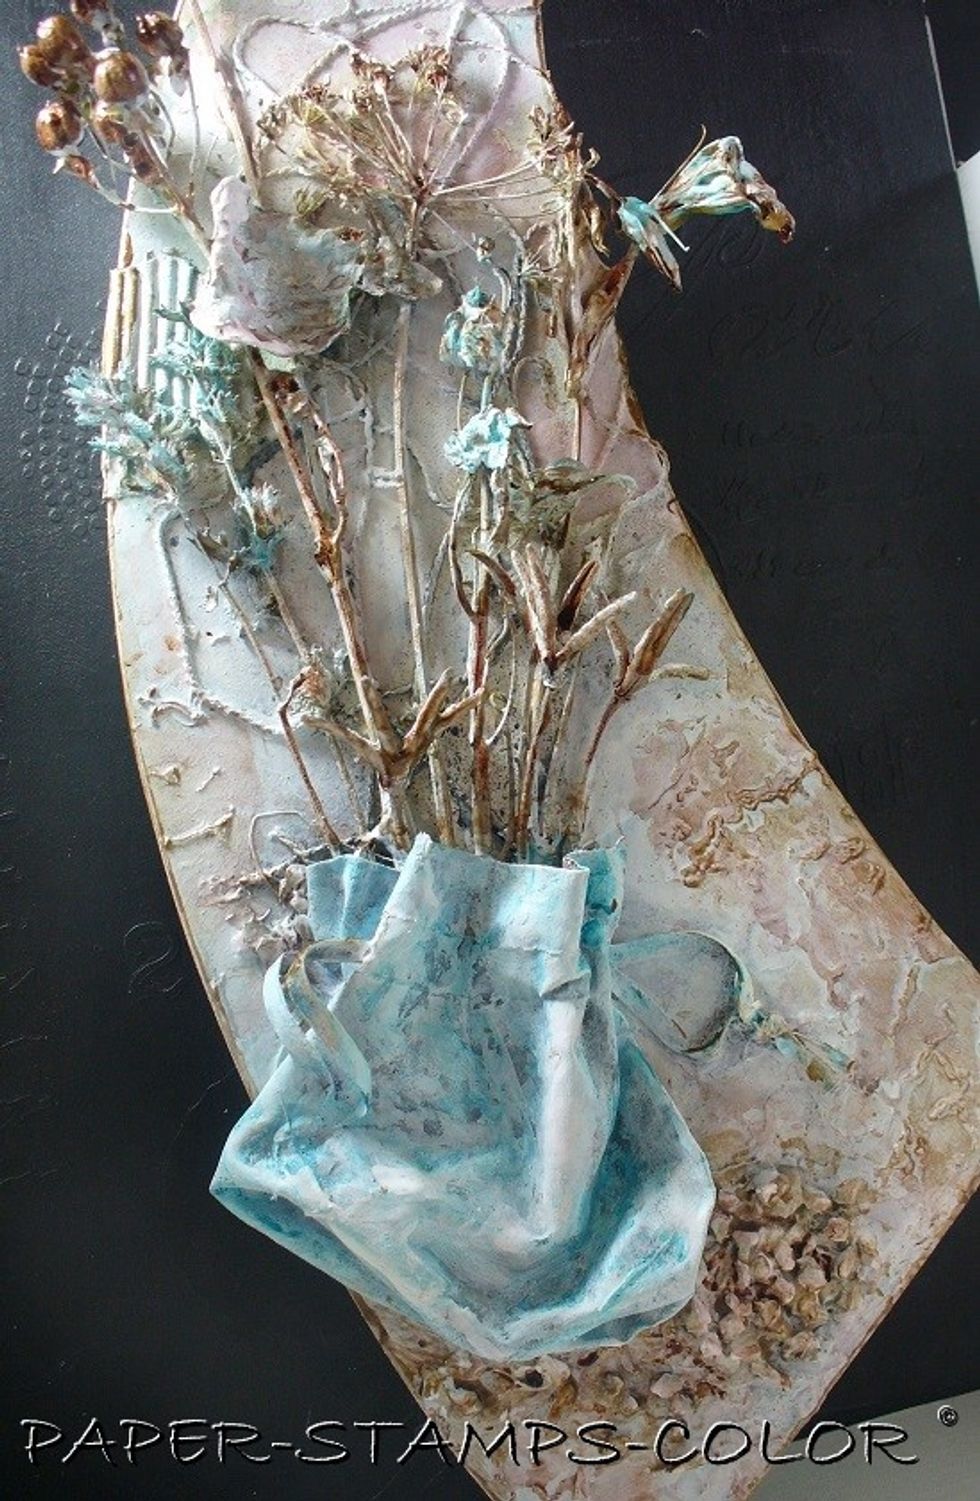
The 'bag' looks a bit shabby white washed and is fairly sturdy from the gesso and white glue.
Here you can see the effect of added color in the background... the Sedona Colorations Spray.
I let the Sedona Spray drip off the side edges as well..
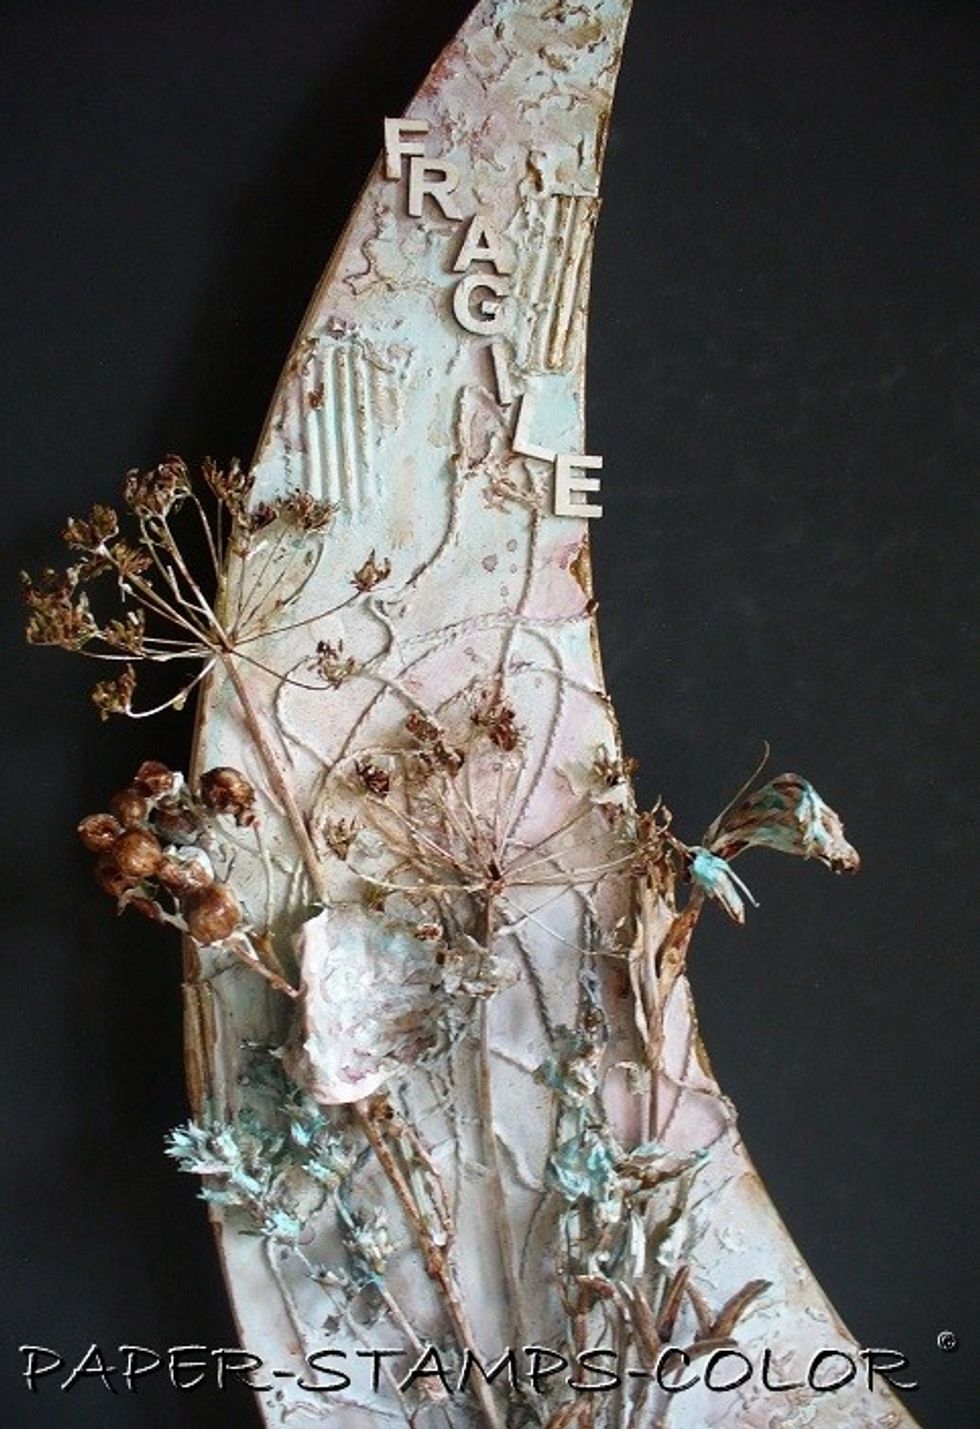
The edges were accentuated with Chocolate Sorbet by dabbing it on with a finger.

HOPE you liked it... and got inspired! .. guess what? I planned doing a collage with seashells.. ended up with this. That's OK.. Next time seashells... homework for me! Get out your paints and inks !!

to see more of me : go see my blog! http://elliecreahoekje.blogspot.nl/