The Conversation (0)
Sign Up
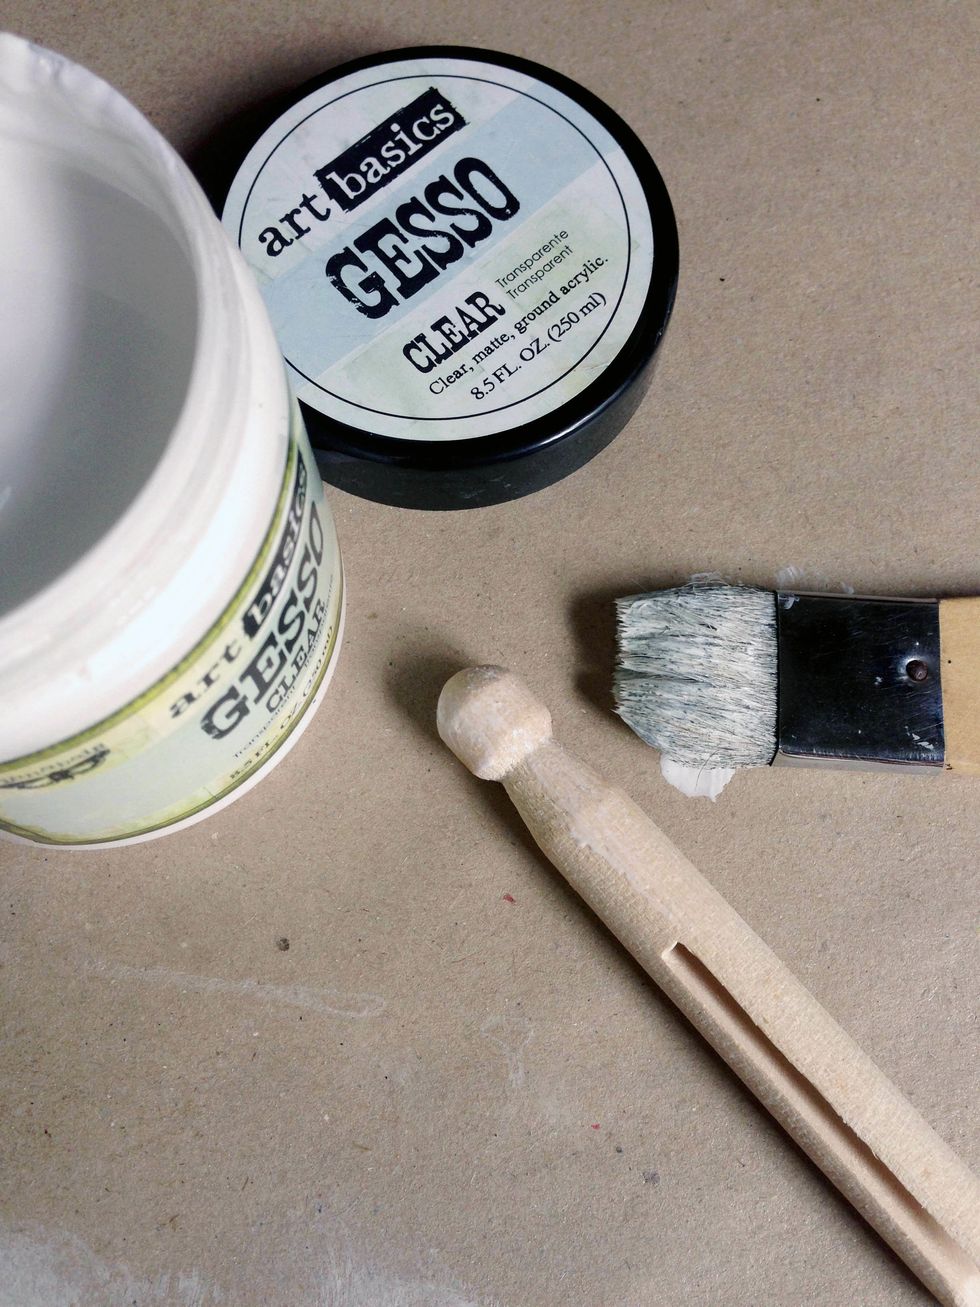
Coat a layer of clear gesso onto the clothespin pegs... This is to prime the surfaces...
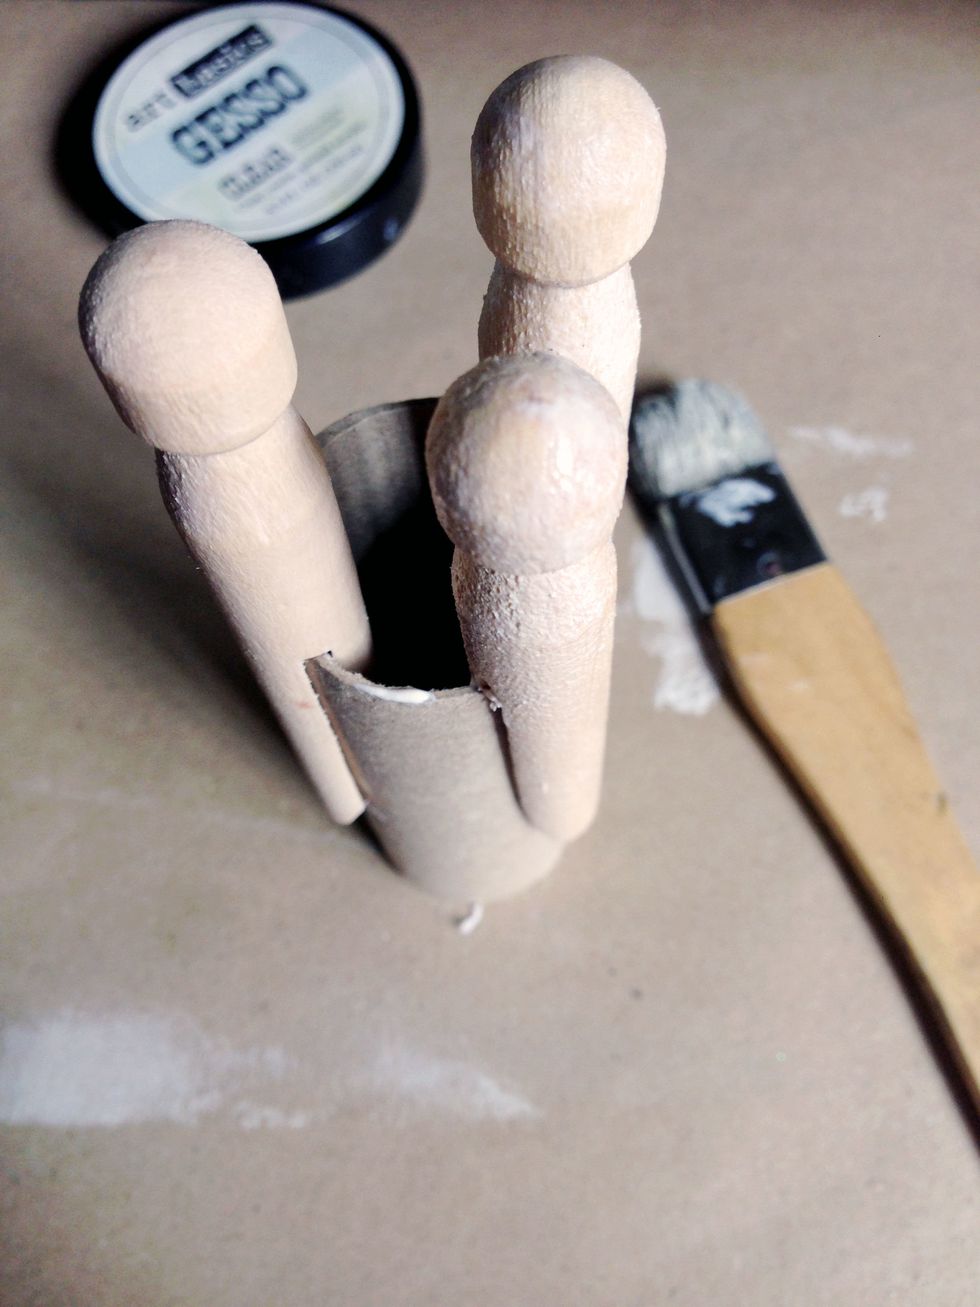
Once coated, place them into a toilet roll and allow to dry naturally...
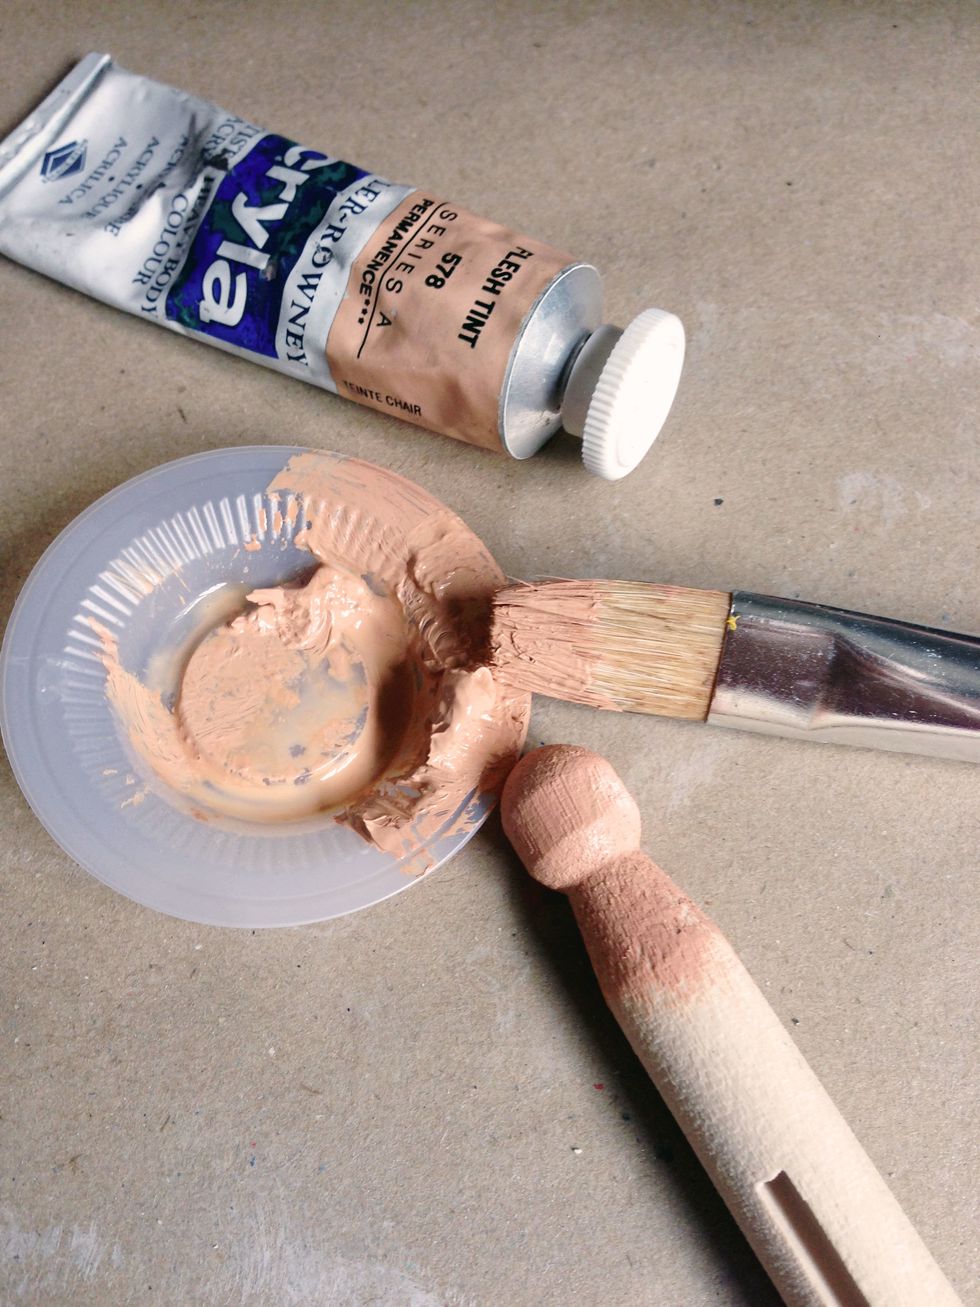
Paint the entire dolly peg using flesh tint paint... If you want a fairer look, you can leave it unpainted...
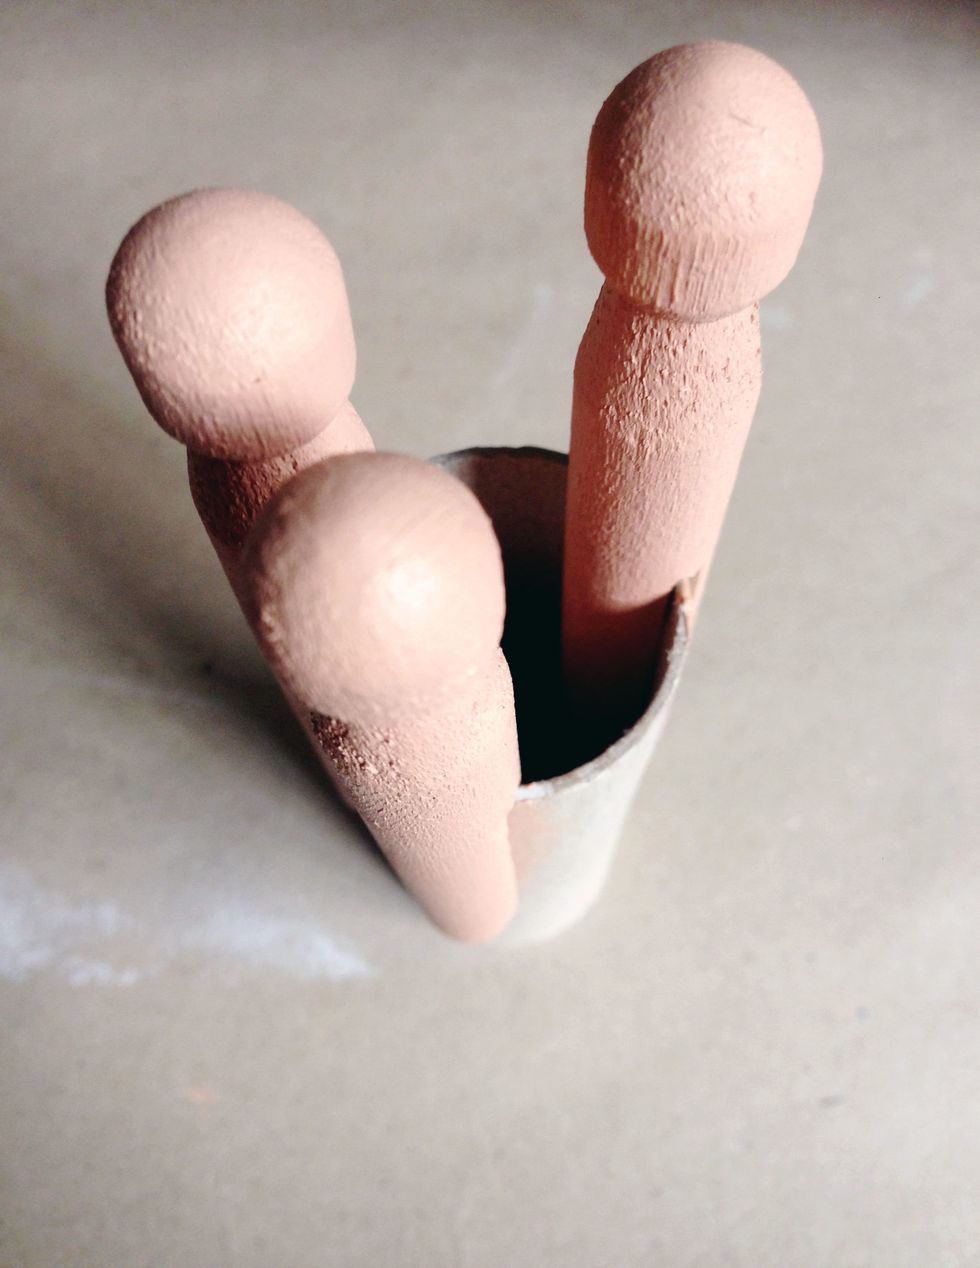
Leave them on the toilet roll to dry...
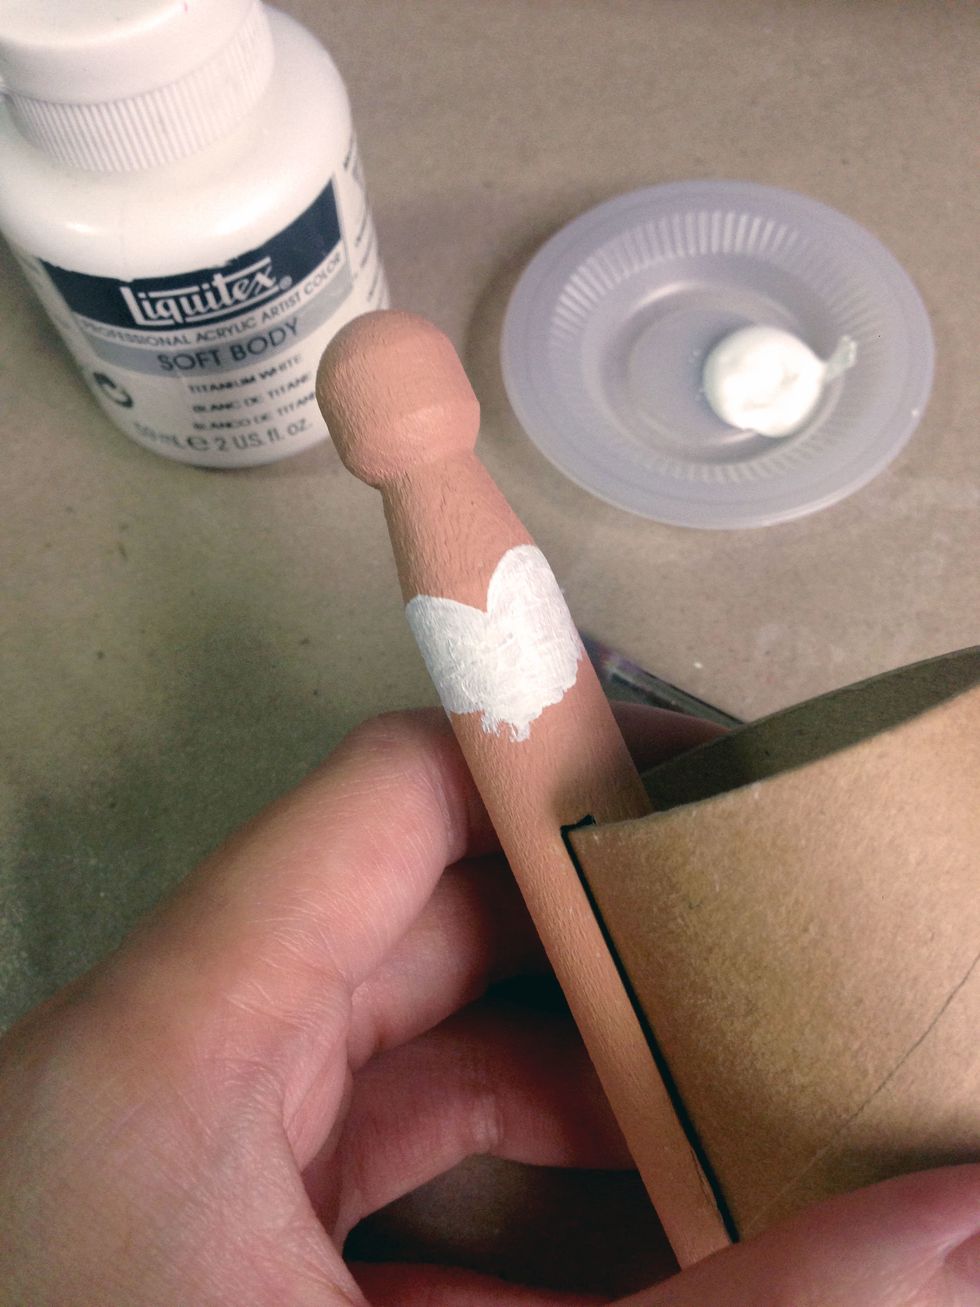
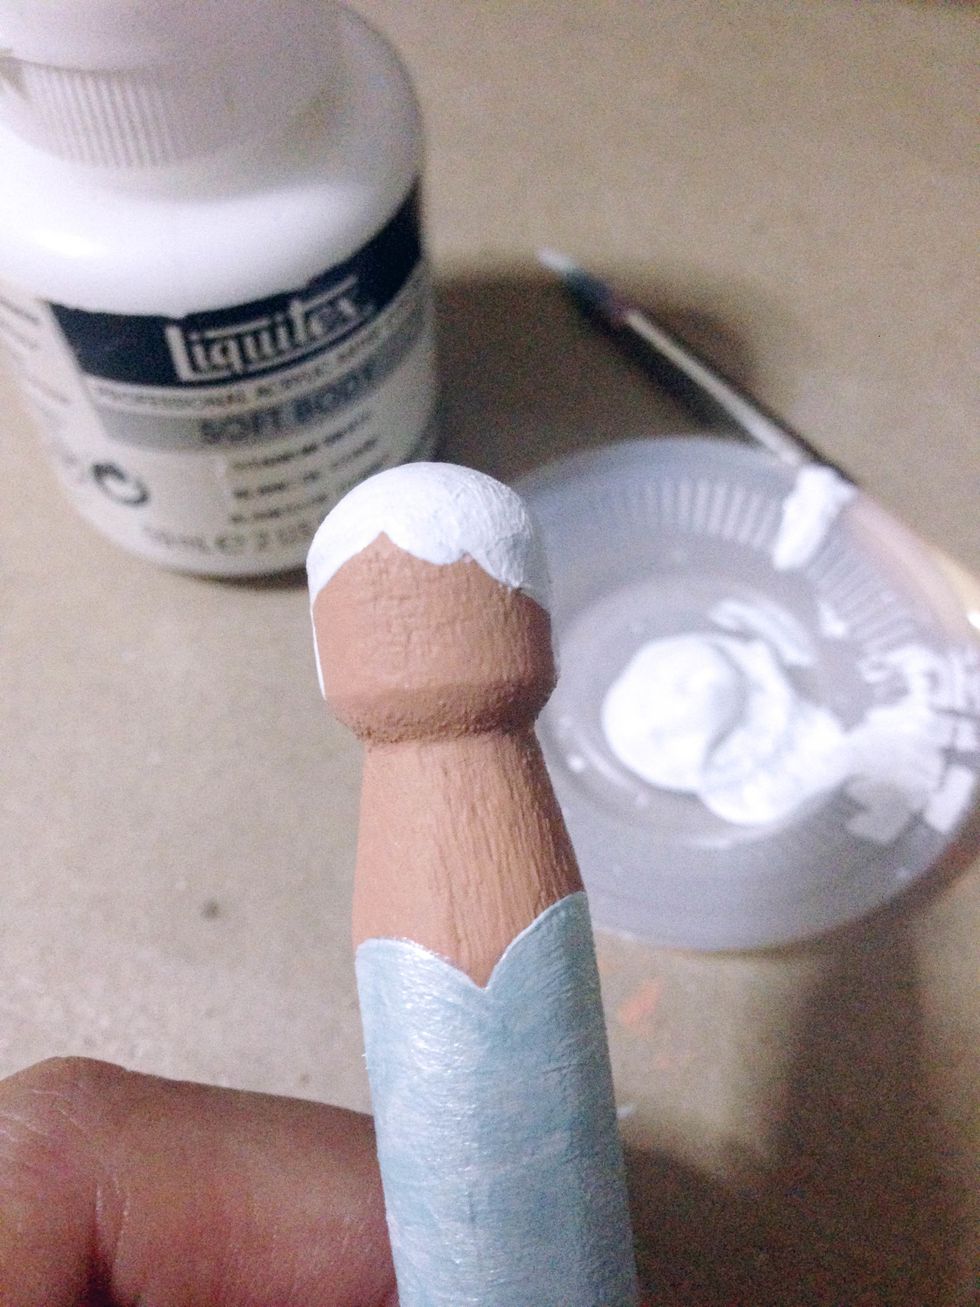
Using a white acrylic paint, paint a heart shaped corset onto the clothespin peg...
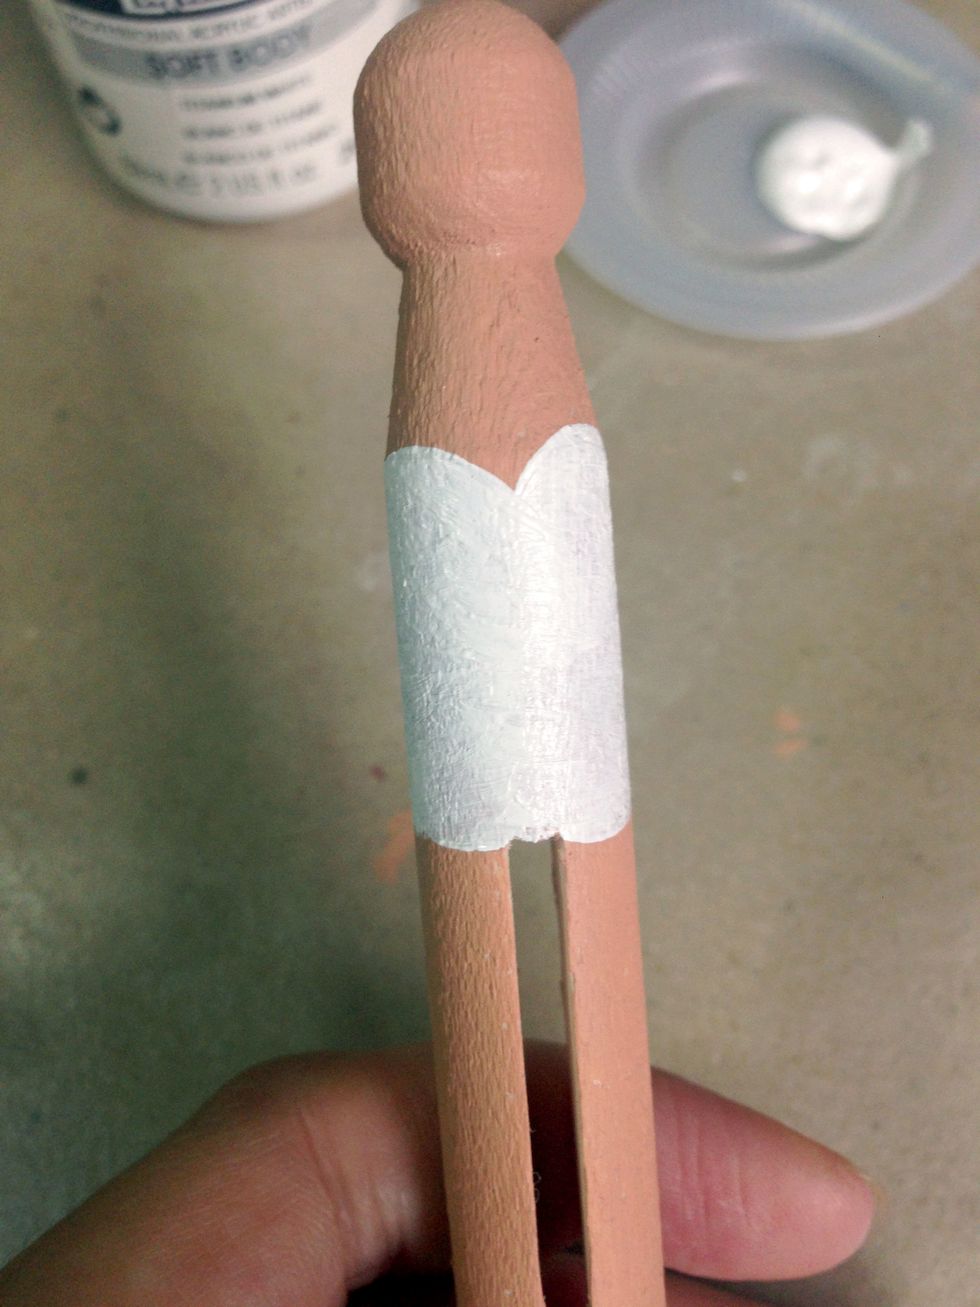
Paint till this length will do...
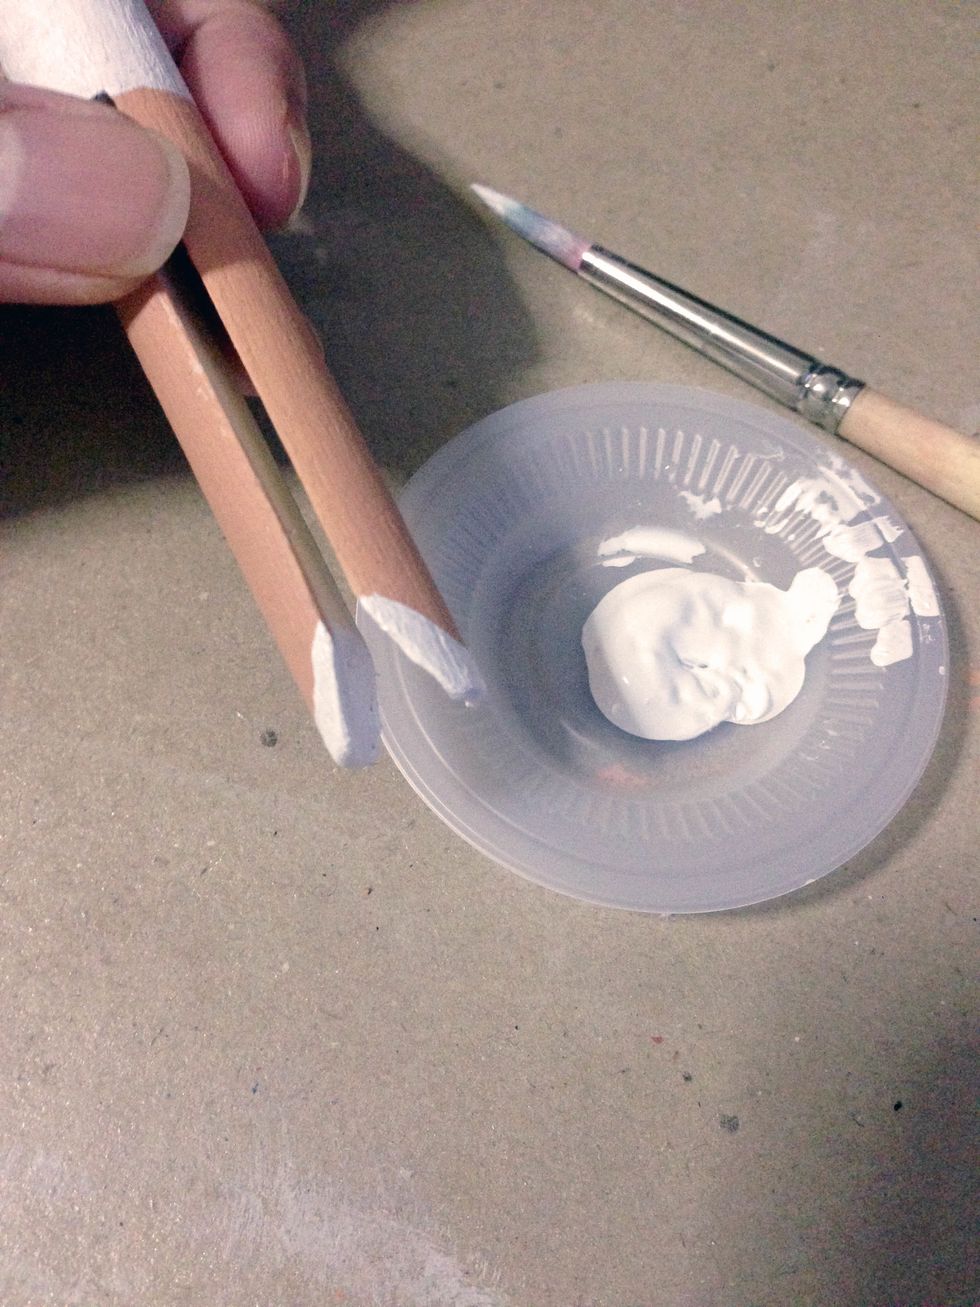
At the end of the peg, paint the shoes as shown...
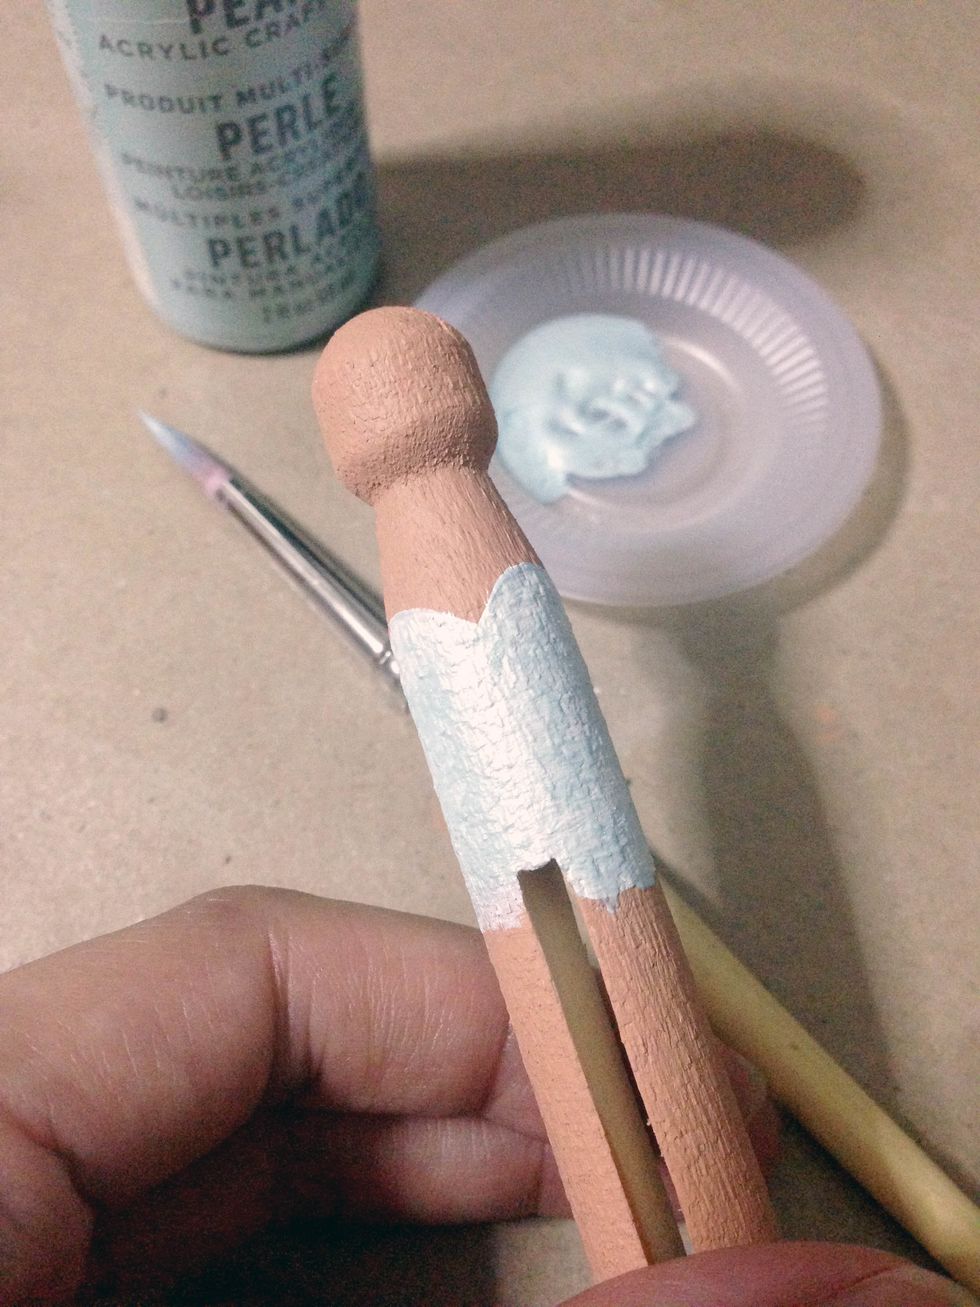
To give the corset some colour, coat over the white paint with some Jet Stream paint... Apply 2 coats so that the colour will show up more...
Use white acrylic paint, paint the hair on the head of the peg... Feel free to create any hairstyle for your fairies...
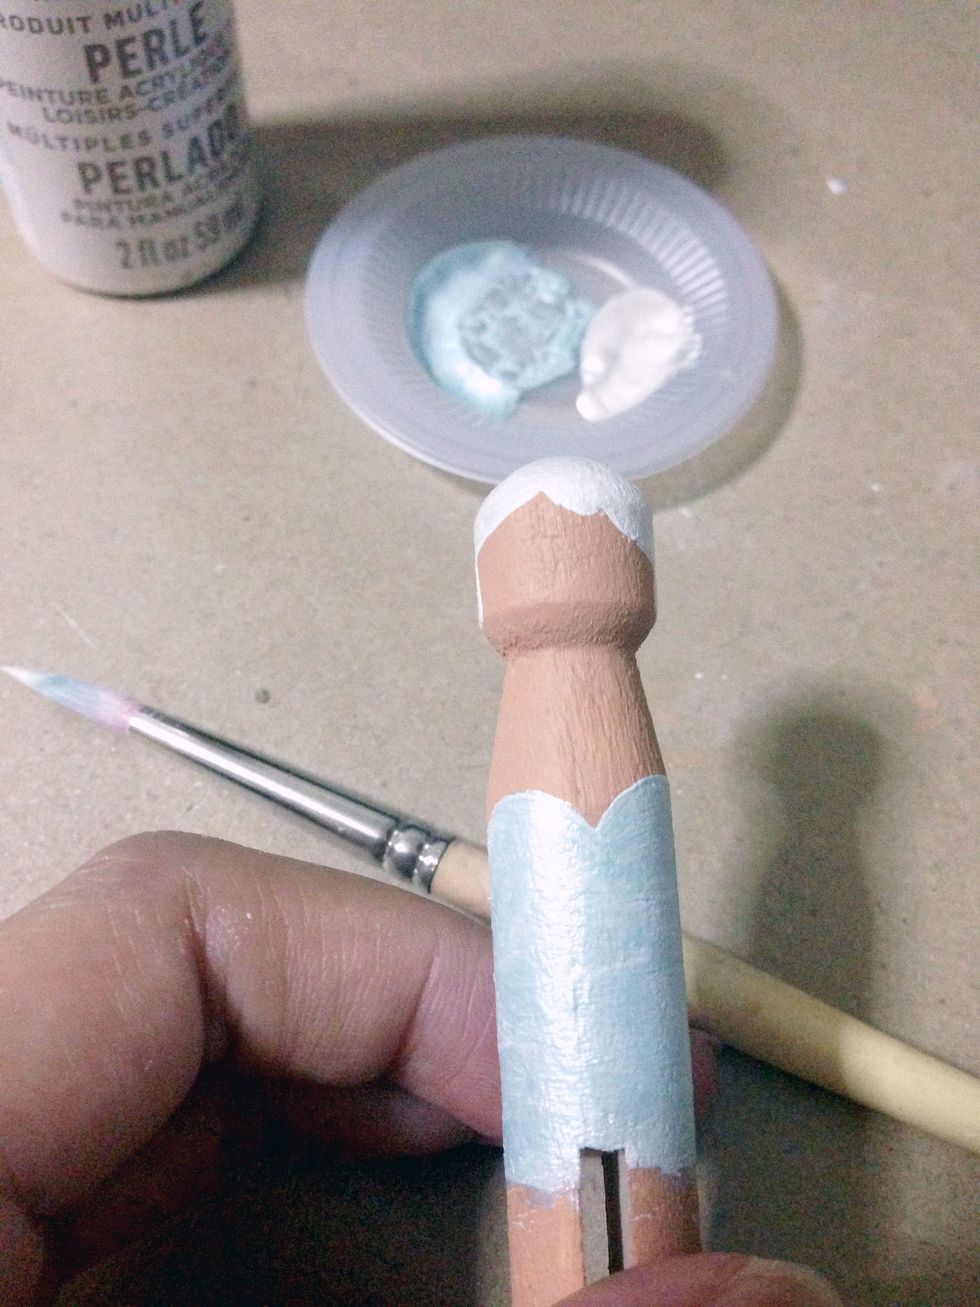
To give the hair some silvery shine, apply 2 coats of Mother of Pearl paint over the hair...
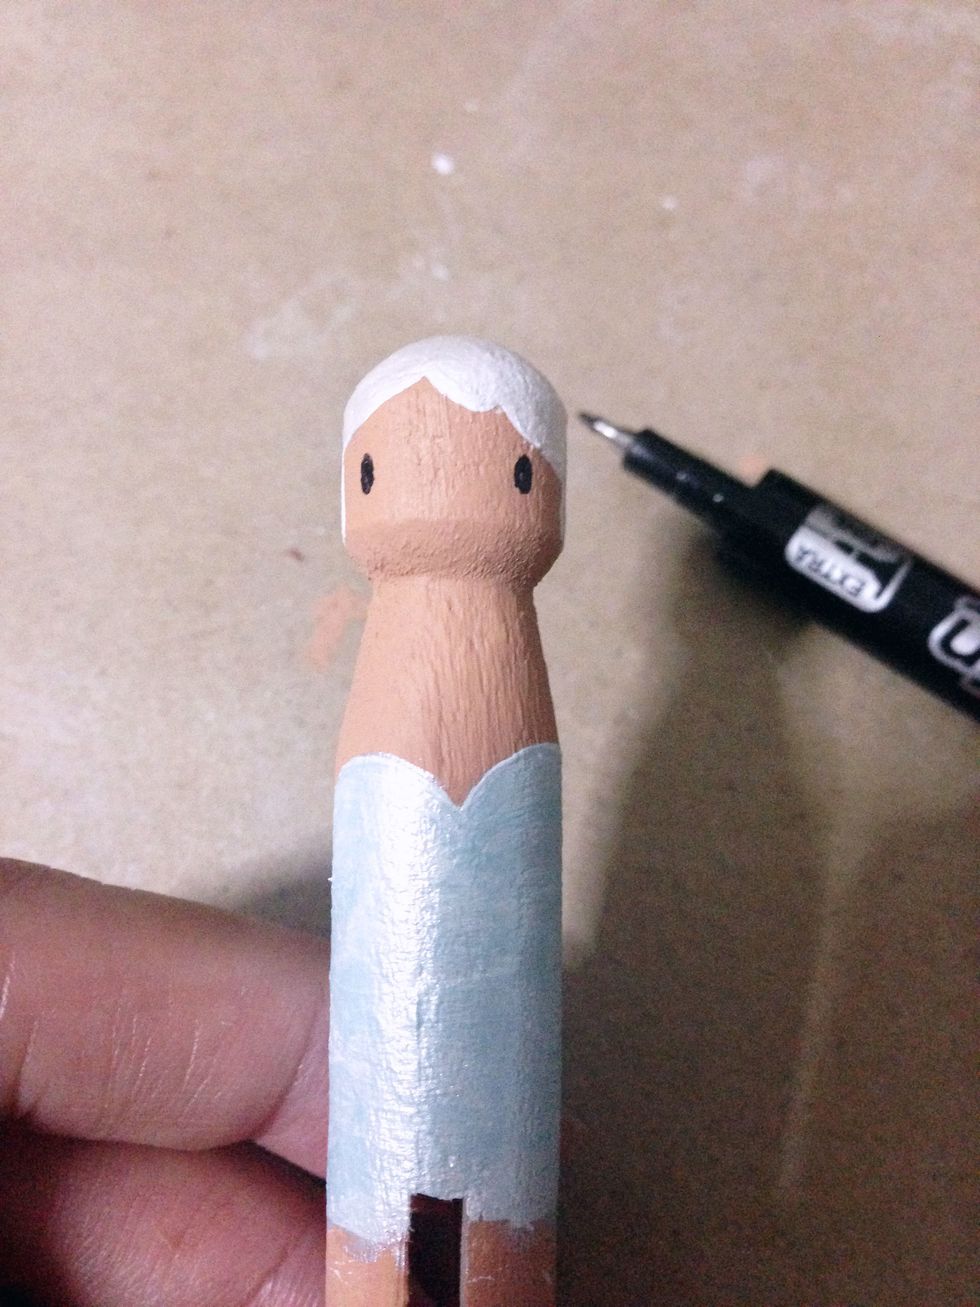
Add the eyes using a black marker... If you would like to, you may add on the mouth... I just find it cuter with only the eyes...
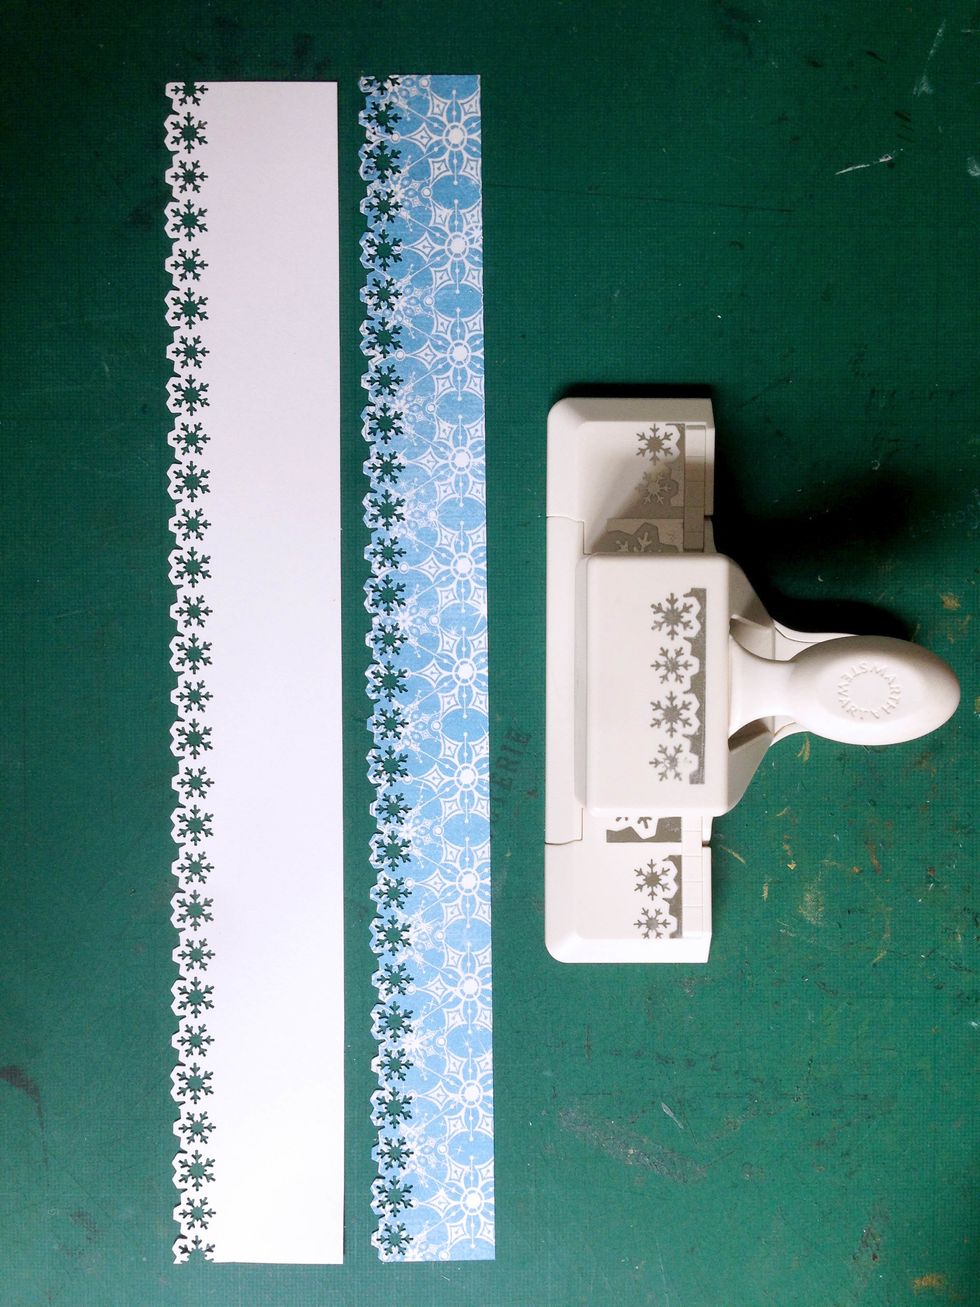
Cut 12" strips of 1.5" from white cardstock & 1.25" from Snowflake Waltz paper... Punch the edges with snowflake punch... Mini snowflakes will come off from the punch which you can use as confetti...

Score them at 0.25" intervals as shown throughout the entire 12" strips...
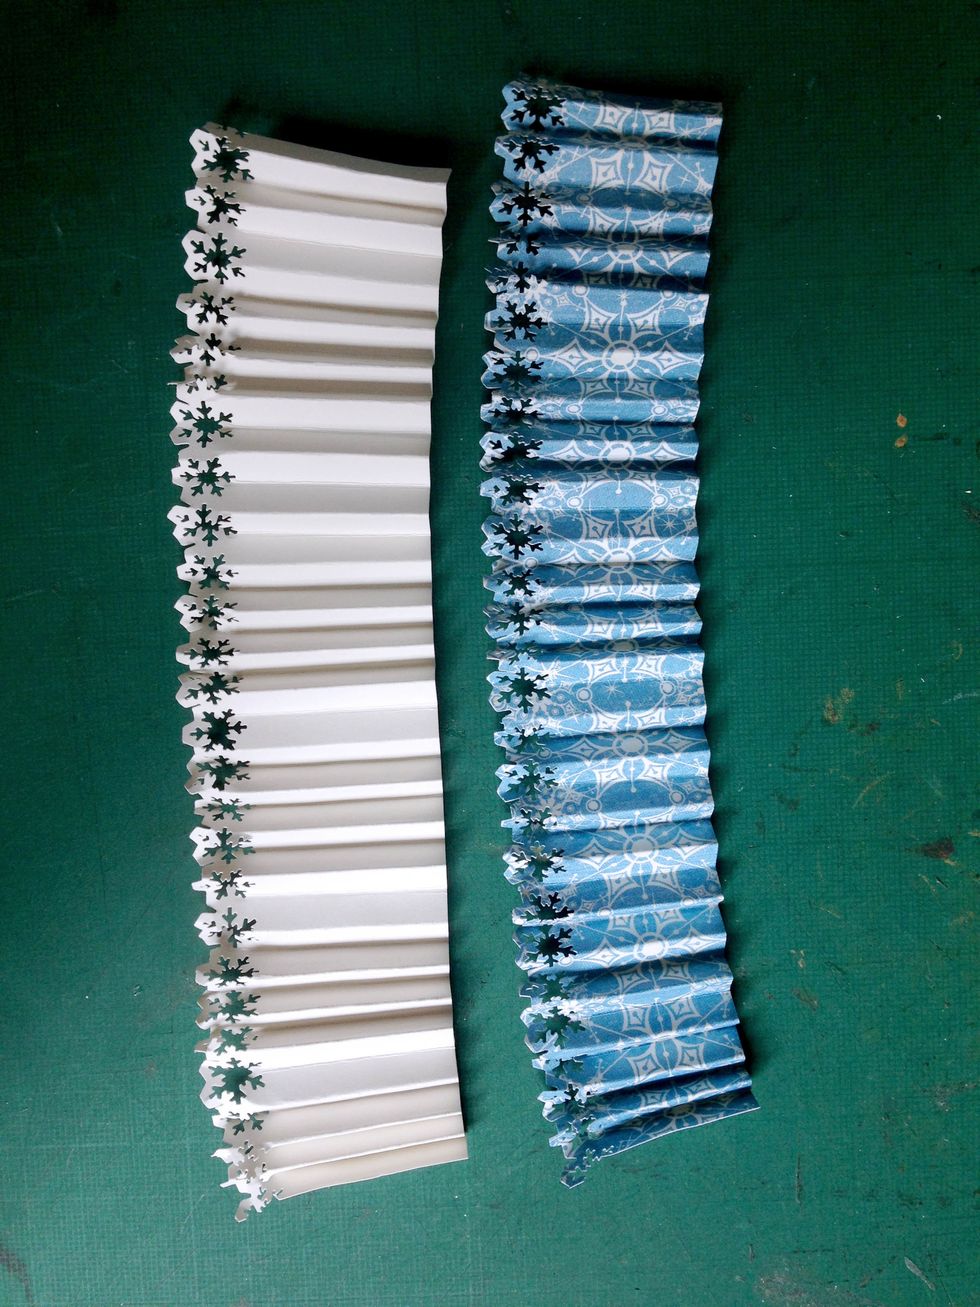
Fold them accordingly as shown...
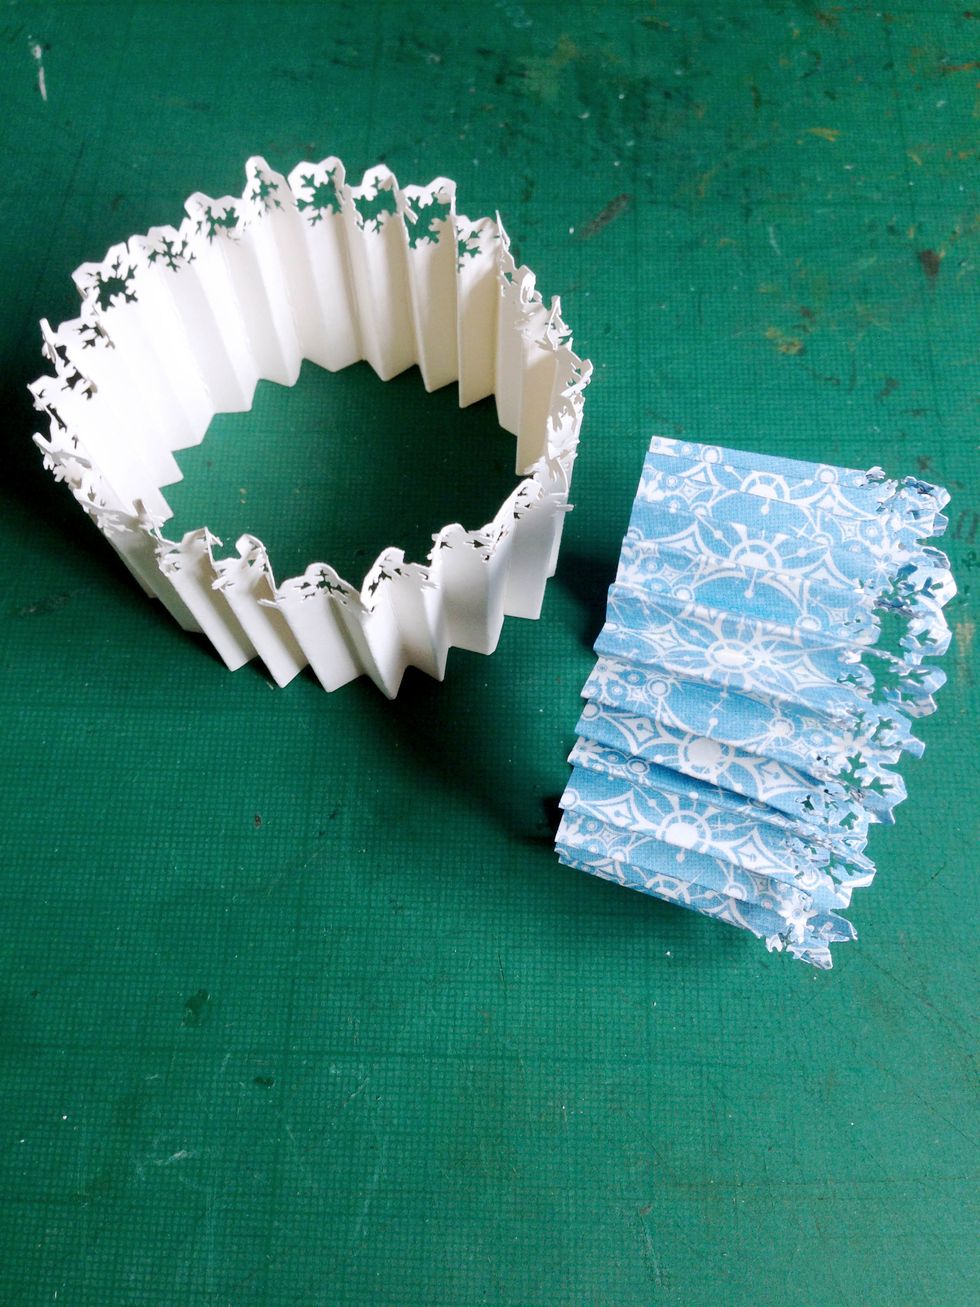
Glue the 2 ends together as shown... These will be the rosettes skirts for the fairy...
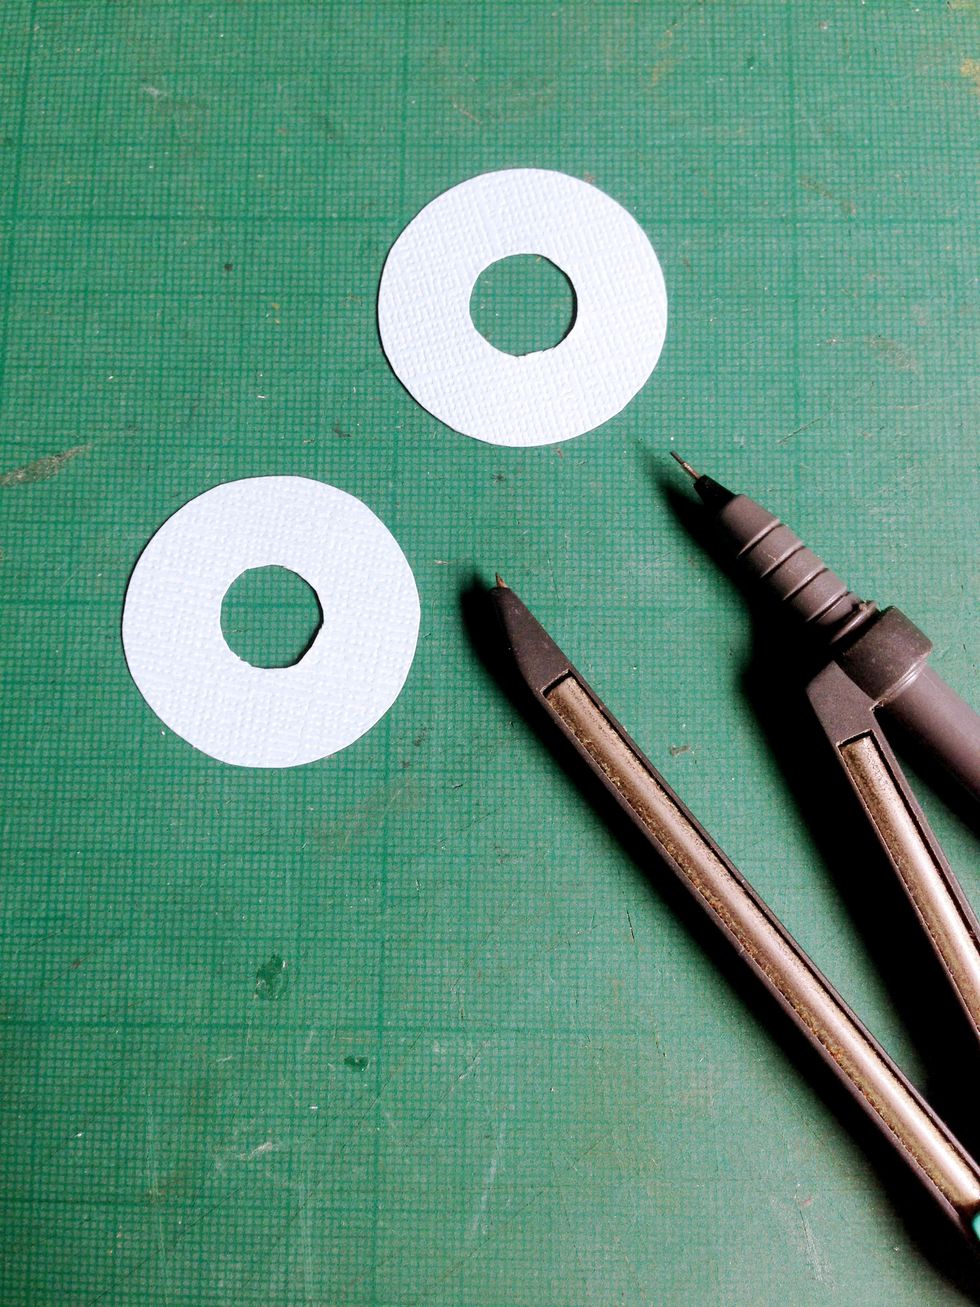
On the Robin's Egg cardstock, using a compass draw out a circle of 1.25" with a 0.5" circle at the centre... Cut them out as shown...
The 0.5" circle at the center is the measurement for the waist of the peg, adjust accordingly when necessary to fit...
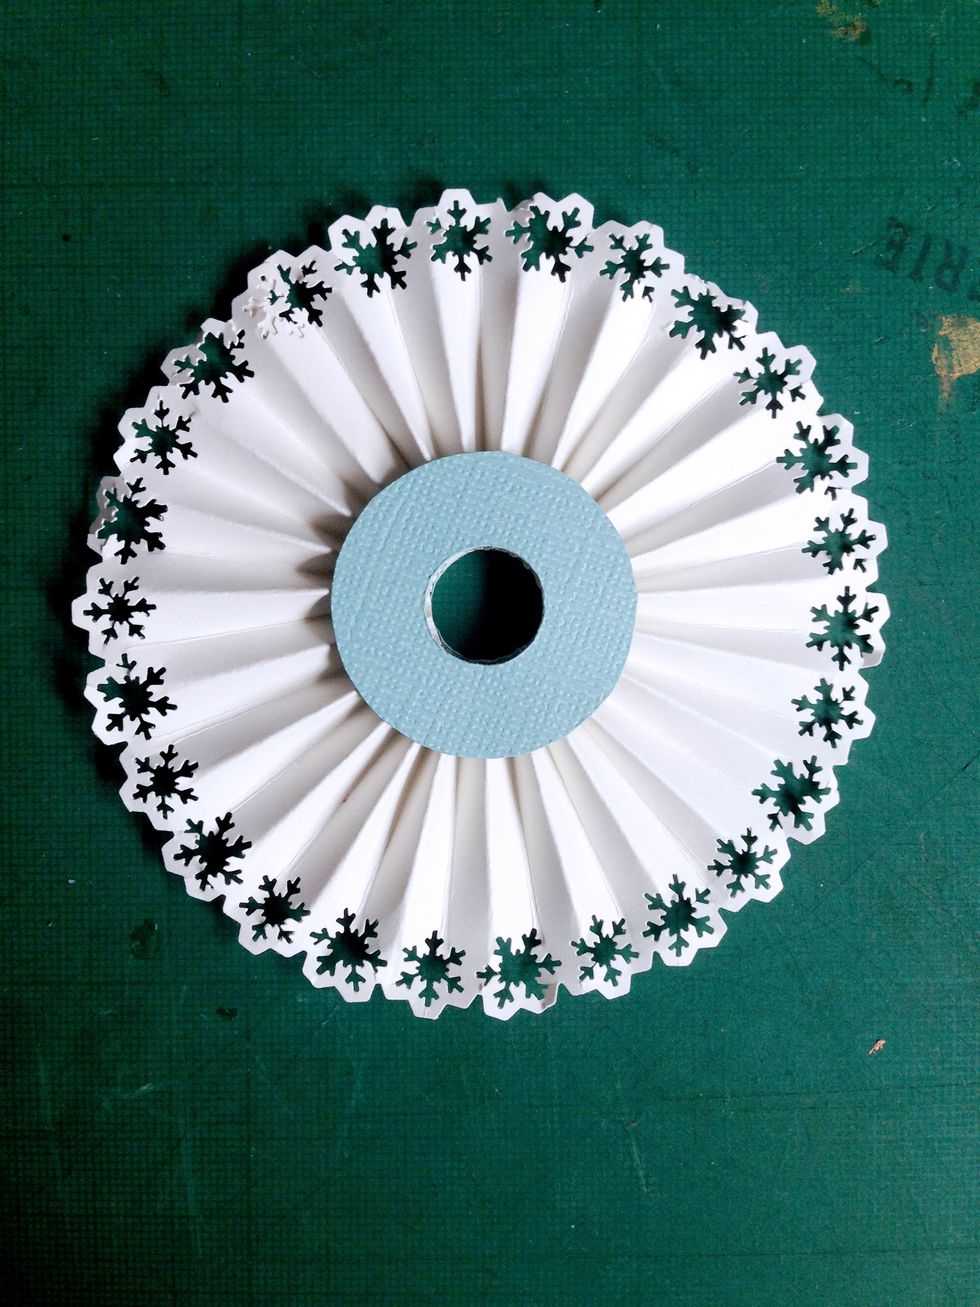
Press down and flatten the white rosette and sandwich in between the 2 circles (from Step 16) as shown... You will need to glue them down to secure them...
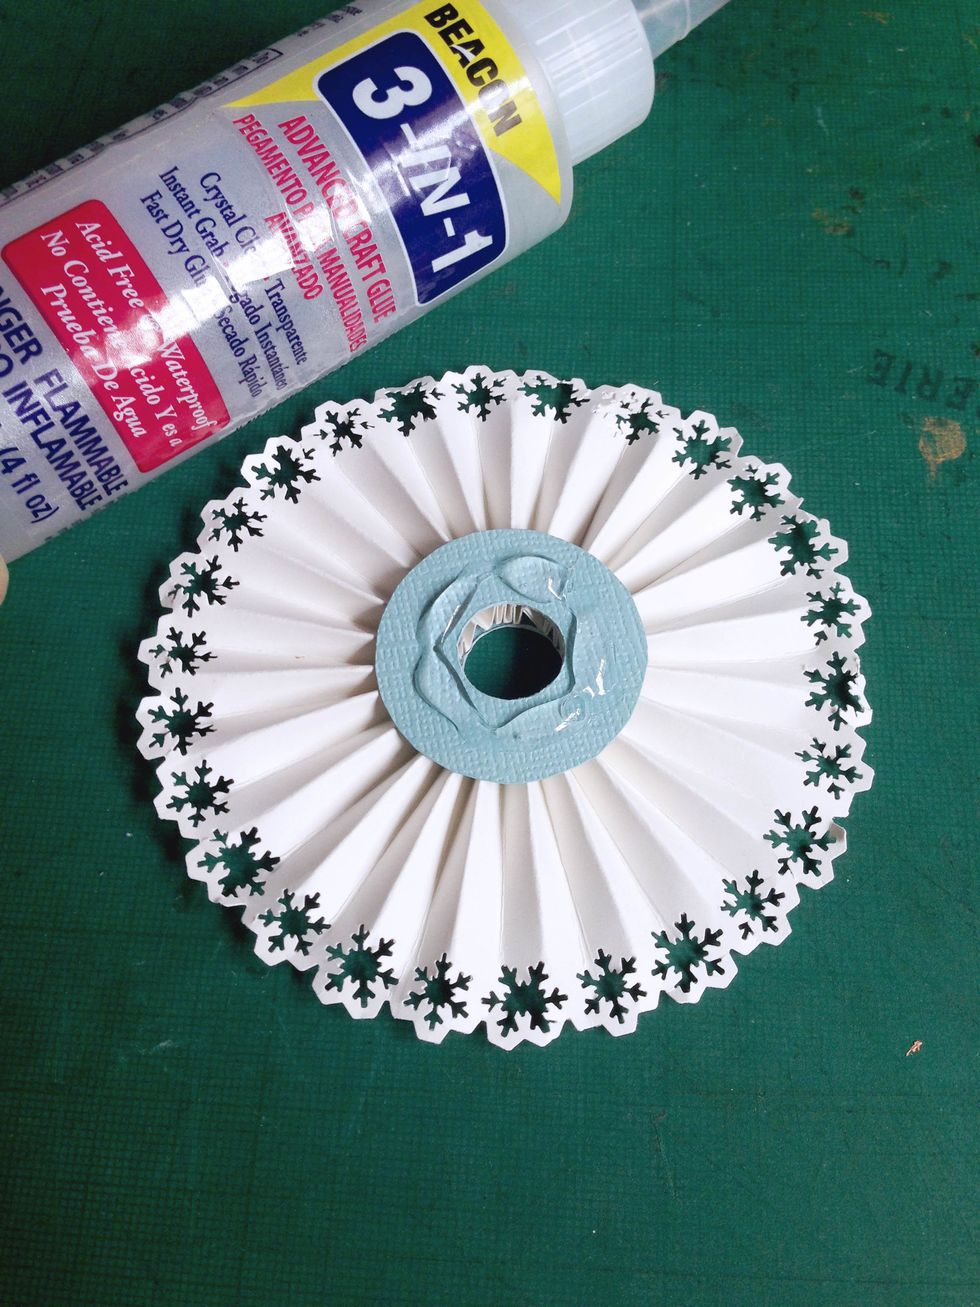
Apply glue on top of the circle as shown...
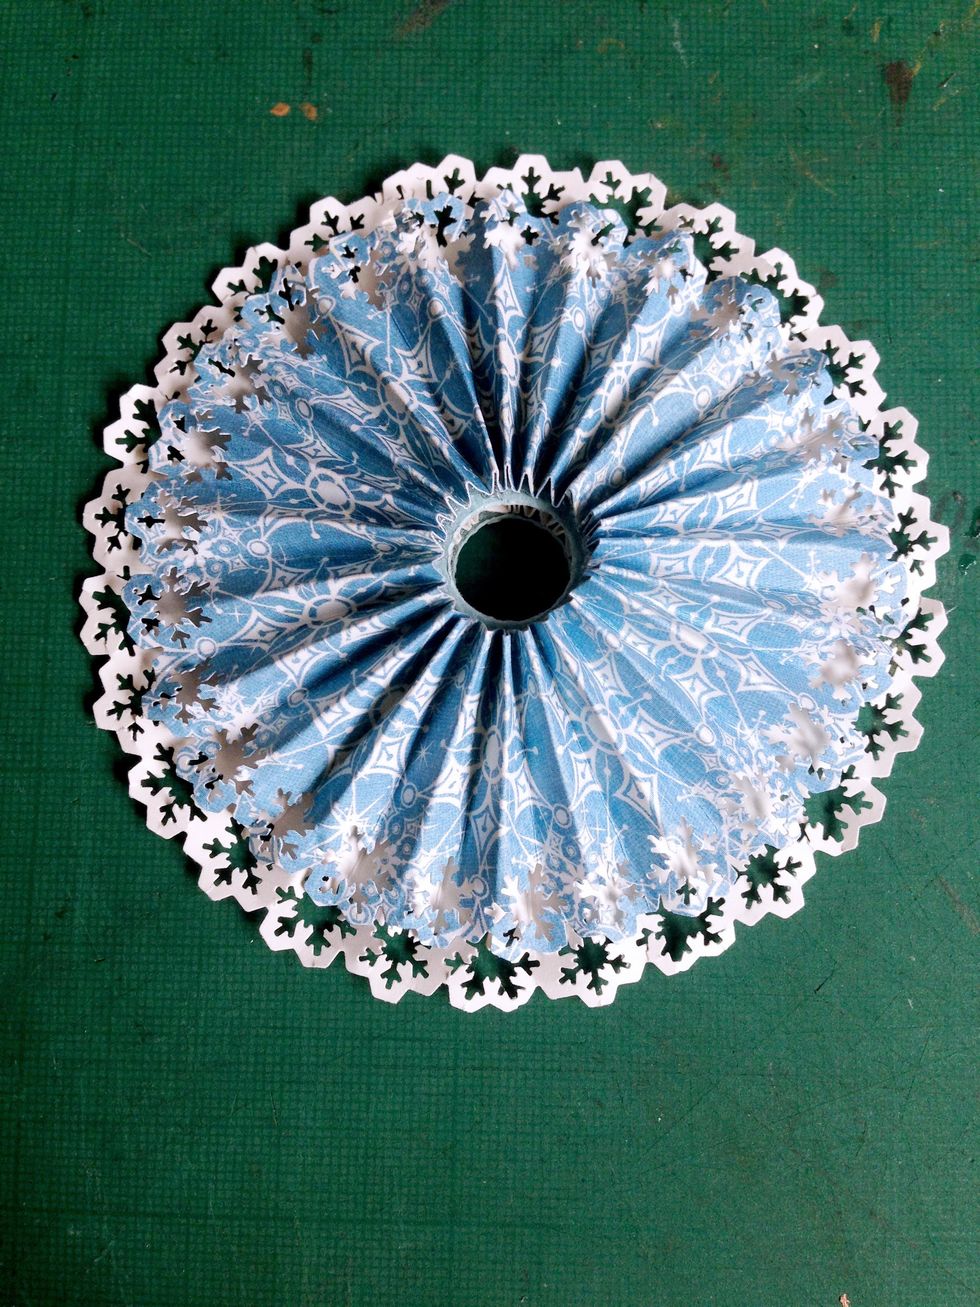
Flatten down the Snowflake Waltz rosette and glue on top of the white rosette, forming a dual layer of rosettes... You may need to hold down the rosette to prevent spreading...
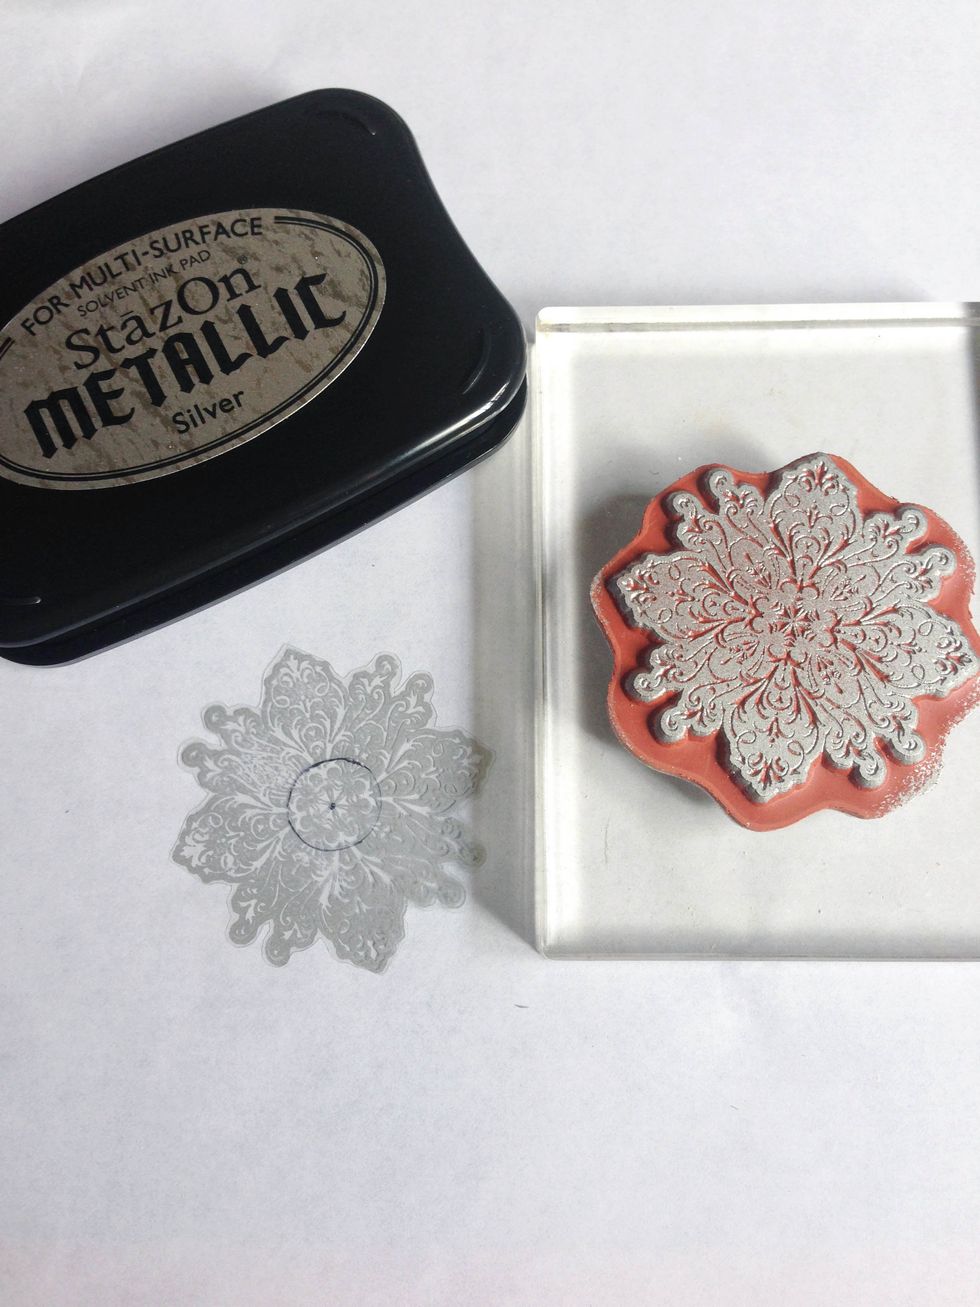
Using a metallic silver StazOn ink, stamp a snowflake image onto a transparency... At the center, mark a 0.5" circle...

Cut out the circle from the center as shown...
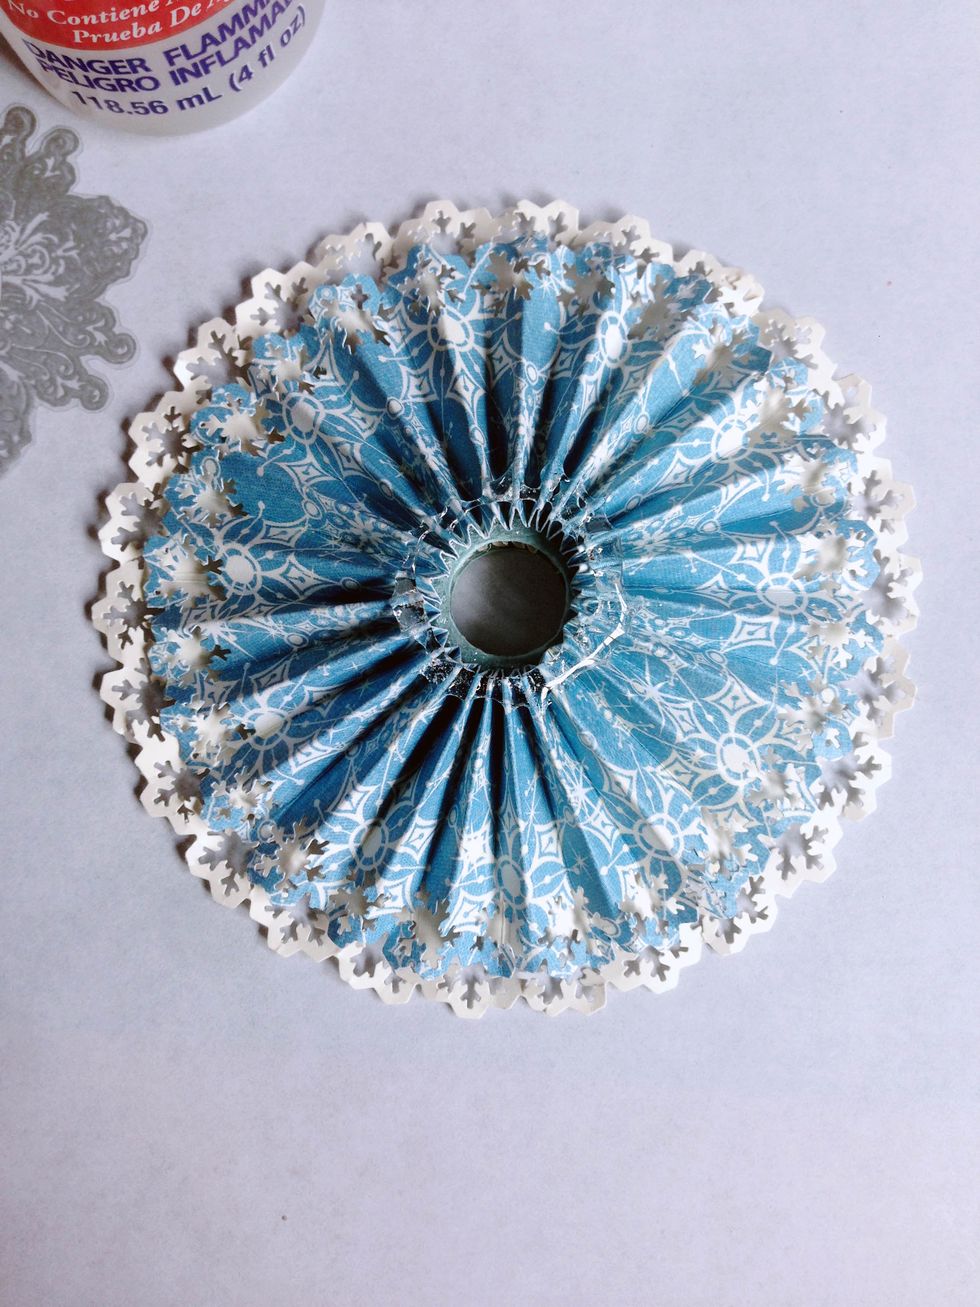
Apply glue on top of the dual rosettes...
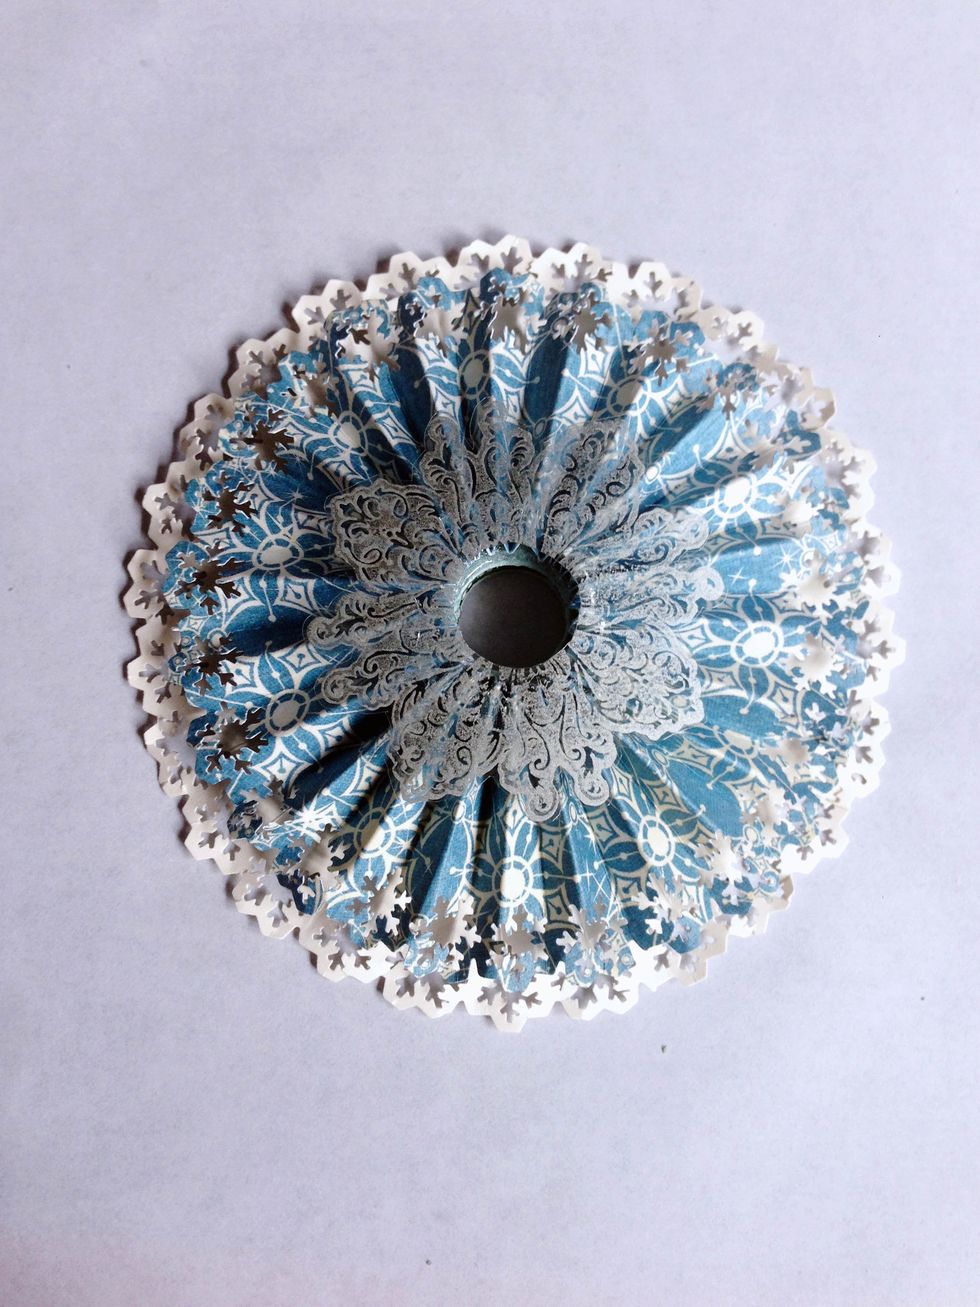
Glue down the snowflake you've done on Step 22 as shown... And you're done with the fairy's rosette skirt!!!
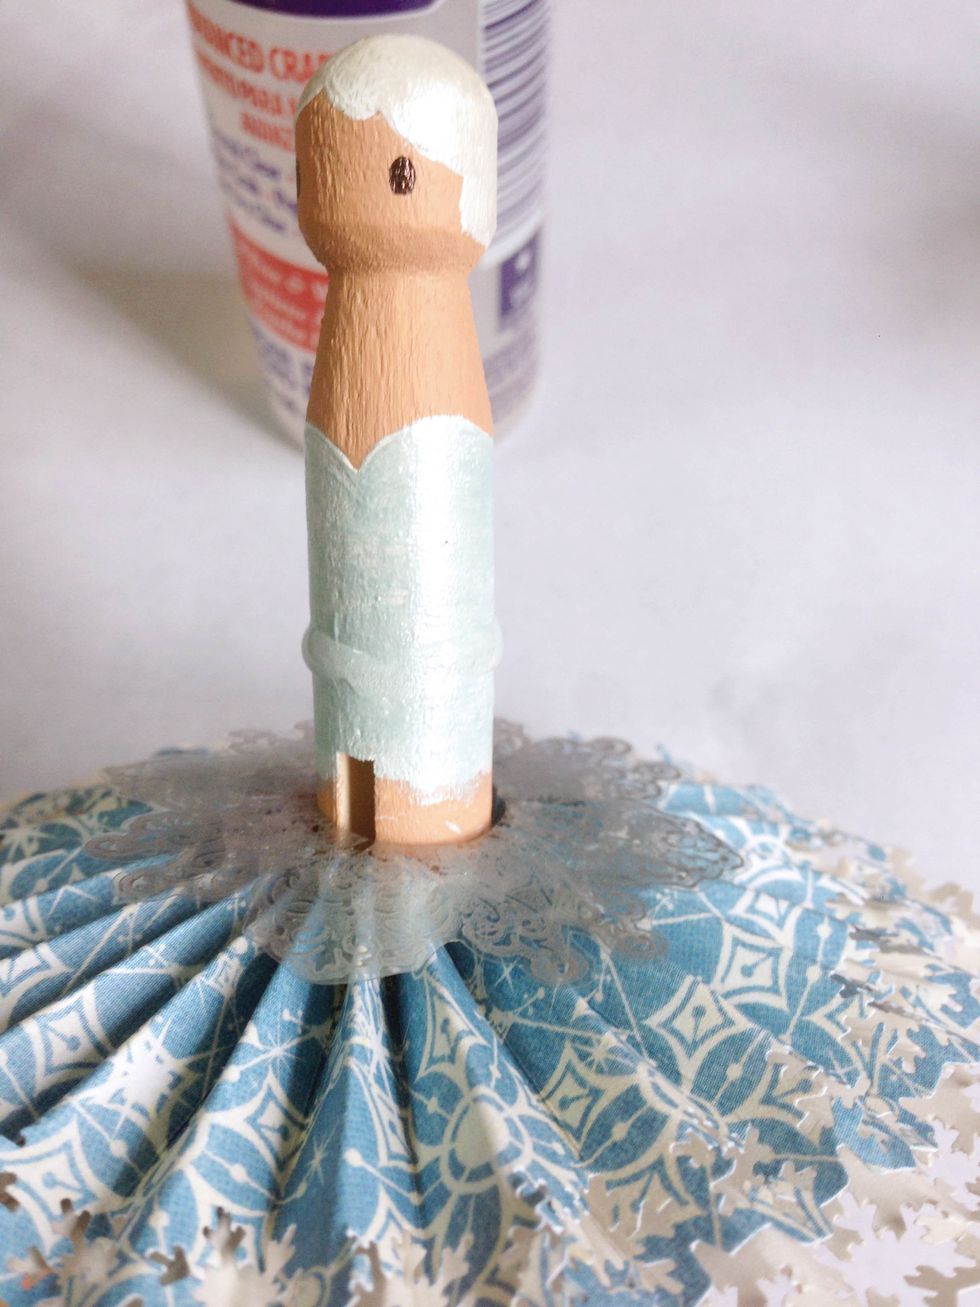
Apply glue around the waist of the dolly peg and insert the rosette skirt from bottom up... And you're done!!!
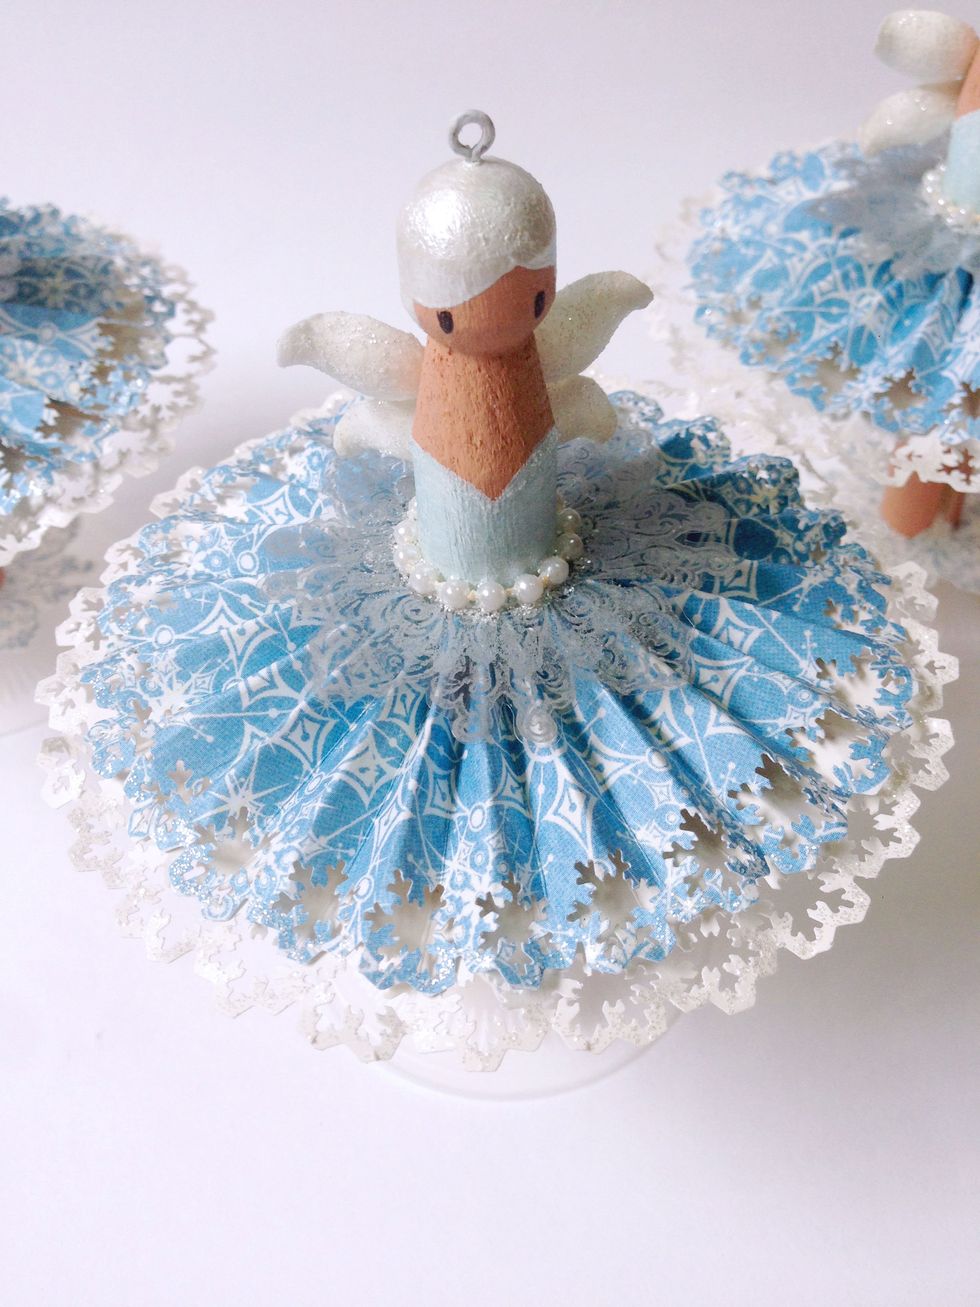
You can add some pearl accent on the fairy's waist... To hang as ornaments, insert a screw eye bail at the head of the dolly peg as shown...
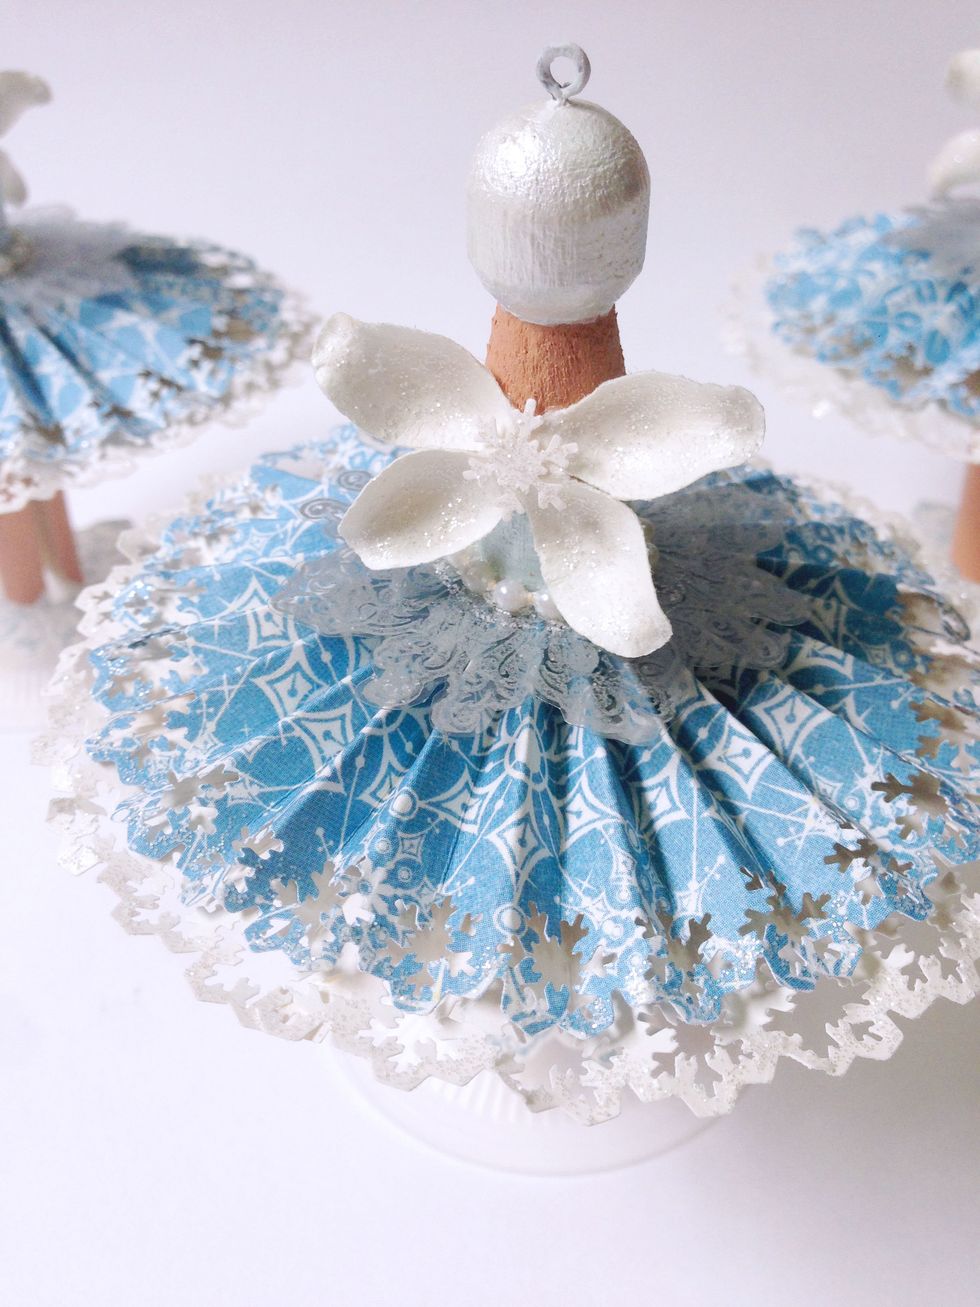
I cut a petal off from a 5 petal mulberry flower and made the wings for the fairies, and place a snowflake punch out from the edge punch at the center of the wings...
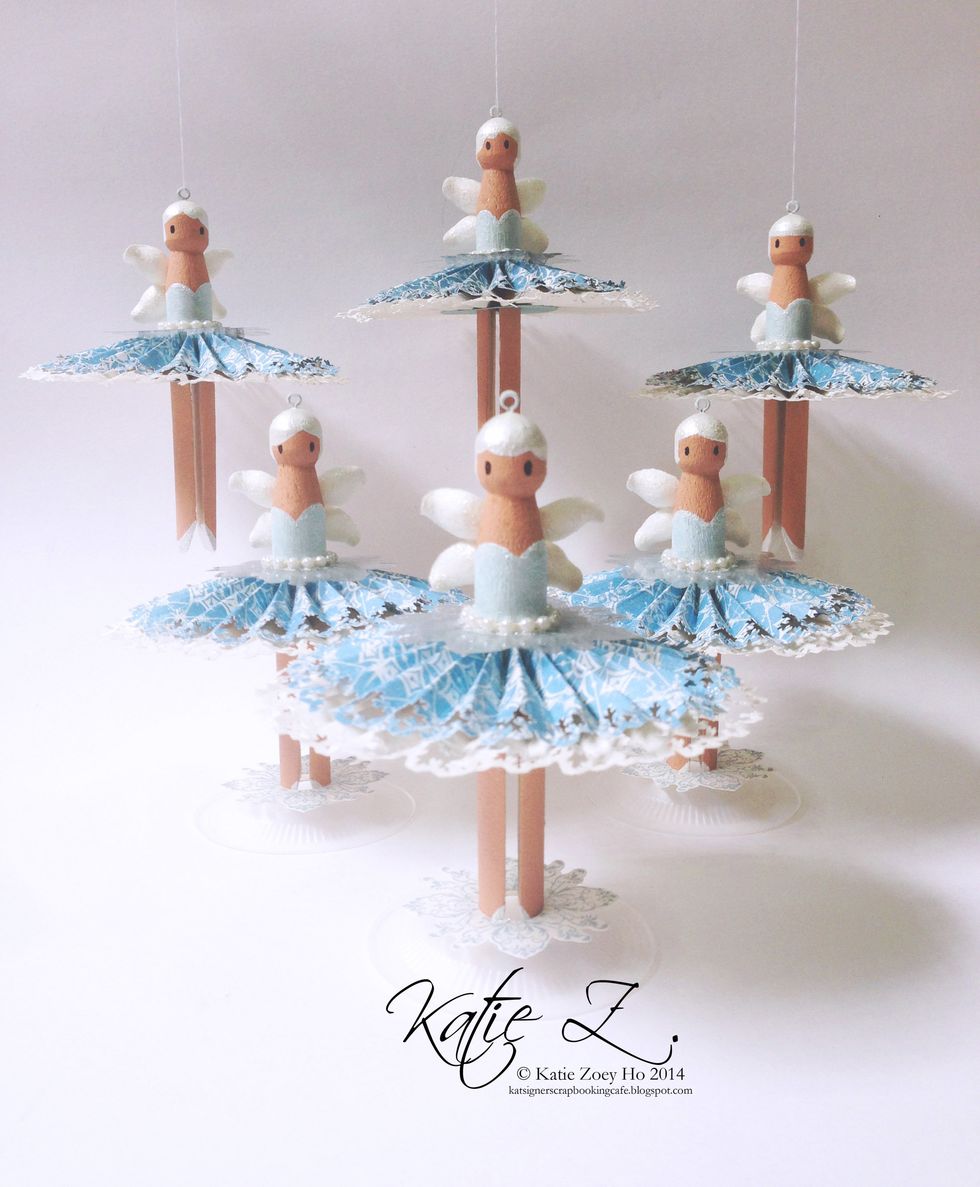
Here is a ensemble of fairies ready to waltz away this holiday... View their little performance here: http://youtu.be/HtYwbCGbcvo... Enjoy & Happy Crafting!!!