The Conversation (0)
Sign Up
This is a funny and easy way to make your own Pop Art pictures. Have fun:)

This is basically what you need to work with the clay. The first step is to copy the picture (I chose Lady Gaga) on the clay.
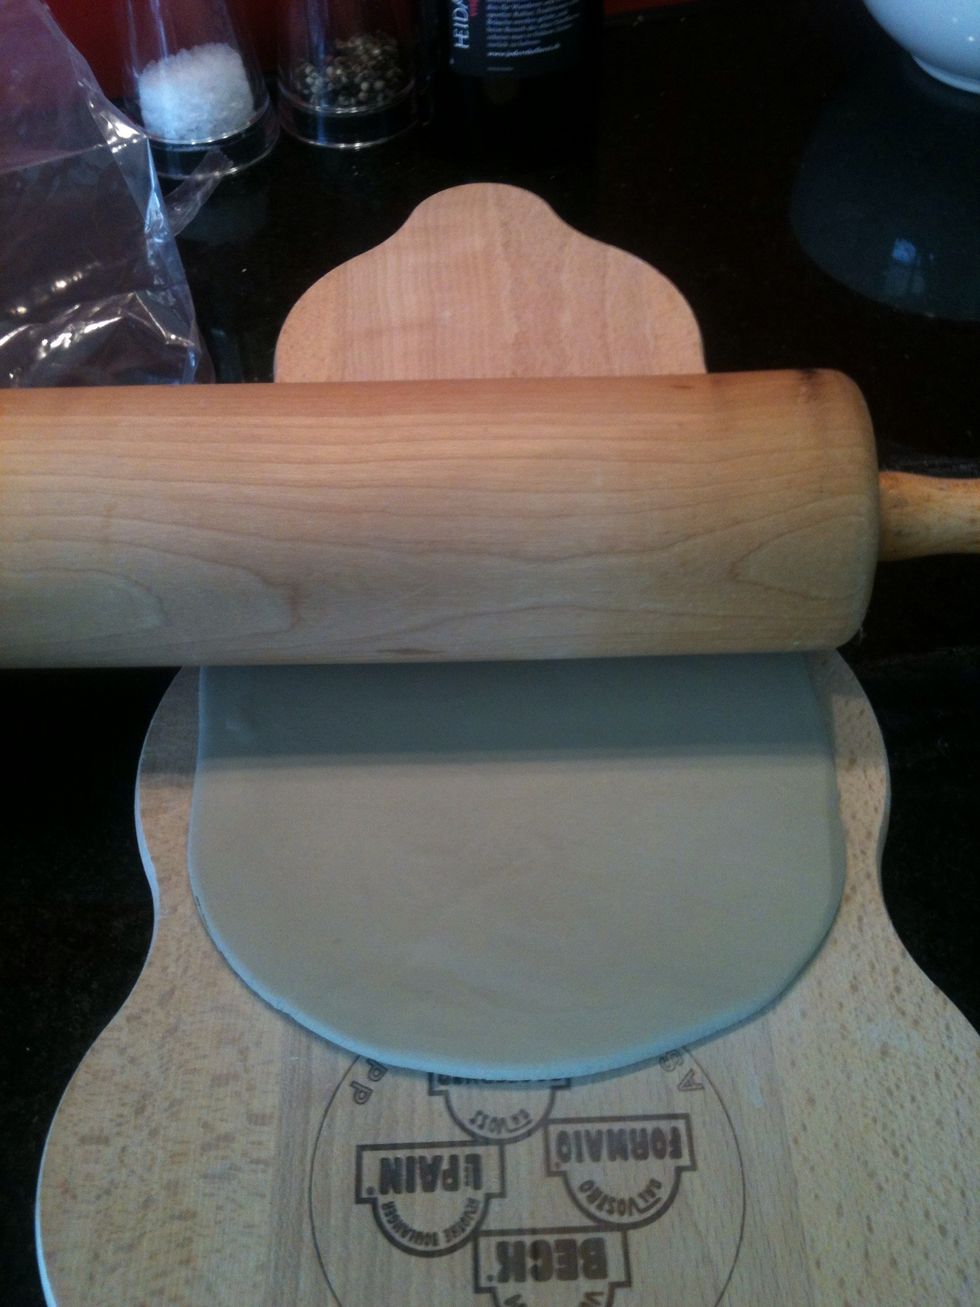
First flatten the clay with the rolling pin and make sure it has the same size as your picture. I use white clay, that makes the coloring afterwards easier:)
Place the picture to control the size. The clay should not be thinner than 1/5 inch! Otherwise it may break.
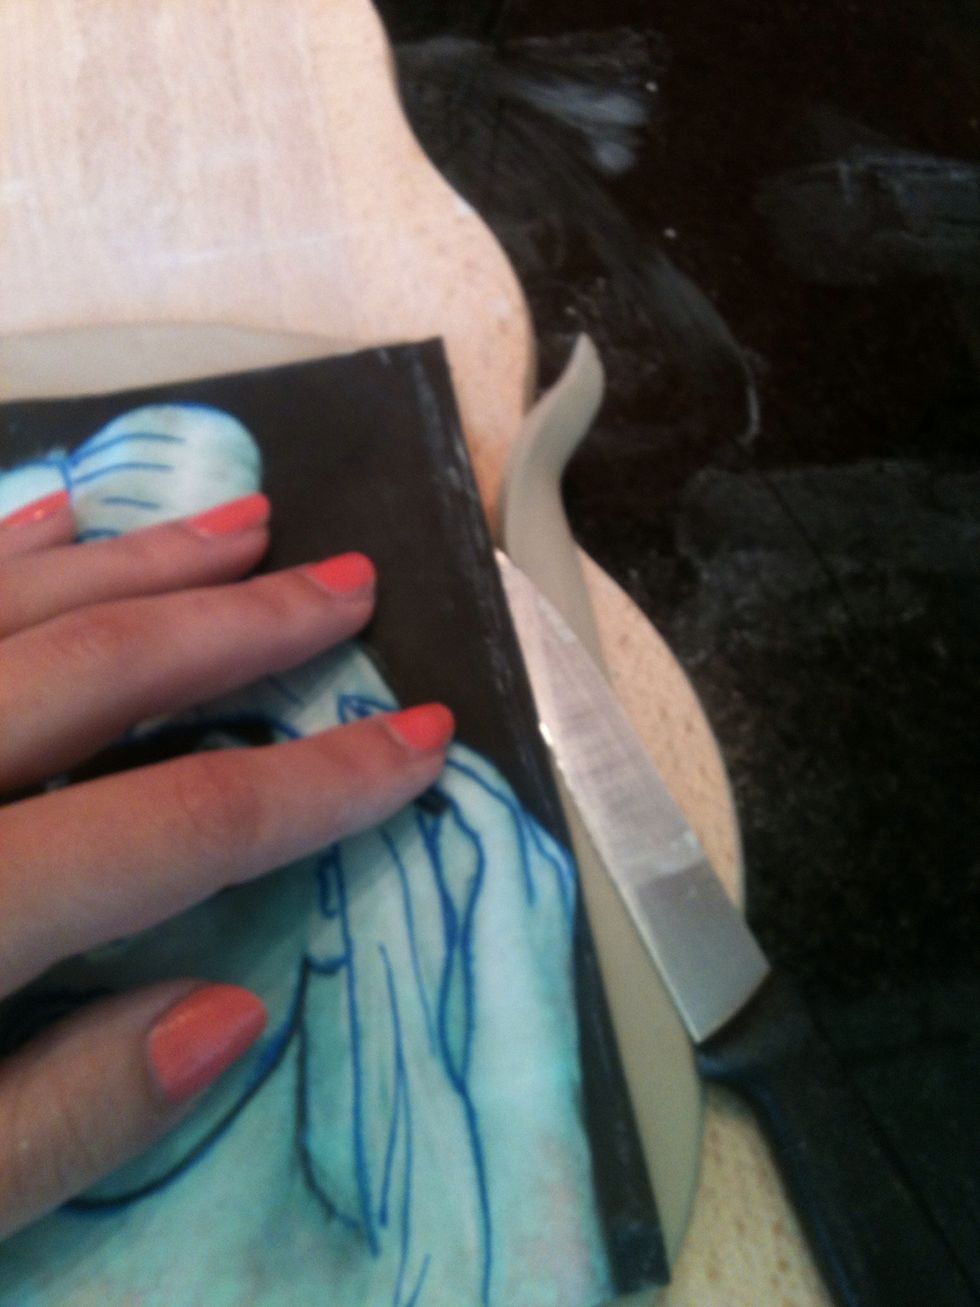
Then cut it out with a knife.
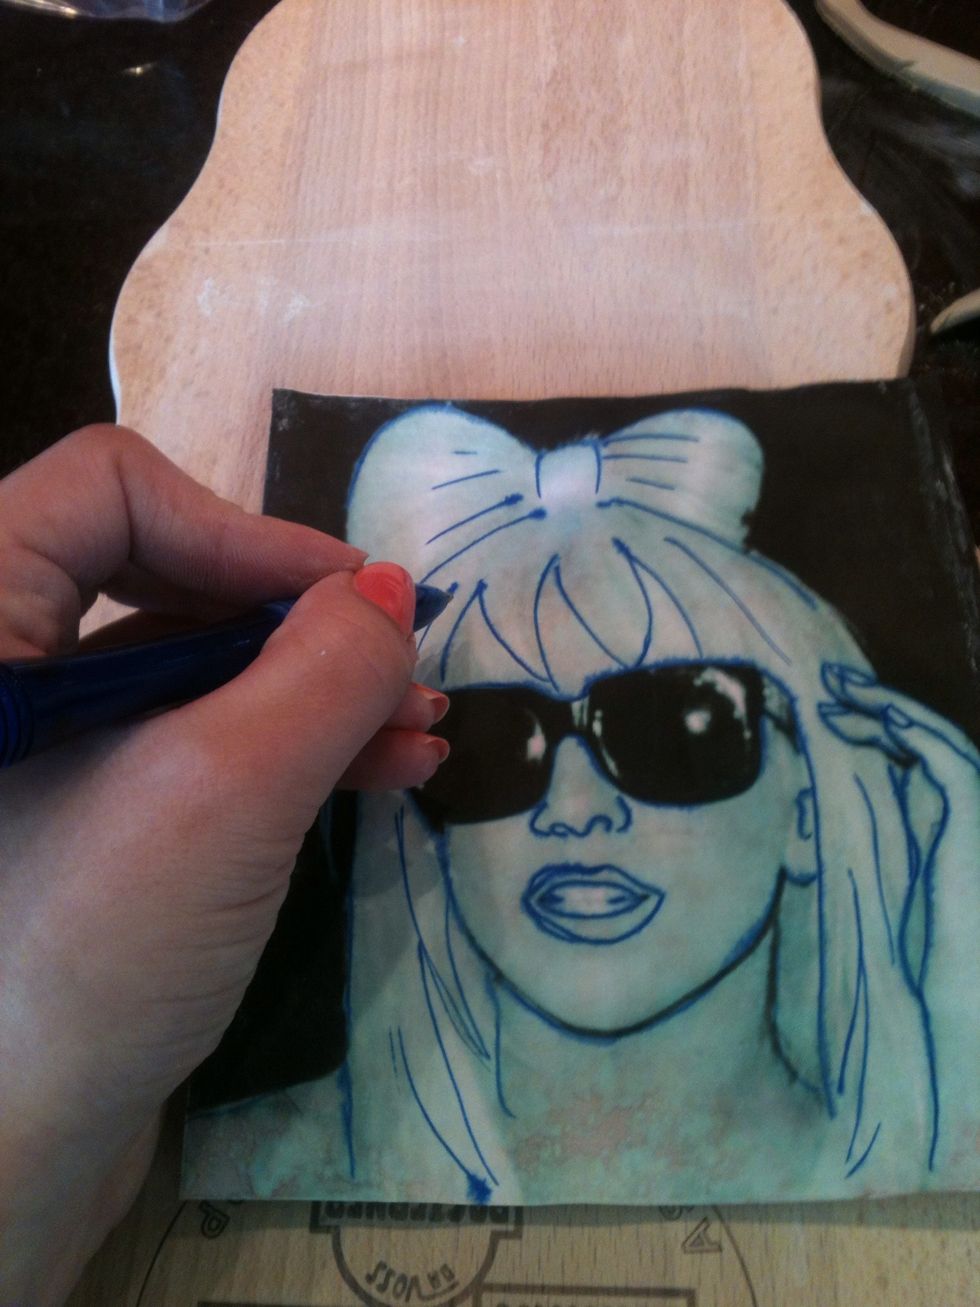
Now take your gel-pen and draw the main lines on your picture. Remember that small parts (as the nails here) are difficult to carve afterwards!

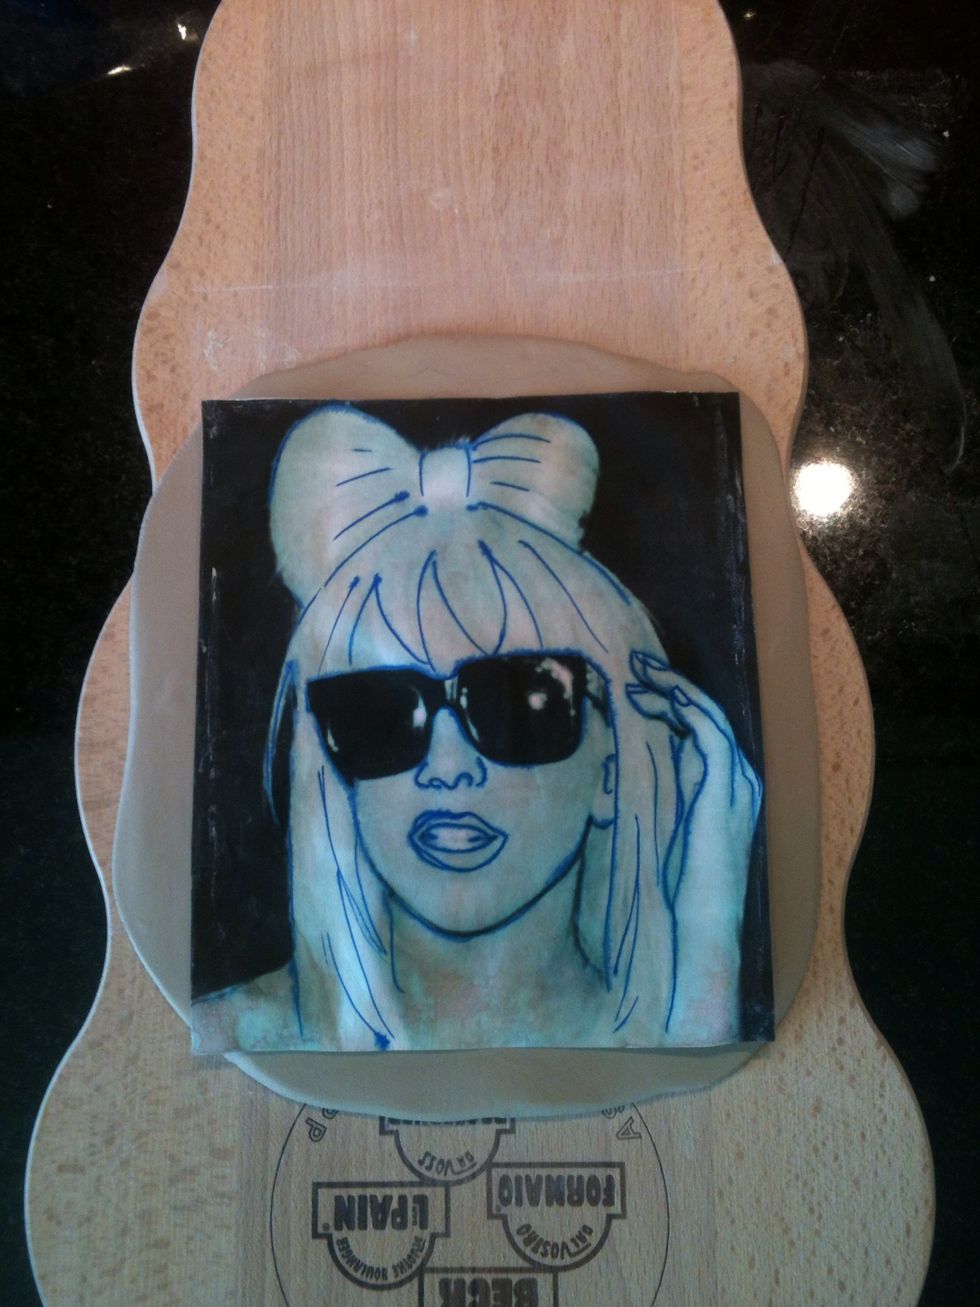
Then put the picture with the colored side on the clay and wet it with a little water.

Distribute the water with your fingers and gently press to copy the lines on the clay.
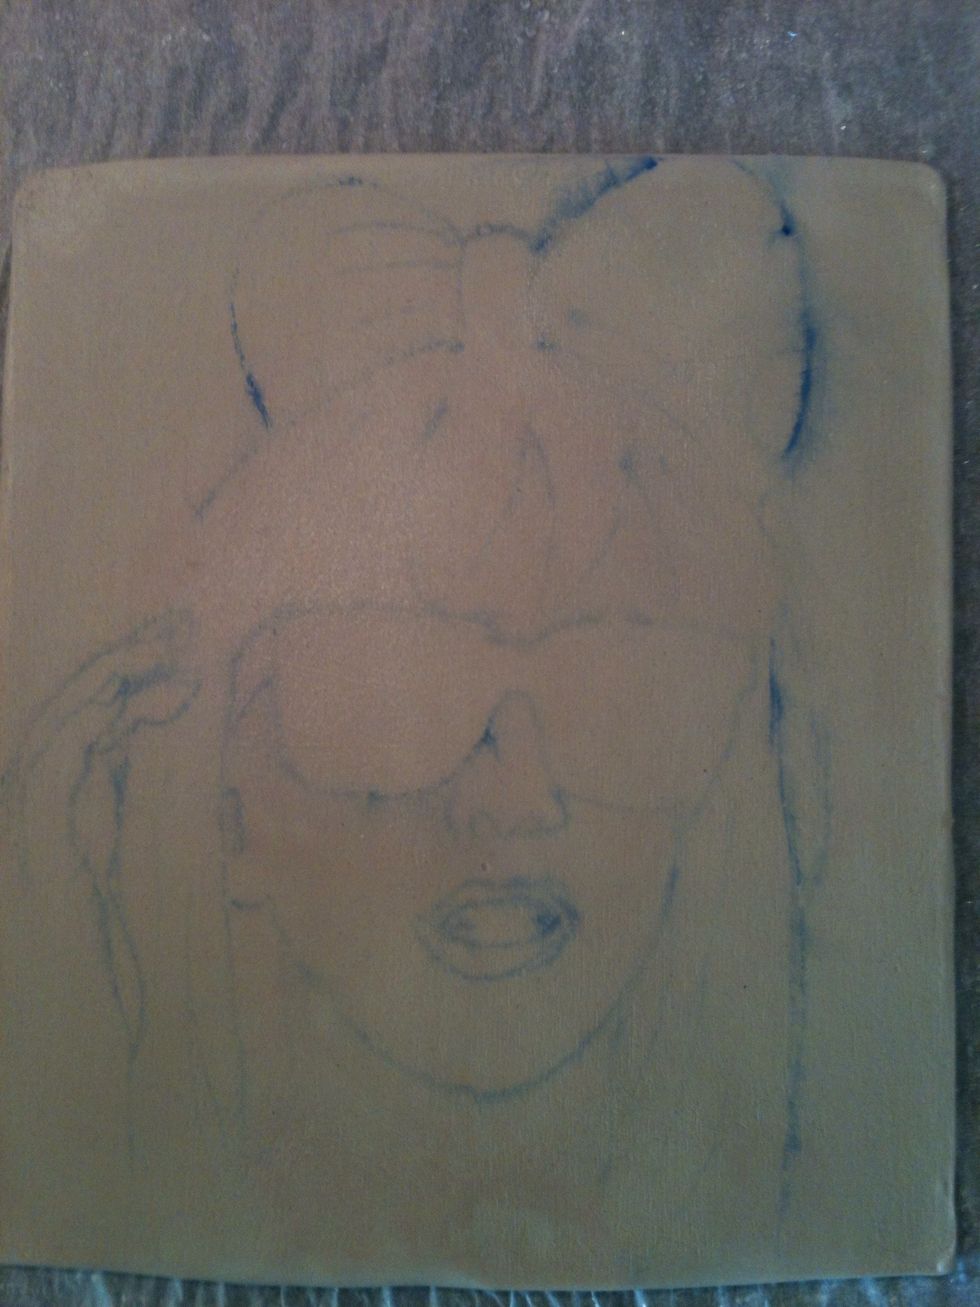
It should look somehow like that now:) With a little water you can remove blurred parts.
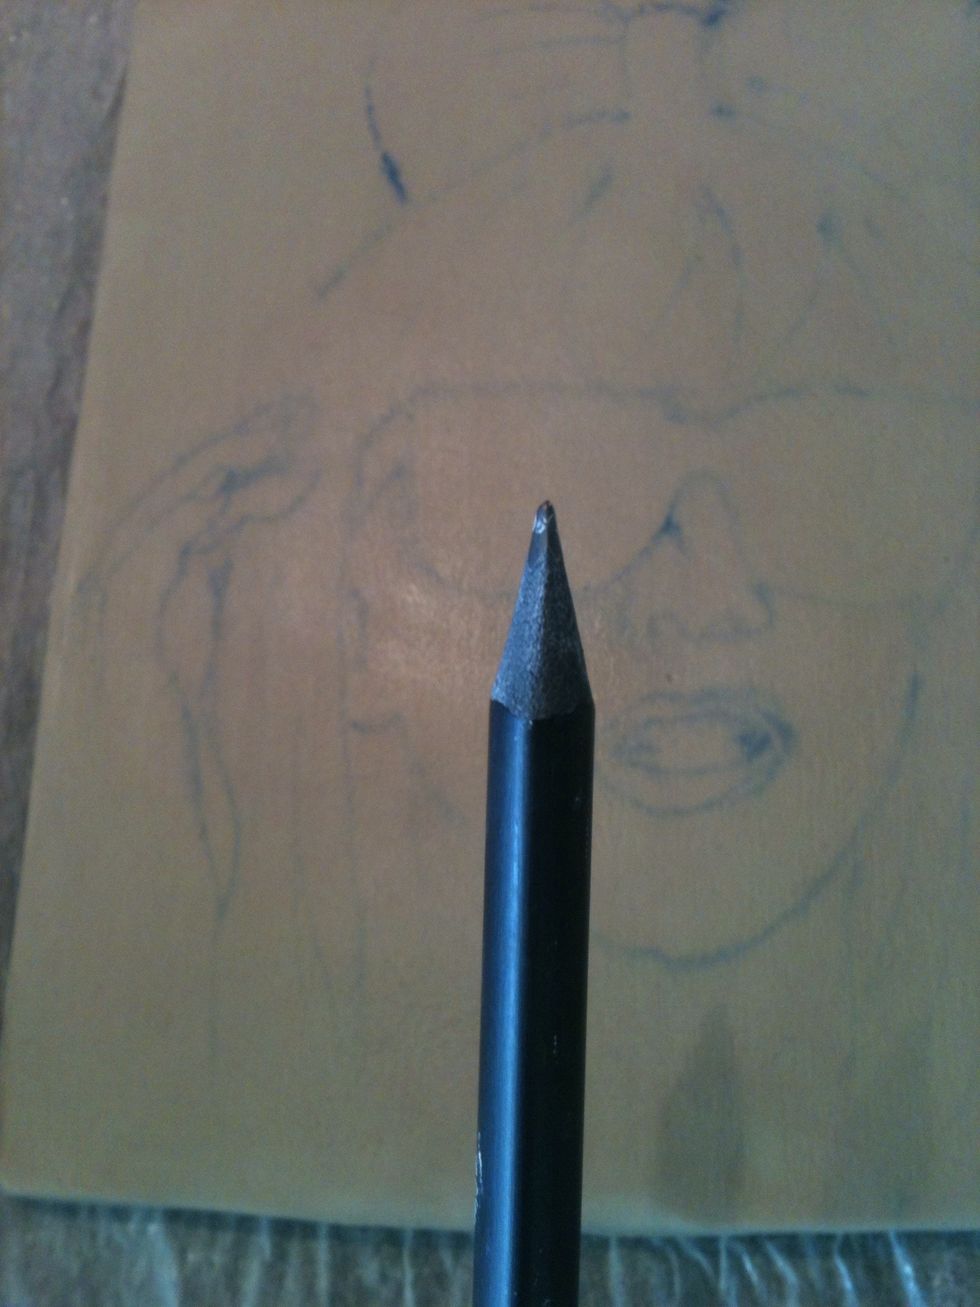
Take your pencil ( if you have a carving kit that's even better). Now we're gonna carve;)

Simply follow the lines you copied on the clay before. Make sure not to carve too deep! Otherwise it will be difficult to color the lines afterwards.
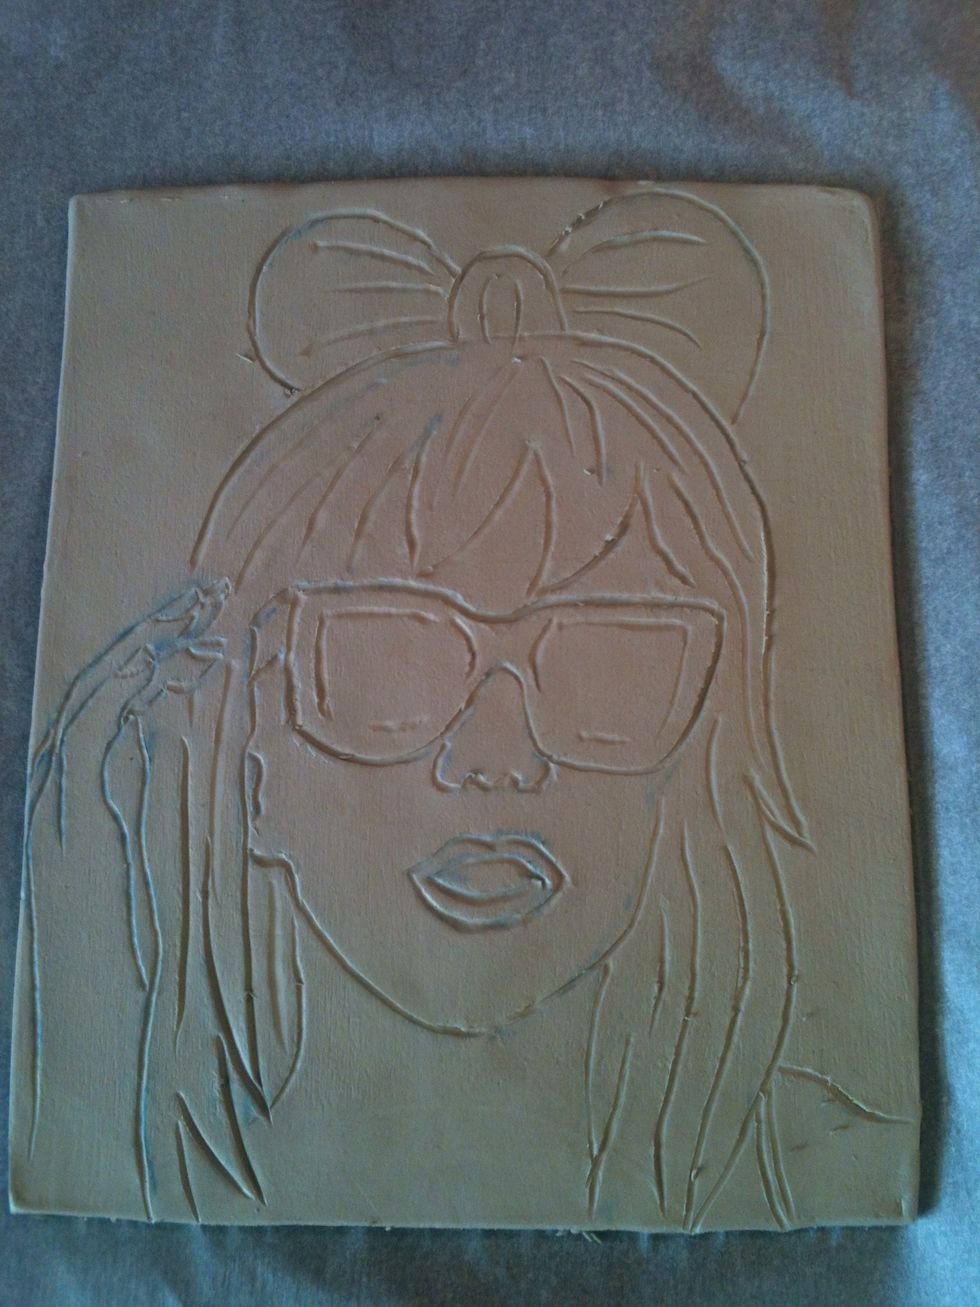
Et voilà:)

Now, if you have a furnace that's great. Just follow the instructions on the package. I use the normal oven for the drying process.
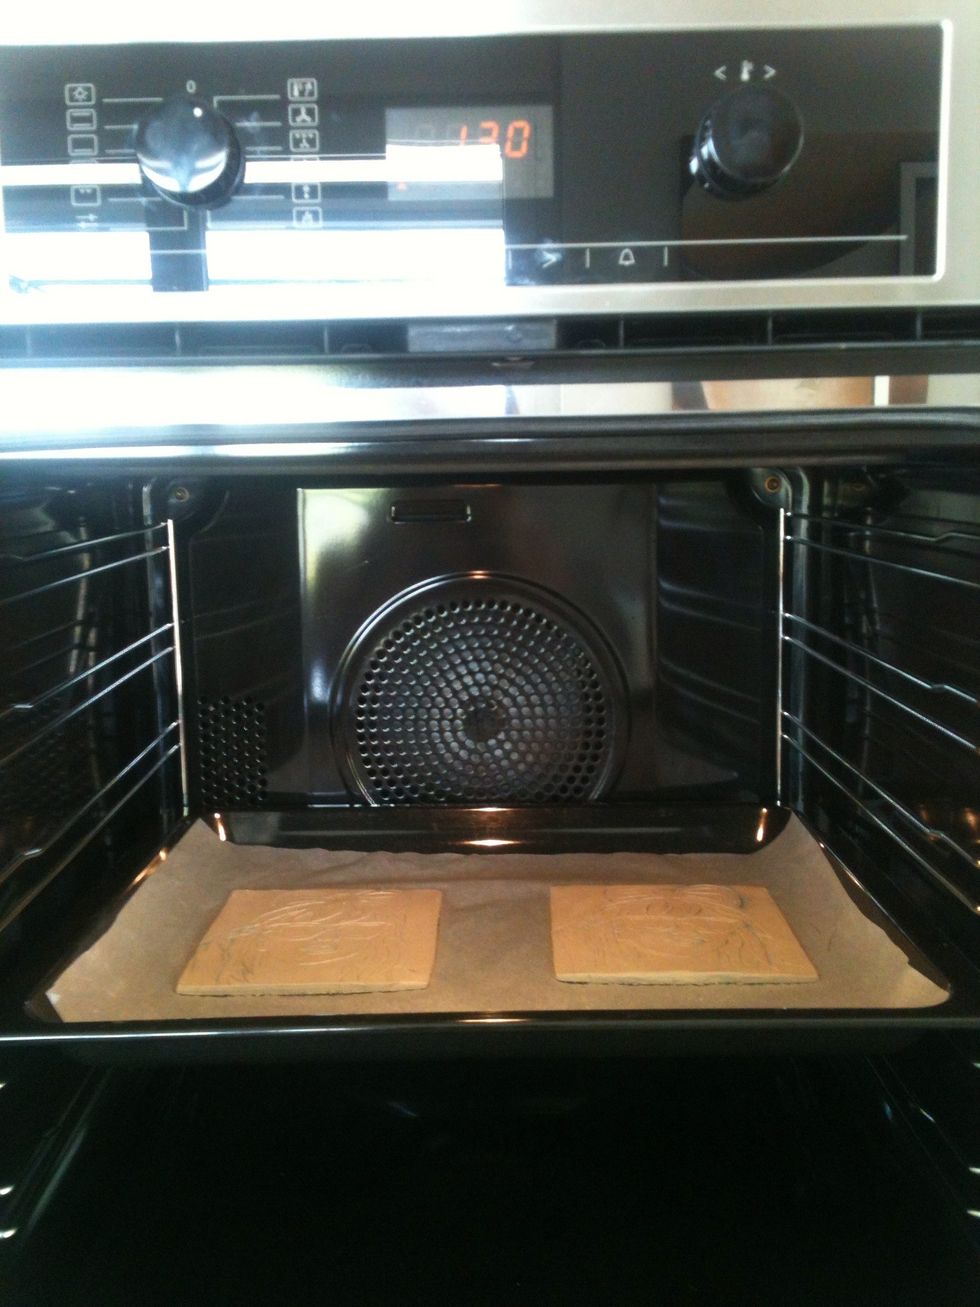
Heat the oven to 130 degrees celsius (266 degrees fahrenheit) and put the clay plates in the middle of the oven. Let it dry for 15 minutes then take it out and let it dry again for 24 hours.
Note for the drying-process: make sure that the underground is dry!! AFTER you took them out of the oven put some books on the clay plates that prevents them from bending!

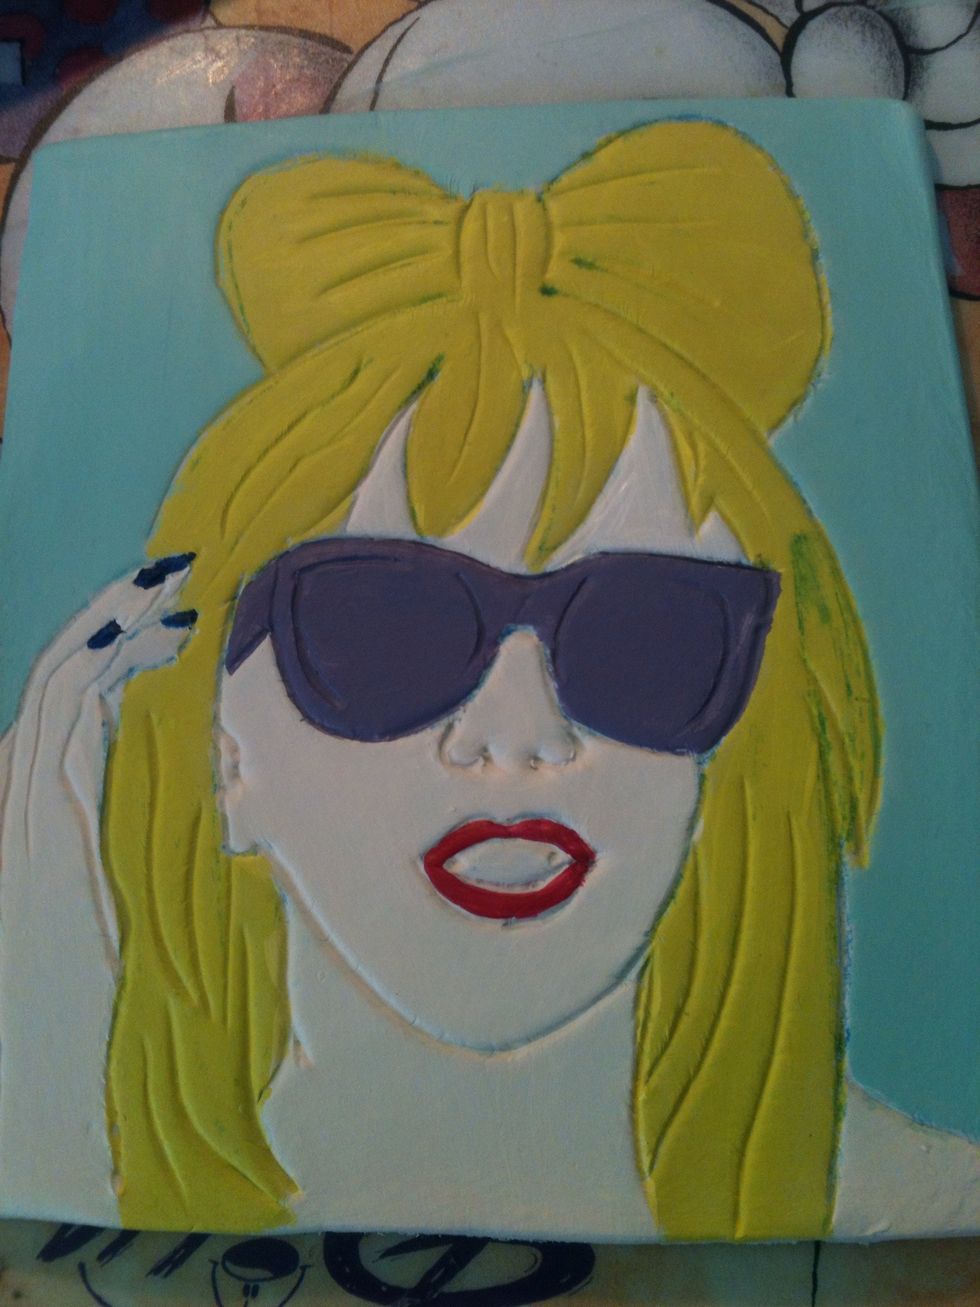
When they're dry it's finally time to give it some colors:) I used acrylic paint, it works best. You're totally free in using any color!:) be creative;)

Simply apply the color. Make sure not to paint outside the area.
Coloring done. Next step: draw the lines in black paint.
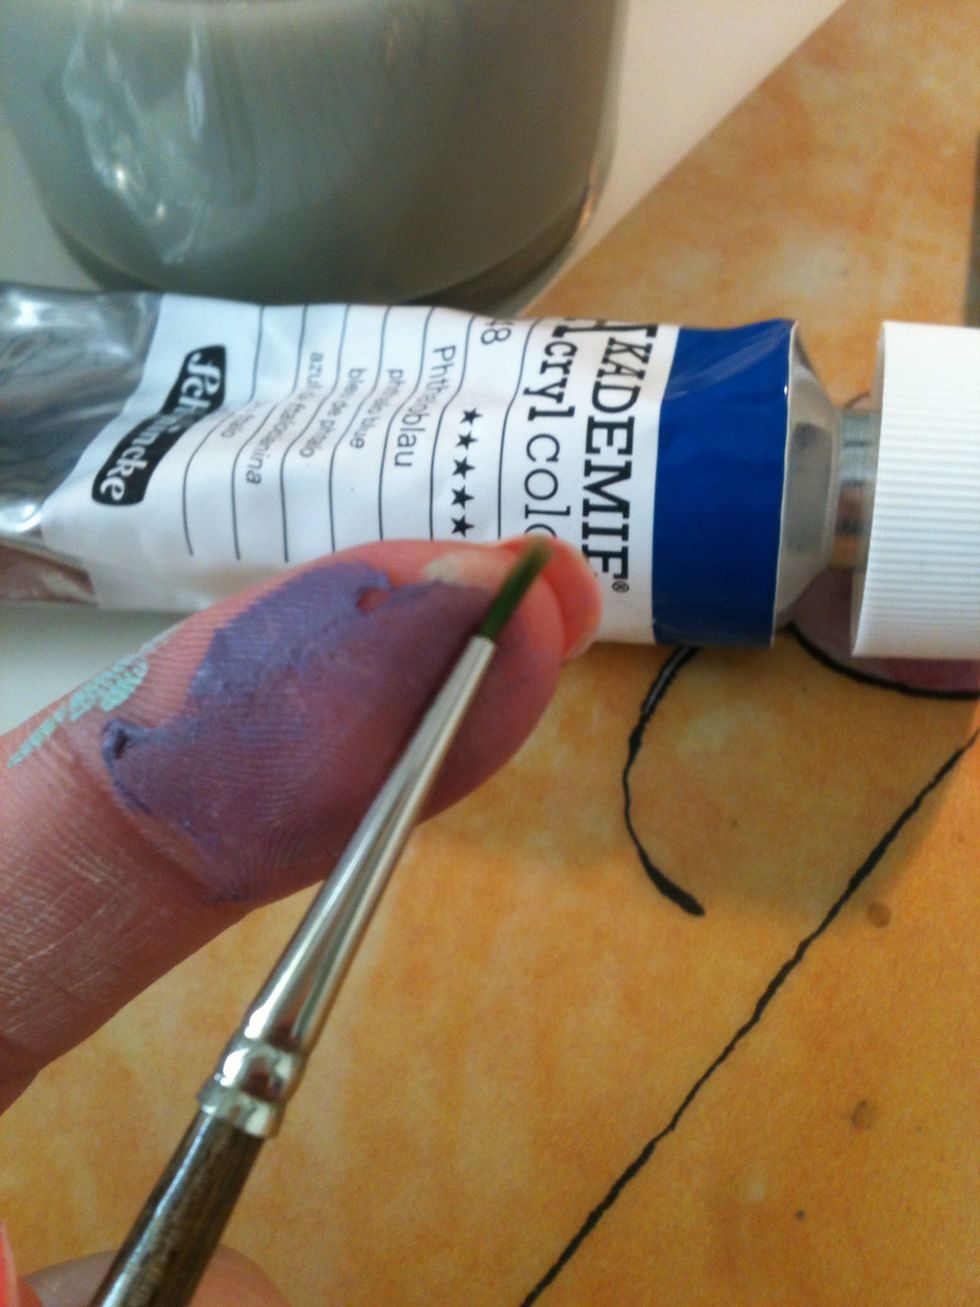
I use a tiny brush as you can see... This really works best because you can control it easily.
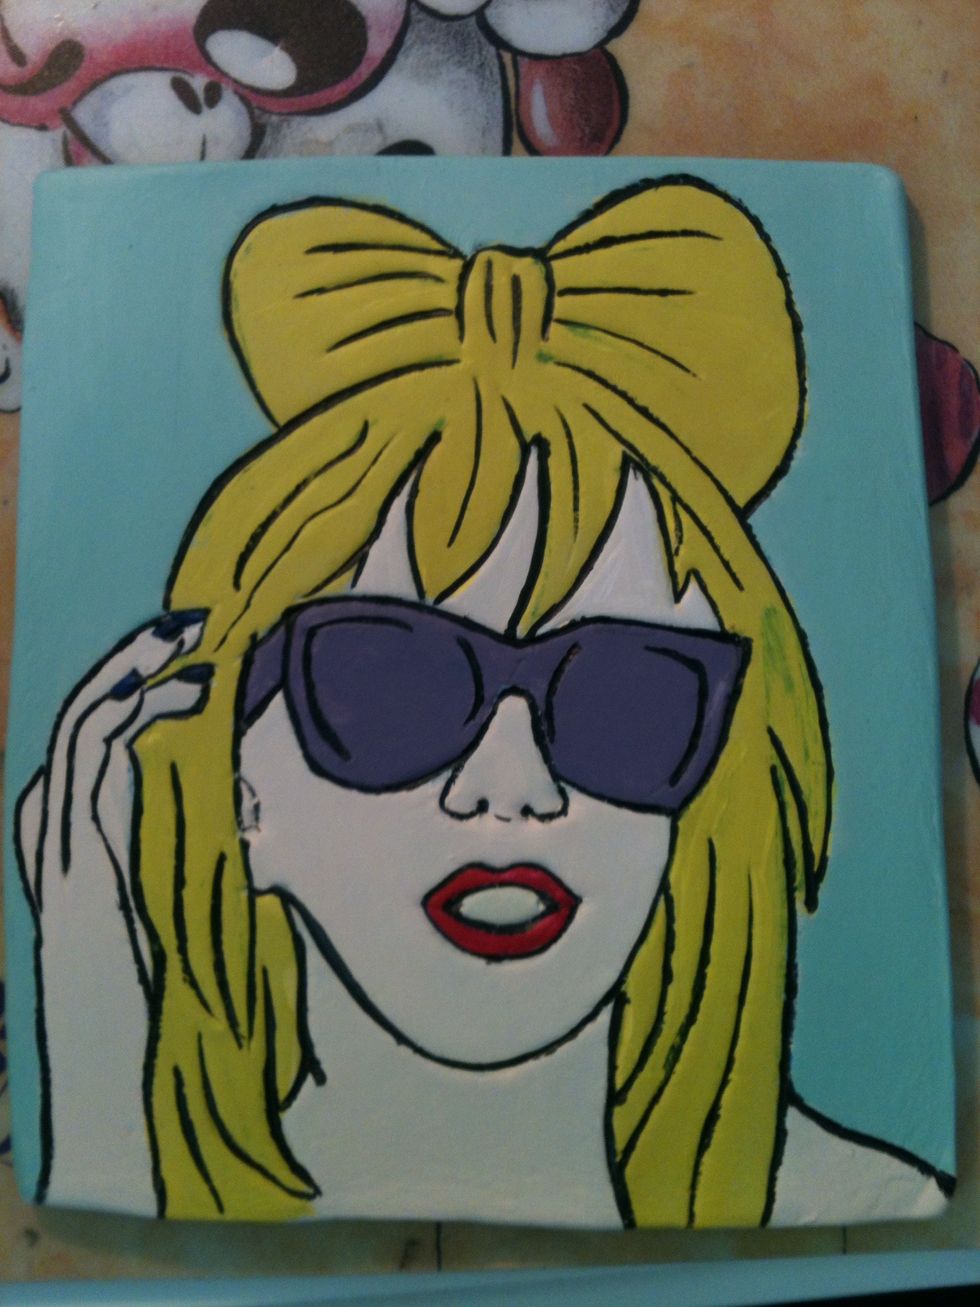
So, this is your first clay Pop Art picture:)
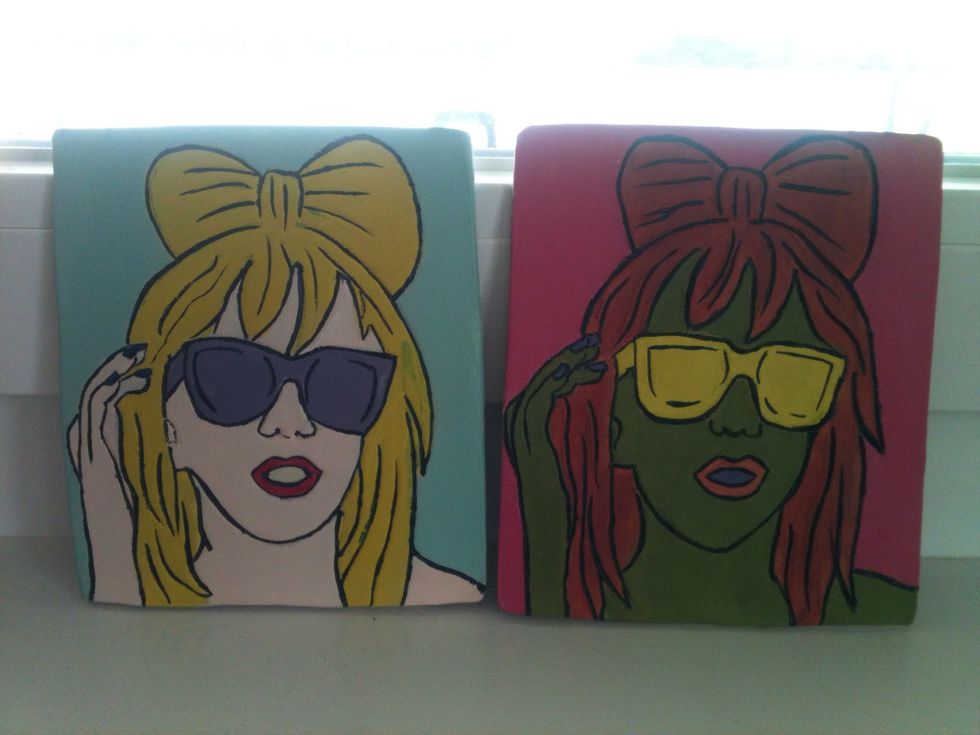
You can use different colors on the same motive. This increases the typical Pop Art effect. :)
I hope you enjoyed this little tutorial:) I am looking forward reading your comments:) Love Ellie