The Conversation (0)
Sign Up

Fold square in 1/2 (pic1). Unfold. Fold top edge & bottom edge to center crease (pic2). Fold in 1/2 (pic3). Unfold. Fold left & right edge to center crease (pic4).
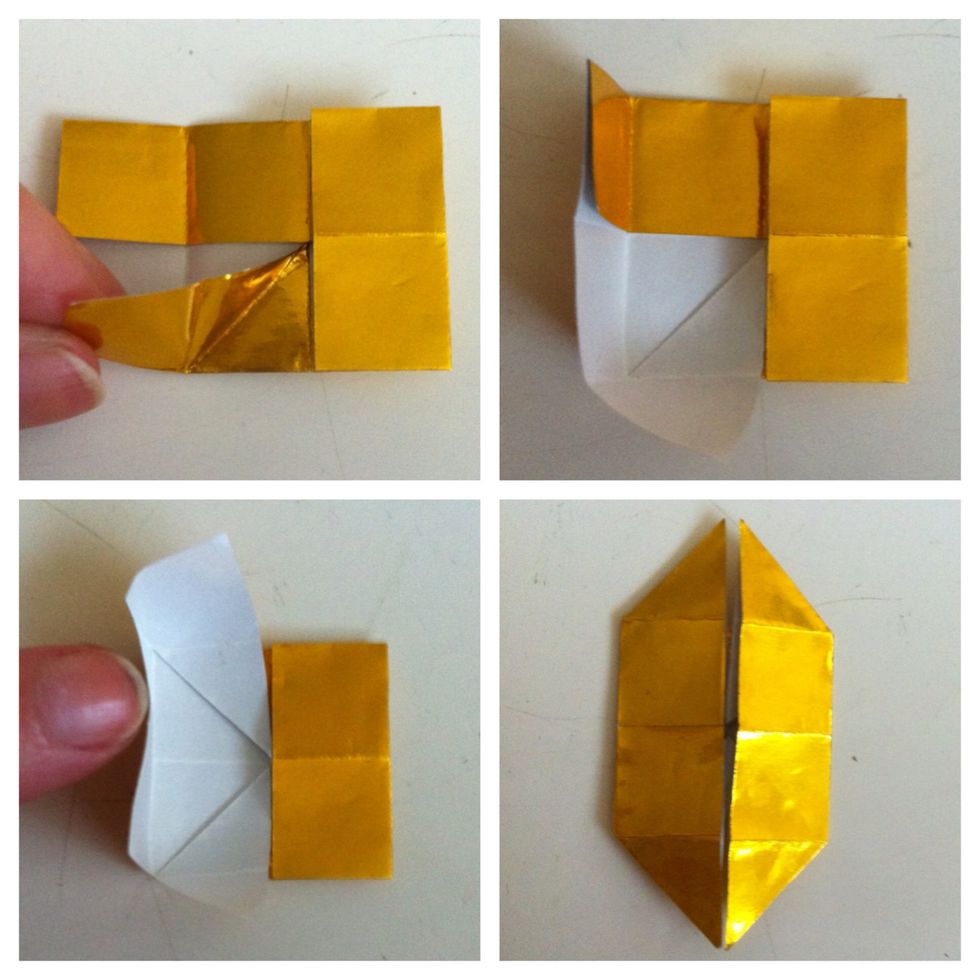
Open left side (pic1). Fold bottom down, making the bottom square fold down diagonally (pic2). Repeat w/ top left (pic3) & push where my finger is to squash flat. Repeat on right side (pic4).
![Pull up top left piece (pic1) & push finger inside (pic2). Squash flat (pic3). Repeat w/ other 3 (pic4). [youre not crazy, the examples do keep changing color. had to retake cuz some were blurry].](https://guides.brit.co/media-library/pull-up-top-left-piece-pic1-push-finger-inside-pic2-squash-flat-pic3-repeat-w-other-3-pic4-youre-not-crazy-the-e.jpg?id=24337135&width=980)
Pull up top left piece (pic1) & push finger inside (pic2). Squash flat (pic3). Repeat w/ other 3 (pic4). [youre not crazy, the examples do keep changing color. had to retake cuz some were blurry].
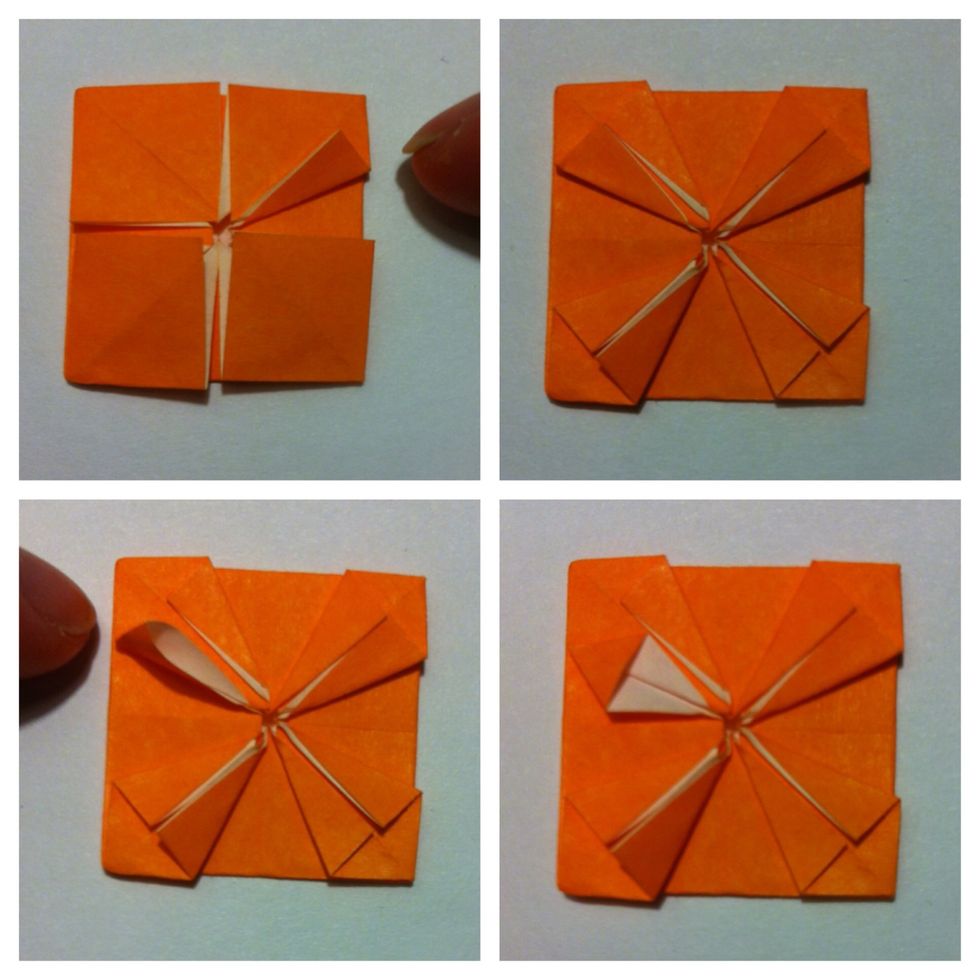
Fold one of the edges from your little squares to the center crease of it (pic1). Repeat on other side & w/ rest of little squares (pic2). Now you'll open each of those up (pic3) & squash flat (pic4).

All squashed flat (pic1). Now fold each corner back (pic2). You can glue those back. You can glue a circle in center (pic3) or make a medal (pic4). Add a bigger circle in center to say what it's for.
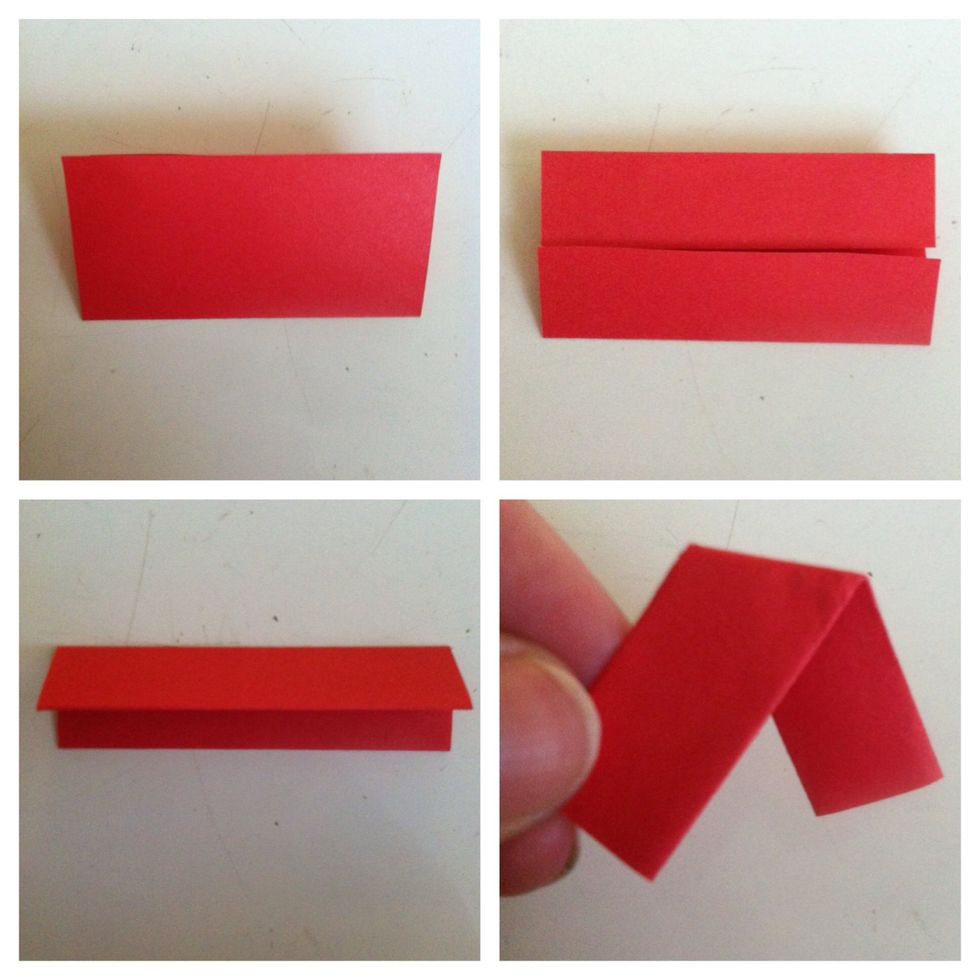
Here's how to make ribbon for the medal. Fold in 1/2 (pic1). Unfold. Fold top & bottom edge to center crease (pic2). Fold in 1/2 (pic3). Bend at a diagonal in middle to get shape shown in pic4.
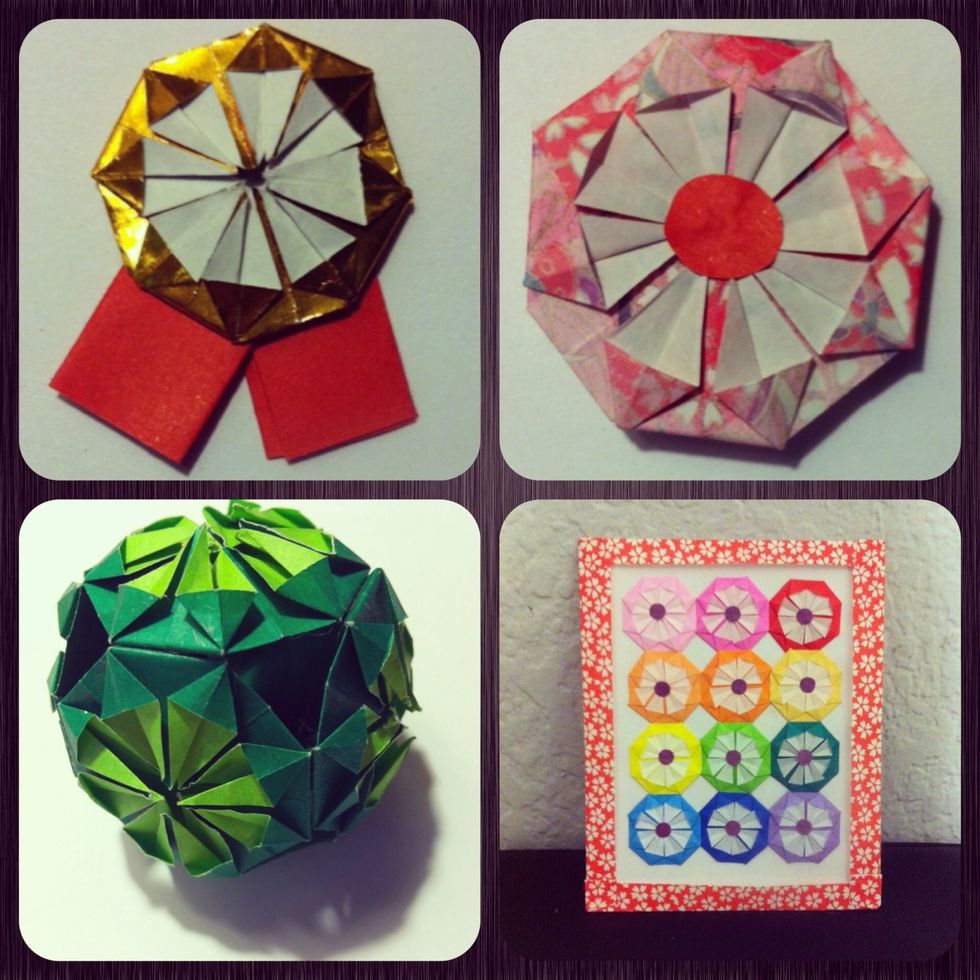
You can glue 2 back to back for ornament (pic2) or glue a pic in middle for frame (add magnet to back). In pic3, I glued 6 together (use corners u folded back) for decorative ball (add tassel). Pic4..

I made a cute paper quilt. I only glued the corners u fold back to the paper, so there's more dimension. I folded another piece of paper around it for frame. I need giant one for wall! What's ur idea?