STEPS
TOOLS
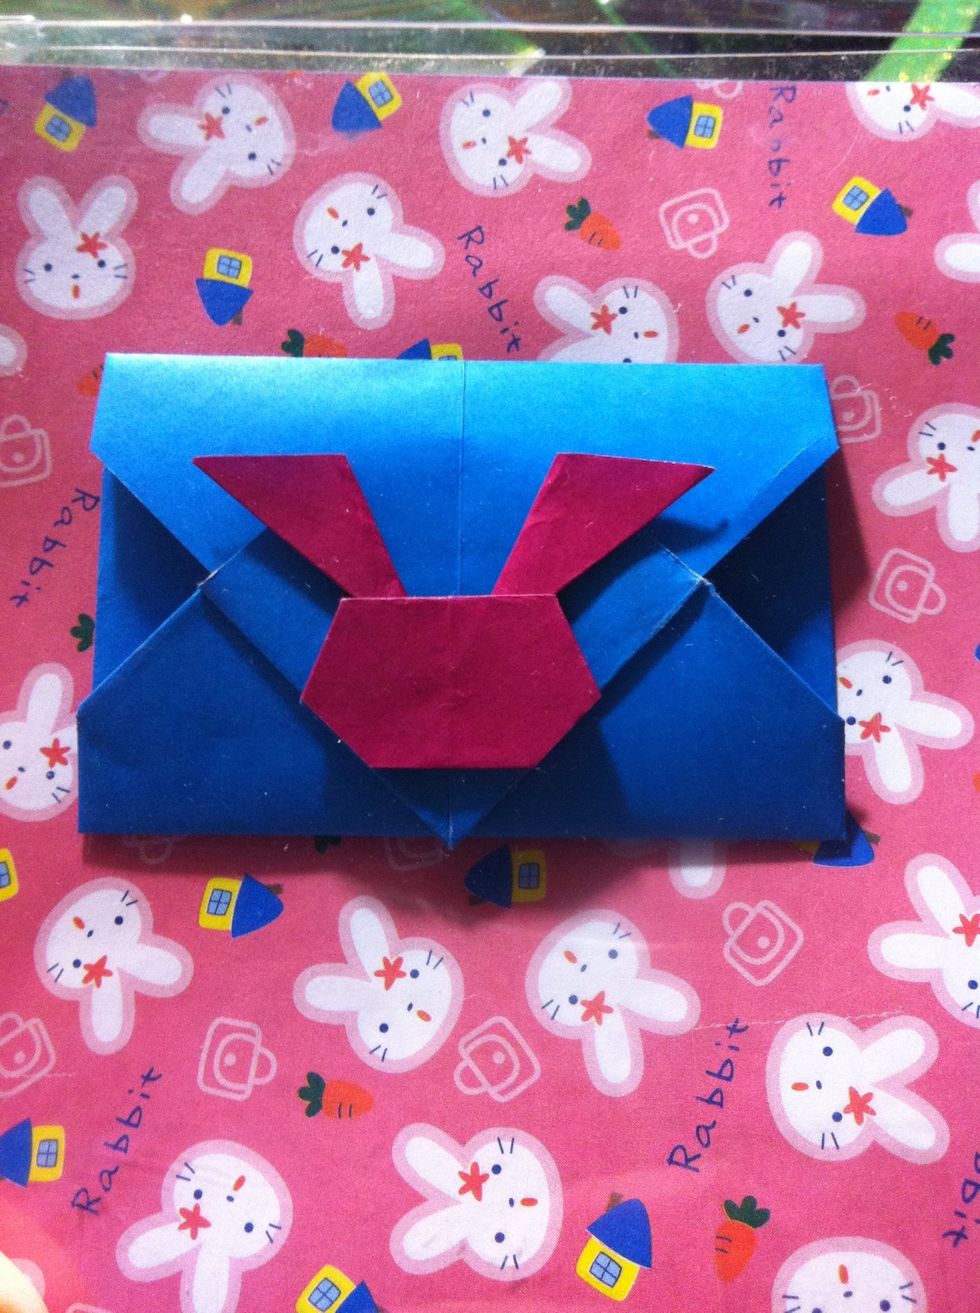
Cute bunny envelope...I bet u can maker even cuter if u give him a face 😋 (btw, start with the color u want bunny to be facing up).
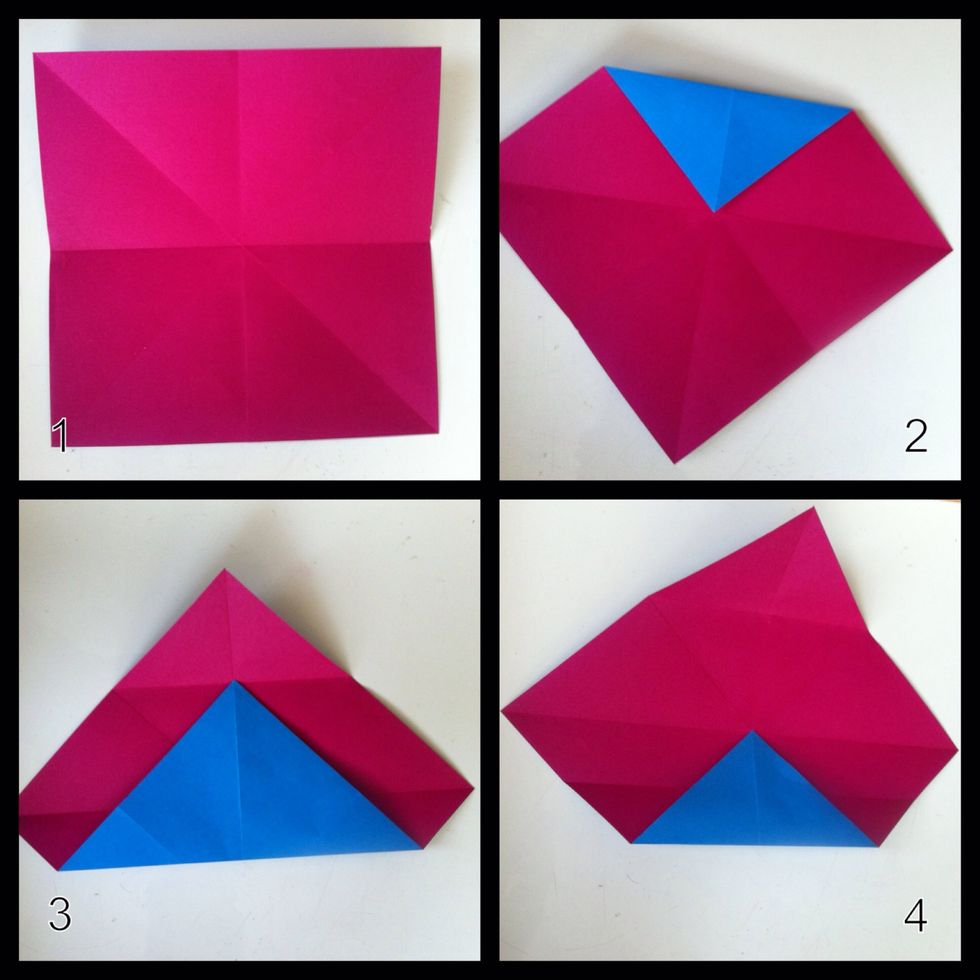
1=fold in 1/2 both ways n unfold, fold in 1/2 tip to tip both ways n unfold. 2=fold top tip to center, unfold. 3=fold bottom tip to step2 crease, unfold. 4=fold bottom tip to step3 crease, unfold.
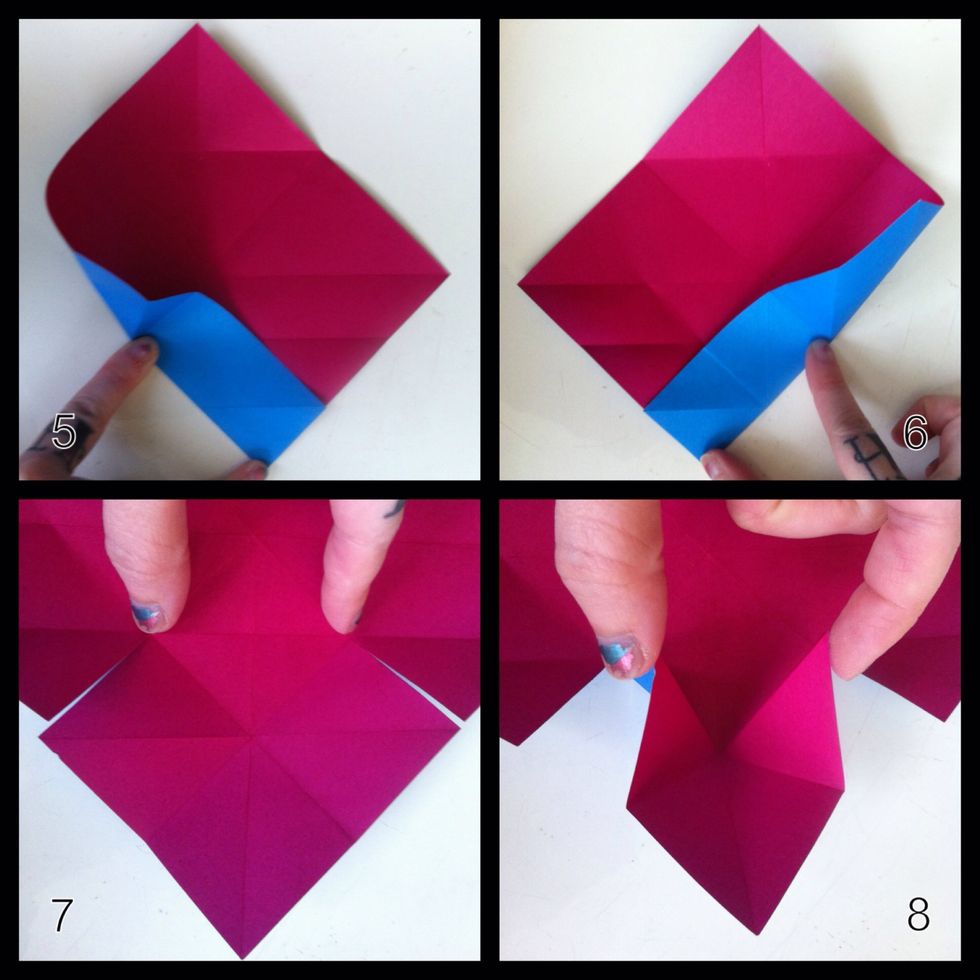
5&6=crease in between my thumb n finger as shown; the creases will make an 'x' as seen in step7. 7=cut to where my thumb n finger are as shown. 8=pinch tips together; starting squash fold.
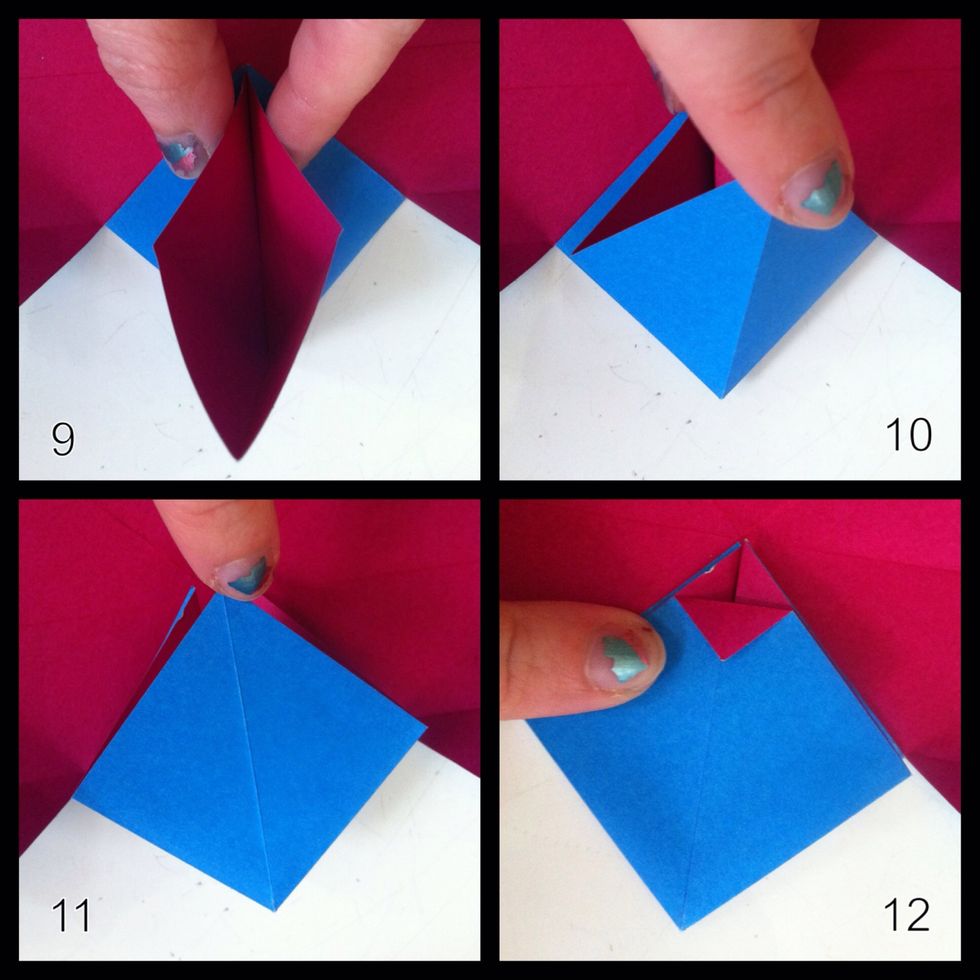
9=continue pinching till they touch. 10=take bottom tip to top. 11=squash flat; squash fold complete. 12=fold top tip down as shown.
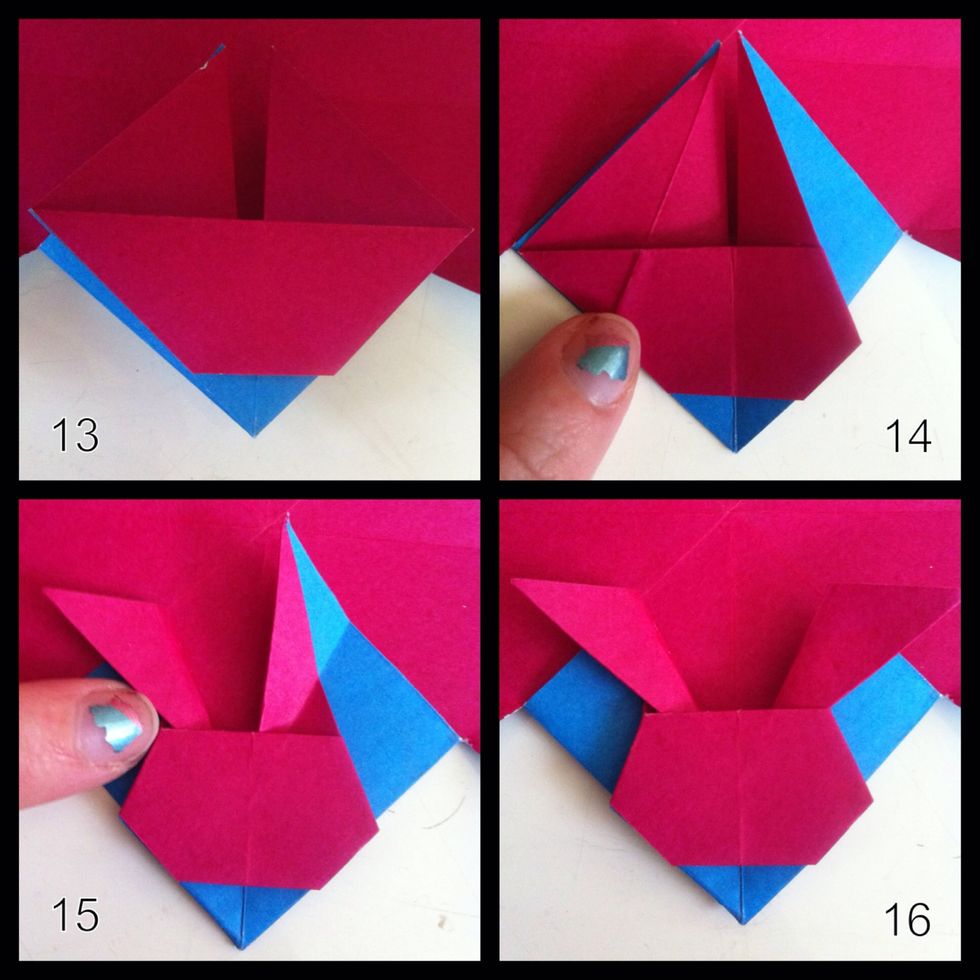
13=fold top layer down. 14=follow crease shown on left side, fold behind on both sides. 15=follow crease on right side, fold ear downward; edge of ear touches face. 16=notice fold is made behind head.
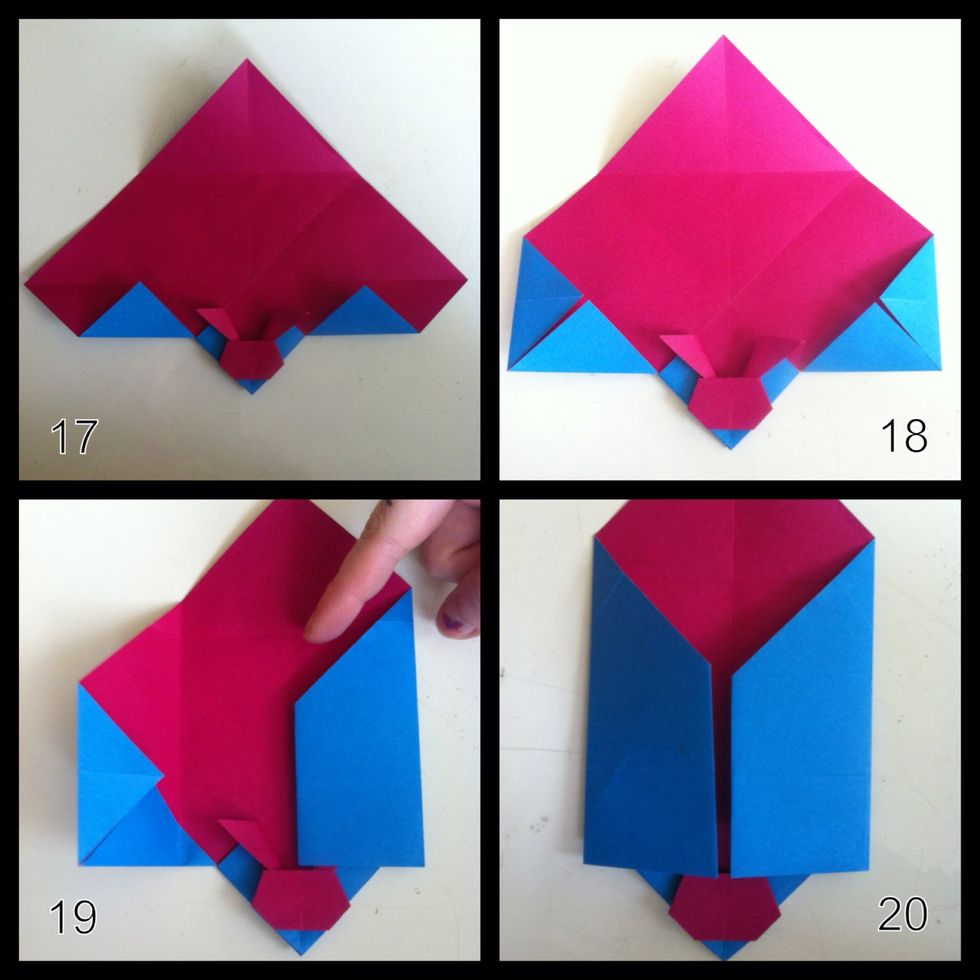
17=fold bottom tips up. 18=fold right n left tips inward as shown. 19=fold right edge to center. 20=fold left edge to center.
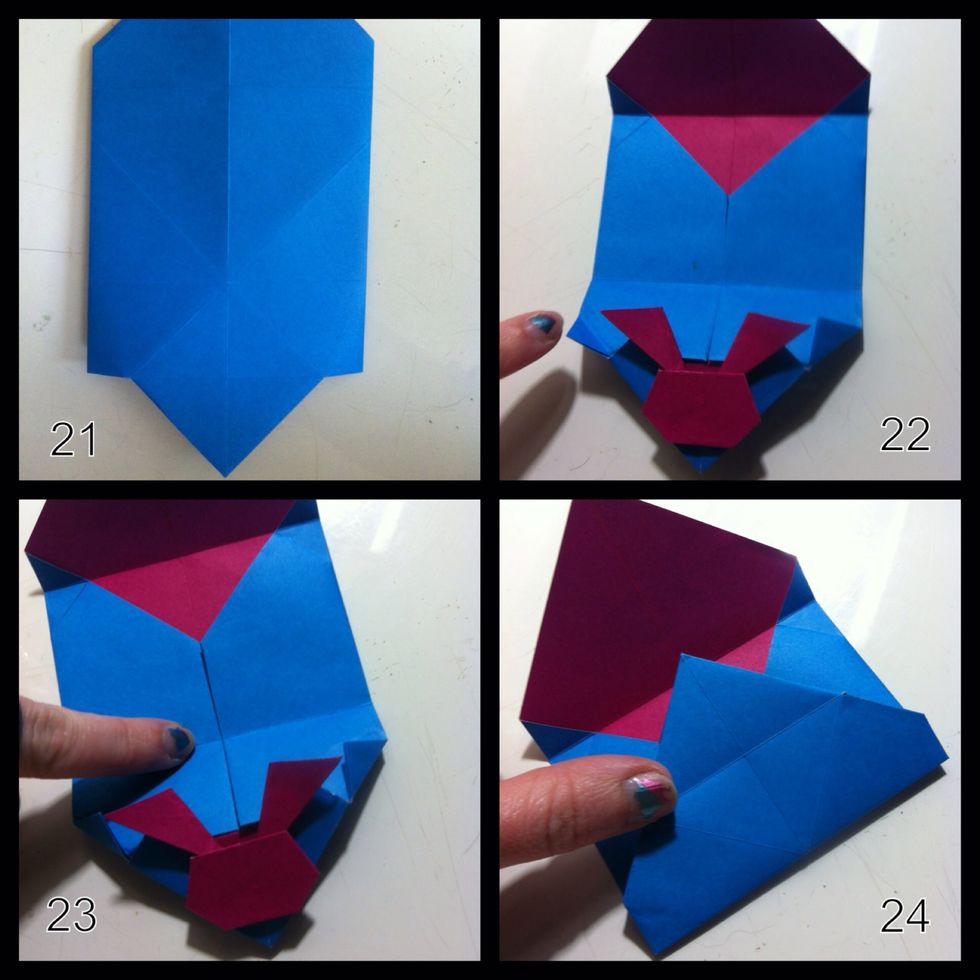
21=turn over. 22=fold right n left tips up as shown. 23=use this crease to fold bottom up. 24=use this crease to fold downward...
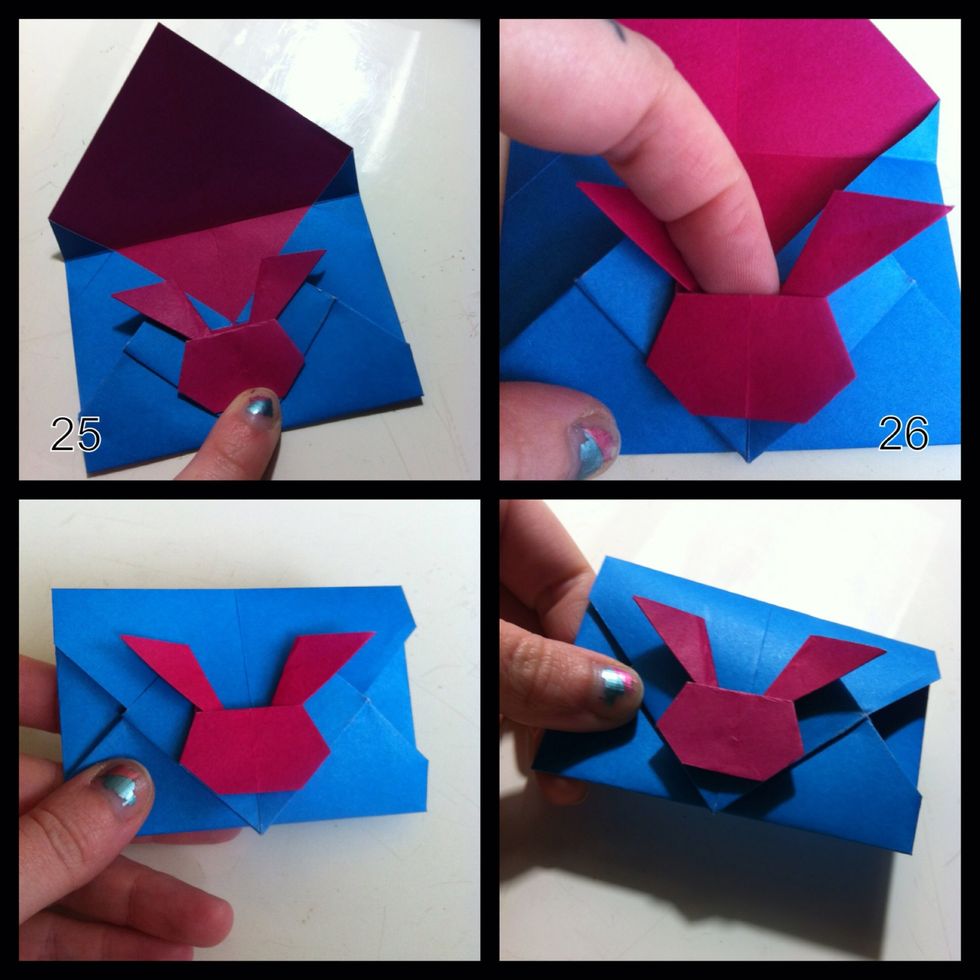
25=like this. 26=tuck top tip behind bunny. You will probably need to glue that blue point under bunny chin to the envelope.
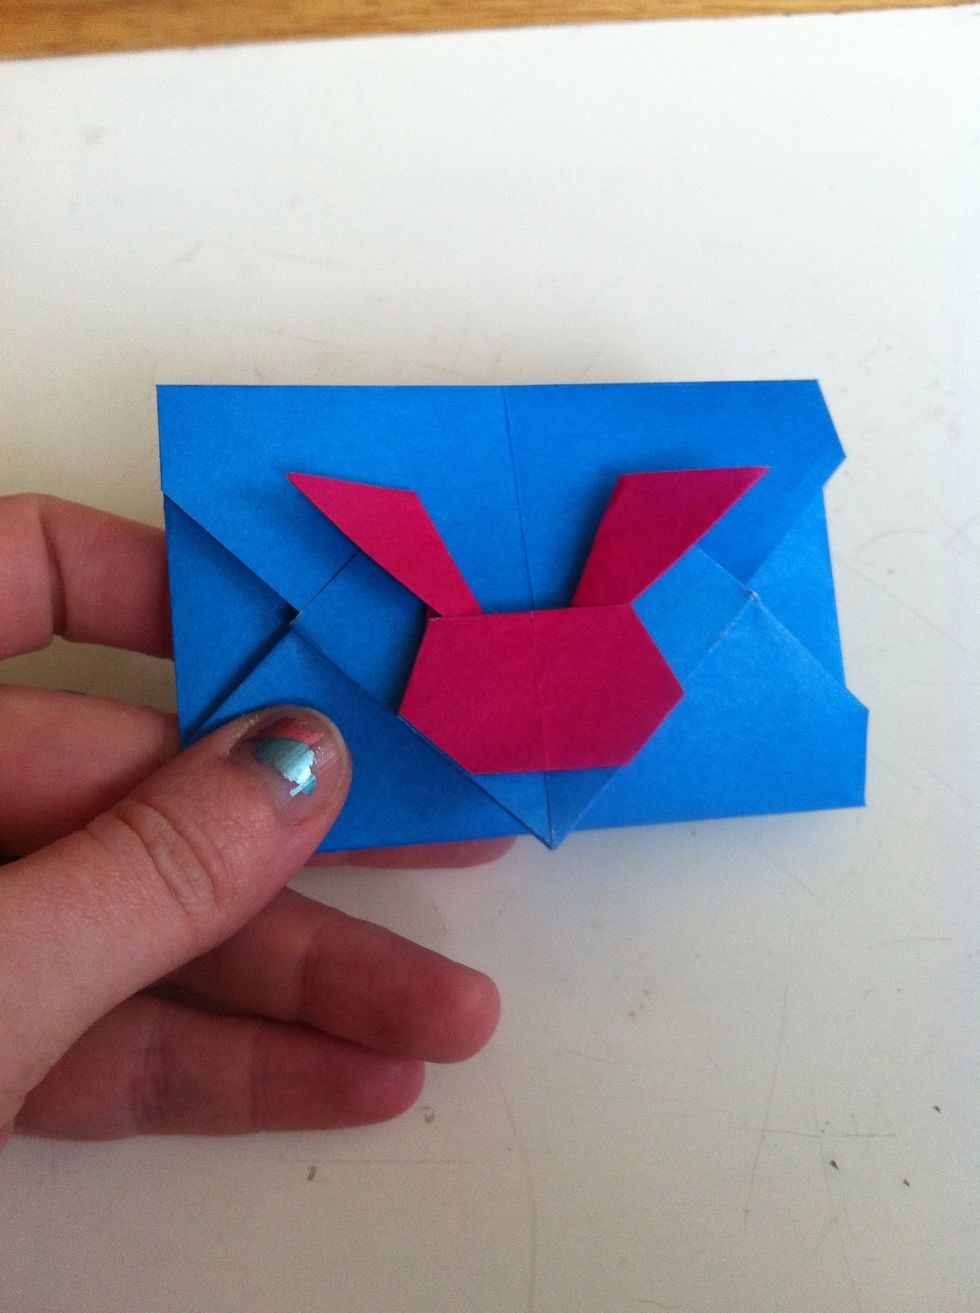
Hi bunny!
![I just liked the shadows in this pic. Enjoy :]](https://guides.brit.co/media-library/i-just-liked-the-shadows-in-this-pic-enjoy.jpg?id=24280498&width=980)
I just liked the shadows in this pic. Enjoy :]
- Paper
- Glue
Ellie Kneeland
ℓᎥƘƎ ᗩИ ⚙C̤̈✞⚙ƤυƧ ⚙И Я⚙ℓℓƎЯ ƧƘᗩ✞ƎƧ\nThese are not my designs; I'm just trying to keep origami alive. Please enjoy & pass along what you learn. ?ellie
Corona, California
The Conversation (0)
Sign Up