The Conversation (0)
Sign Up

Start with a base coat (not shown) and a single coat of the lighter polish.
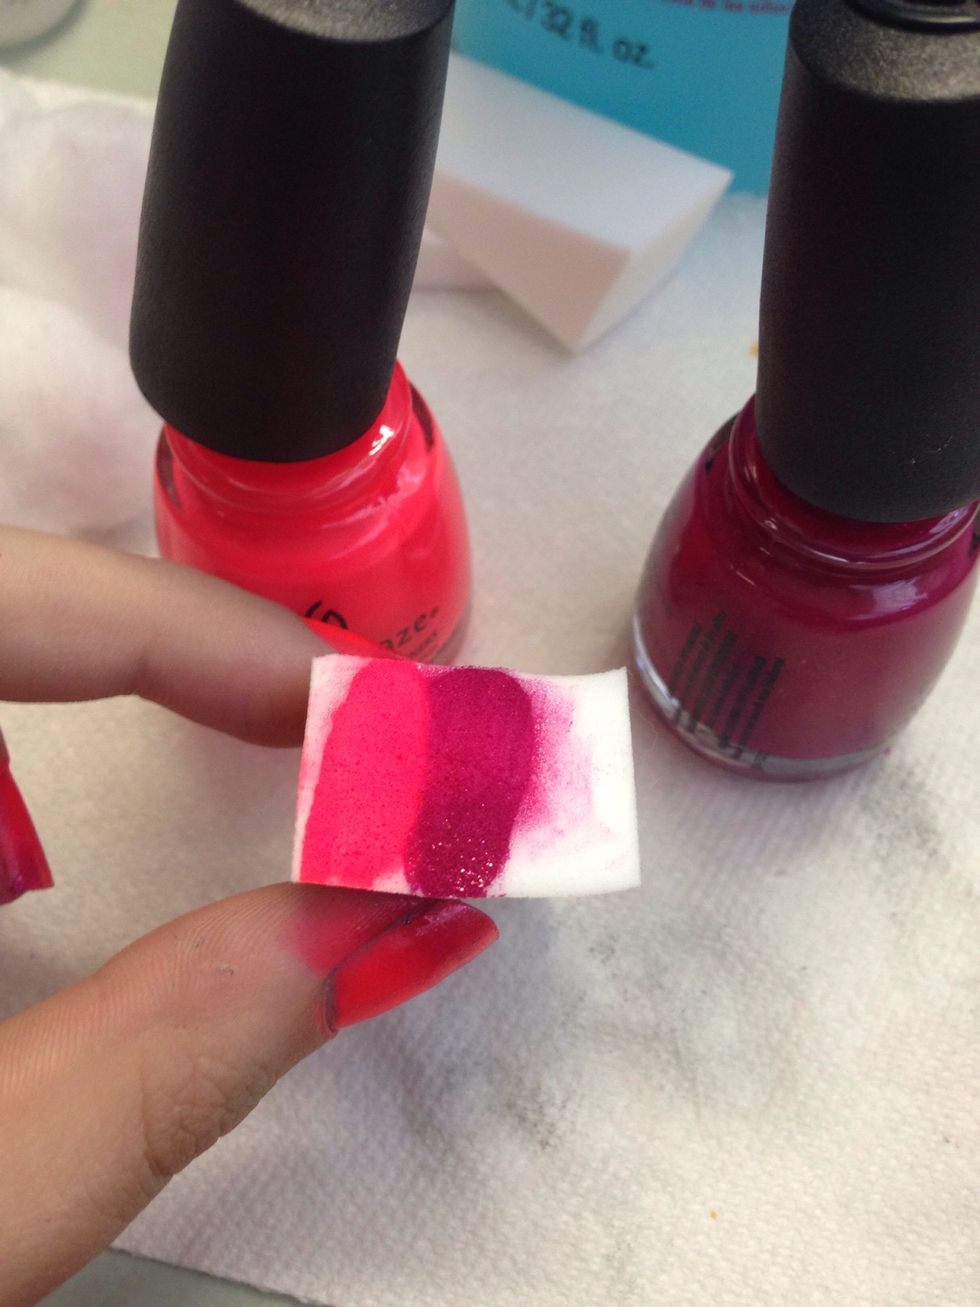
Paint both polishes onto a make up sponge.
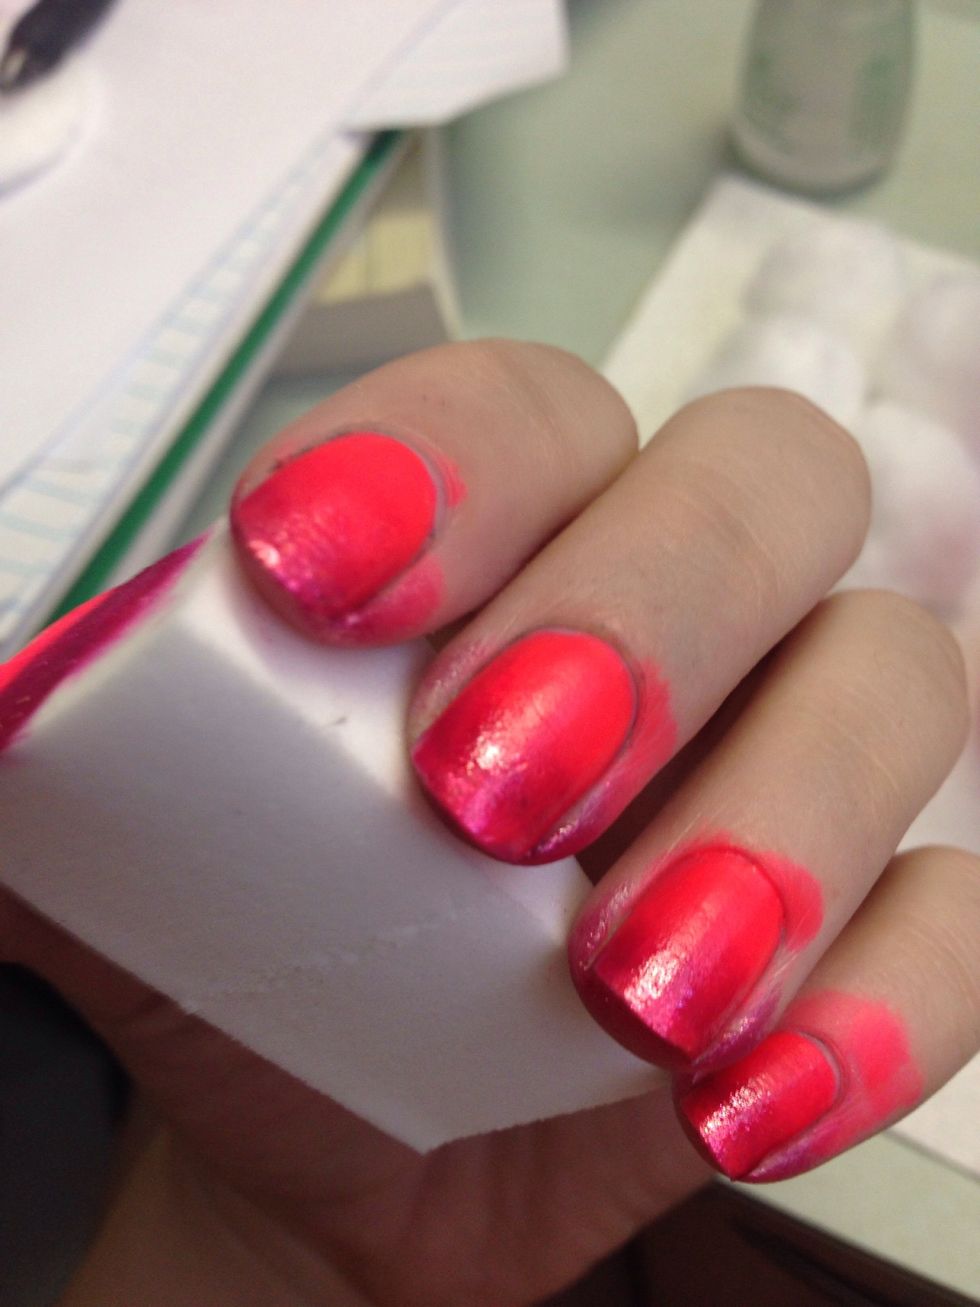
Dab the sponge onto your nails several times until you get the shades you want. Let each coat dry at least a little. I prefer putting the darker color towards the tips.

Put on a fast drying top coat to smooth the gradient and let it dry completely.

Now for the striping polish. First, draw a small arch near the moon of your nail and make it about the same size as the moon, but make it off centered, don't line it up with the moon itself.
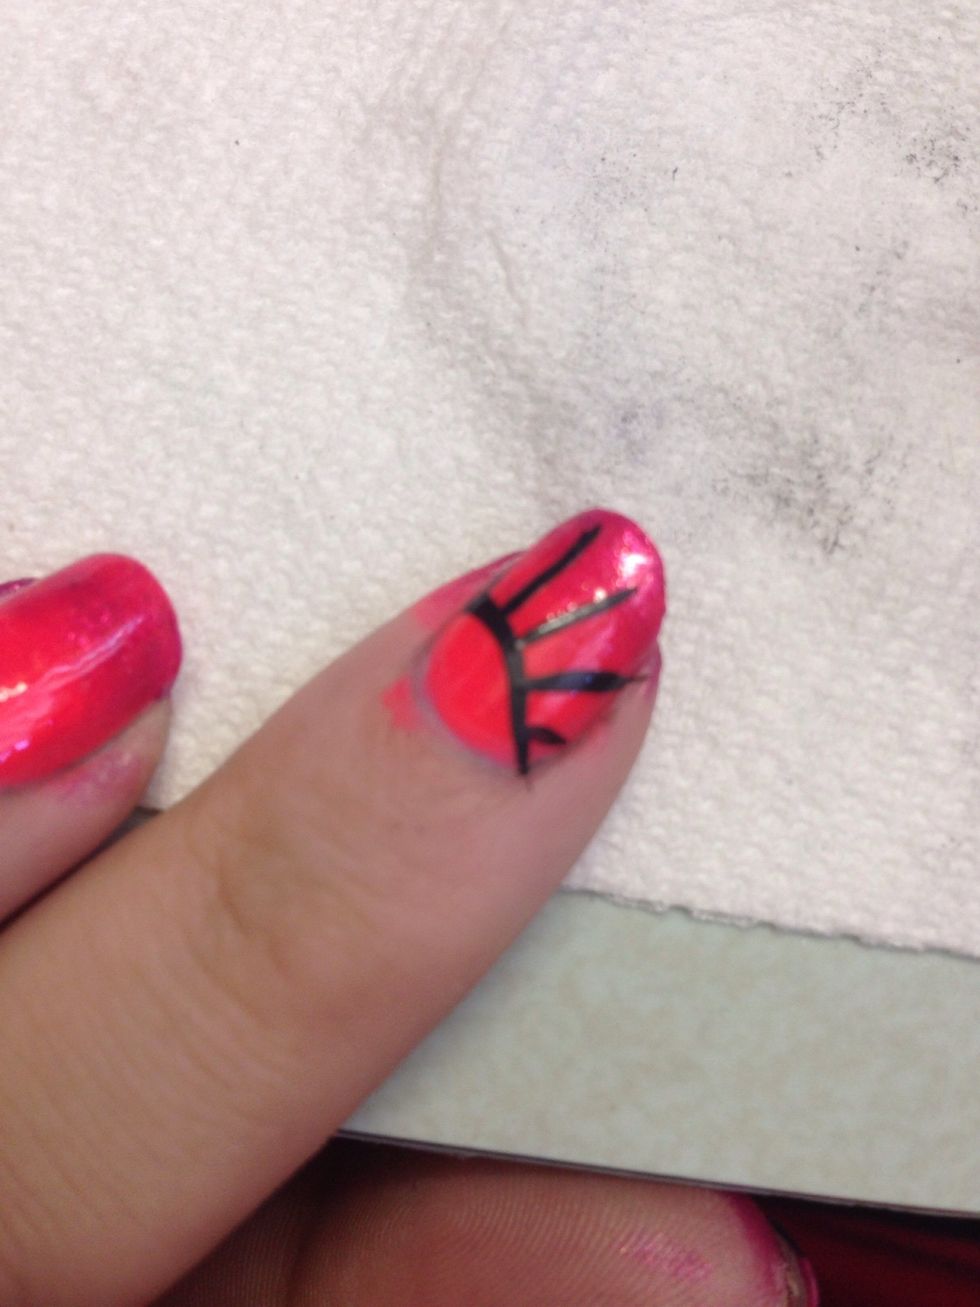
Draw 3-5 lines extending from the arch that do not go all the way to the tip. They could, but this helps you determine what size you want the wings to be.

At the ends of the lines, connect each adjacent one with a smaller arch.
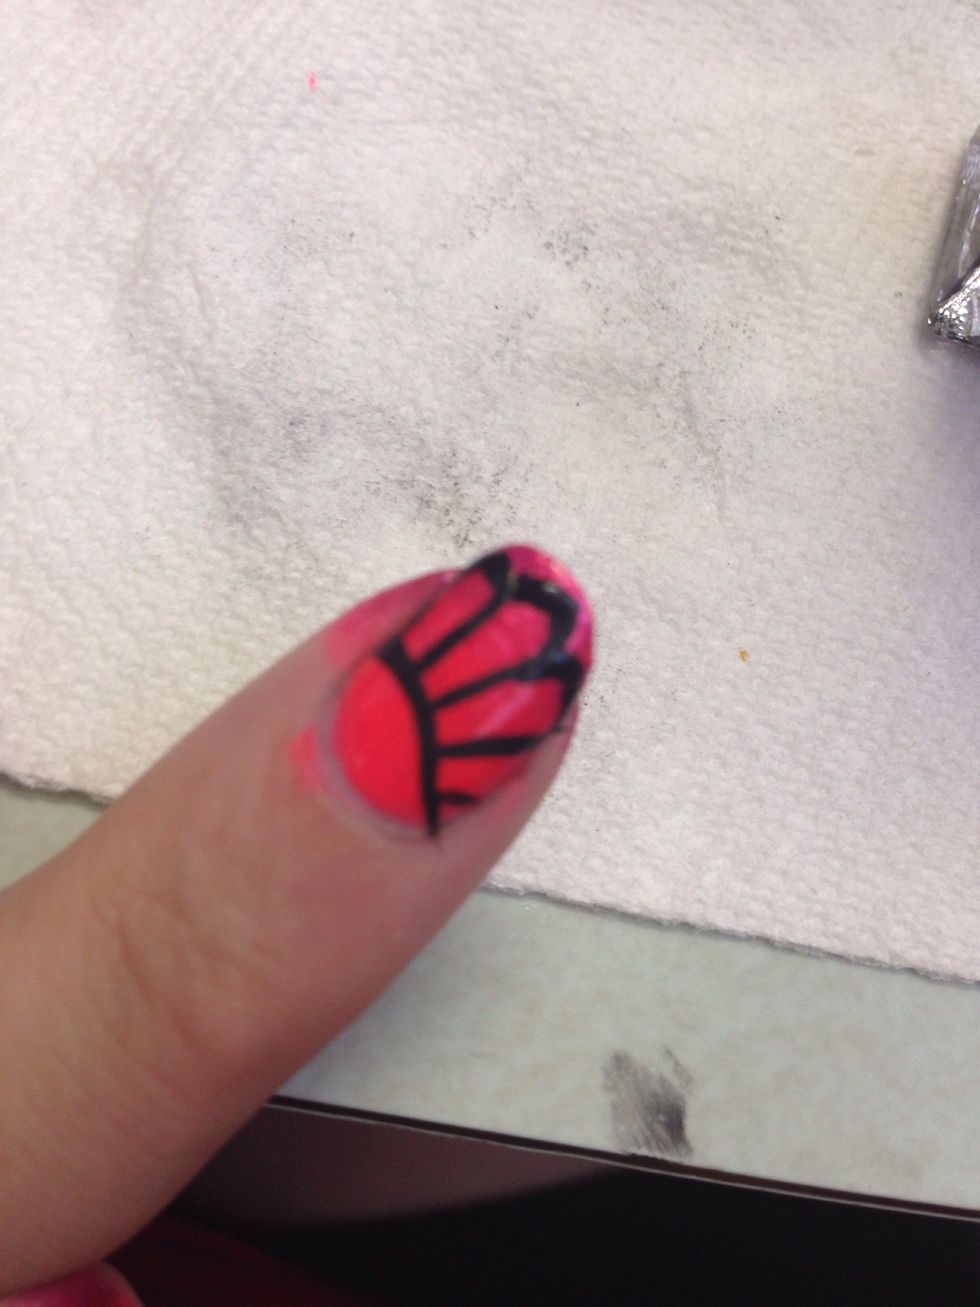
Connect all the lines, then fill in the tips of your nails with black.
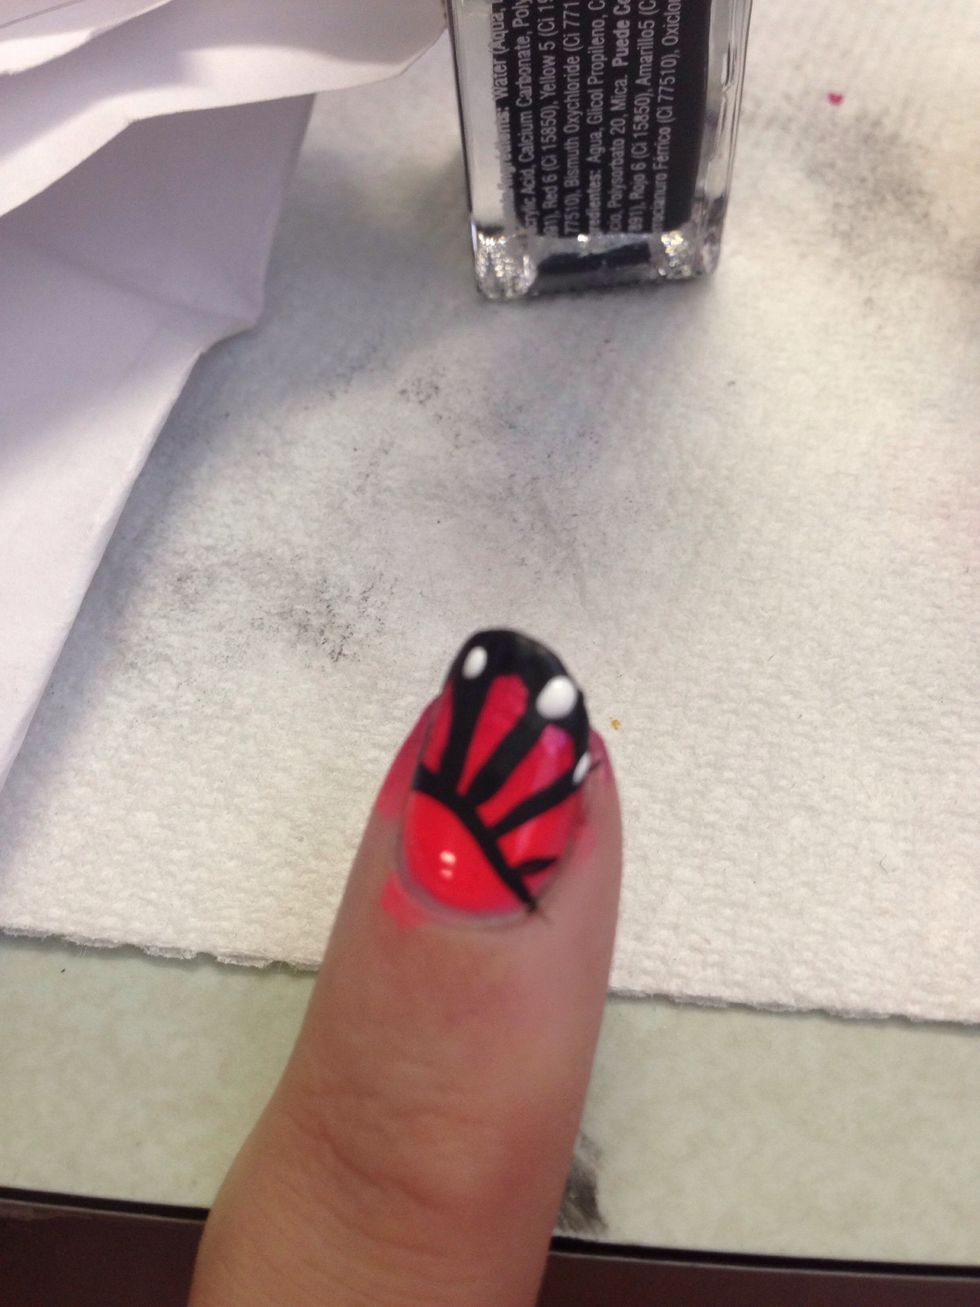
I like to start my dots with a large one at the tips of where the lines were. Then add more small ones all over the black.
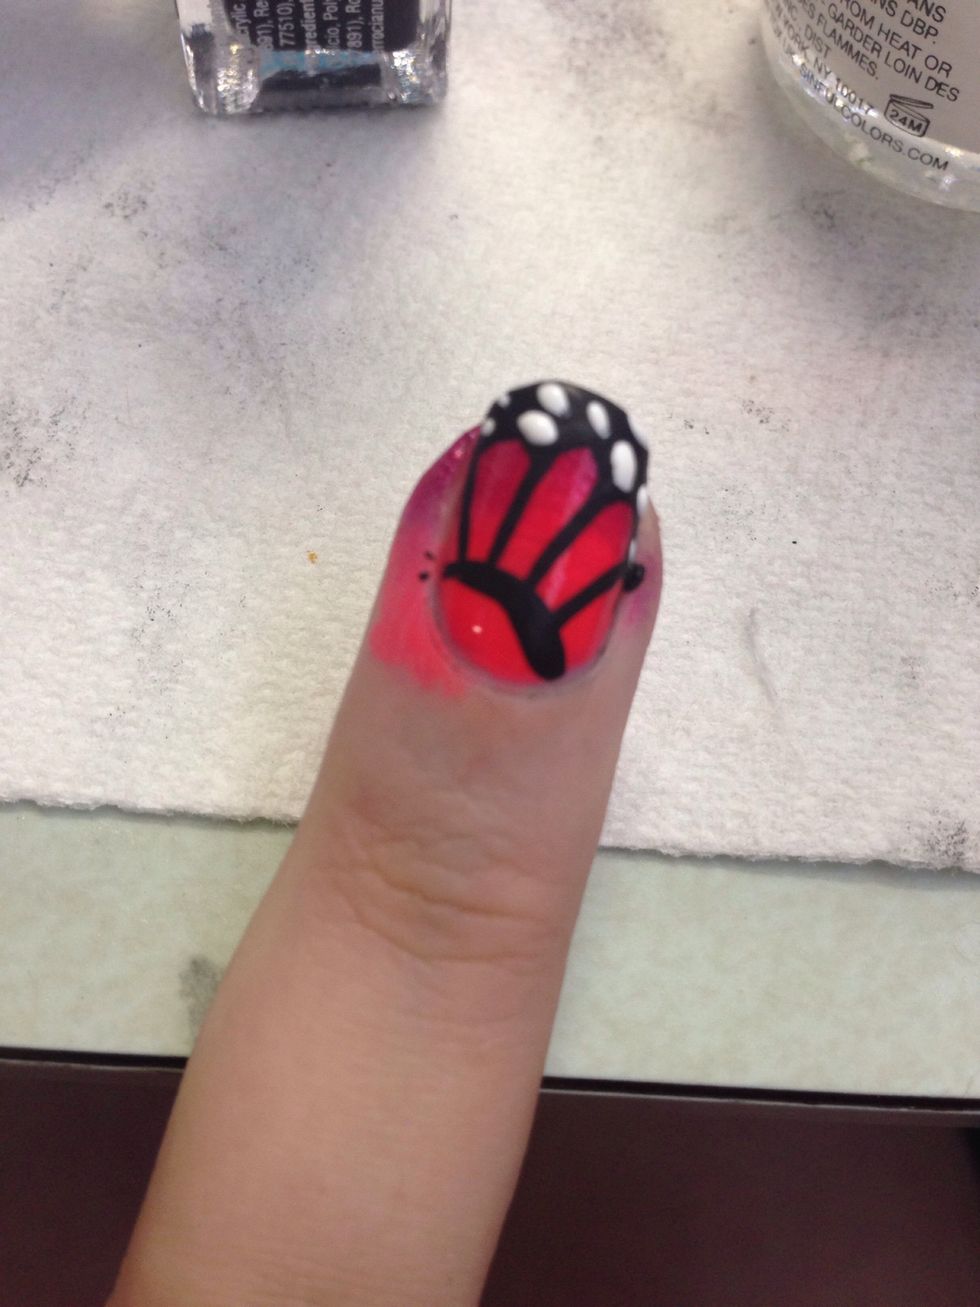
Add your topcoat after the dots have had some time to dry. Being a bit thicker than a coat of polish, they could smear all over the place.
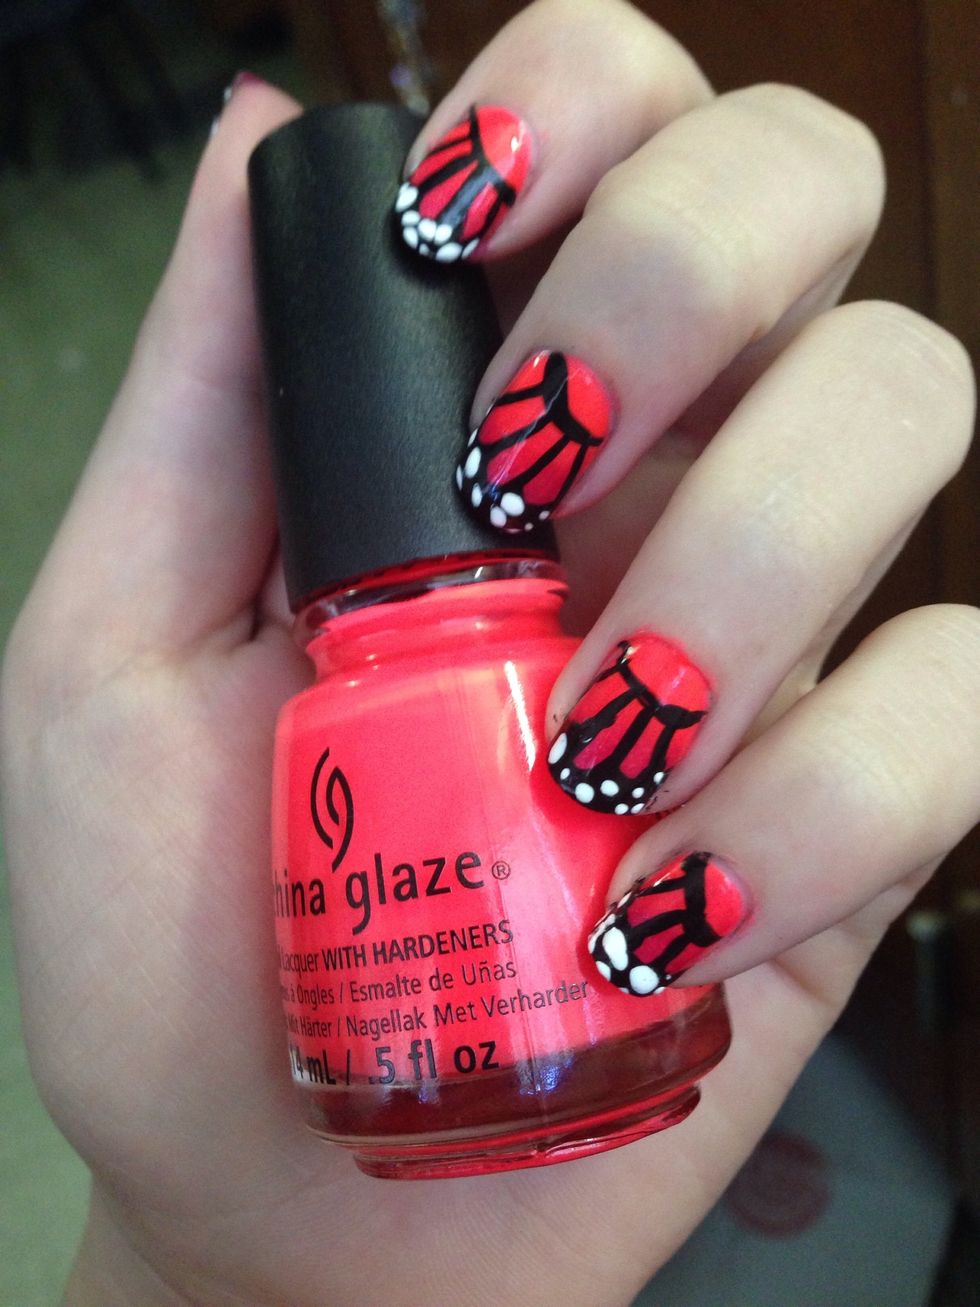
Voilà! You've brought nature indoors and onto your nails! Use whatever color gradient you want, it doesn't have to be orange!