The Conversation (0)
Sign Up
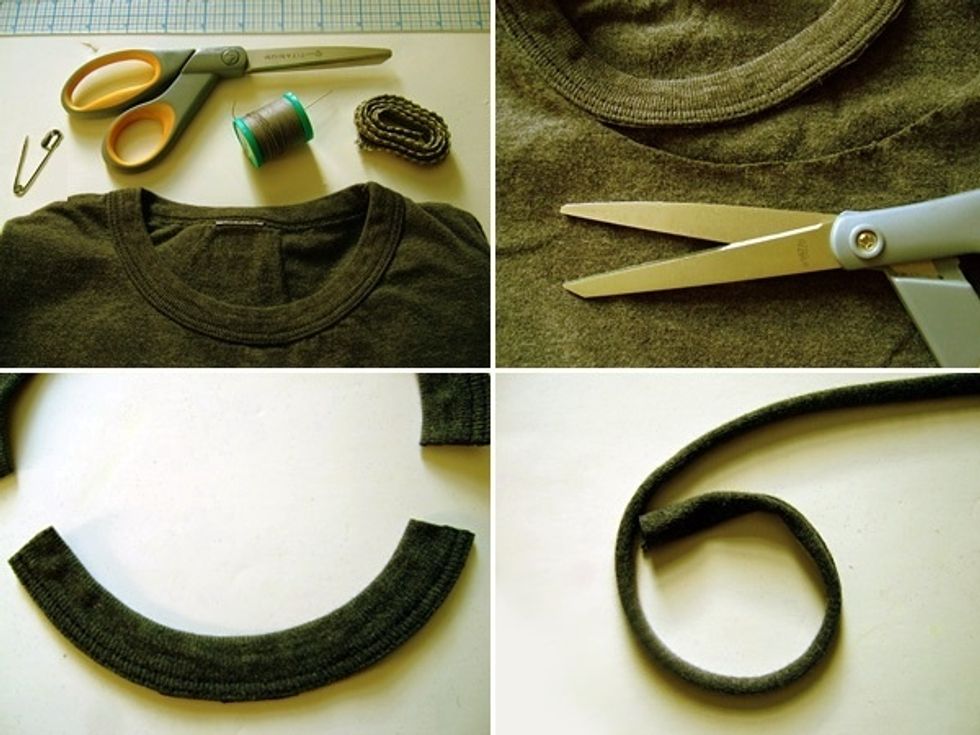
Cut off the neckline and the piece which will become the necklace. It is usually surged and will not unravel. Then cut a long 1 inch wide strip “along the grain”.
That means cut from the bottom hem into the direction of the shoulder, not across the shirt. Pull the strip and it will curl along the edge giving it a finished look.
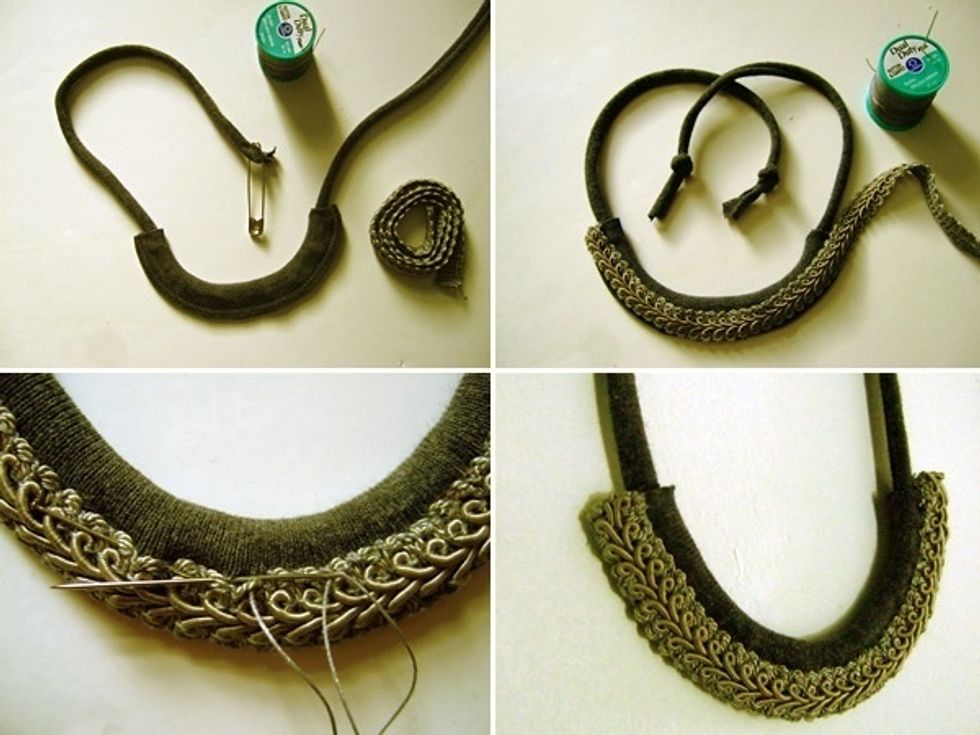
With the help of a safety pin pull the string through the opening of the neckline. Voilà! It’s done. Now it’s time to decorate:
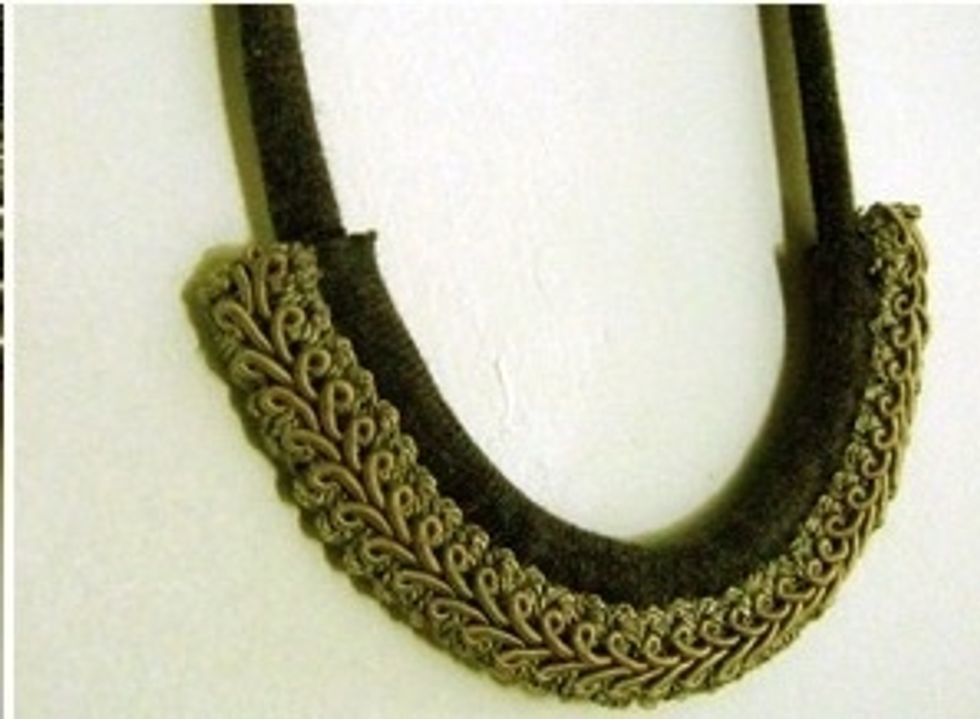
The grey necklace features a piece of trim which was then sewn onto the neckline. The blue one has a simple ruffle sewn onto it. If you don’t feel like sewing at all,
beads can be glued, which makes the necklace less flexible, but this way it is a hit among the younger girls:
There are many ways of decorating. Use embroidery thread, buttons, beads or flowers. Sew on trinkets and tasseled trim.
Use velvet ribbon, make the necklace long or short, it’s your choice, but have fun exploring.
And your done Hope u guys like it :)
Add me up and Follow me up ^_^ Tnx much love<3<3<3

Facebook.com/Princessladypurple30

Instagam: suplada30