The Conversation (0)
Sign Up
We’ve teamed up with Gymboree to share a step-by-step guide to make DIY collar clips and bring your child’s favorite shirts to the next level this back to school season.
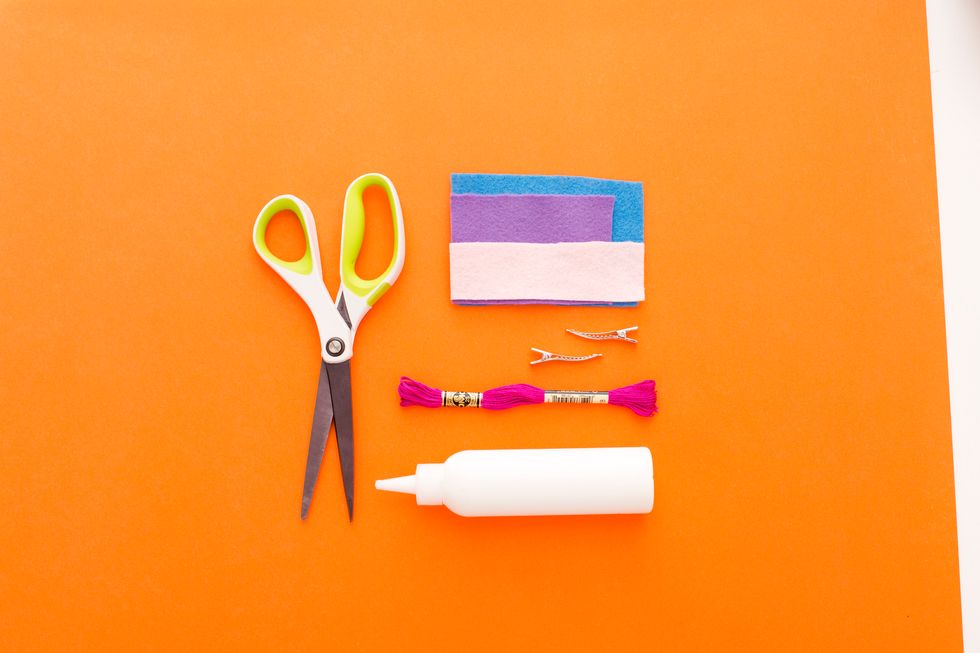
1. Gather your supplies.
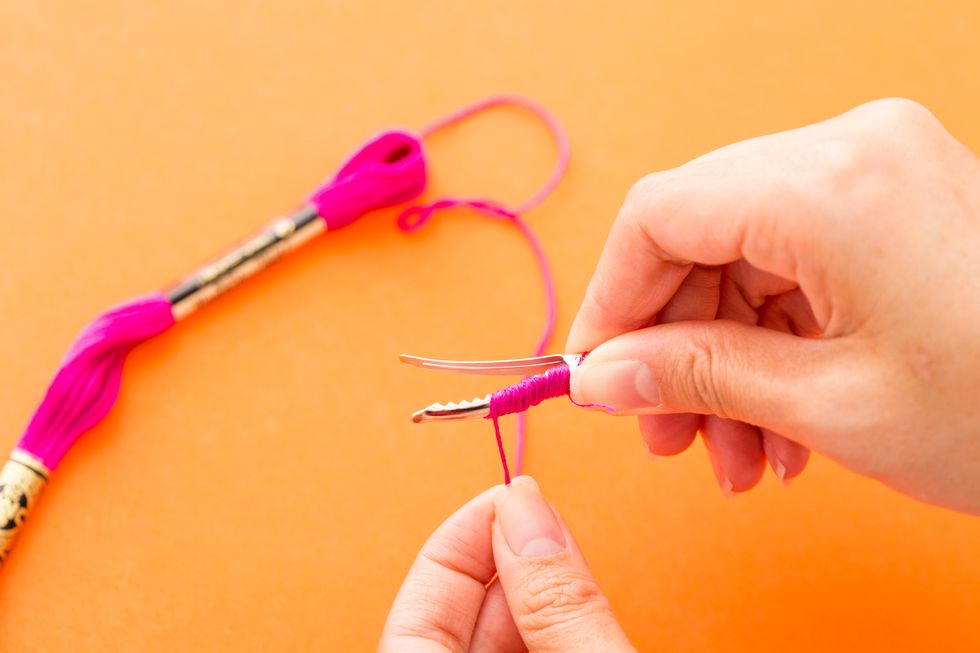
2. Wrap embroidery floss around the top of the alligator clip.
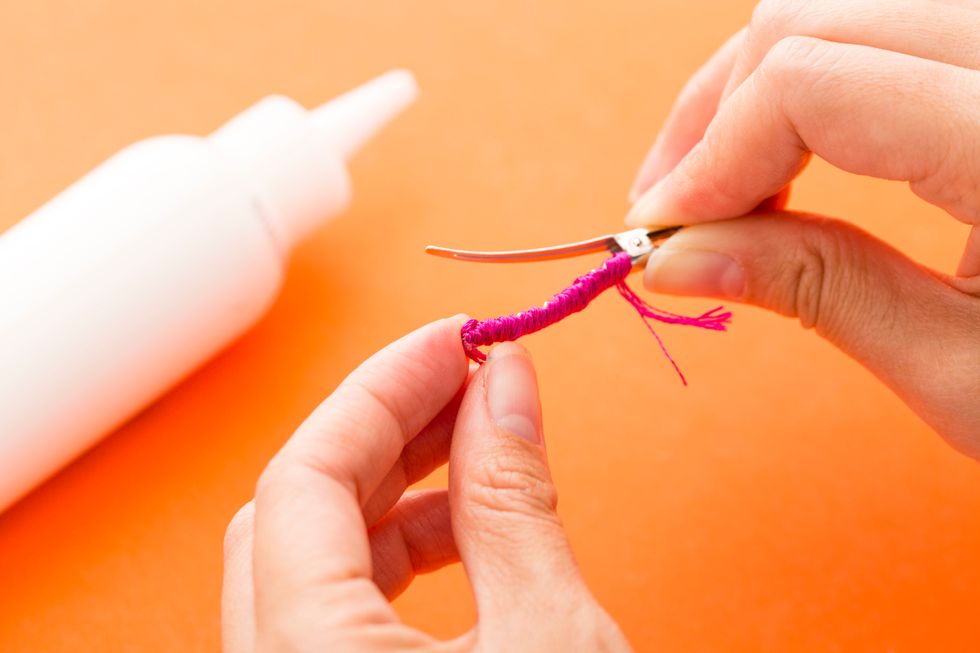
3. Glue the floss down at both ends.
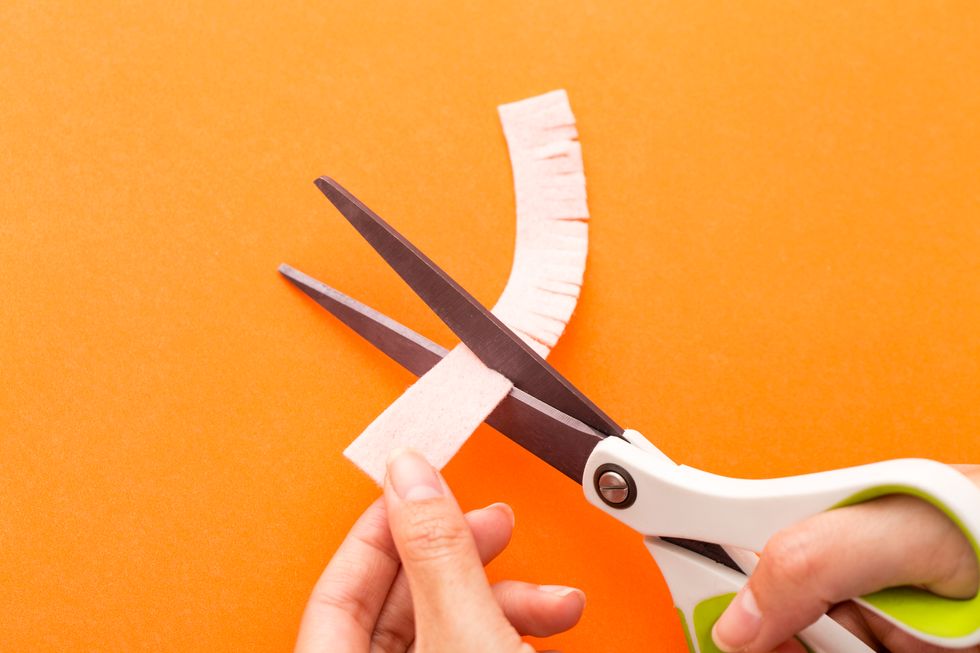
4. Take a thin strip of felt - our strip was no bigger than 3/4" x 4". Cut a fringe along one length of the felt.
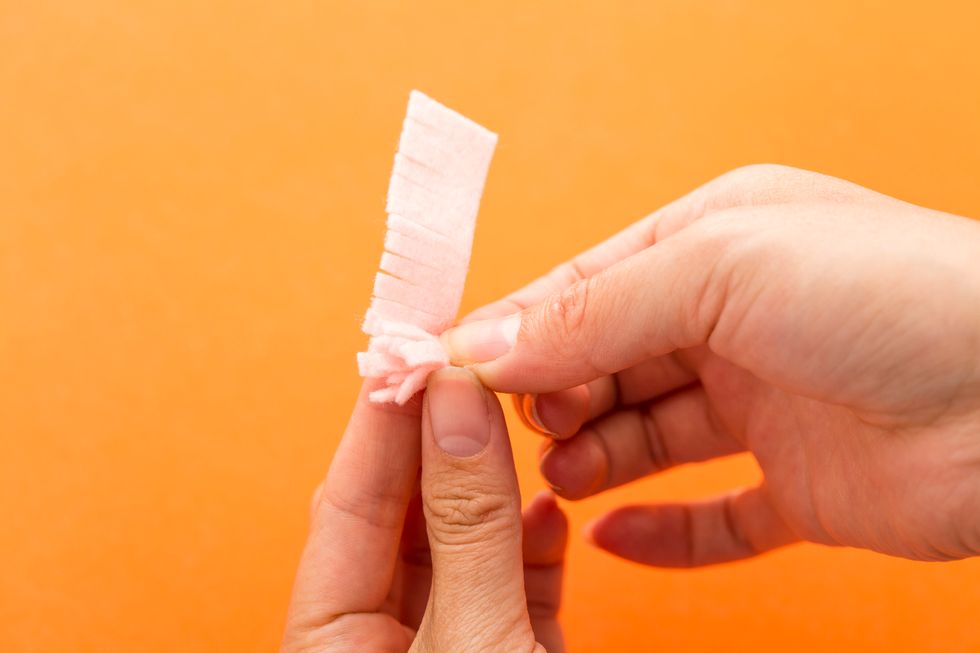
5. Roll it tightly.
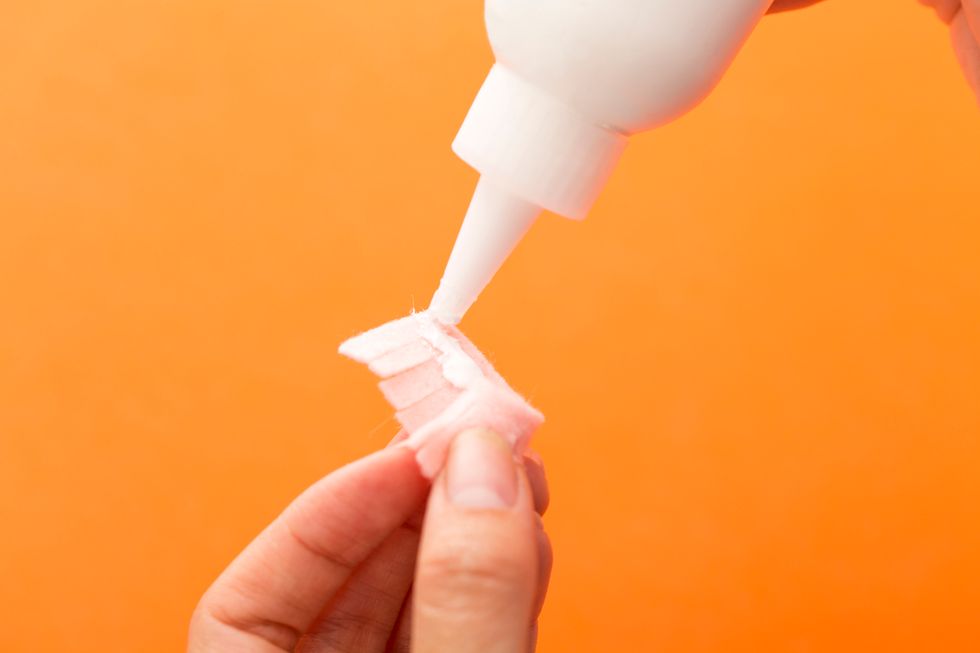
6. Secure with glue.
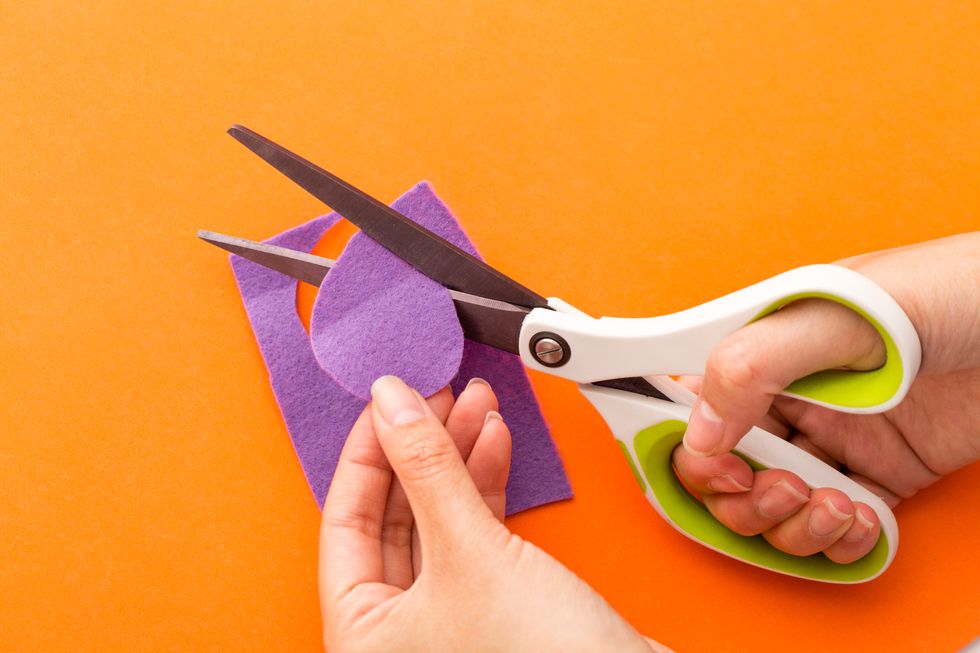
7. Cut a 2" diameter circle out of felt
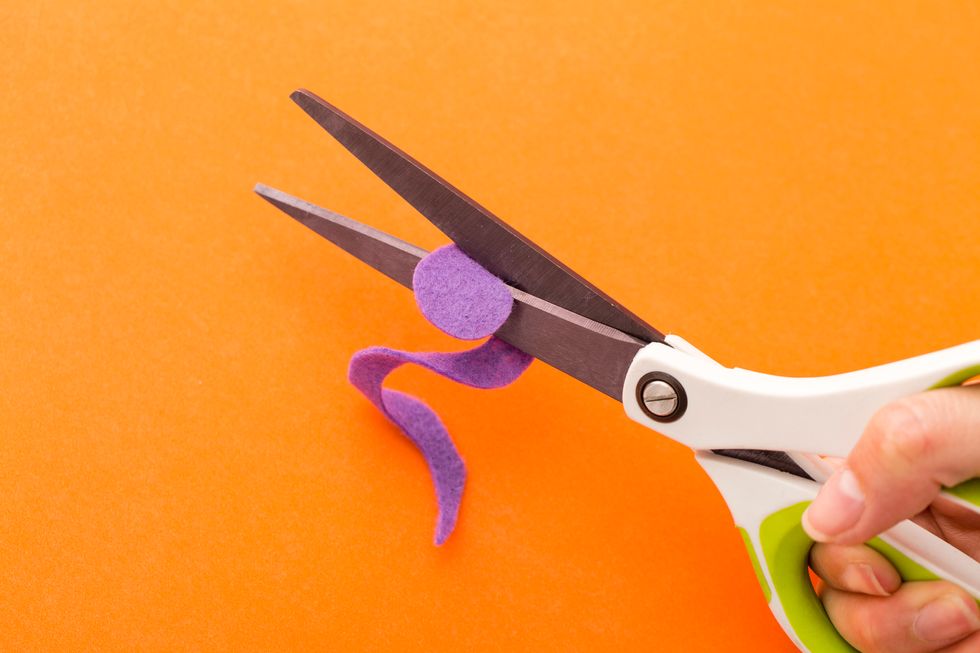
8. Turn it into a spiral by cutting slightly inward, turning the circle toward your cutting hand.
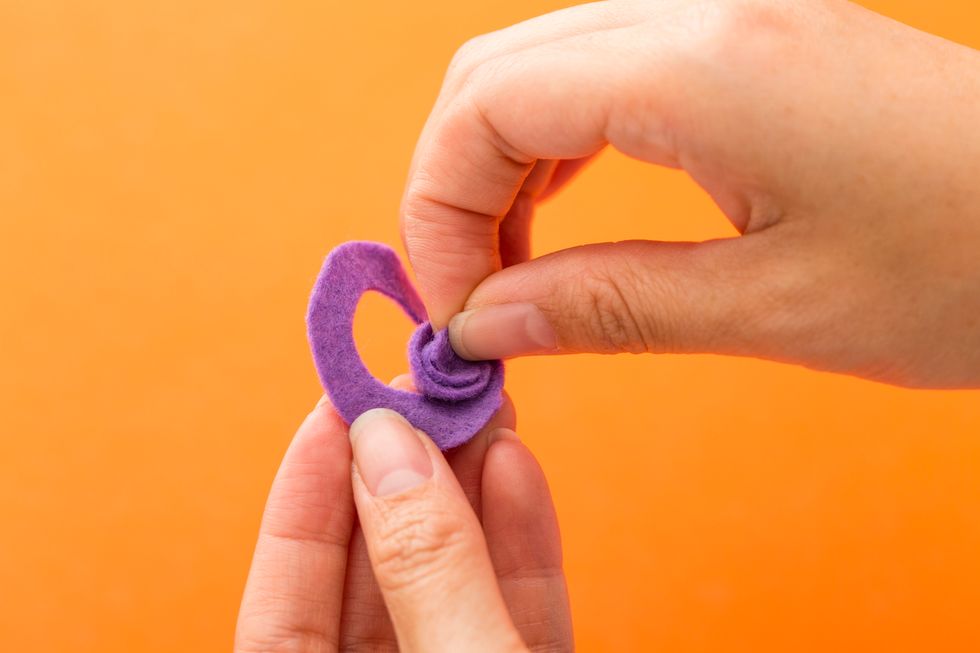
9. Wrap the spiral.
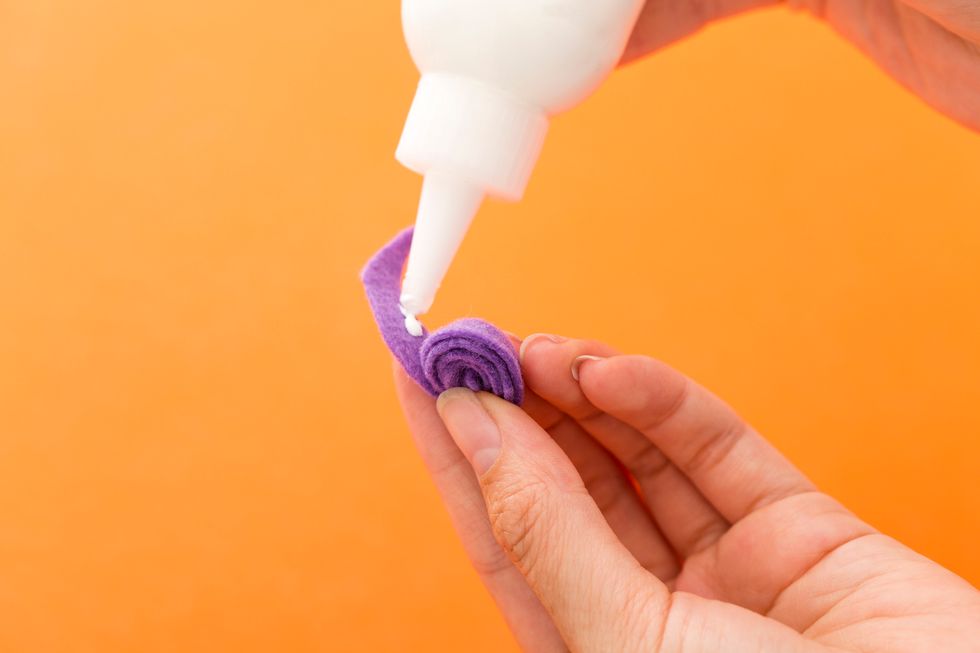
10. Secure with glue.

11. Cut 3-4 leaf shapes out of felt.

12. Gather all the pieces that you created.
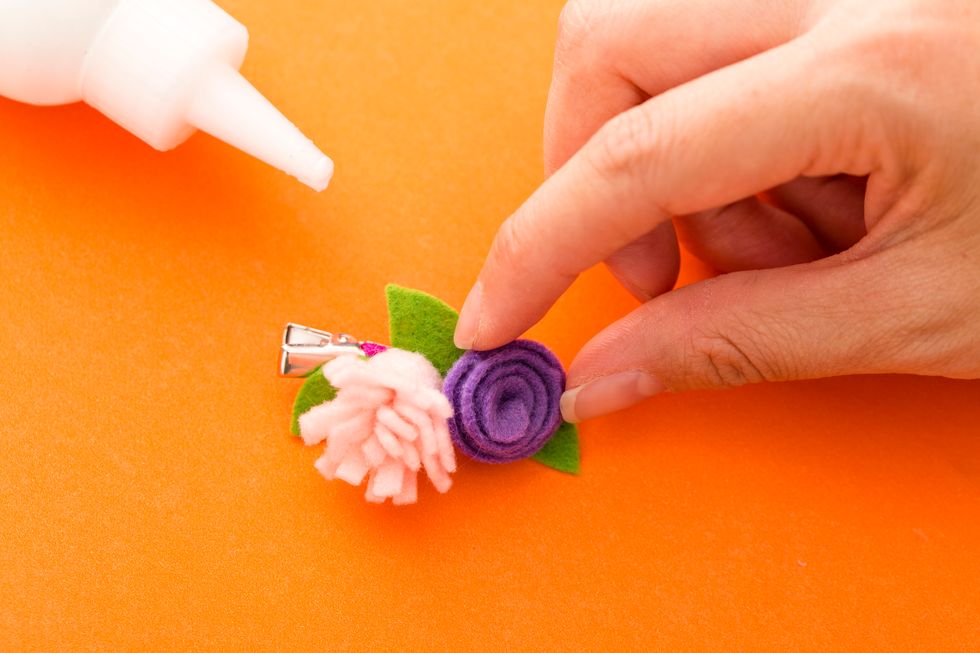
13. Adhere to the top of your floss-wrapped alligator clip with fabric glue.

14. Clip to your kiddo's collar for adorable flair!