The Conversation (0)
Sign Up
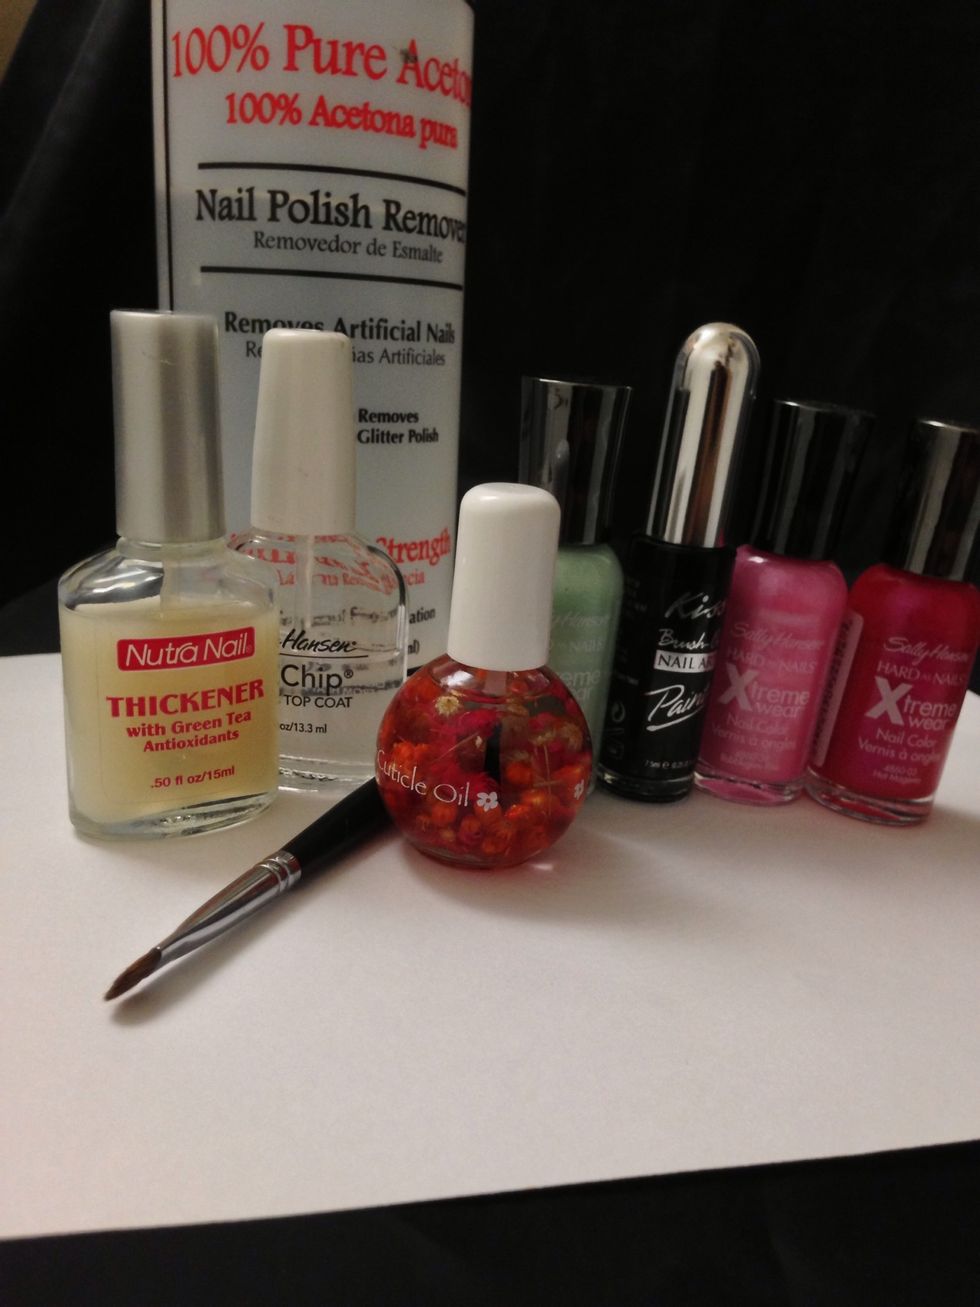
Supplies. Make sure your nails are clean, shaped, and buffed!
This is my first time doing this effect so please bear with me. Lol
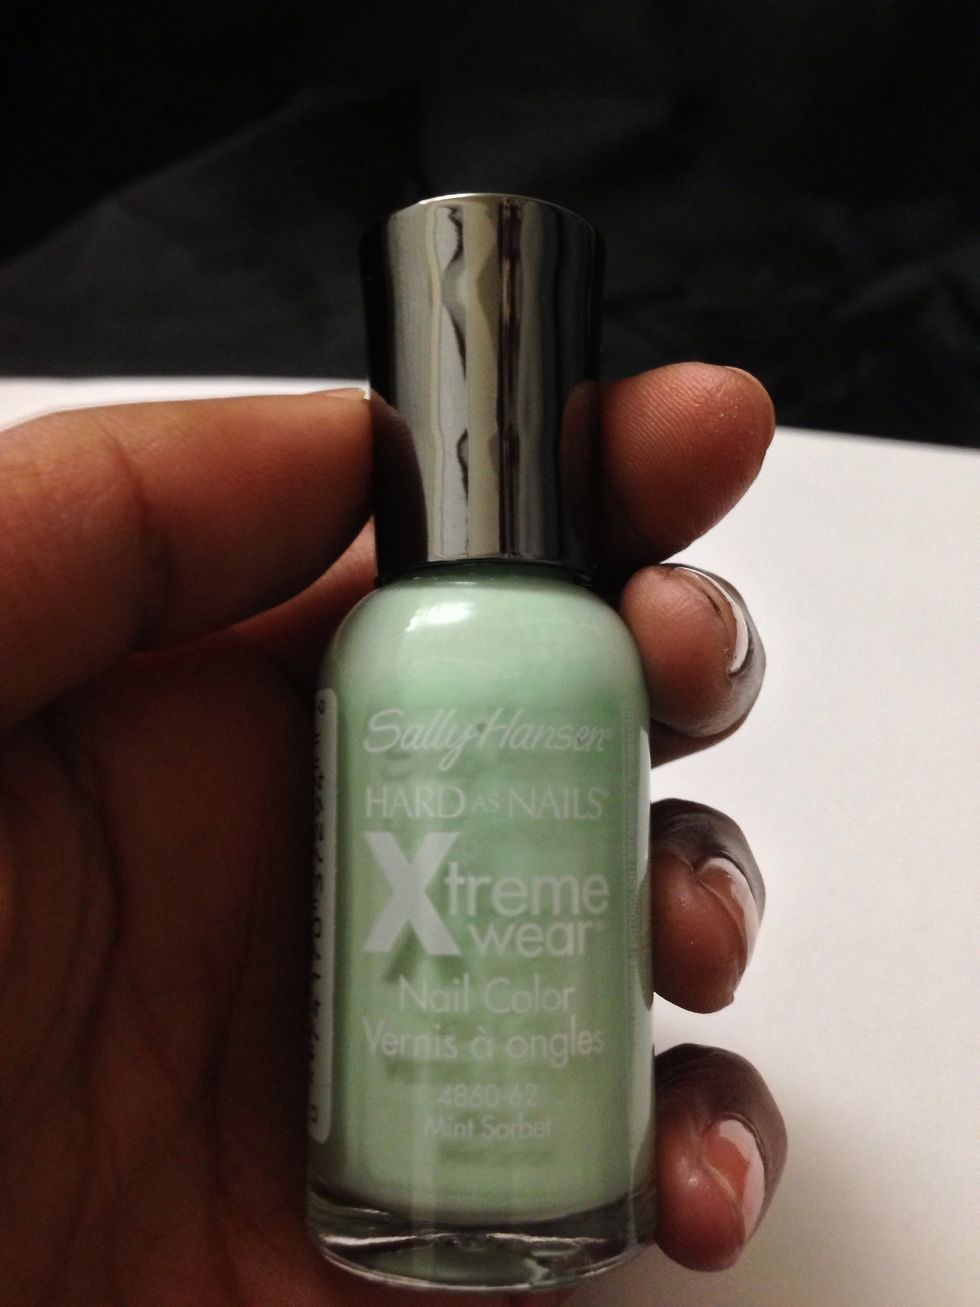
Grab your green nail polish and paint your nails. I'm using Mint Sorbet by Sally Hansen.
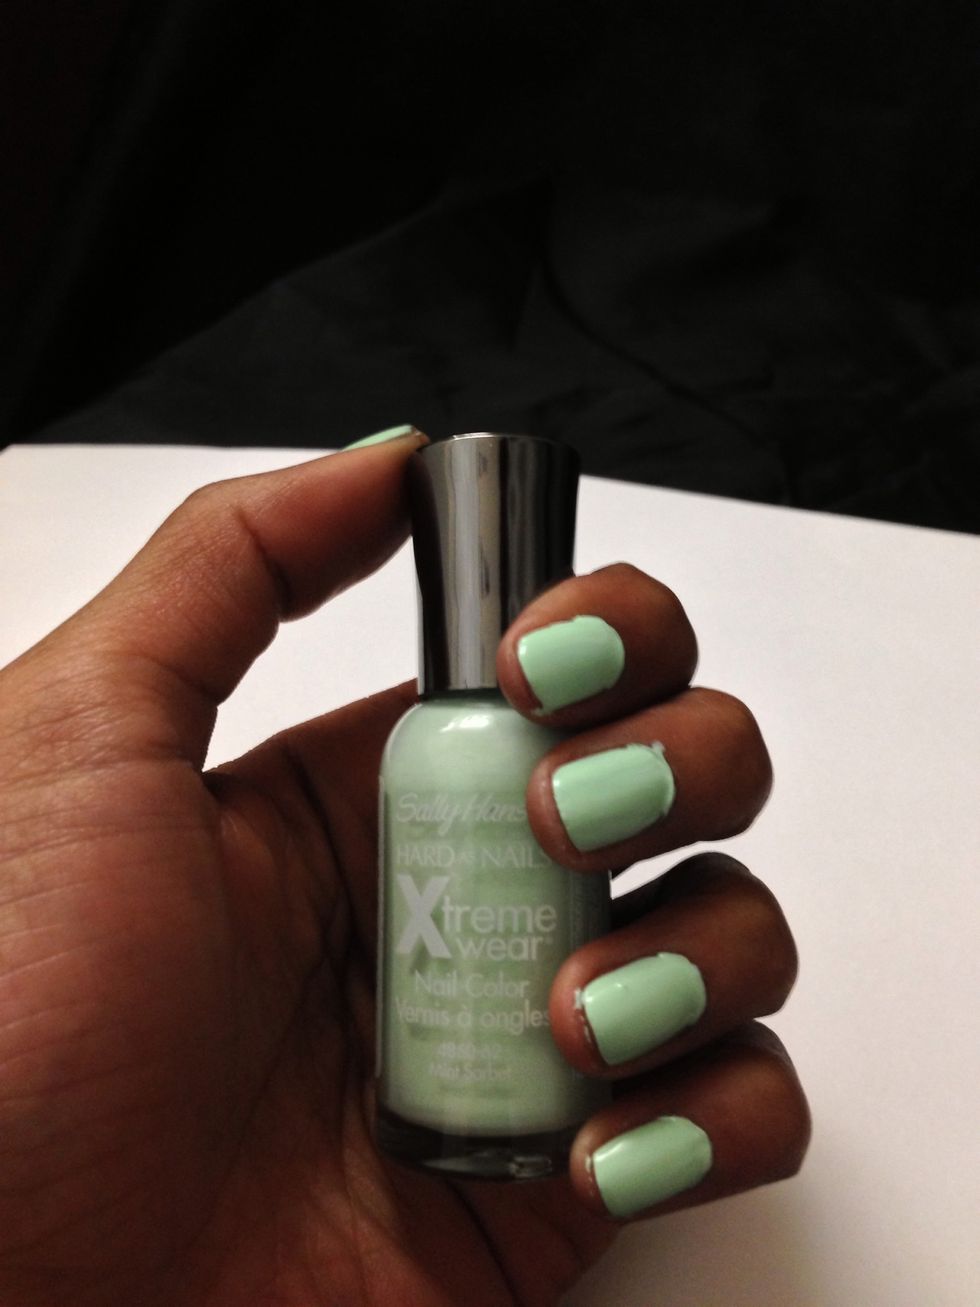
I applied two coats since it comes out kinda chalky. Let dry!
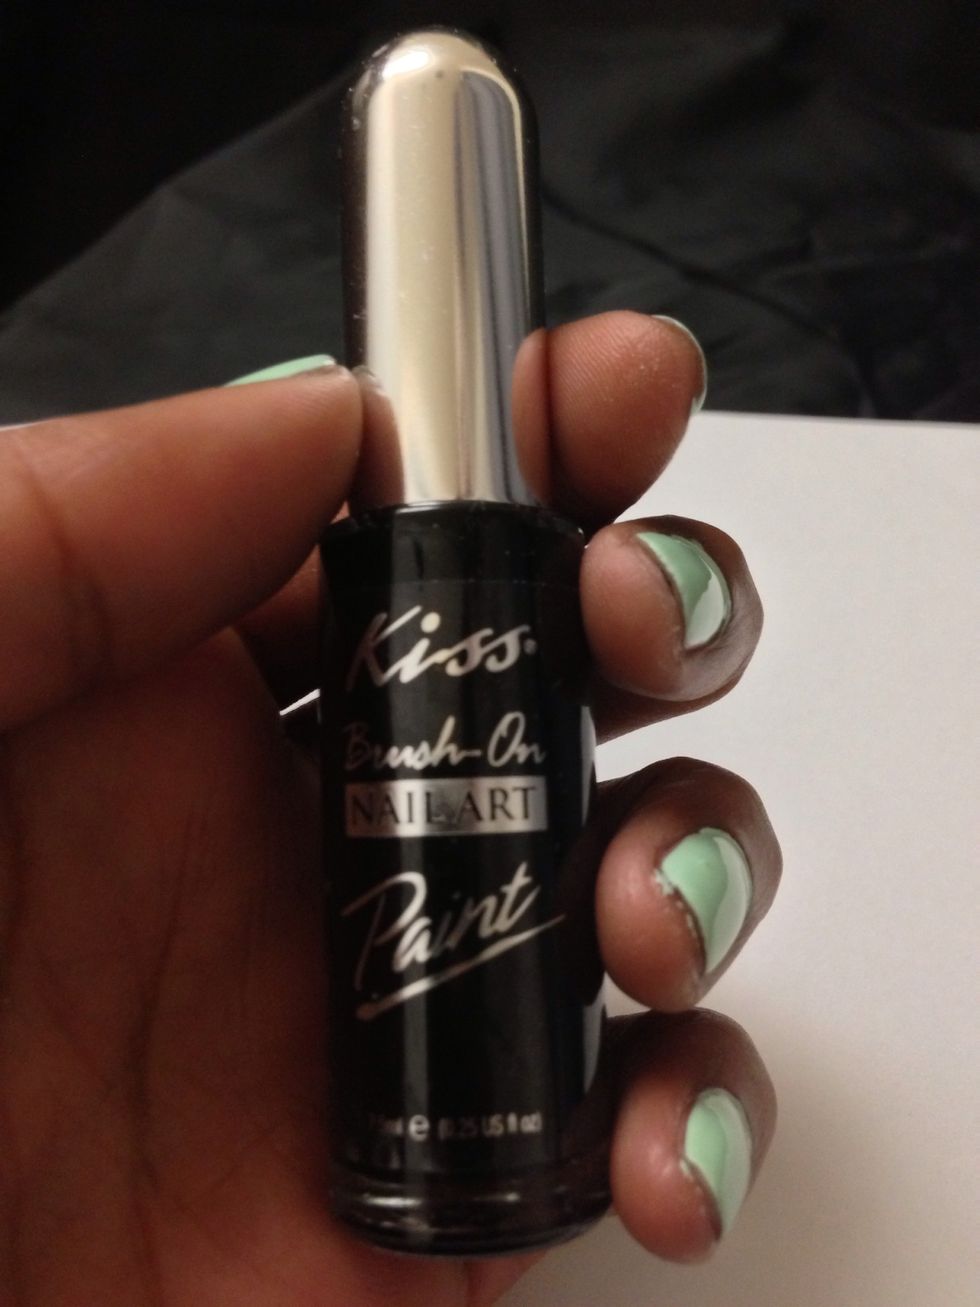
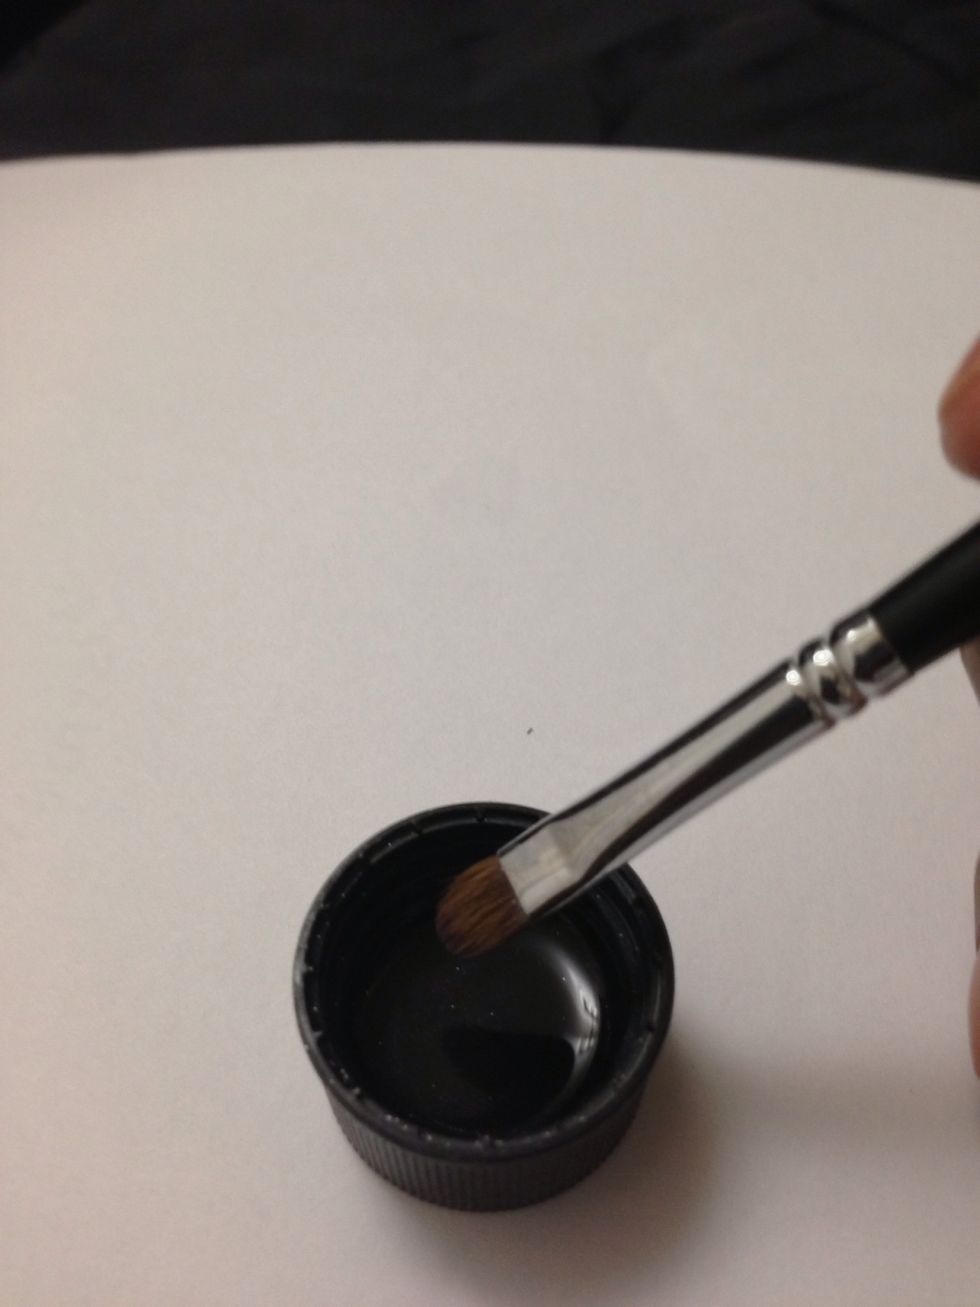
Next grab your black nail art pen or paint. I'm using Kiss Brush On Nail Art Paint in Black. Using sweeping motions, draw branches on each nail.
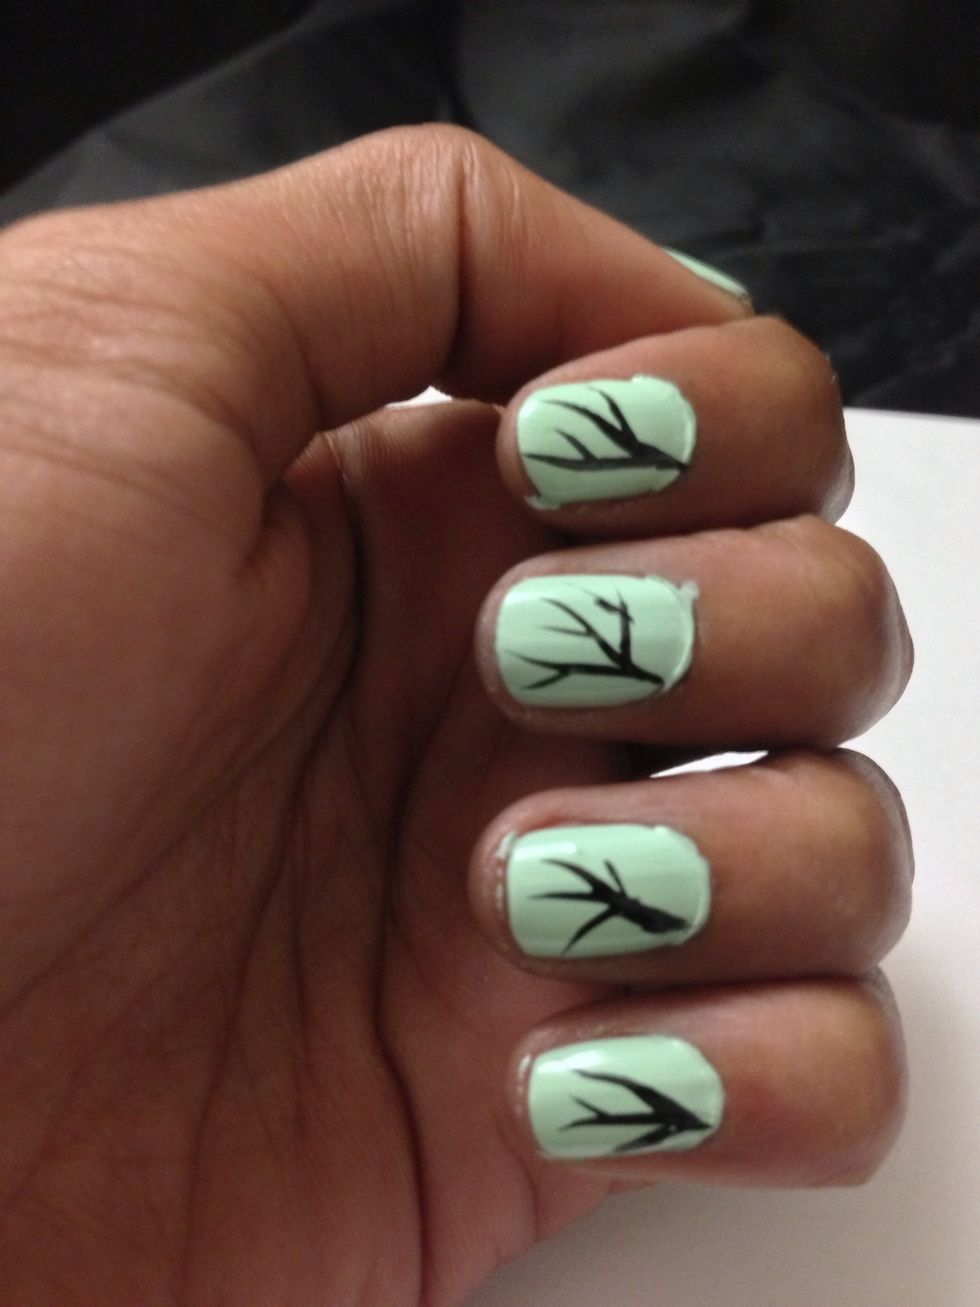
Something like this. It doesn't have to be perfect.
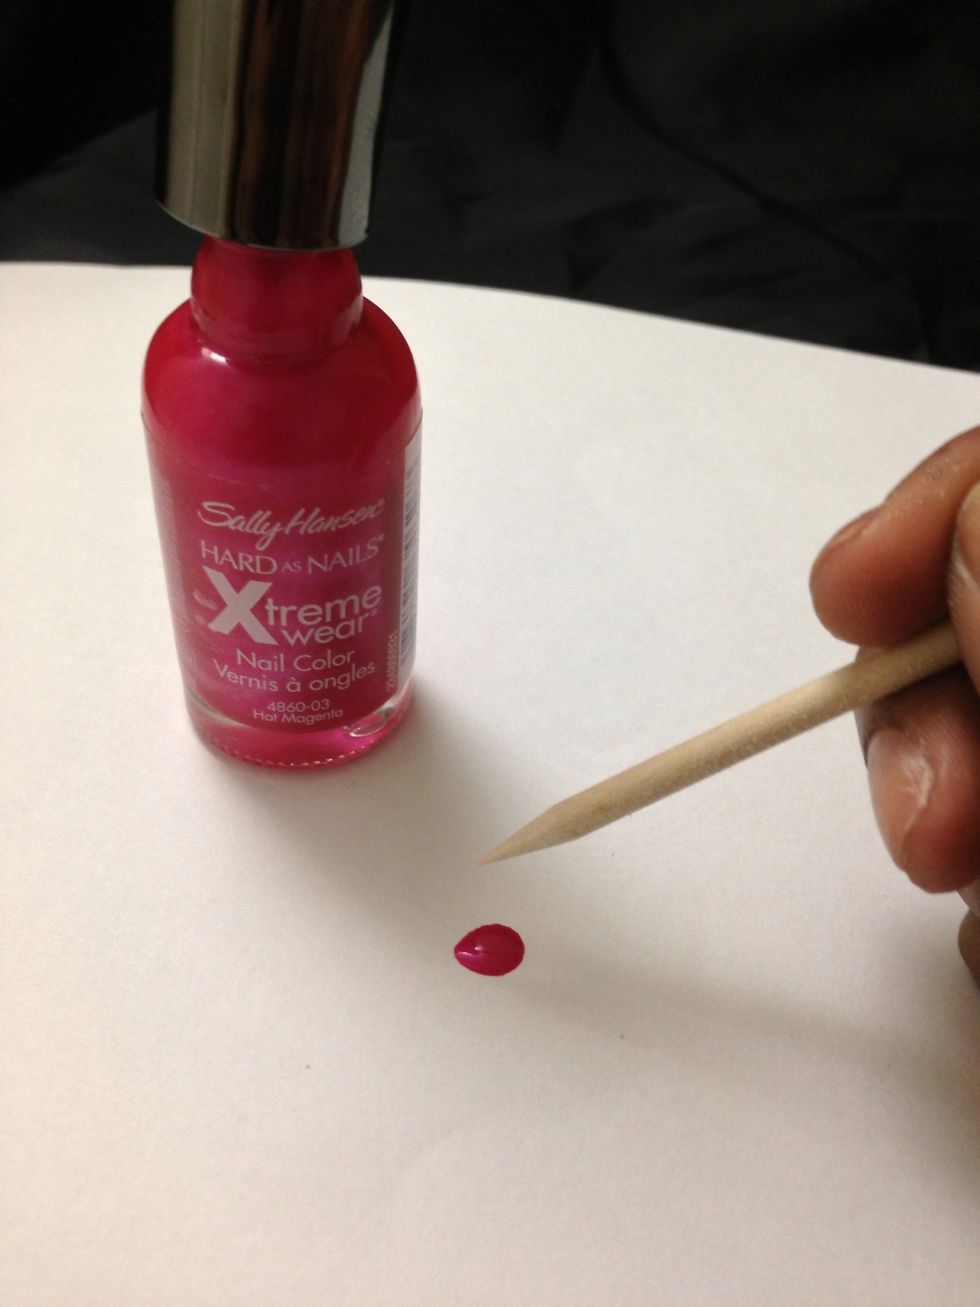
Next grab your dark pink color and your tooth pick. Drop some paint on a piece of paper and dip your toothpick to pick up some color. I'm using Hot Magenta by Sally Hansen.
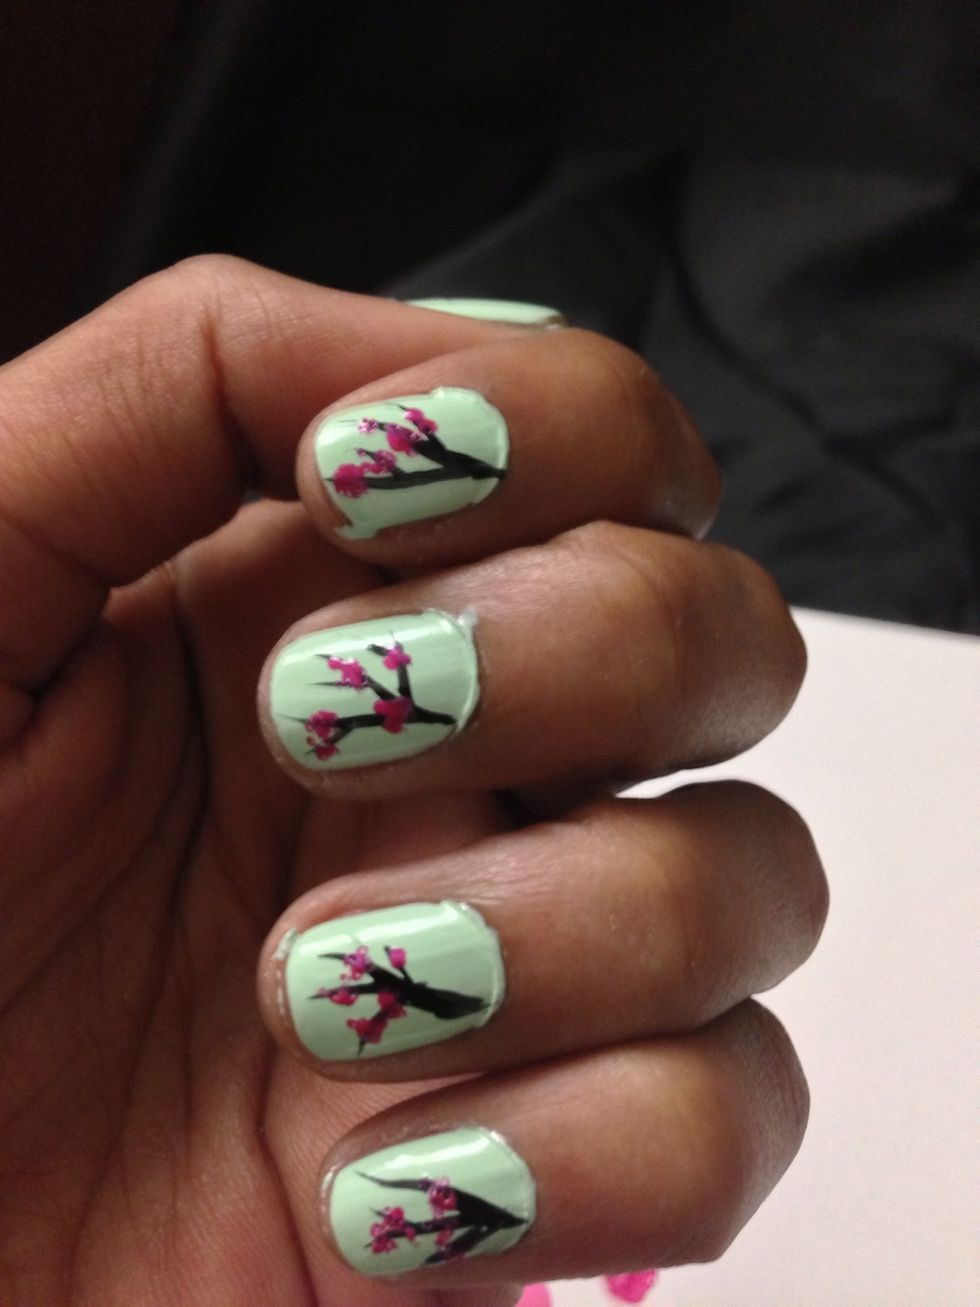
Dot this color on the branches. As you move towards the end of the branches make the dots smaller.
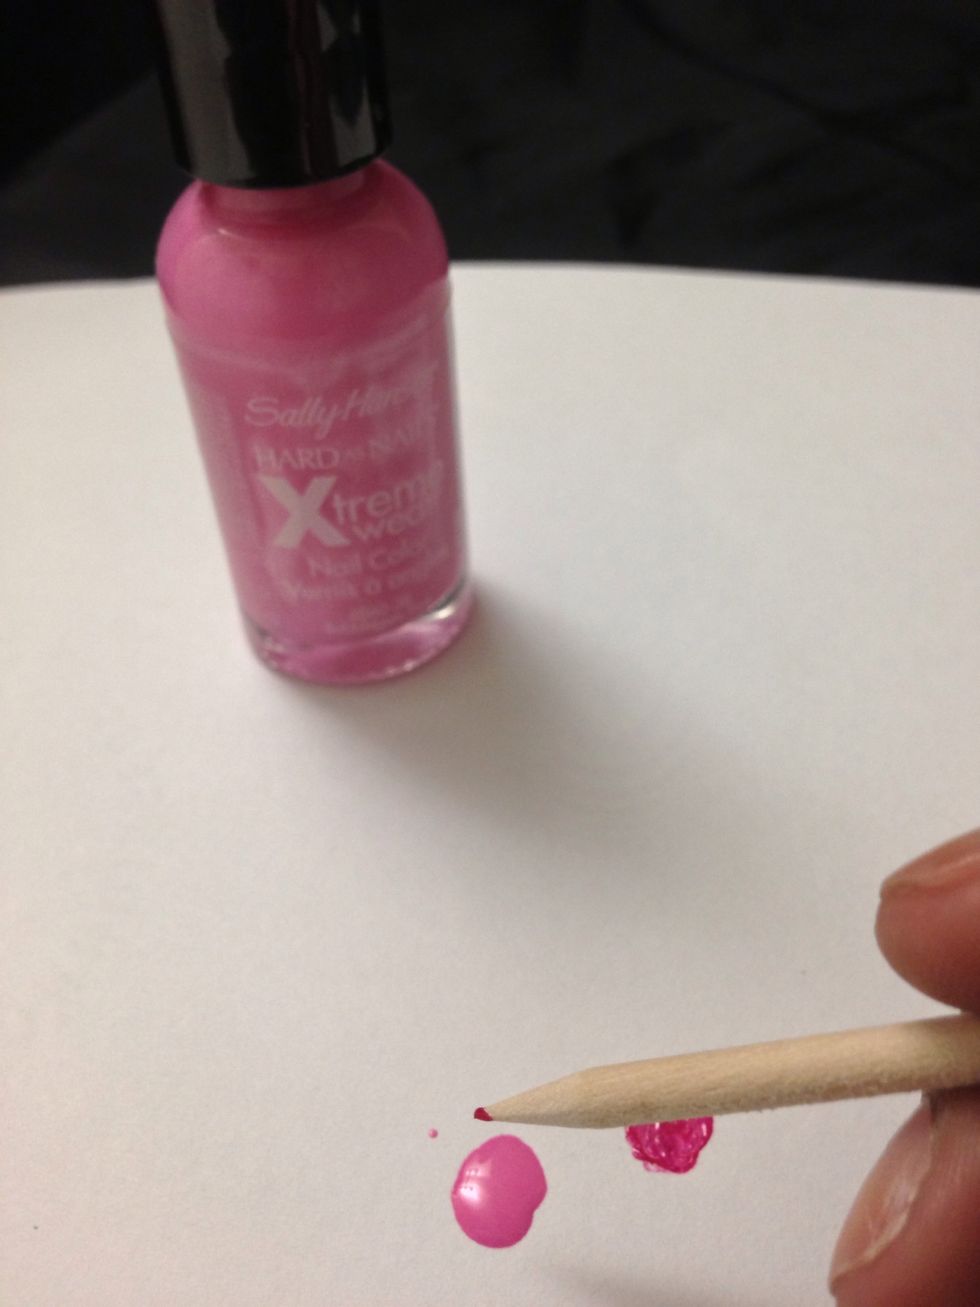
Next grab your light pink color and dab your toothpick to pick up some color. I am using Bubblegum Pink by Sally Hansen.
Dot this on top of and around the dark pink to add more depth.
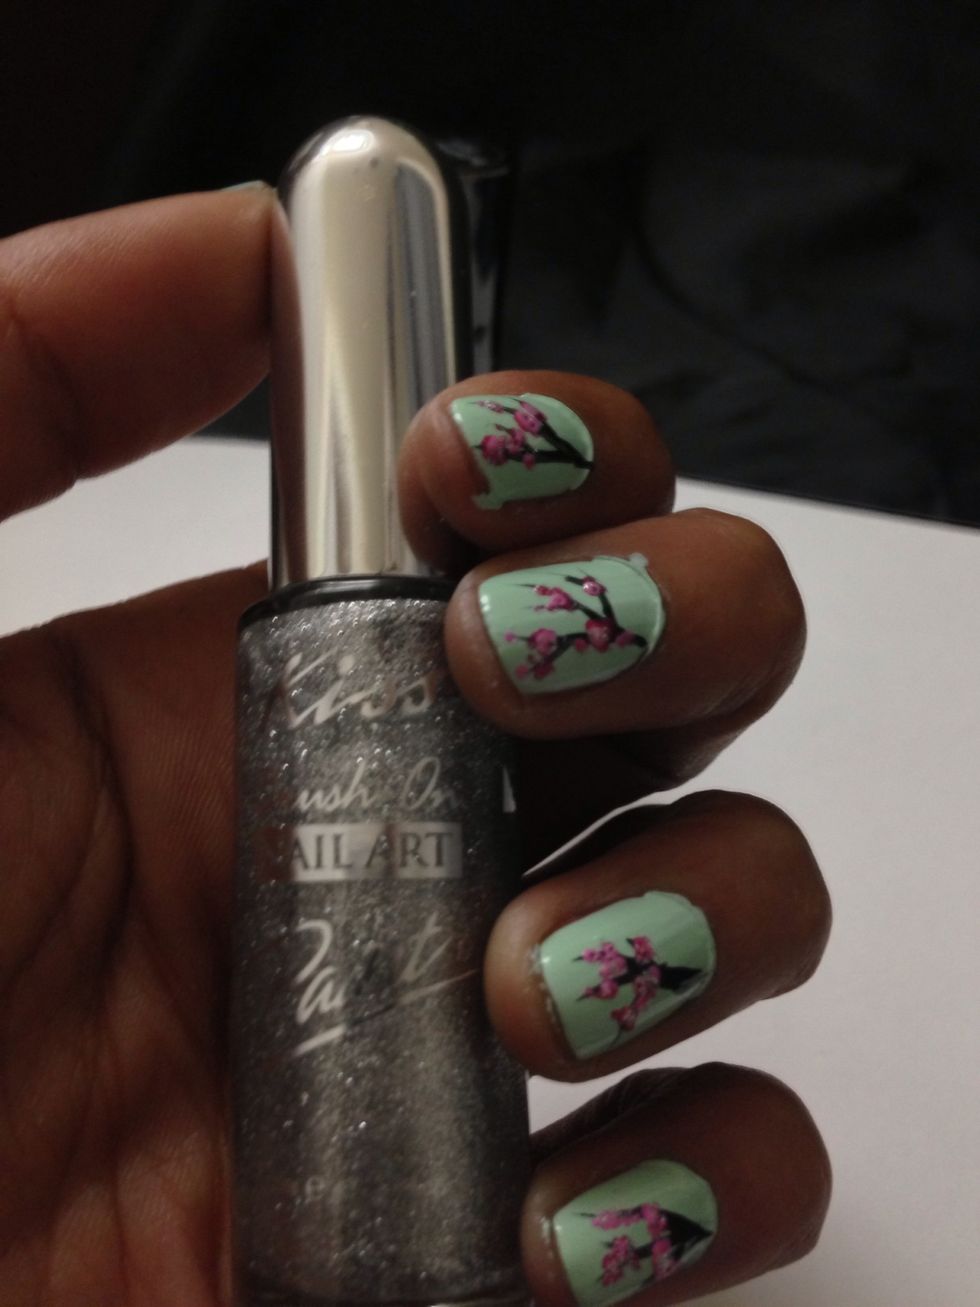
This step is totally optional! For a bit more dimension add a bit of silver right in the center of all your flowers. This is Silver Glitter by Kiss Brush On Nail Art Paint.
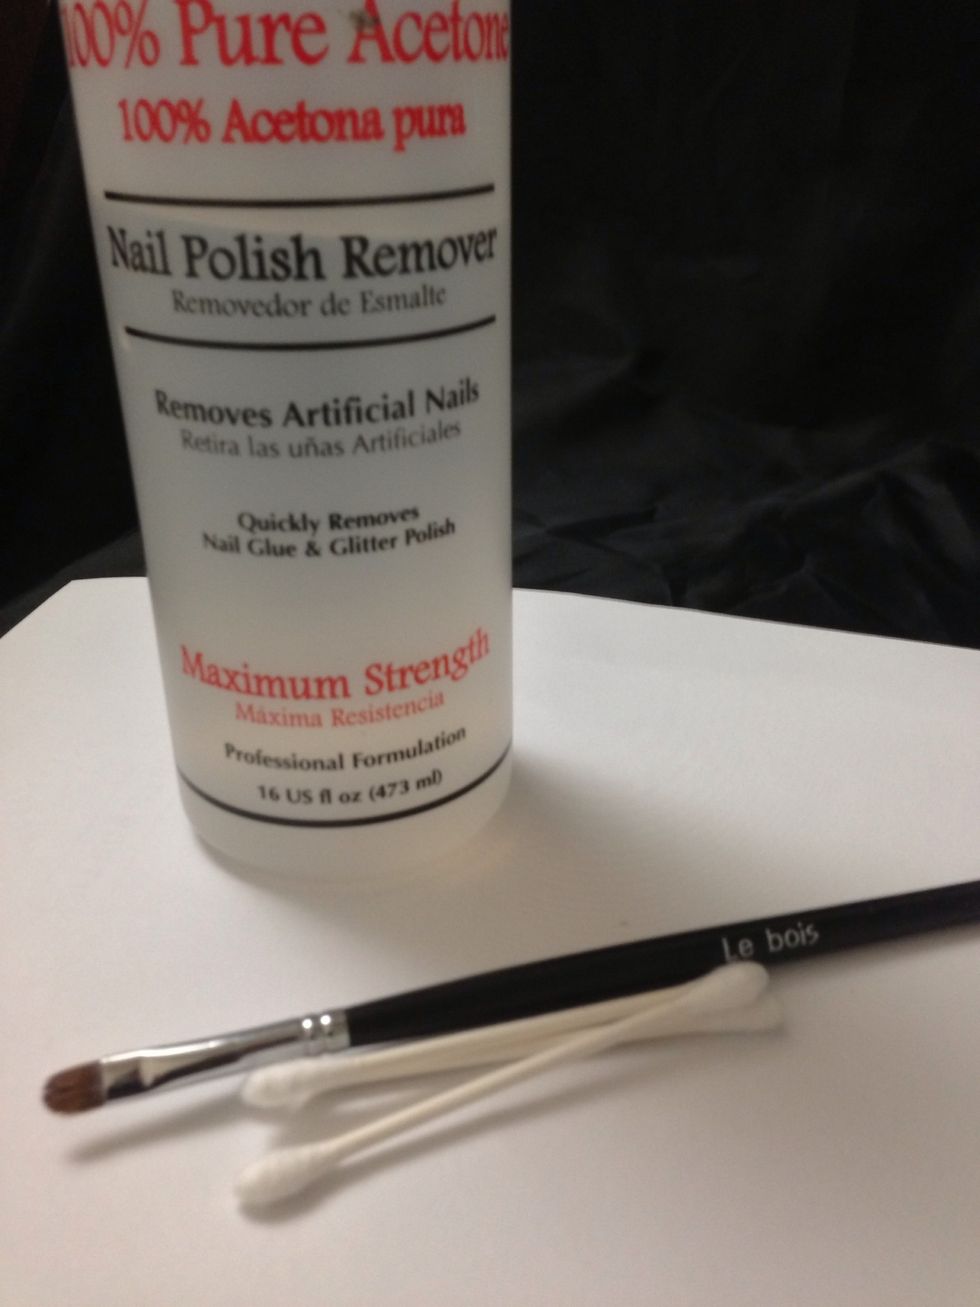
Grab your acetone or nail polish remover. It's clean up time!
Dip your q-tip or nail brush into the solution and clean the excess nail polish off your fingers and around your cuticle.
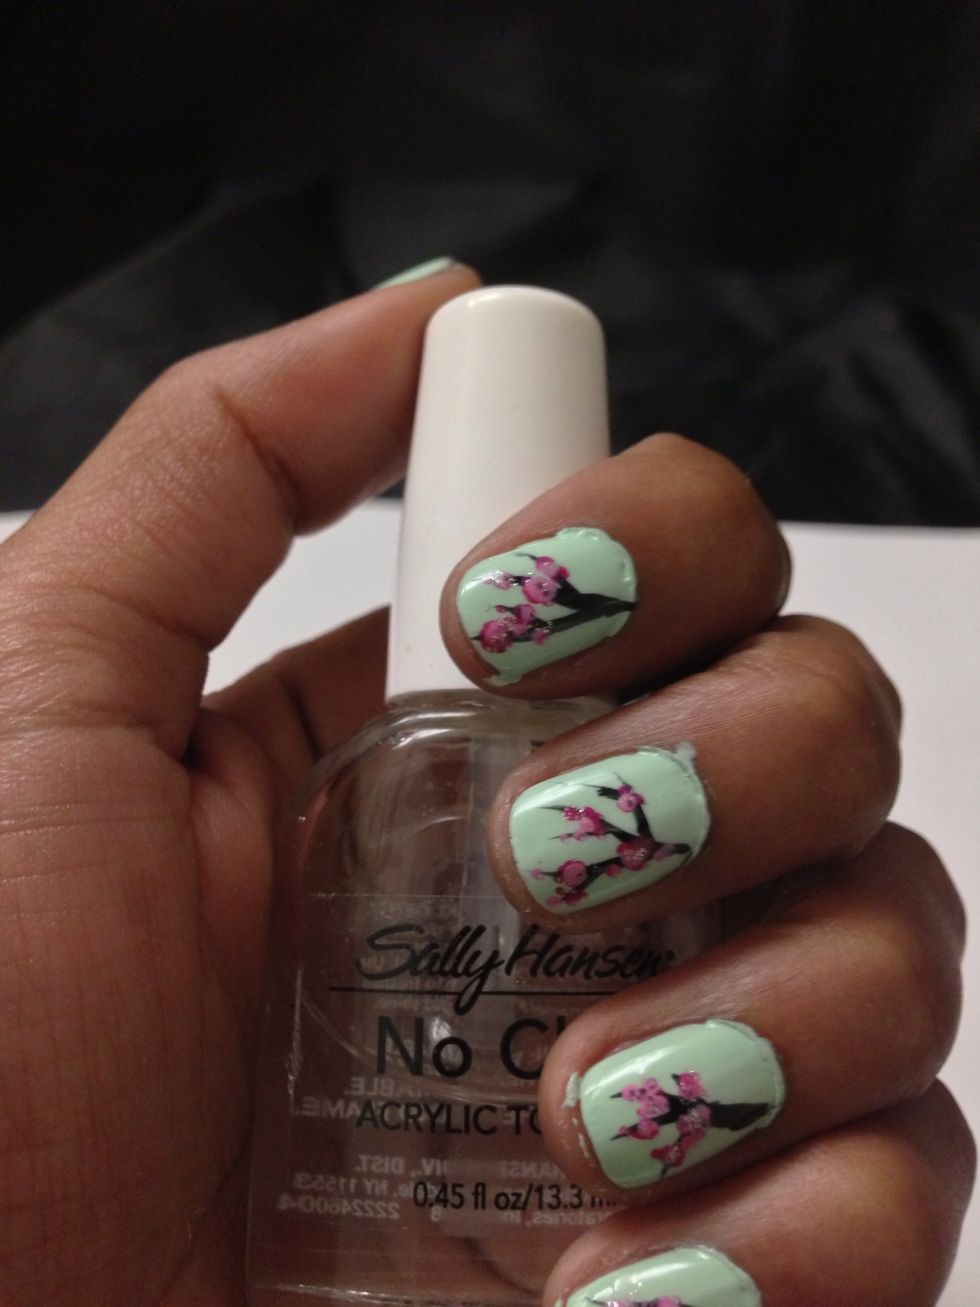
Apply top coat to all of your nails and let dry. This Sally is Hansen's No Chip Acrylic Top Coat.
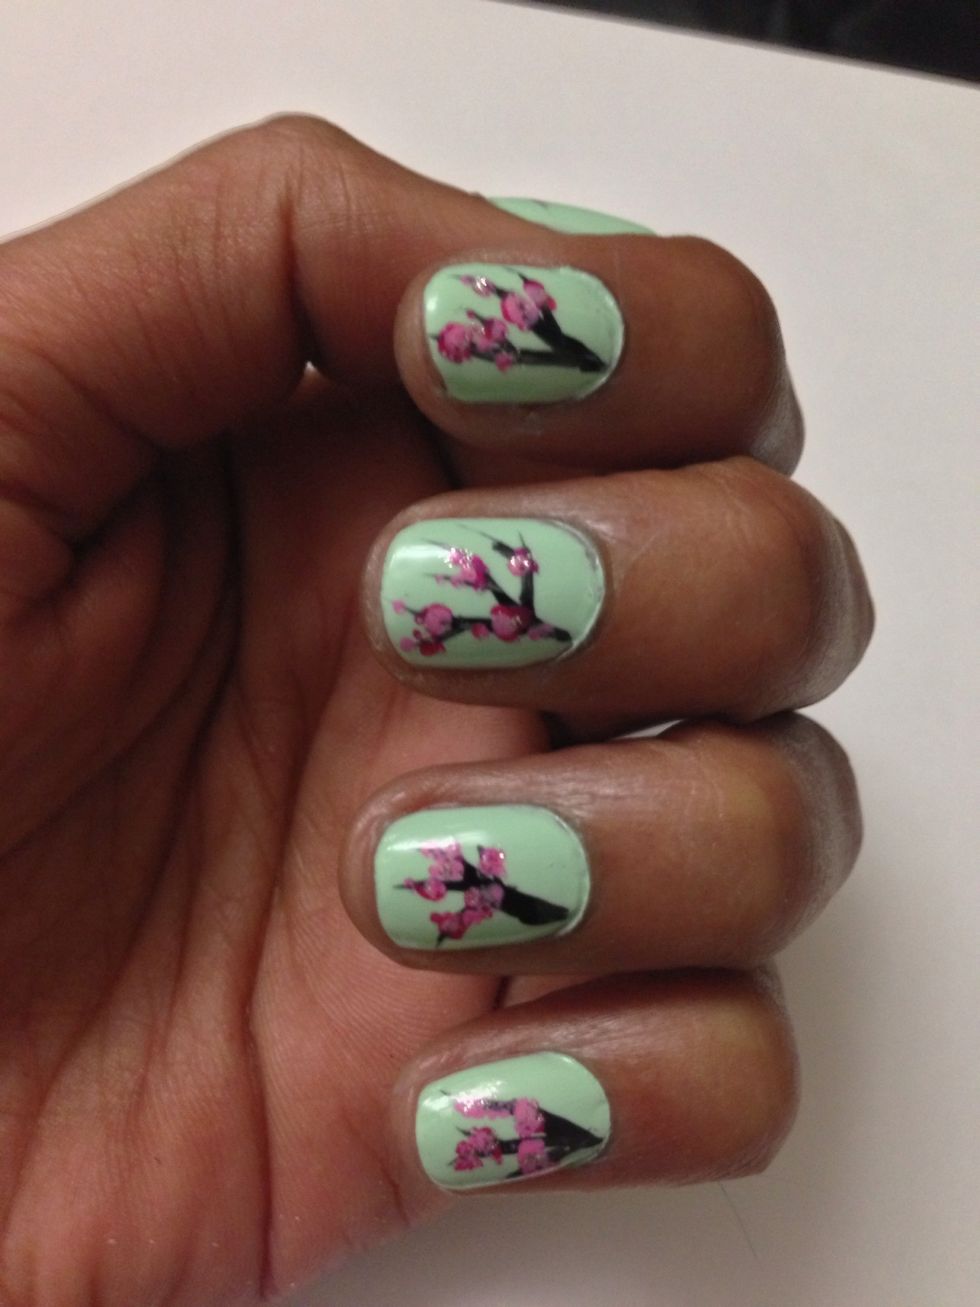
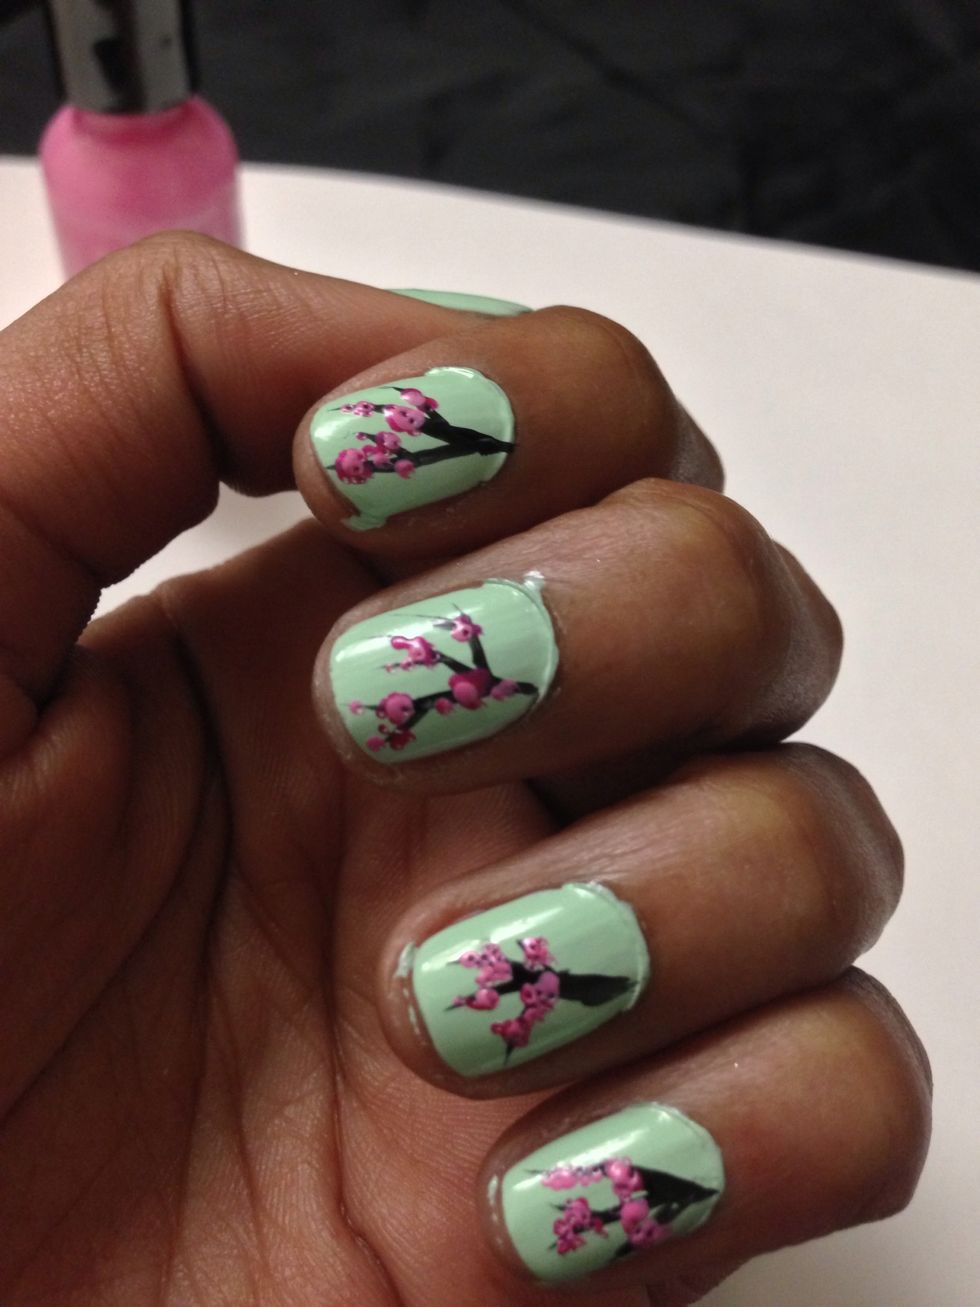
All done! Thanks for checking me out.