The Conversation (0)
Sign Up
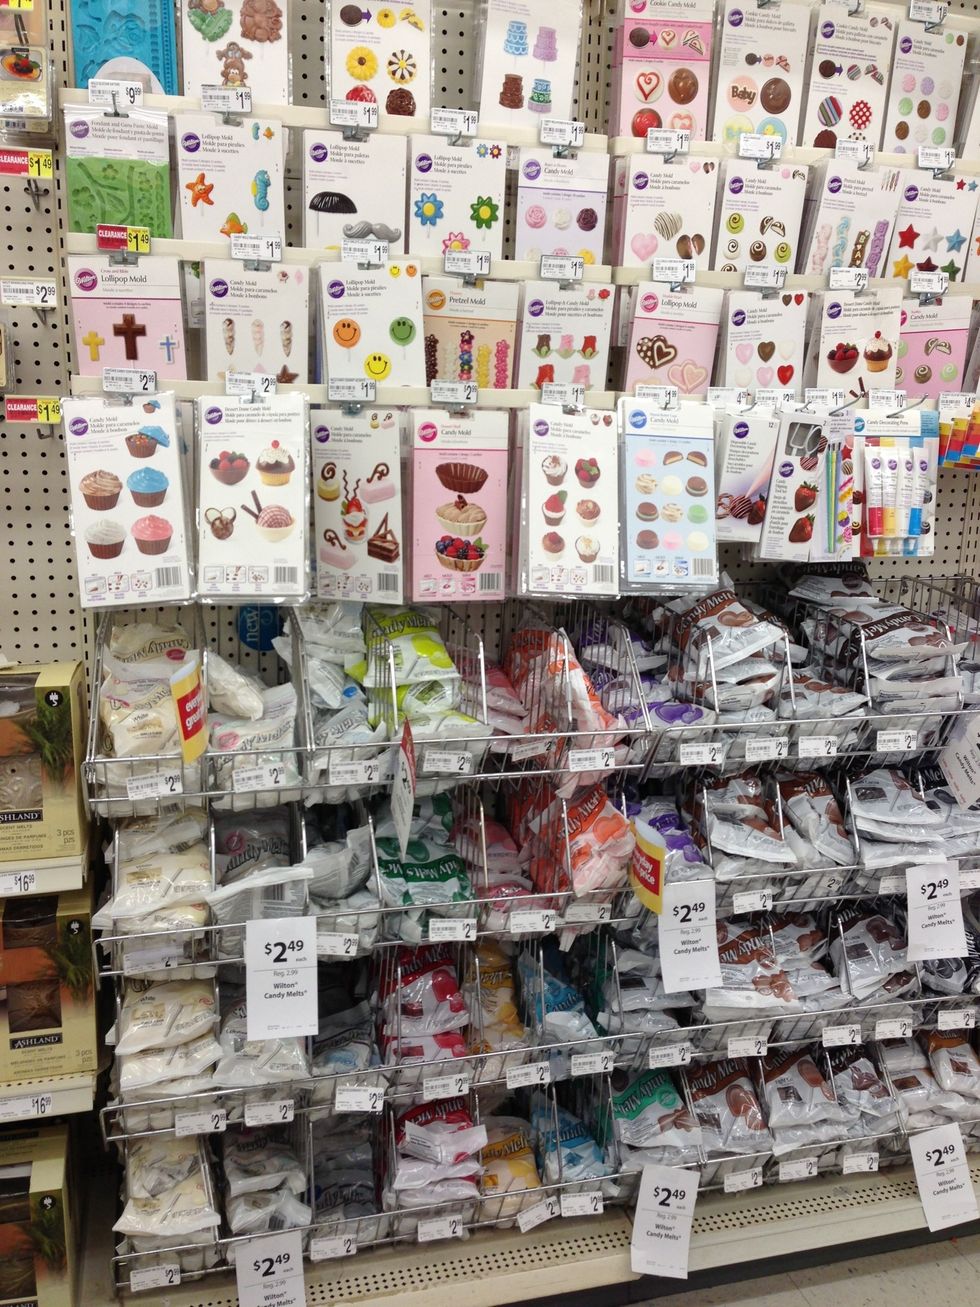
Find a store with candy making supplies. Our local craft store, Michaels, has a large selection of candy disks in many colors, as well as molds.
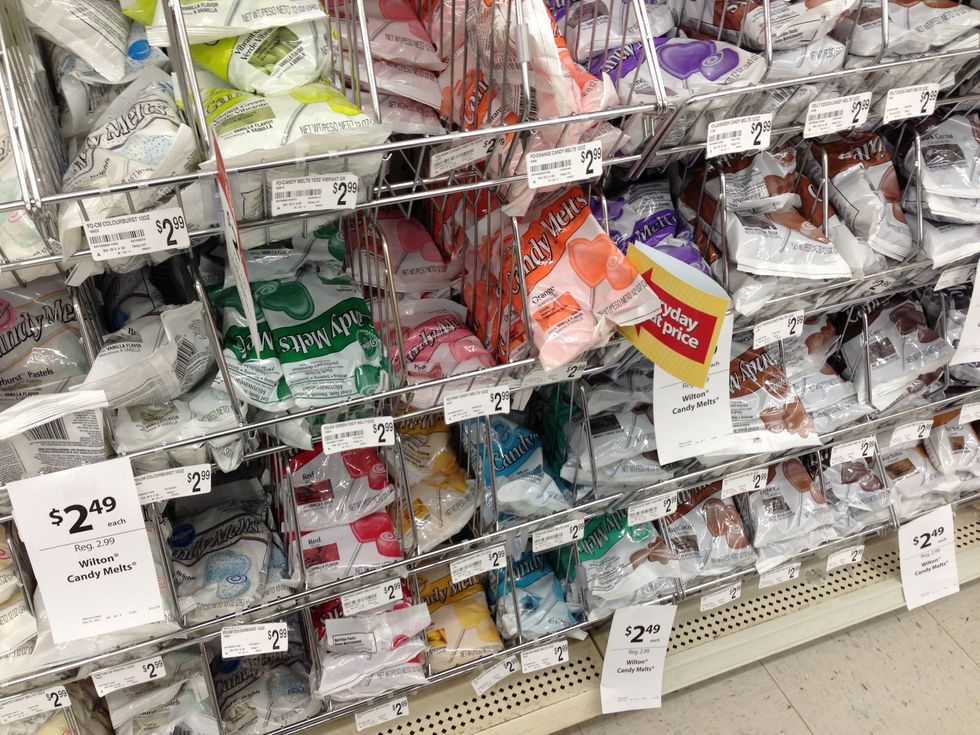
The little colored candy and chocolate disks come in bags. I find them at our craft store, Michaels, in the candy & baking section.

Gather molds, candy disks, plastic squeeze bottles. Place disks into bottles. I have some still in bottles from previous year. Remove tiny red caps. Lie on sides in microwave.
Microwave slowly & CAREFULLY on low power for 30 second intervals, checking as you go, by squeezing to test if candy disks have melted. (I have had one bottle melt so be careful)
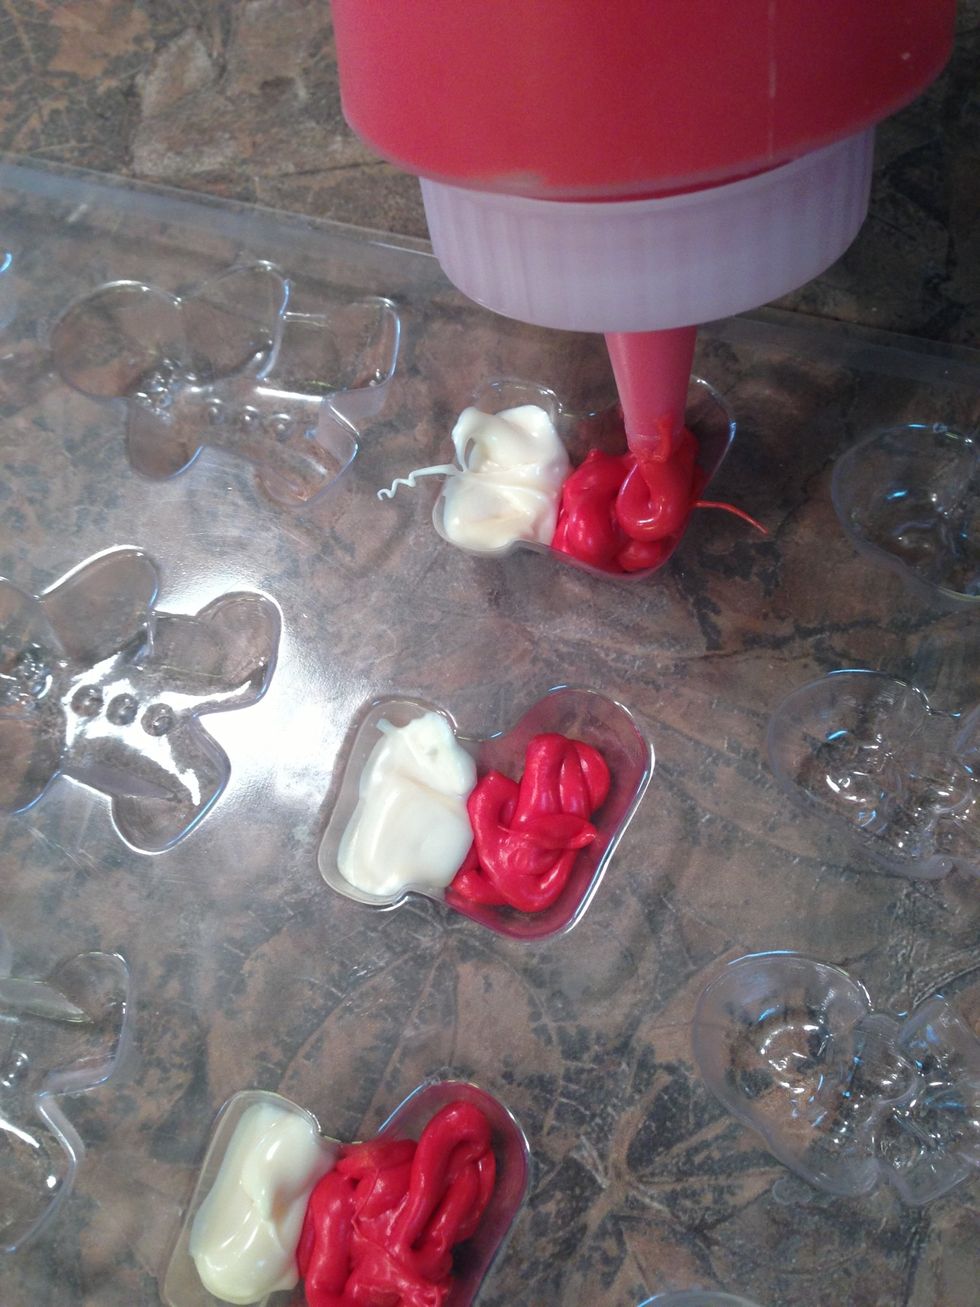
Squeeze colors where desired into molds, remembering you are working designs upside down.

I pick up and drop molds about 6" to help settle candy and eliminate bubbles. I often place in freezer for just one minute or so to speed up hardening. Don't freeze them
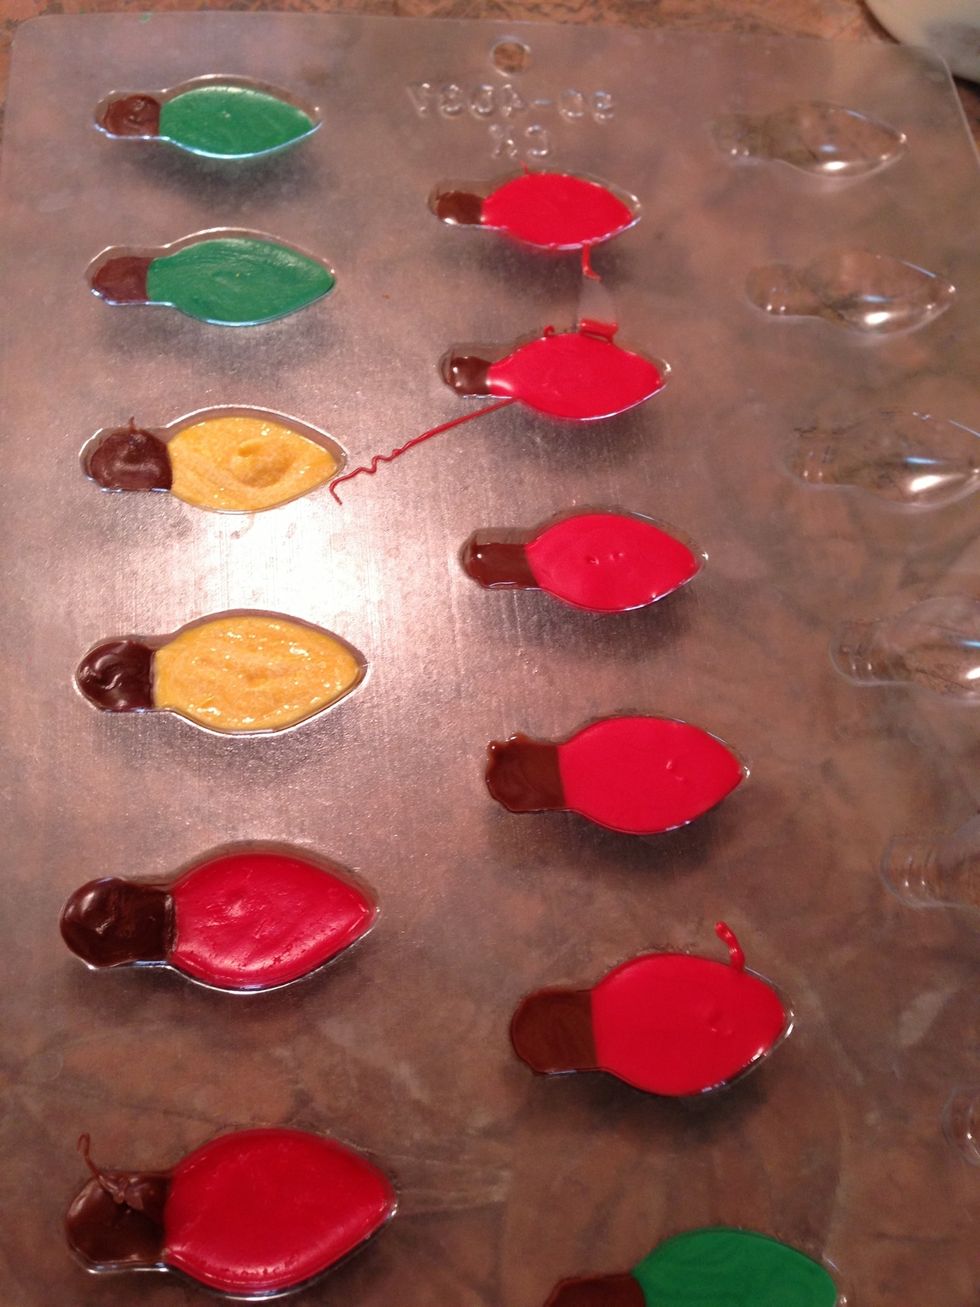
I squeeze chocolate first for bulb base, then colored bulb right away before chocolate spreads too much.
Gently flex molds upside down to cause cooled hardened candies to drop out.
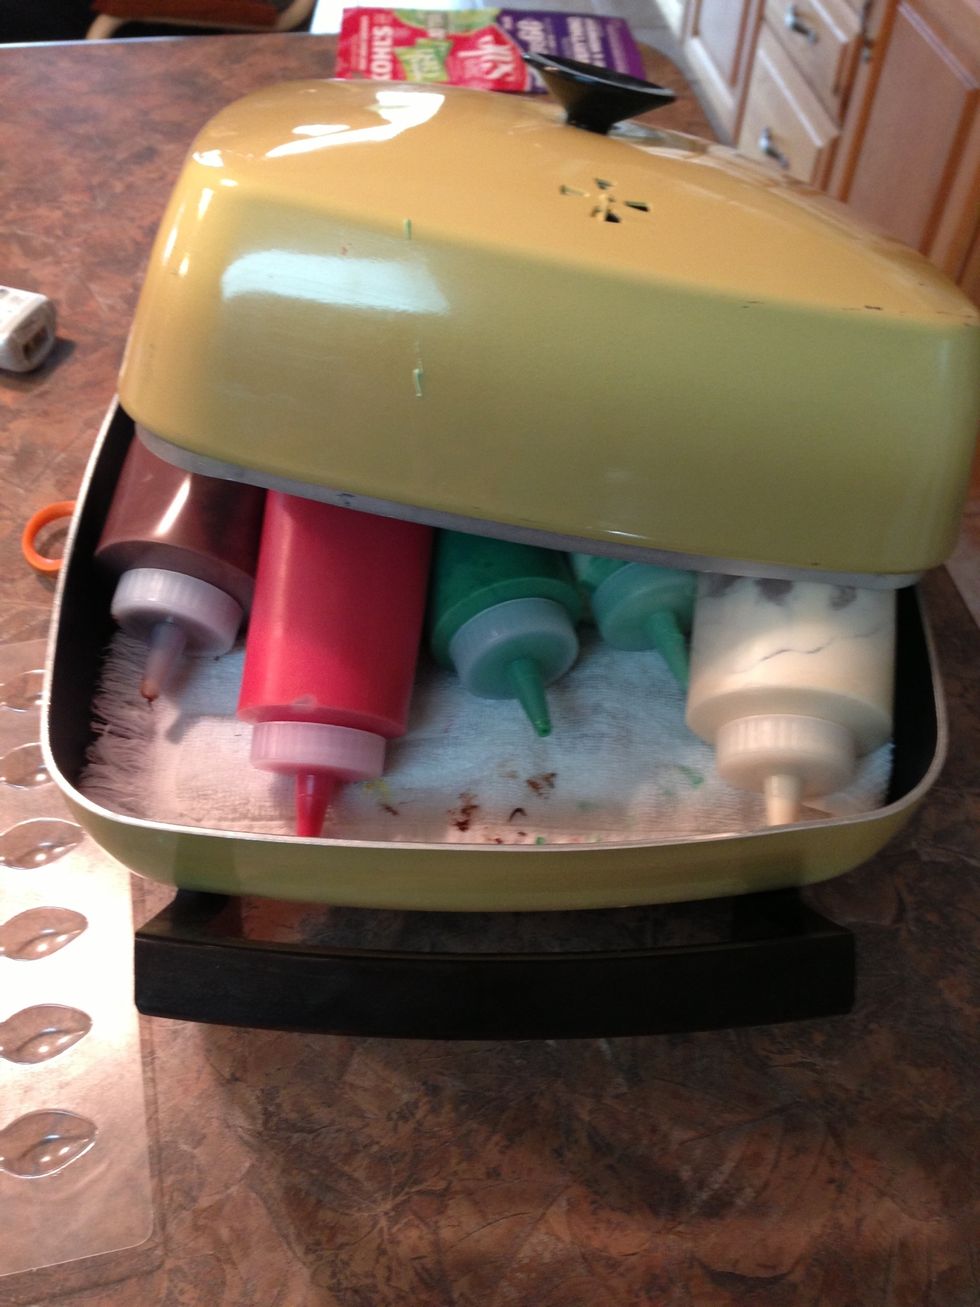
After warming in microwave, keep bottles warm in covered electric frypan on lowest setting with towel lining bottom.
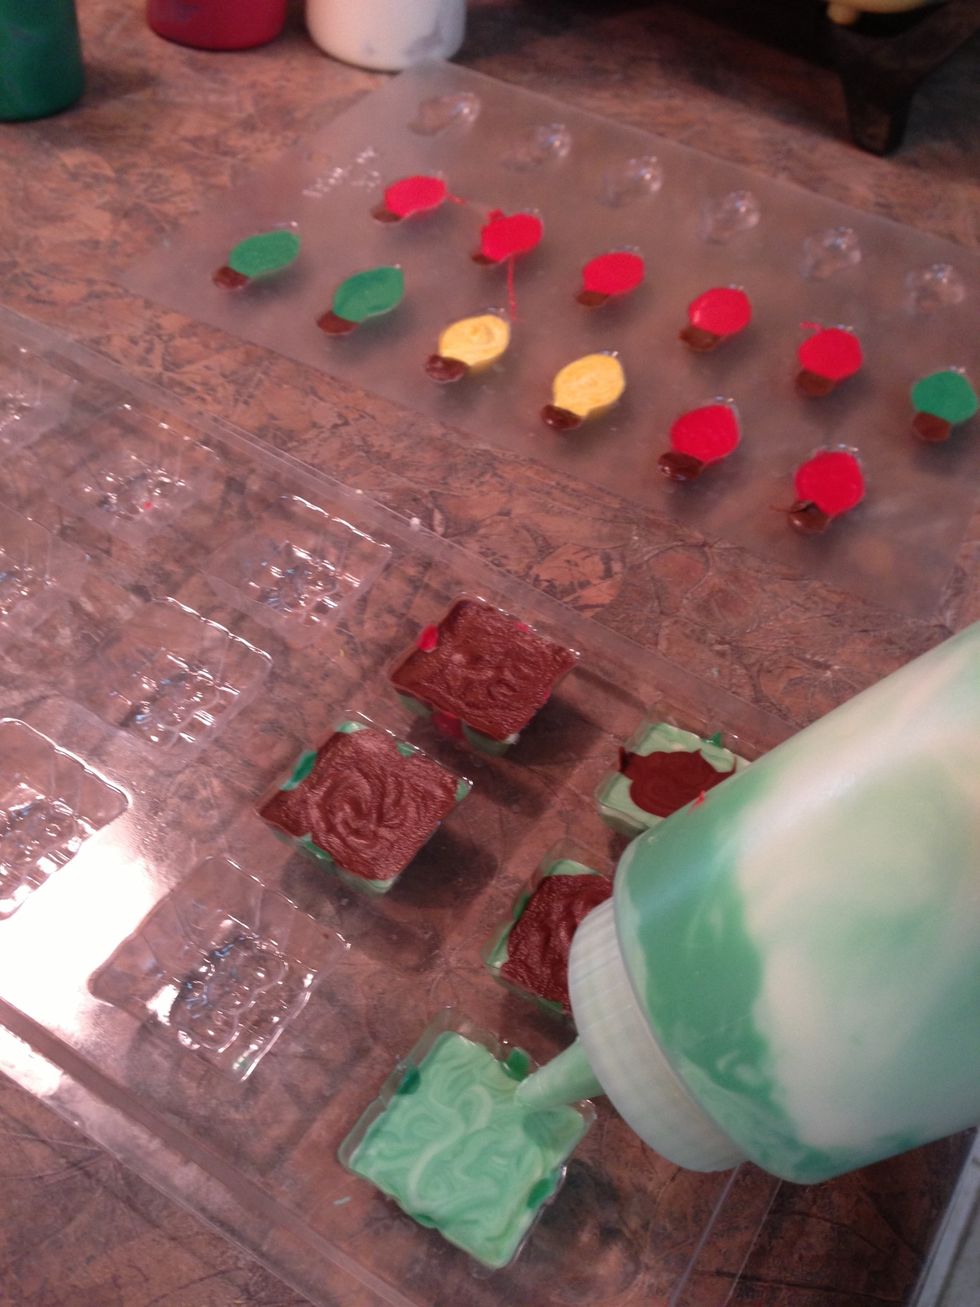
Squeeze colors where desired into molds, starting with whatever color will end up on top.

You are working from front to back, or top to bottom of each candy. The fun surprise is once you in-mold them.
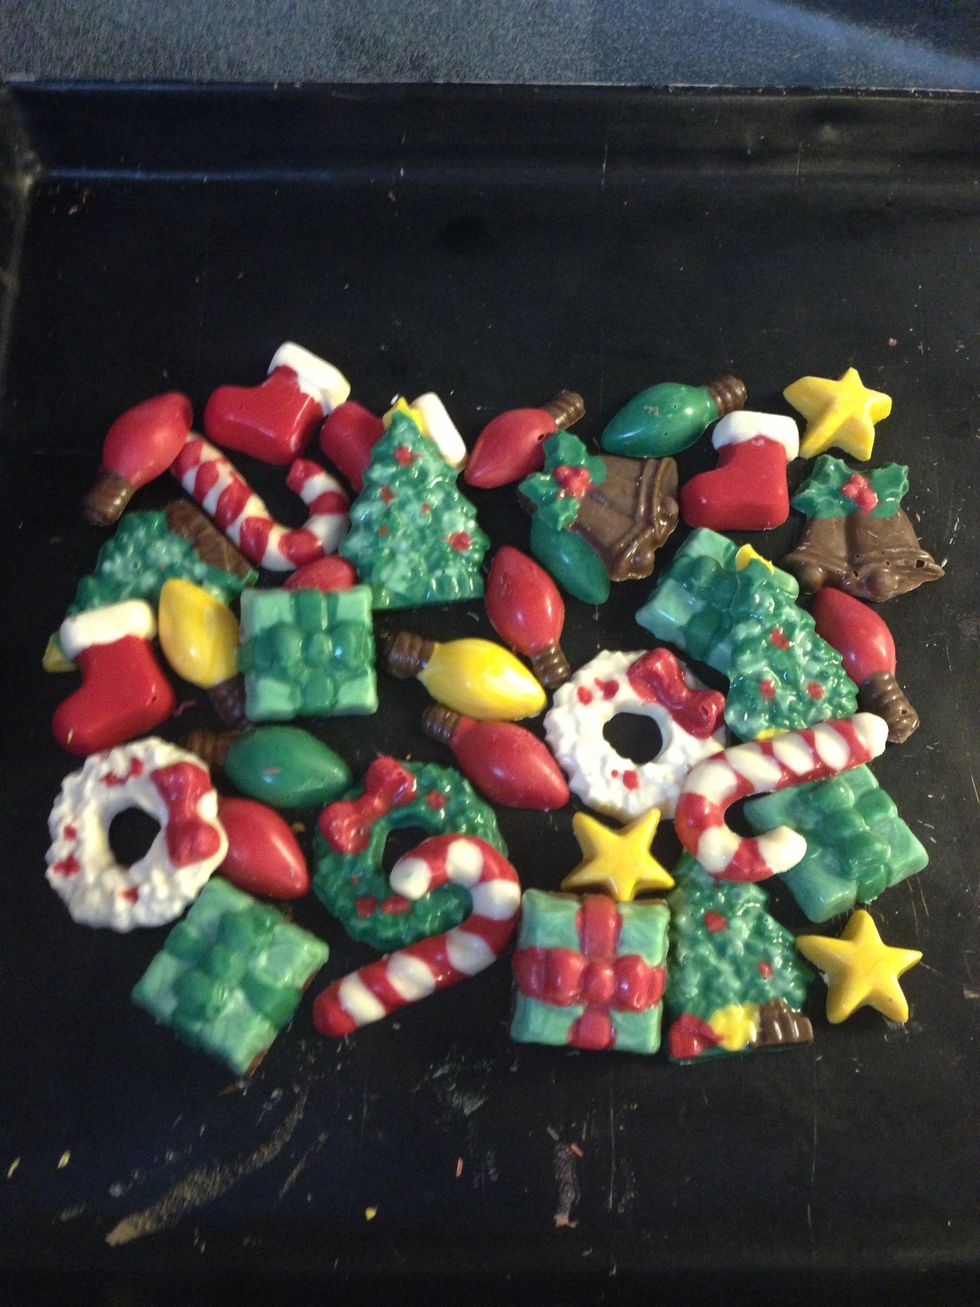
Tiny bite-size candies that look nice mixed in with your cookie plate display! ...and they taste good too!
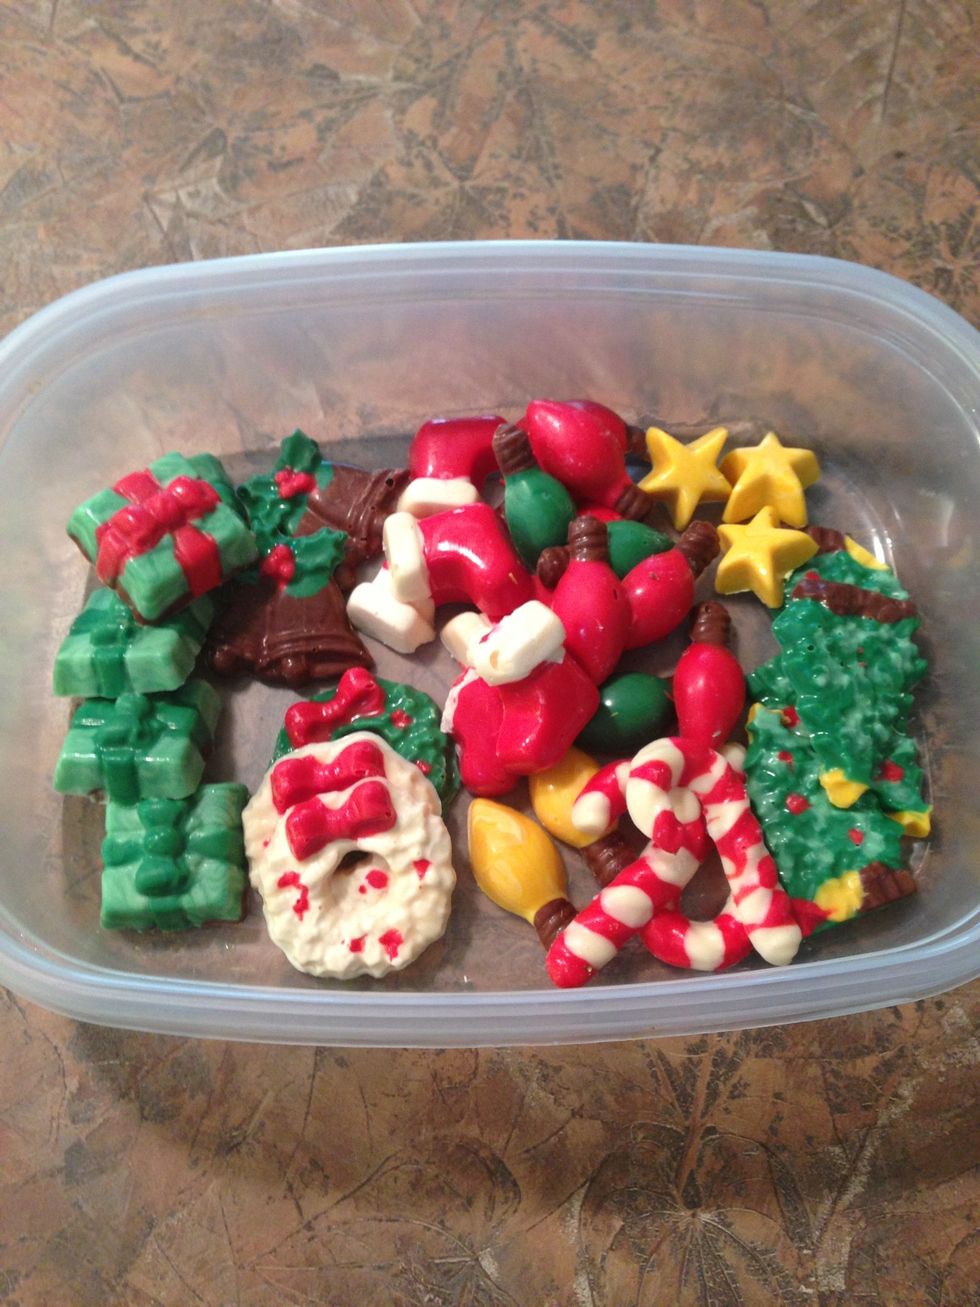
Store at room temperature in covered container. Leftover melted colors can be stored in their respective bottles and re-melted for next time.