The Conversation (0)
Sign Up
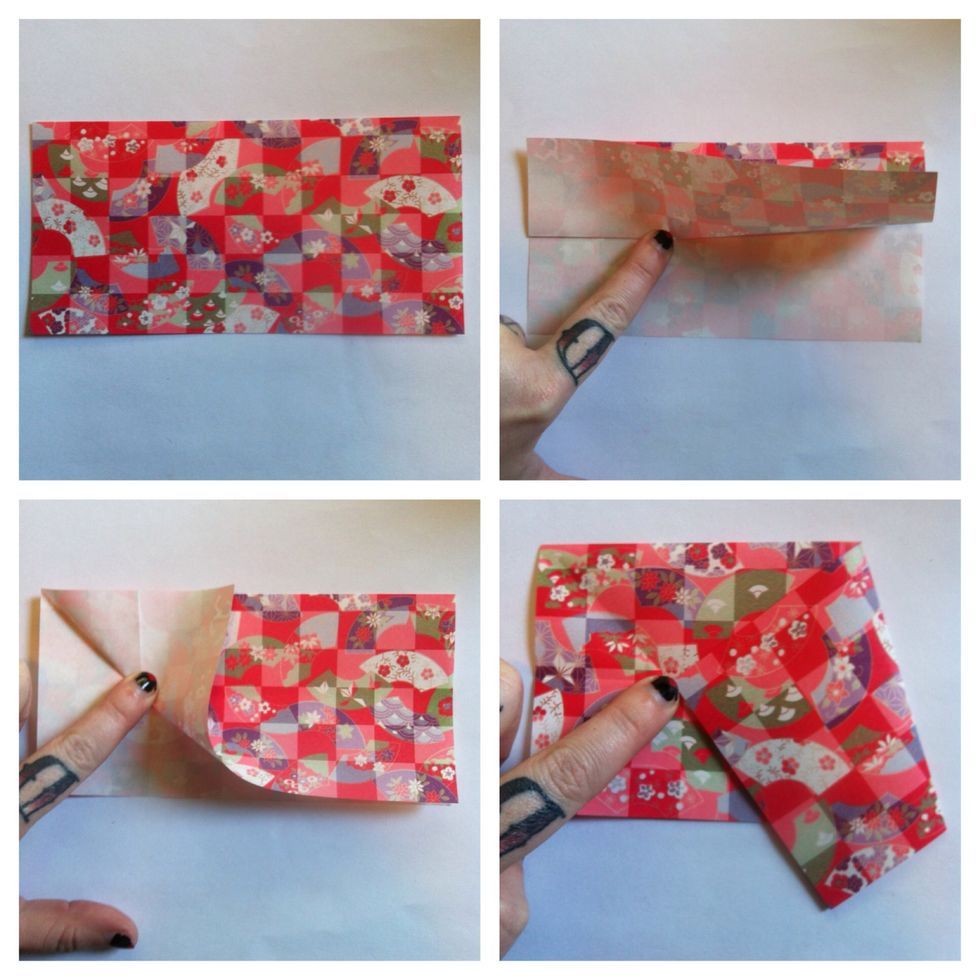
1 piece any size square. Fold in 1/2. Fold up & crease from my finger over. Fold corner up crease w/ fingertip on top of other crease. Fold top right corner to where those creases intersect.
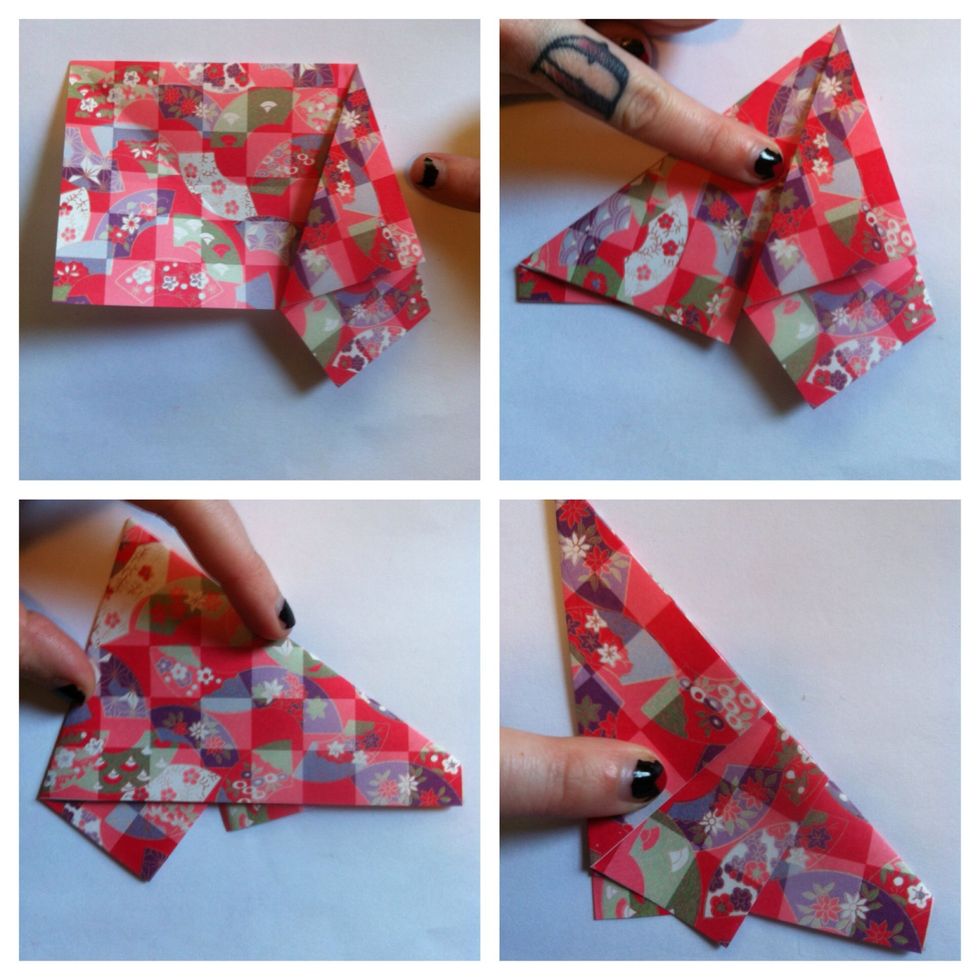
Fold flap over to my finger as shown. Fold left edge along right edge where my finger is pointing. Fold edge to edge; in half. You should see line where my finger is pointing in last picture...

That is where you cut. Throw away what's on the right & open up left piece. Pentagon. Mountain & valley fold as shown to collapse into star shape as shown in last picture.
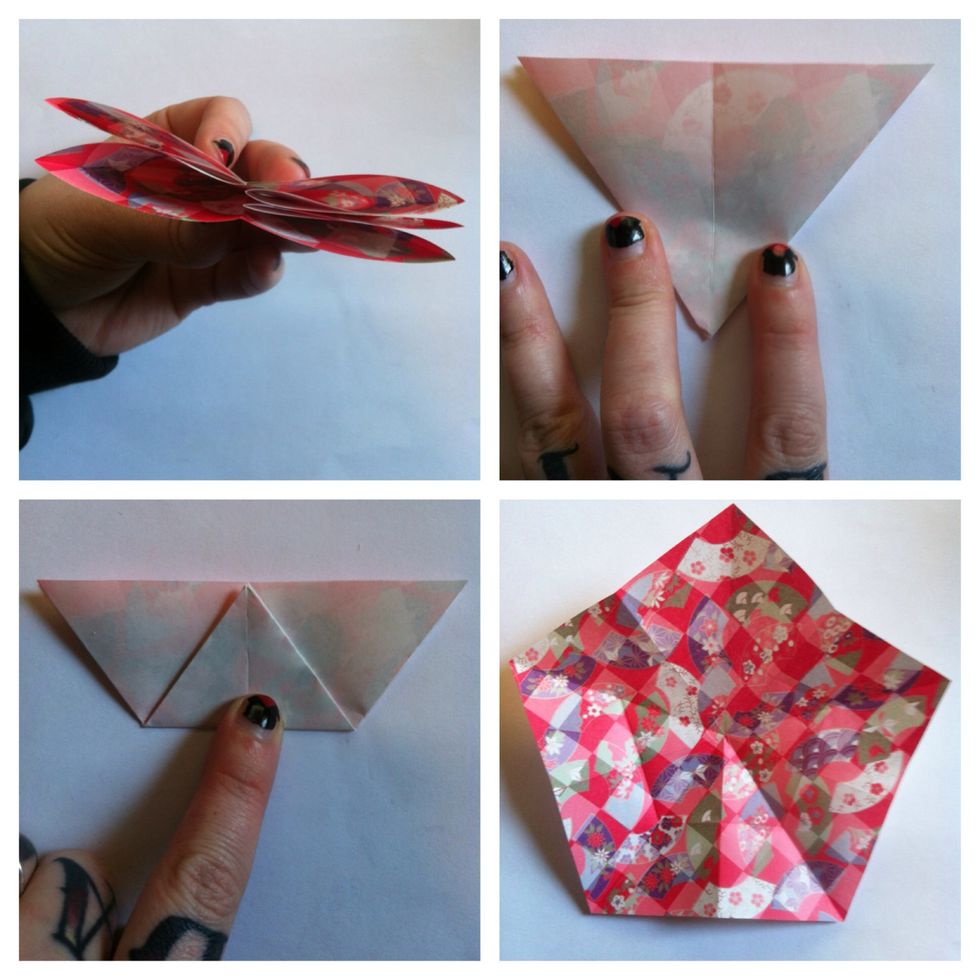
Squish flat. Fold bottom tip up to top. Crease really good & open up. You'll see that crease formed a pentagon in the center. Use those creases for next steps...
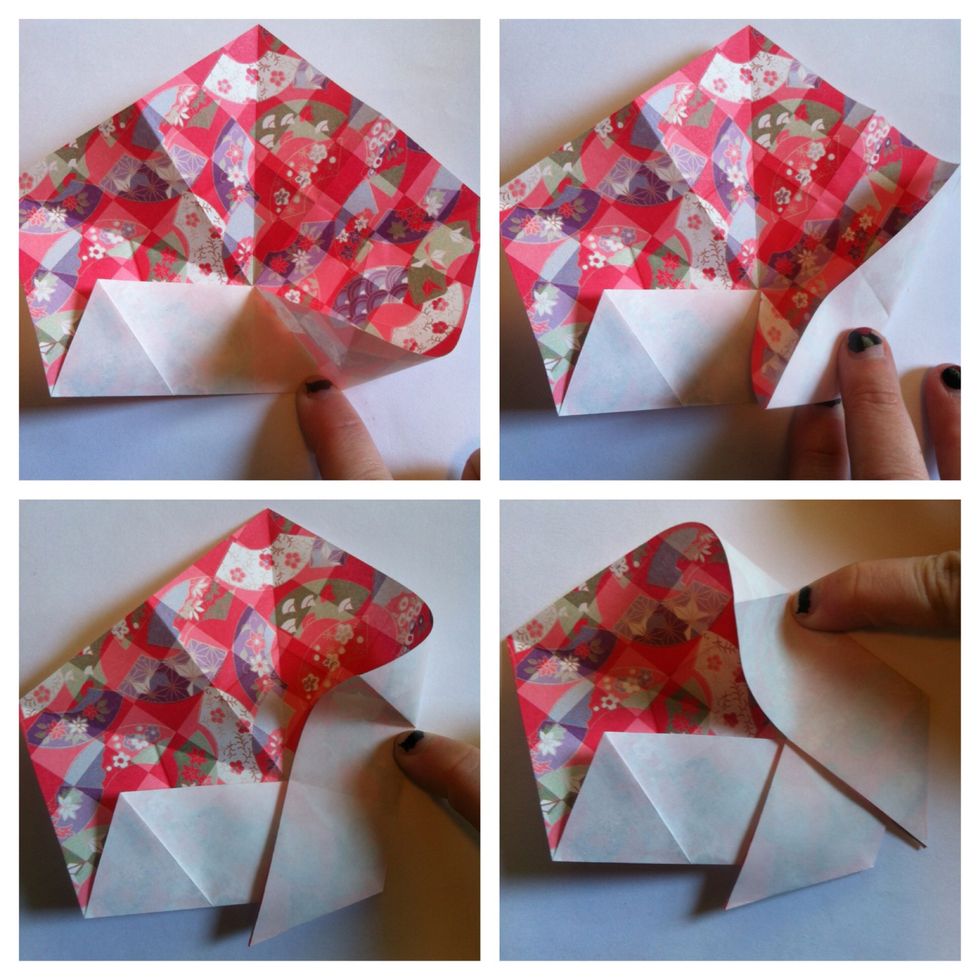
Bring bottom edge to center & crease from my finger over. Fold tip downwards bringing right edge to center (using crease from pentagon). Crease from my finger down. Repeat.
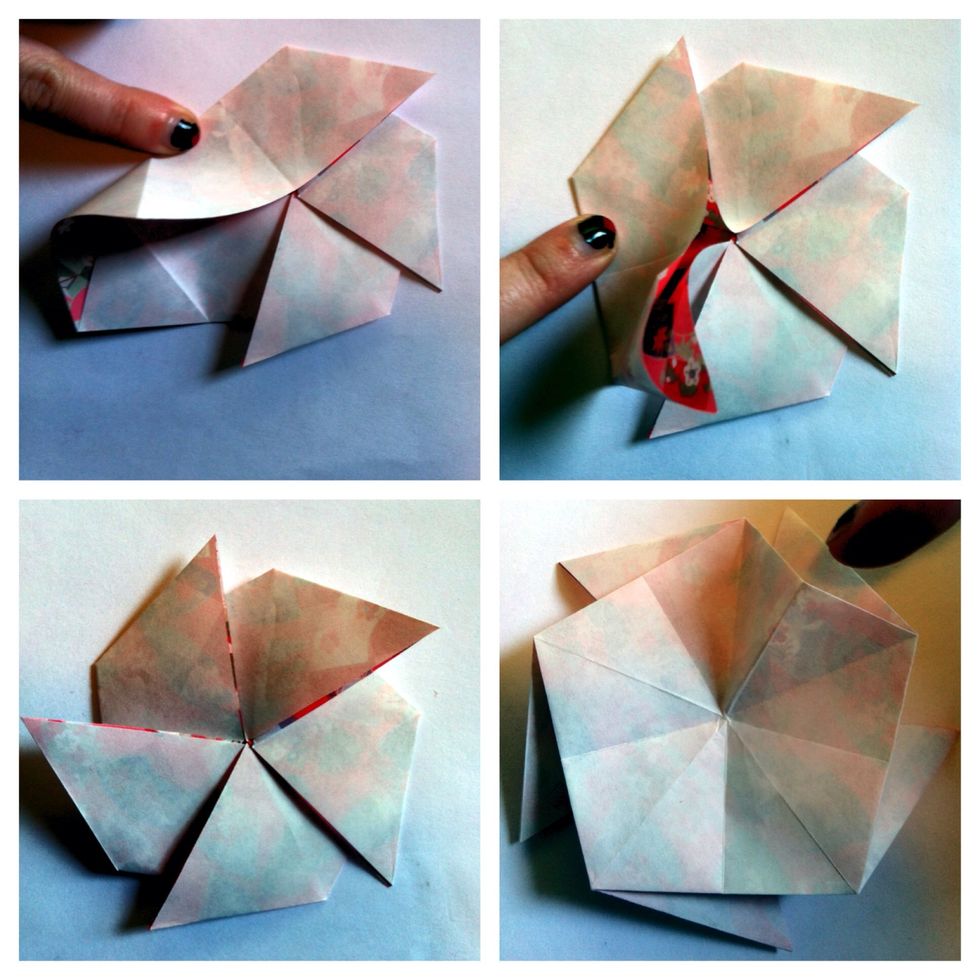
Repeat around. The last one pull out & then lay flat. If you use color on both sides paper, you could have a coin purse now! Flip over & mountain fold creases coming from edge; valley ones from point.
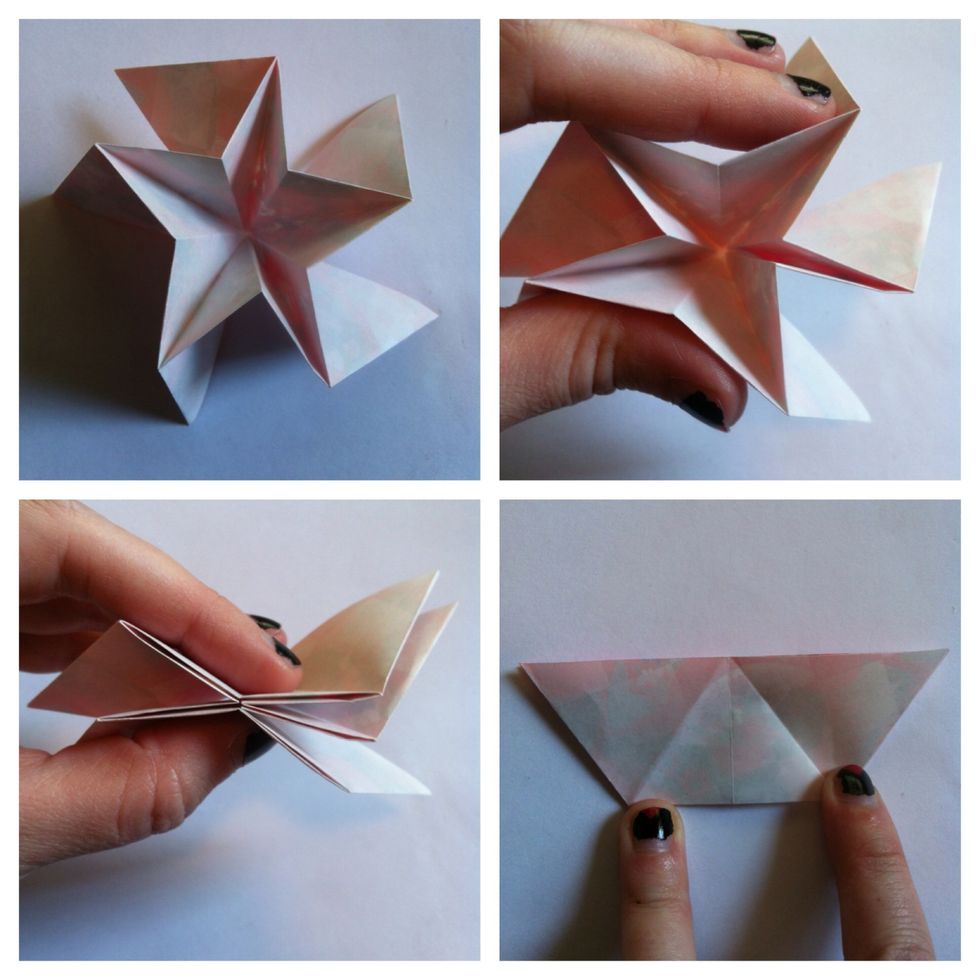
Shape it into a star (the mountain & valley folds you just did will do this for you) & squish flat.
From my finger to top right point, fold bottom right edge up. Do this to each flap. You'll have to swing them around to get them all...always work on right one. Last pic...push this down...
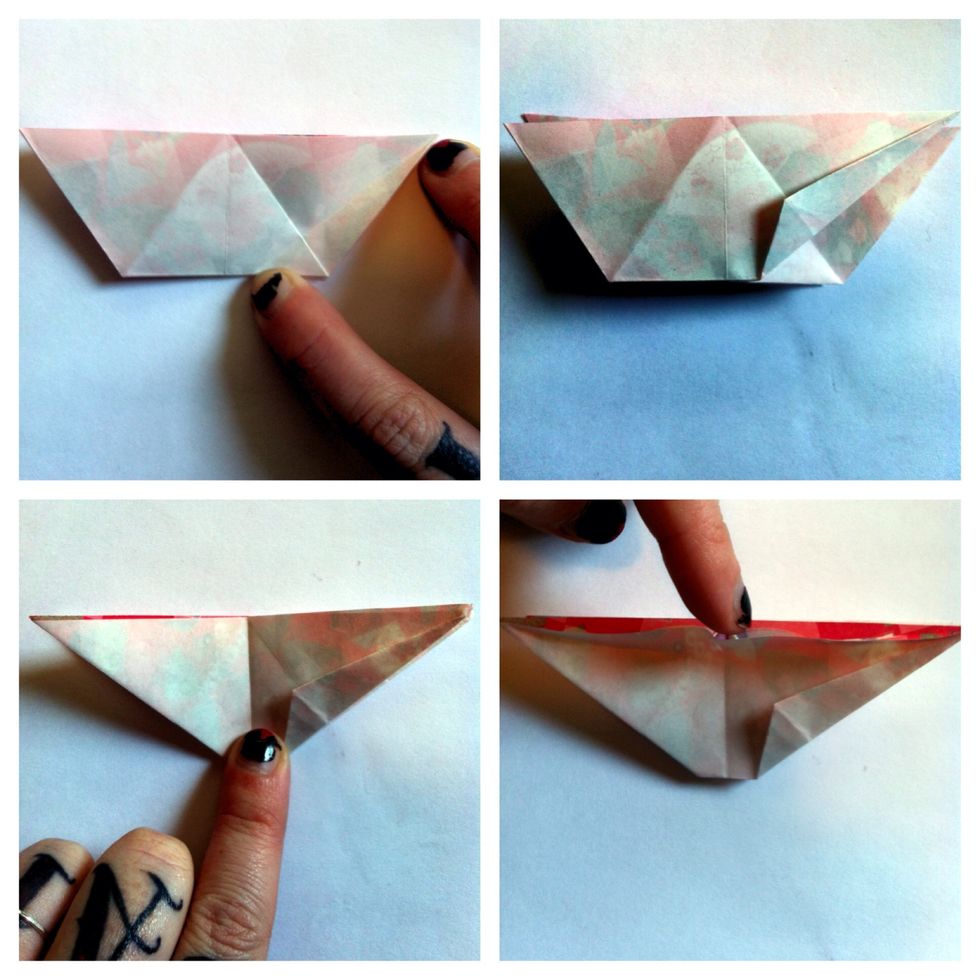
Like so & squish flat. Do this to each...
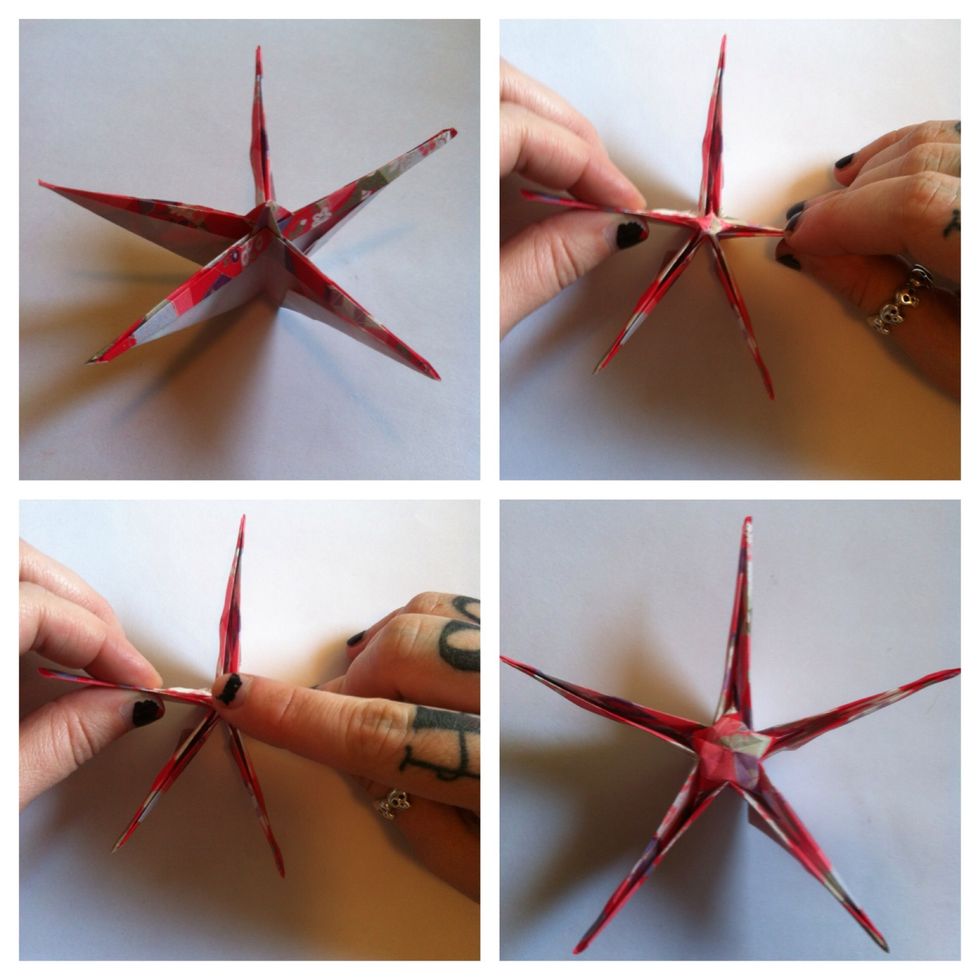
Forming a skinny star. Pull on opposite limbs to make a star pop up...I push down it at same time to keep the star from ripping in the middle.

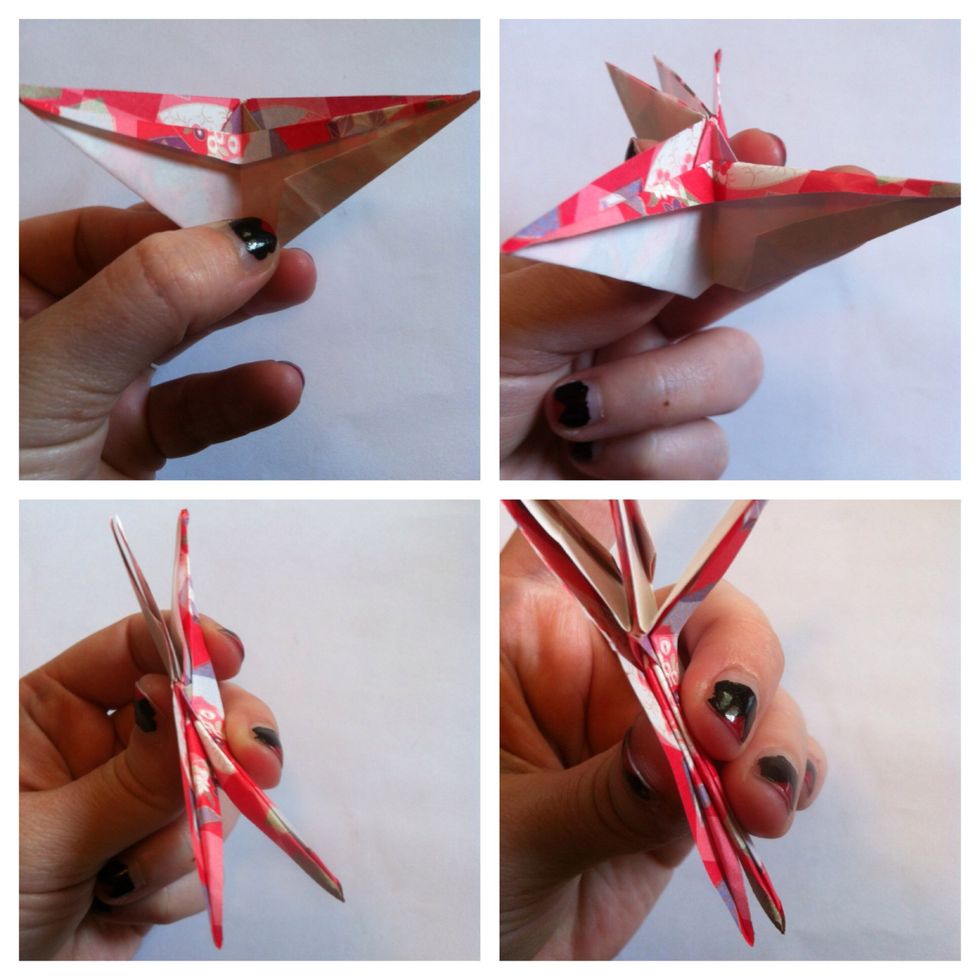
You'll take that patterned flap my thumb is pointing at and pinch. Pinch & pull downwards. Do this all the around.
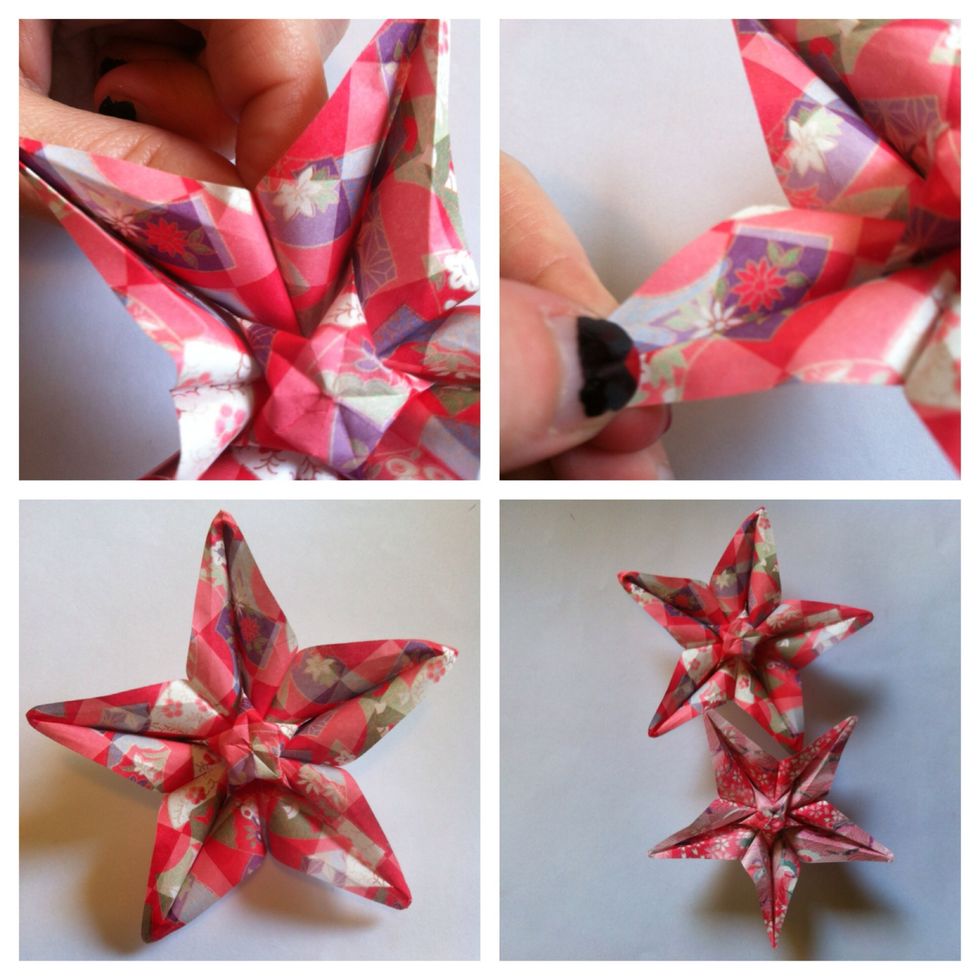
Form star better by running fingertips over the creases to open petals up more. Also pinch the tips pulling downward to open up more. In last picture, I shaped top one more then bottom one. Pretty.