The Conversation (0)
Sign Up
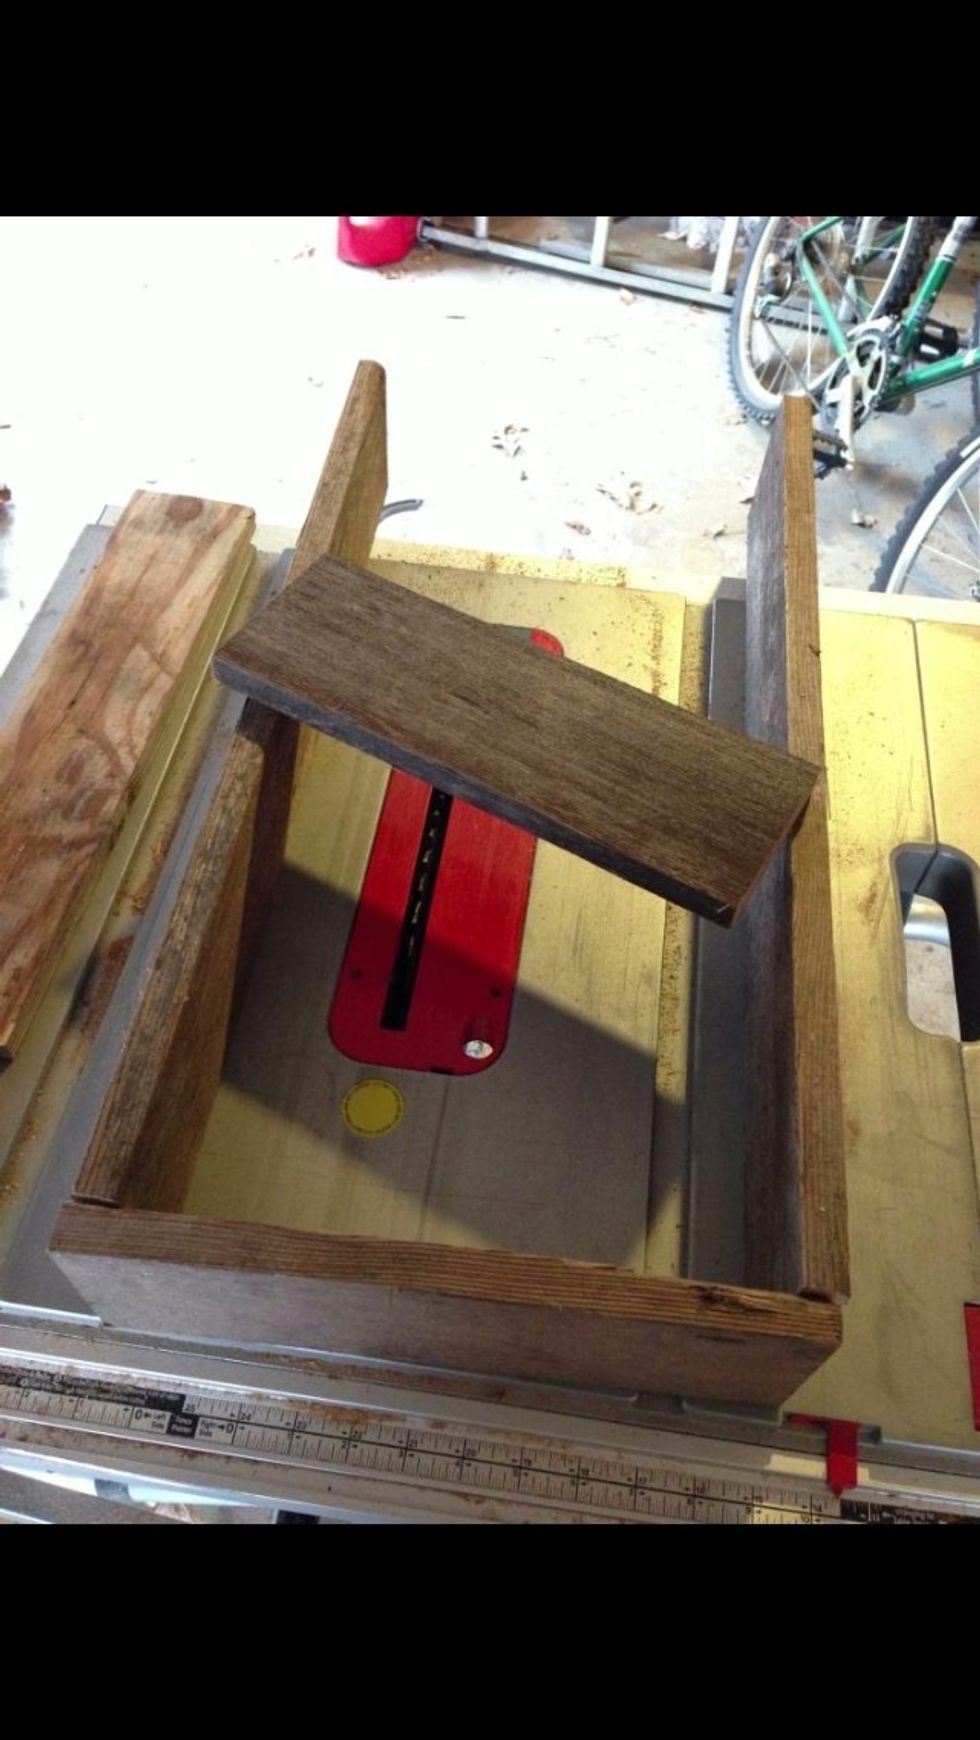
Build your frame. This frame is 1 foot high by 2 feet long. I used older "barn wood" to give it that "outdoors" appearance. Use screws to hold it together.
You'll need to go find some trees. Find good strong limbs that have sections that can be used as hooks.

Once your frame is built and your branches are cut, you can start fitting the branches to your frame. If cut straight, the branches should be pretty easy to fit in.
Fasten the tops and bottoms with screws to keep them in place. On this project, I didn't try to hide the screws. I decided to keep with the "rough outdoors" look.
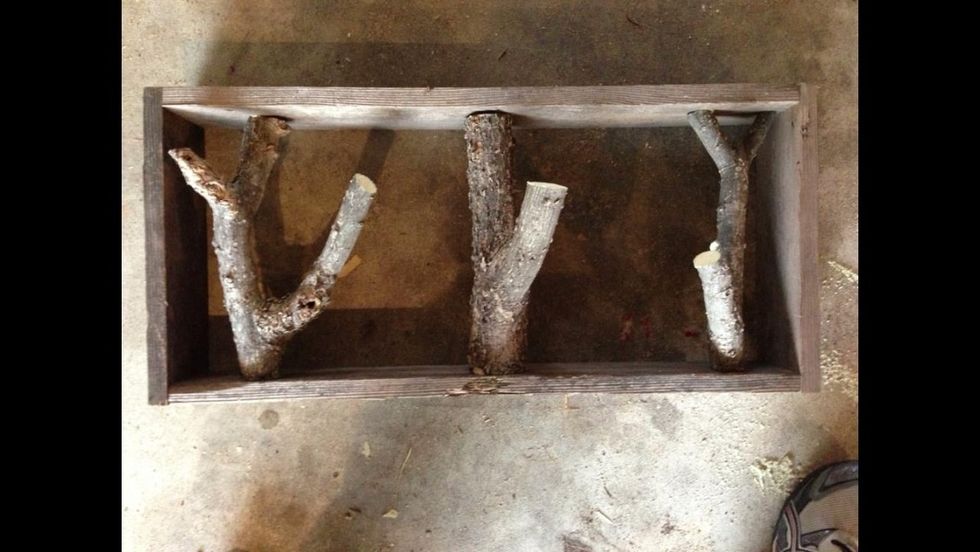
Continue putting branches in.
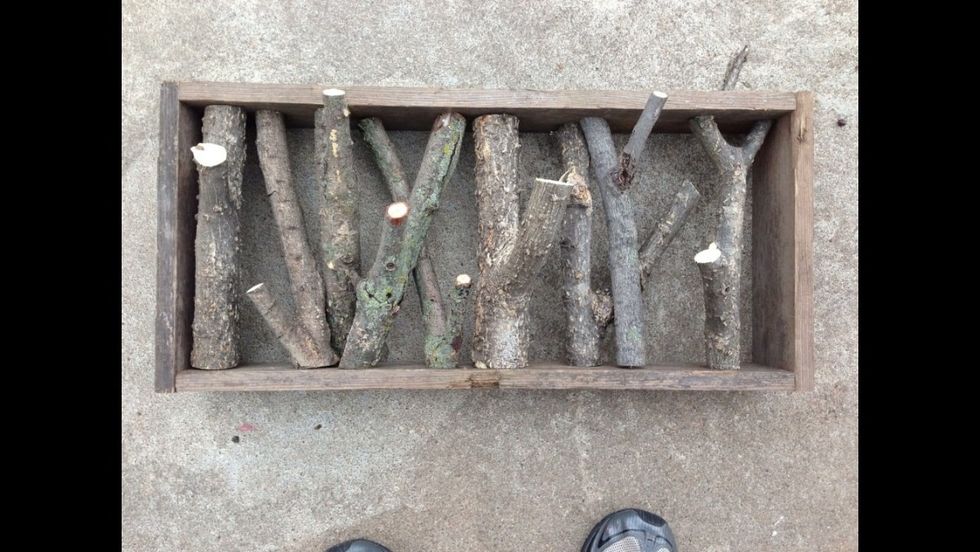
I decided to cut a few angle pieces to make it look fuller.
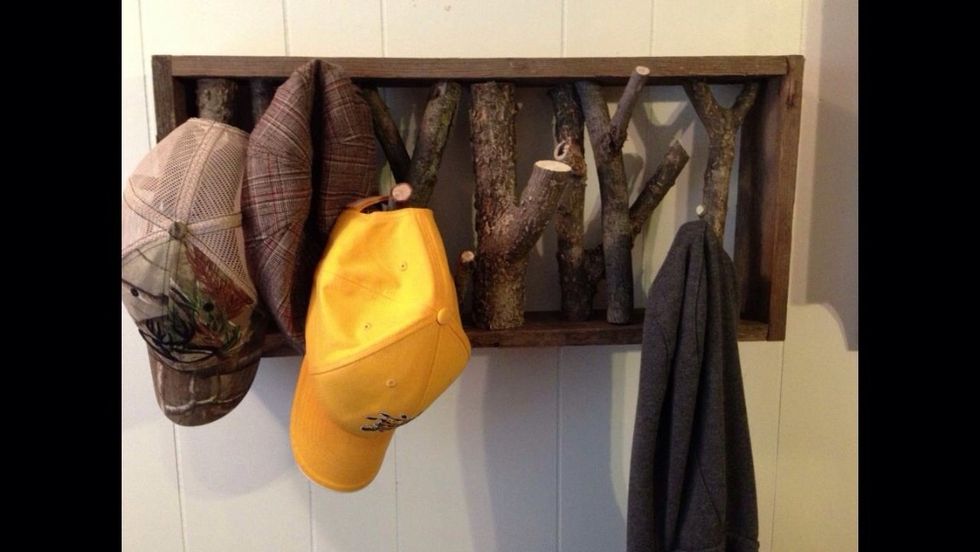
Now it's complete. Hang it on your wall. I drilled holes in the back then put screws in the studs of the walls. Then I placed it on the wall.
1x2 may be a bit small for a coat rack so you may want to go wider, not necessarily taller. It's a fun project that is easy, cheap, and would make a great gift for someone.