The Conversation (0)
Sign Up
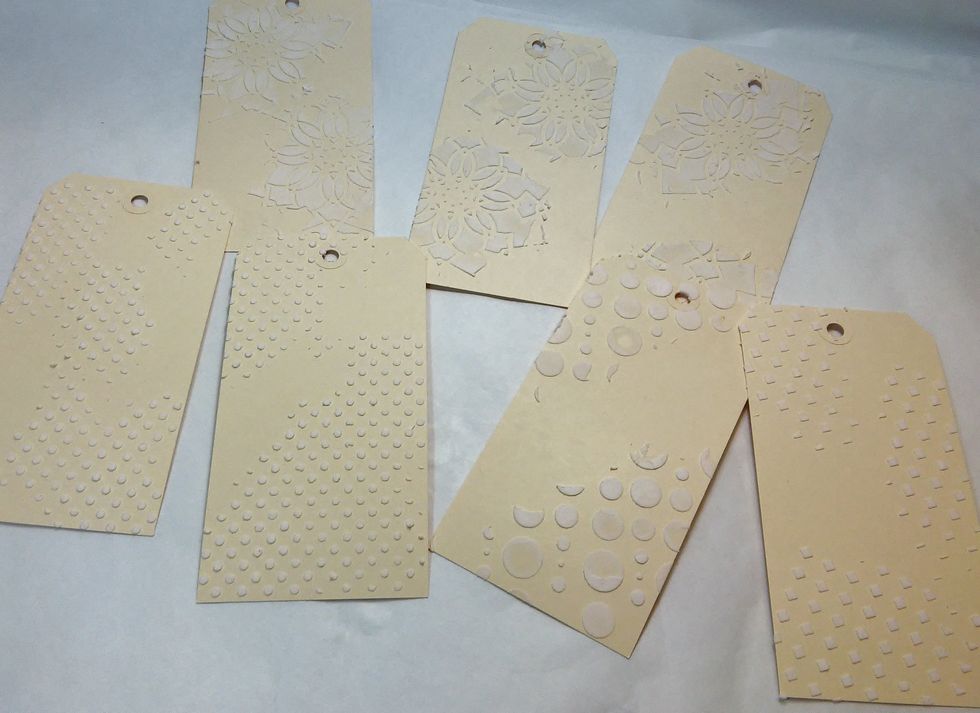
I started out with some cardstock tags, and added texture paste to each one with a few Art Anthology Stencils.
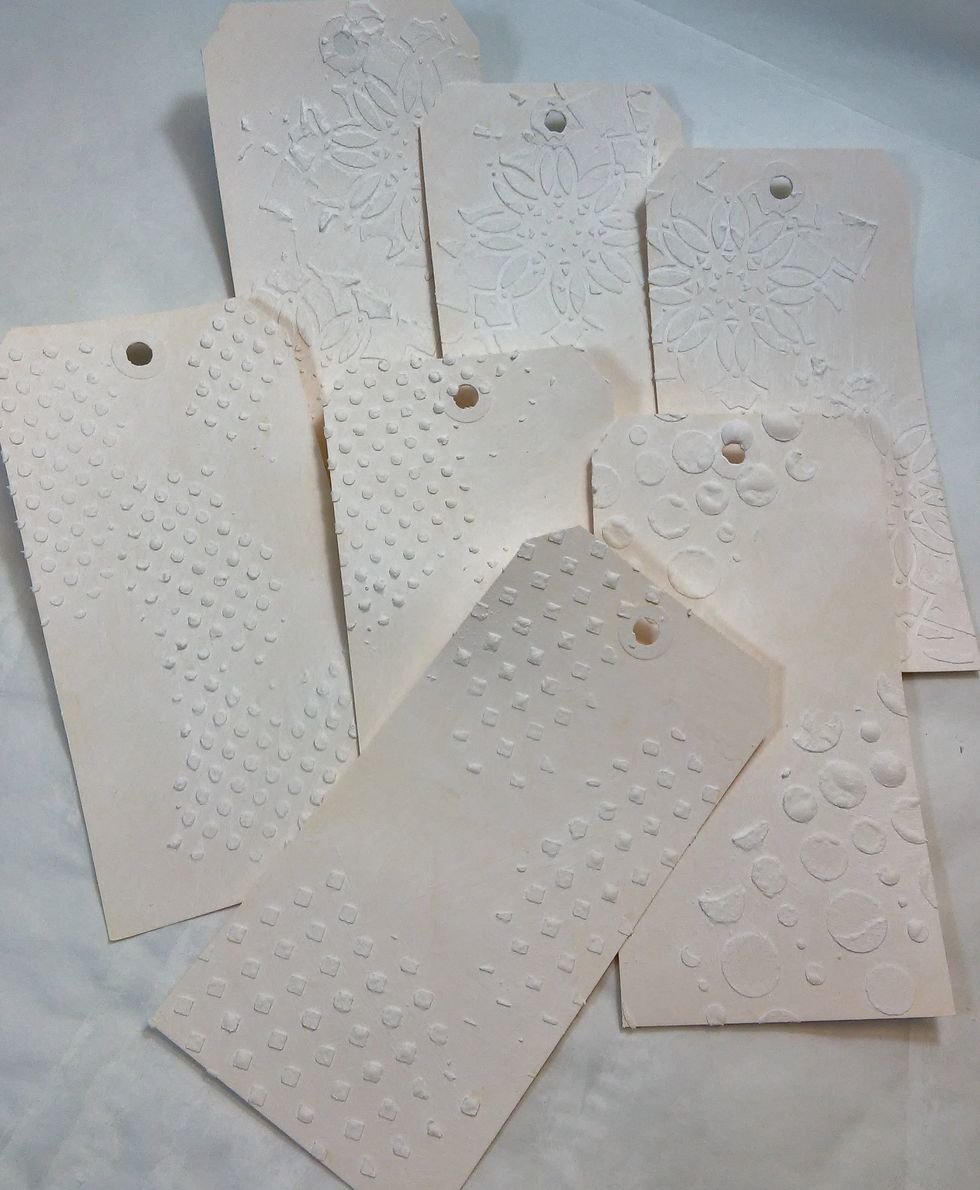
Next, a quick coat of gesso over the front of each one.
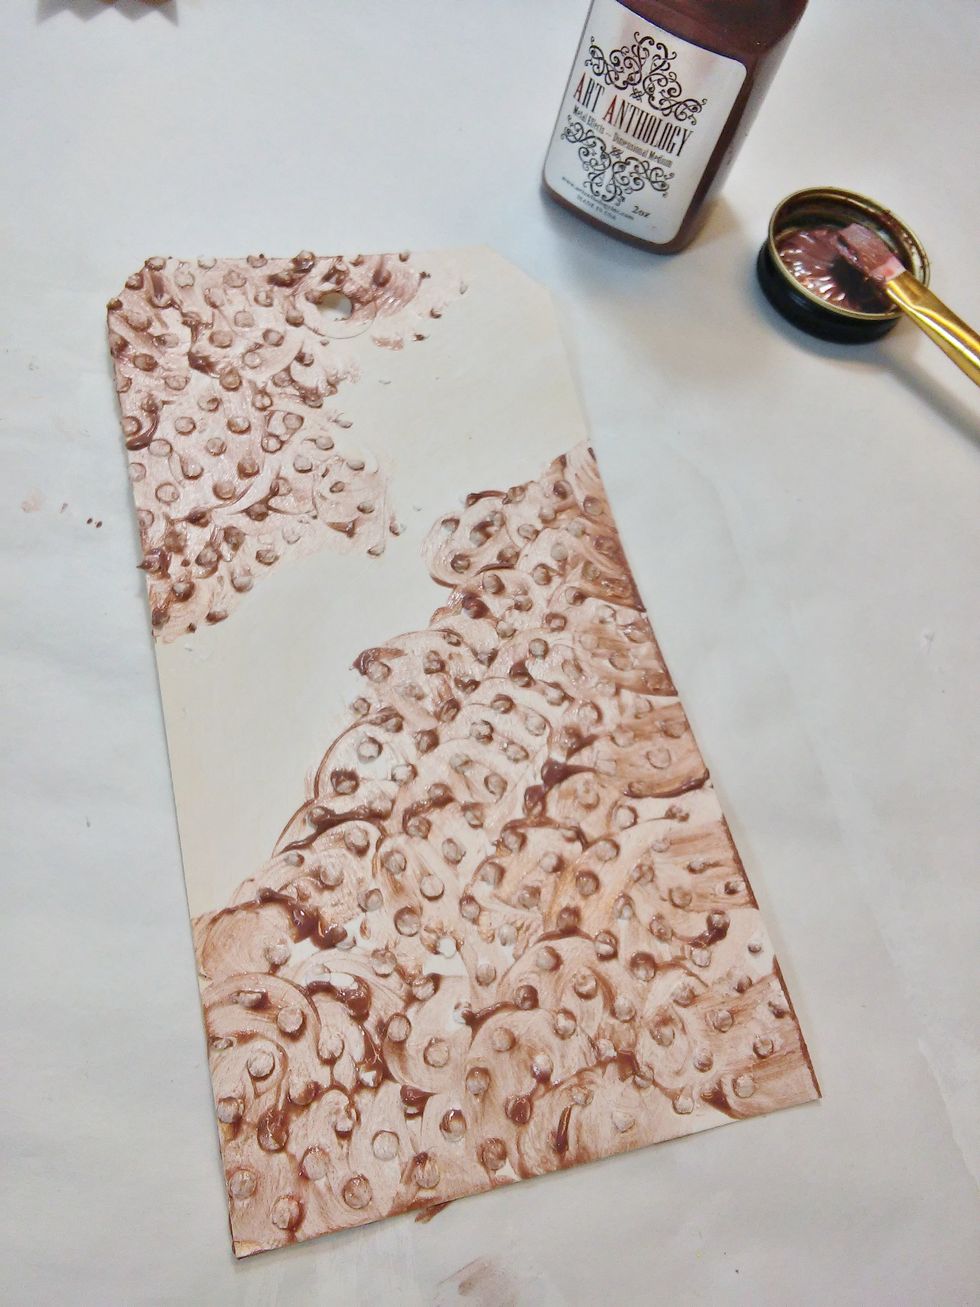
Now for color! I used my Metal Effects Copper Paint and paintbrush to dab paint over my textures areas. Don't let it dry!
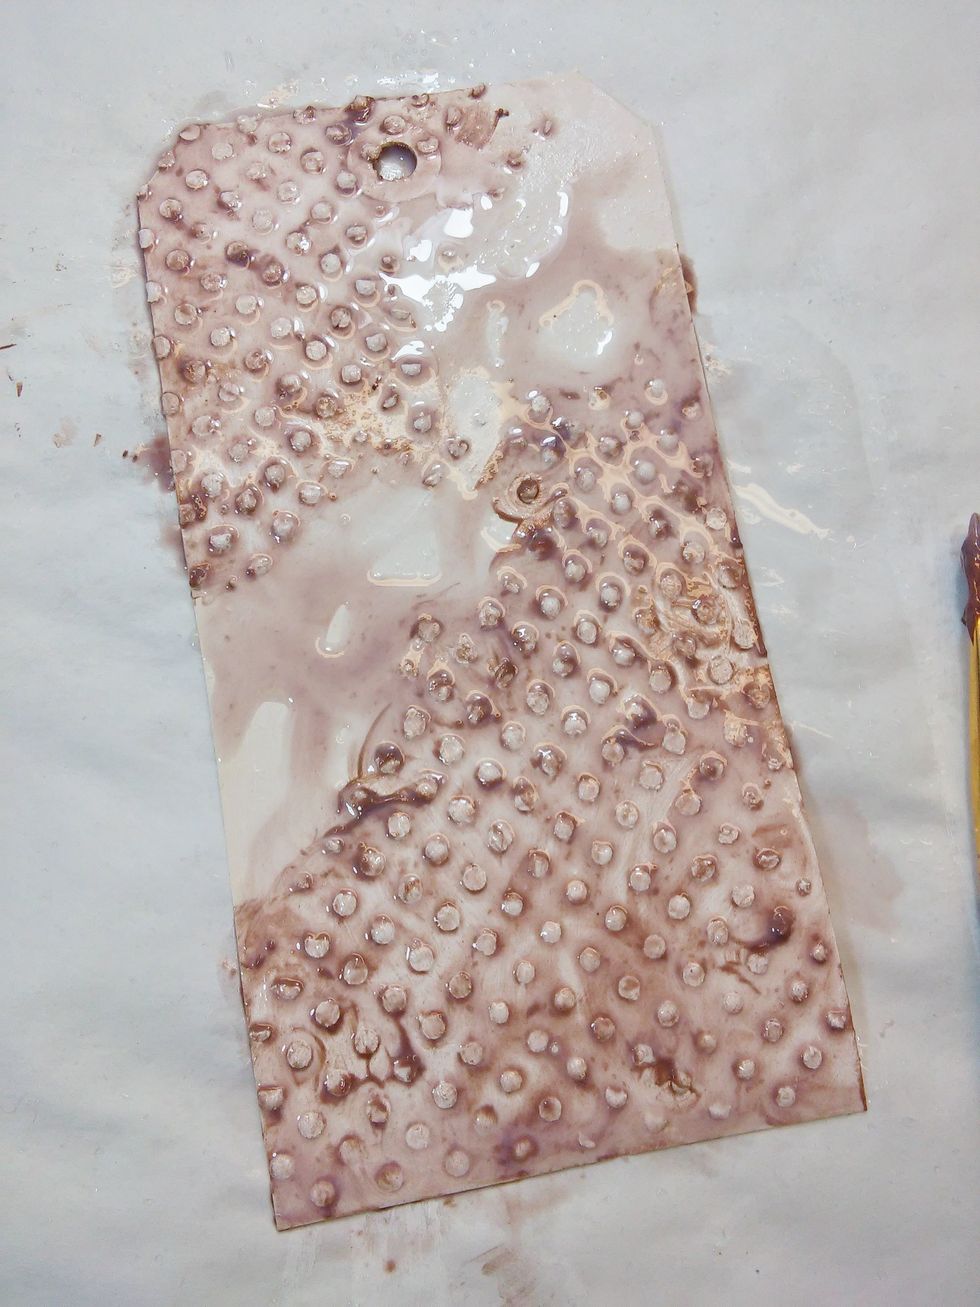
Now a few spritzes of water to gently settle some of the paint, and let some watercolor the rest of the tag. You can tilt the the tag to let some excess water run off. The dry it with you heat tool.

Love it! That Copper Metal Effects paint has a beautiful shimmer to it!
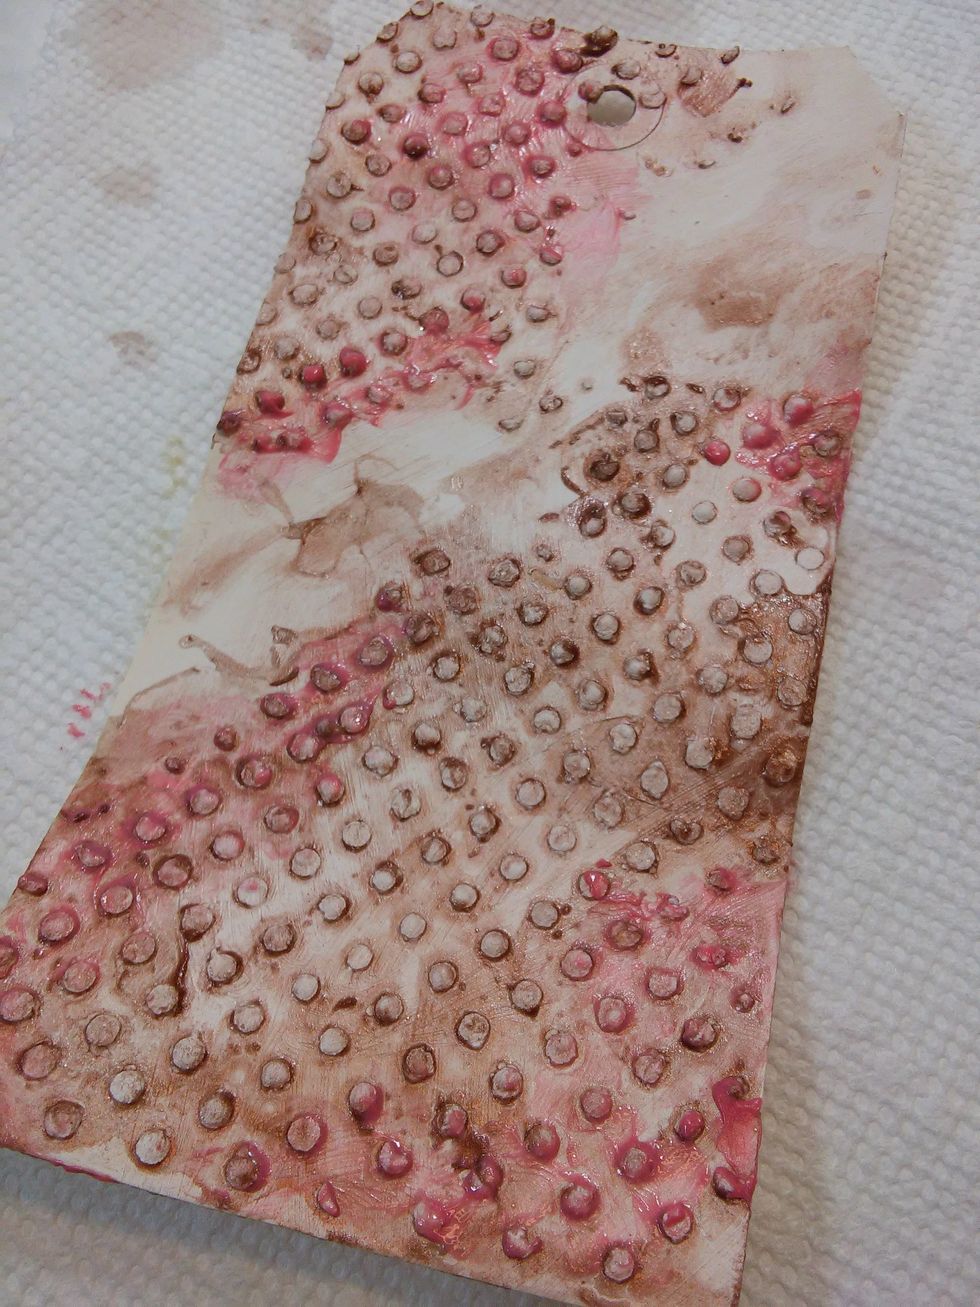
Next I choose Some Velver Persimmon Dimensional Paint for my accent color. I just dabbed a few spots around with my finger to create some interest. Then dried it again with my heat tool.
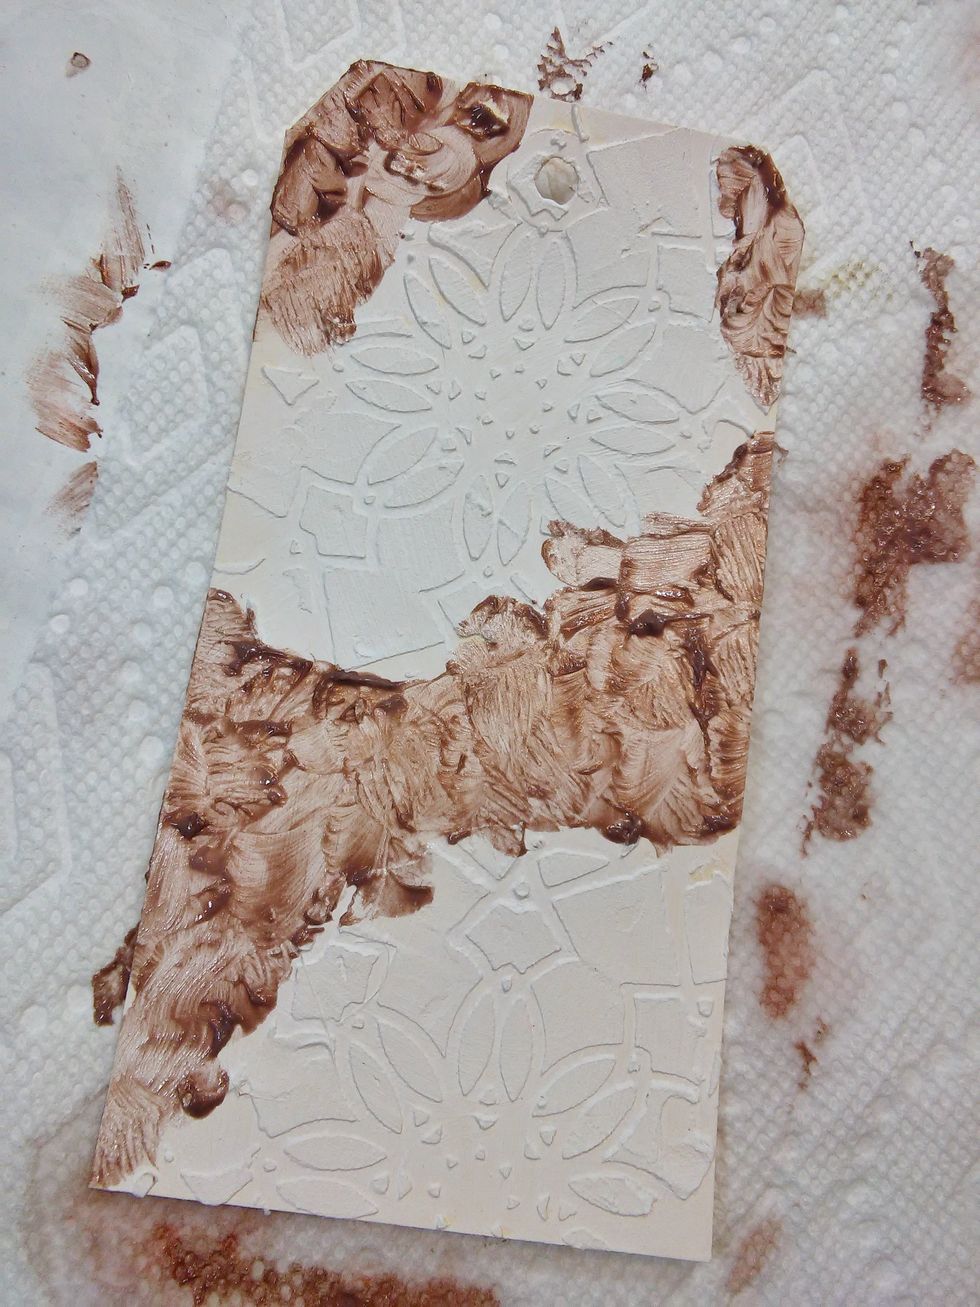
For the tags I used the Kaleidoscope Stencil on, I revered the technique and put the Copper on the tag where there was no texture.
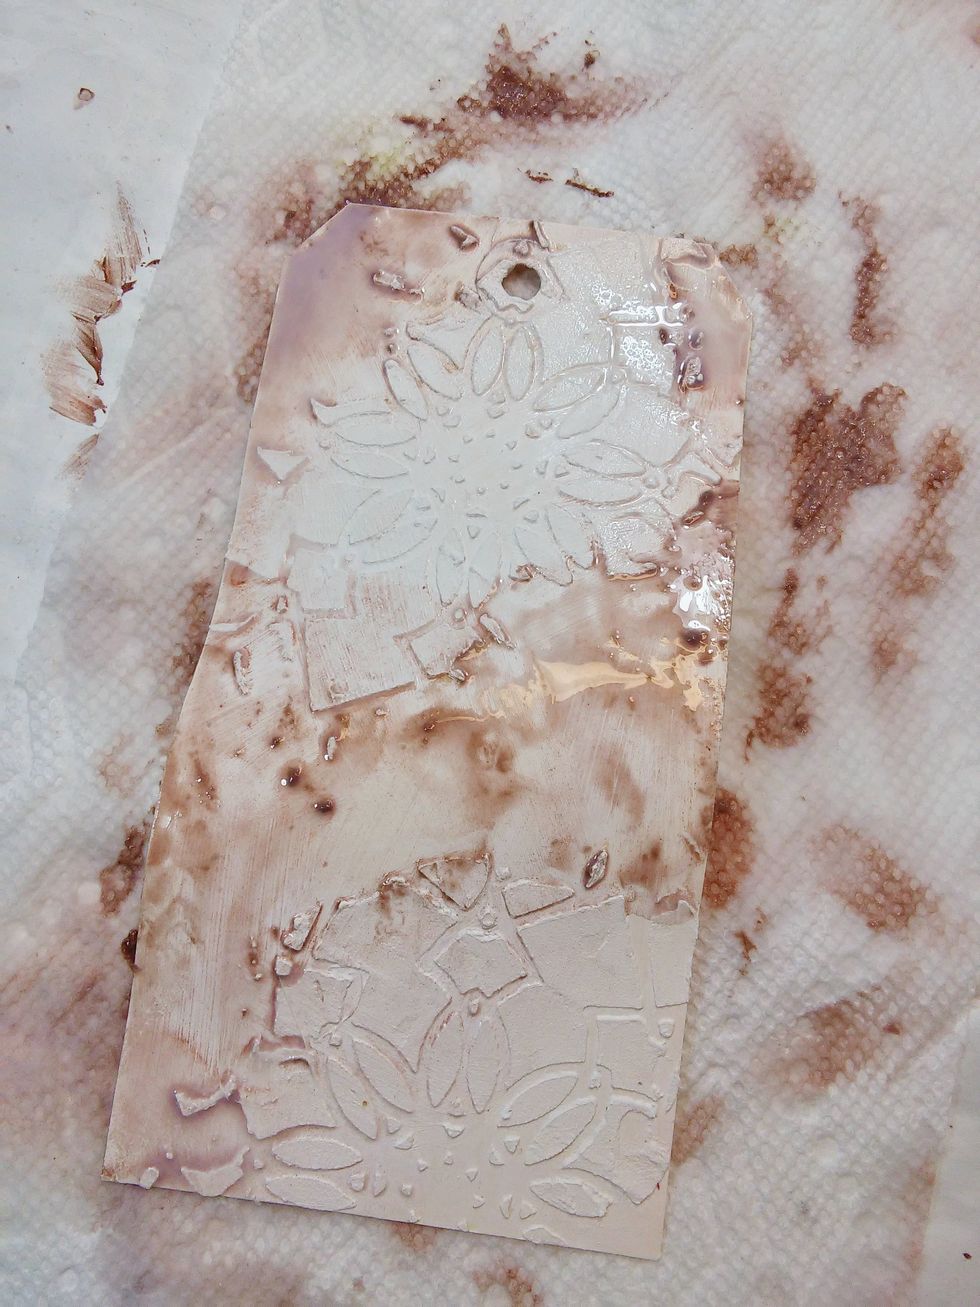
Again, don't let it dry, but add a few sprays of water. Drain the excess and dry with a heat tool.
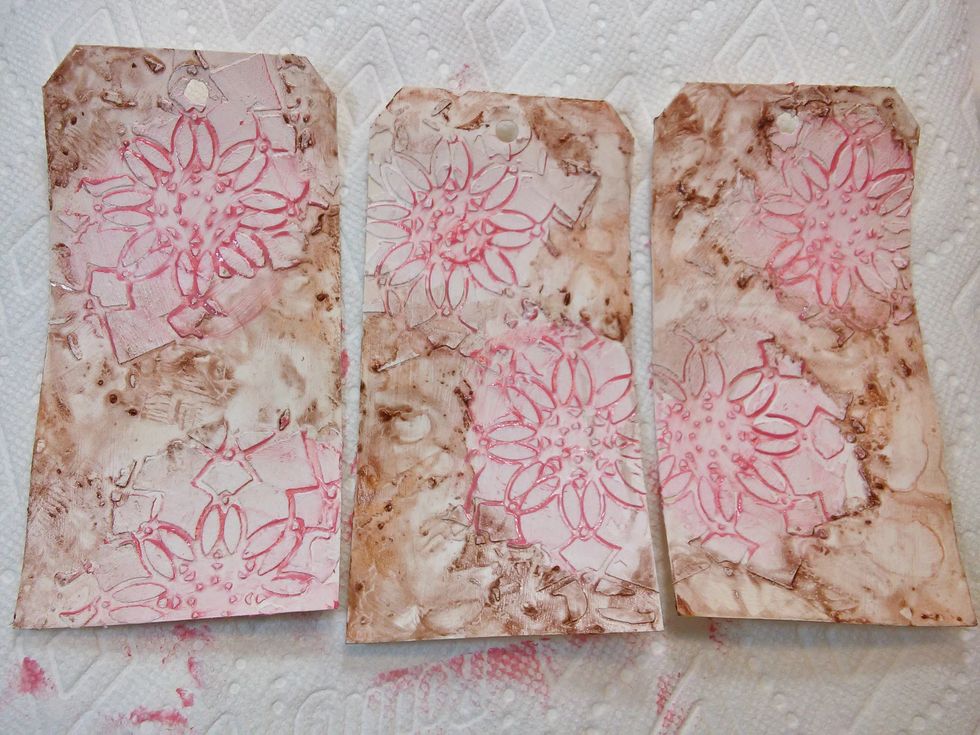
This time I used my finger to dab the Persimmon paint in the florals and wiped with a circular motion until the recesses were filled with paint. So pretty :)
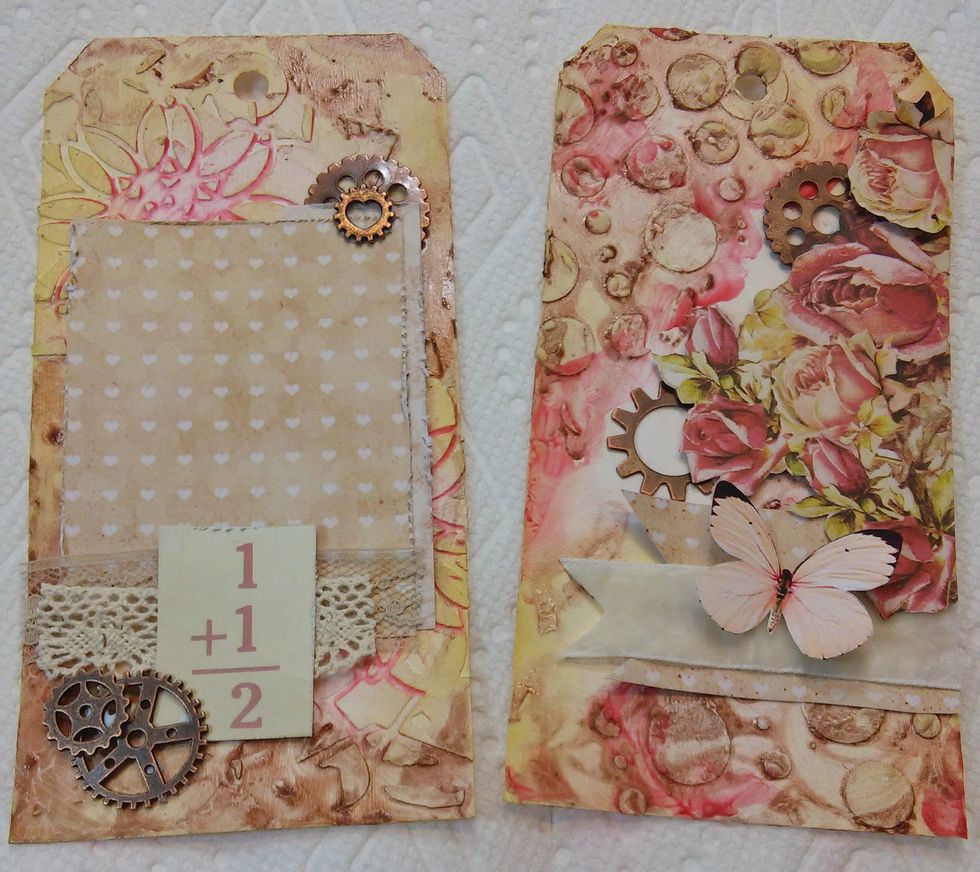
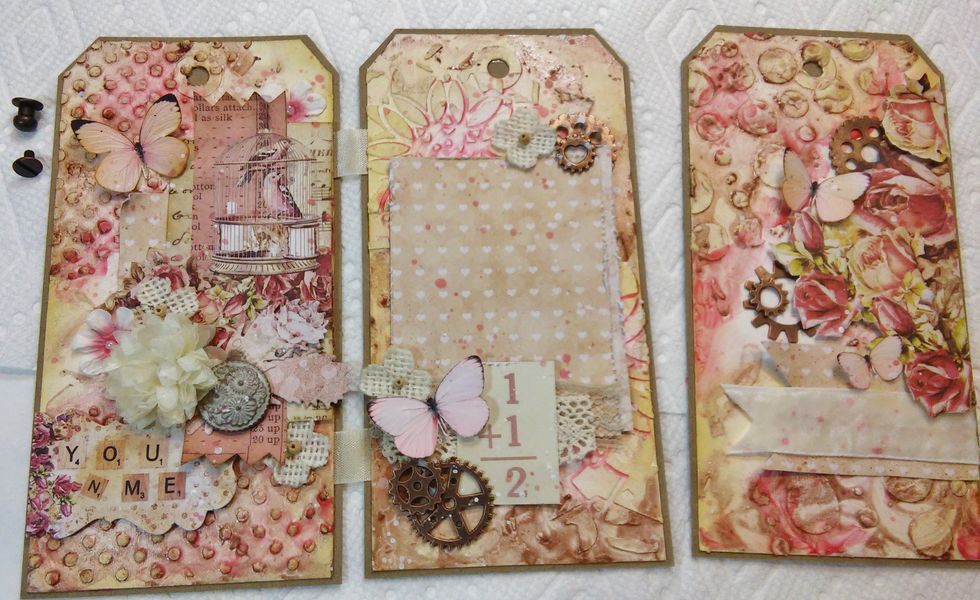
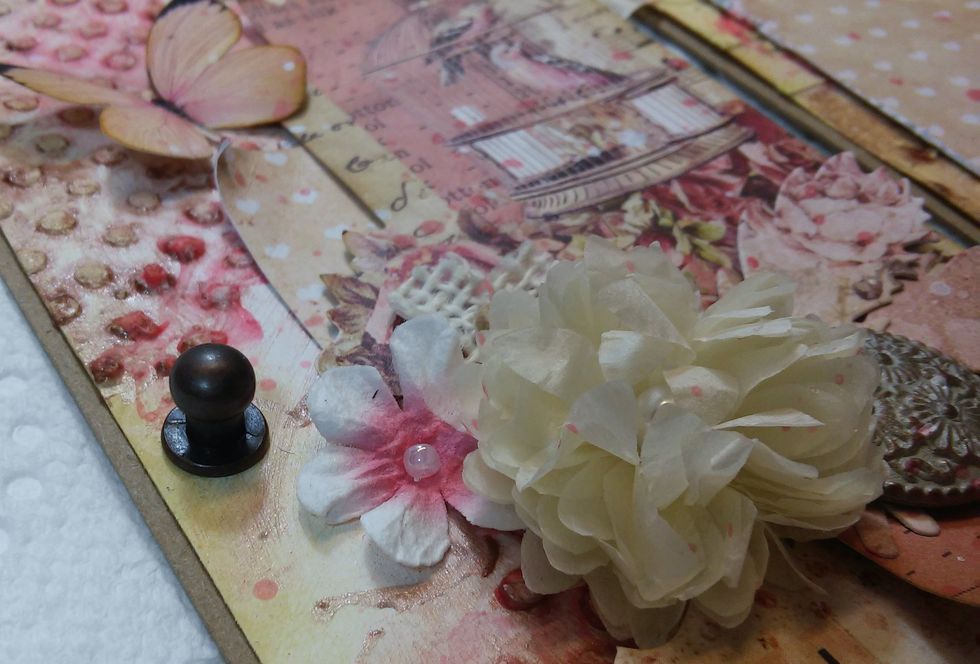
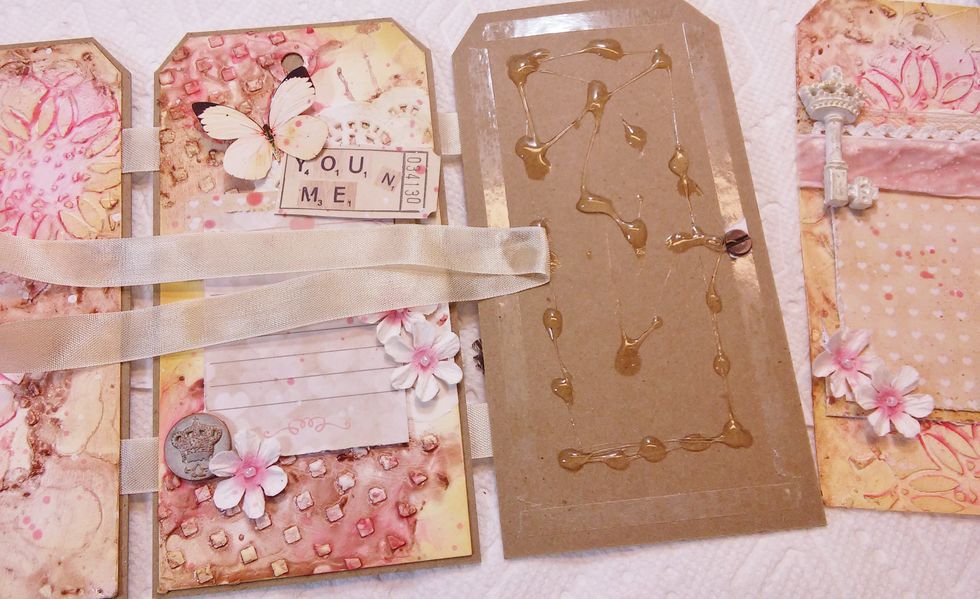
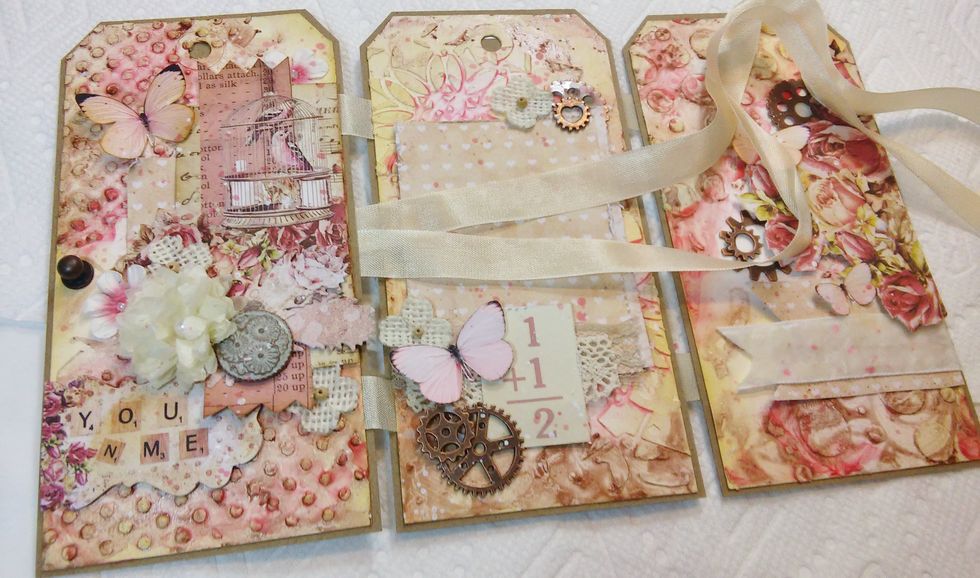
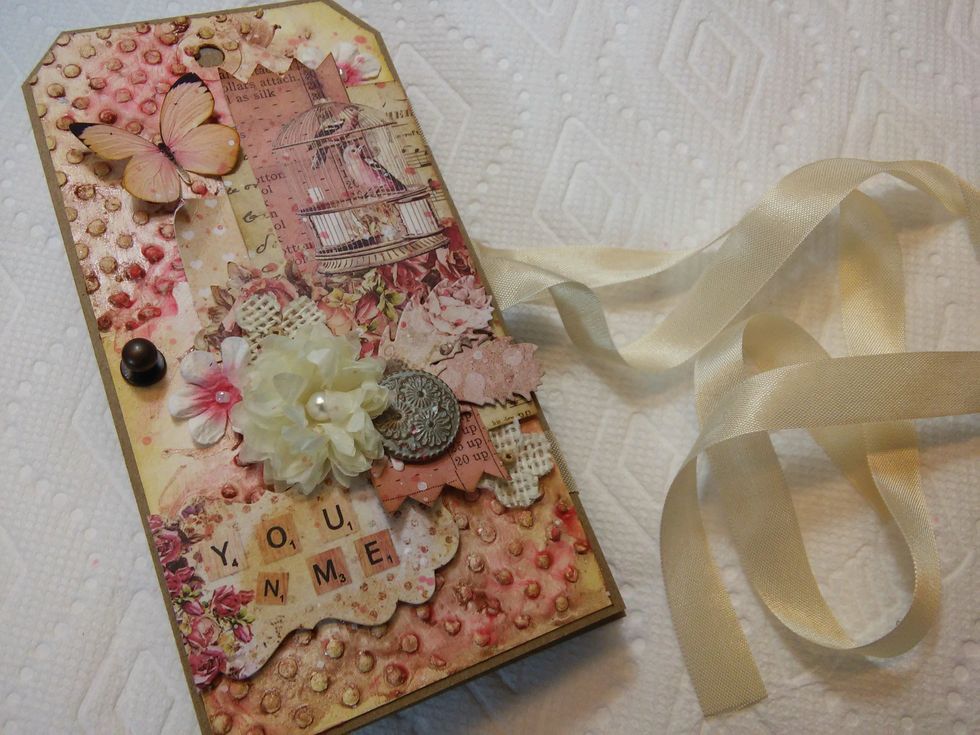
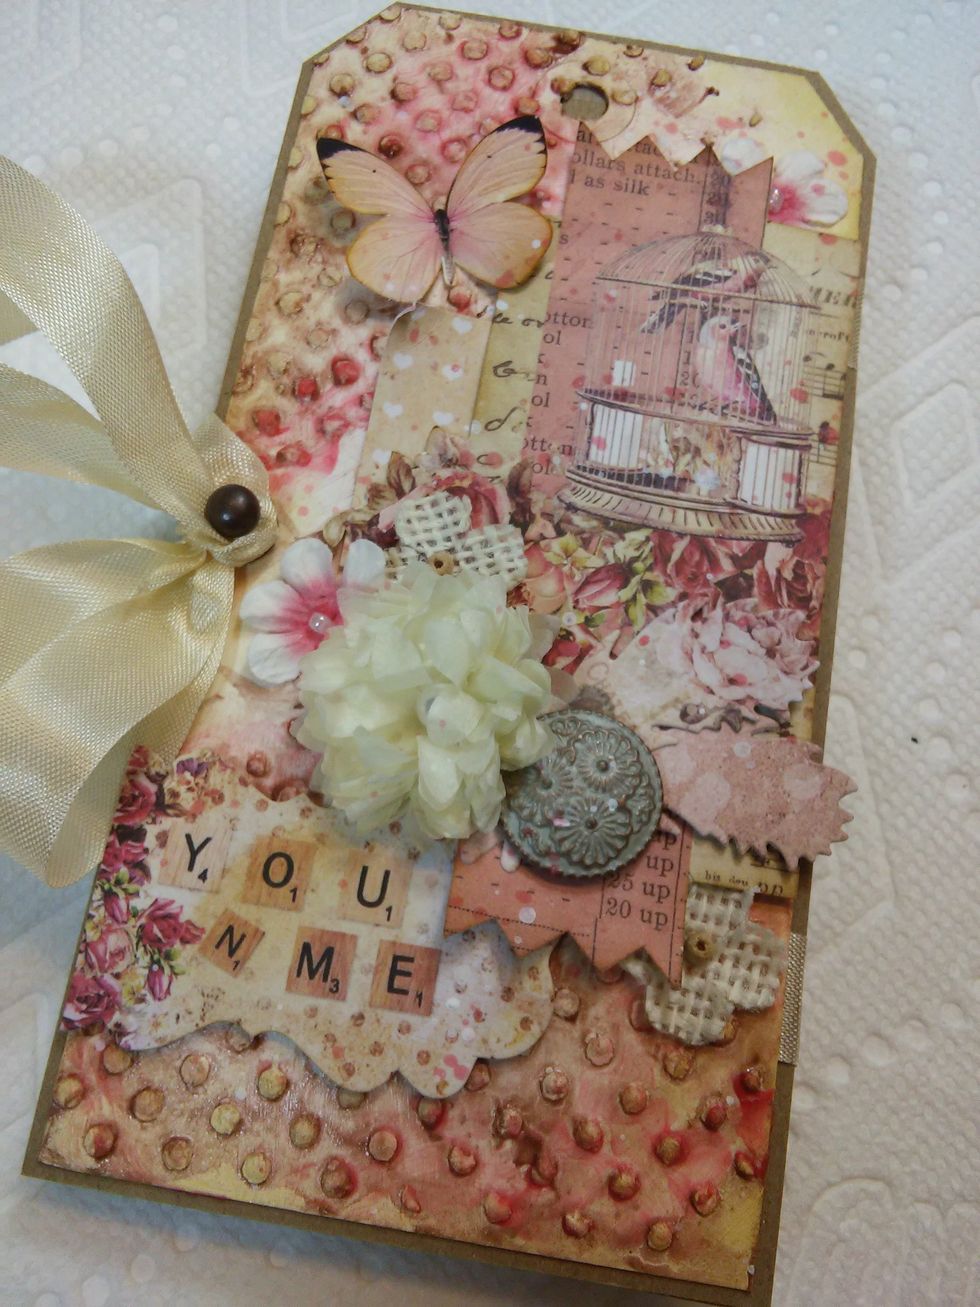
Now I'll add some embellishments and photo mats to decorate the pages!
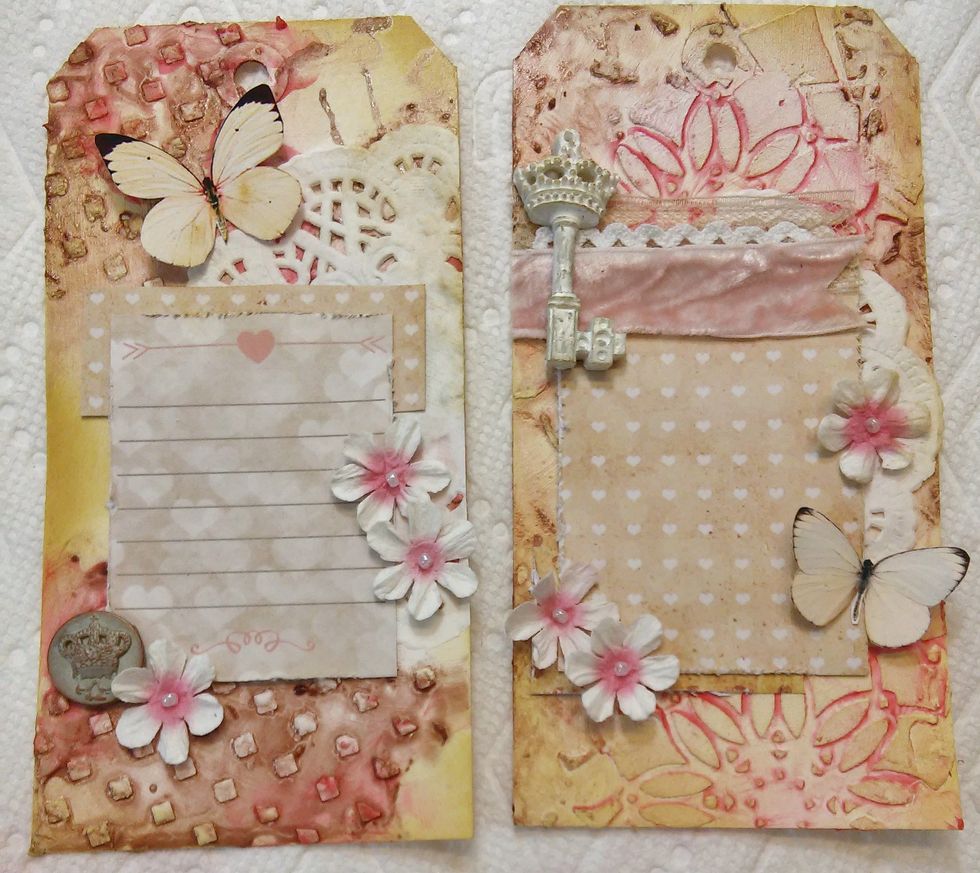
I try to add things that don't hide too much of the beautiful colors and textures.

This is the cover tag and the back tag. You could still embellish the back page, too!
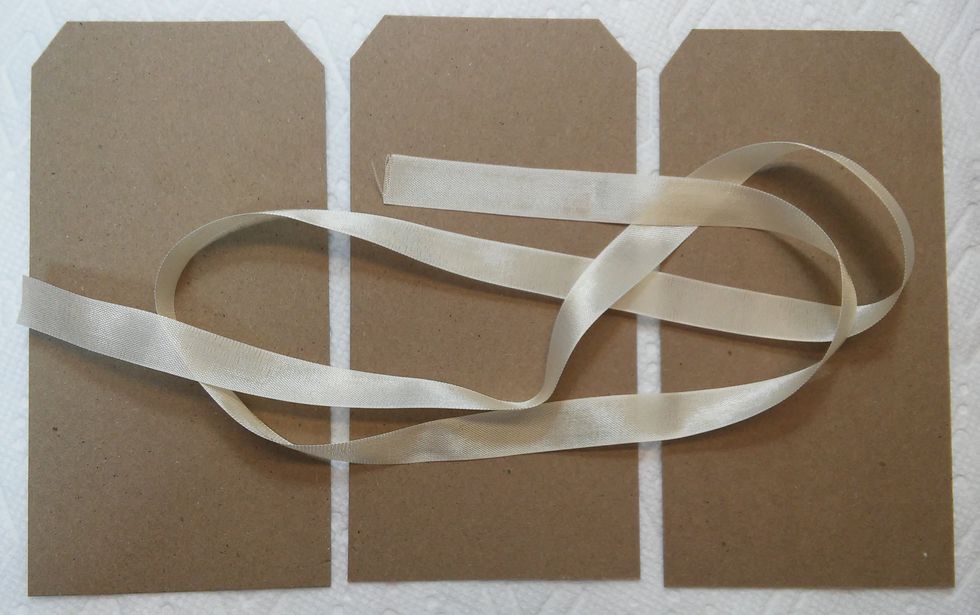
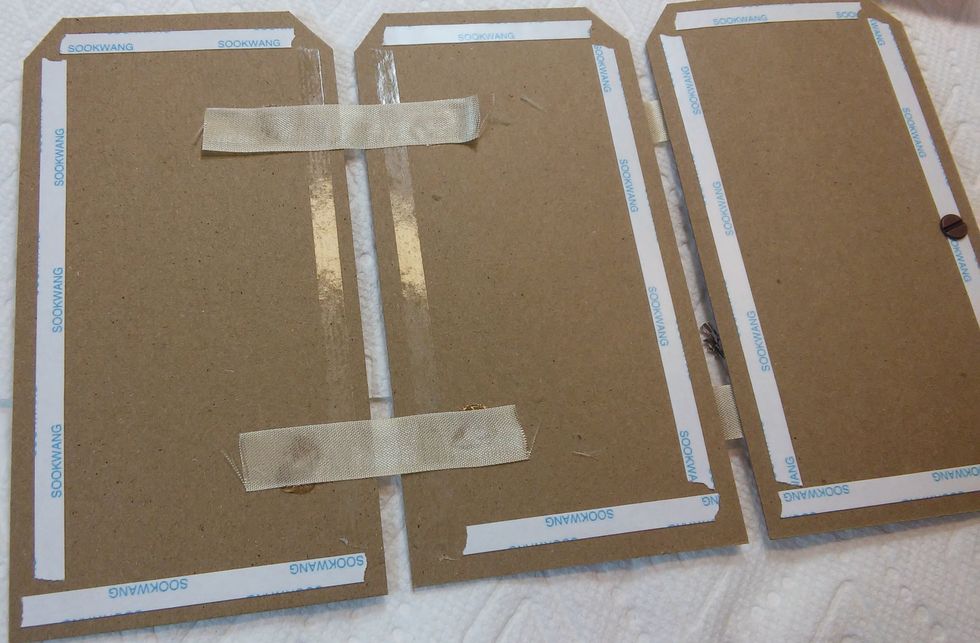
I cut some chipboard to base my tags on for pages. You'll need some ribbon too.

First I'm going to flick some watered down paint and white gesso sporadically on the tags, for even a little more interest! :)
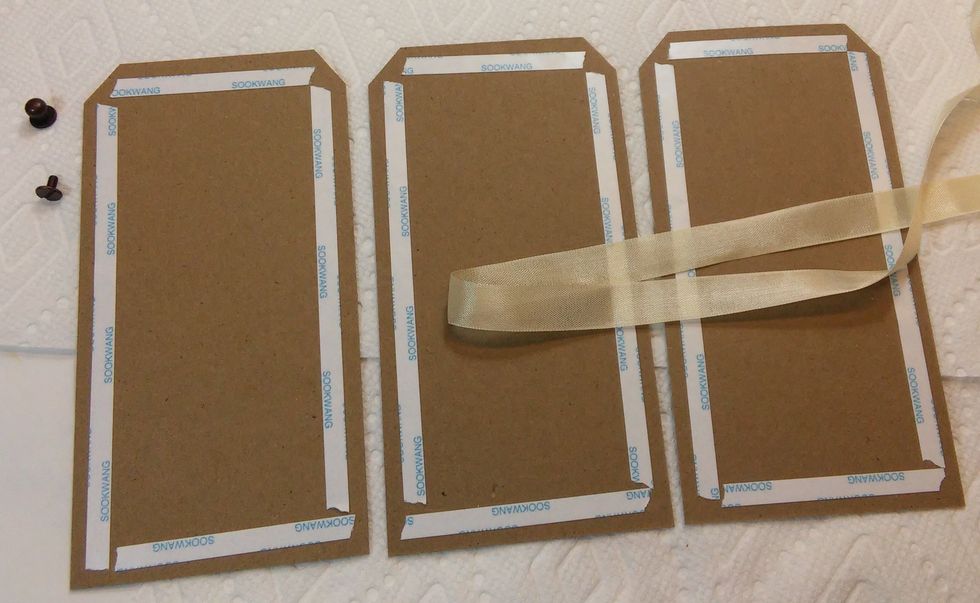
Cardstock tags do not fair the best with all that paint and water, so I like to use A nice sticky double sided tape to stick the outer edges of the tags down. I'll use Fabritac glue for the inside.
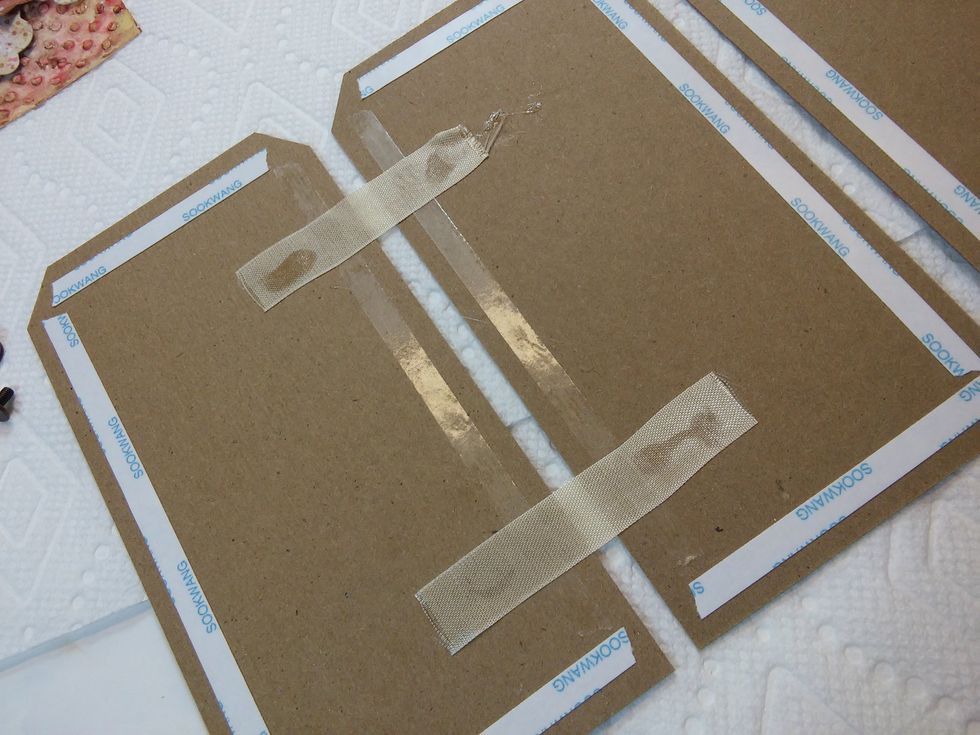
Here I've used small pieces of ribbon as hinges. Since my album will be accordion shaped, I'll just be attaching it between the first two tags.
Now I'll attach each tag to it's base on these sides. Remember, if you use tape you have to be sure where you are putting down the tag...not much room for adjusting!
One more thing before I flip it over...I've punched a hole and put a little piece of metal hardware on he left side of the first tag. Later I'll use this to help close the album!
Flipped over, I'll do the same thing as I did for the front side. Make a couple ribbon hinges, add fabritac and the tags...
Hold up on the last one. We need to add our tying ribbon closure. A couple of feet in ribbon length is great. Fold it in half and stick it to left side of the last tag base, and put on the tag.
Here i just pulled the ribbon in between the tags to the front.
Once folded into an accordion, wrap the ribbon around the back, and come forward on the left side.
Use the little hardware knob to tie the ribbon around and you're all done!