The Conversation (0)
Sign Up
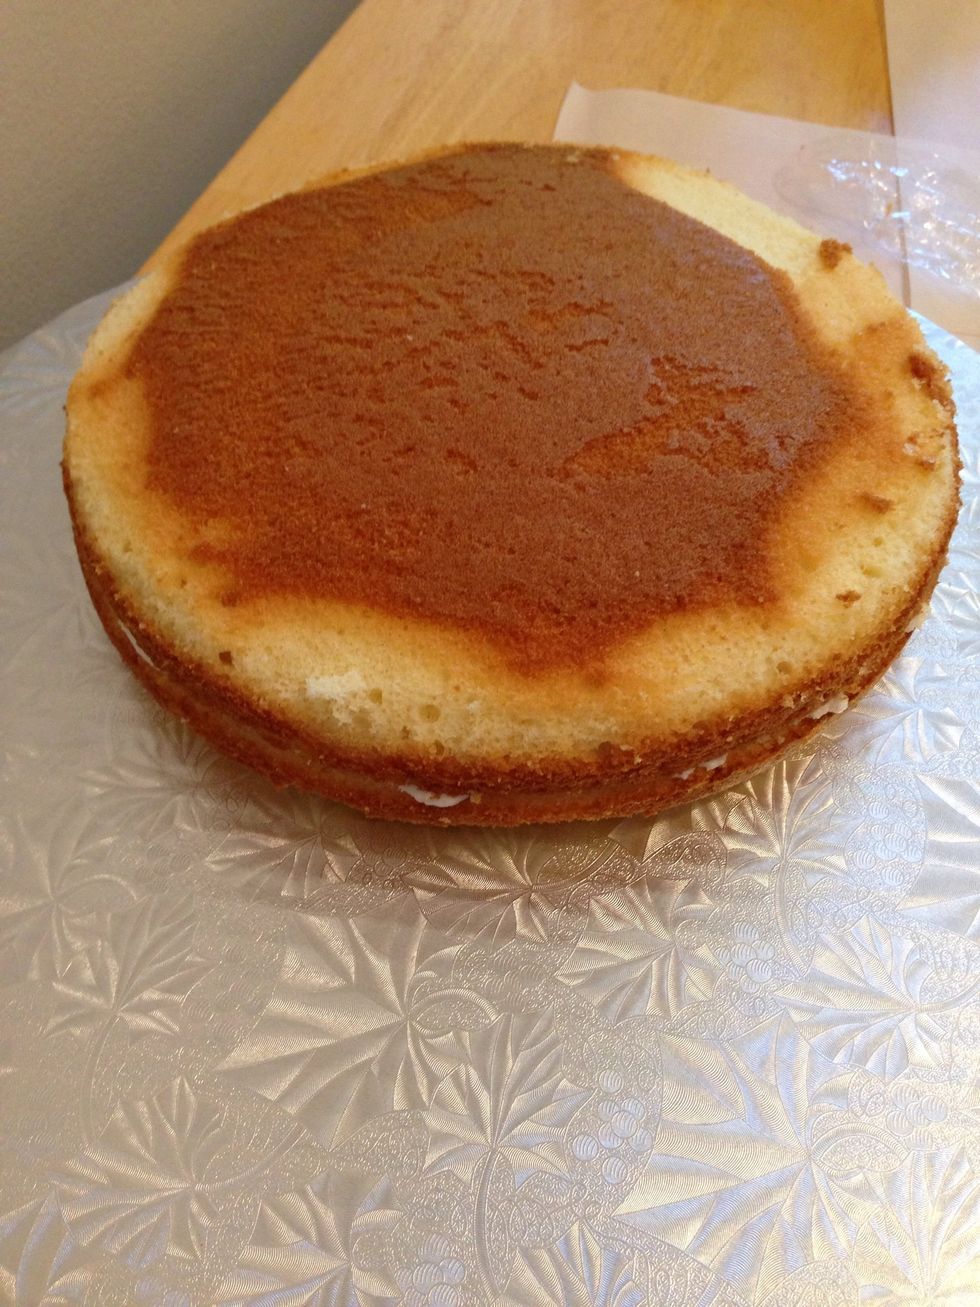
Tort, fill and round off the edges of your cakes.
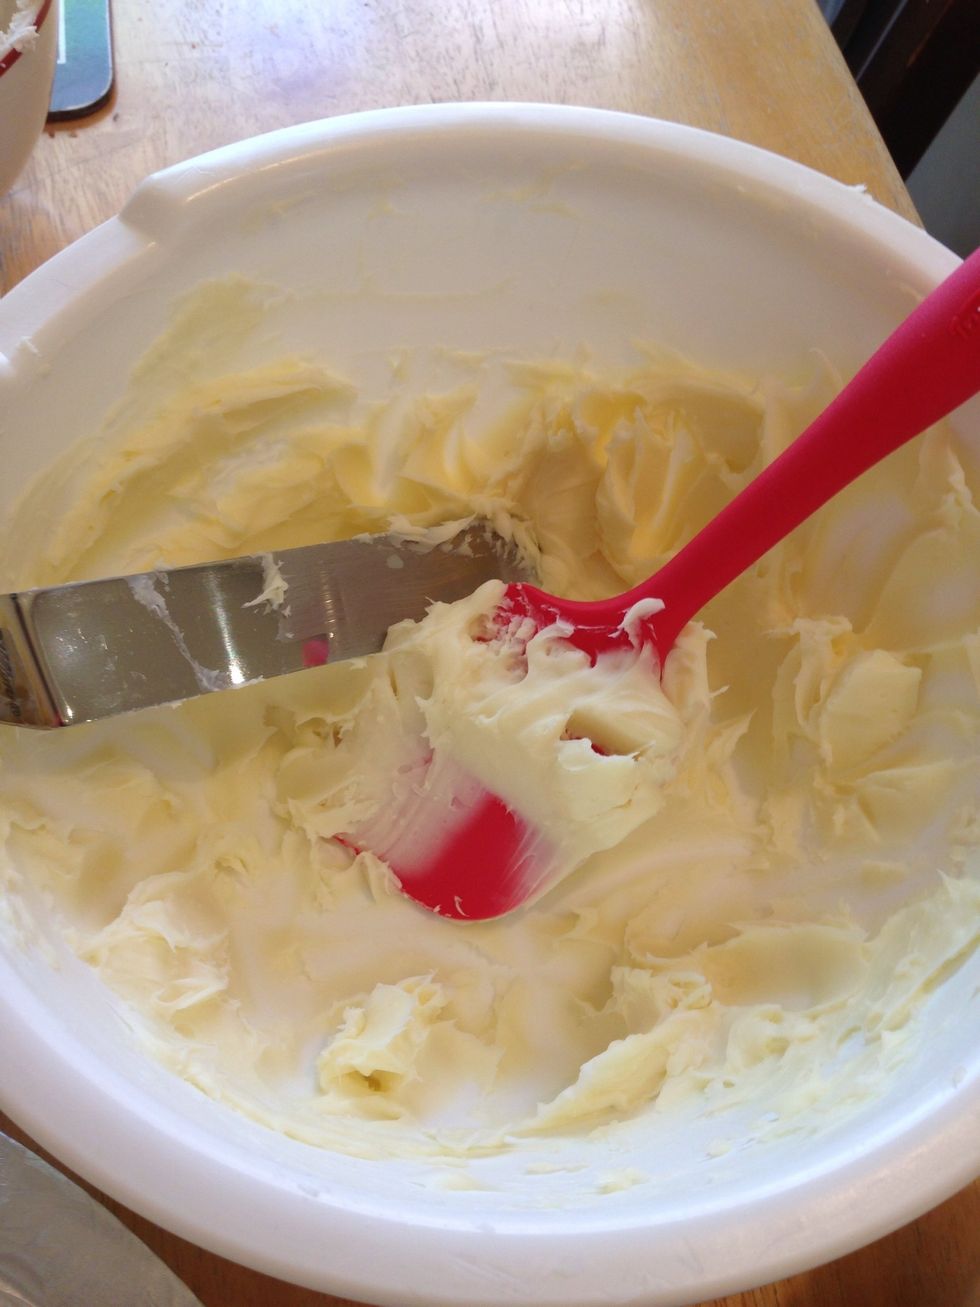
Coat with buttercream and/or ganache. I coated mine in buttercream, and then I decided that ganache might help keep everything together and smooth, so I tried it for the first time, and LOVE it!!
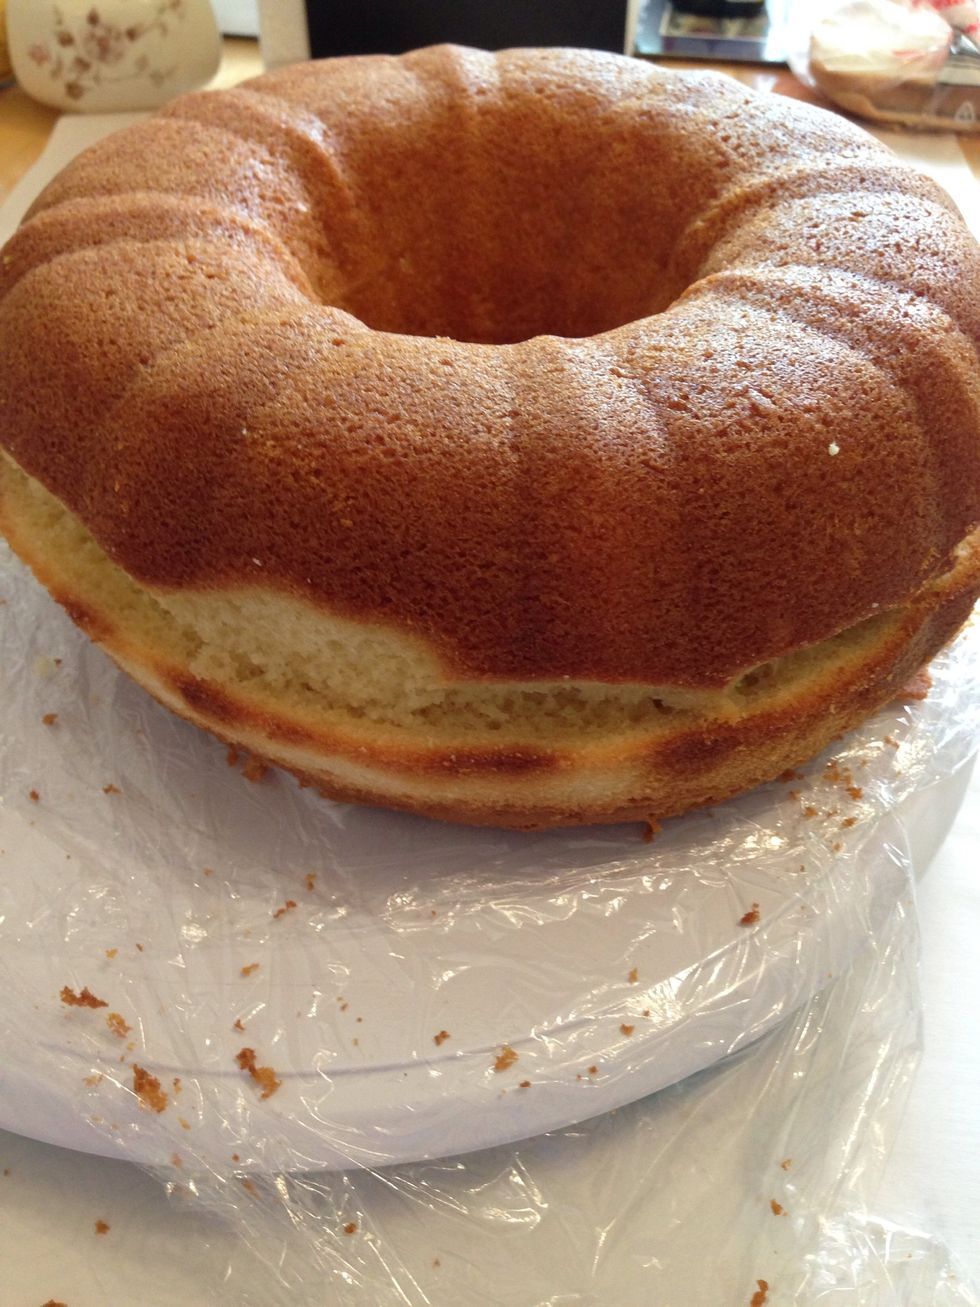
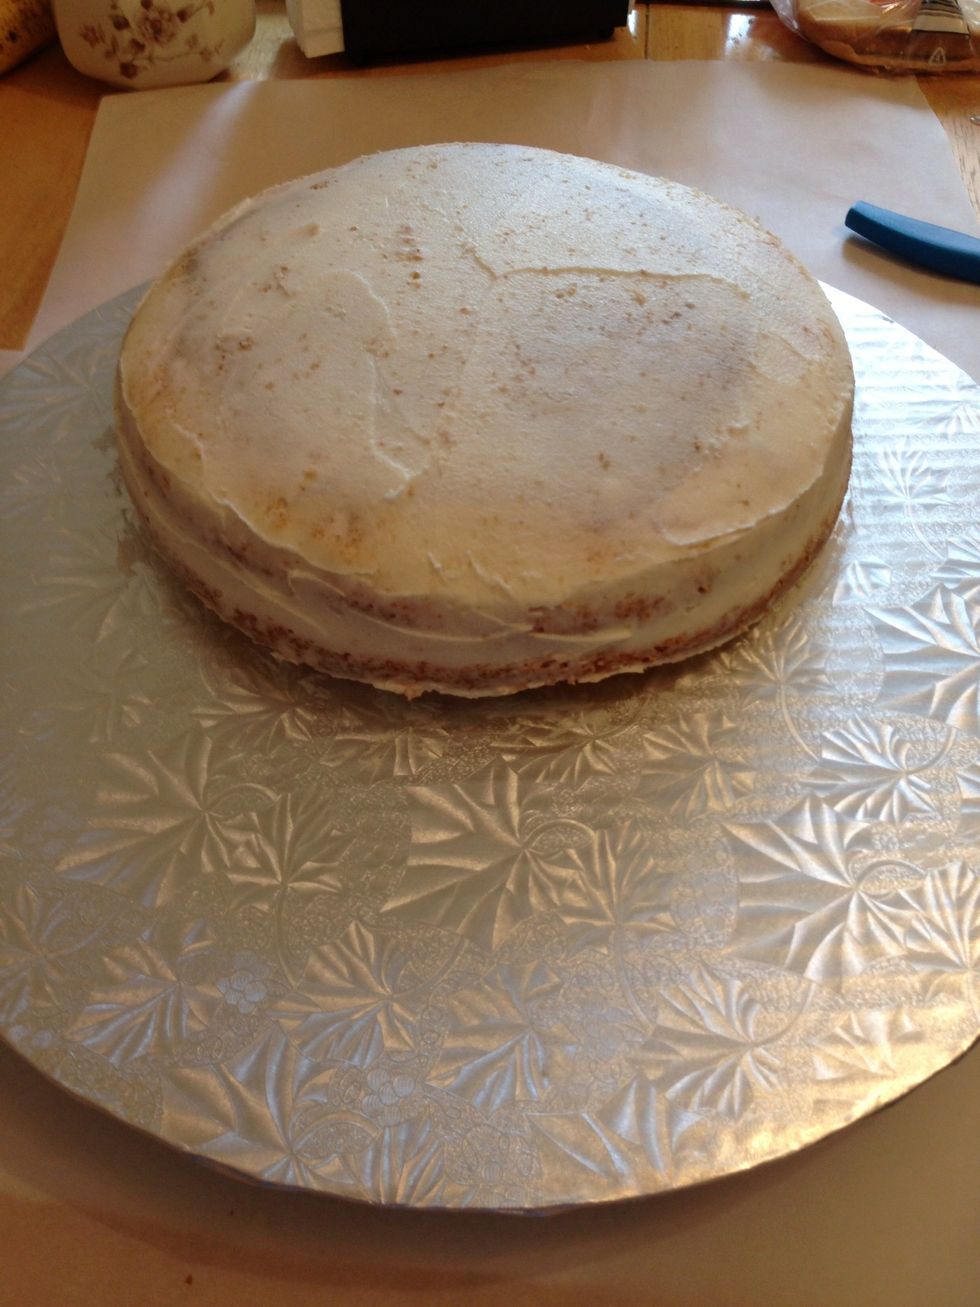
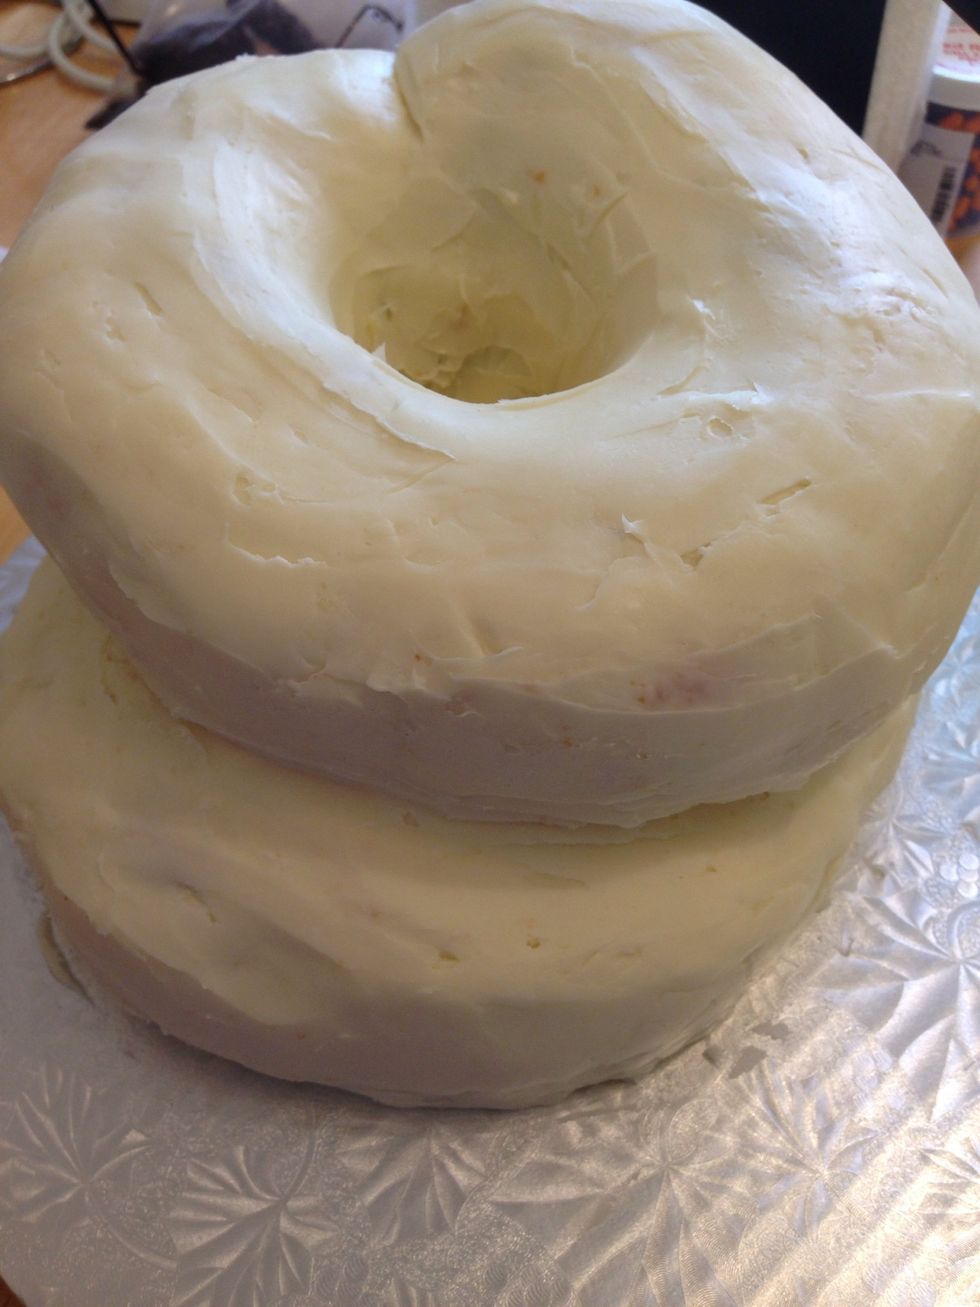
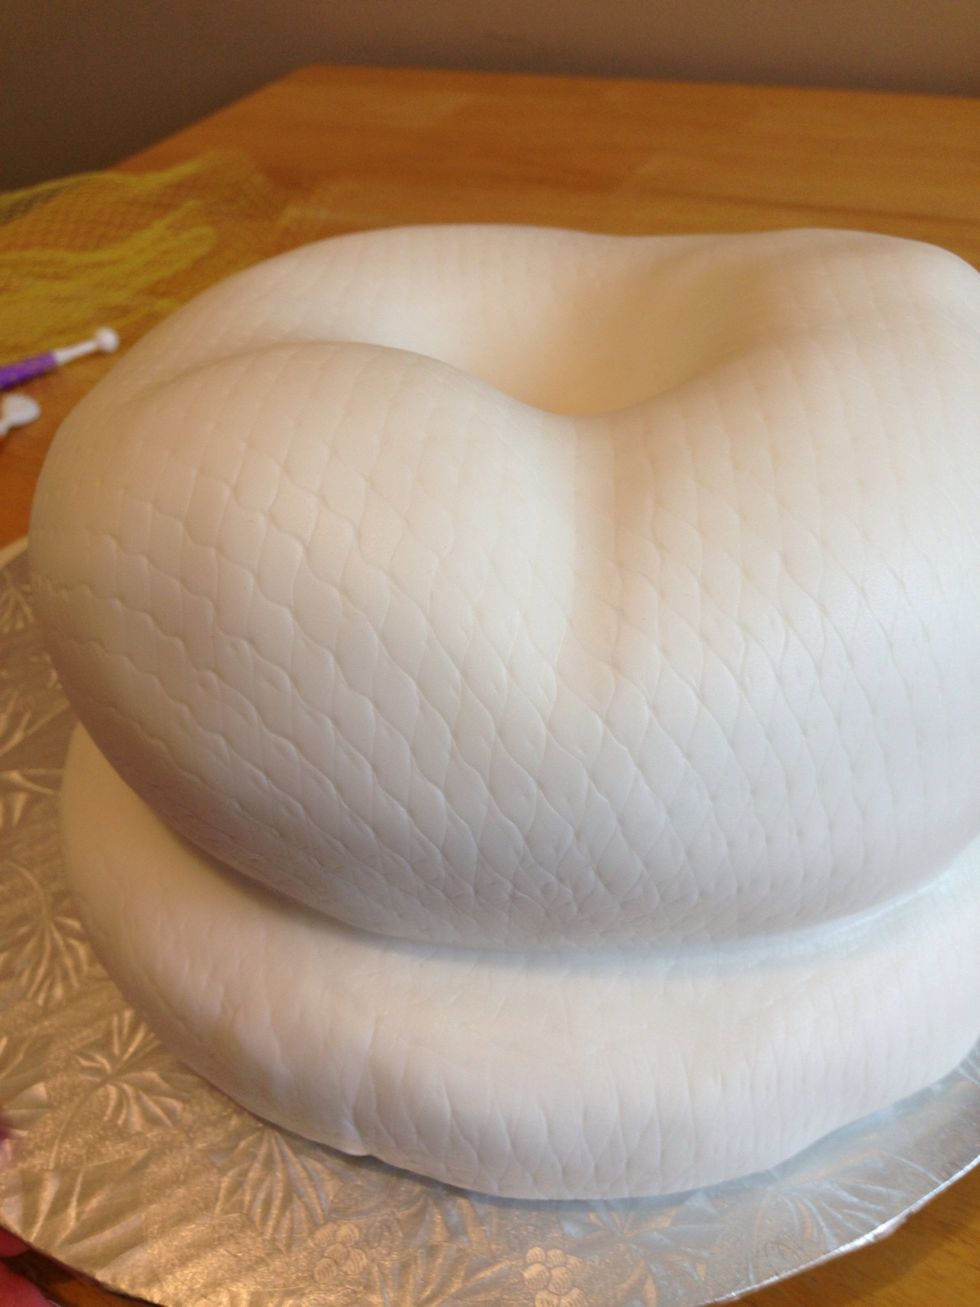
Add 2nd cake on top of first. I used the "fatter" bundt for two reasons: 1) the middle part of the snake is fuller than the front or end of the snake; 2) it had a nice hole in it for the snake's head.
Buttercream and/or ganache this cake after adding to the bottom cake. Some cakes I saw had the fat part at the bottom. It's really up to you. By the way, did I mention that I now love ganache?
This is white chocolate ganache. Depending on the colour you plan to make the snakeskin, you could use either white or darker chocolate. I was undecided so I opted to use white just in case!
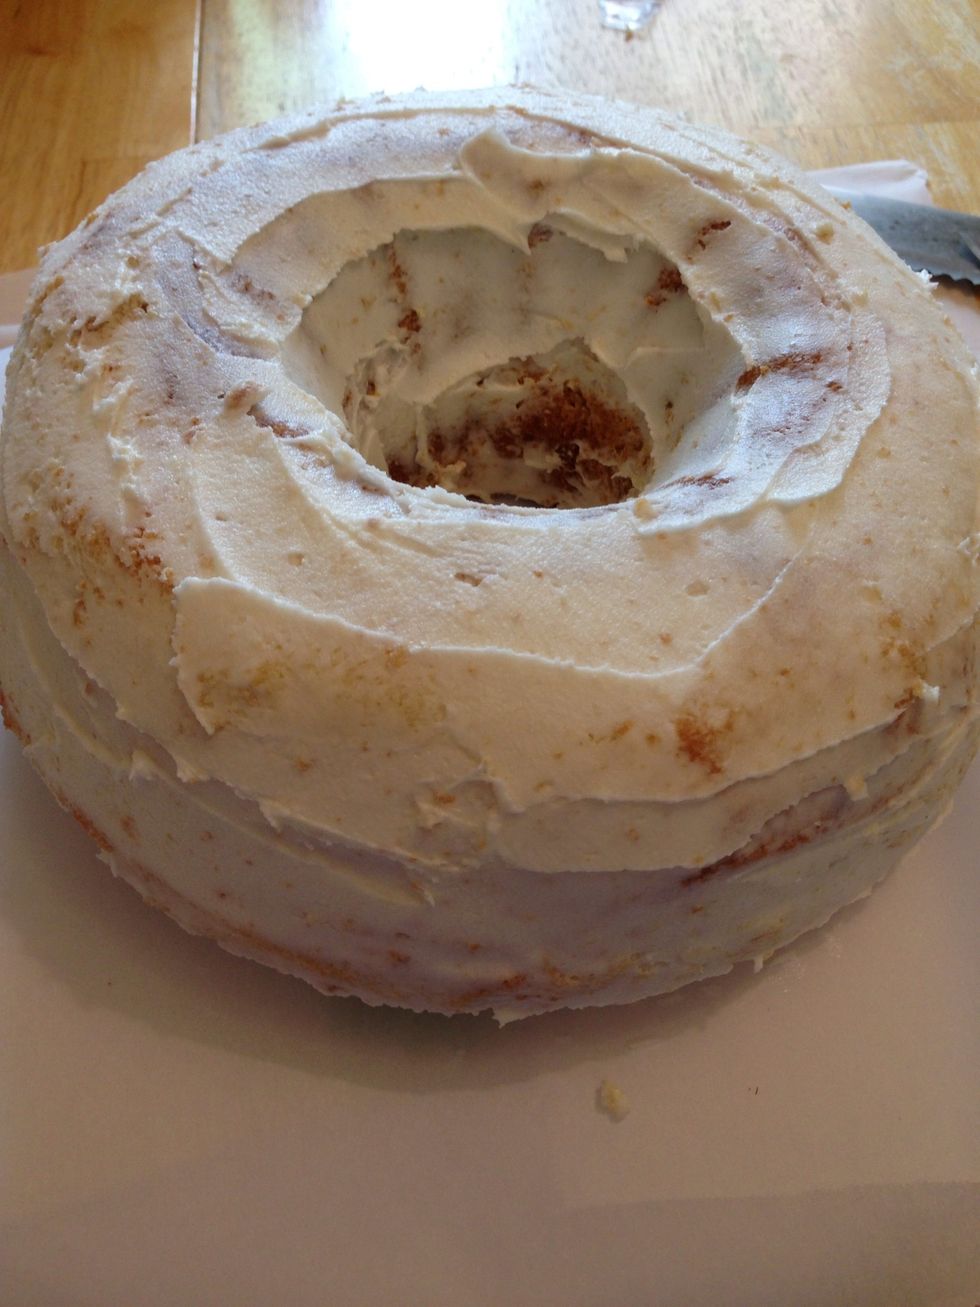
This is how the ganached cakes looked as I was smoothing them out. You use a hot spatula or knife (I dipped in hot water and dried it off before using it) to smooth the ganache. Worked like a charm!
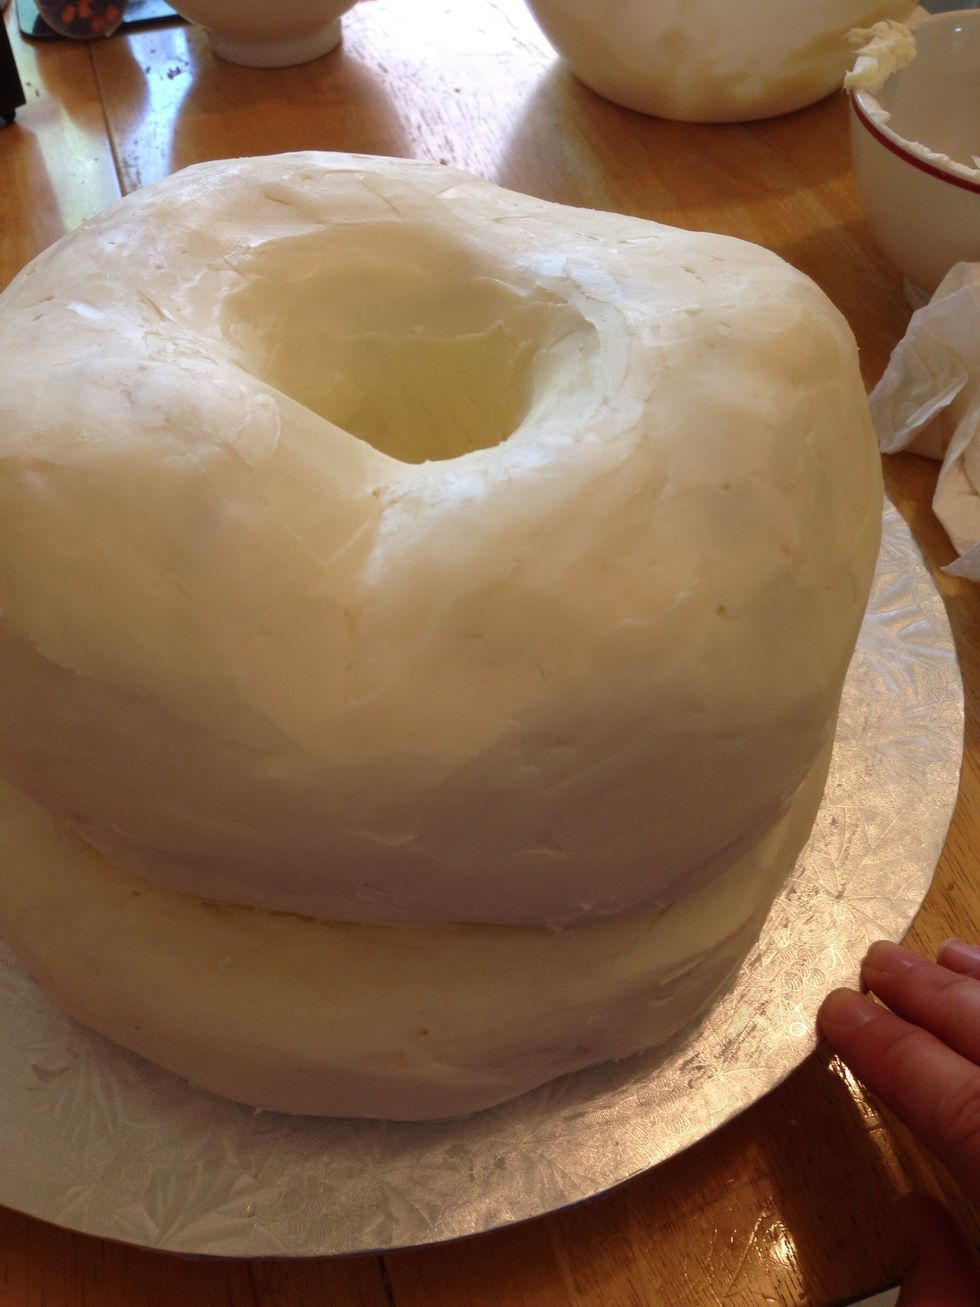
Now it's really smooth and awesome to put your fondant onto! The more time you spend smoothing the ganache, the better result you will have when you cover it with fondant.
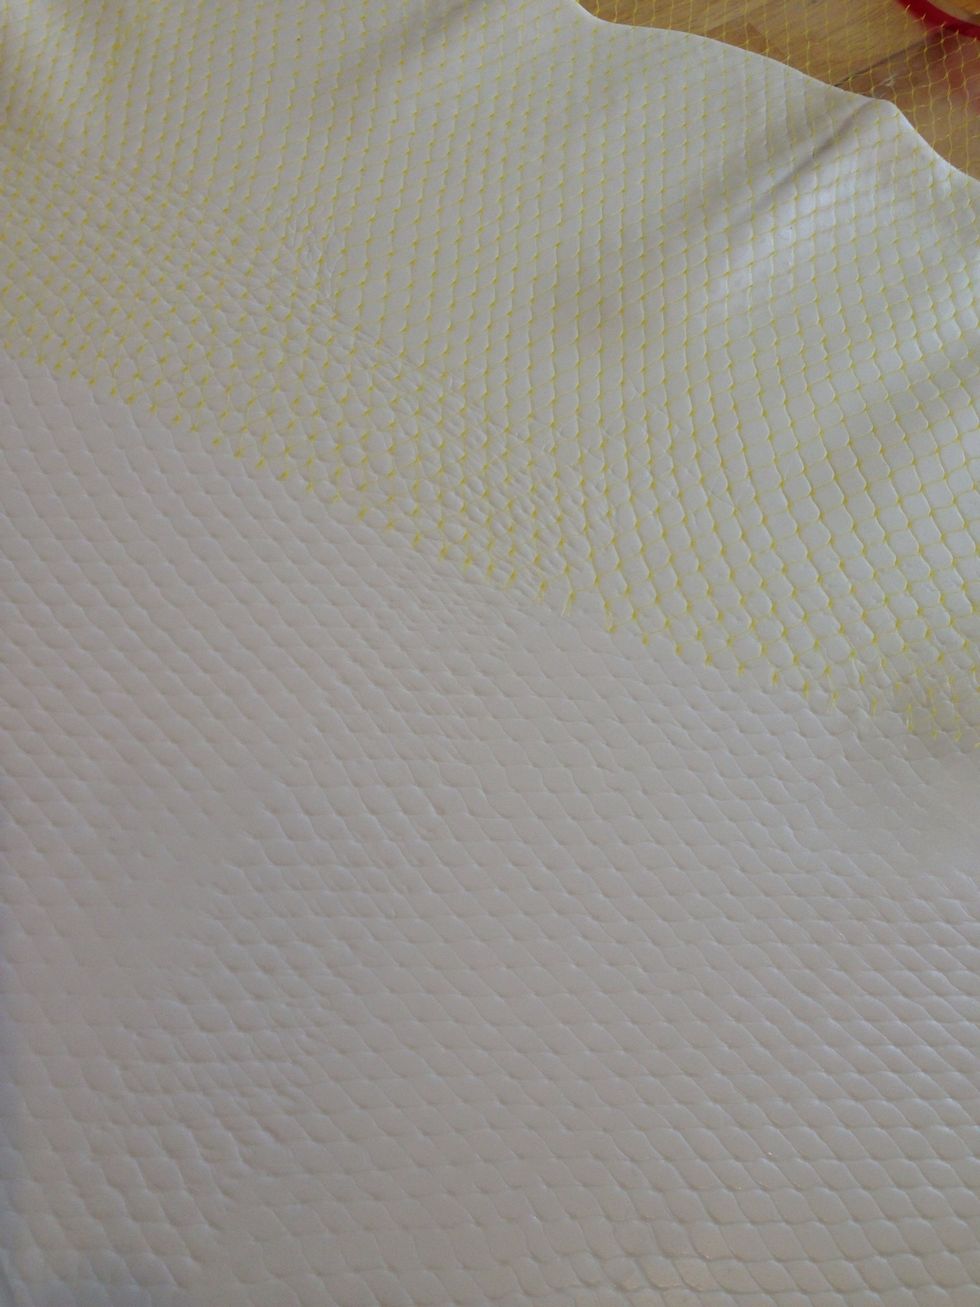
I used an onion bag to make a "snakeskin" pattern on my fondant. I was able to use "The Mat" to roll out my fondant, roll out the pattern, and flip the fondant onto the cake so it didn't stretch.
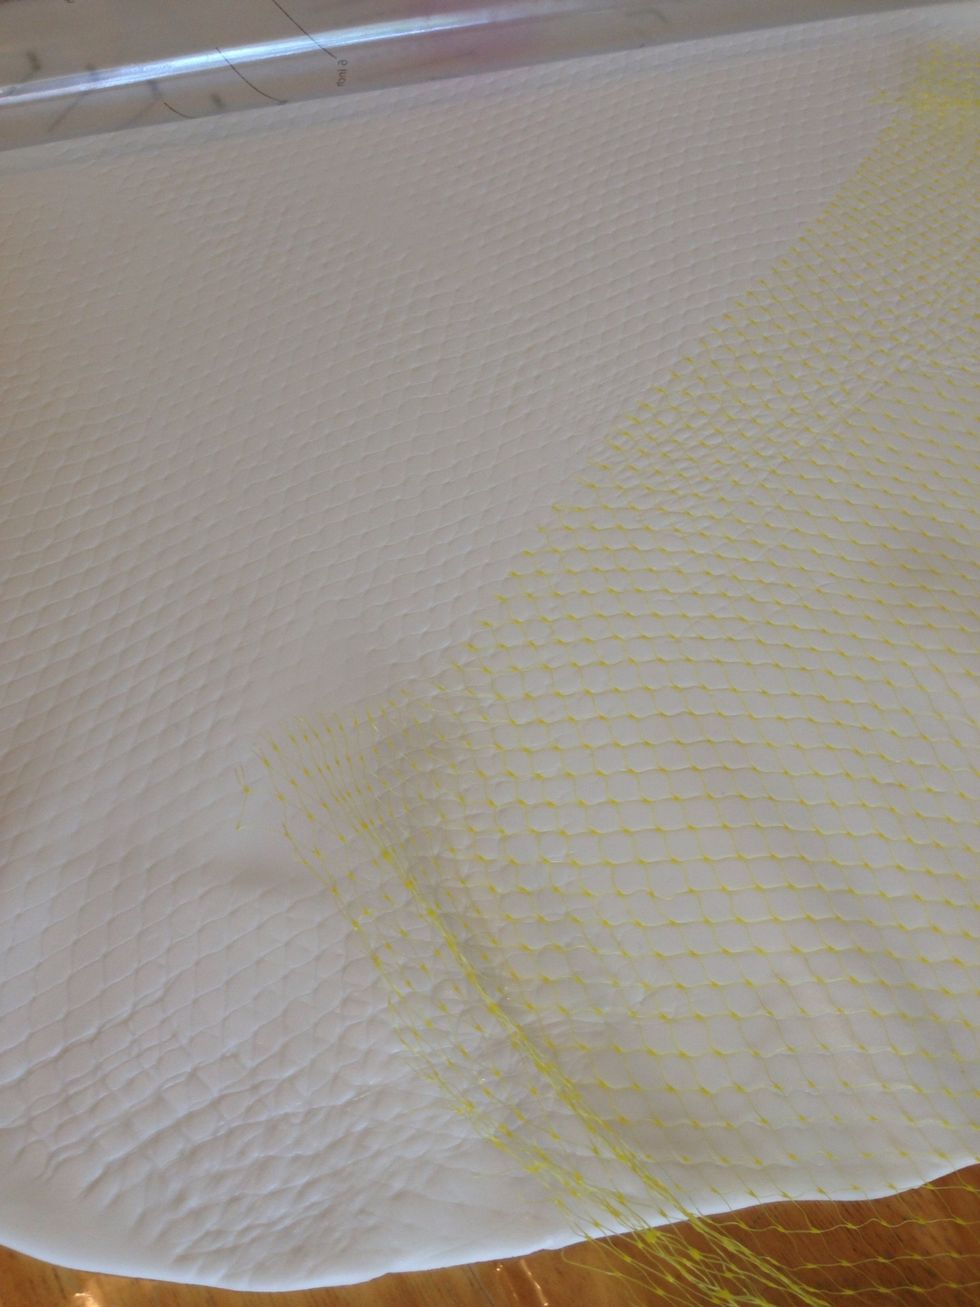
If you don't have "The Mat", you may have to press the pattern onto the fondant after you put it onto the cake, using cake smoothers to press the onion bag lightly into the fondant.
Lightly spritz the ganached cake with a mist of water, and put your fondant over the cake, carefully pressing it into the "snake coils" and any crevices you've created to add definition to your cake.
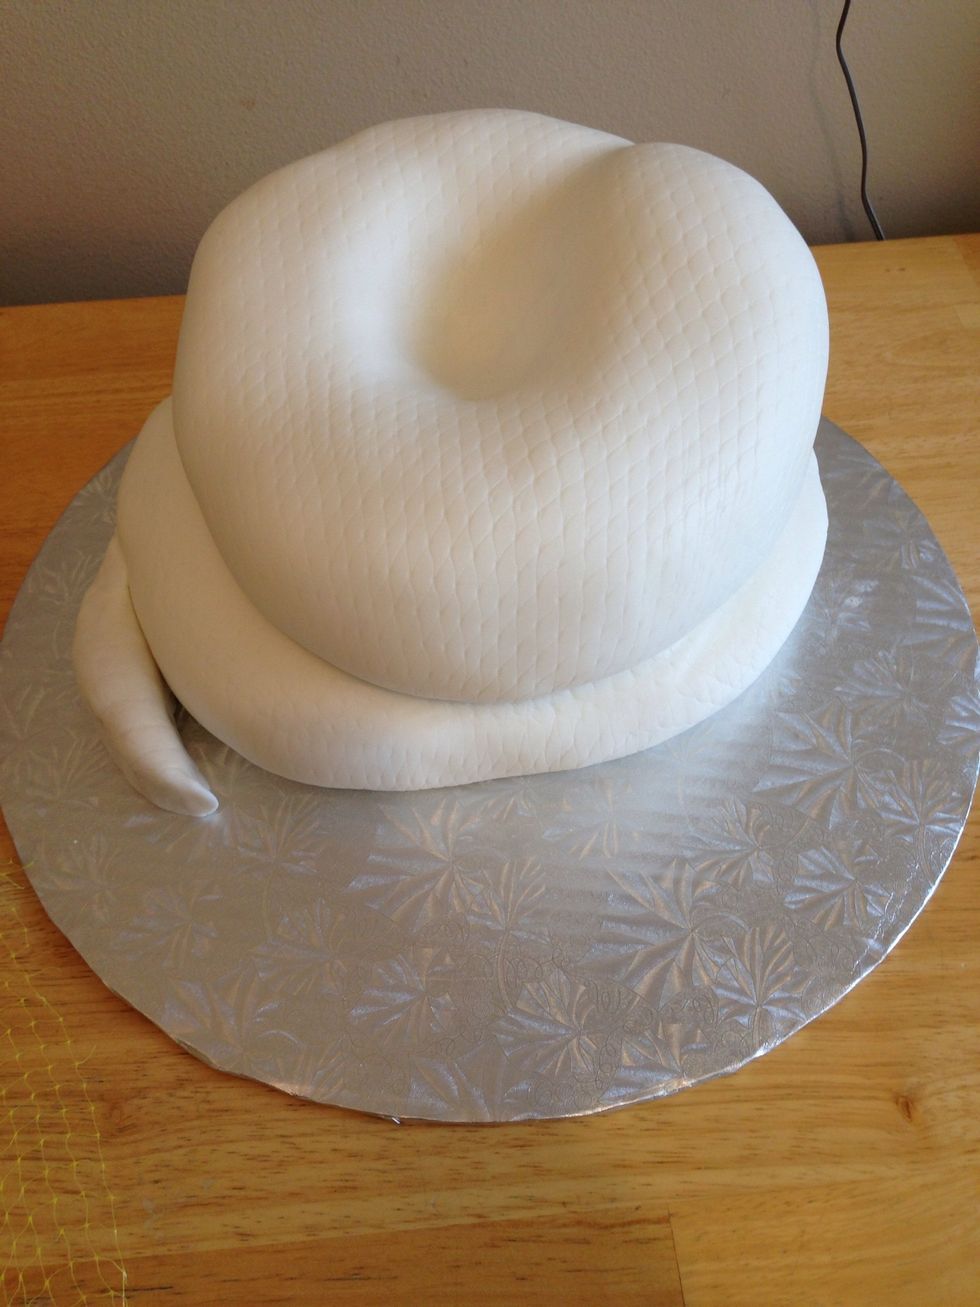
Add a tail made out of either fondant or rice cereal treats covered in the patterned fondant shaped to fit beside the bottom coil as if attached. I used the treats, as they are very easy to work with.
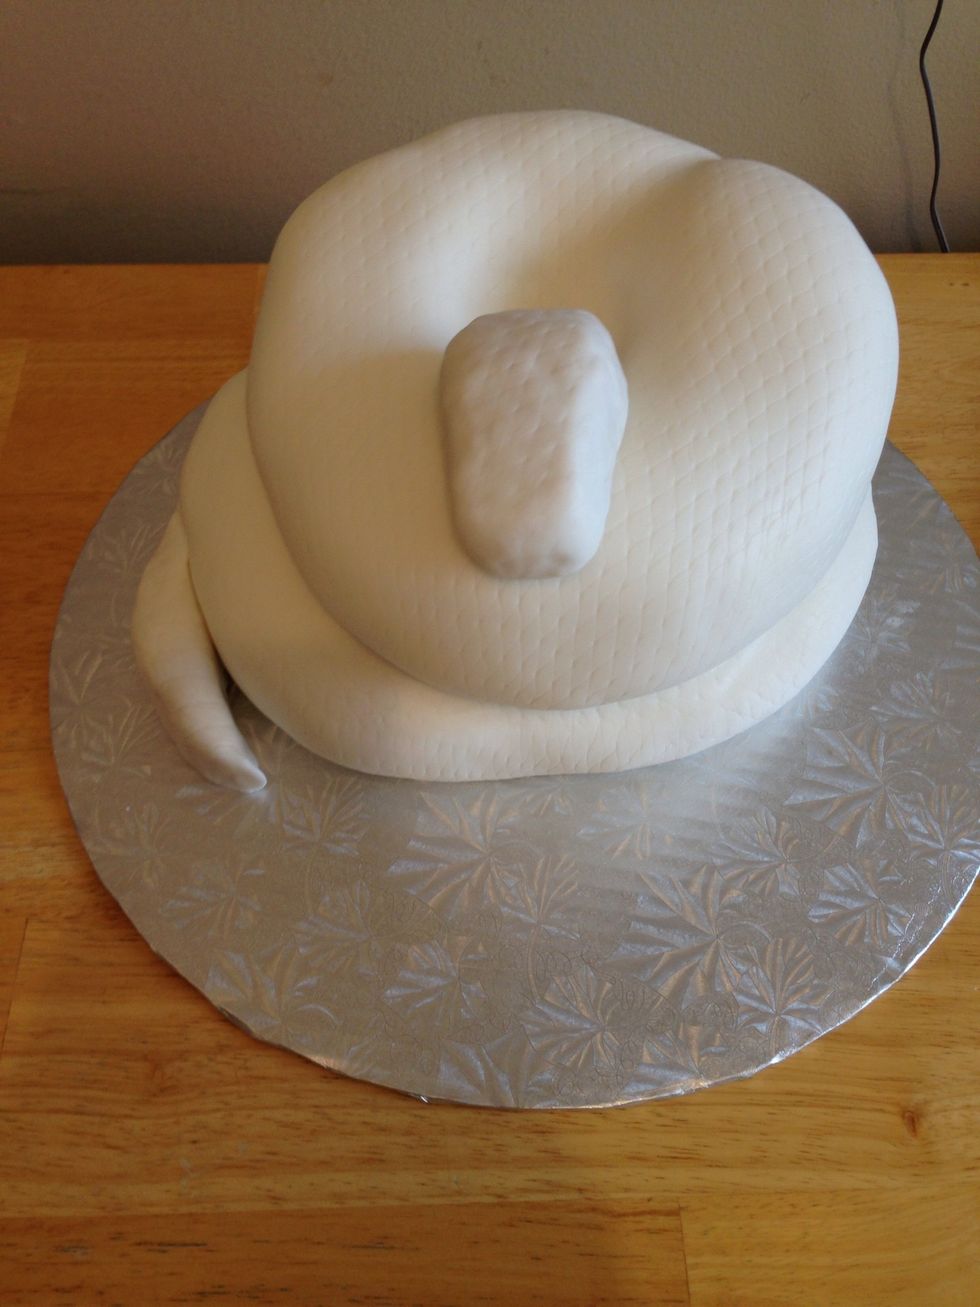
I also made the head out of the treats, and covered it with the patterned fondant. Another nice thing about using the treats is that you will have leftovers to eat with your family or friends! ;)
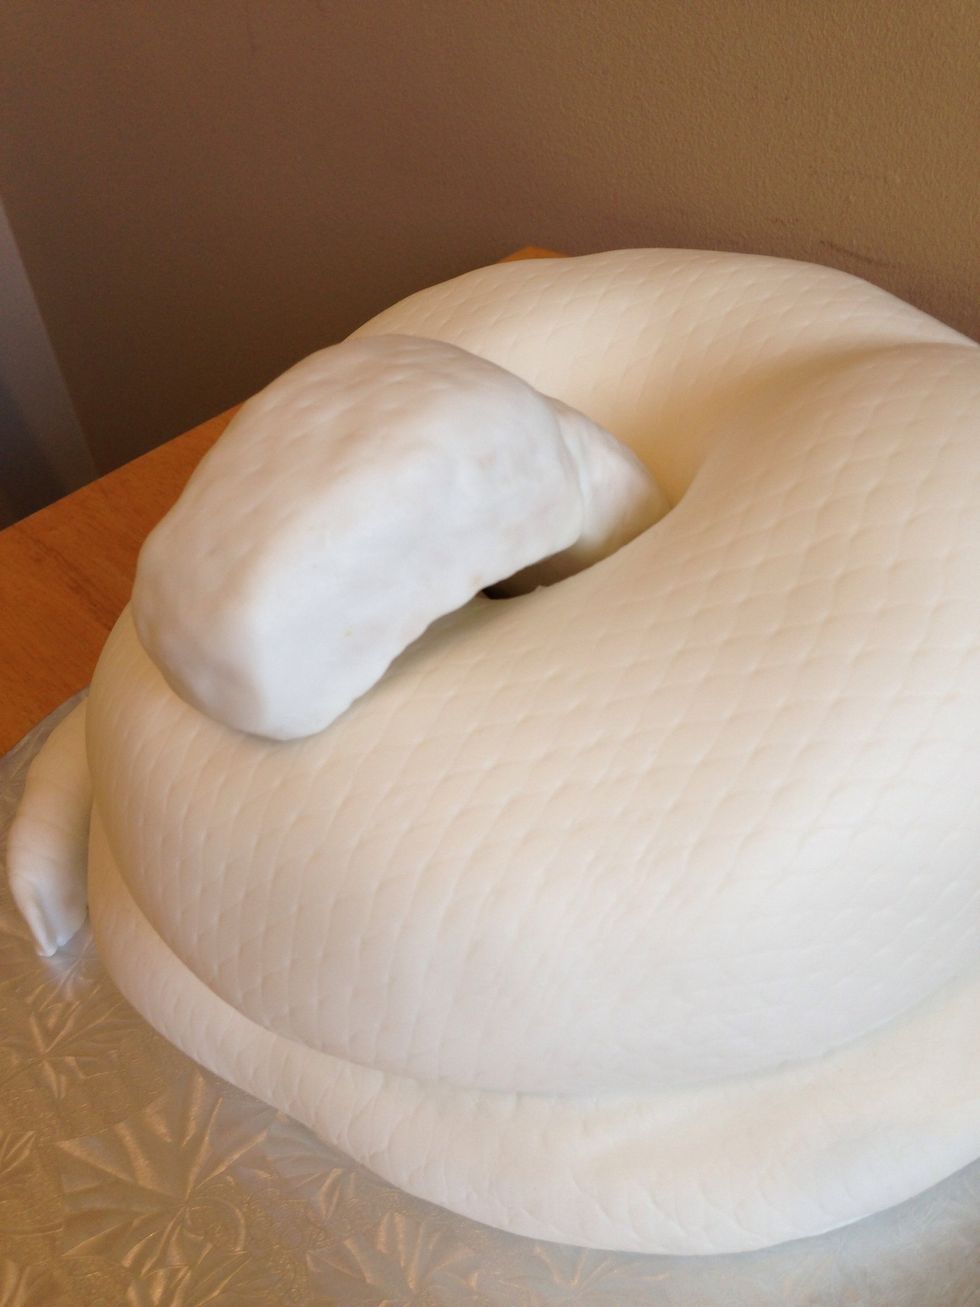
Shape the head to make it look like it is poking up over the coils from the inside of the hole. Make sure you have a bit of an extension like a neck so it isn't just bobbing there looking unattached!
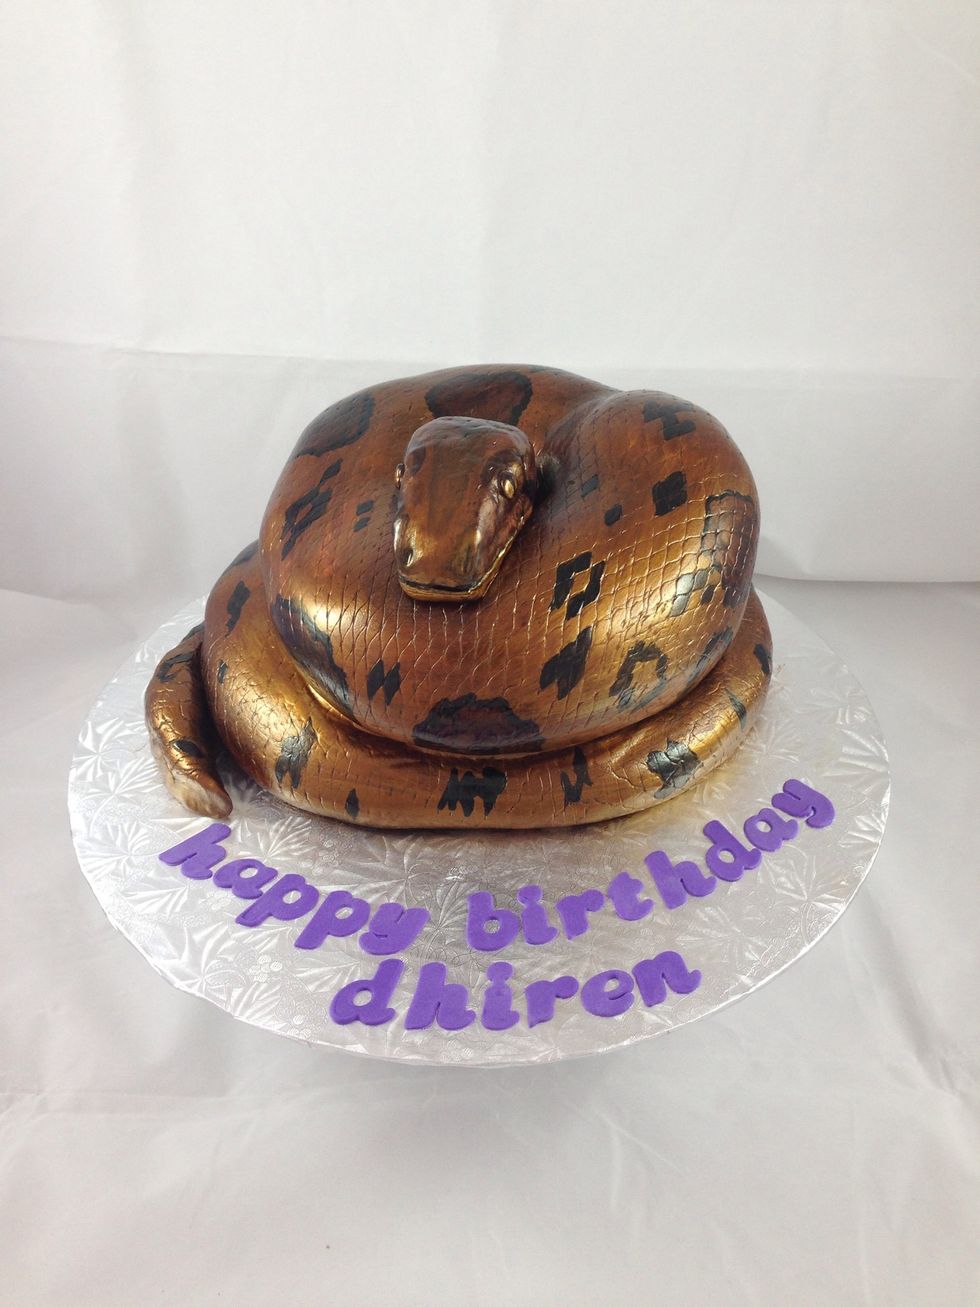
Paint to your heart's content. Look up snakes on the Internet, choose one you'd like to model your cake on, and have fun getting creative! I first airbrushed the cake, then painted on top of that.
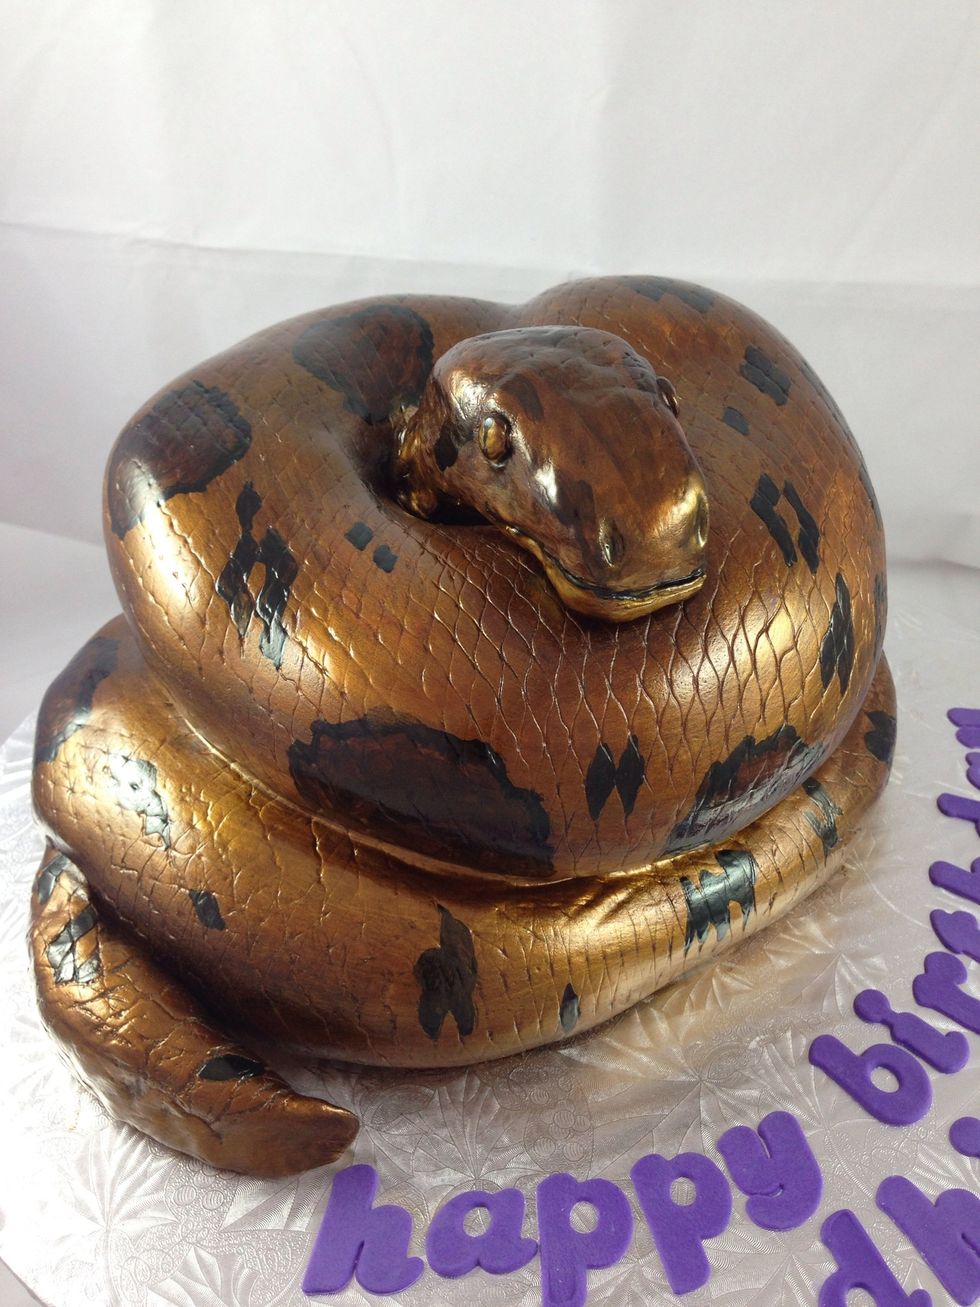
Don't forget to make eyes for your snake, and paint a slit down the middle. I think that is what gave me the biggest shivers! I'd love to know if this helped you! www.facebook.com/JuliesCustomCakes