The Conversation (0)
Sign Up
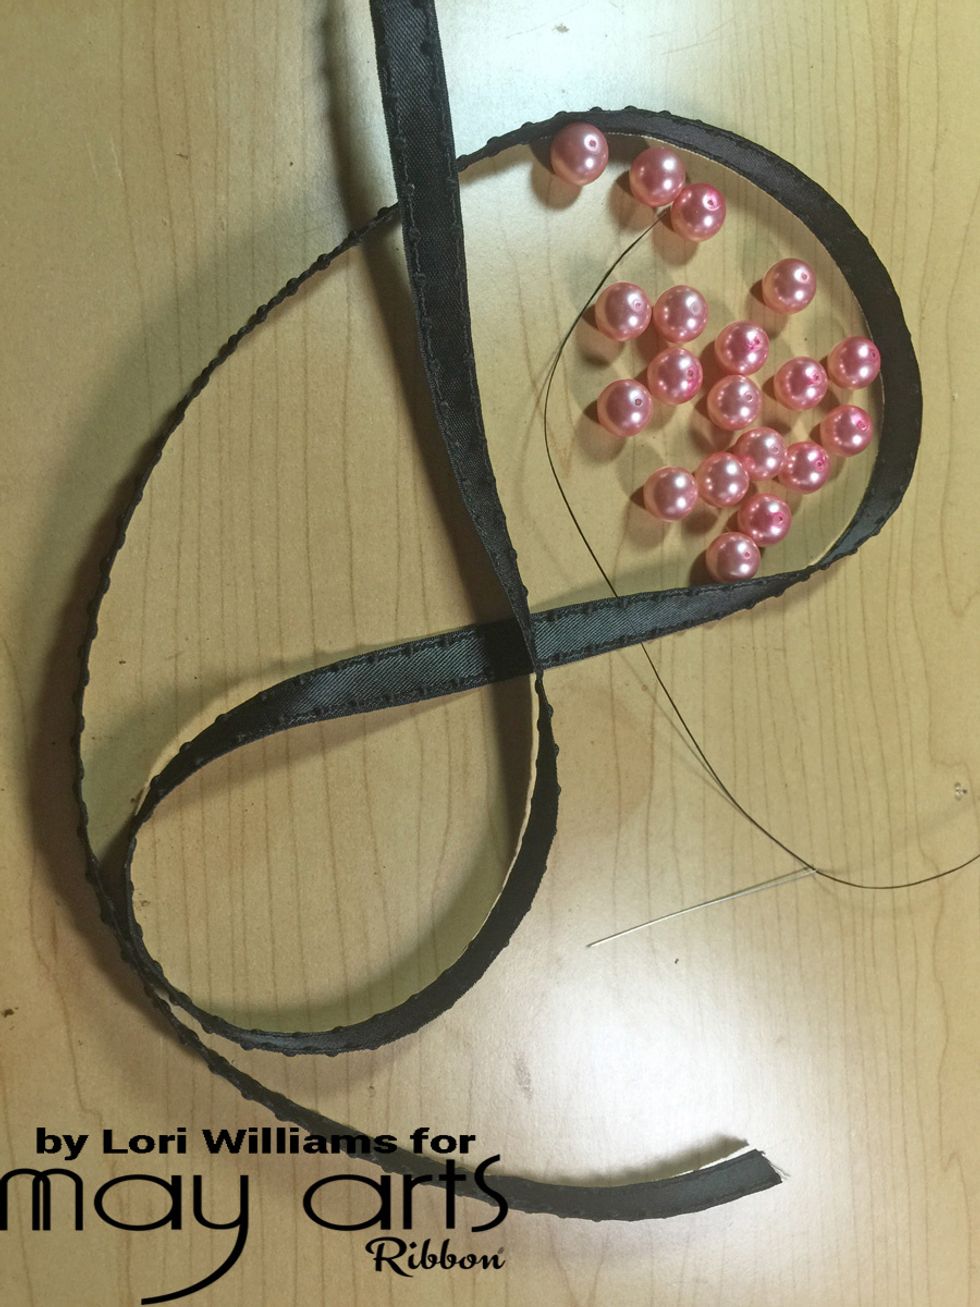
Gather together ribbon, beads/pearls, needle and bead thread
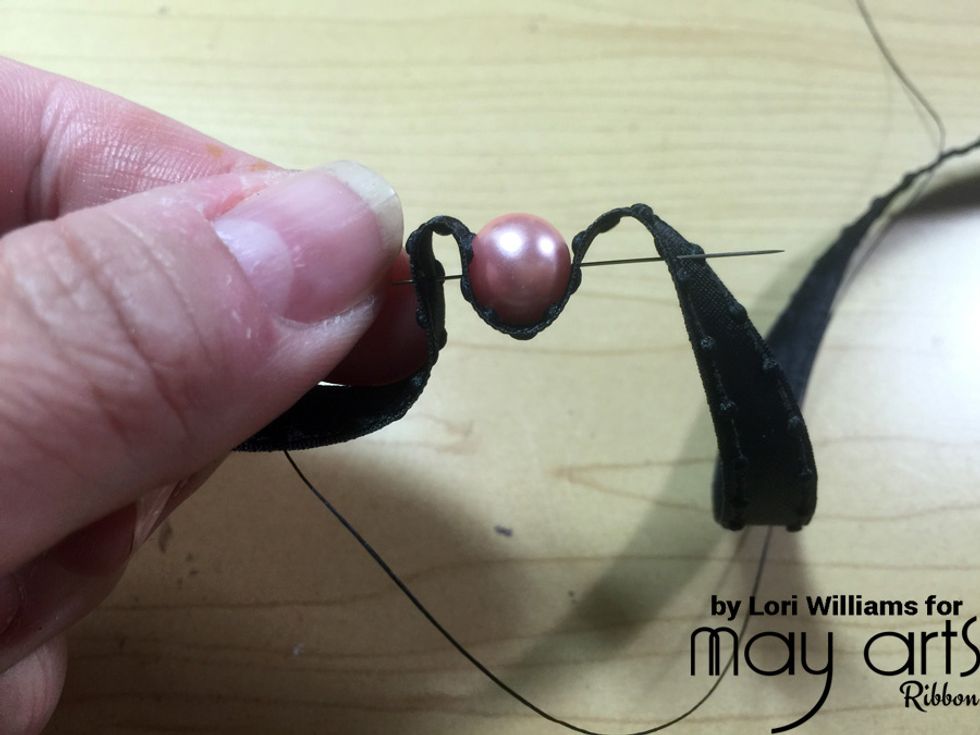
Fold your ribbon with a small hill(about ¼” to ½” depending on the side of your pearl) and lay your pearl beside it, then run your needle and thread through to set.

Continue the first step until you have enough of a length to go around your wrist. I used 13 beads, but this will varying depending on your size bead and size of bracelet desired.
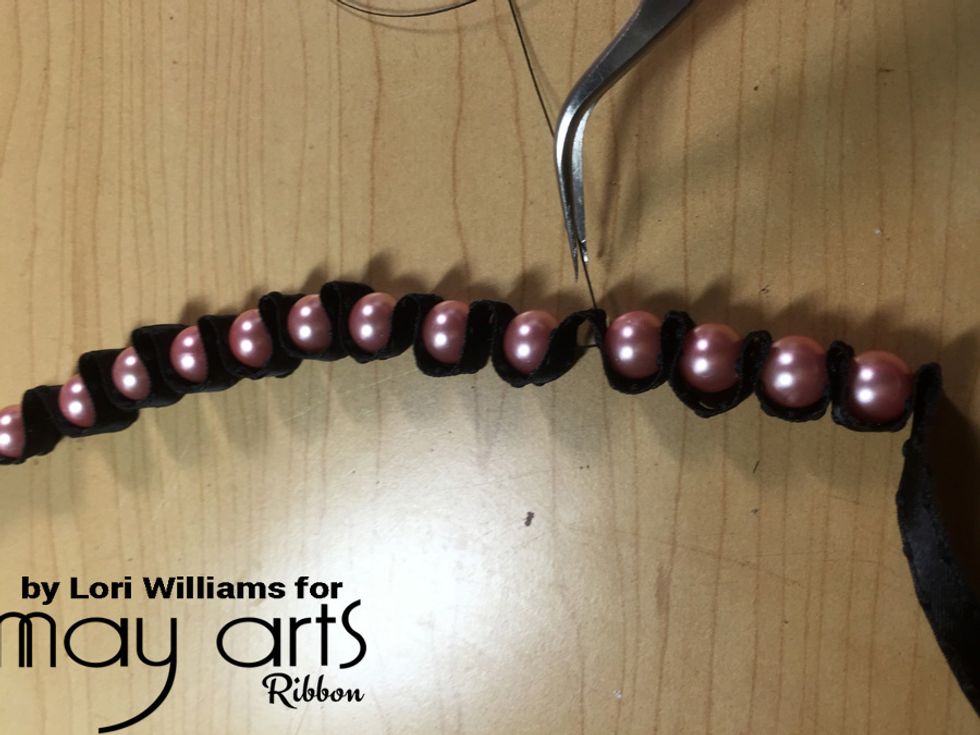
Once you have all your beads set, then run back through the ribbon and the beads with your needle and thread. This will help to make sure the bracelet stay tight and secure the beads/pearls.
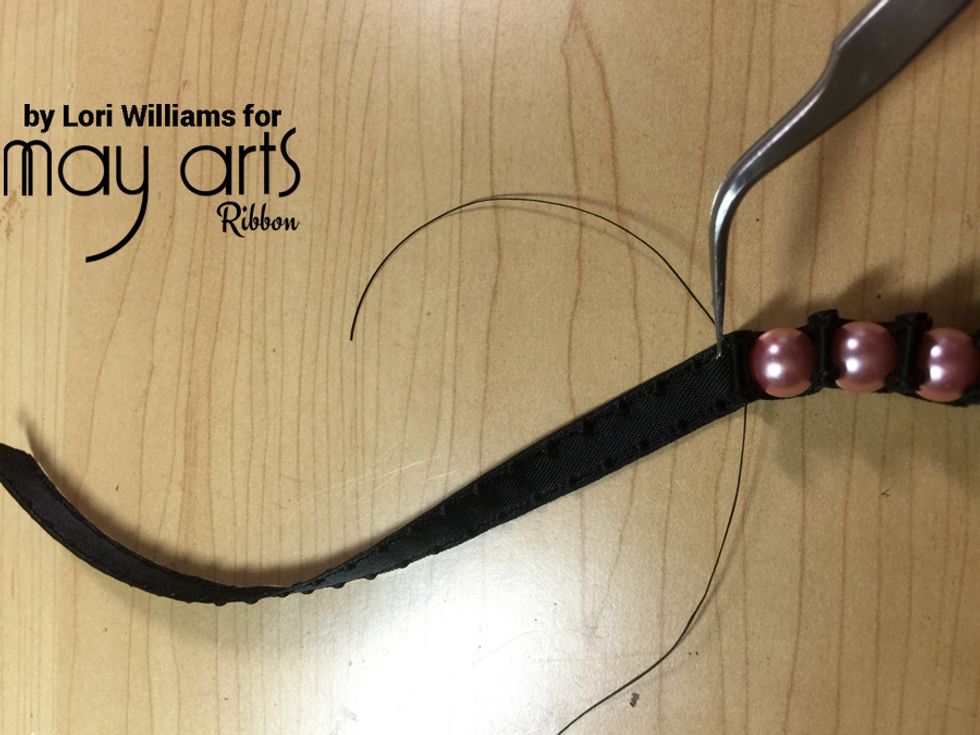
At the end of your bracelet when you’ve run the thread back through tie a double knot and then run the loose ends back through the three or four of the pearls to finish off.

Finish off your bracelet with a cute bow. I just slide my over my wrist when I want to wear, but you could just tie on and off if you prefer.

I'm Lori Williams and I design for May Arts Ribbon & Ribbon Resource you can find more of my work on my blog www.pinkcloudscrappers.blogspot.com or shop at www.ribbonresource.com & www.mayarts.com