How to make a raspberry pi case from an altoids tin
Make a Raspberry Pi Case From an Altoids Tin
194
STEPS
TOOLS
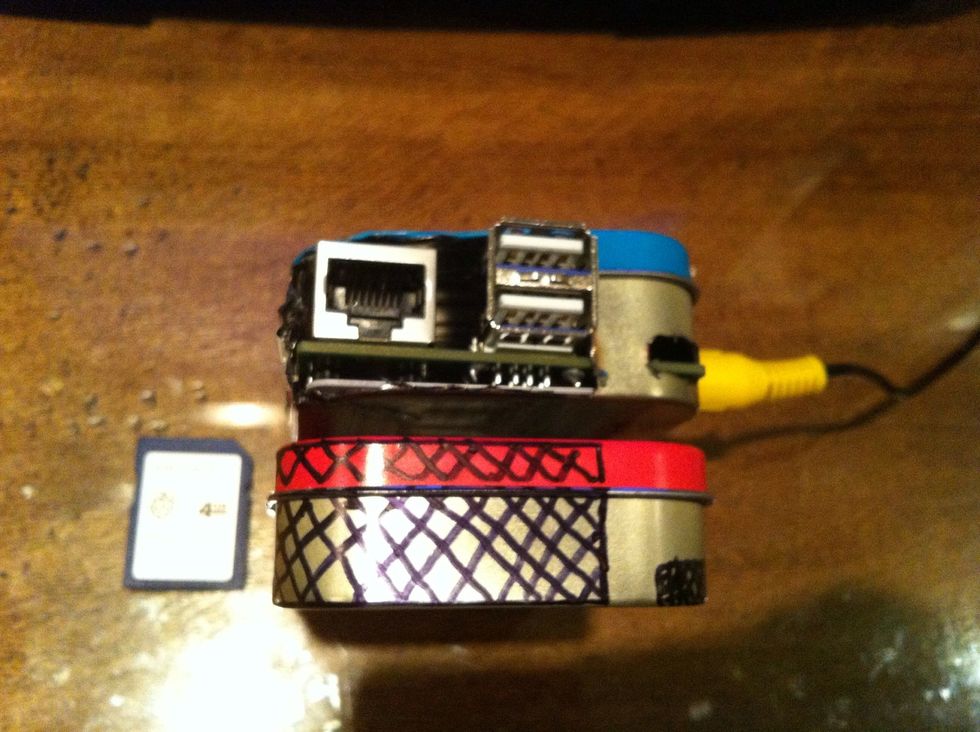
Drill a hole for the Pi LED corner at the bottom front of tin (lower right in picture); then, with tinsnips or diagonal cutter, cut out large indicated area for Ethernet & USB (left side in picture).
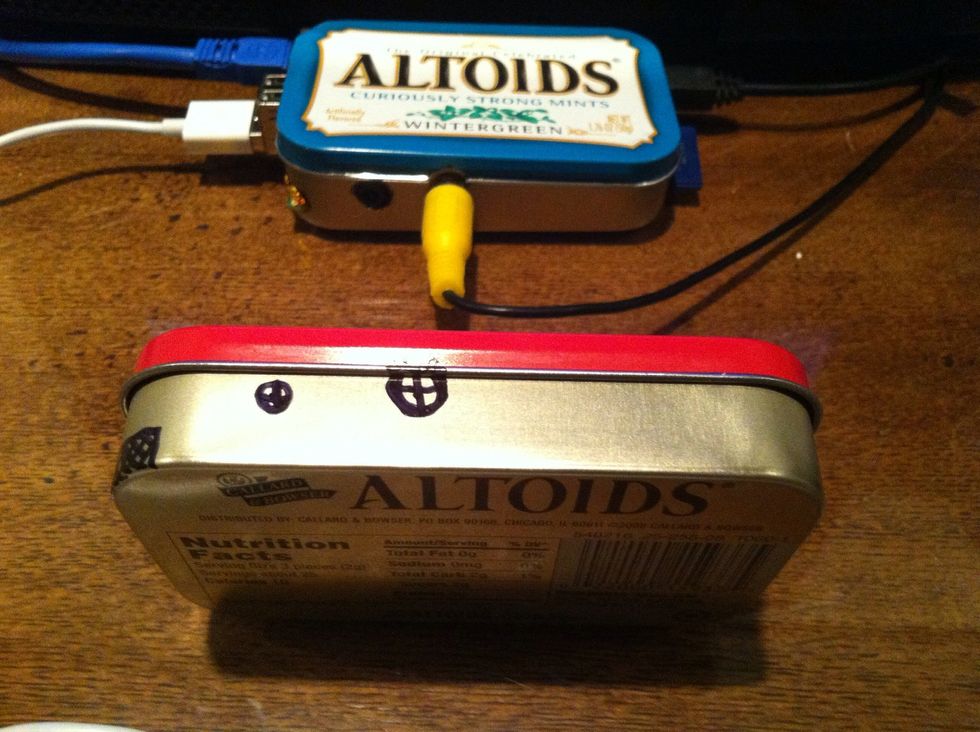
Drill holes in the front side of tin for the audio and RCA jacks. The RCA jack hole will include part of the tin lid lip.
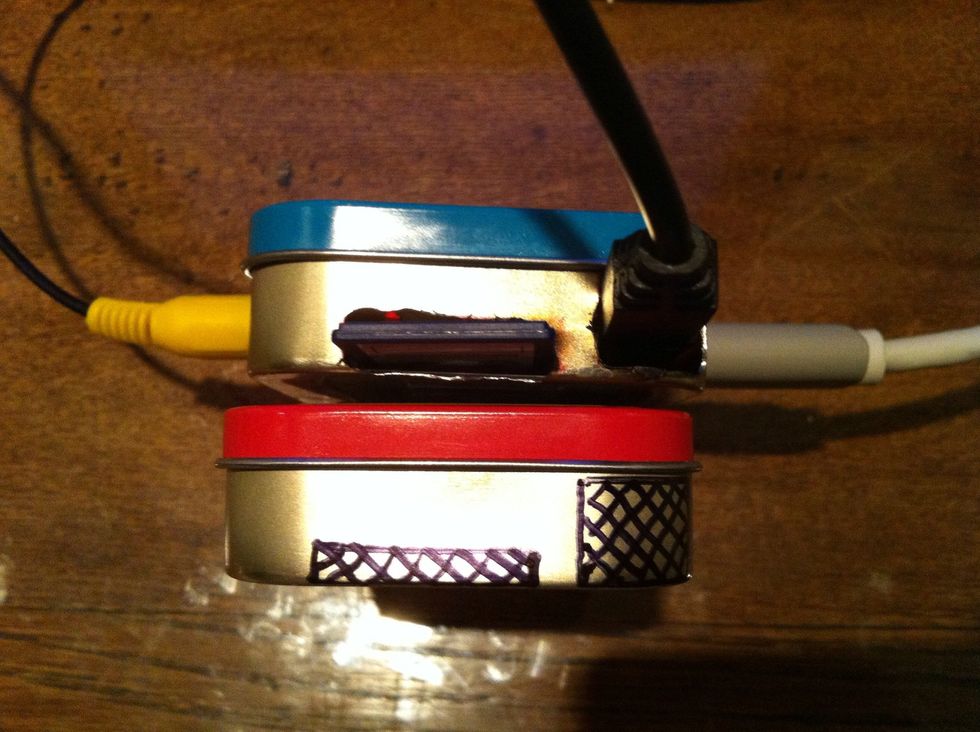
Drill holes for the SD card and power jack.
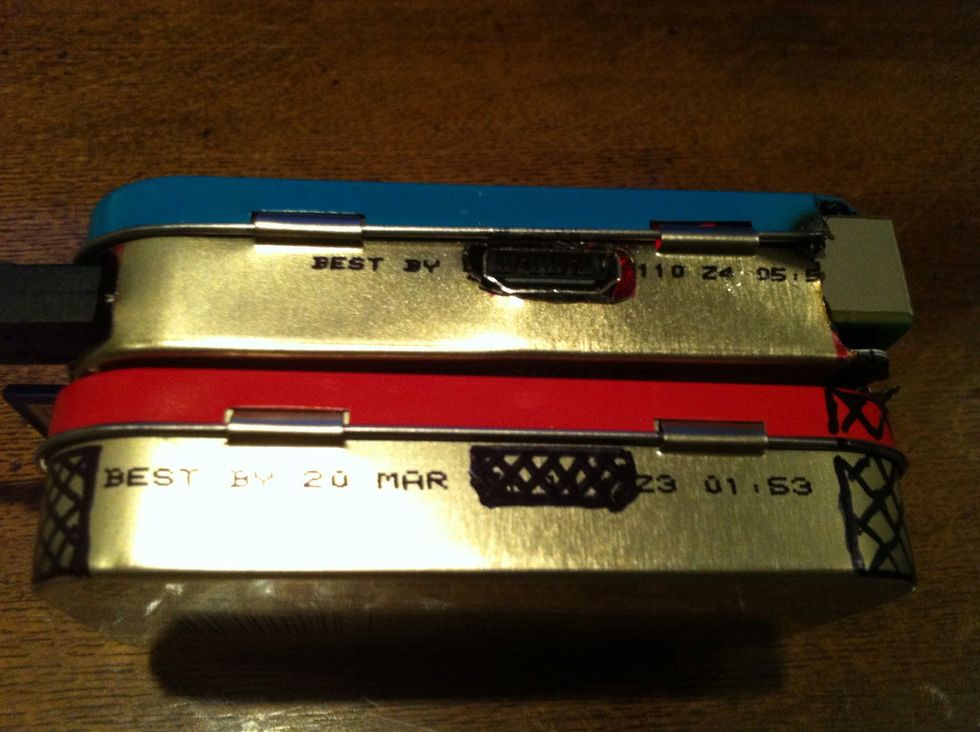
Drill a hole for the HDMI port on the hinge side of the tin.

Drop a plastic gift card into the tin to insulate the bottom of the board from the bottom of the tin.
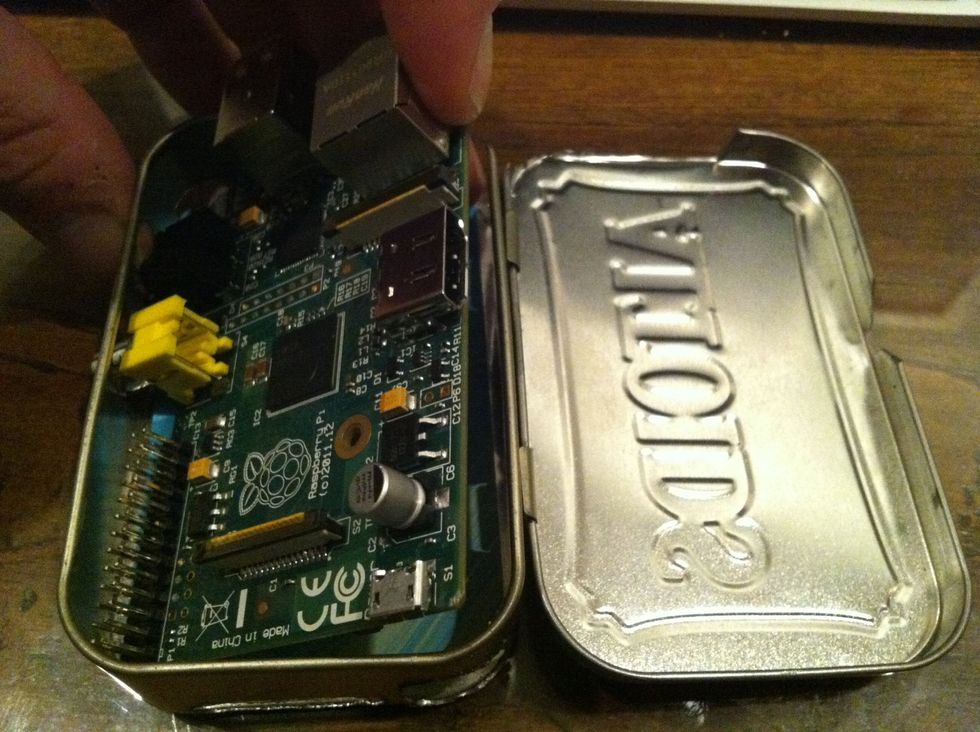
Angle the board into the tin so the RCA jack goes through its hole first.
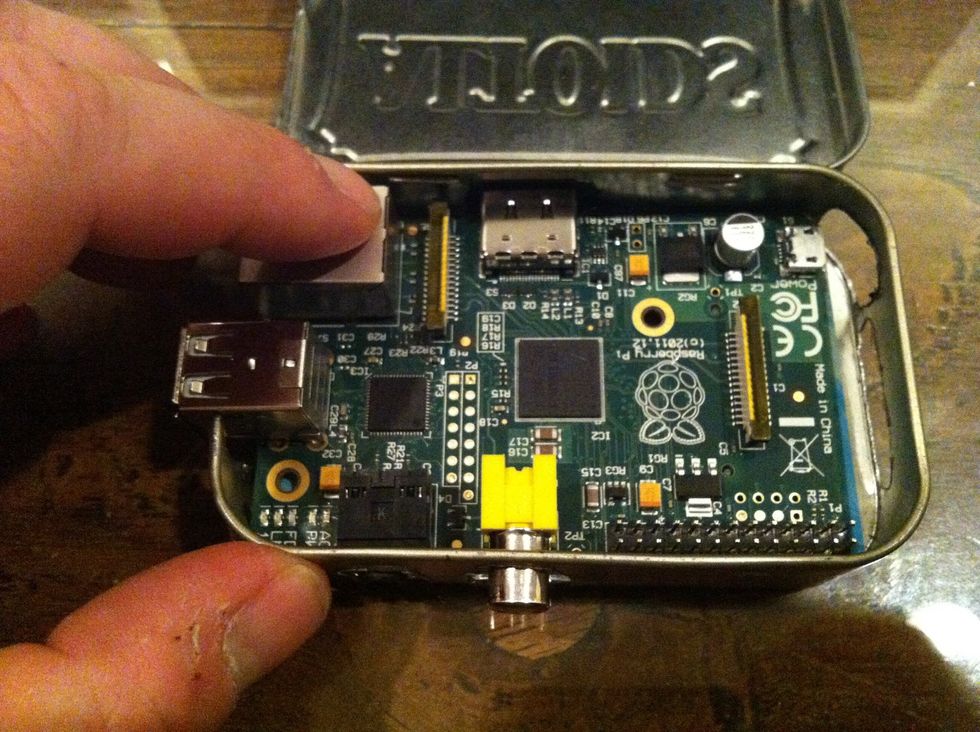
Drop the HDMI side down.
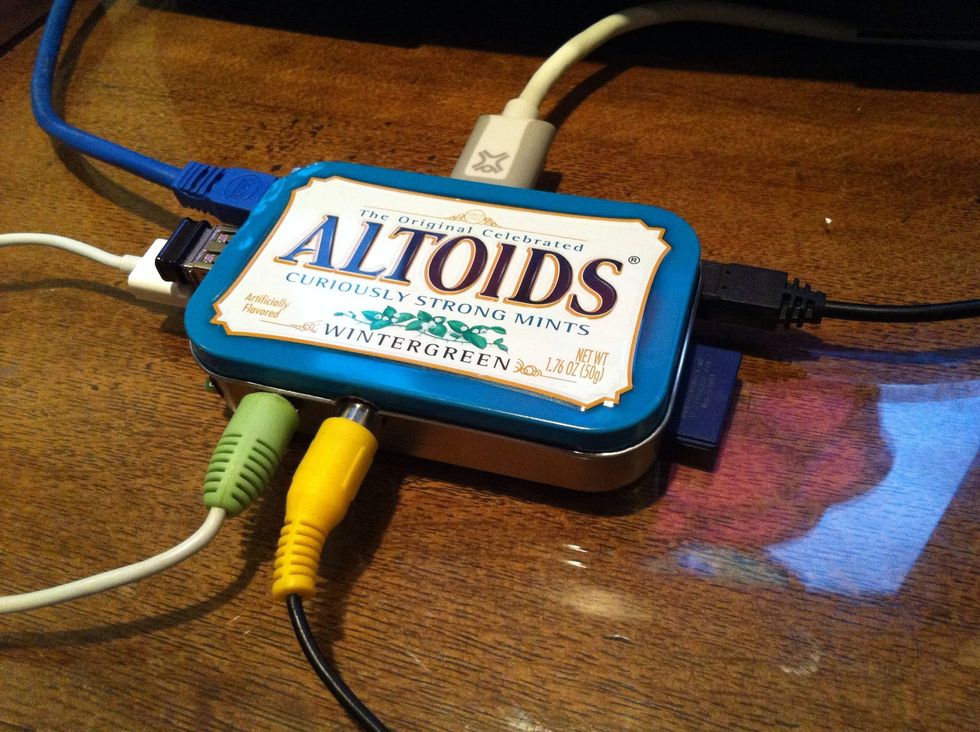
Plug in your SD card, video (RCA or HDMI), audio, Ethernet and USB plugs; then plug in the 5VDC power plug (a 1-amp or higher supply is helpful).
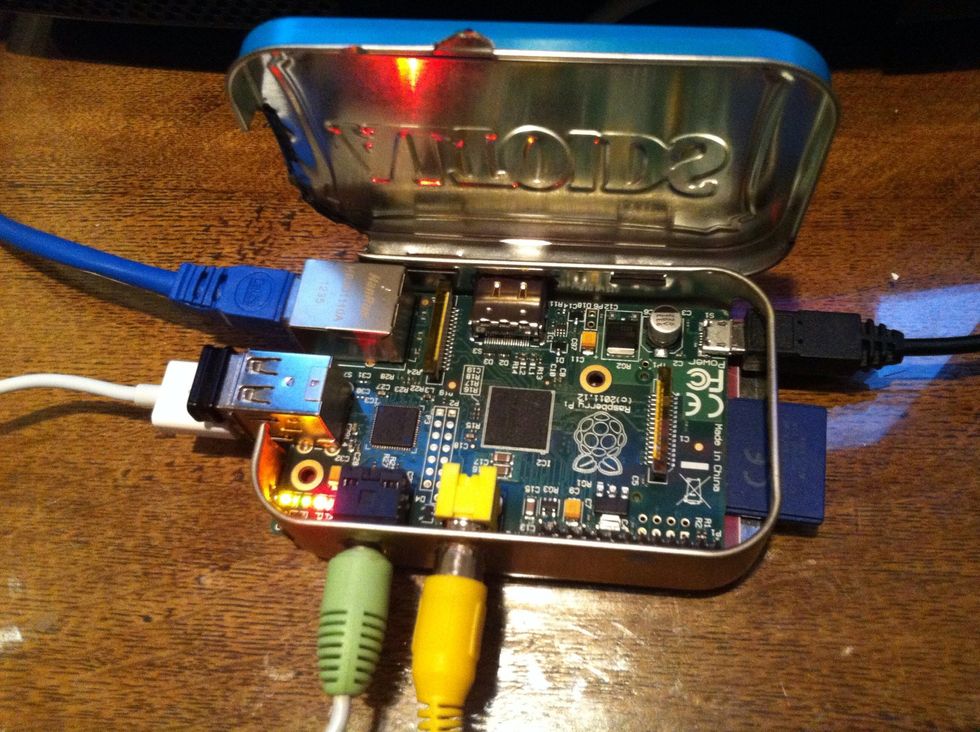
The LEDs should light up once the power is plugged in. The GPIO pins are accessible by opening the tin lid.
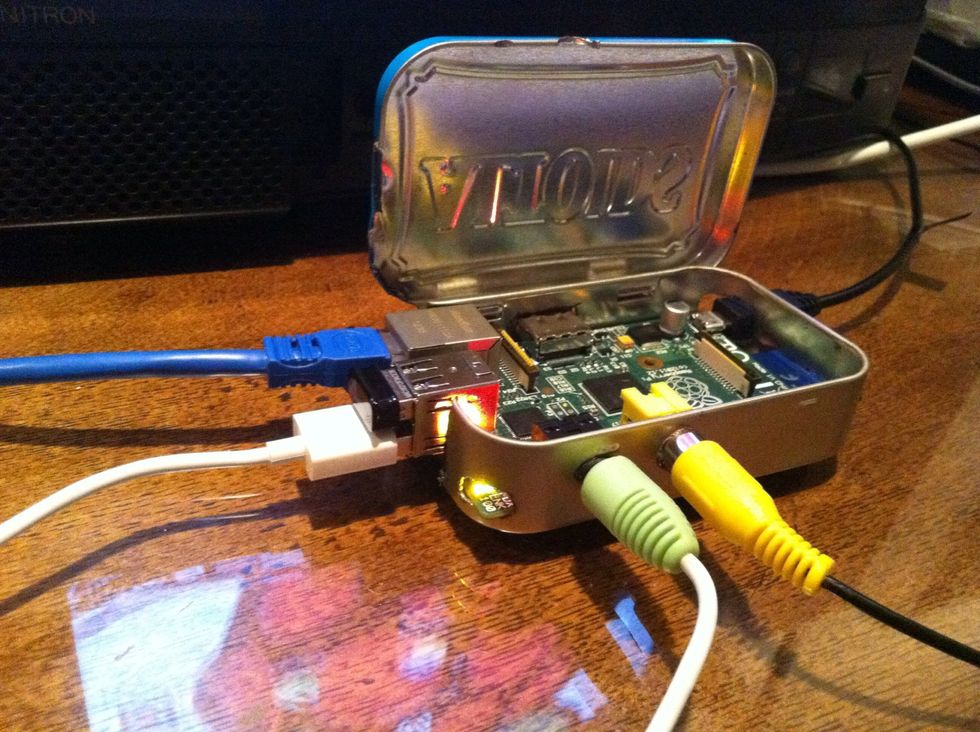
Using an Apple aluminum keyboard allows you to plug a mouse into the keyboard. This frees up one USB port. With a WiFi USB dongle as pictured, you can disconnect the Ethernet cable.
- 1.0 Raspberry Pi computer board
- 1.0 Altoids mint tin
- 1.0 Plastic gift card
- 1.0 Dremel or Small drill
- 1.0 Tin snips or diagonal cutter