The Conversation (0)
Sign Up
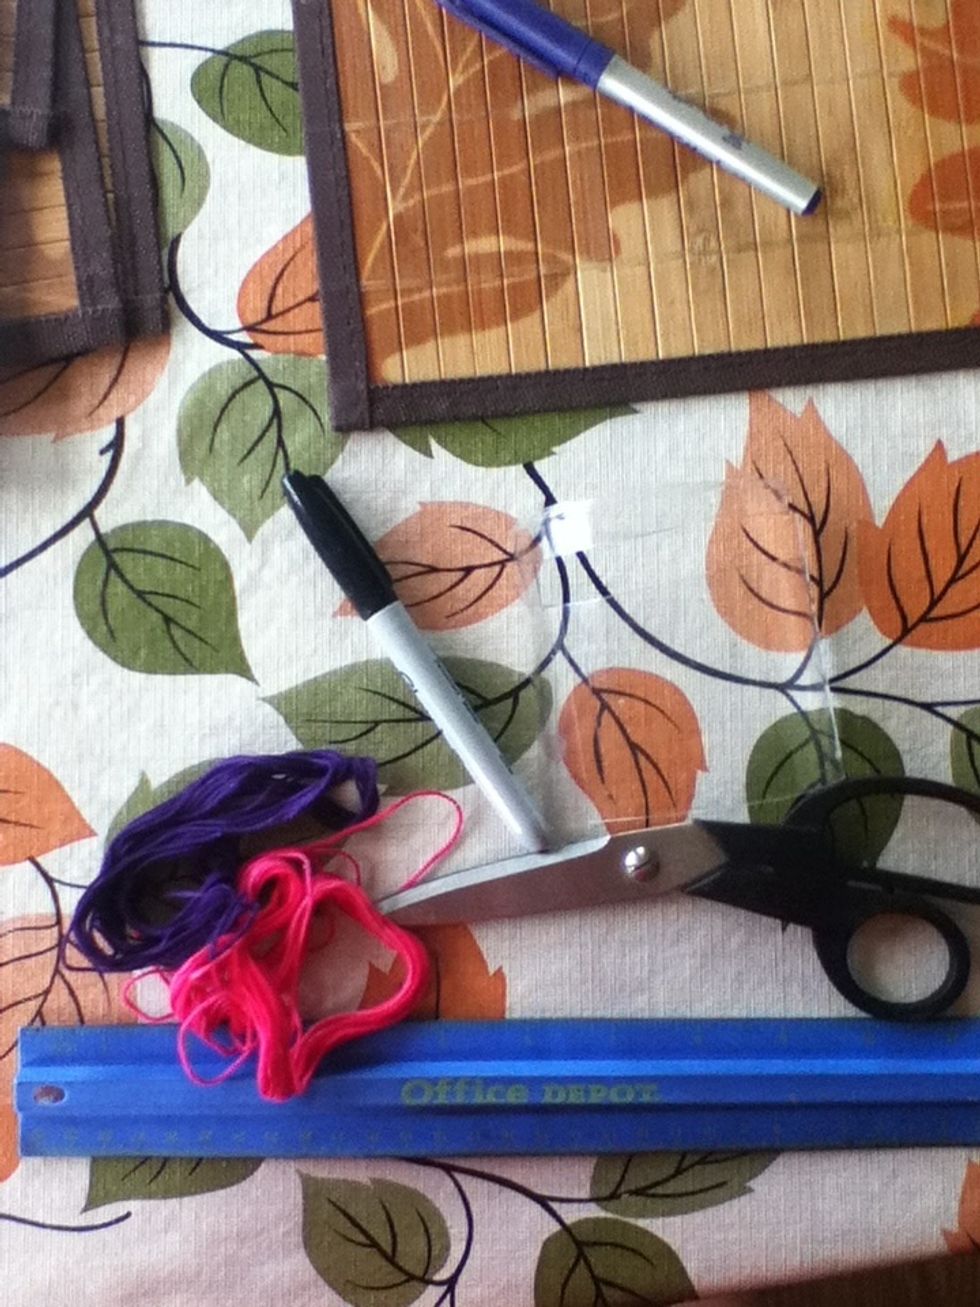
Supplies (the glue isn't there)
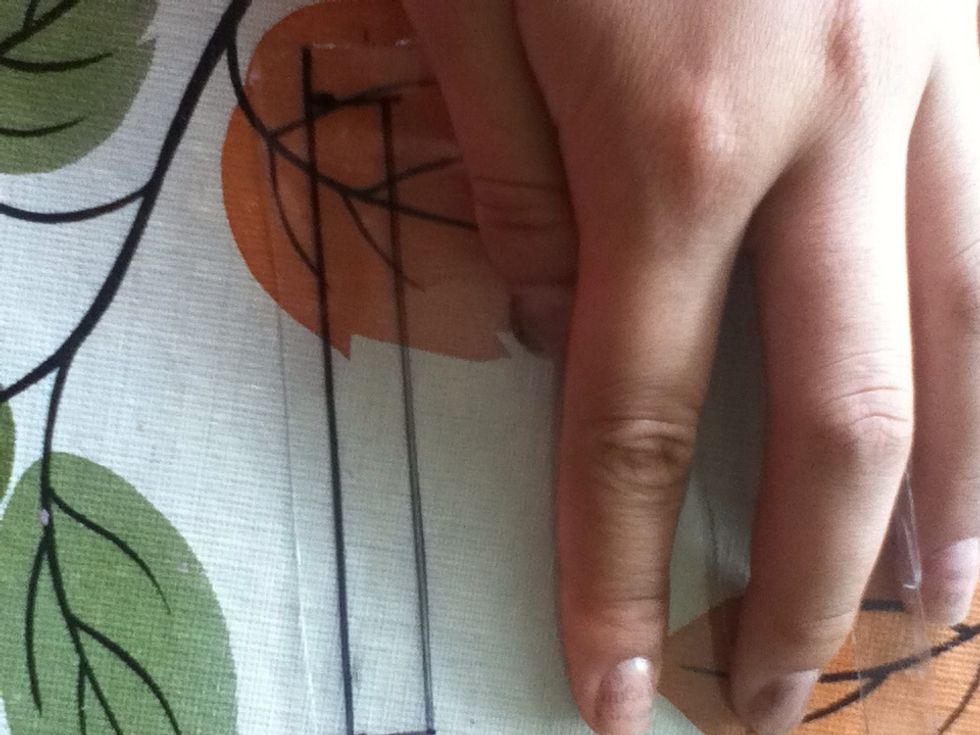
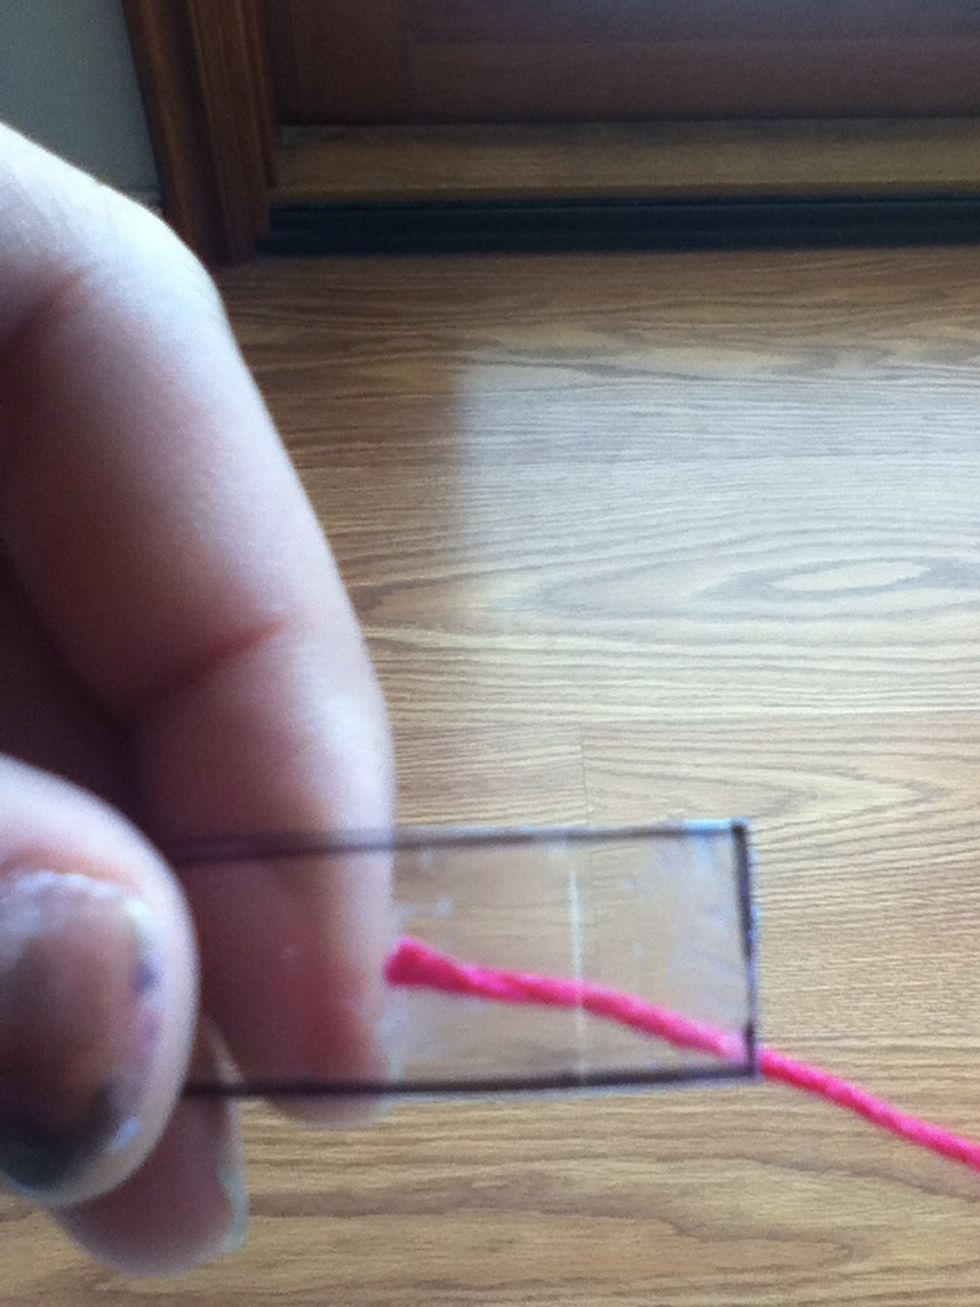
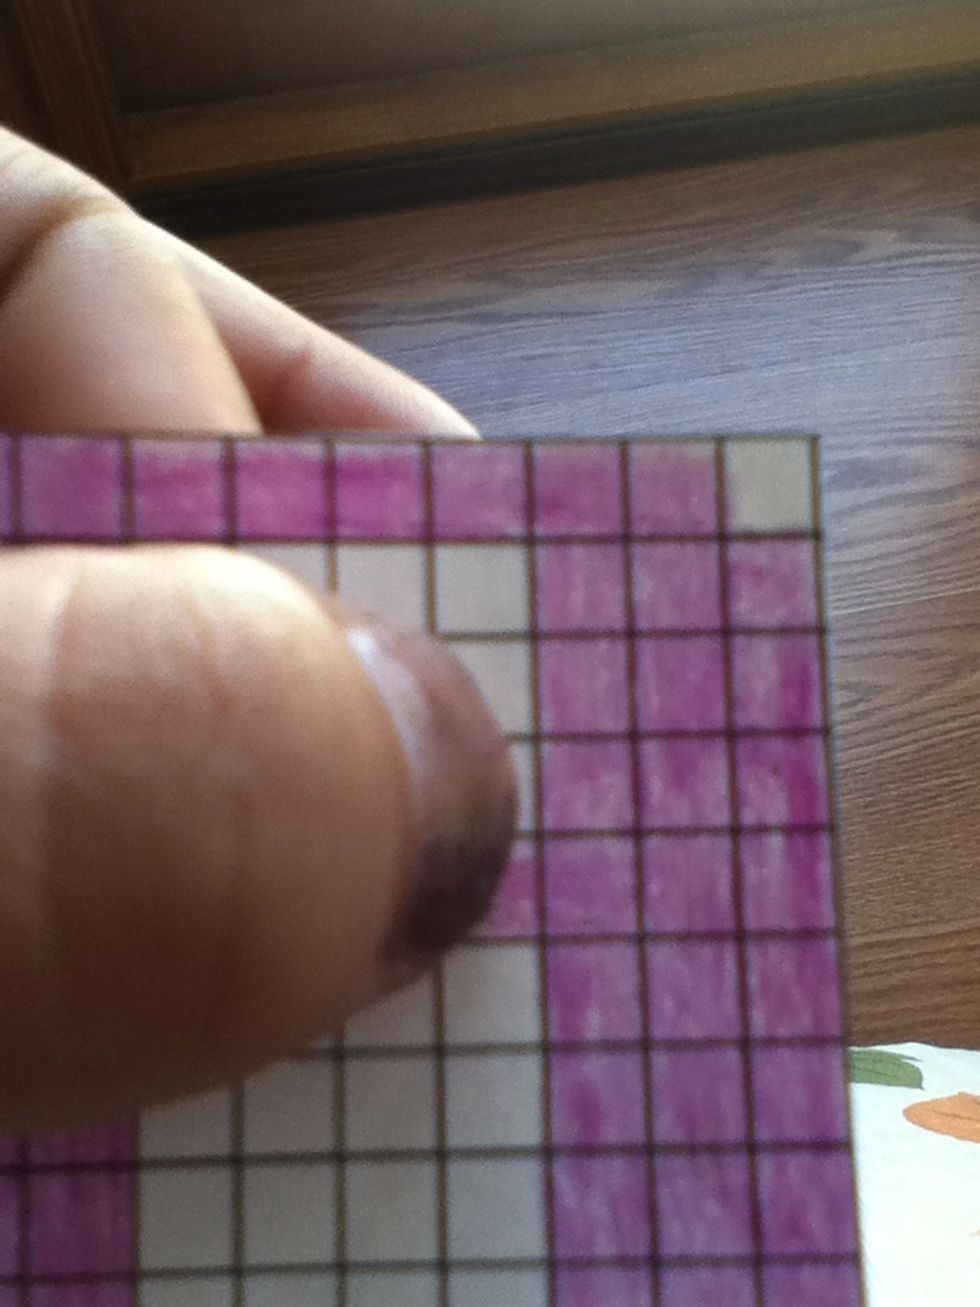
Draw a 10cm x 1-1.5cm rectangle on your plastic (I got mine from a peanut butter jar)
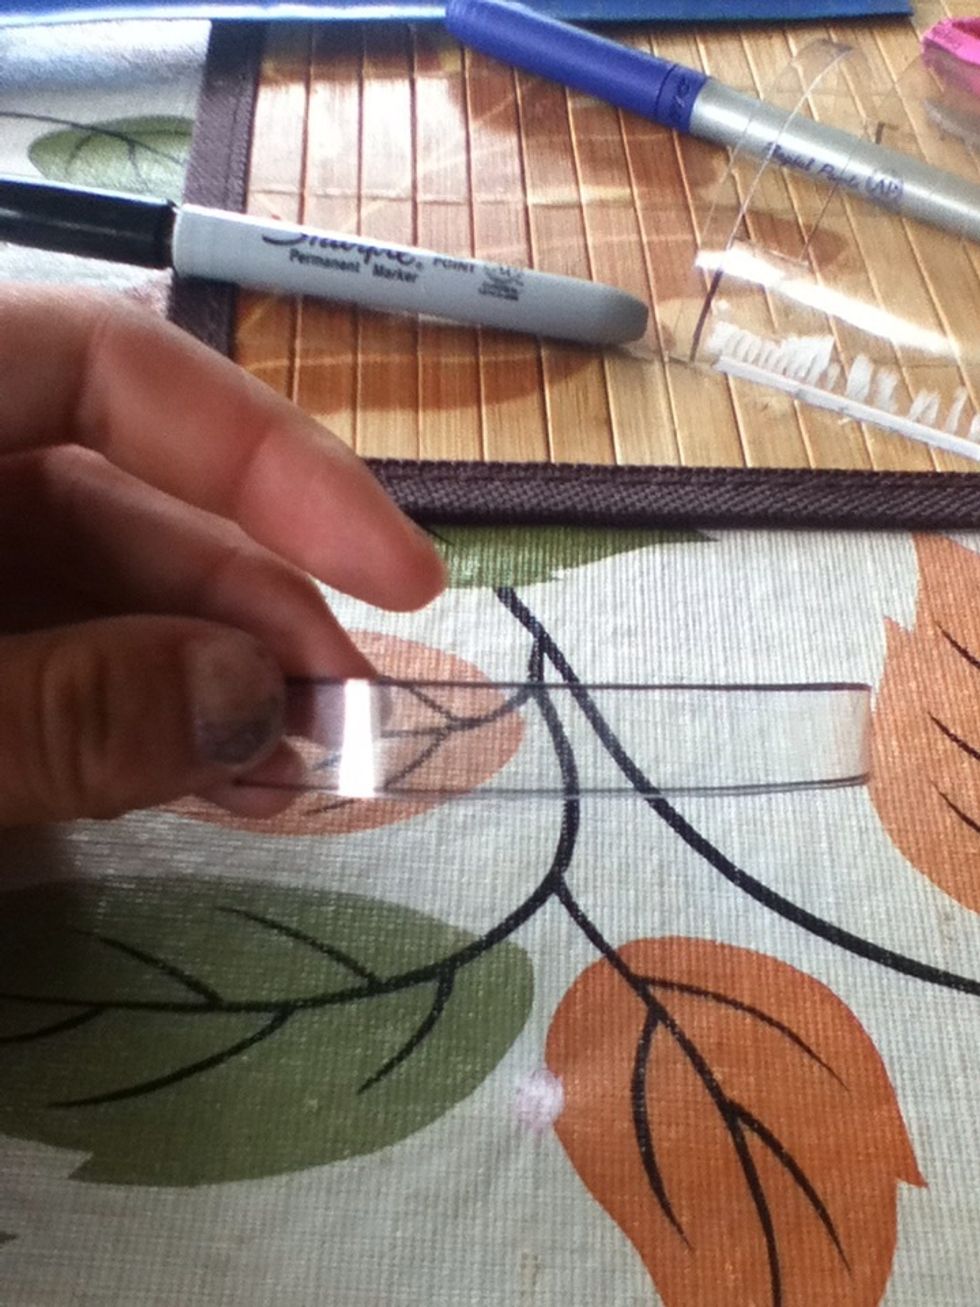
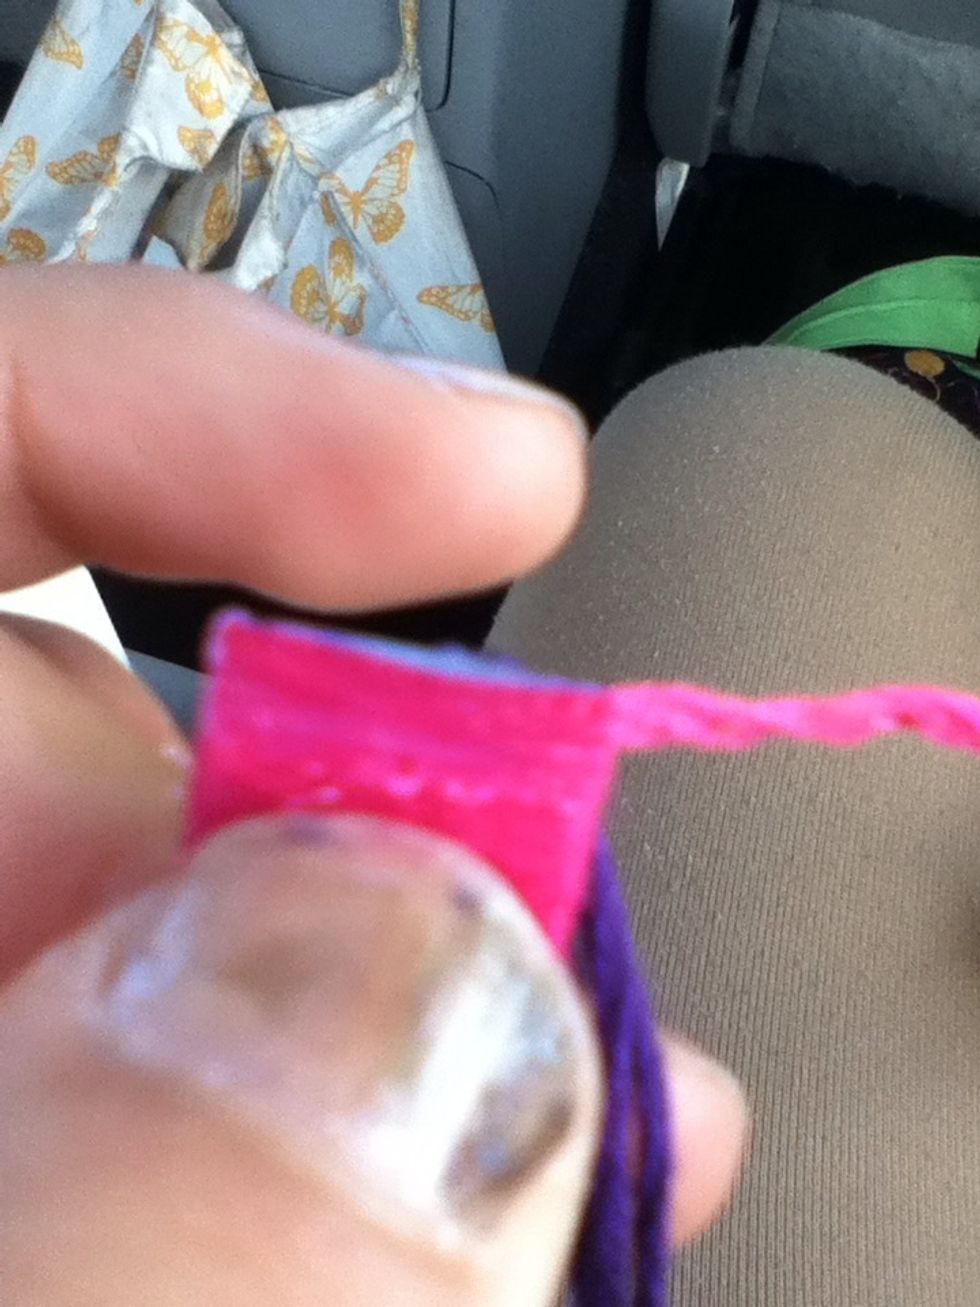
Cut out your rectangle, make sure sides are smooth
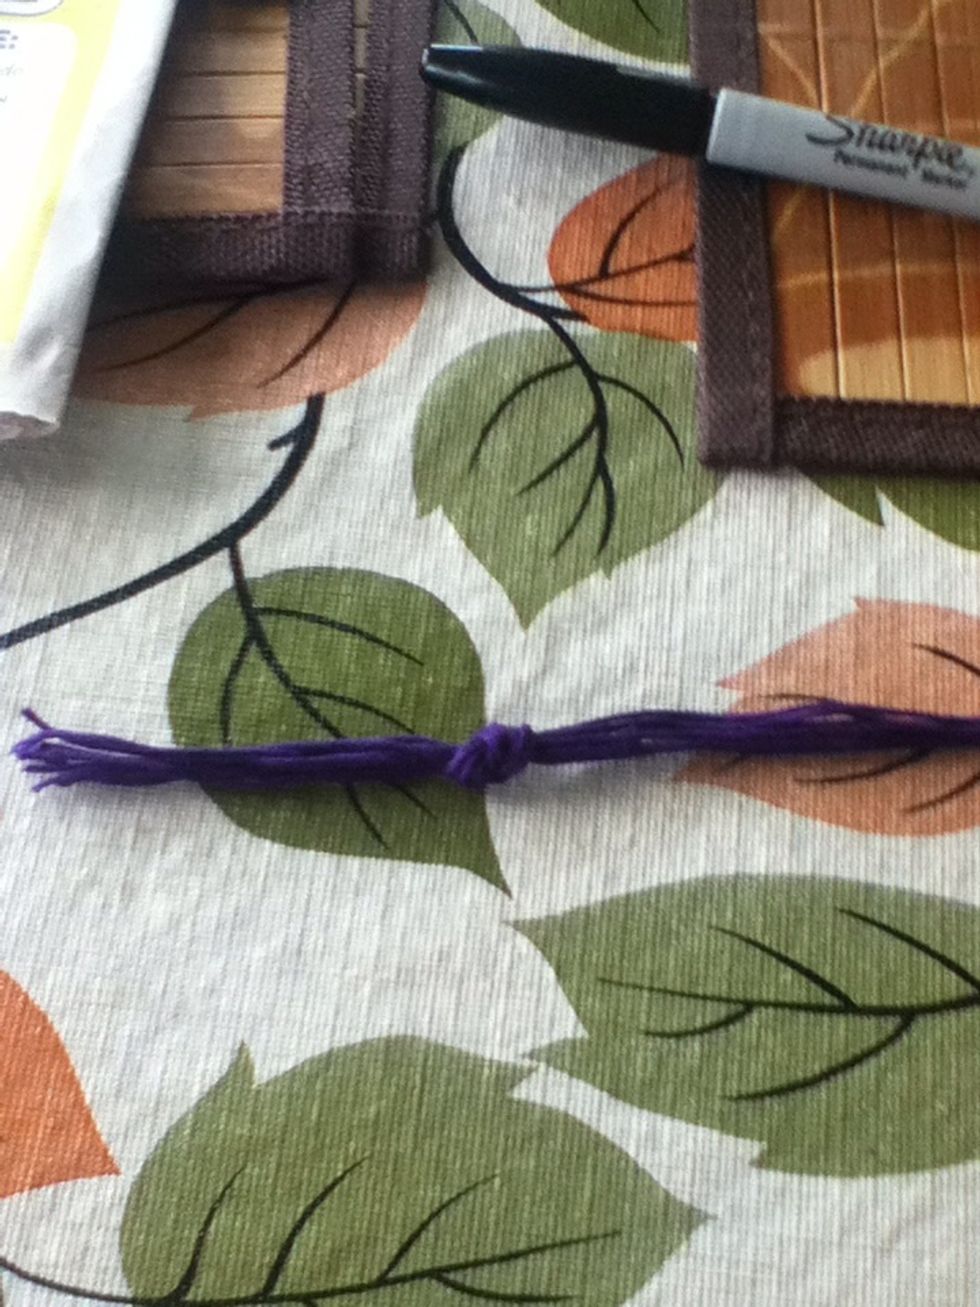
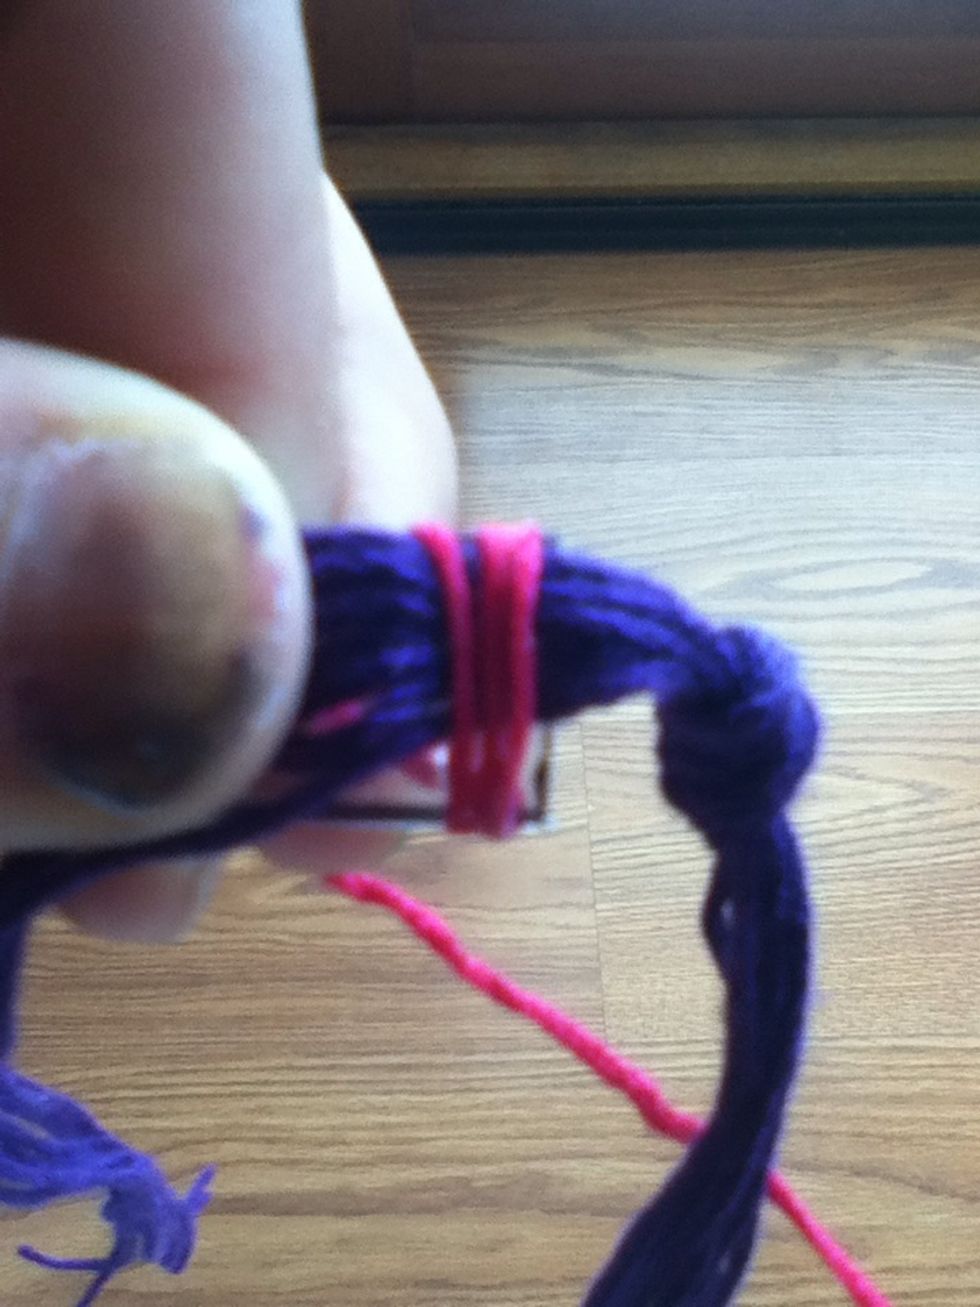
Cut about 14" of the letter color, make 9. Tie a loose knot about 3 1/2" from one end
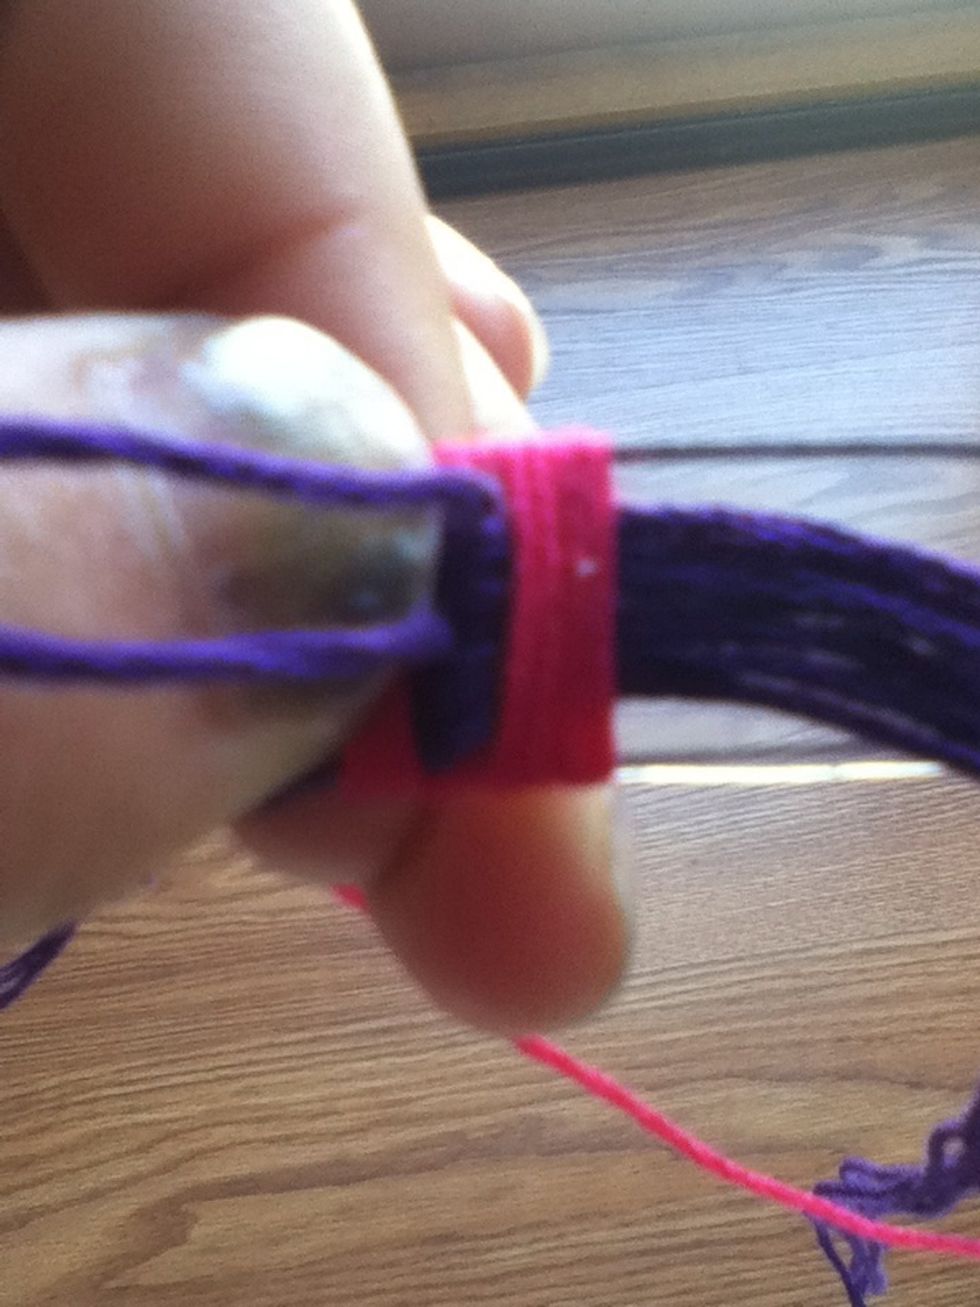
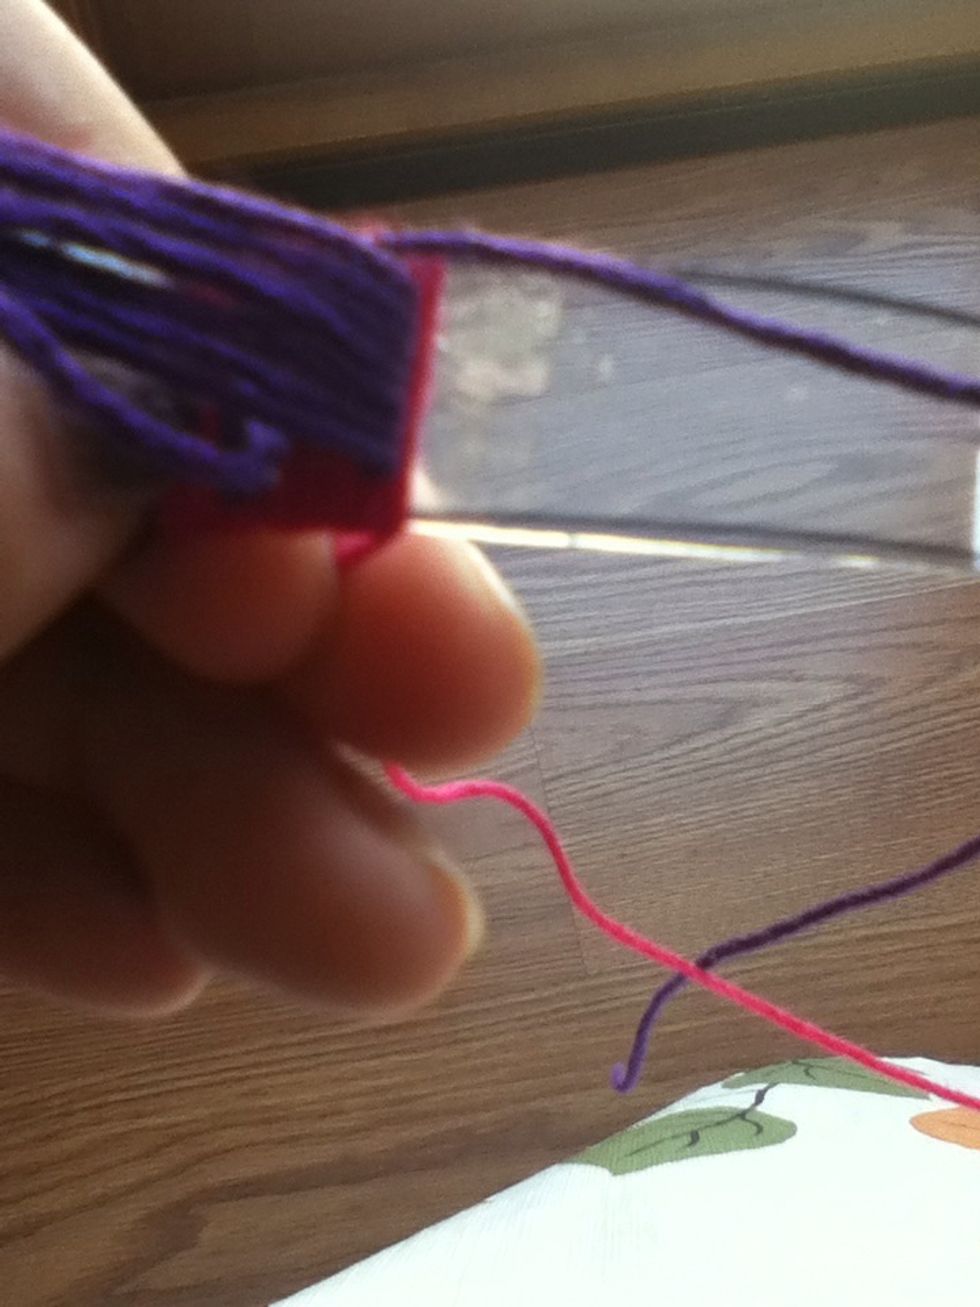
Put some glue on back (the side that curves inward) and around top edges (the far right one)
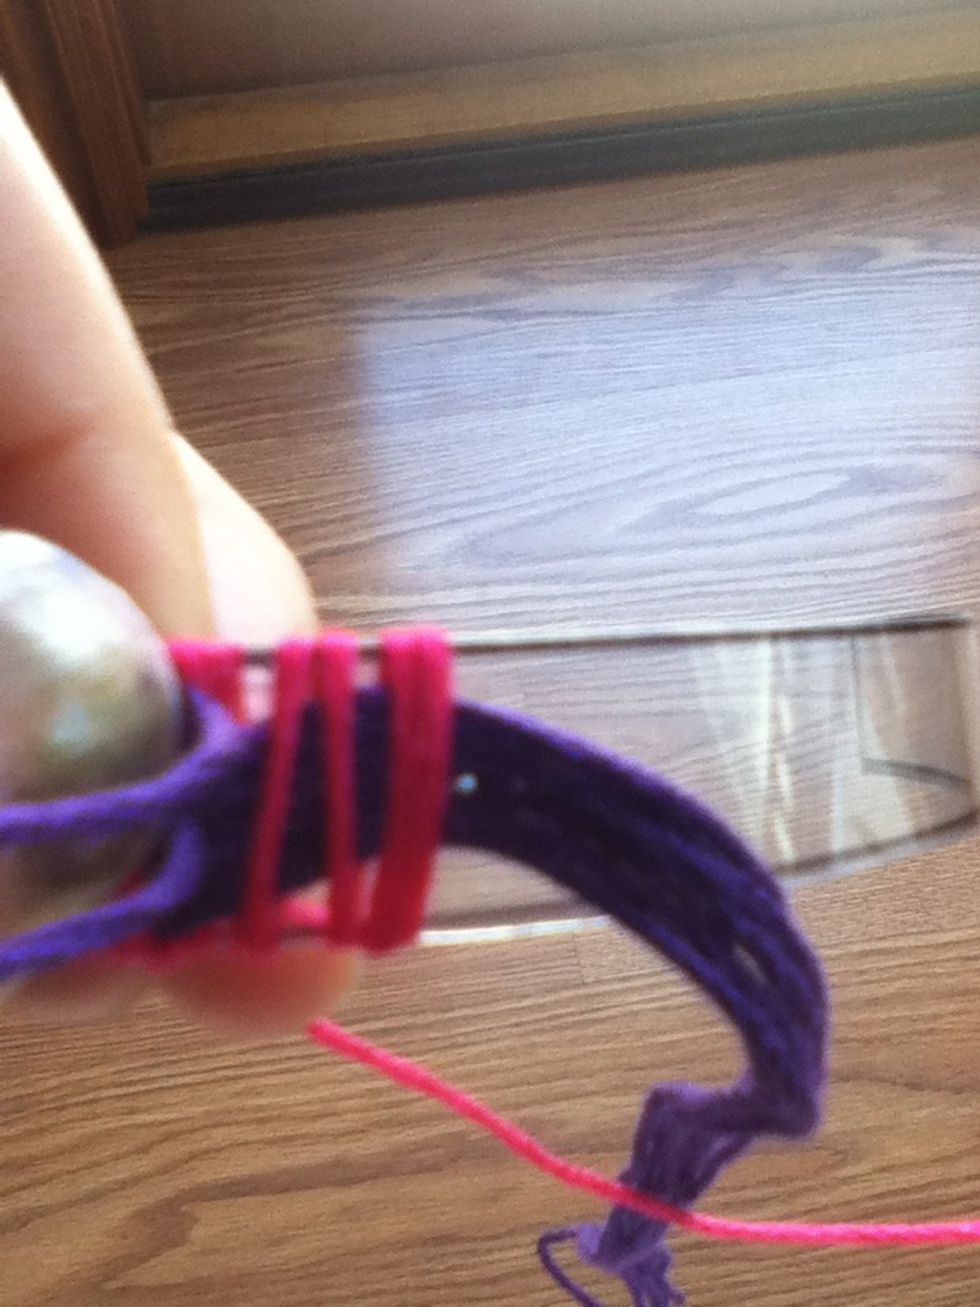
Take your background color and stick it on the back where the glue is

Placing your knot at the edge, put the letter color on the top of the plastic (the side that curves outward
Wrap your background color around the plastic (I wrapped it around 3 times but you can do more depending on the length of the name)
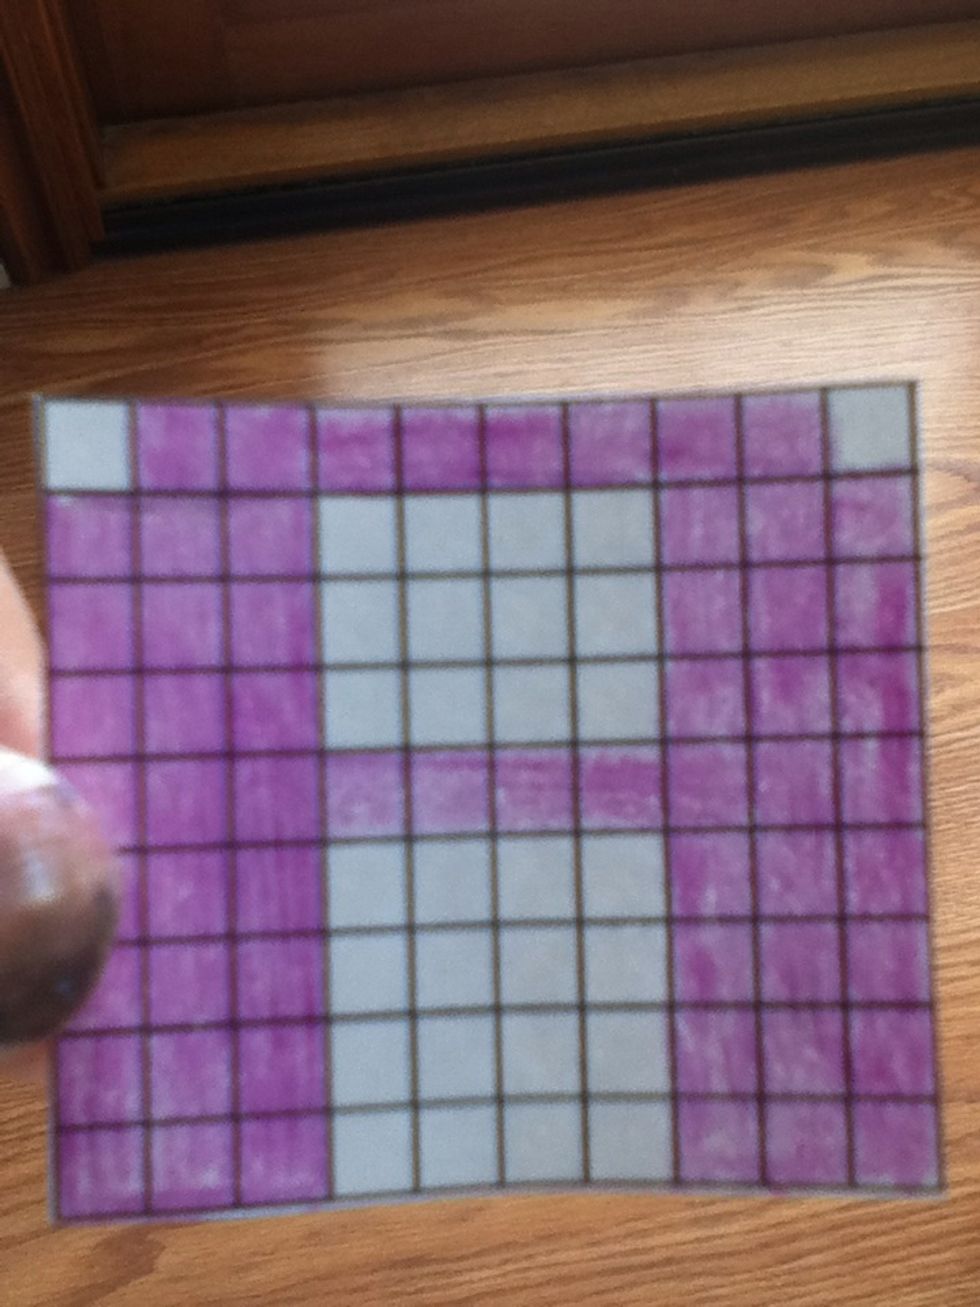
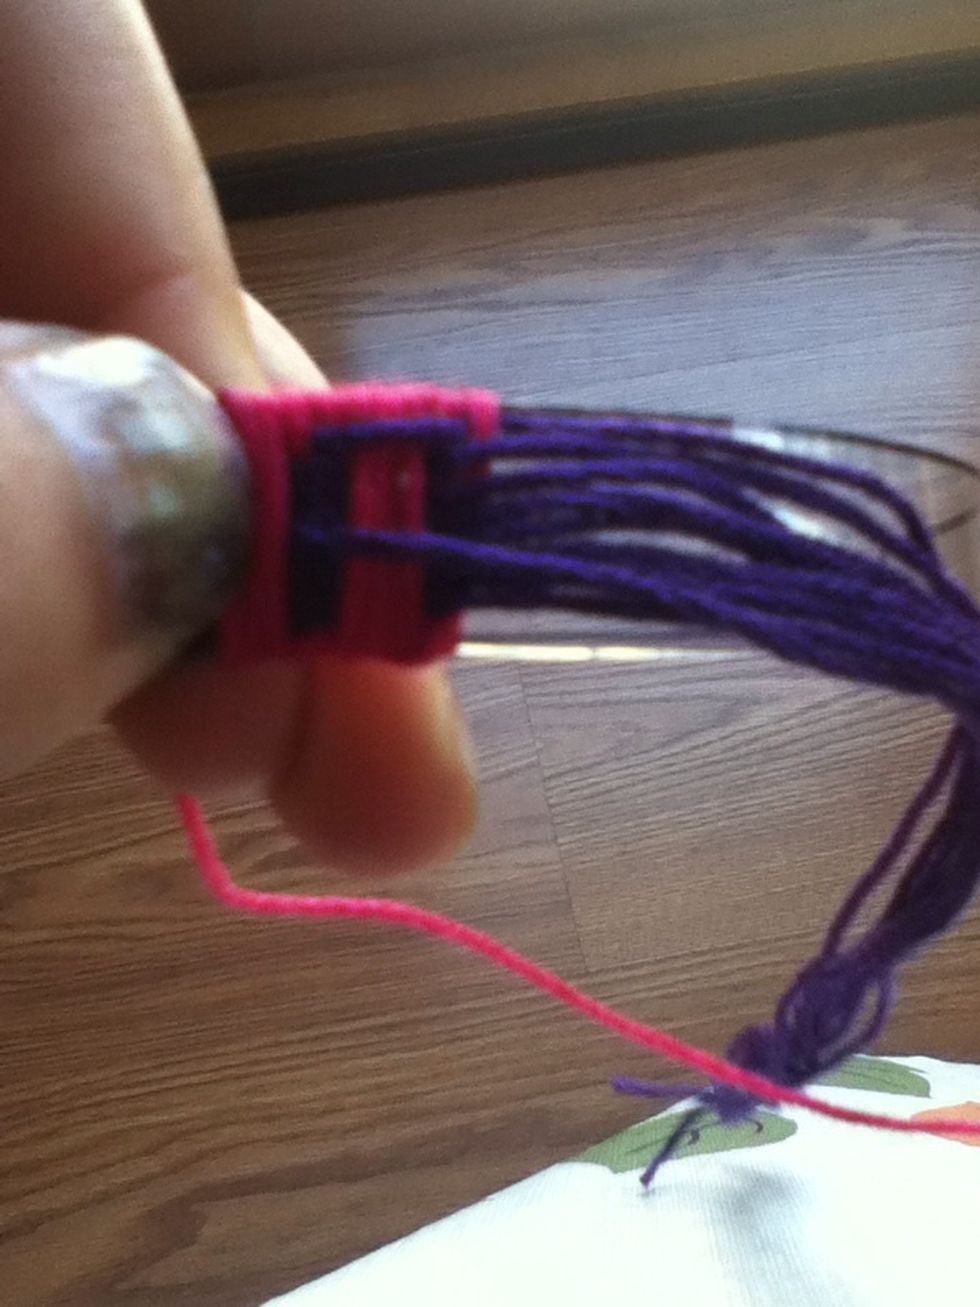
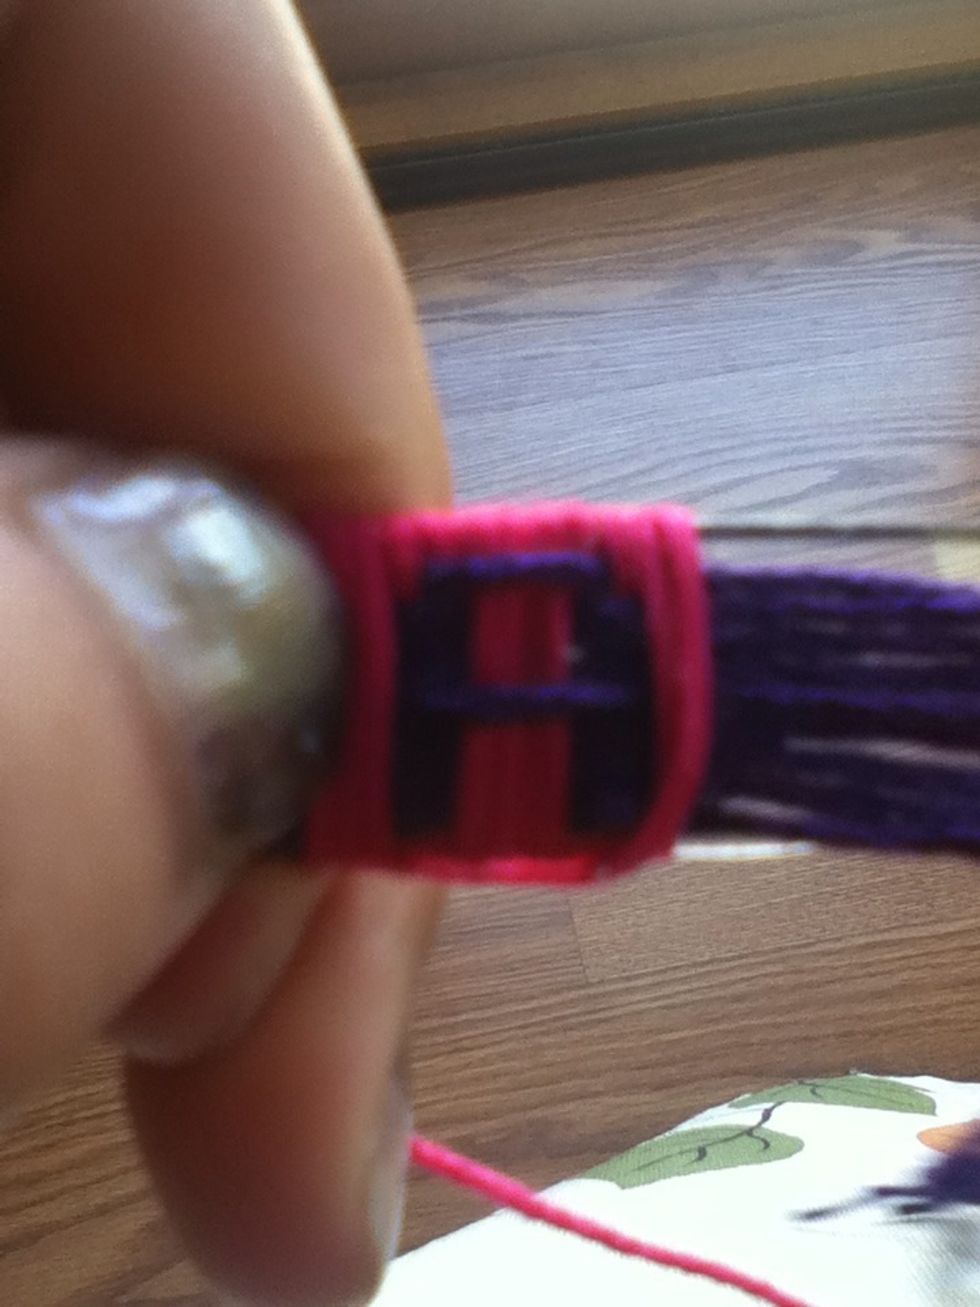
I'll demonstrate using the letter "A"
Pull top string and 5th string down back and wrap around four times
Push together
Check pattern
Pull all back and wrap twice
All except top string back and wrap once
Put strings back down and arrange. Gently pull on the letter strings so the lie flat.
Wrap around twice. Always wrap around twice between letters

When you've finished the name, wrap it around the same amount of times you did at the beginning

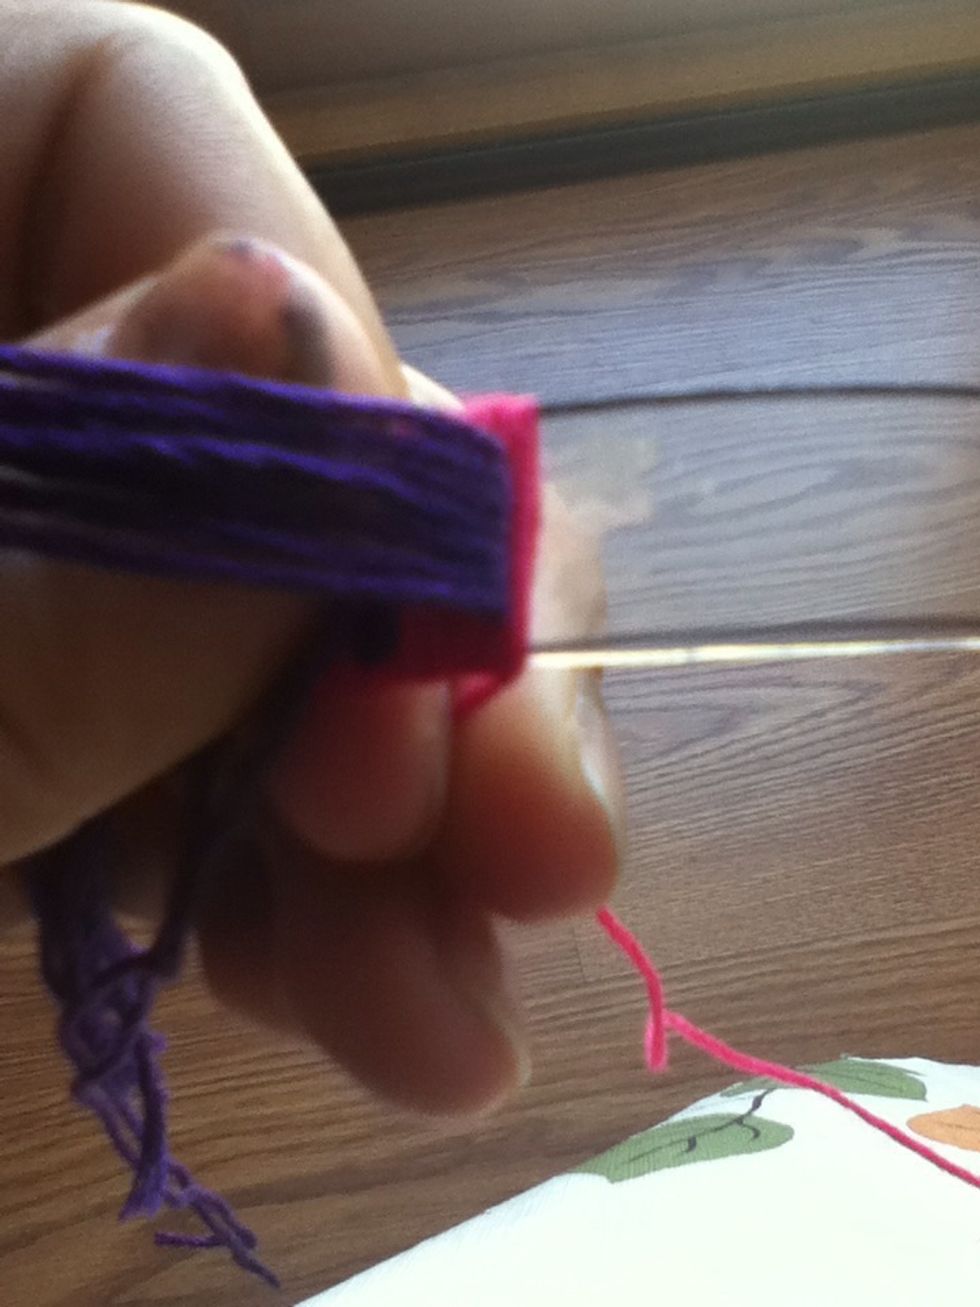
Put some glue around the last wrap

Press the string down so it holds, then cut it off at the end
Glue down the end of the string, cut it off, glue it better. (option 2: cut the string, tuck it into the back, glue)
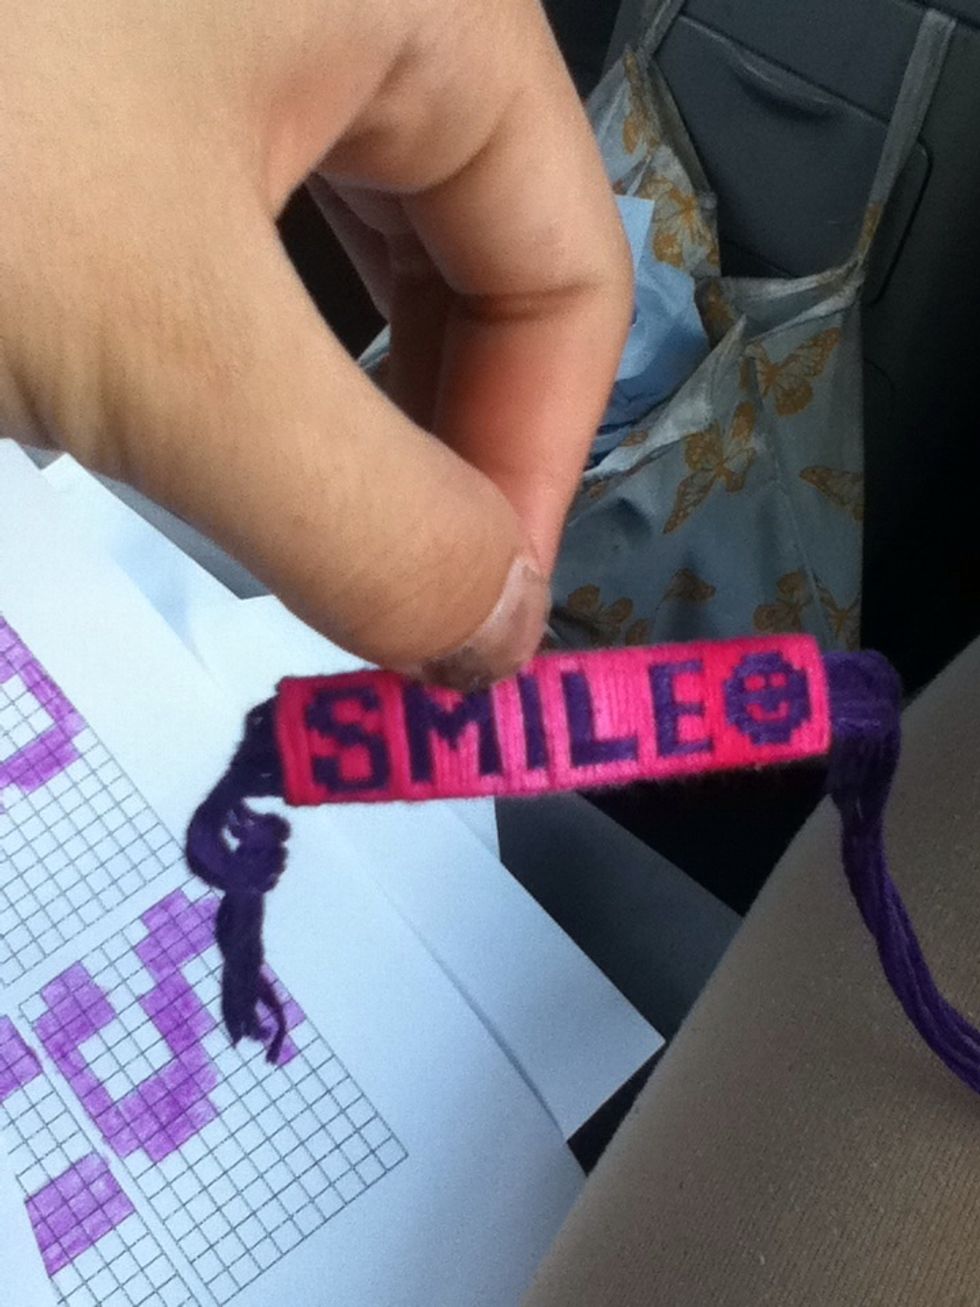
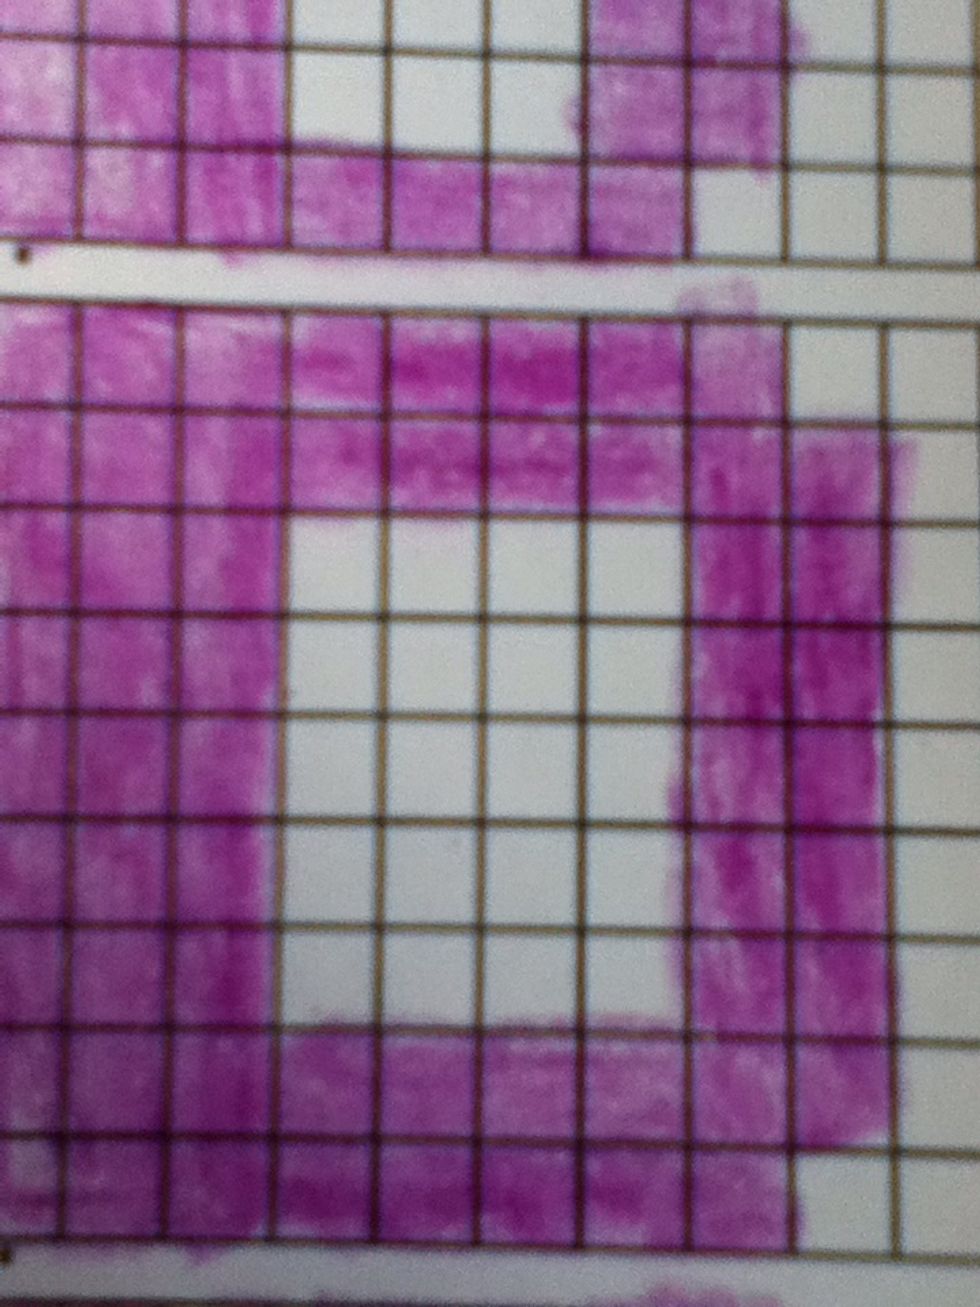
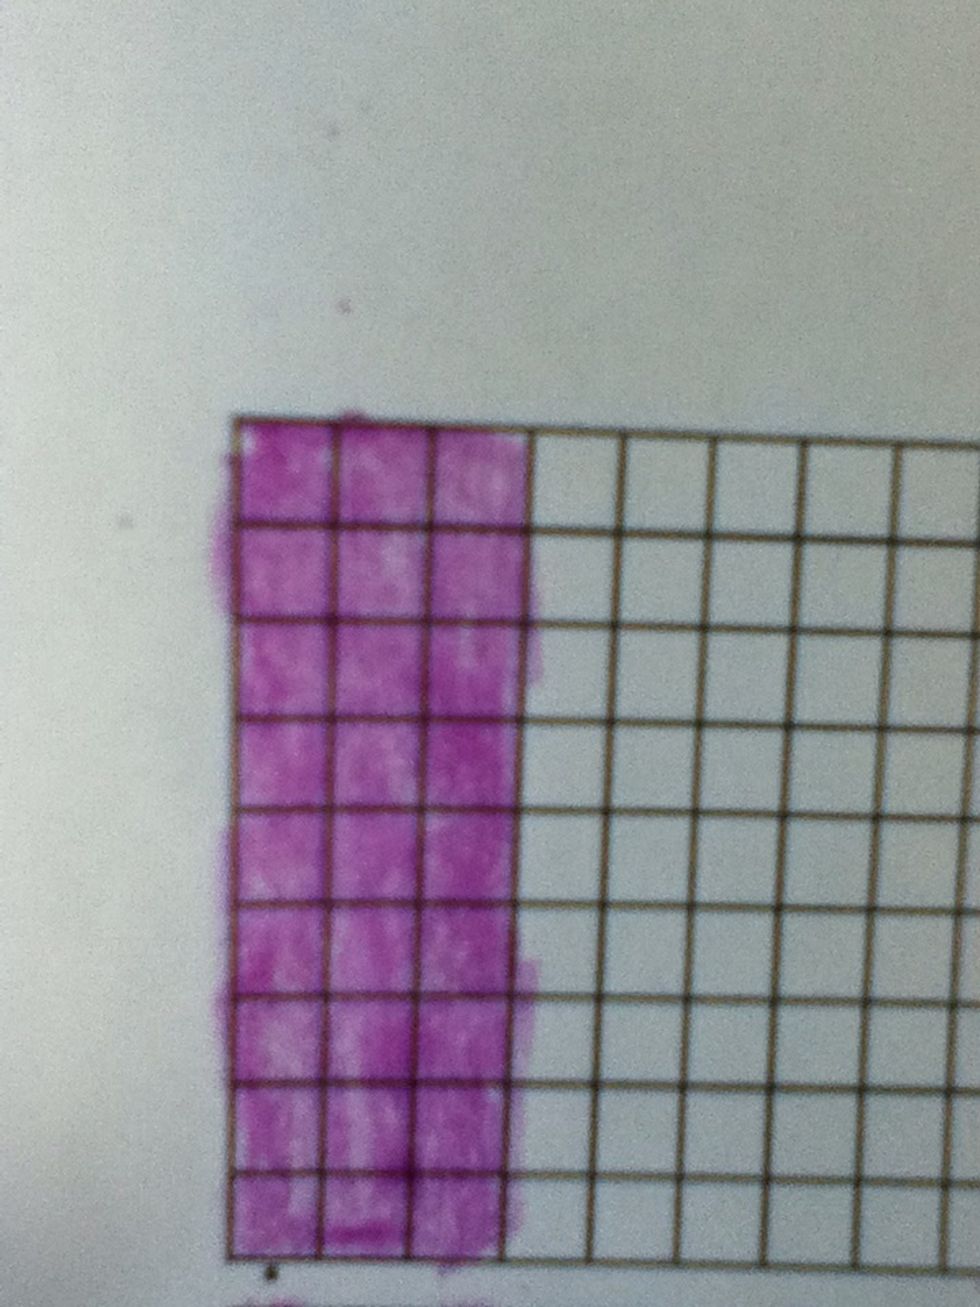
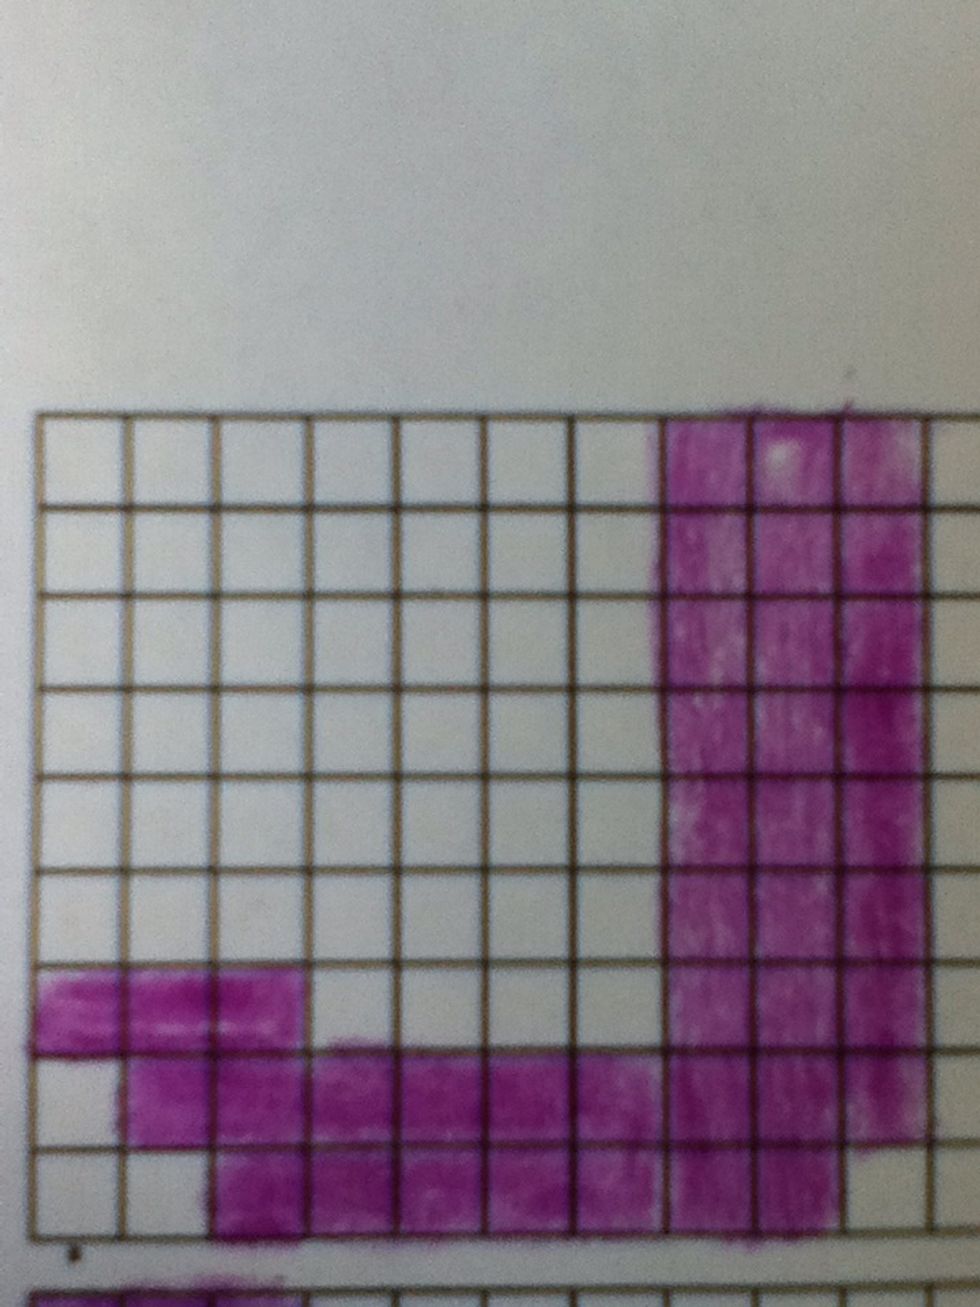
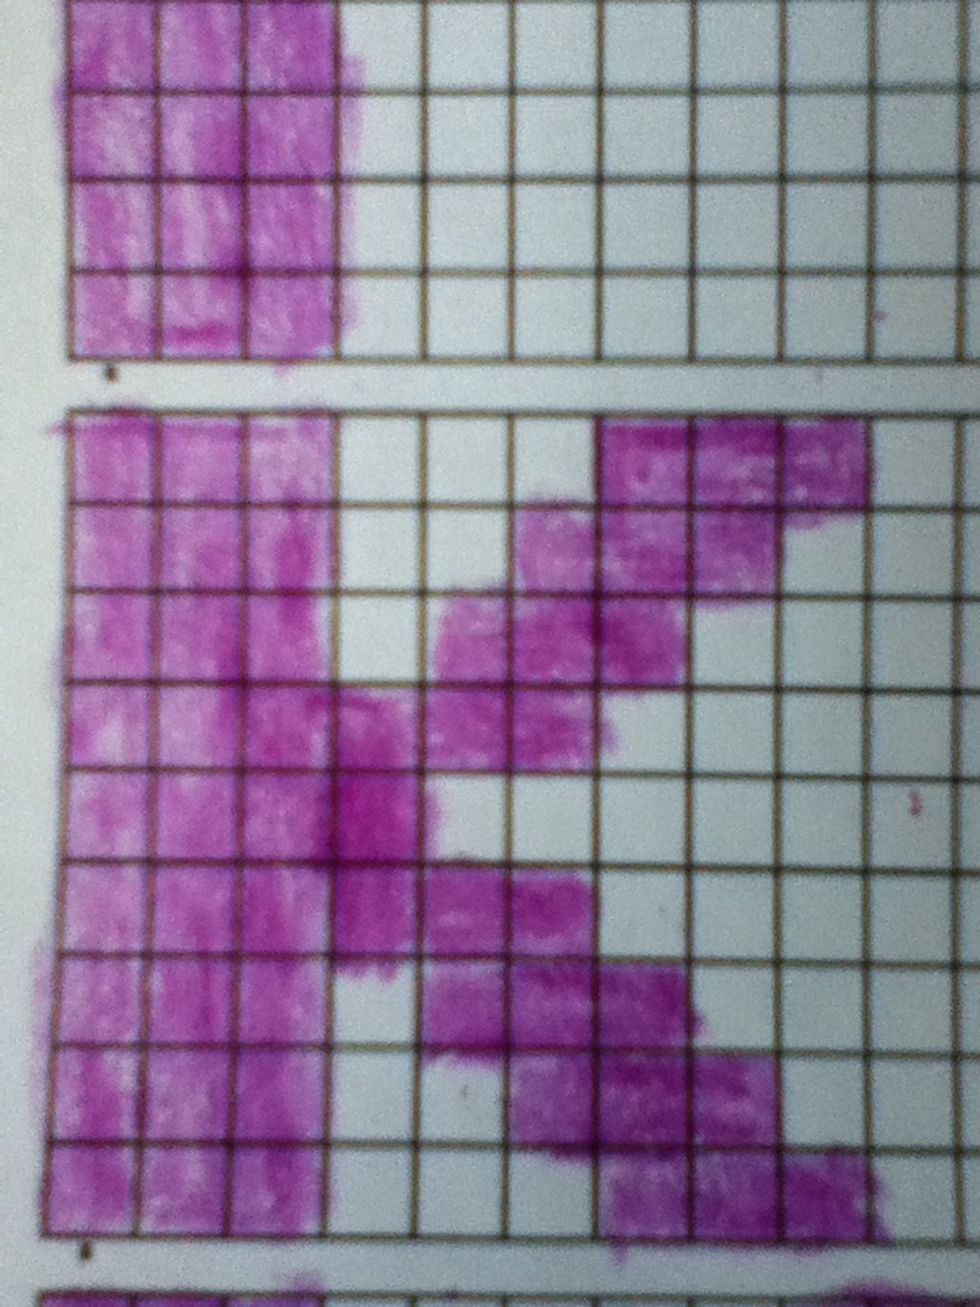
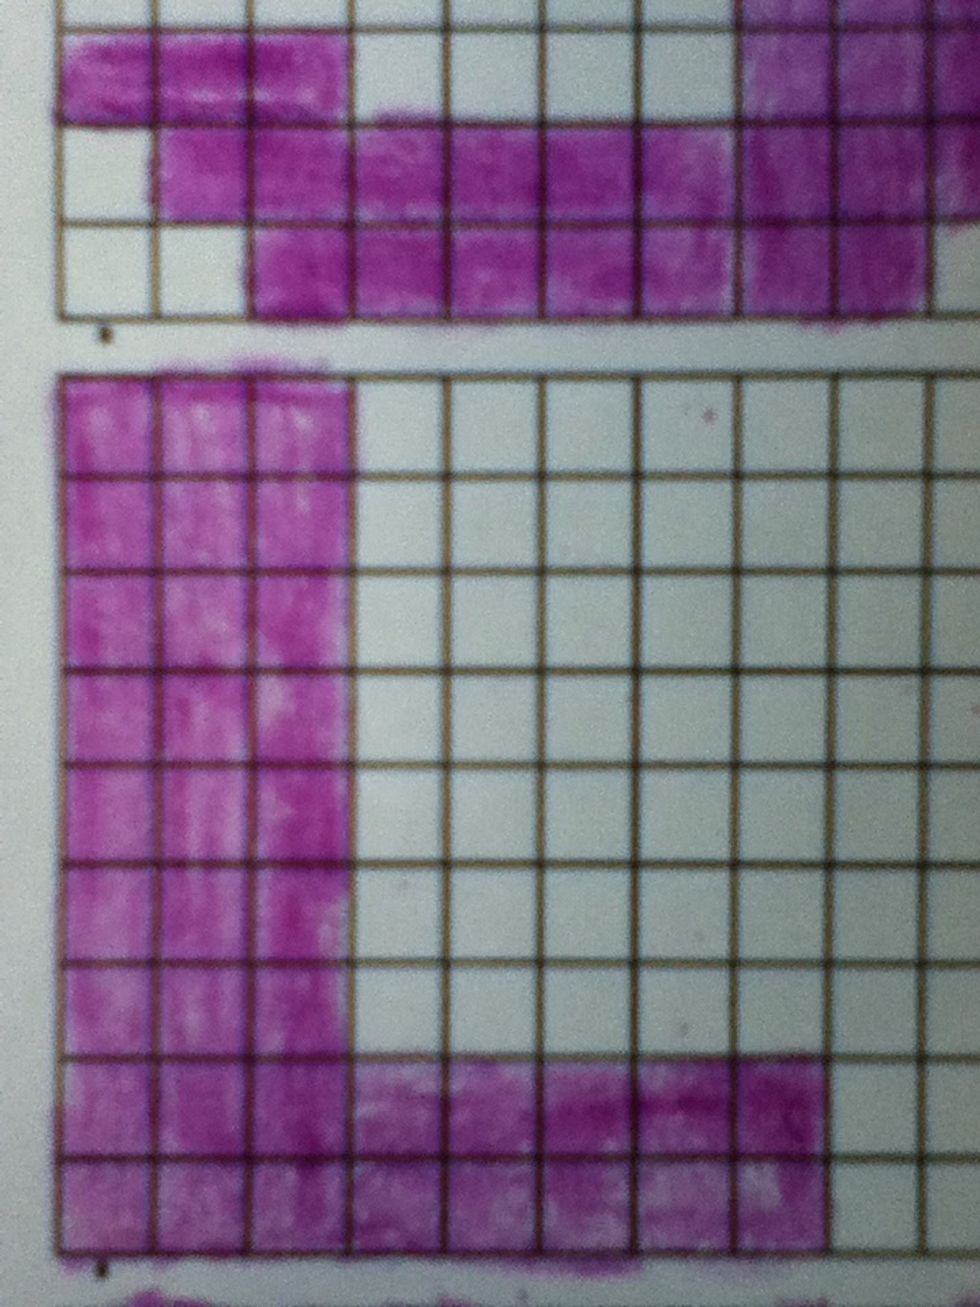
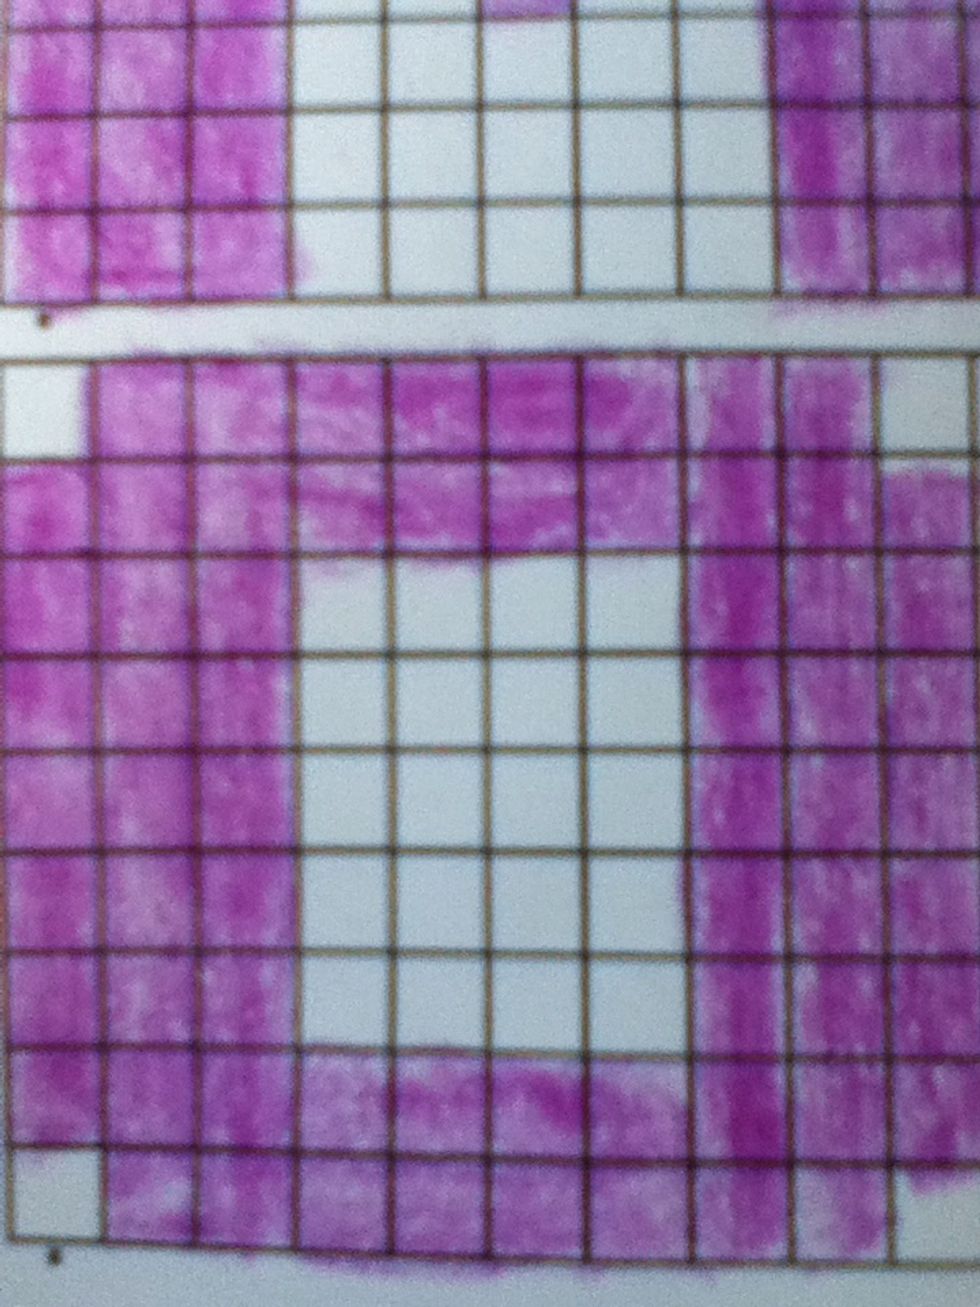
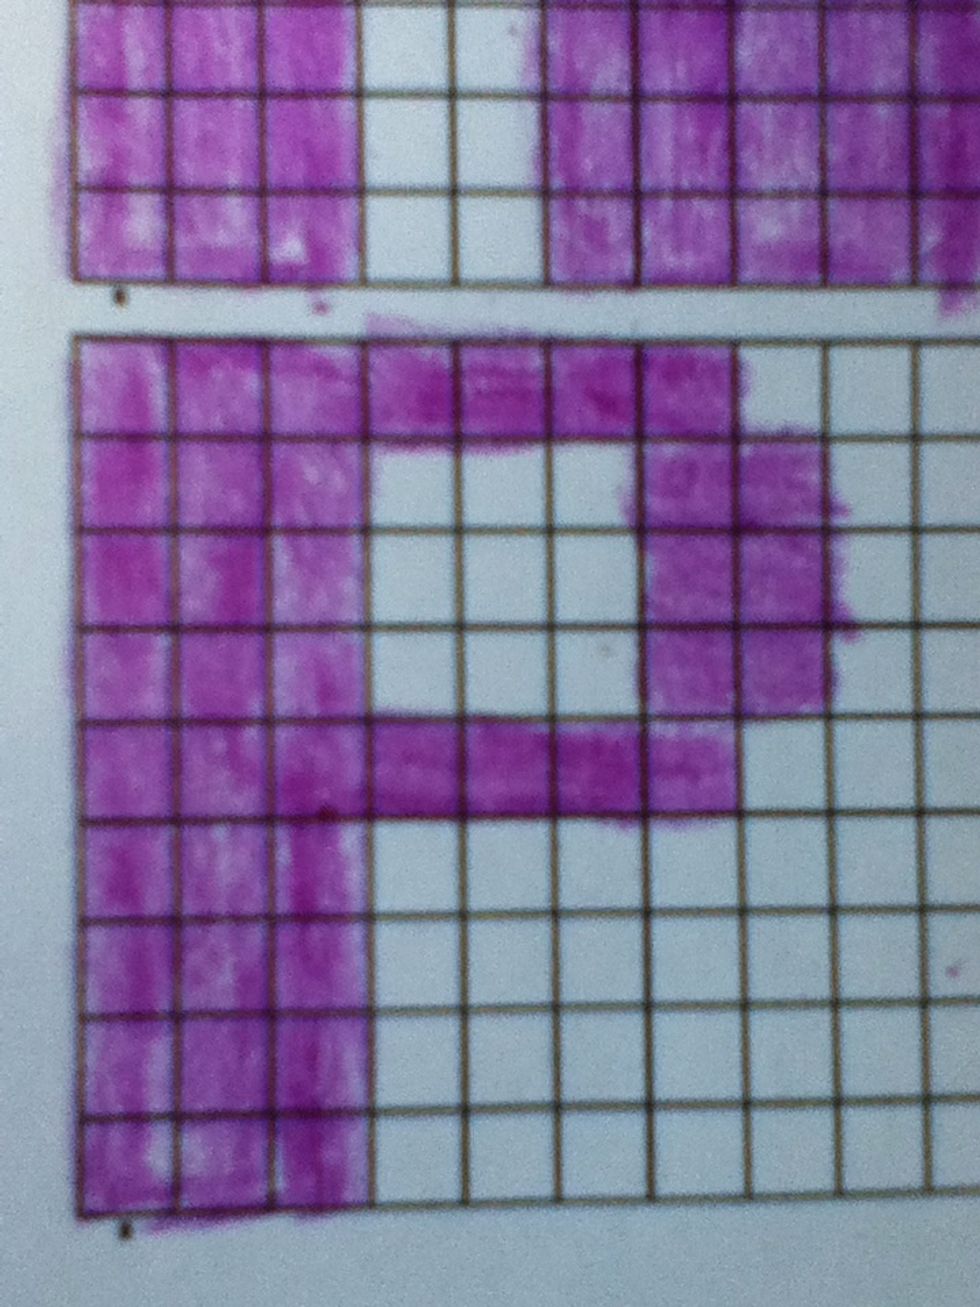
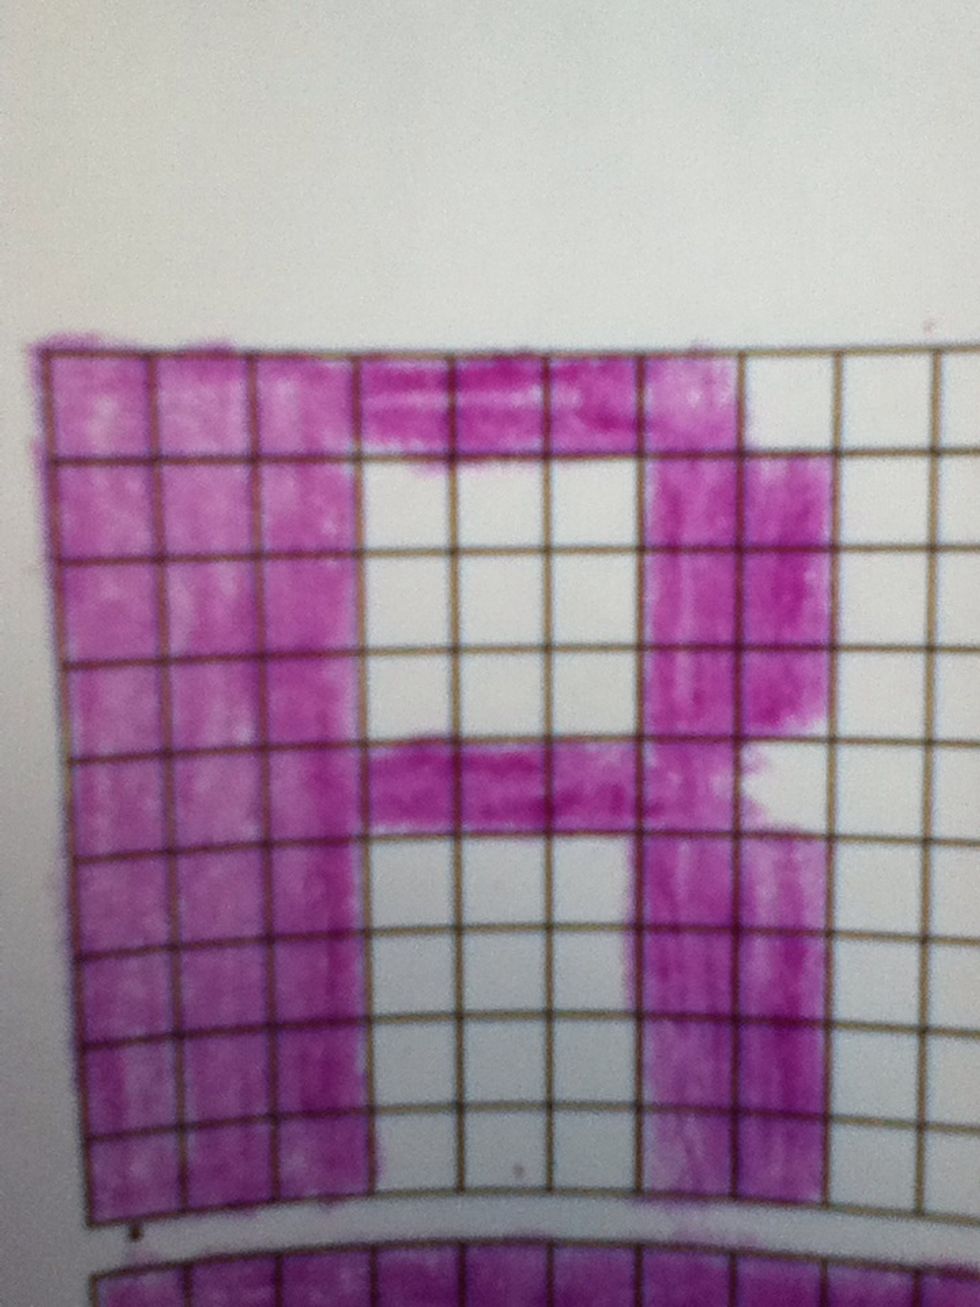
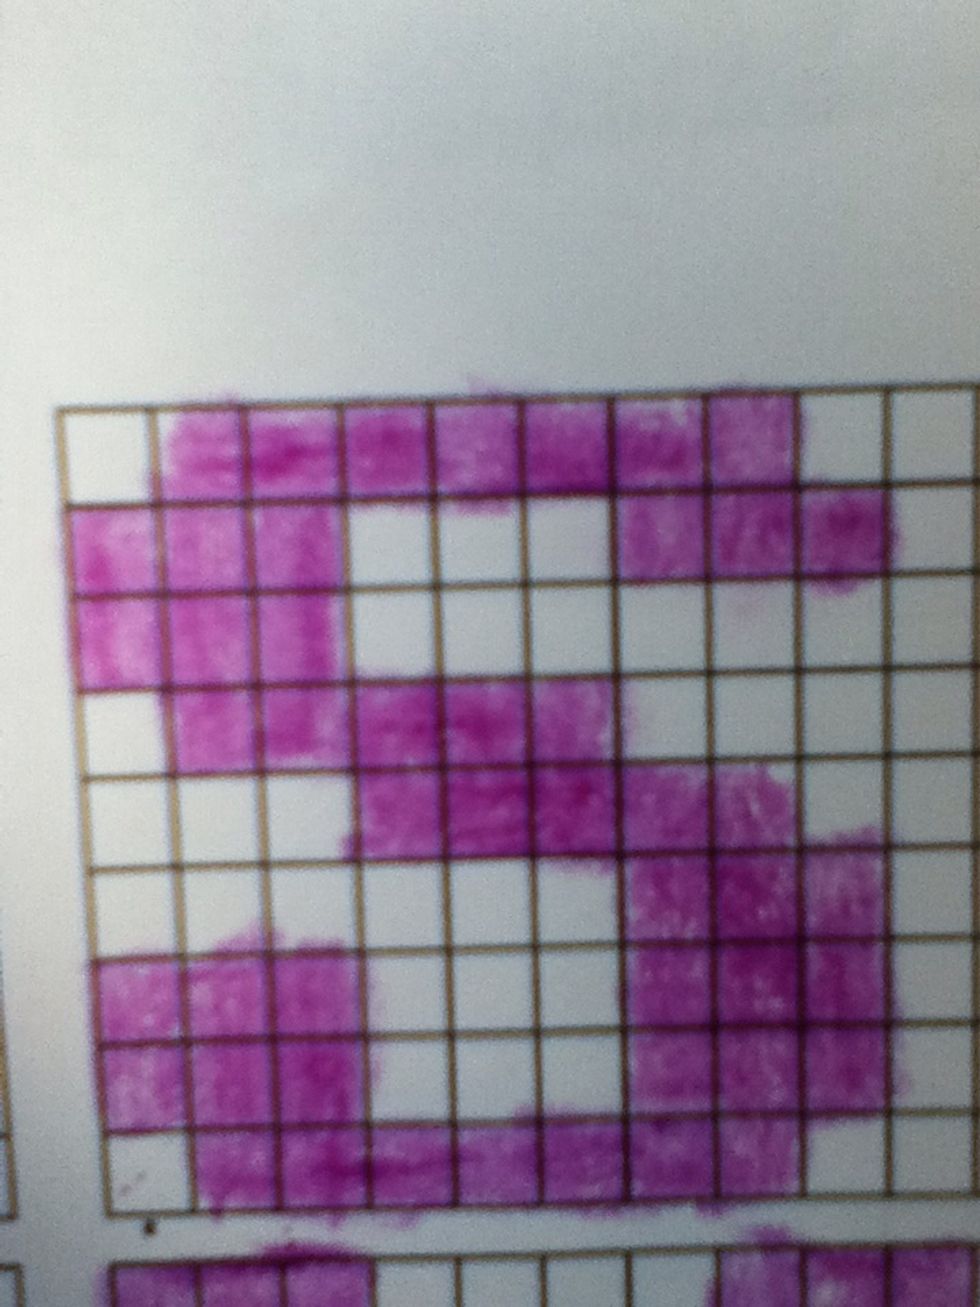
Ta-da! The next steps are all the patterns that I made. You can make your own letter pattern there is one I know of online. You might have to expand the picture for the entire pattern.
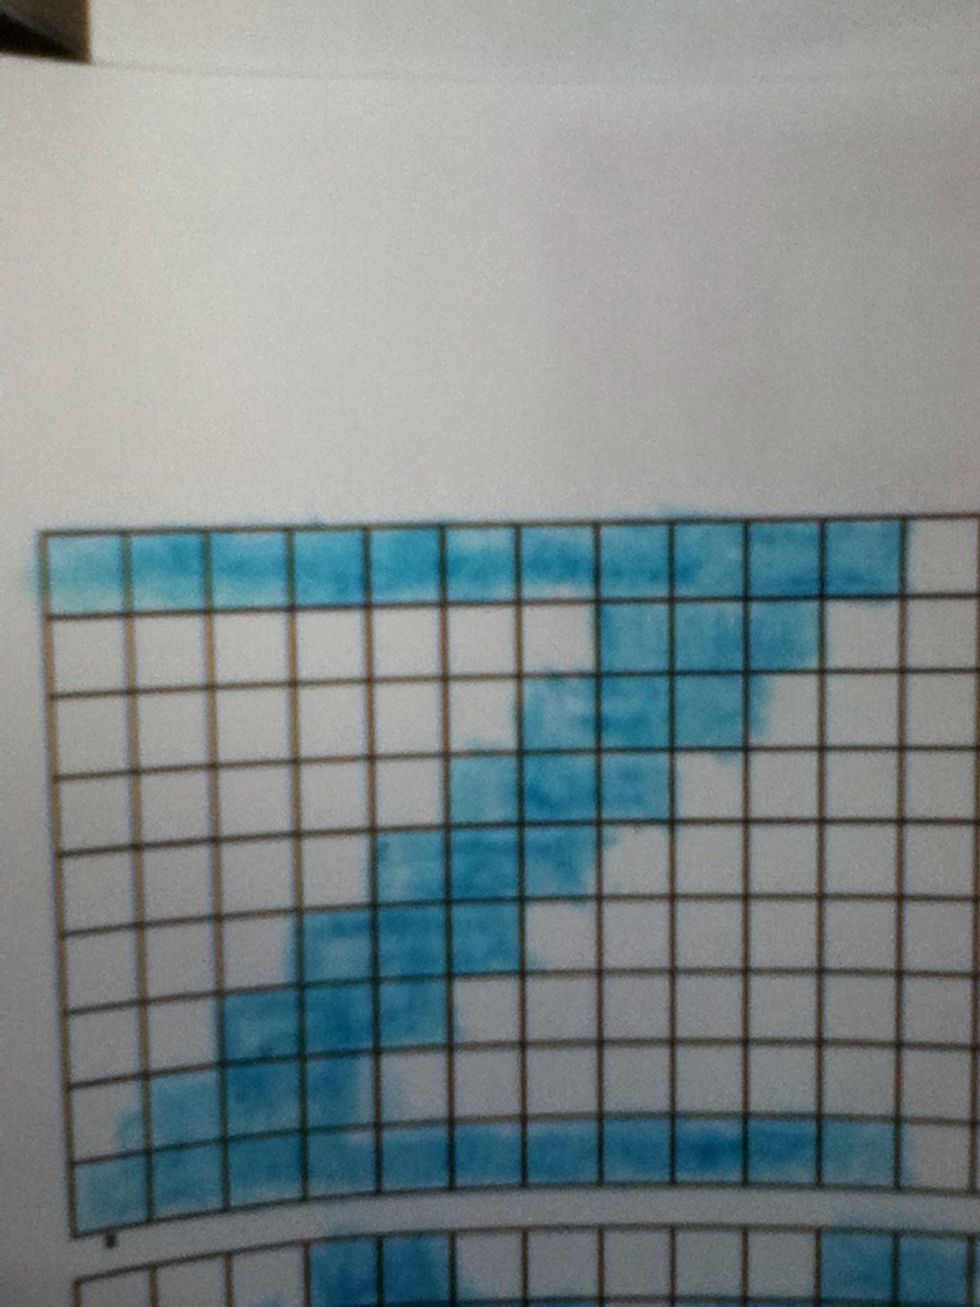
A
B
C
D
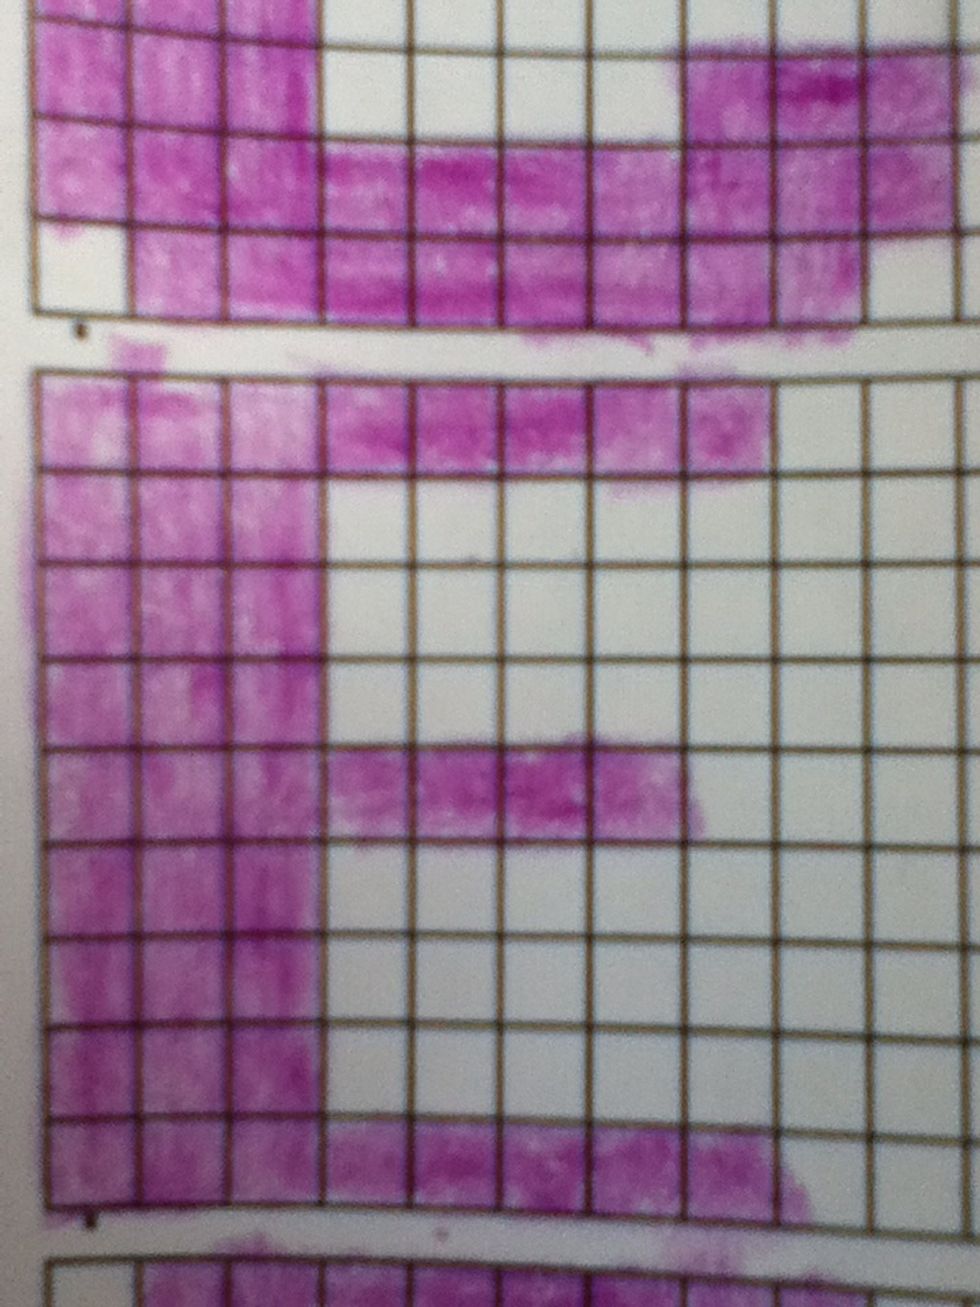
E
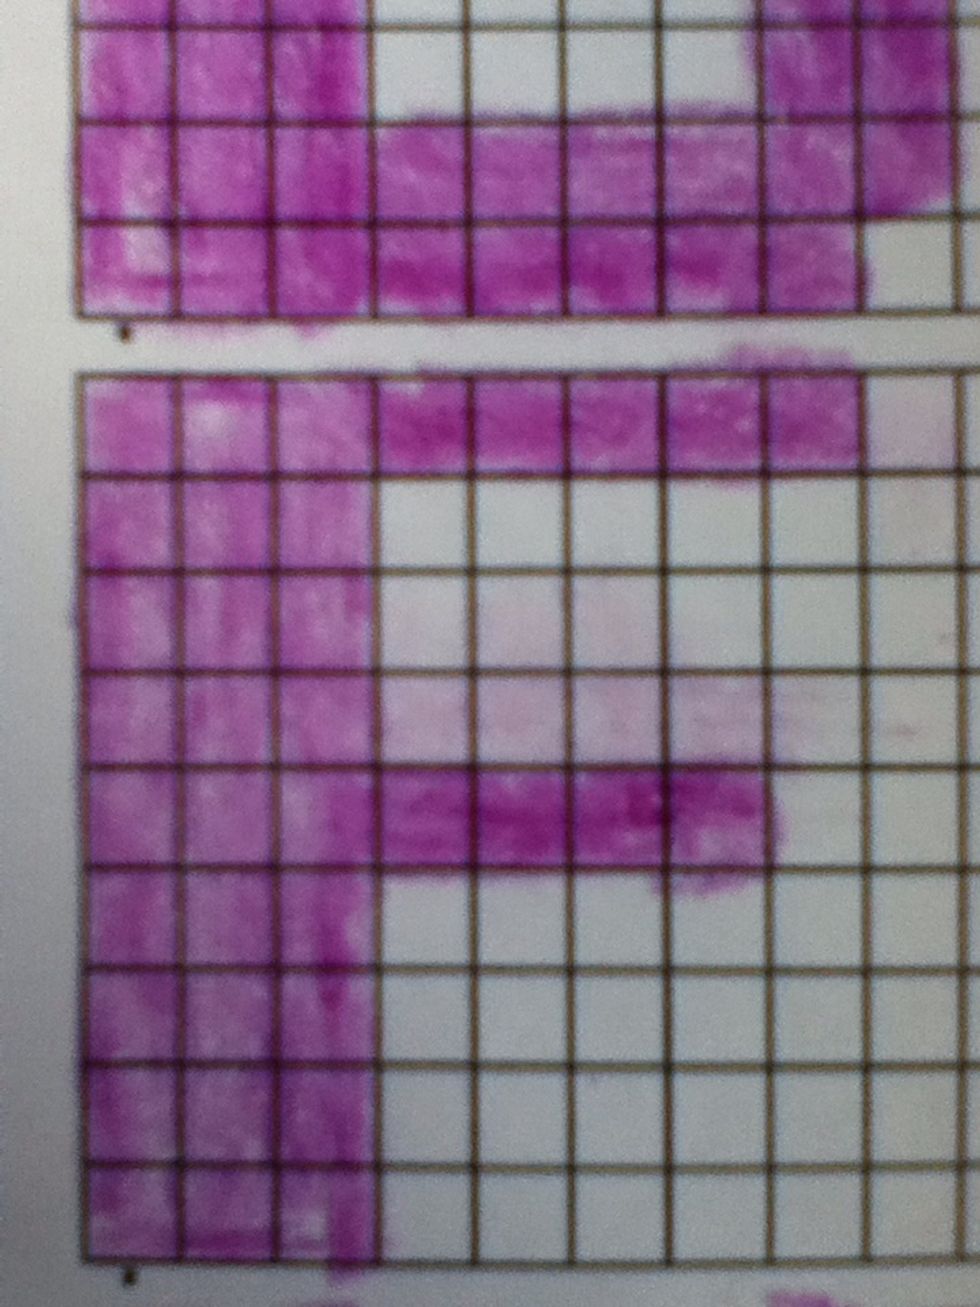
F
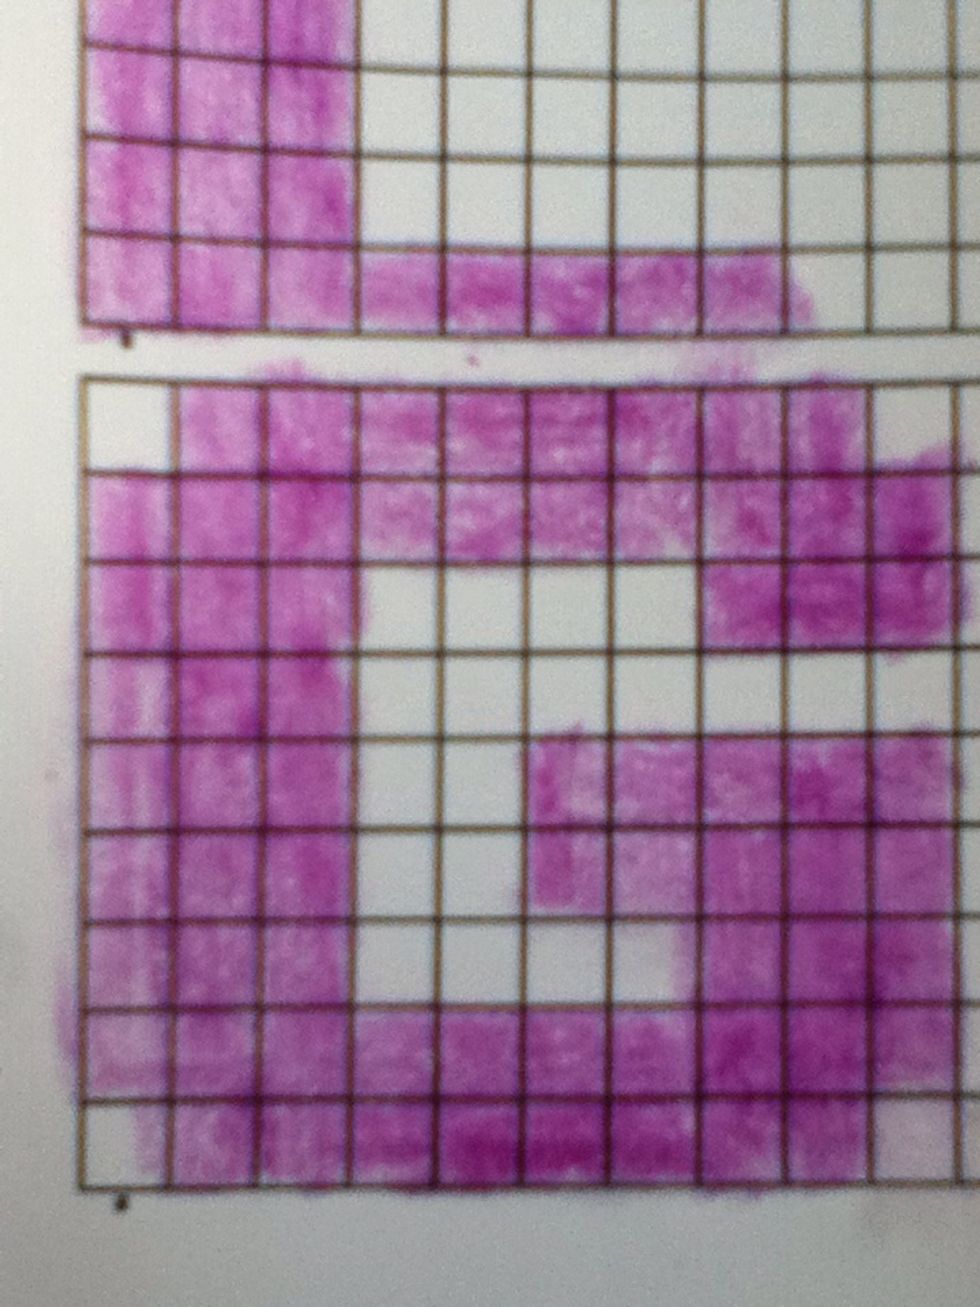
G
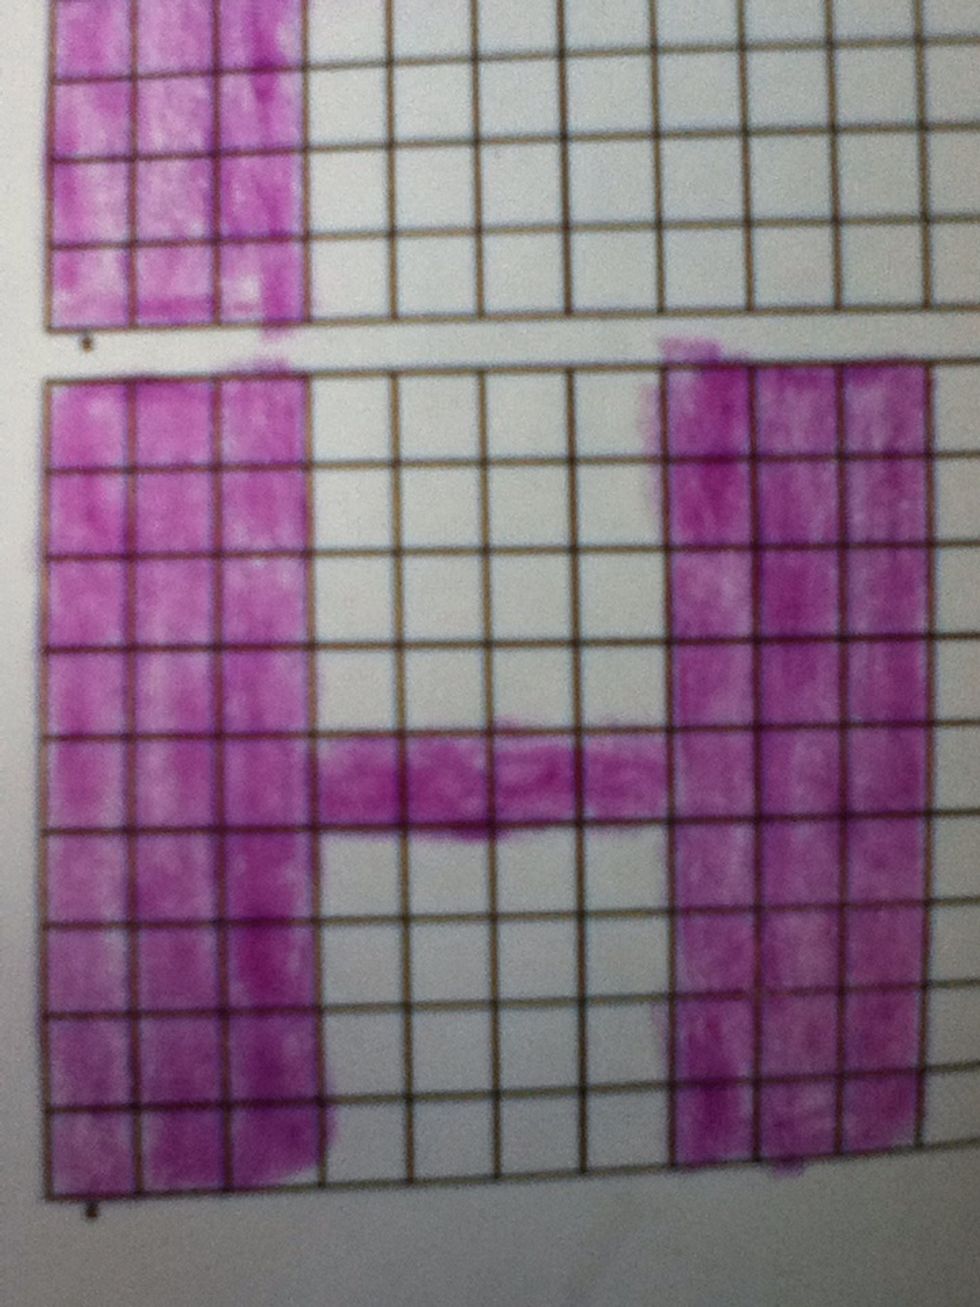
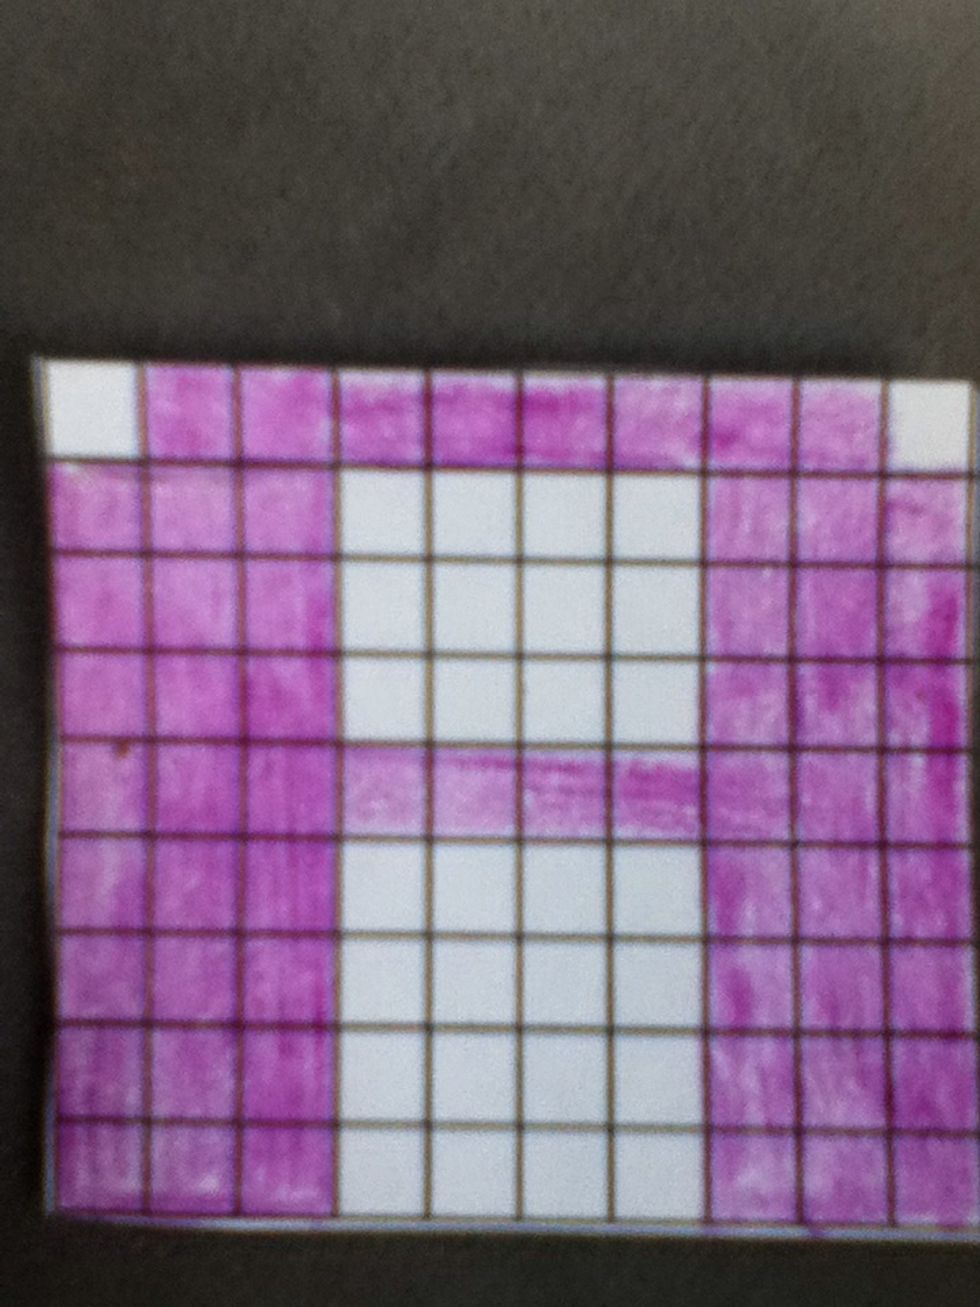
H
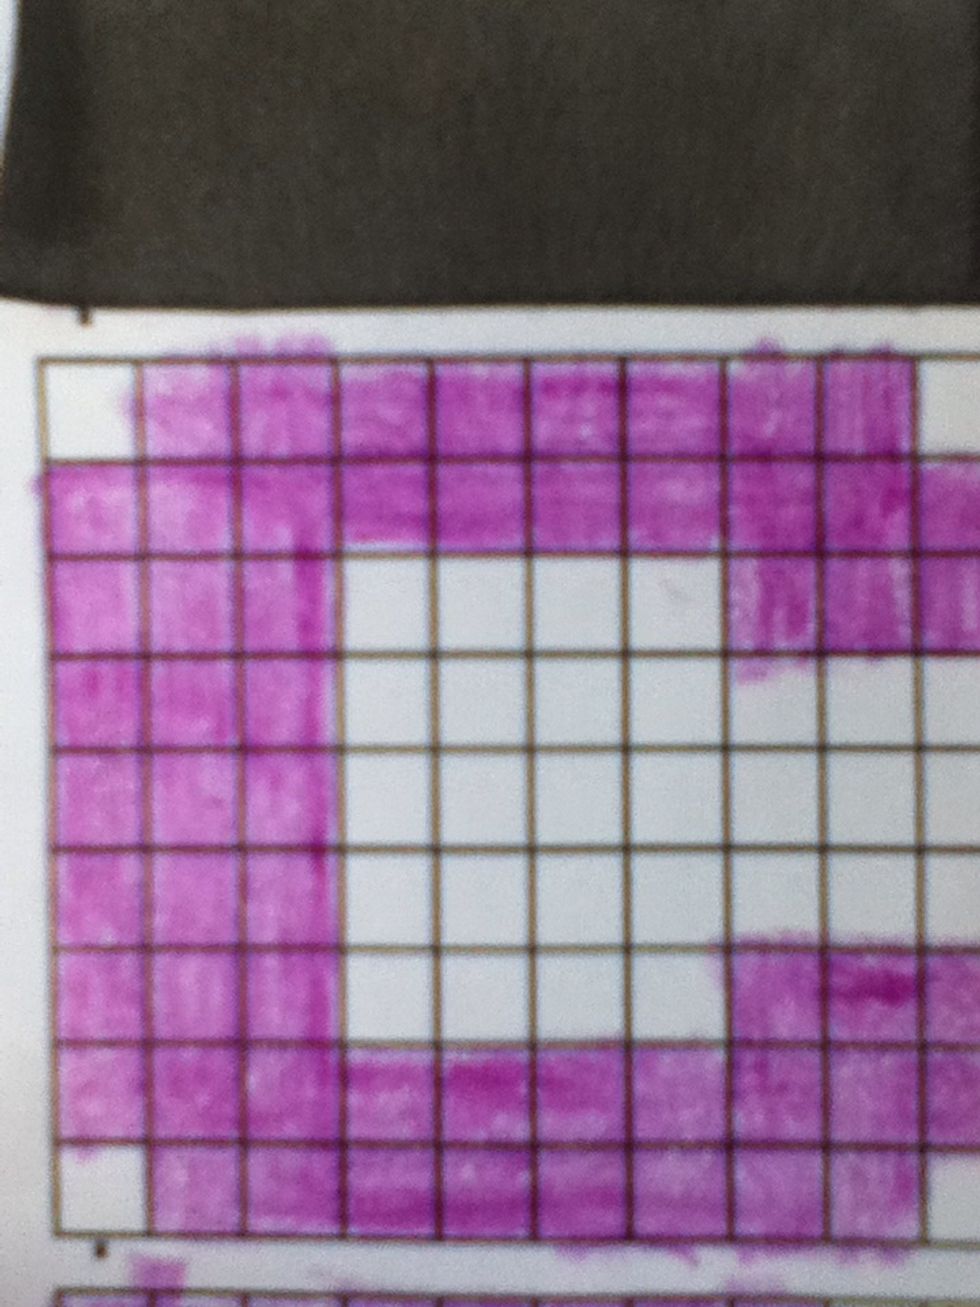
I
J
K
L
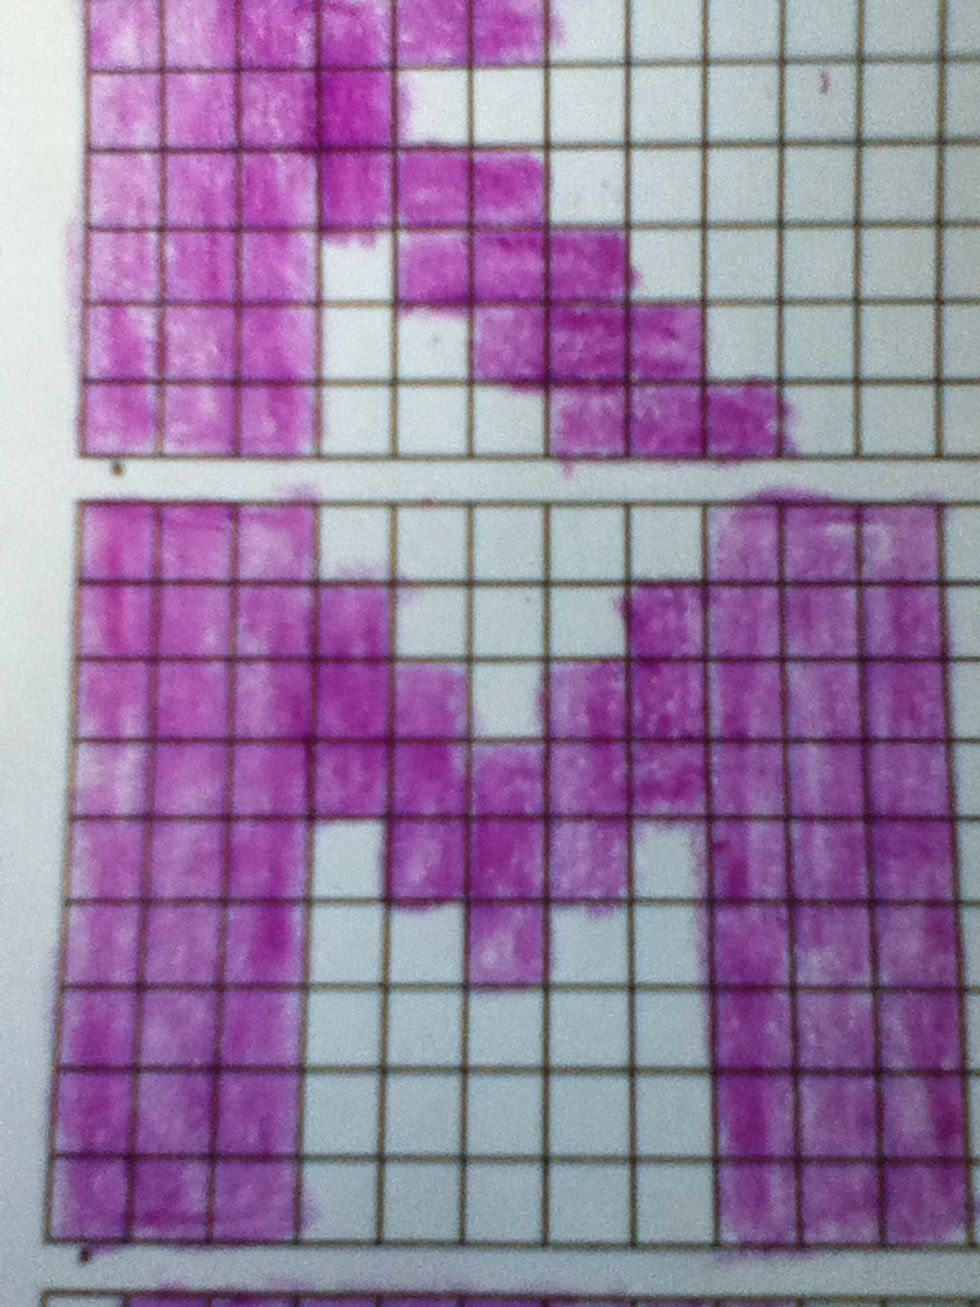
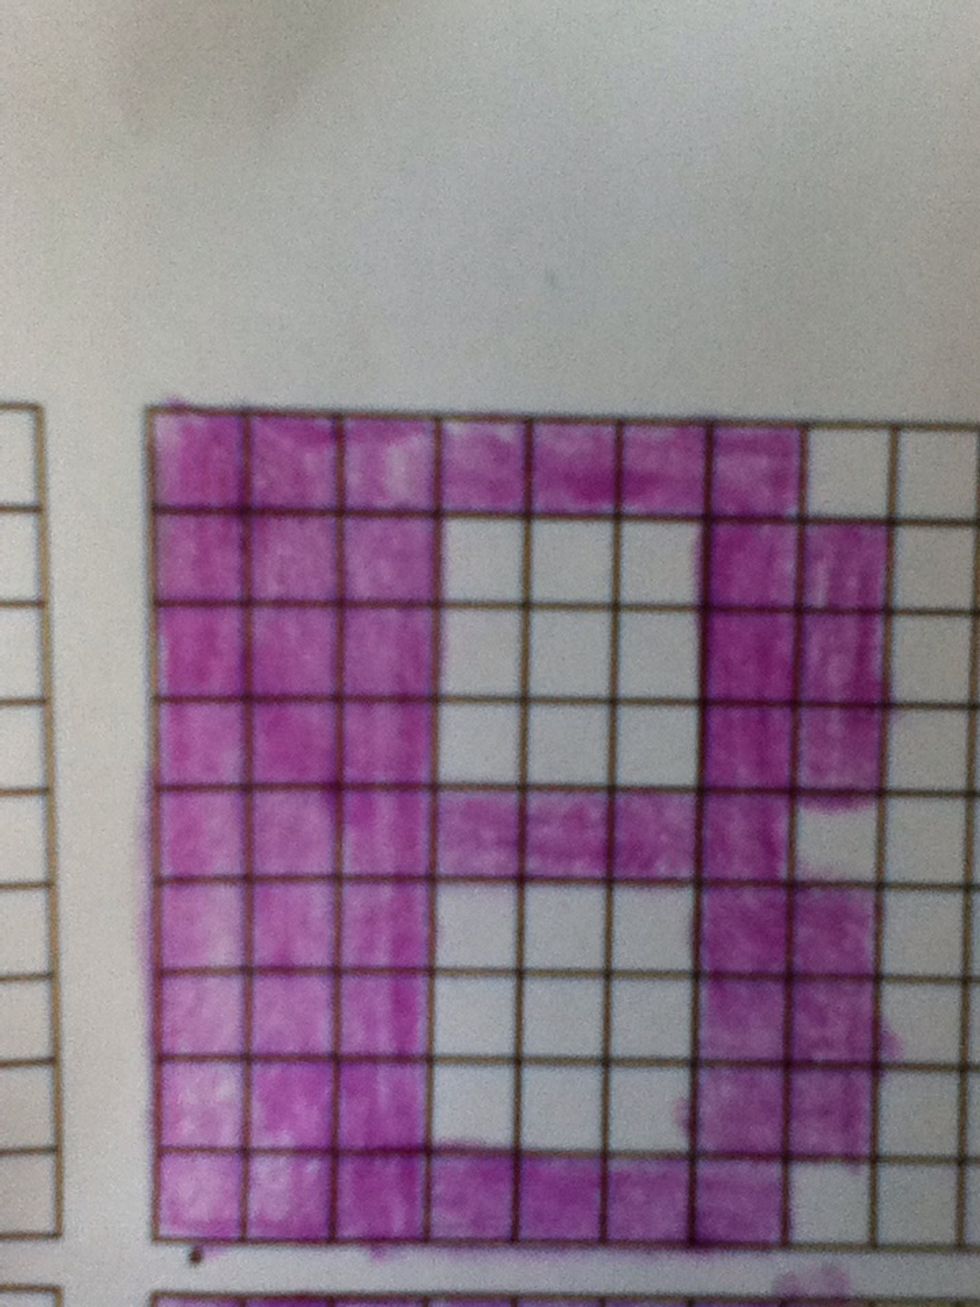
M

N
O
P

Q
R
S
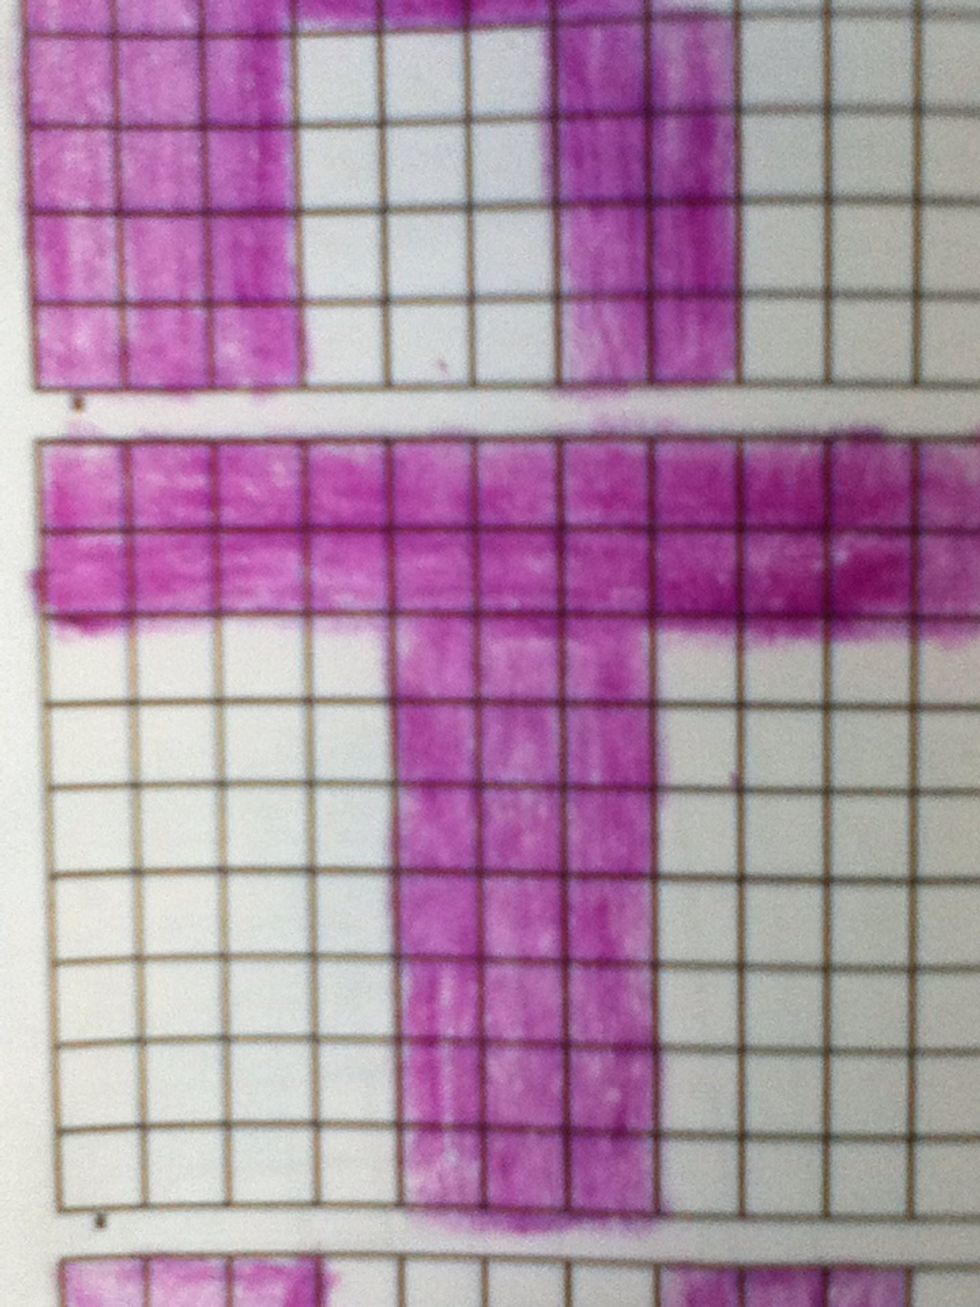
T
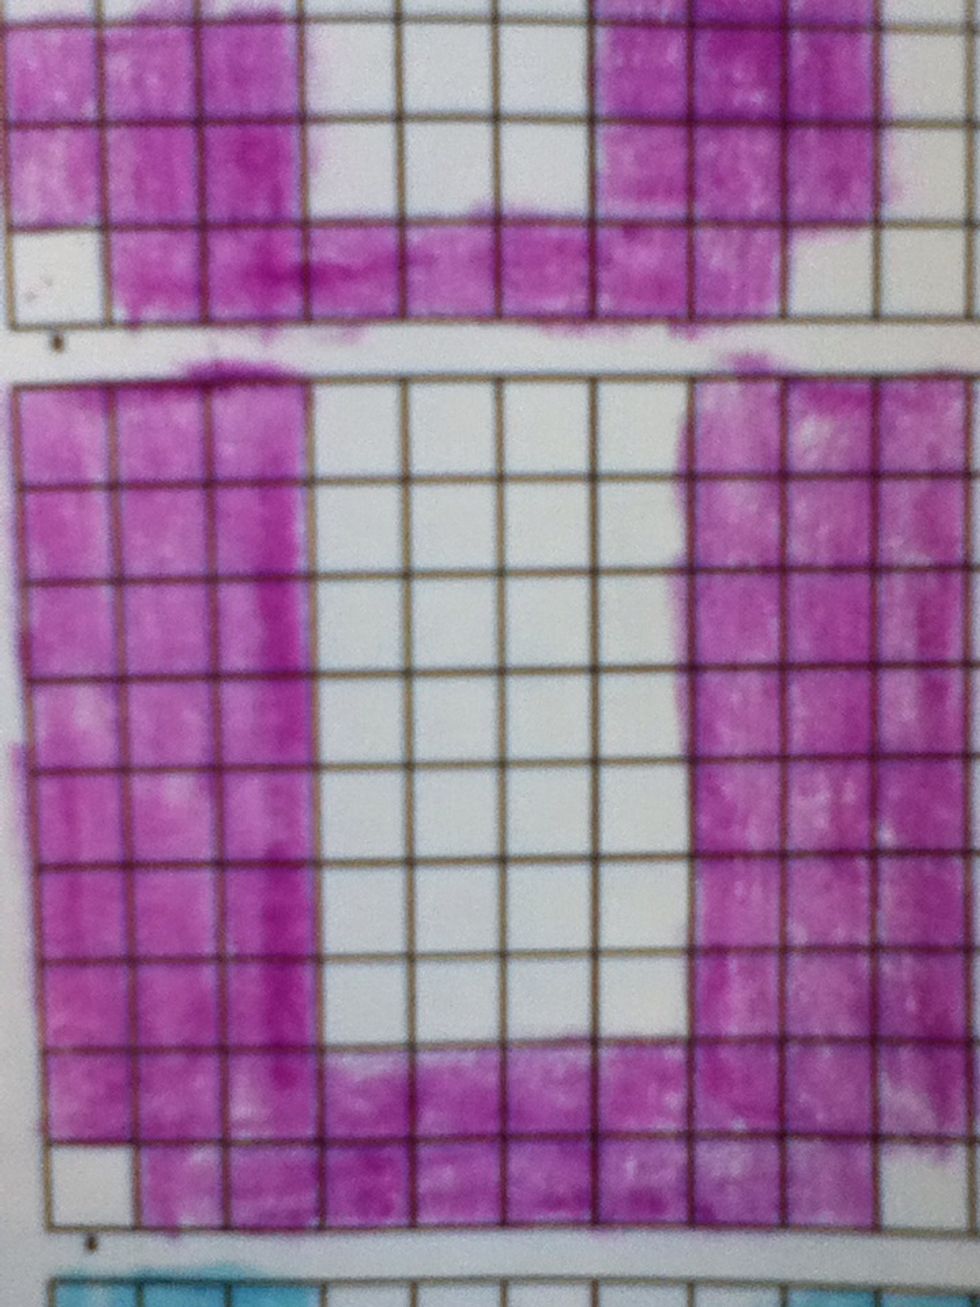
U
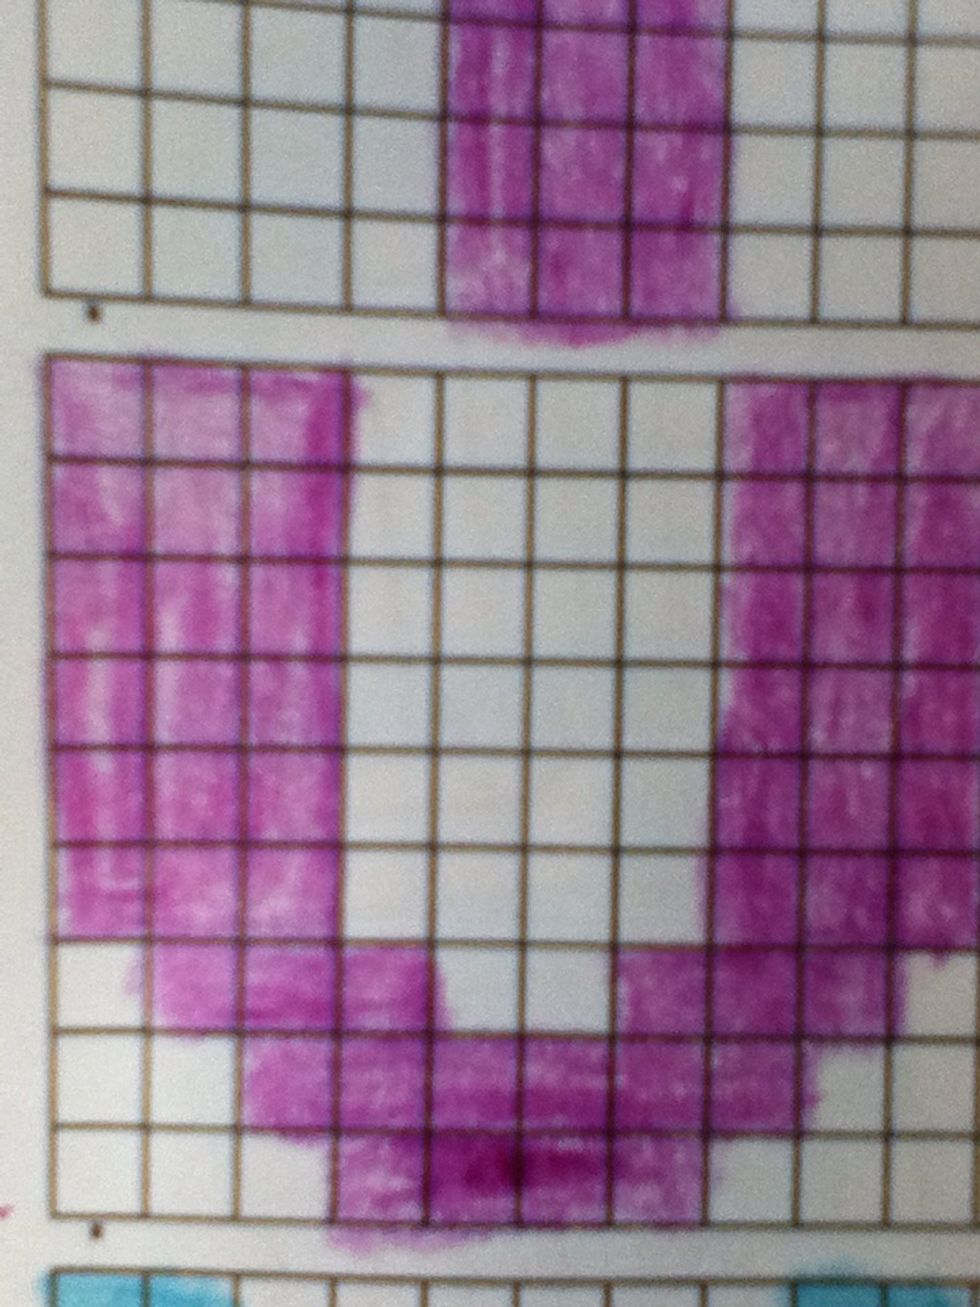
V
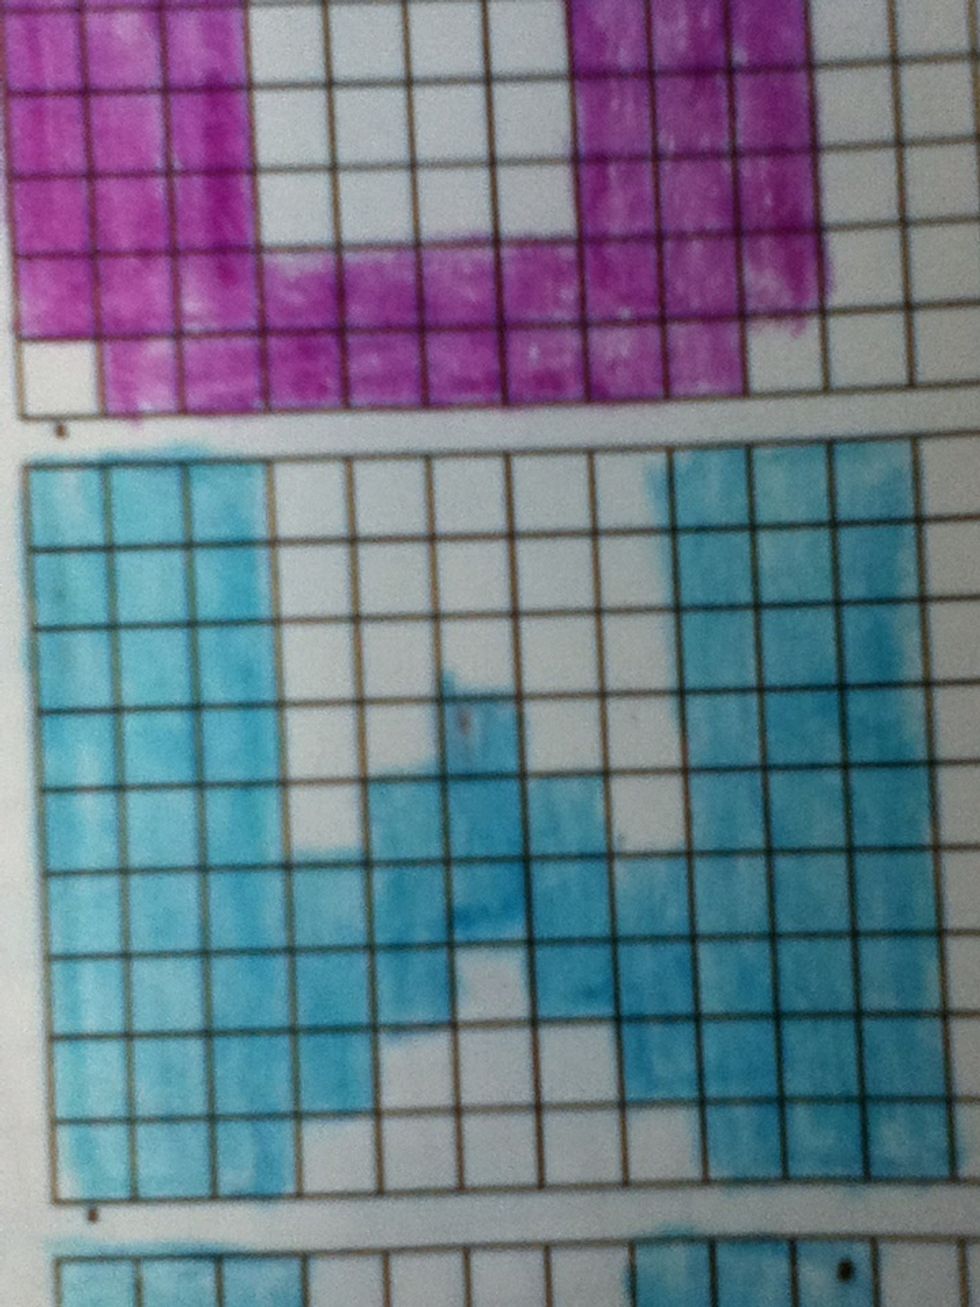
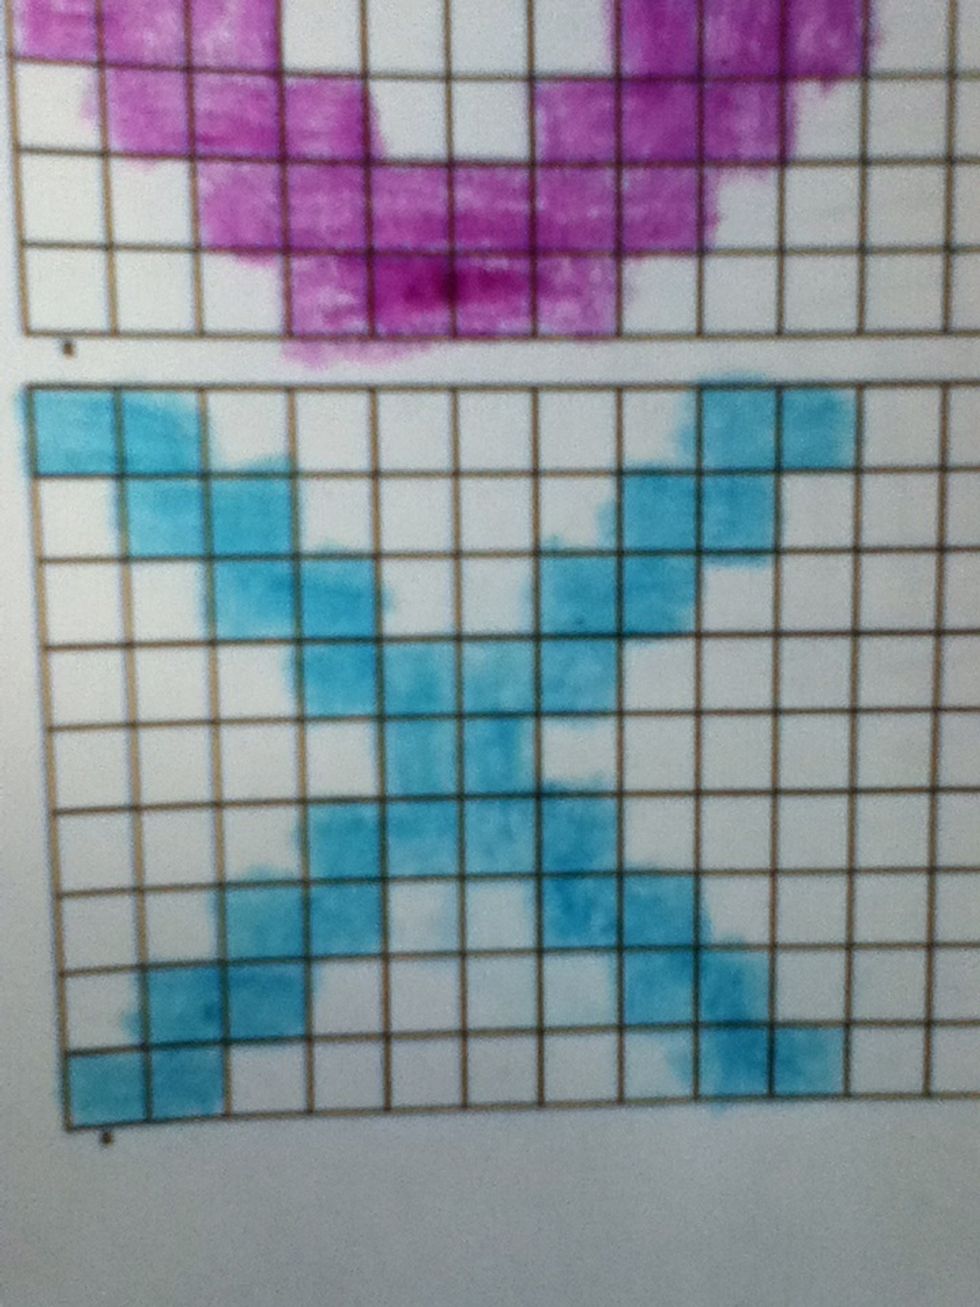
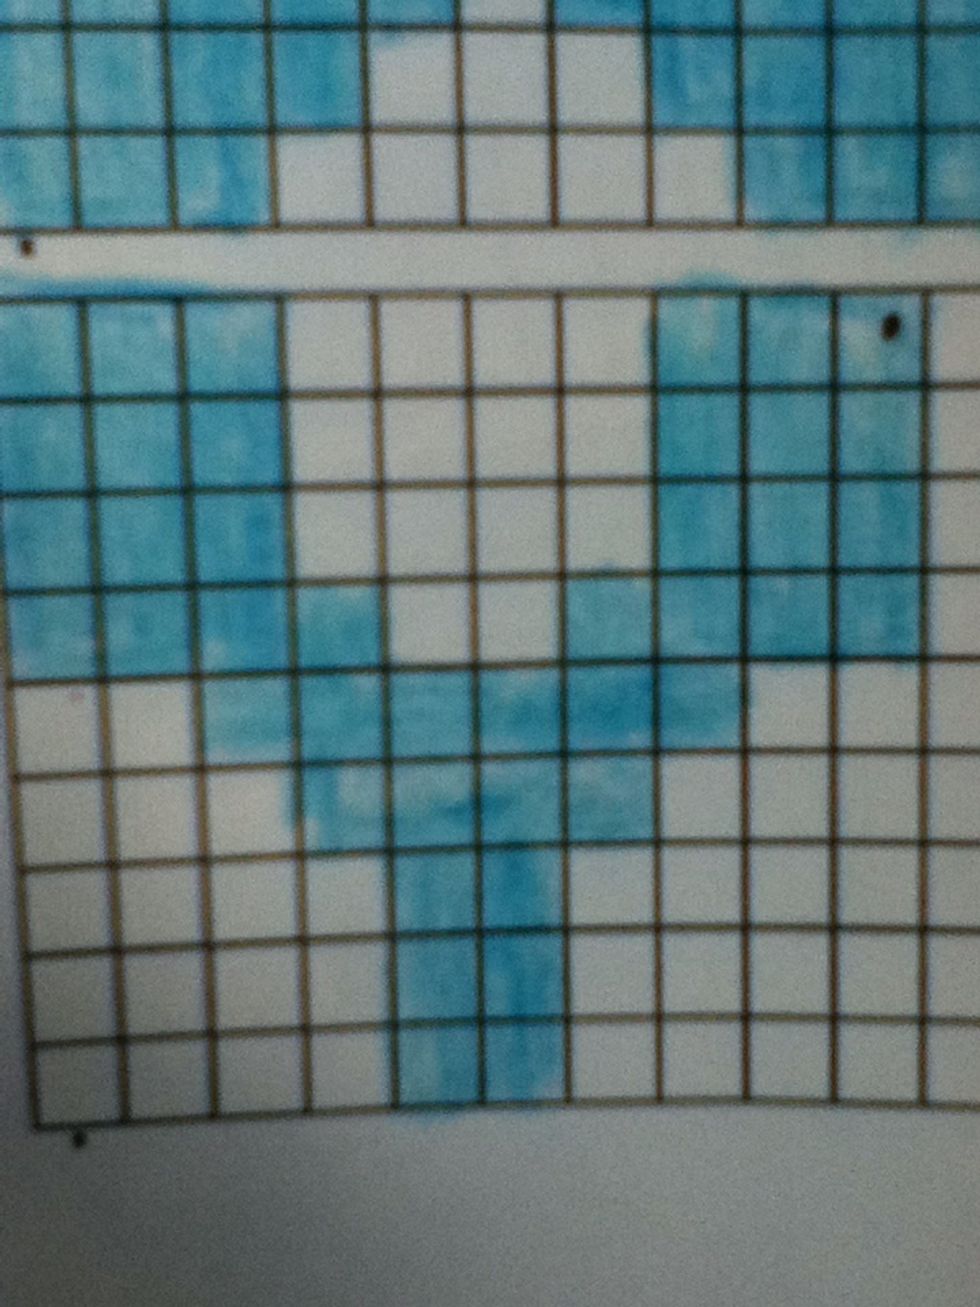
W
X
Y
Z
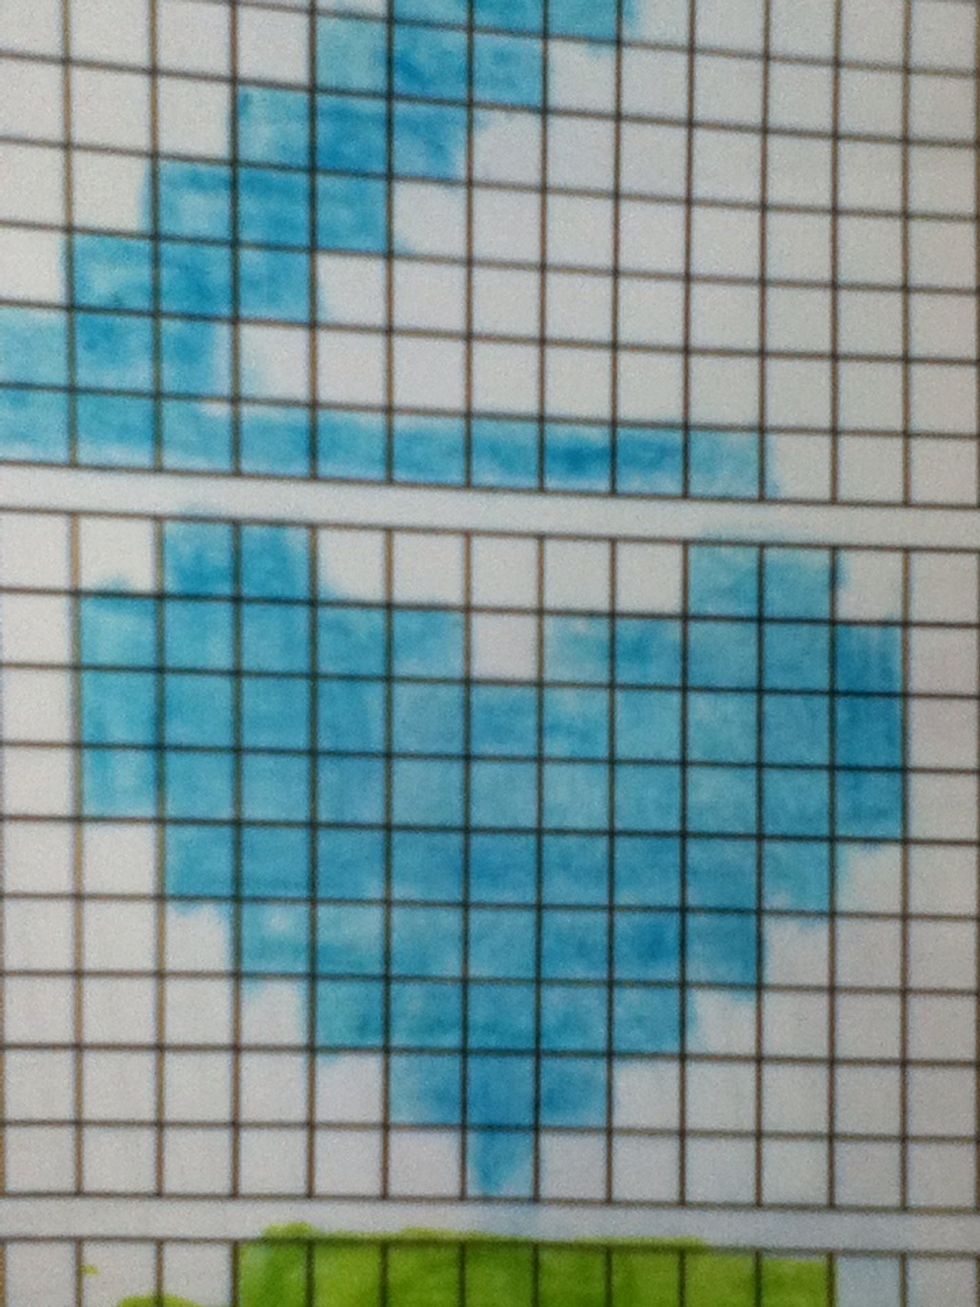
❤
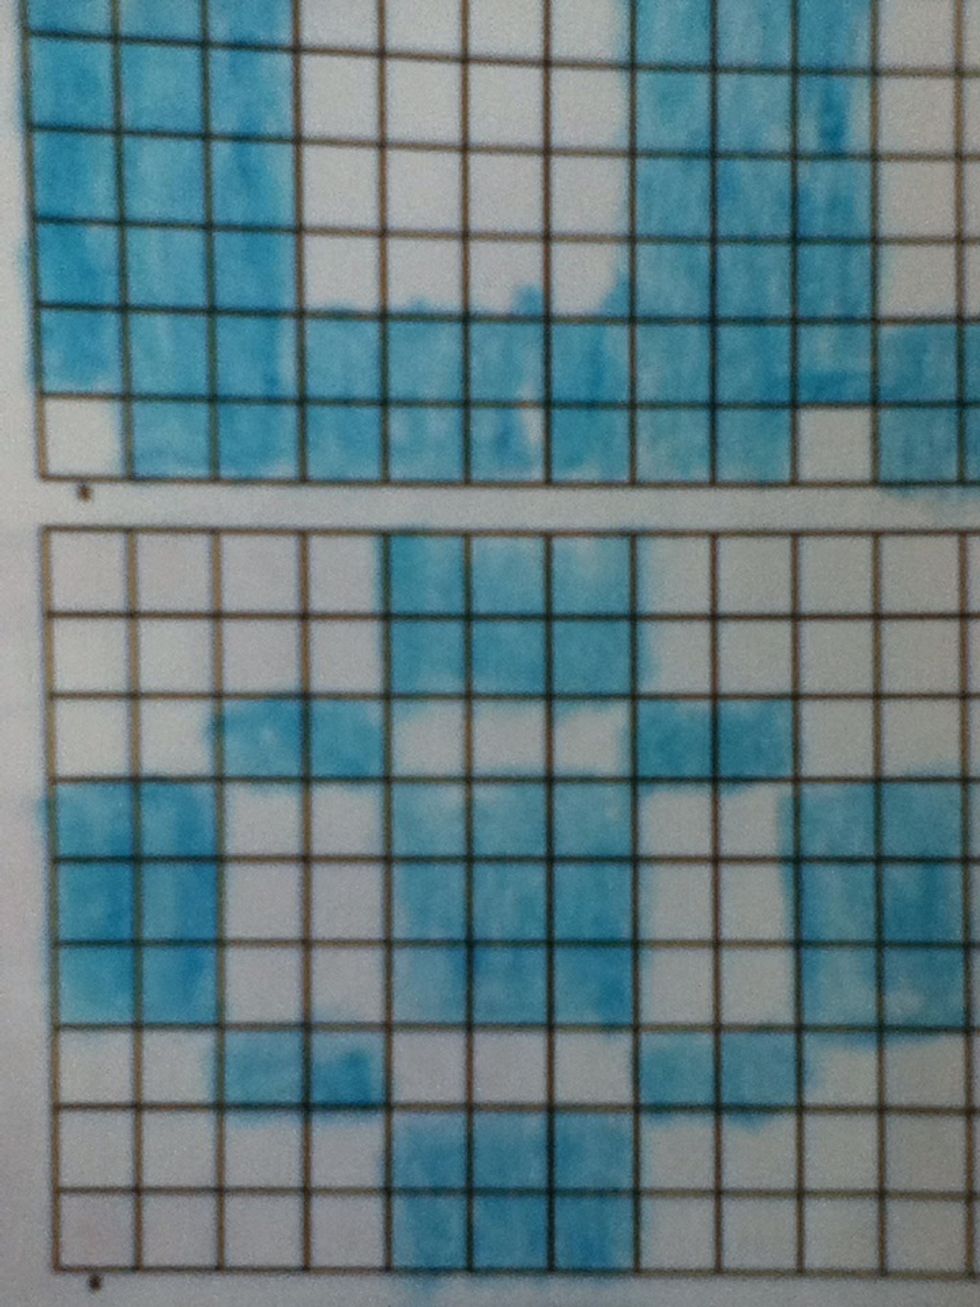
Some symbol
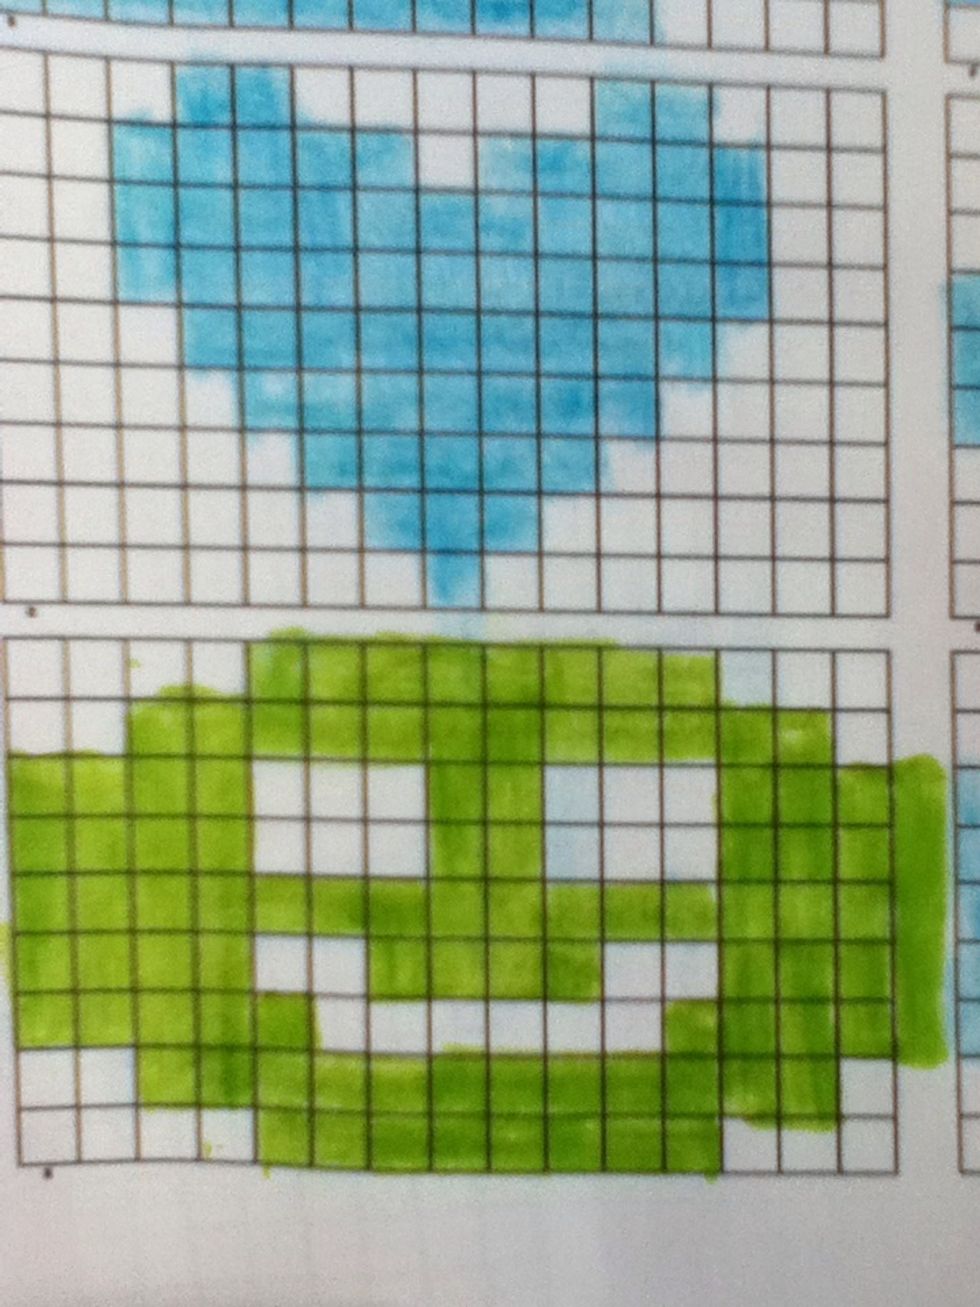
😃