The Conversation (0)
Sign Up
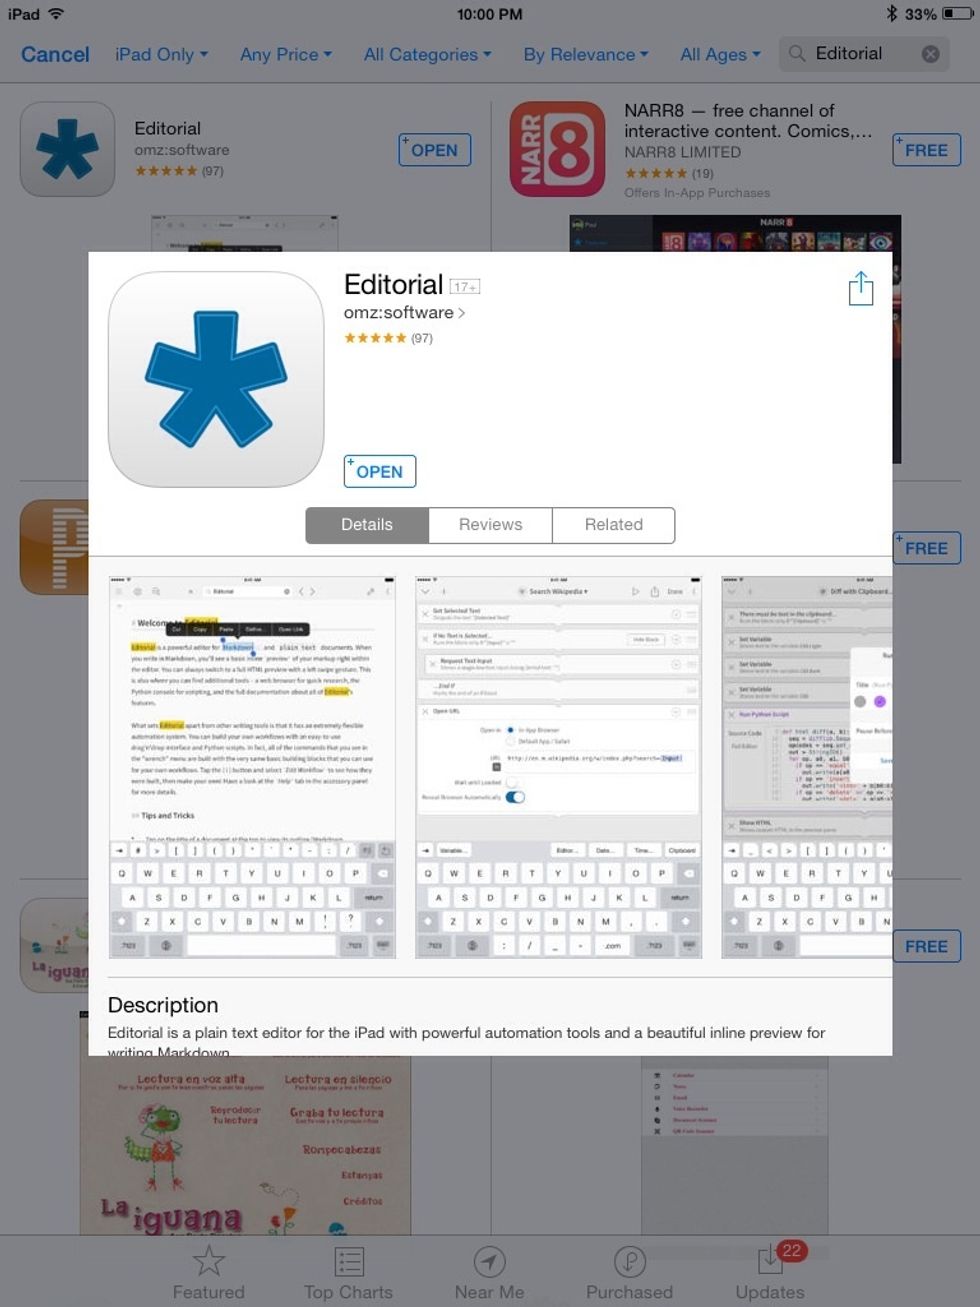
Download "Editorial" by OMZ:SOFTWARE ($7)
Editorial is a text editing app that automates your writing needs. But it can do more than that now with version 1.1
You can use it to make a private business app!

So, open Editorial and tap the Wrench at the top left of the screen.
Make the Interface:

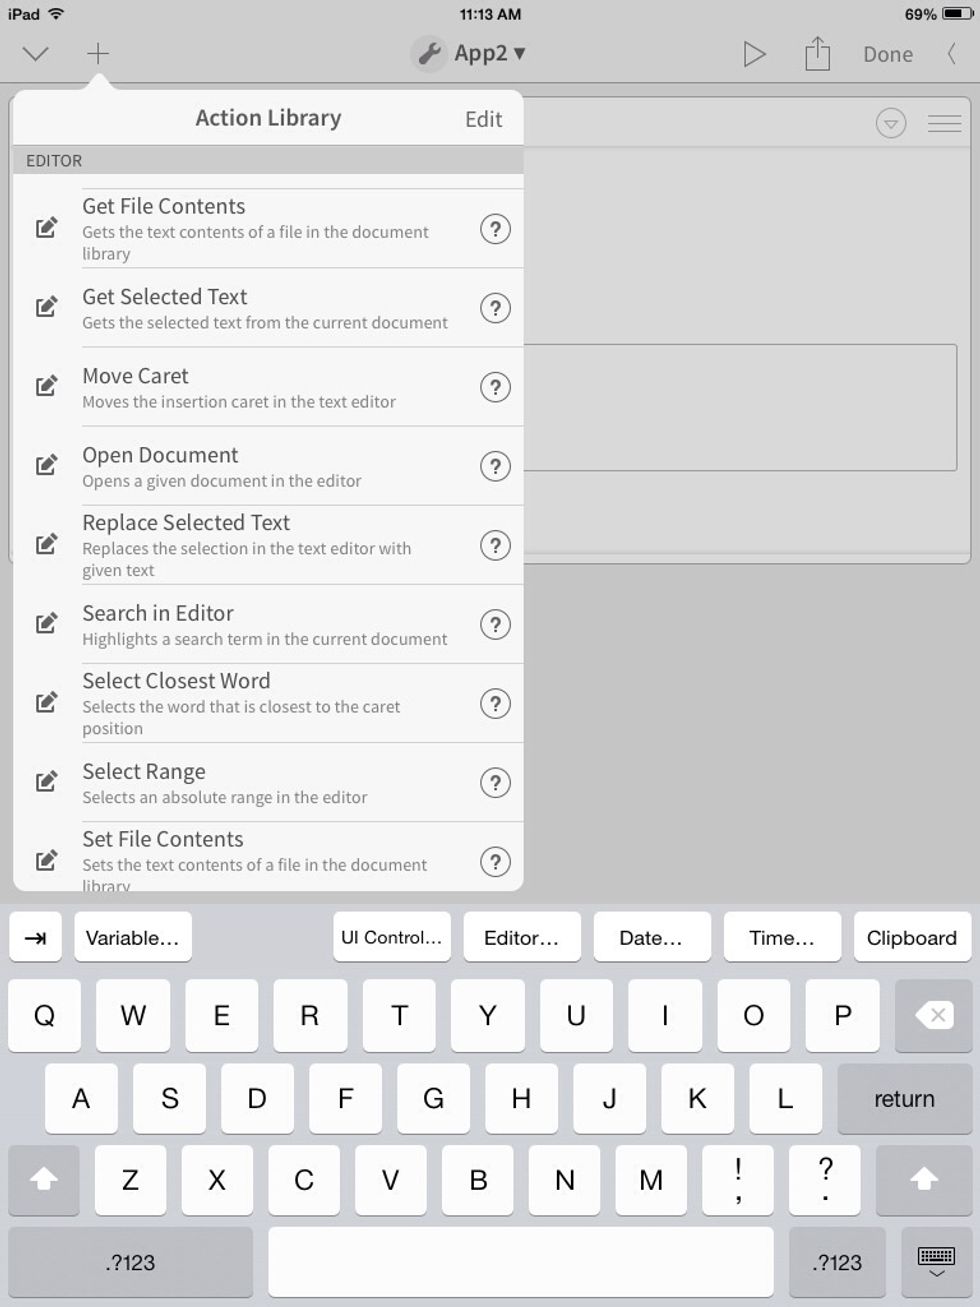
Now tap the + to create a new workflow.

Tap the title of the workflow to change the name of the workflow.
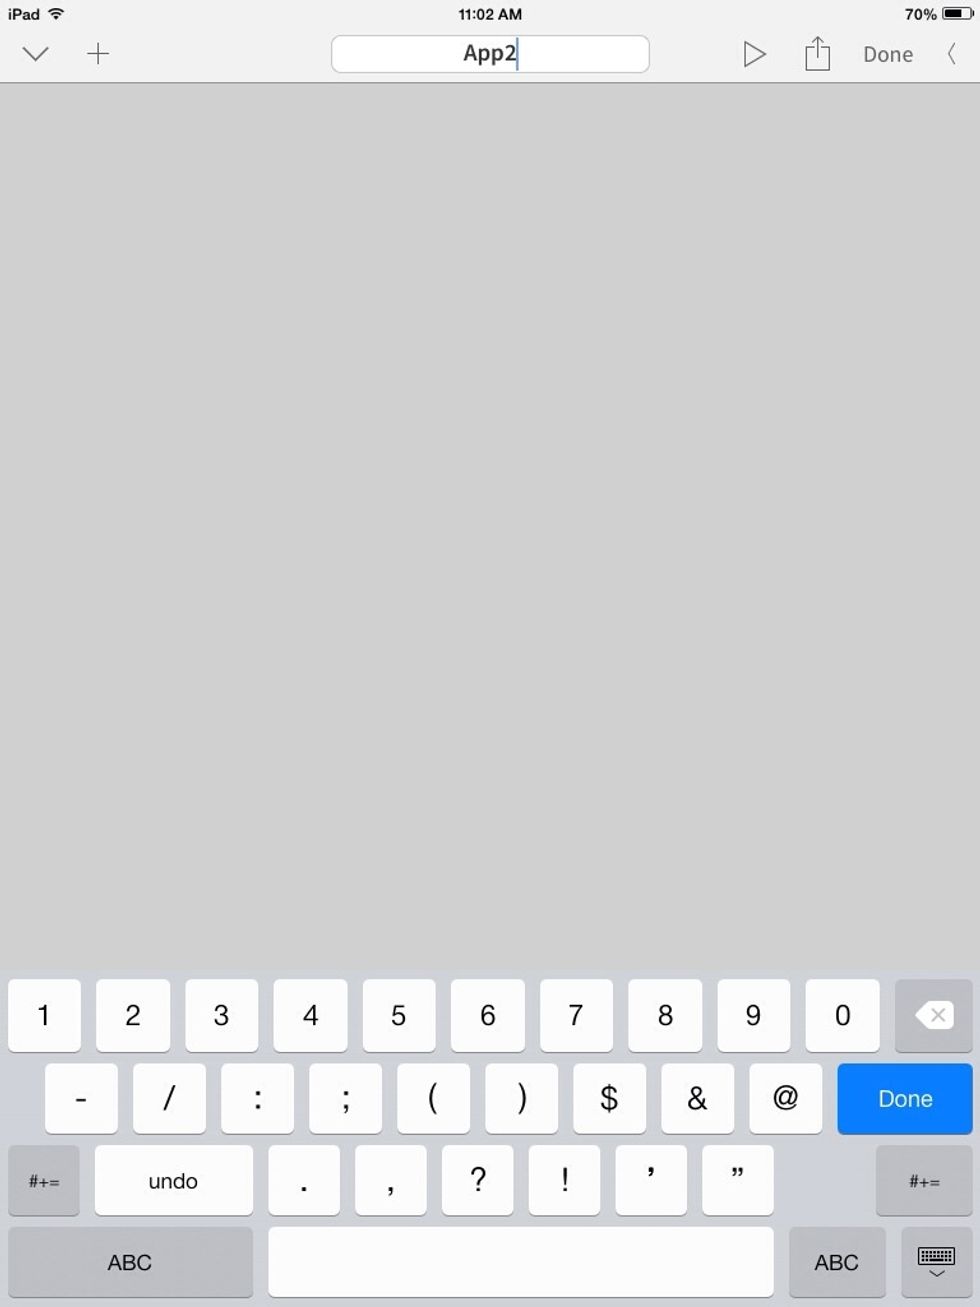
I named my workflow "App2," because it is very original. ;)
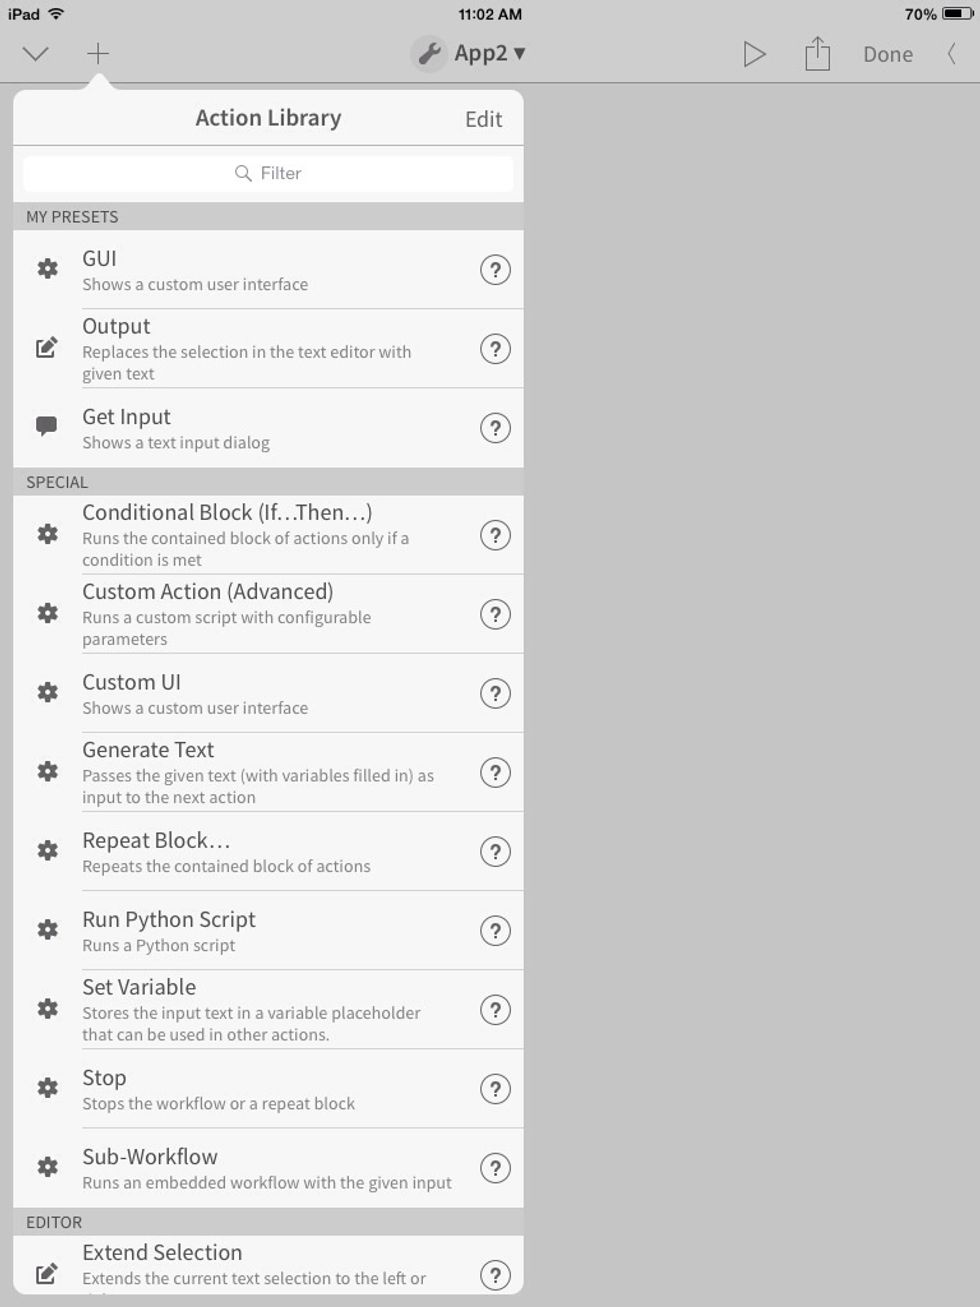
Tap the + and scroll to Custom UI (Custom User Interface). This is how we will create our app!
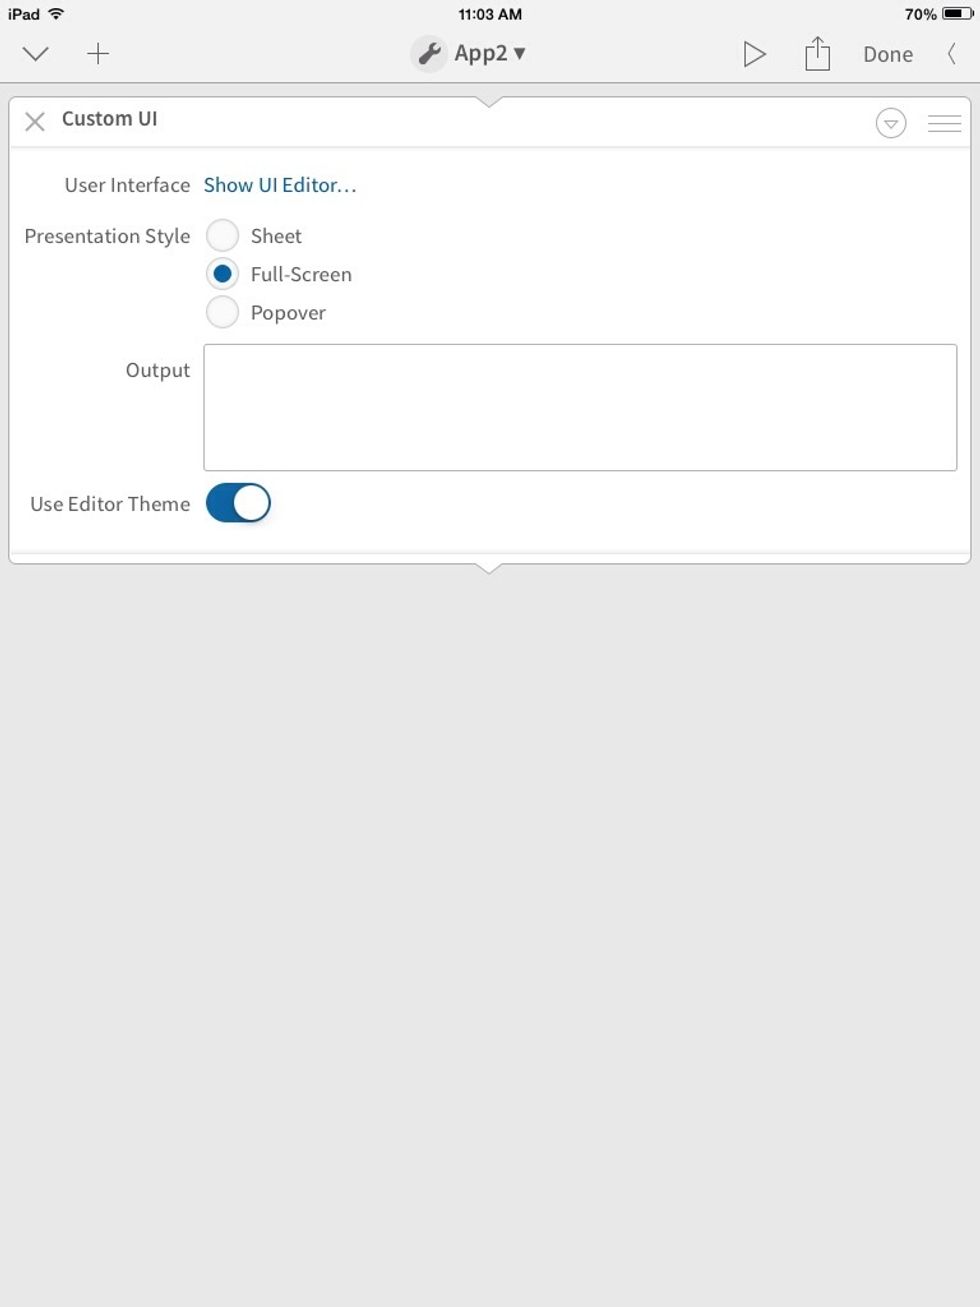
I am making this for an iPhone 5, to display full-screen, so change the presentation style to Full-Screen and then tap "Show UI Editor."
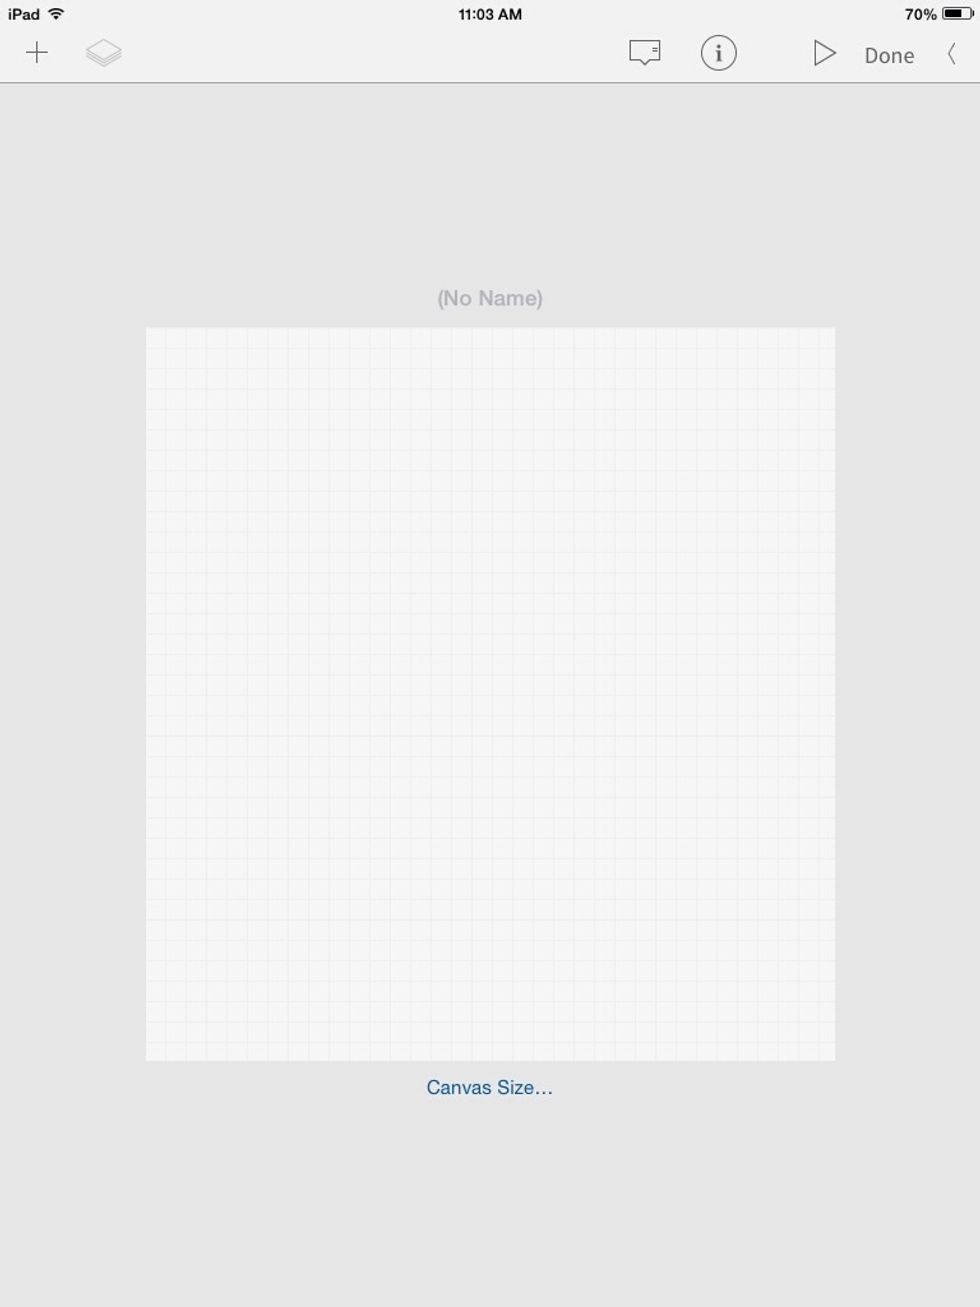
This is the UI(User Interface) editor. This gridded view is called the canvas. It is just like a painting canvas, all of the interface stuff goes on the canvas. Tap the info icon (looks like an "i").
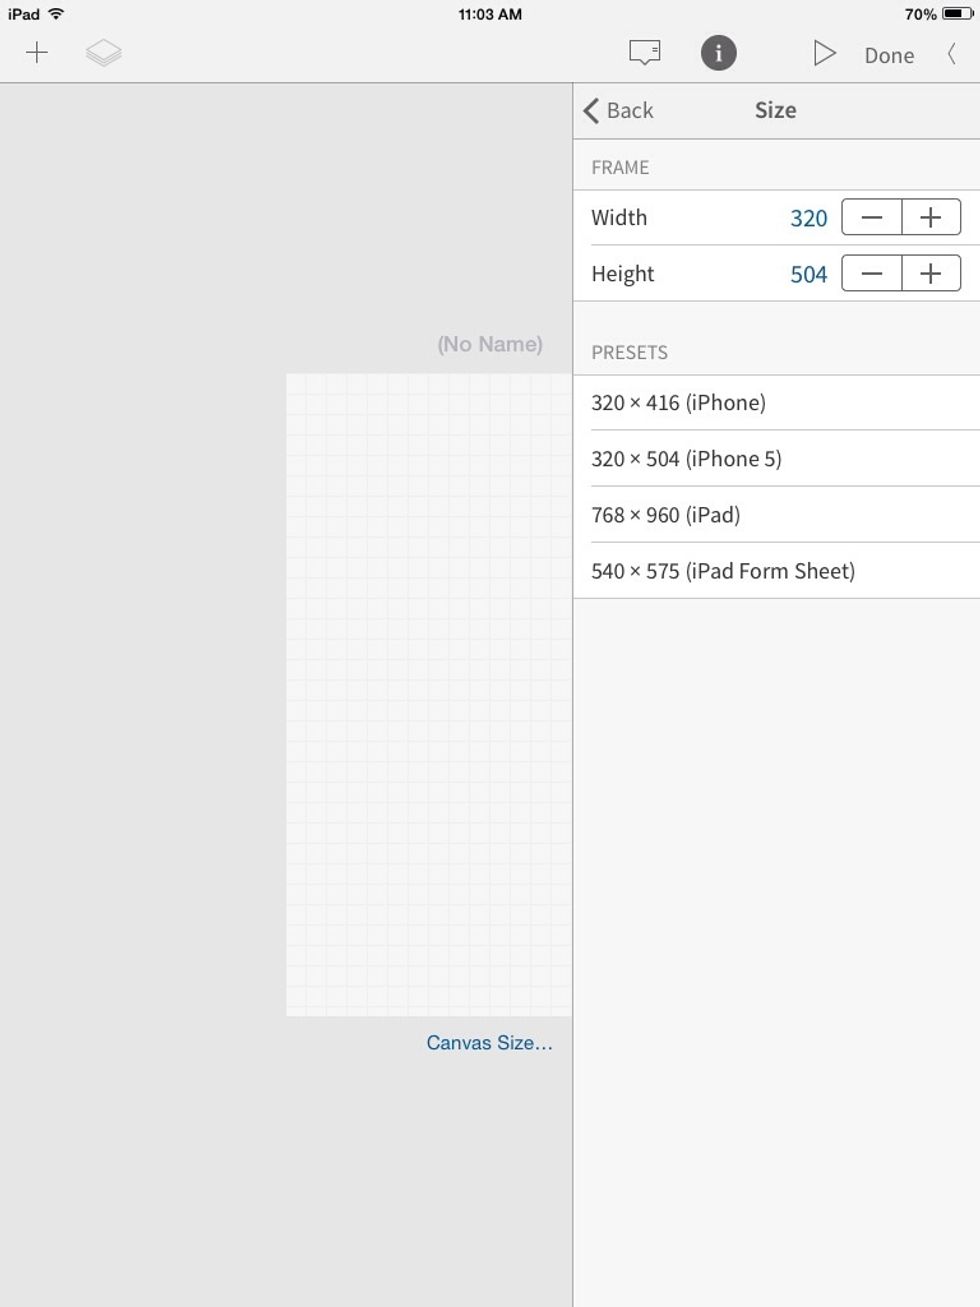
These are the setting for the Canvas. I am making this for an iPhone 5, so select "320 x 504(iPhone 5)." This will make the canvas a size suitable for the iPhone 5. Tap the "i" again to close.
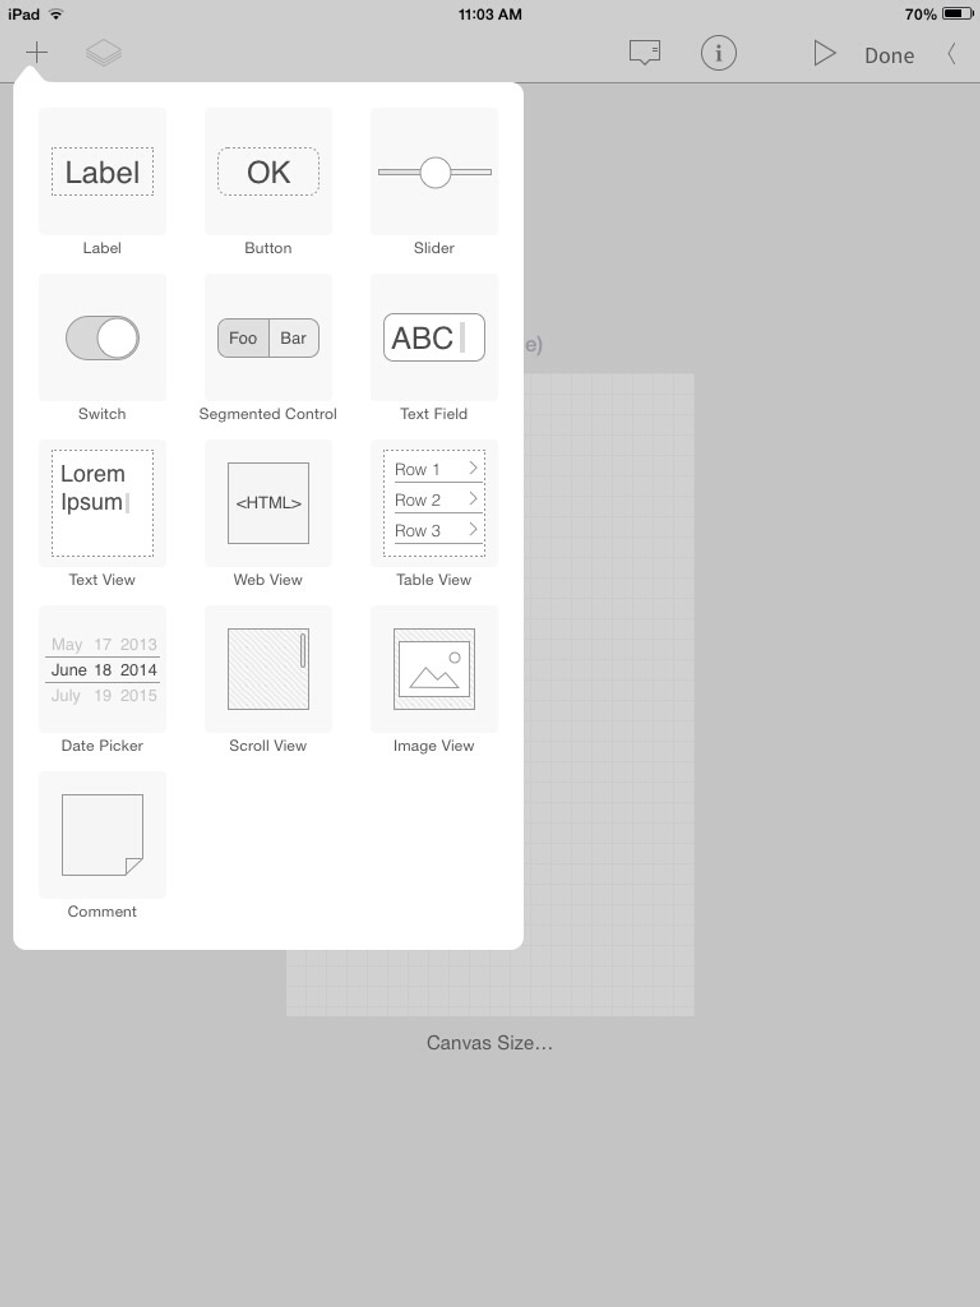
Tap the + at the top-left. This is where all of your controls are! Select "Label"
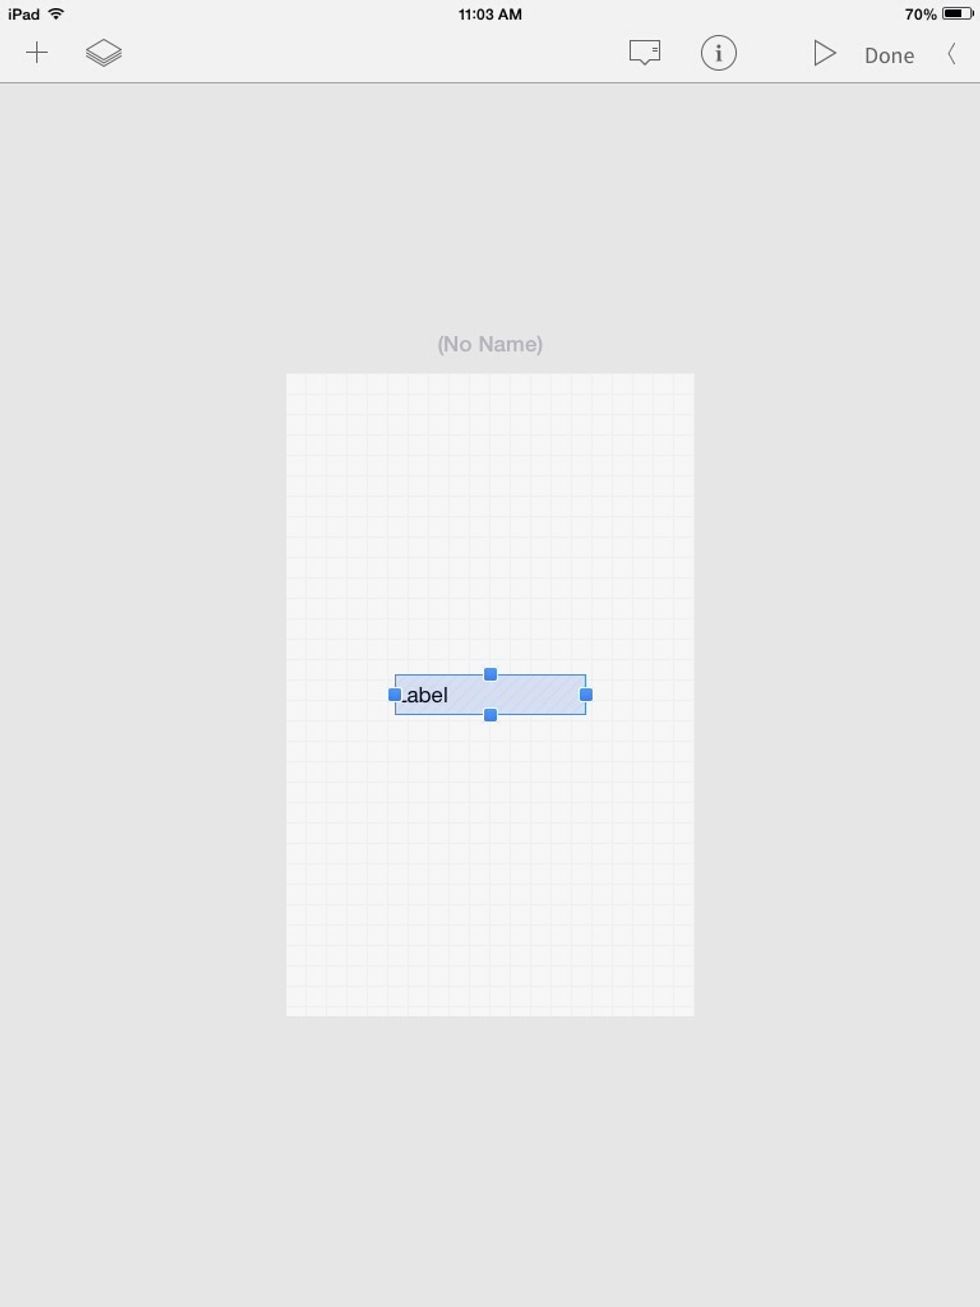
A label is like the label on a jar. It stores information about other objects.

Give this label a border by tapping the "i" and going to "Border."
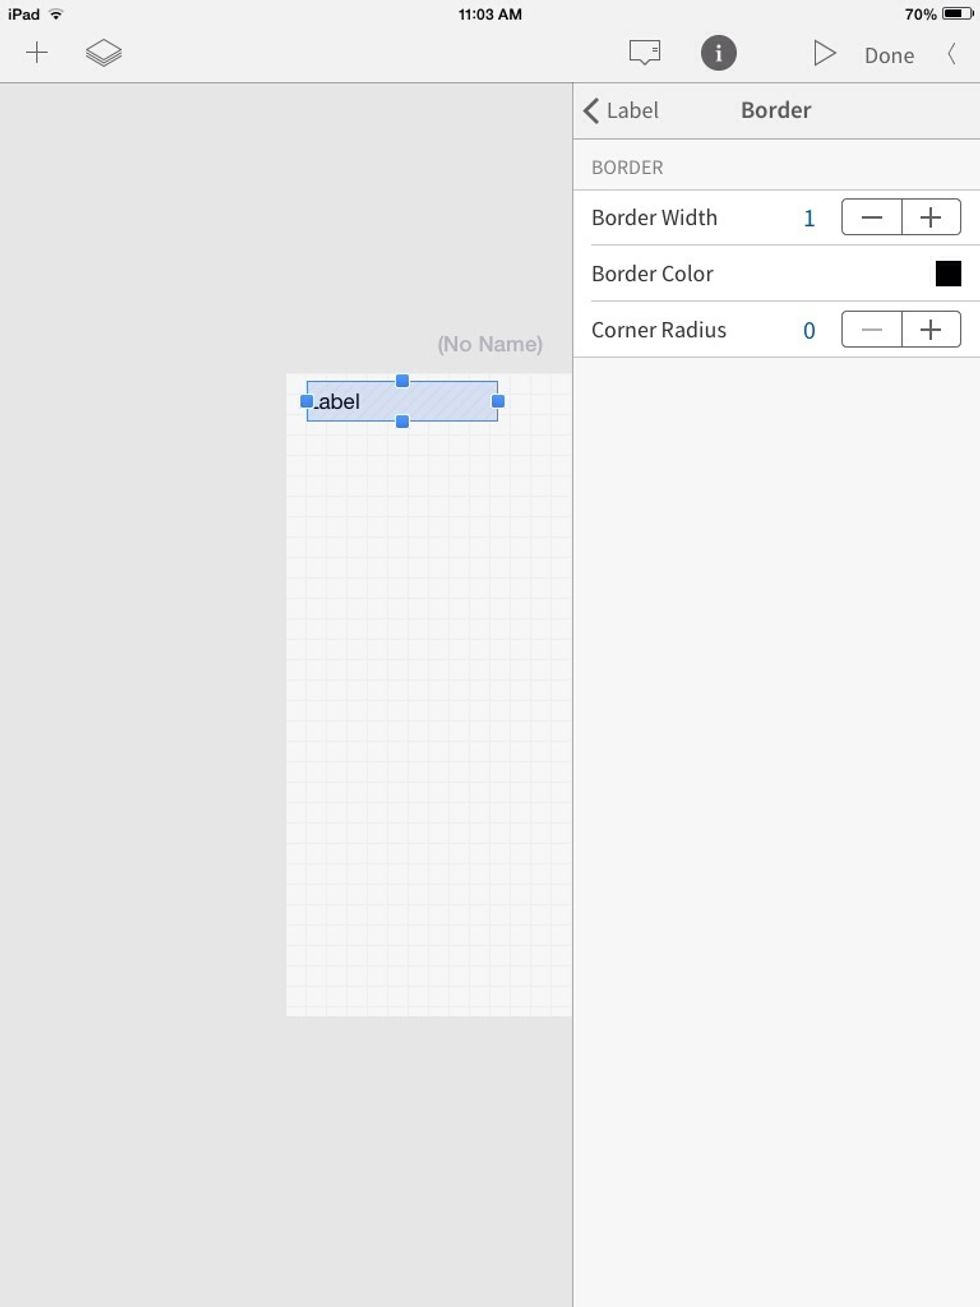
Where it says "Border Width" change it to 1. (For my app, I didn't keep the border). You can also adjust the color and the corner (whether it is rounded or not) of the label.
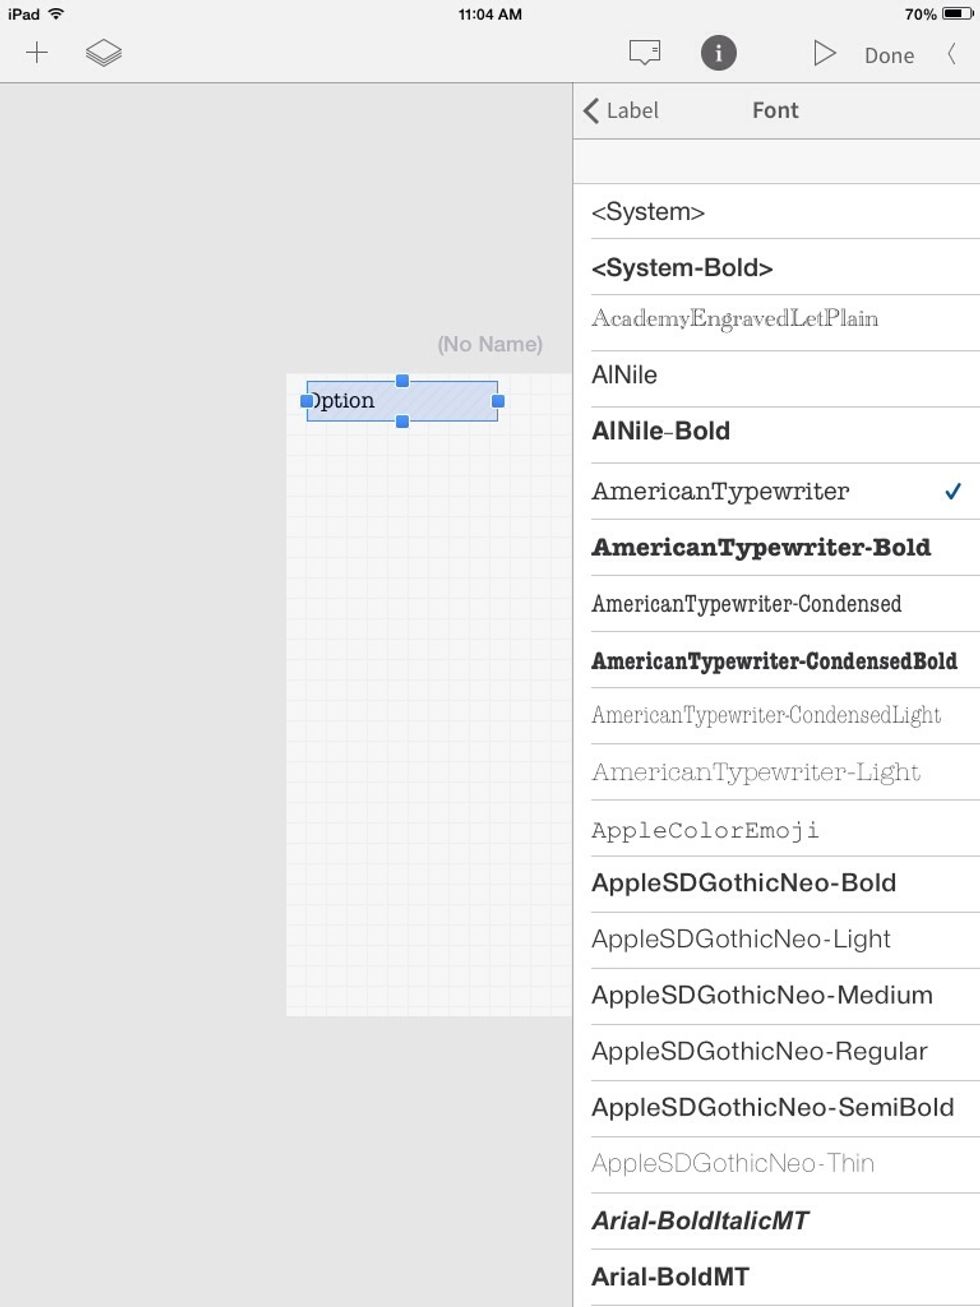
You can adjust the font as well.

Now add a "Text Field"
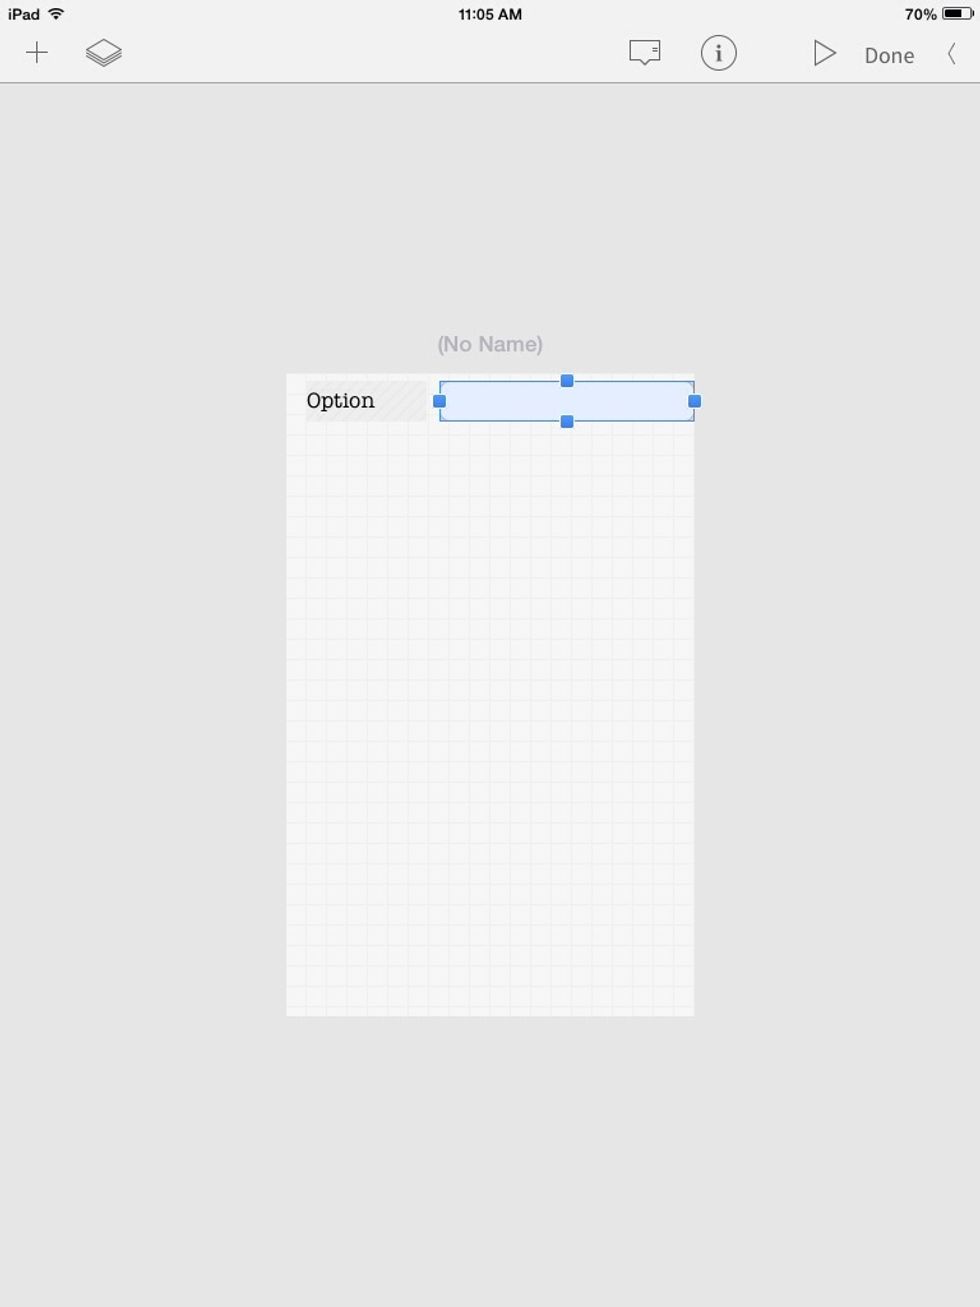
A text field is a little window that lets you type text. Let's look at the info for a text field...
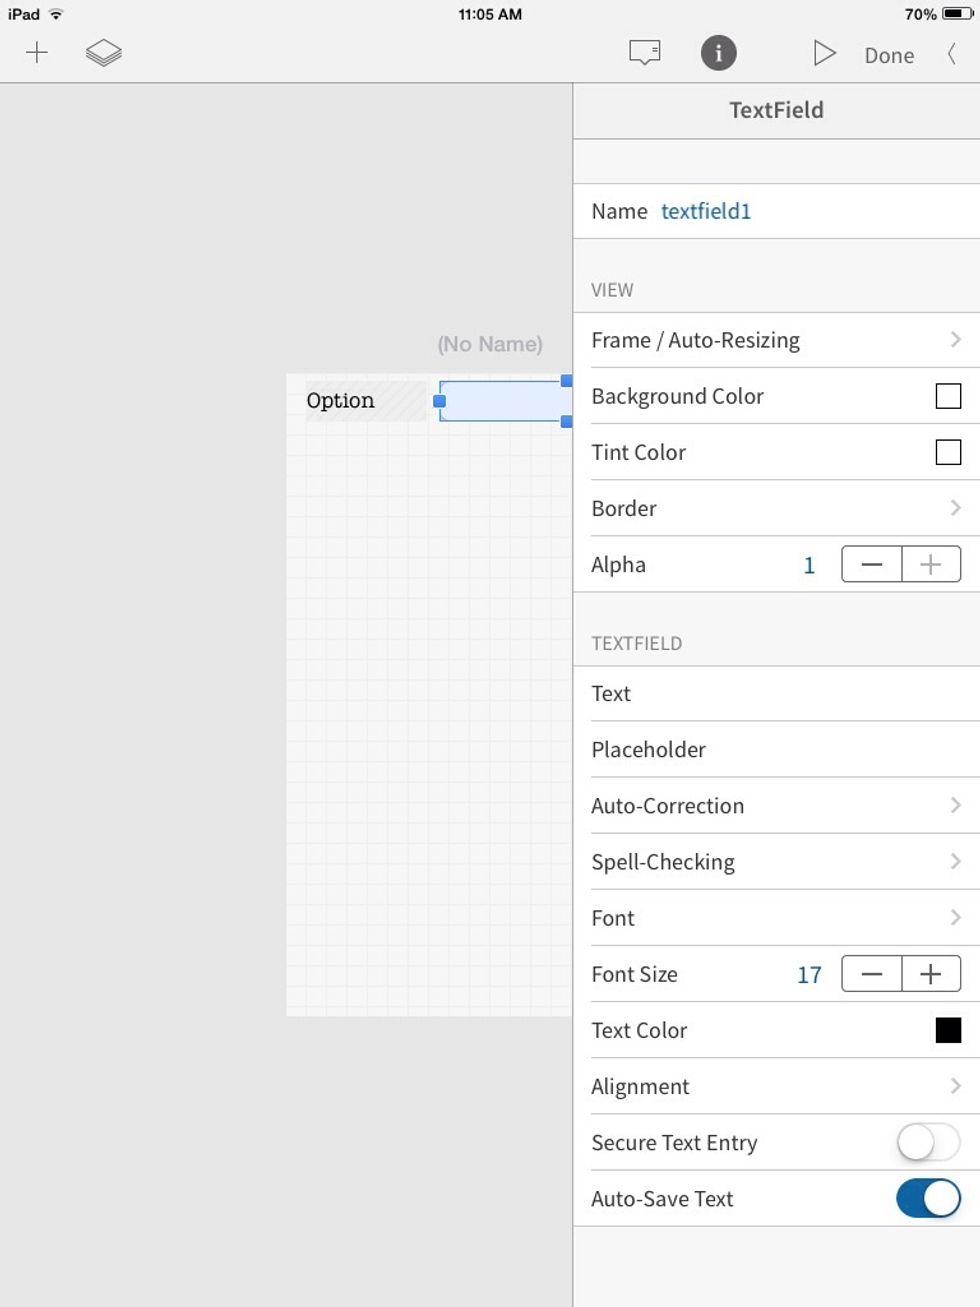
Hmm, lot's of stuff we can do, but for now I will just turn "Auto save" on. This saves all text entered in the text field, even though we quit our little appy app. hehe.

The triangle at the top-right of the screen is the Run/Play button. Tap it to preview our app!
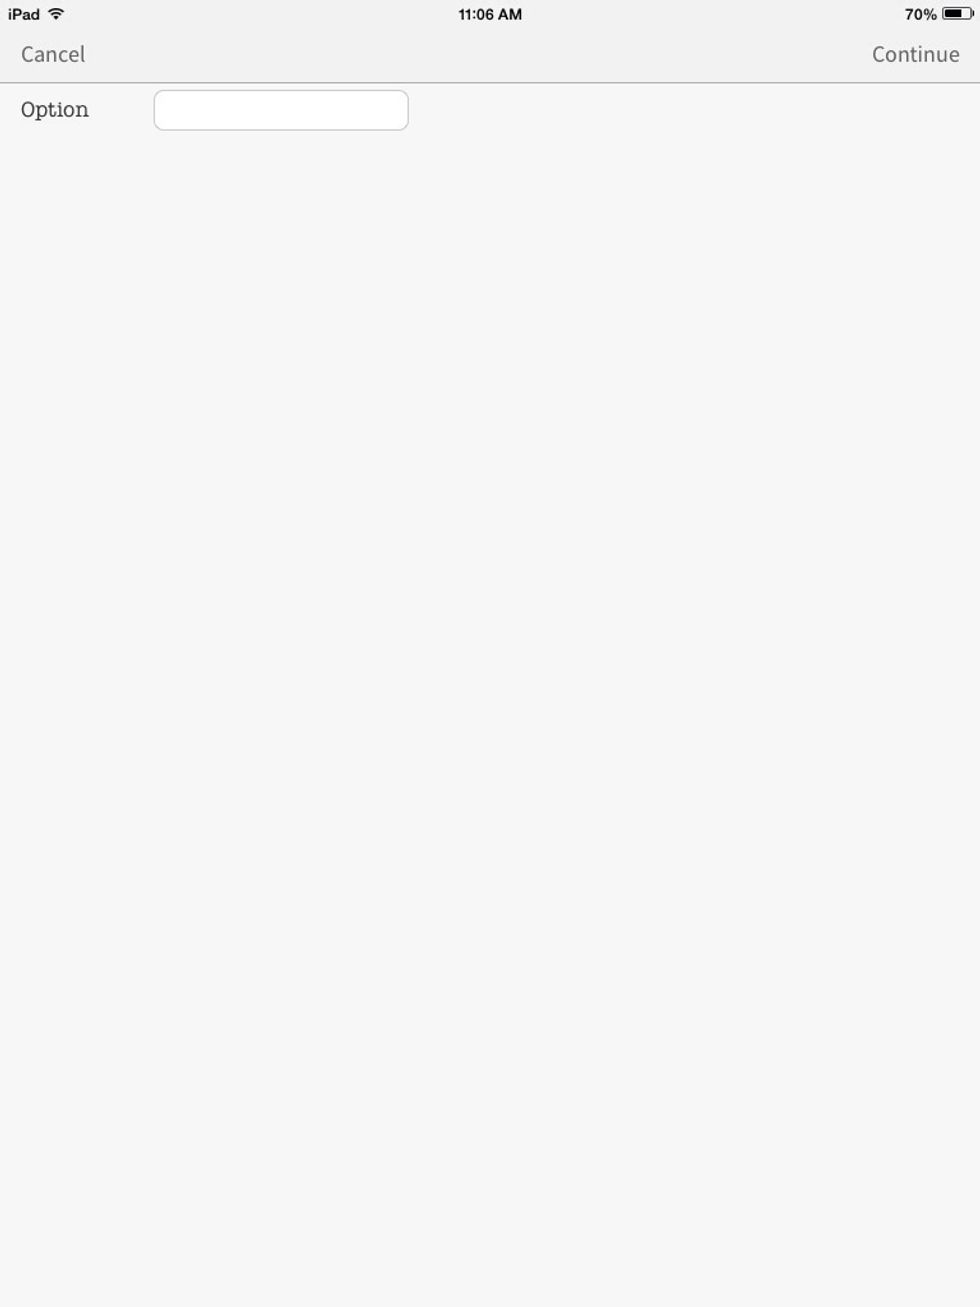
Lookin' good!
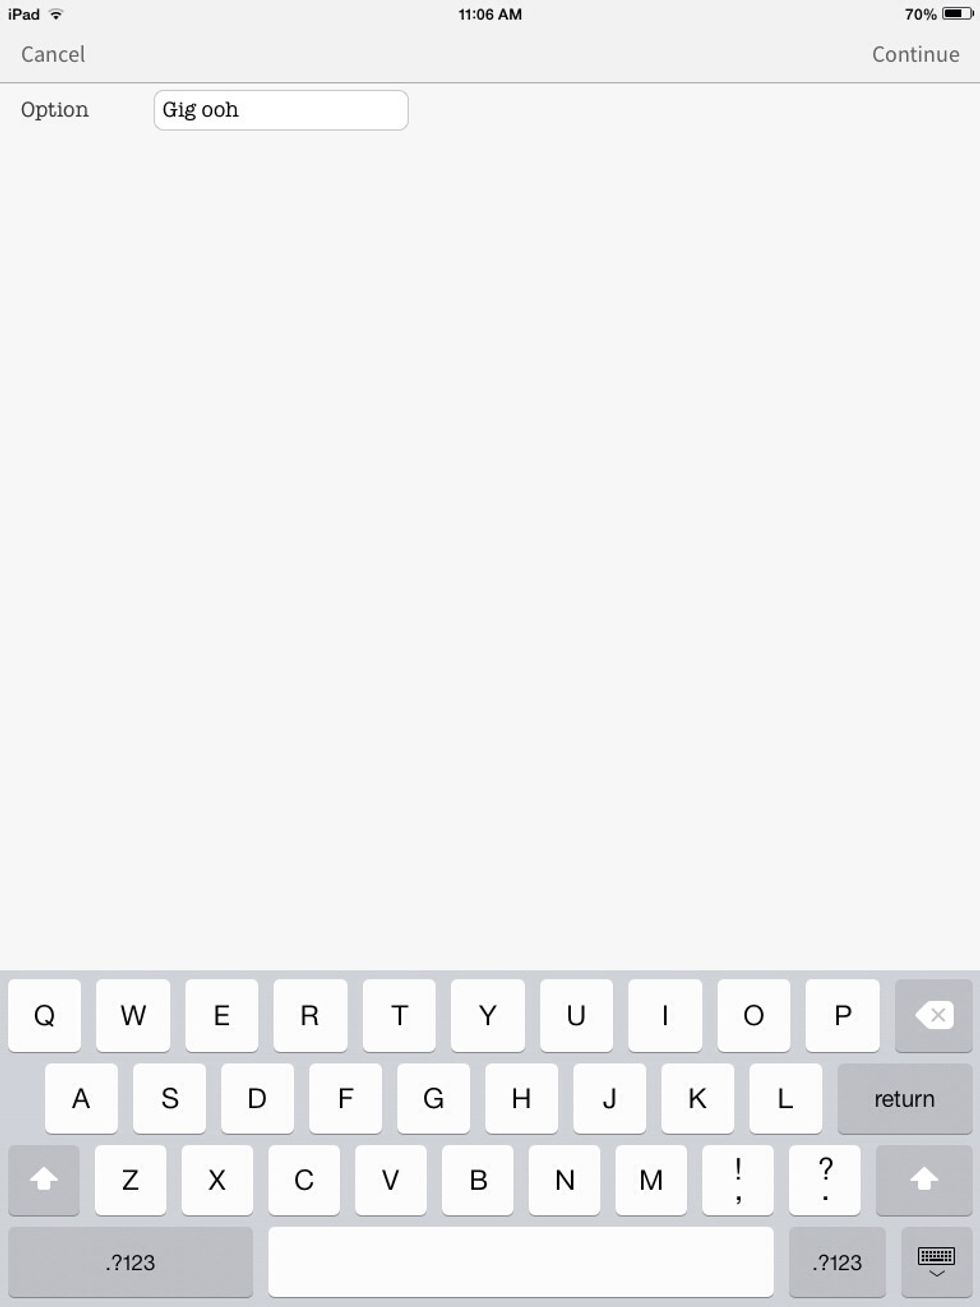
Tap in the text field and start typing!
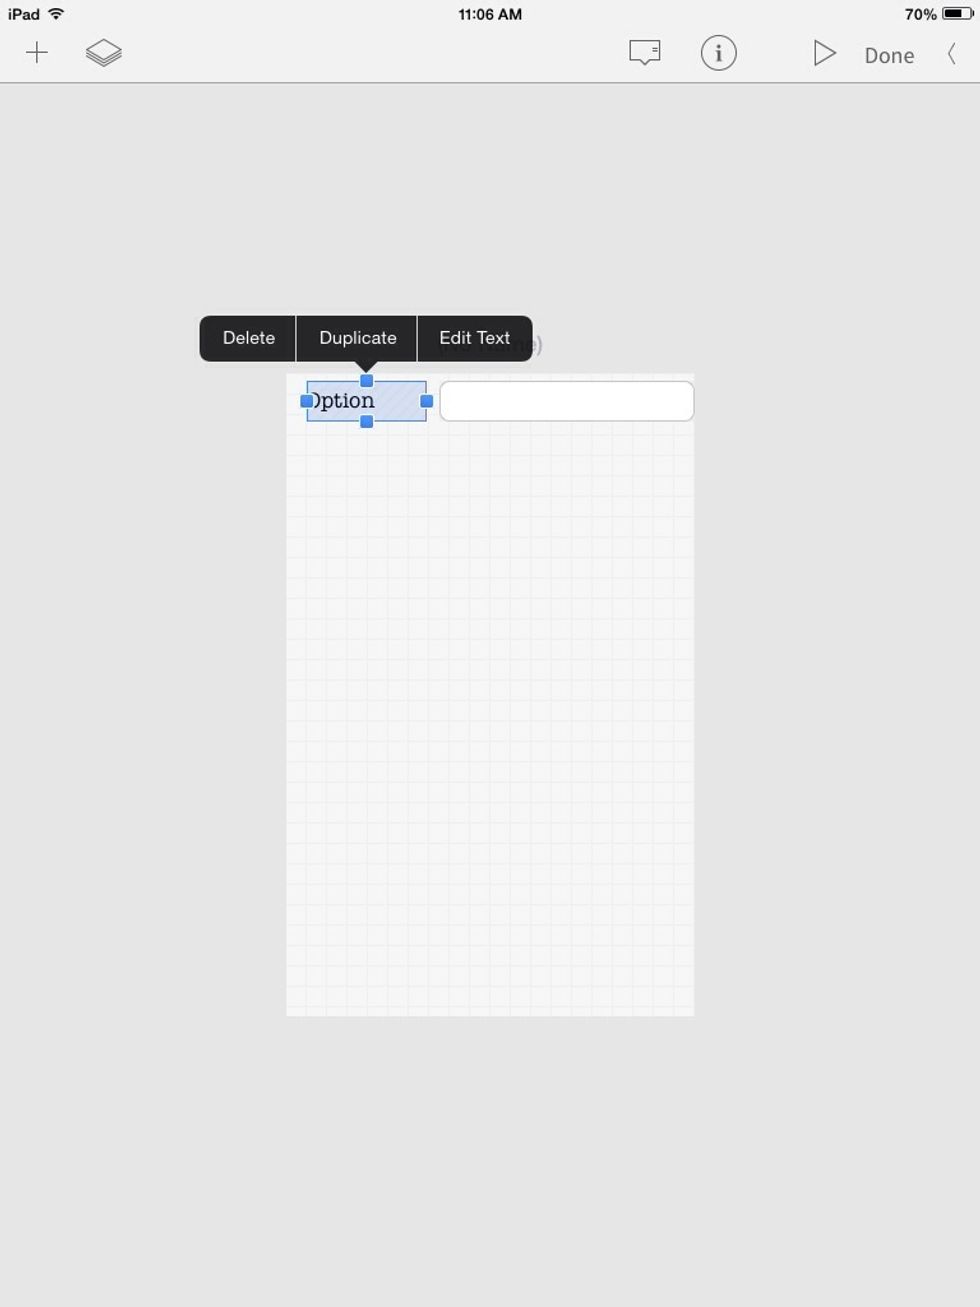
Okay, let's duplicate the label and the text field several times by selecting it and selecting "Duplicate" from the menu that pops up.
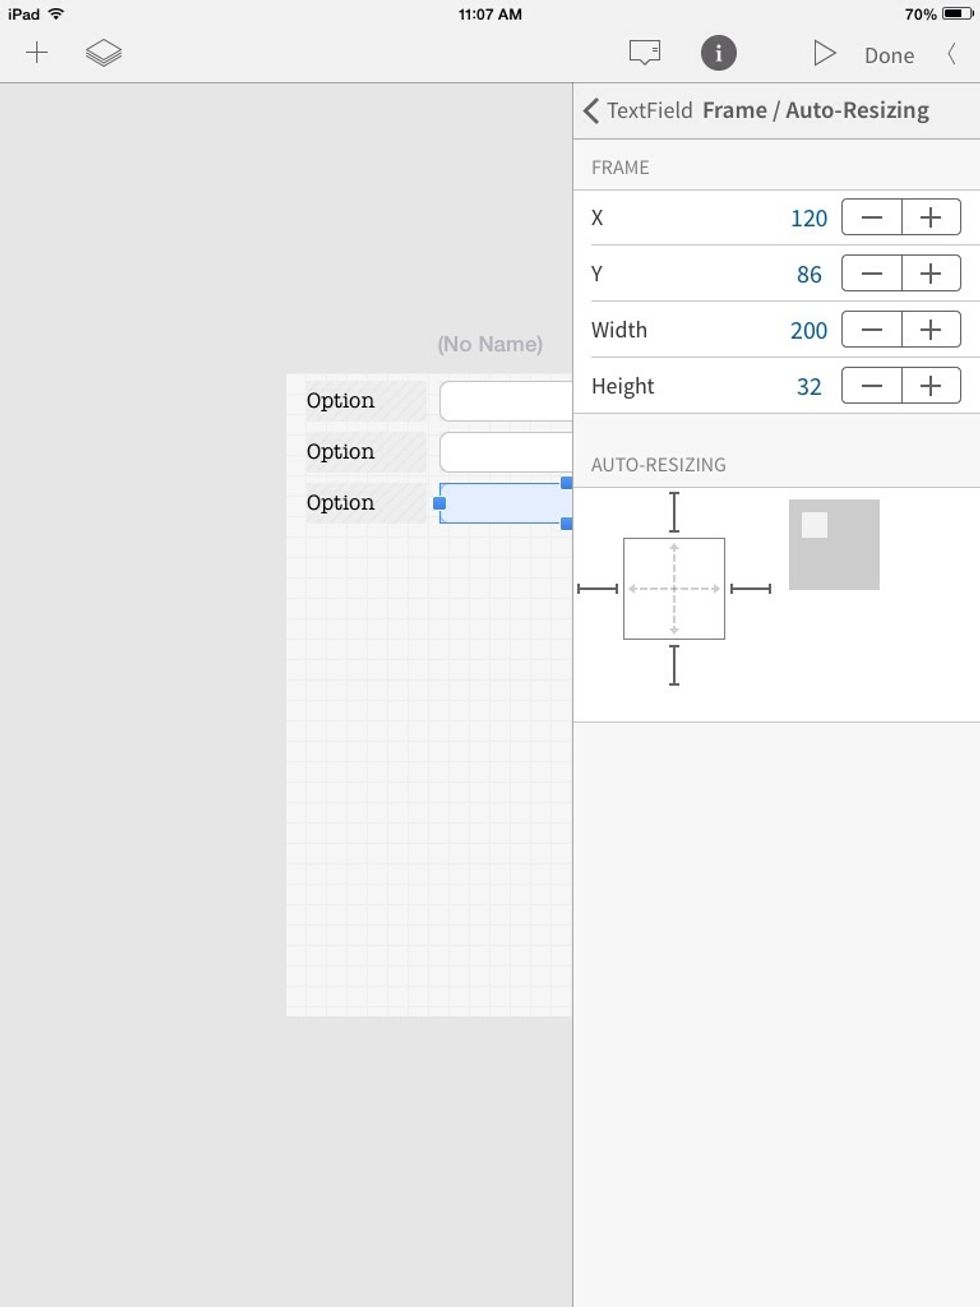
You can fine-tune the position and size of an object under the "Frame" section of the info menu. The Auto-resizing section allows you to set how the object re-sizes when the iPhone is tilted.
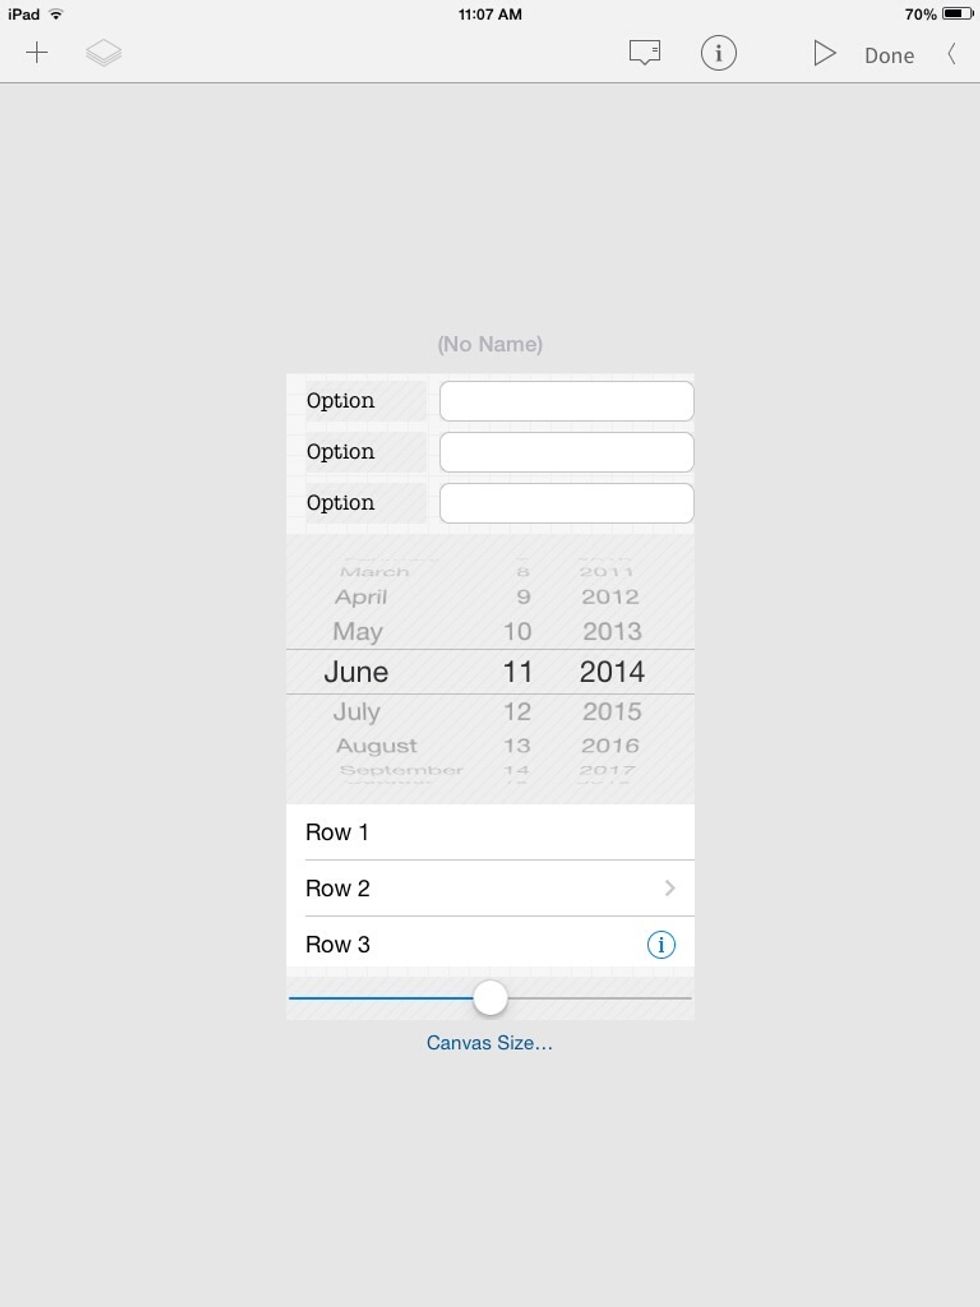
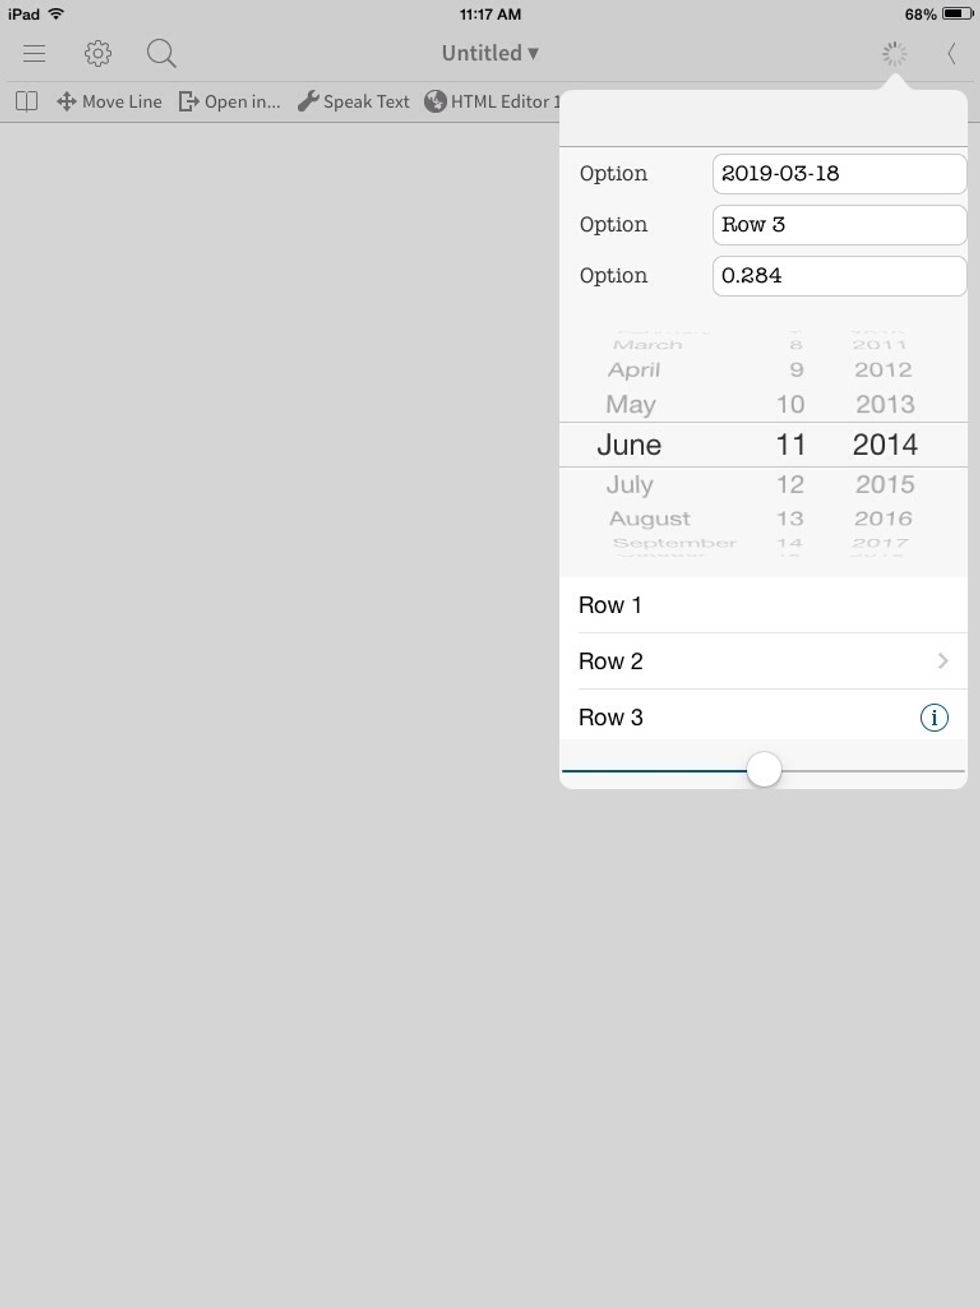
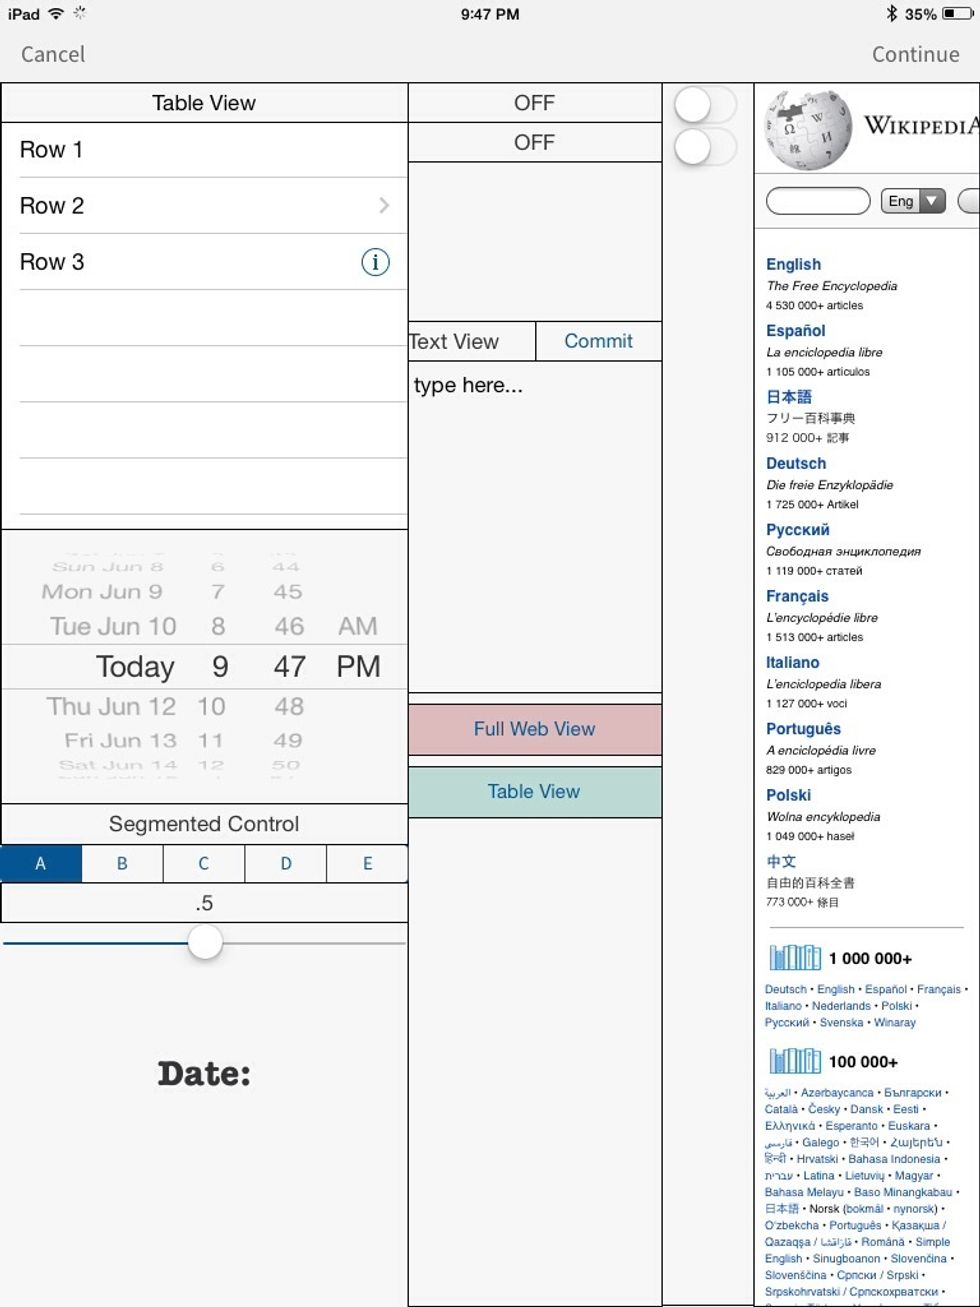
I added a "datePicker", a "TableView," and a "Slider" to the canvas.
Run it!
Time to make stuff work:
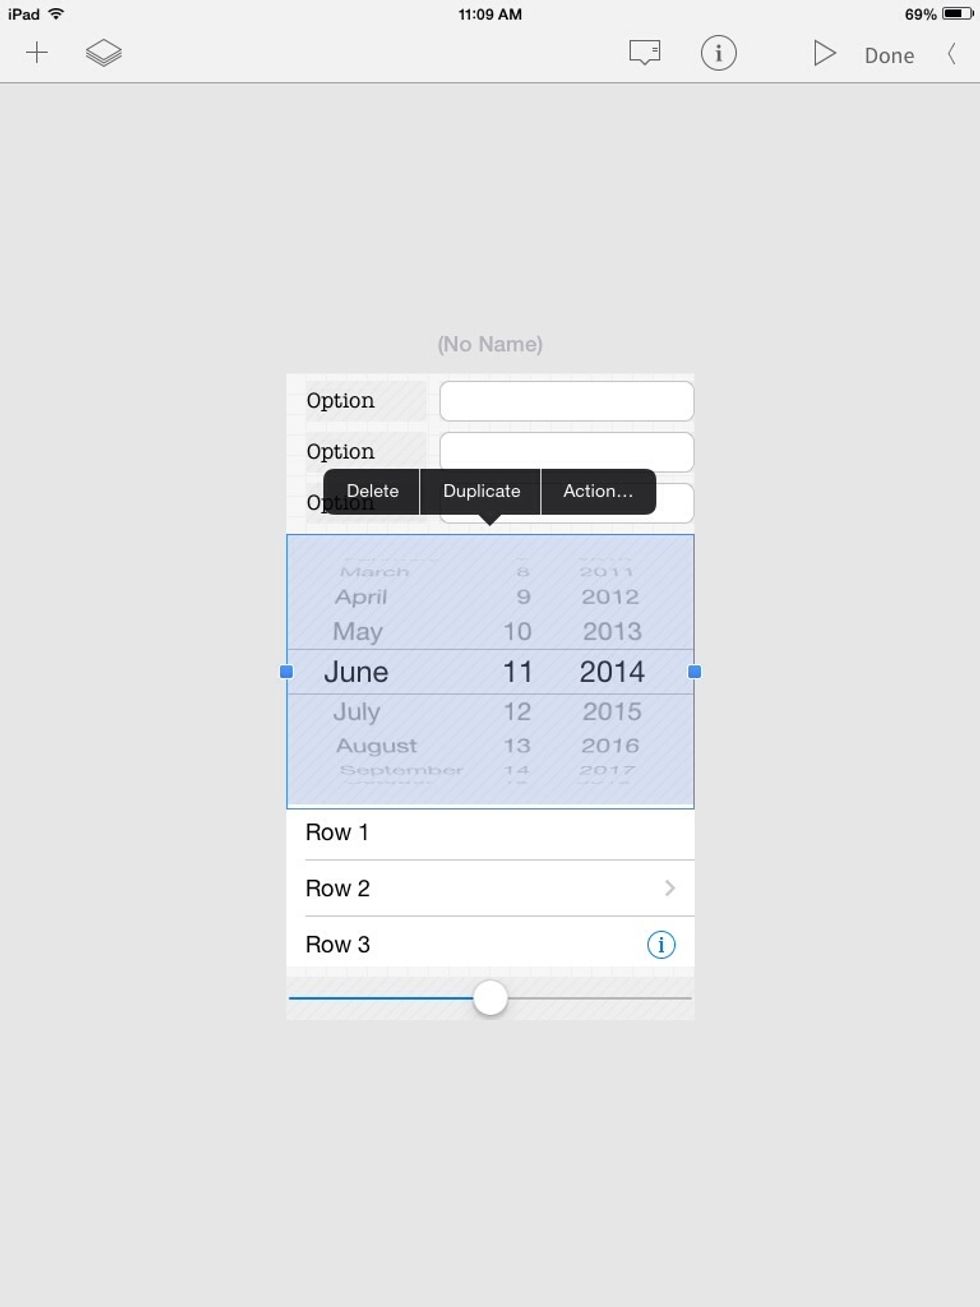
Select the date picker and select "Action" from the menu that pops up. An alternative to this is to select the speech bubble at the top of the screen.
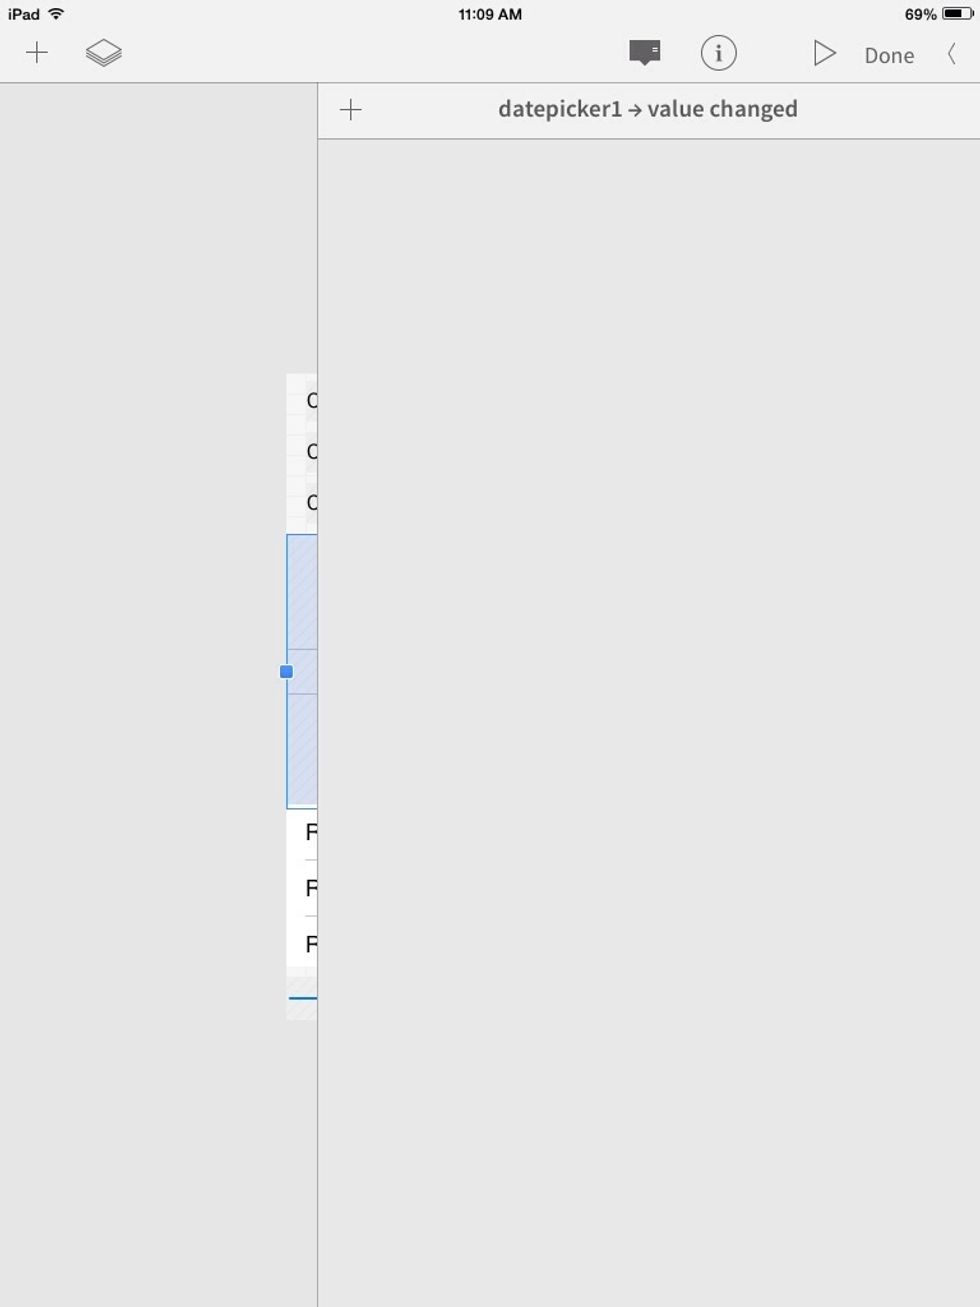
We are going to give this button some actions! Tap the + to add an action.

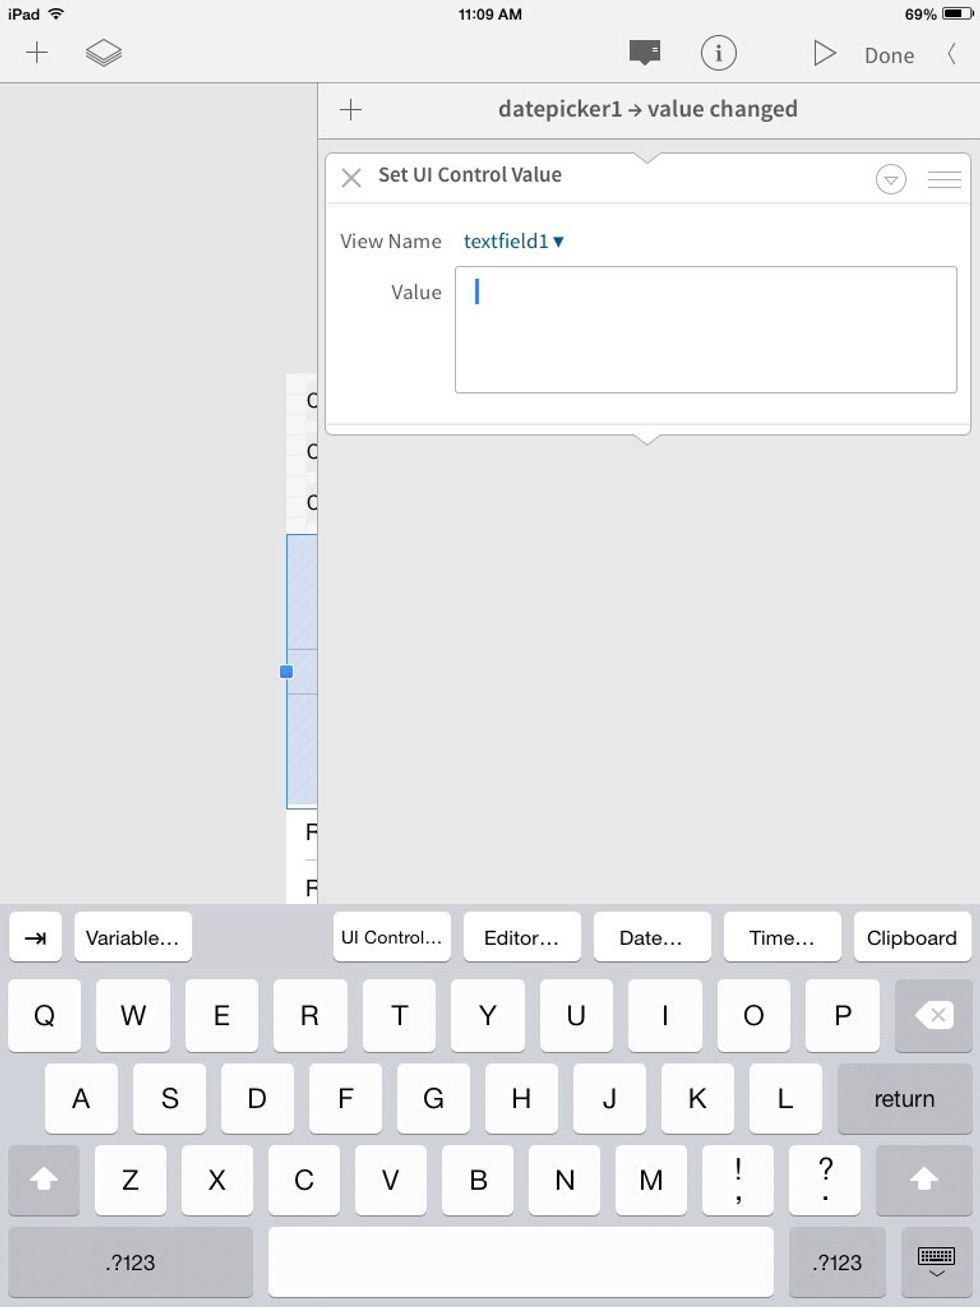
Scroll to where it says "Set UI Control Value"
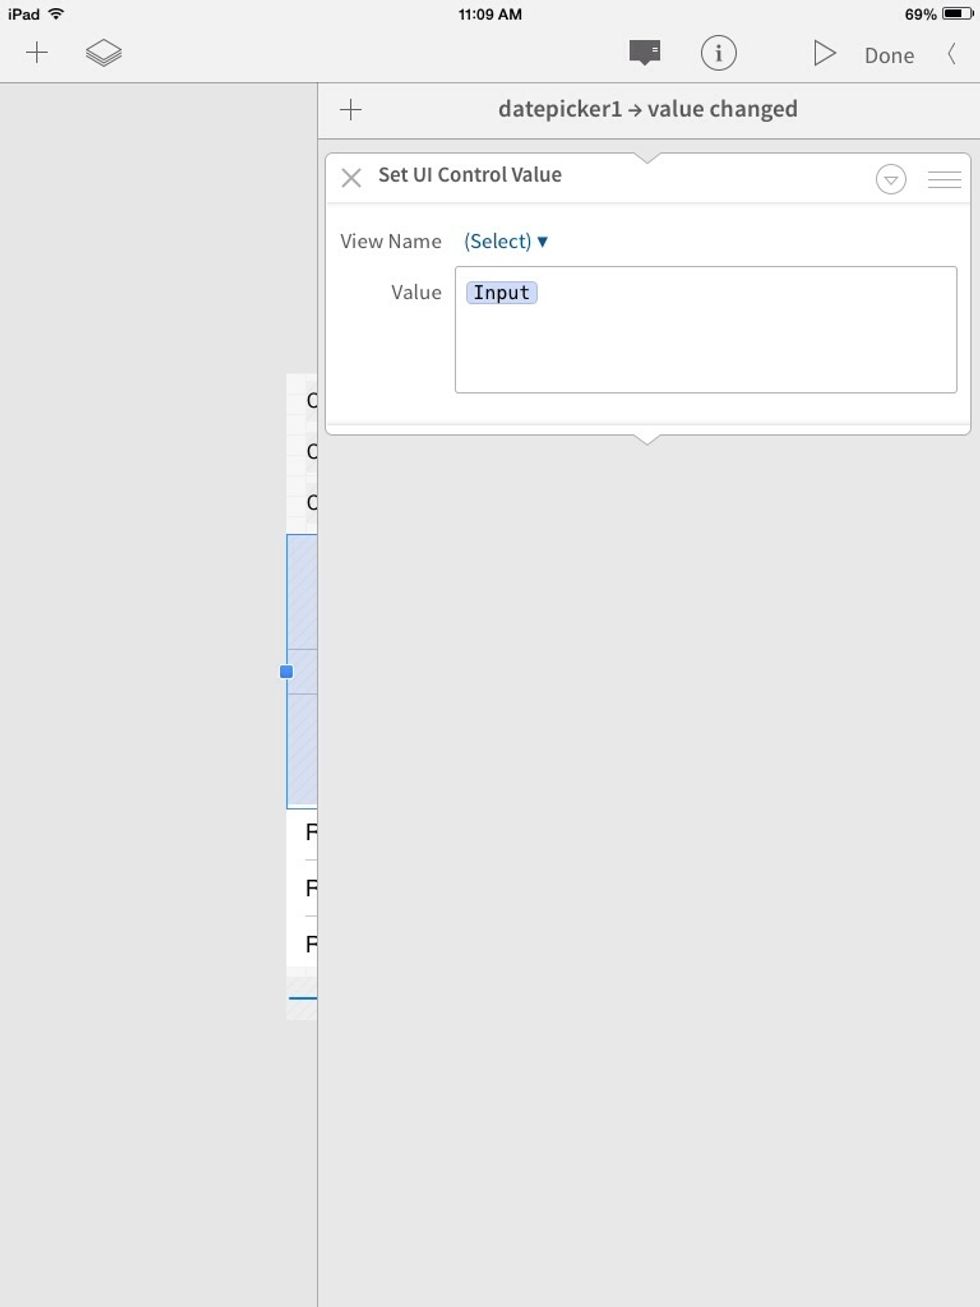
This action sets the value of a control in our UI. Tap where it says "View Name"
Then tap "textfield1".
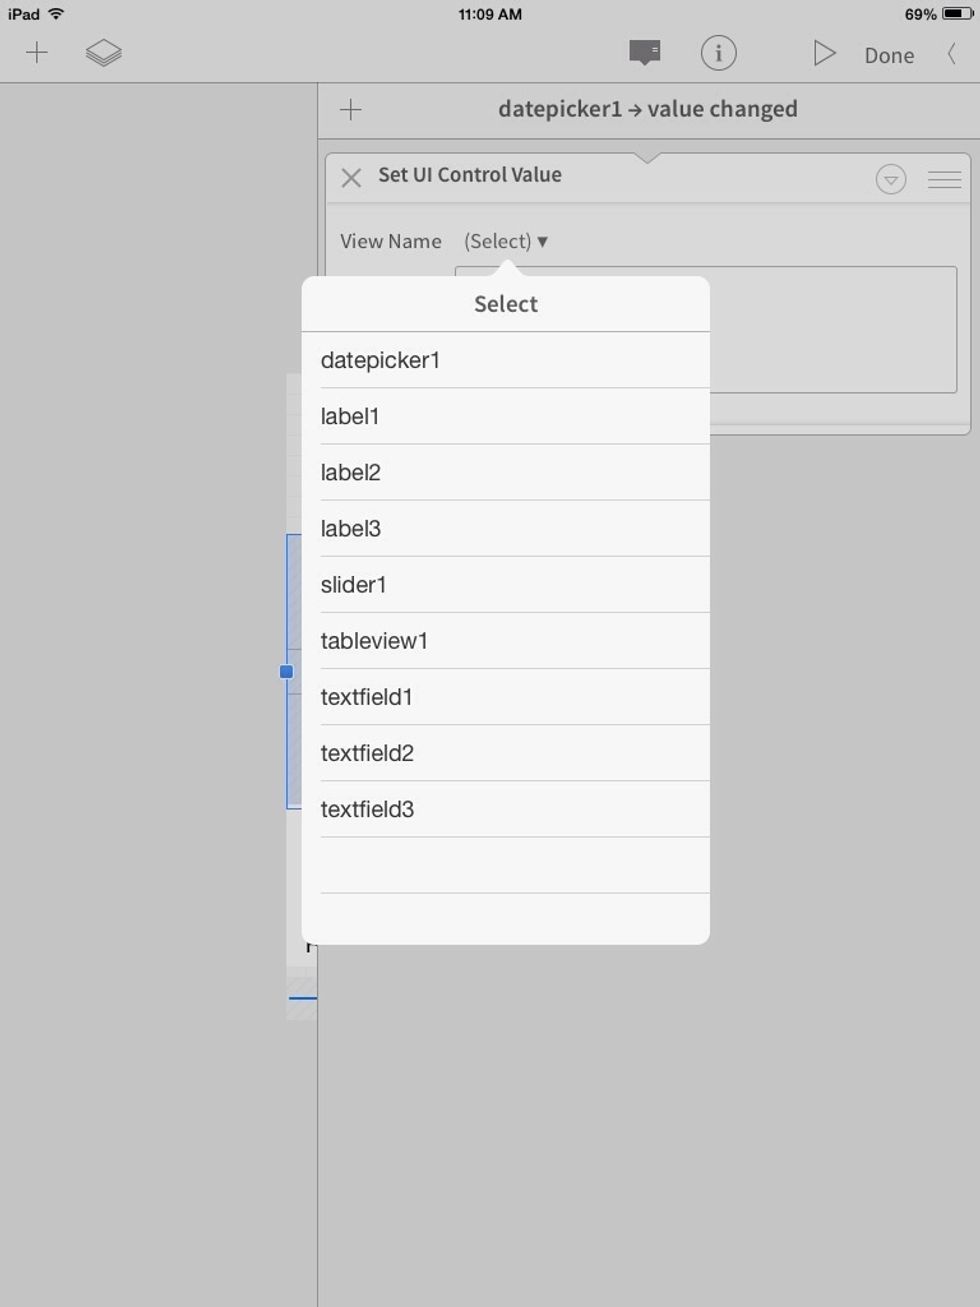
We want to set the value of this text field to the date picker. Tap where it says "UI control" above the keyboard.
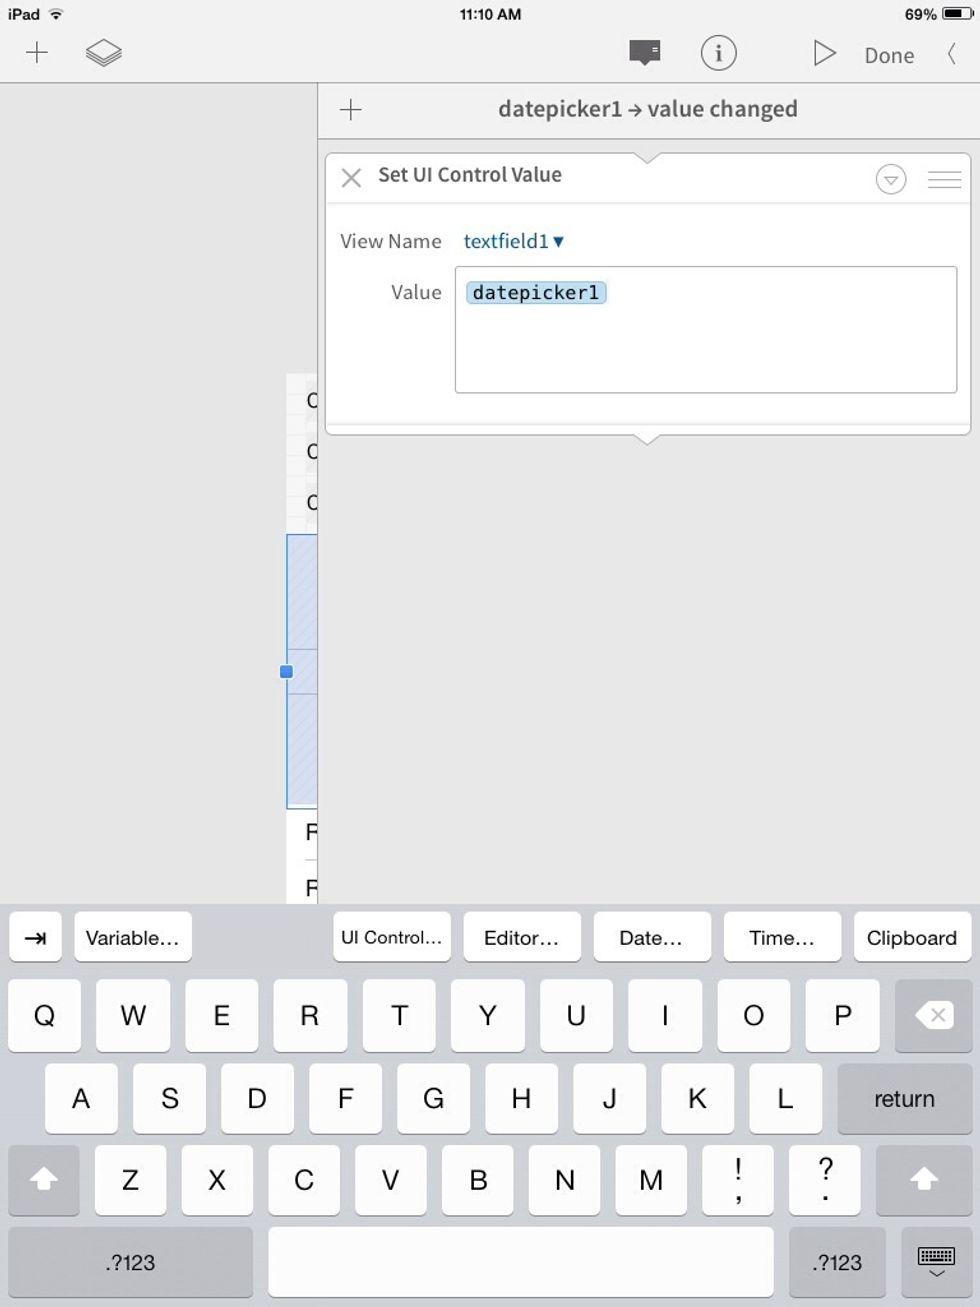
select "datepicker1" from the window that pops up.
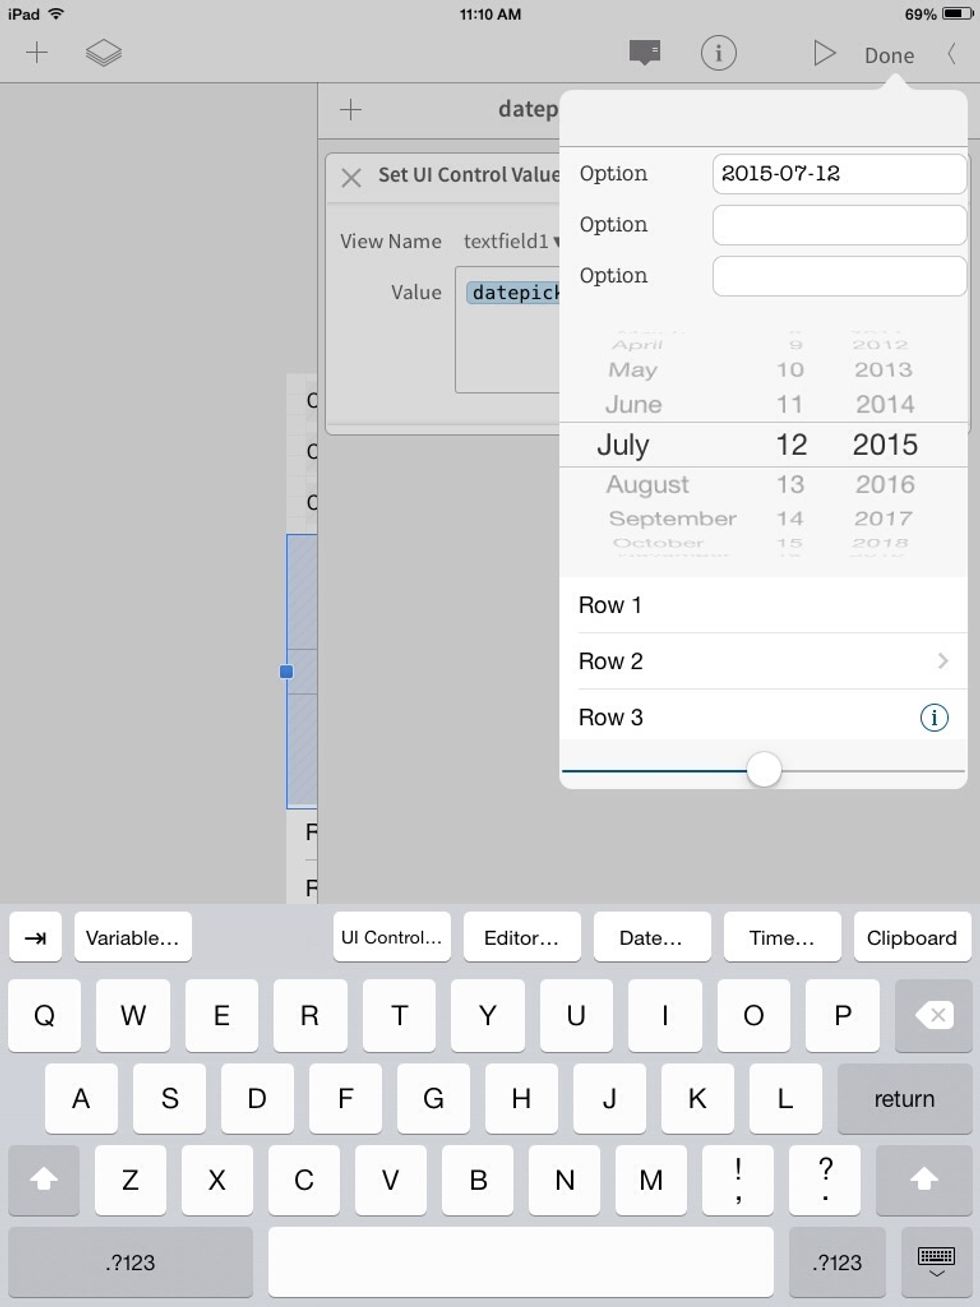
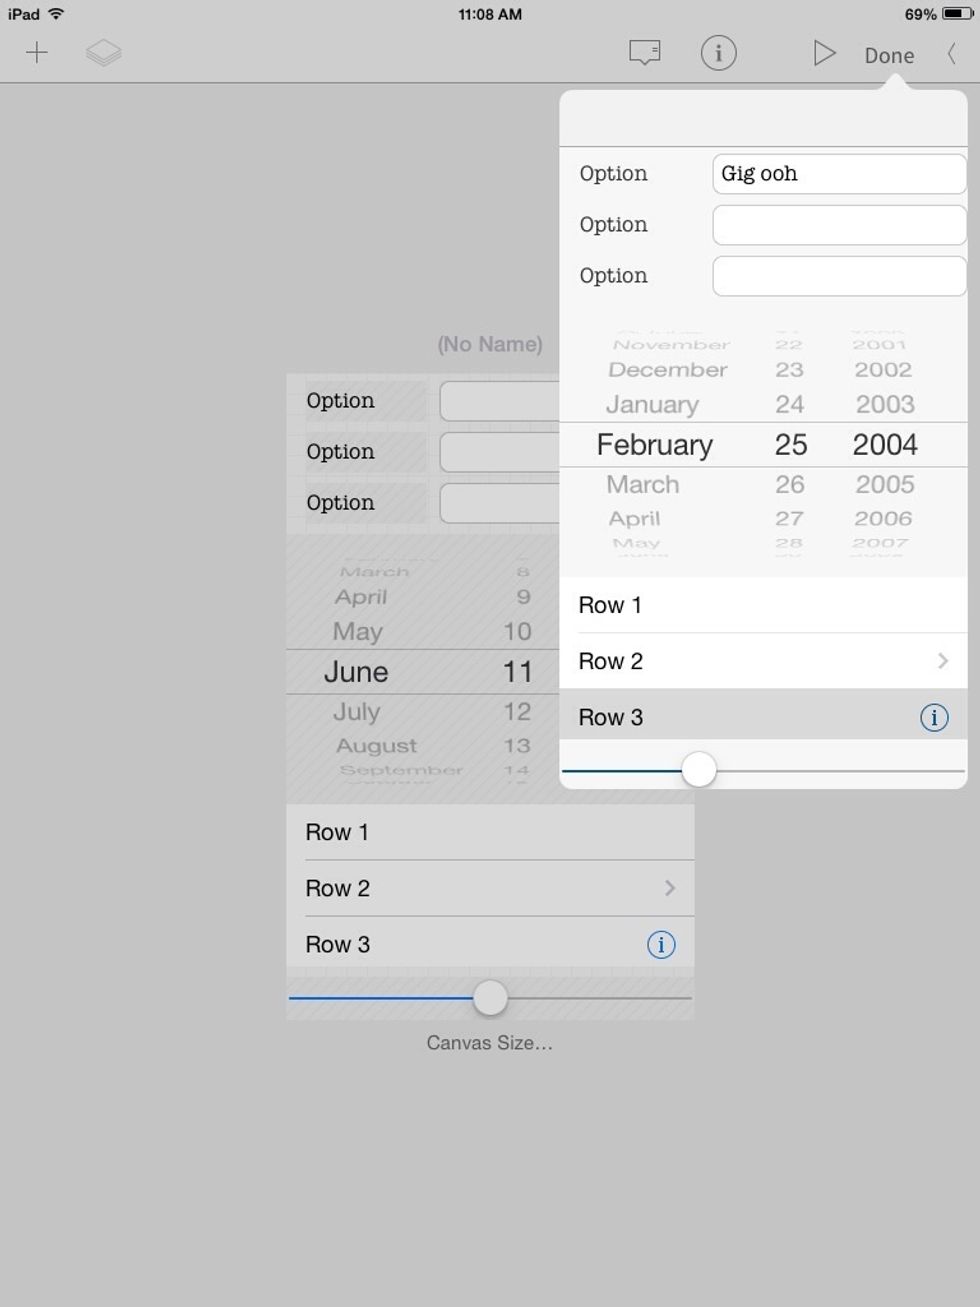
When we run it and change the date, it shows up in the text field we chose!
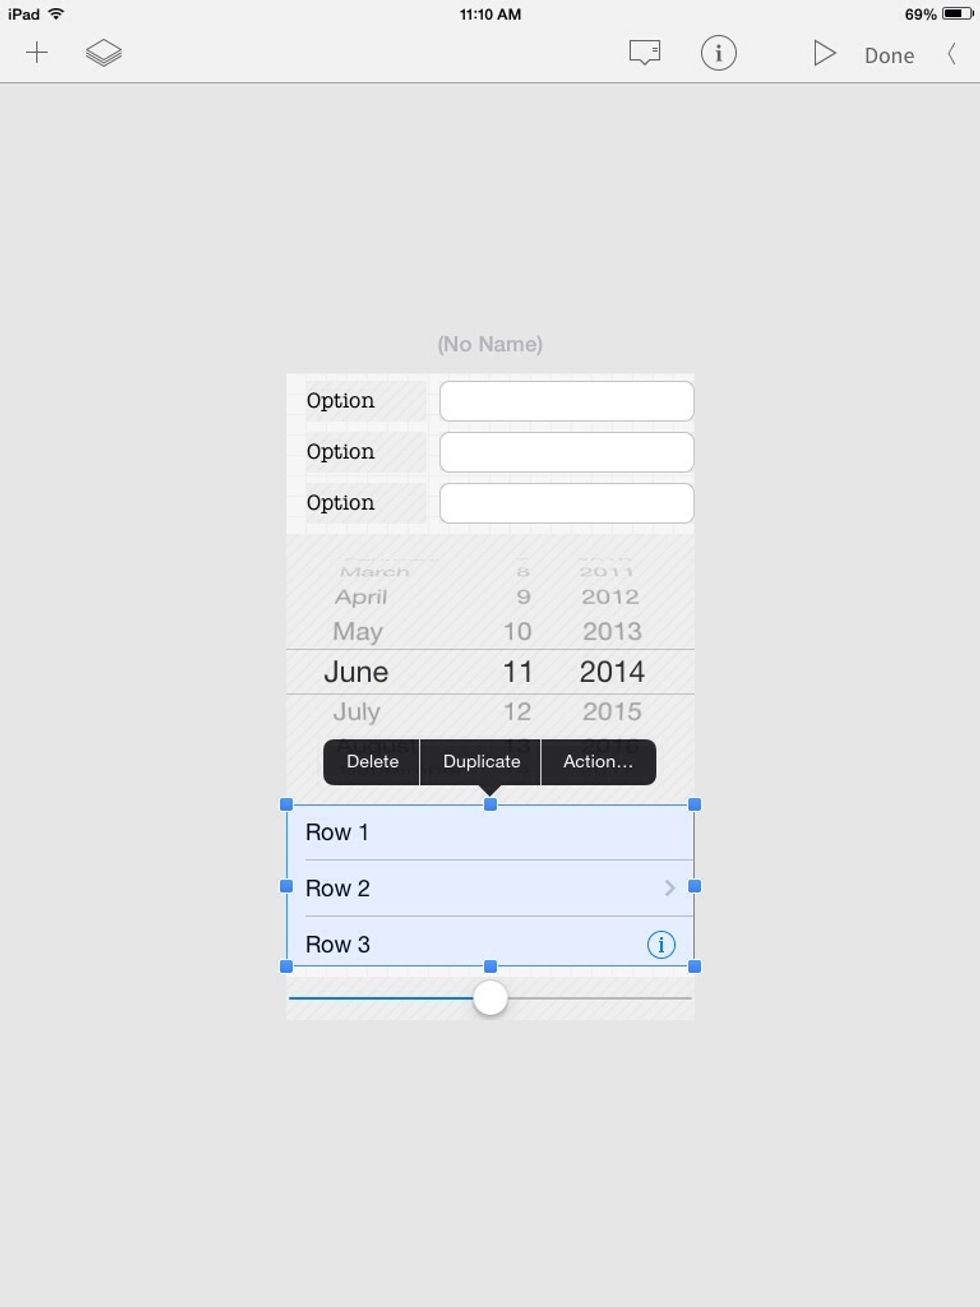
Tap the table and go to the action menu!
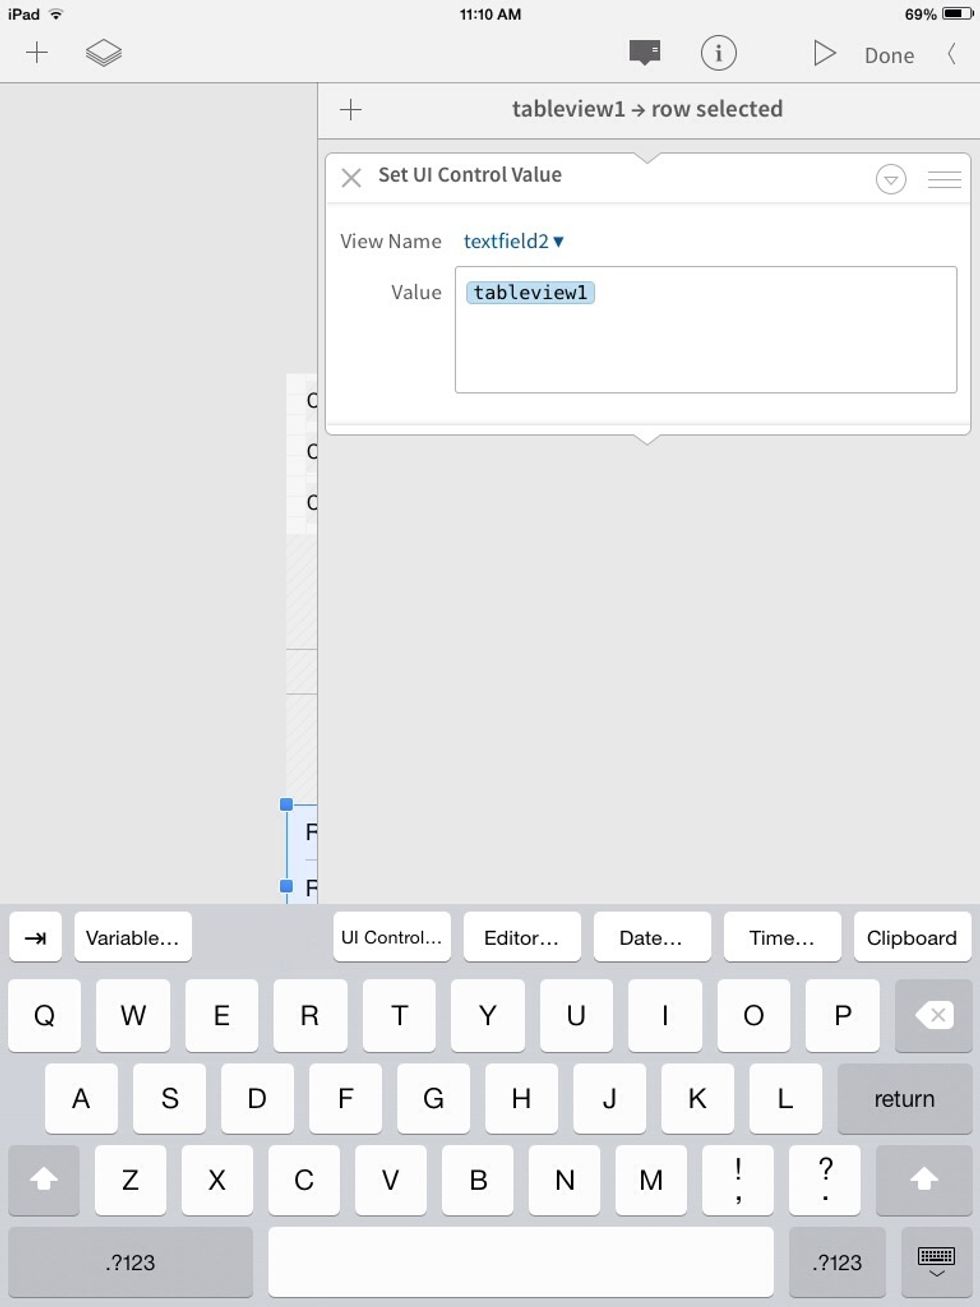
set "textfied2 to "tableview1".
Oops! If we do this, it will show the whole table! We only want to show whatever item is selected!
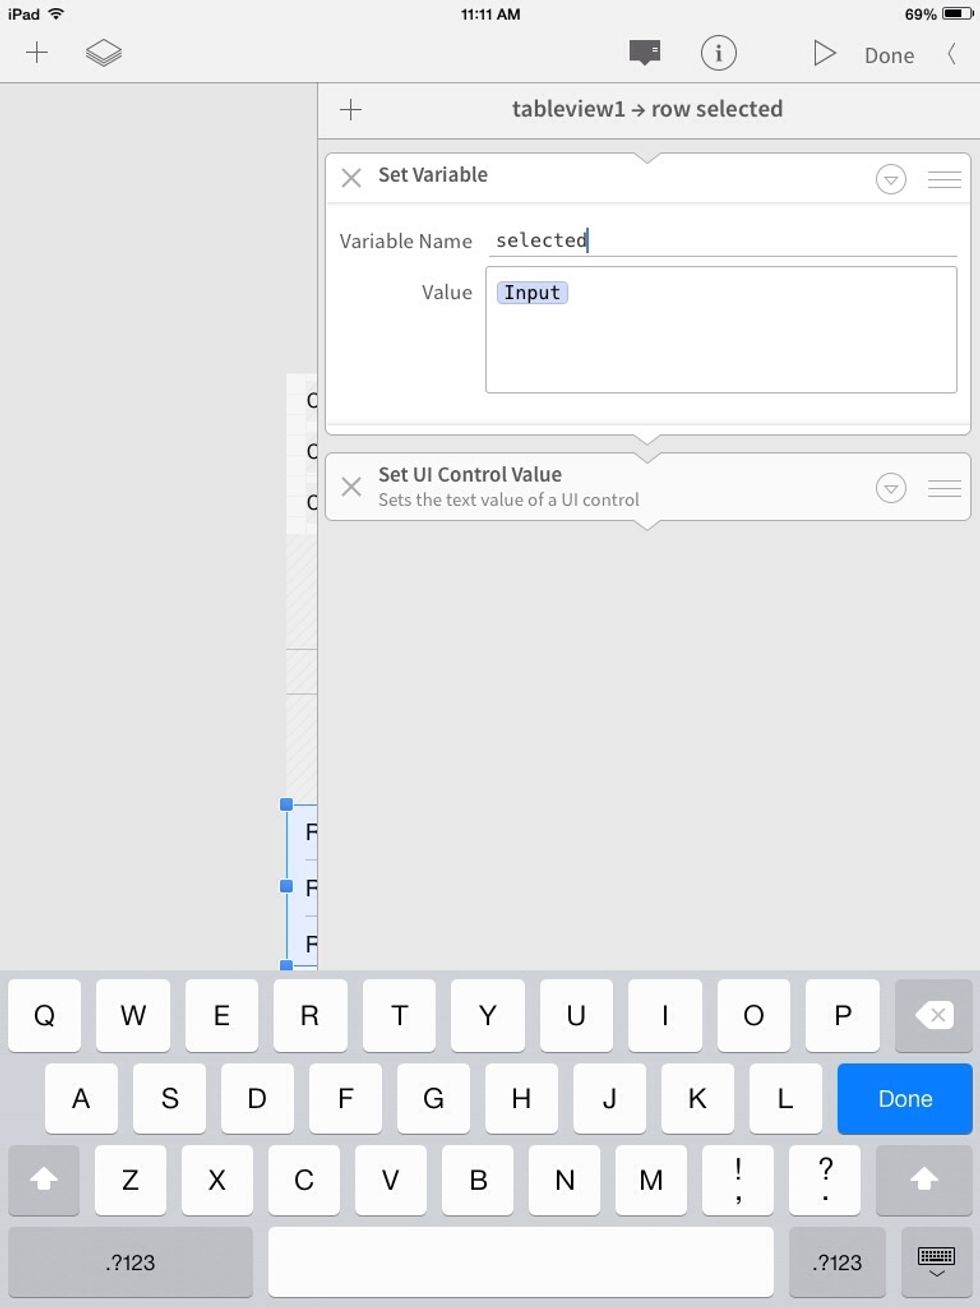
So we need to store whichever option is selected into a variable, and then set that to the text field. Add a "Set Variable" action and name it "selected. It's Value will be the "Input" from the table.
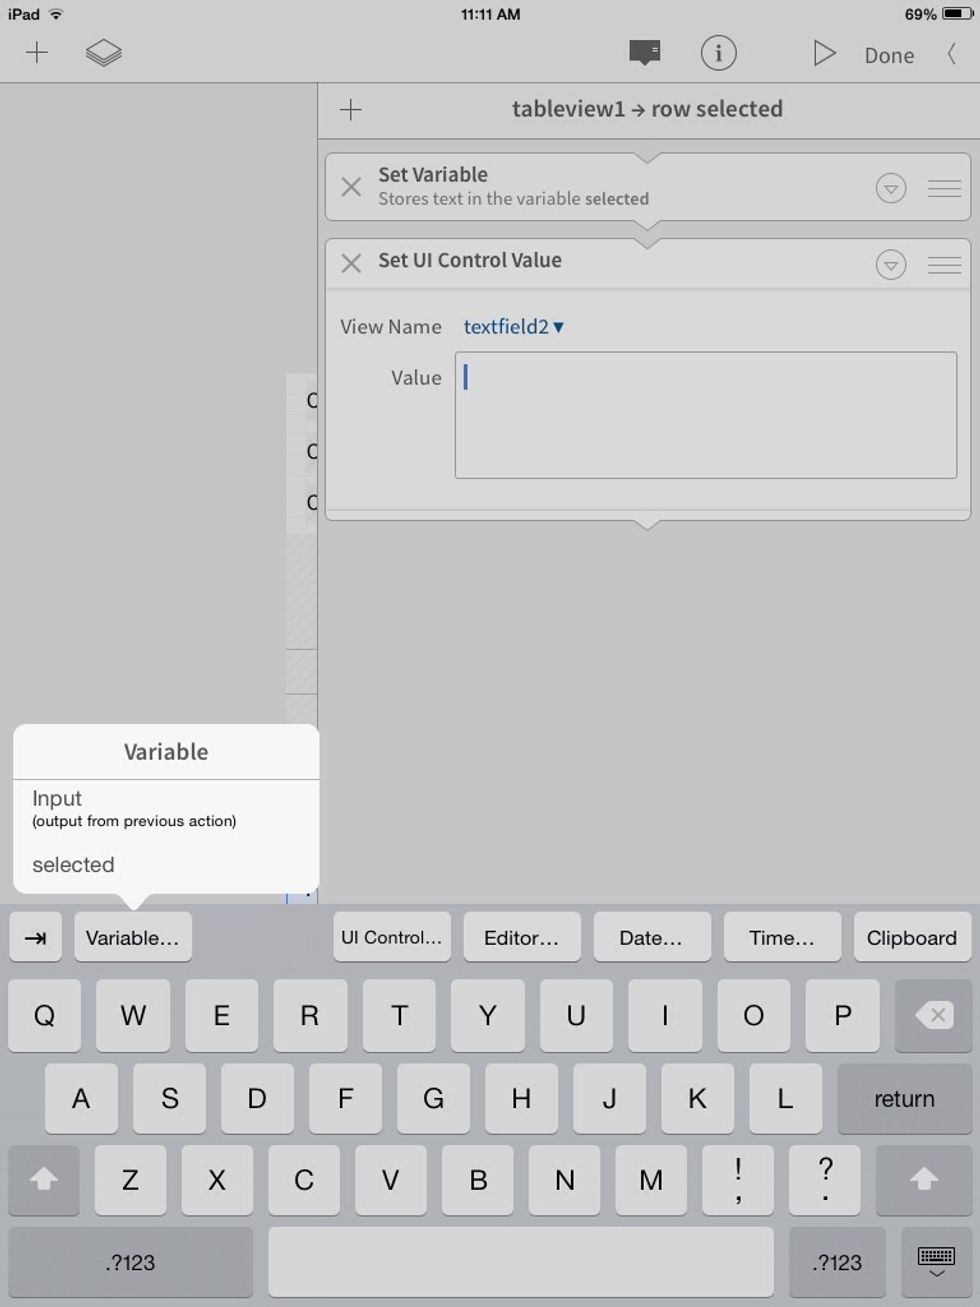
In the value box, tap where it says "Variable" above the keyboard. Our created variable will be in the list. Select it!
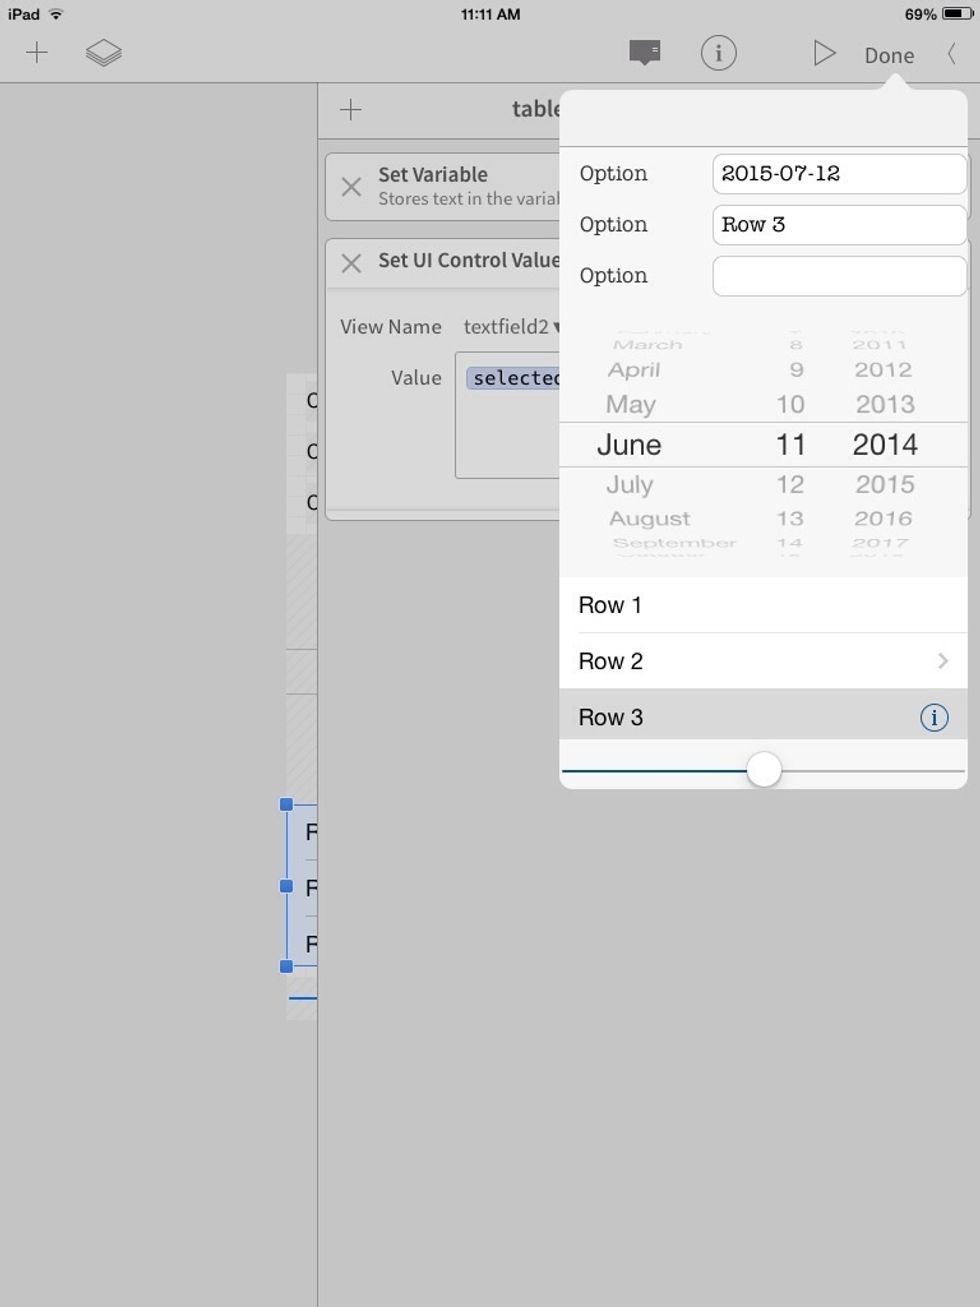
Now run it. Only the selected item will show up in the text field.

Last thing! Add some action to the slider.
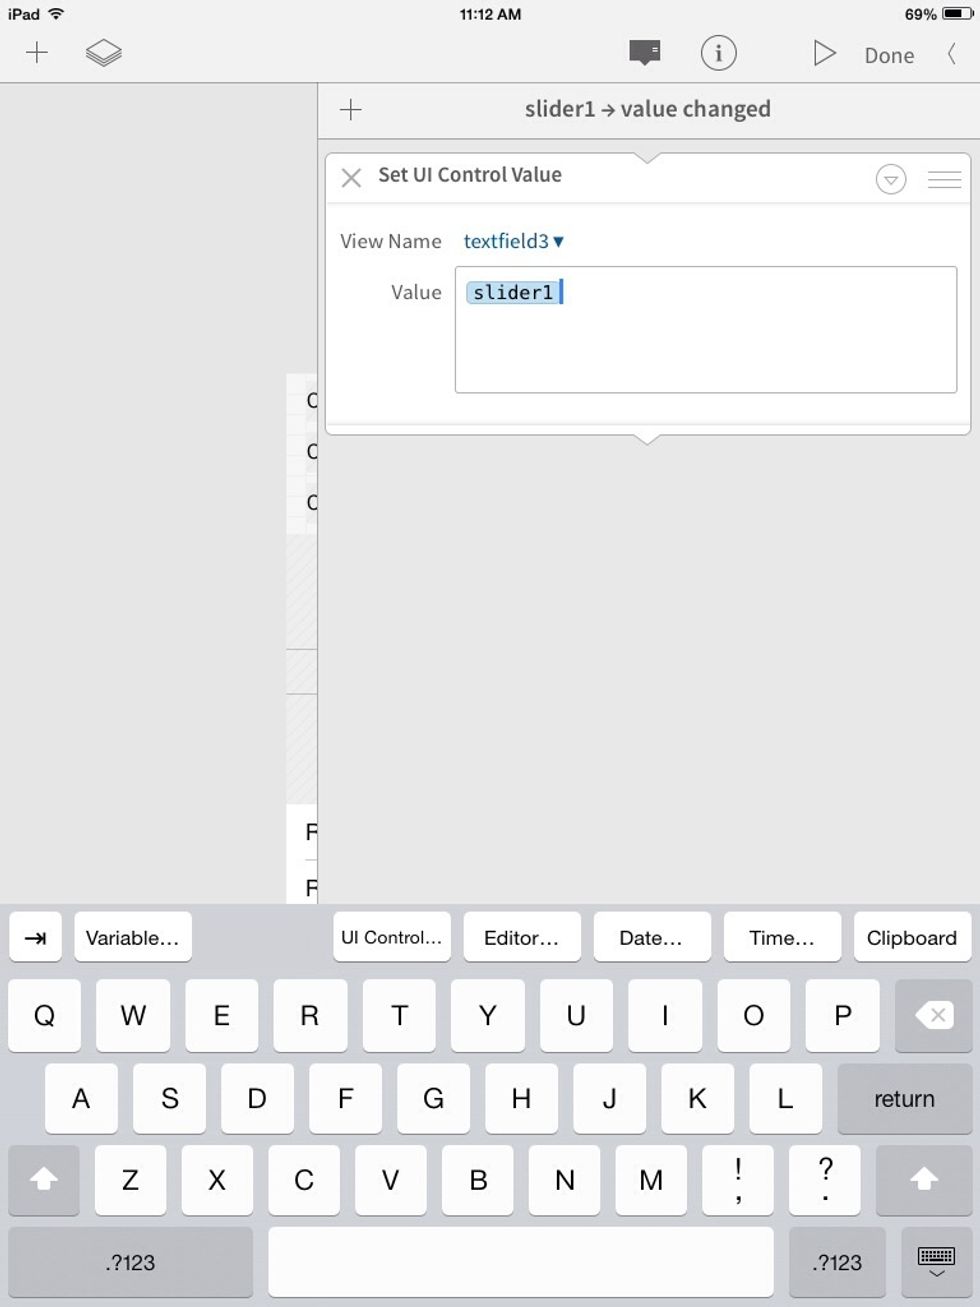
set "textfield3 to the slider. Tap DONE to get back to the main workflow.

When making an iPhone app using the iPad, it is best to view it in the "Popover" style. Change it back to Full-Screen before sharing it!
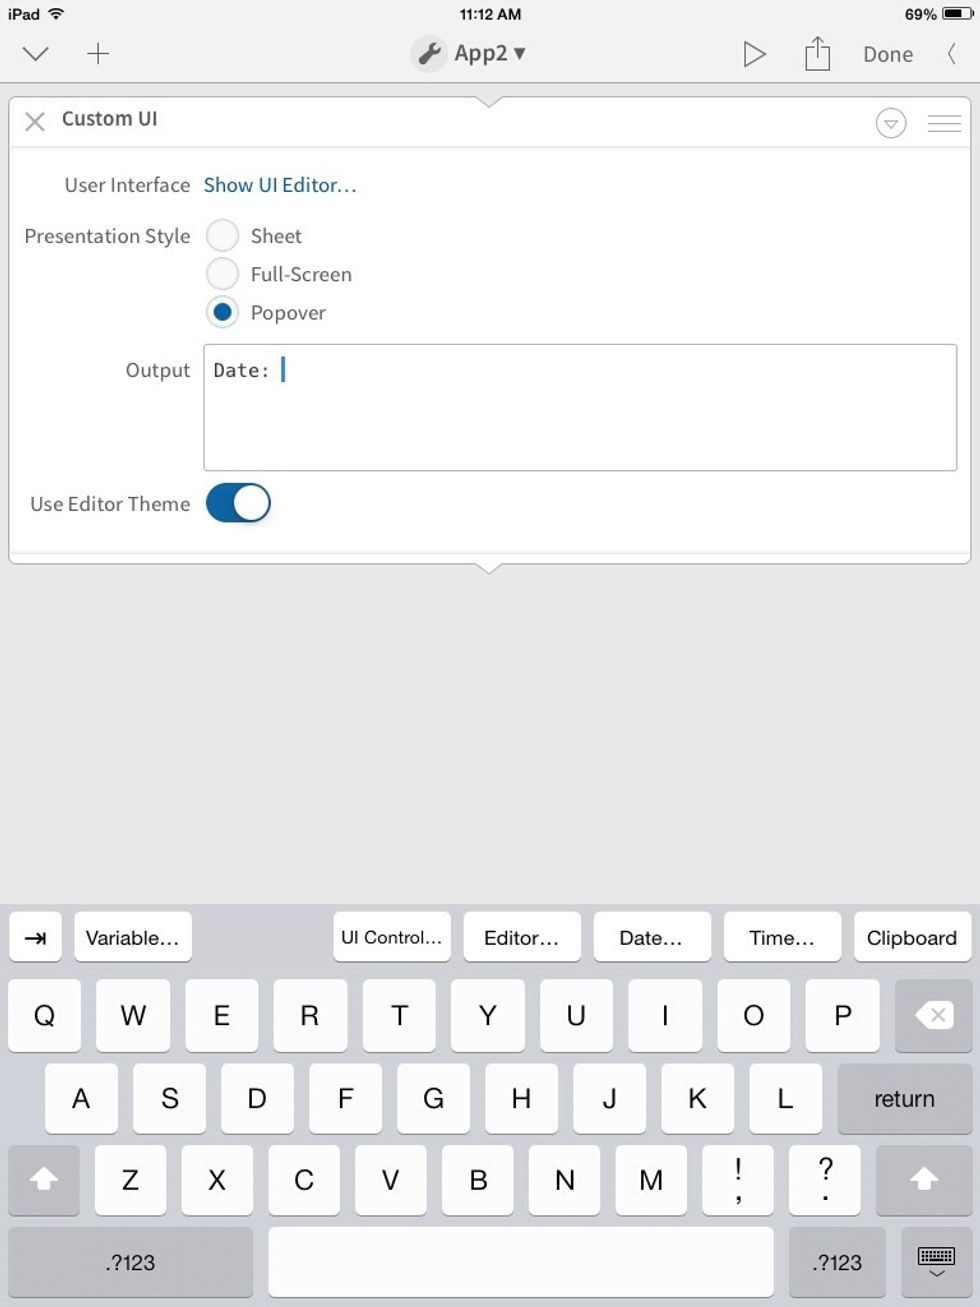
Now we can output the contents of our UI to the main workflow. I typed the word "Date:"
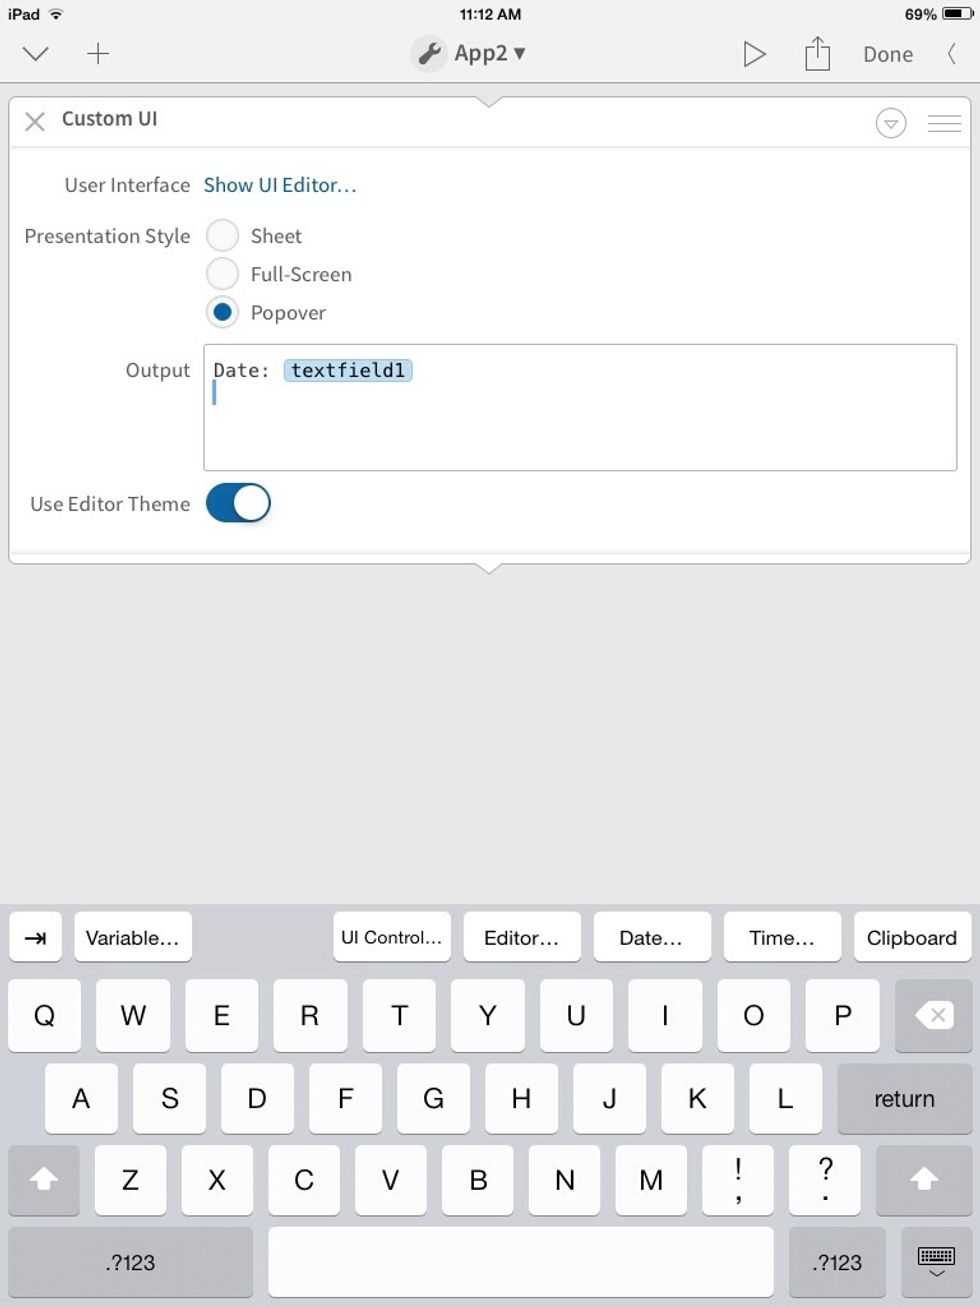
Then I tapped "UI Control" and selected the text field that stores the date!
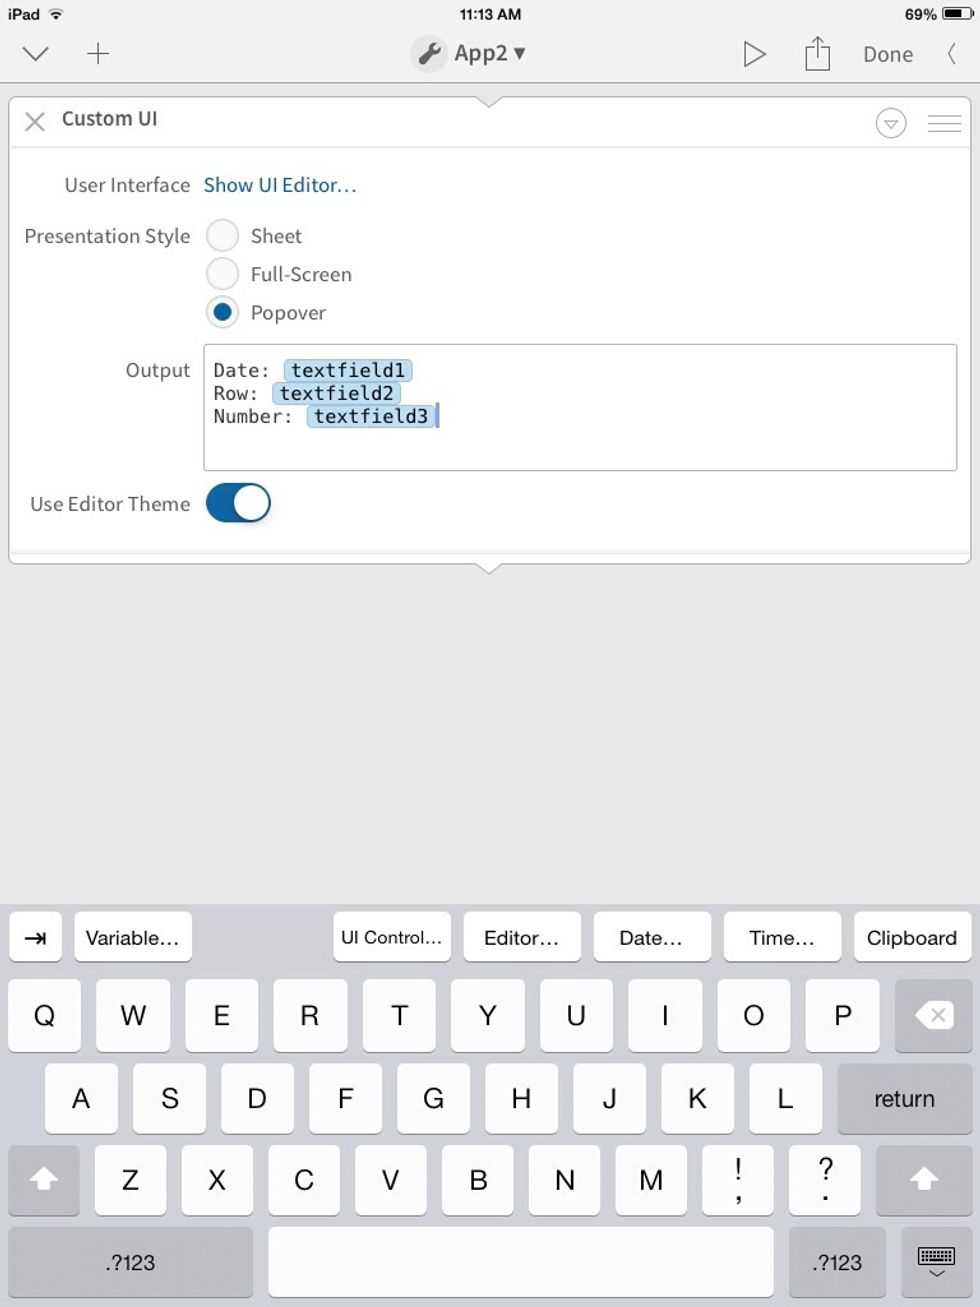
Repeat
Note: It is best to give controls descriptive names in their info panels, especially if the app gets complicated.
Now, tap the + and scroll to "Replace Selected Text."

Leave the "Input" as it is. this will replace all text in the document with what the action above it outputs.
Run it one last time!
Play around with it this app and its setting to get even more interesting apps. You will discover some awesome things that can make your life a little easier!
The end.
Examples:
A Demo UI:
A page full of controls!
Quick access to Workflows:
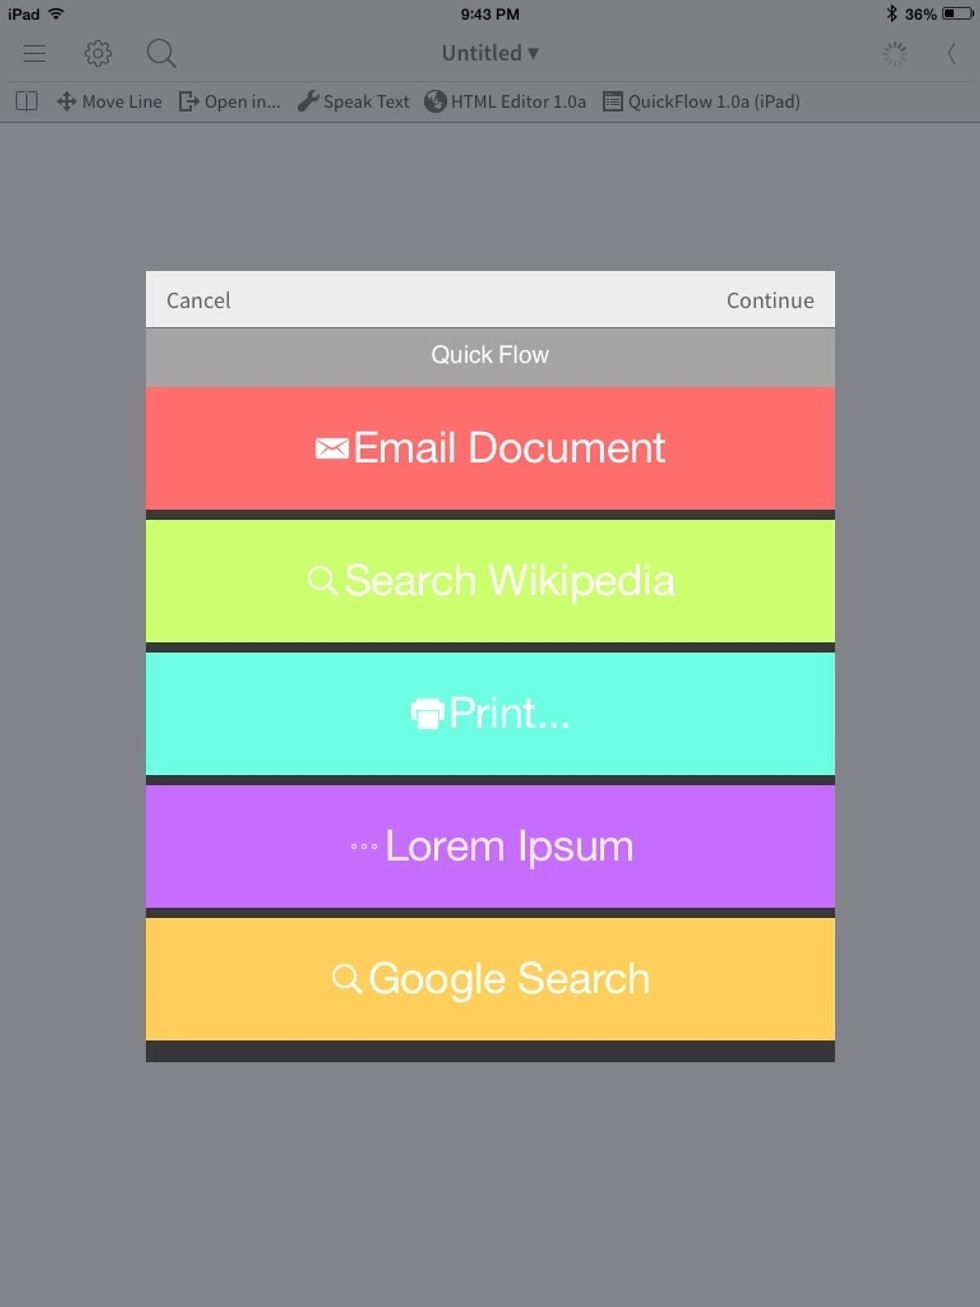
Quickly Email your document, and a bunch O' other things!
Bunch O' buttons:
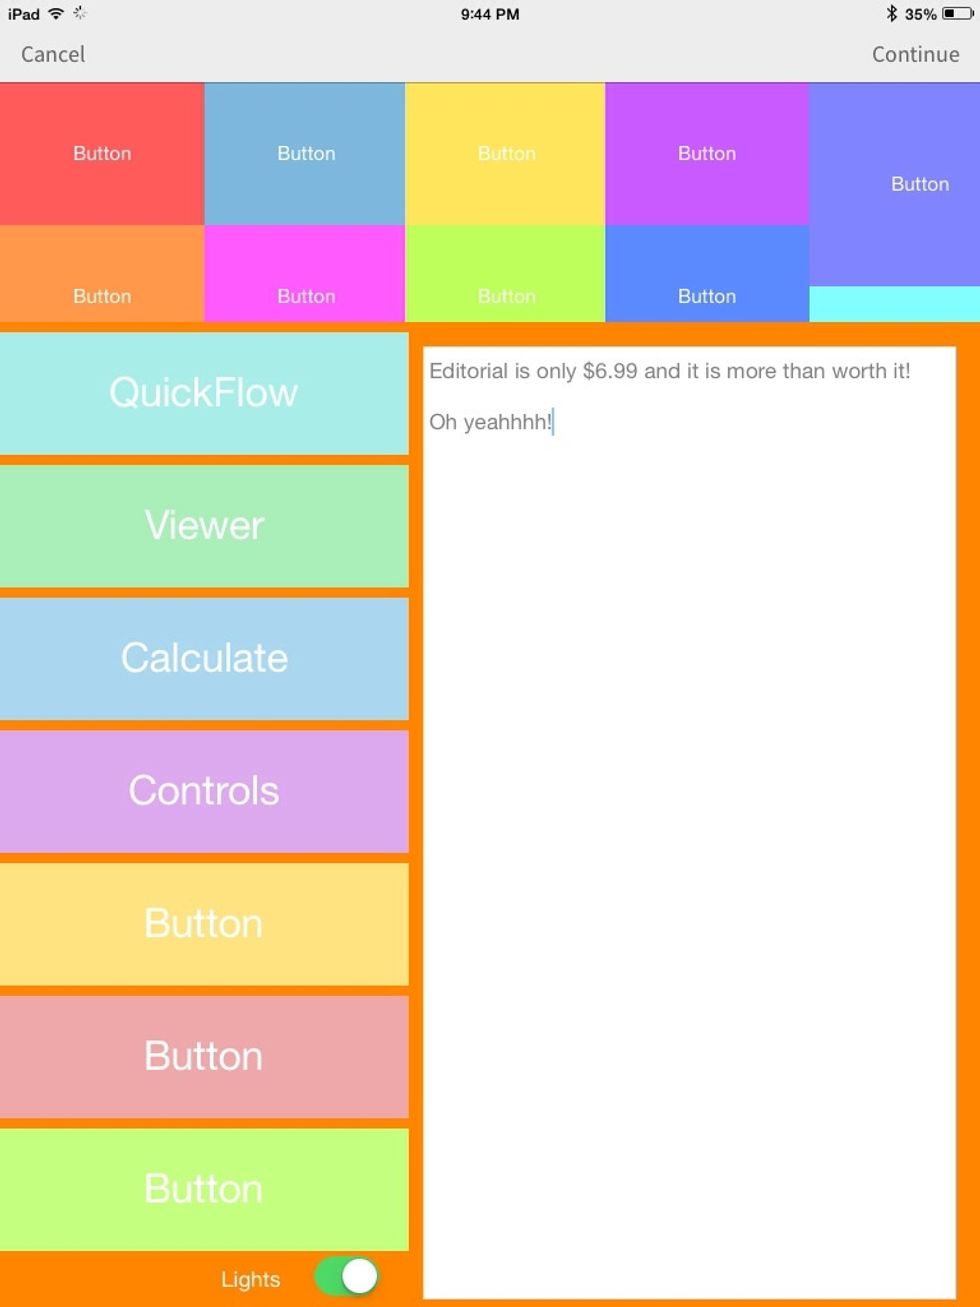
Whoa! That is a lot of buttons!
Medical Form:
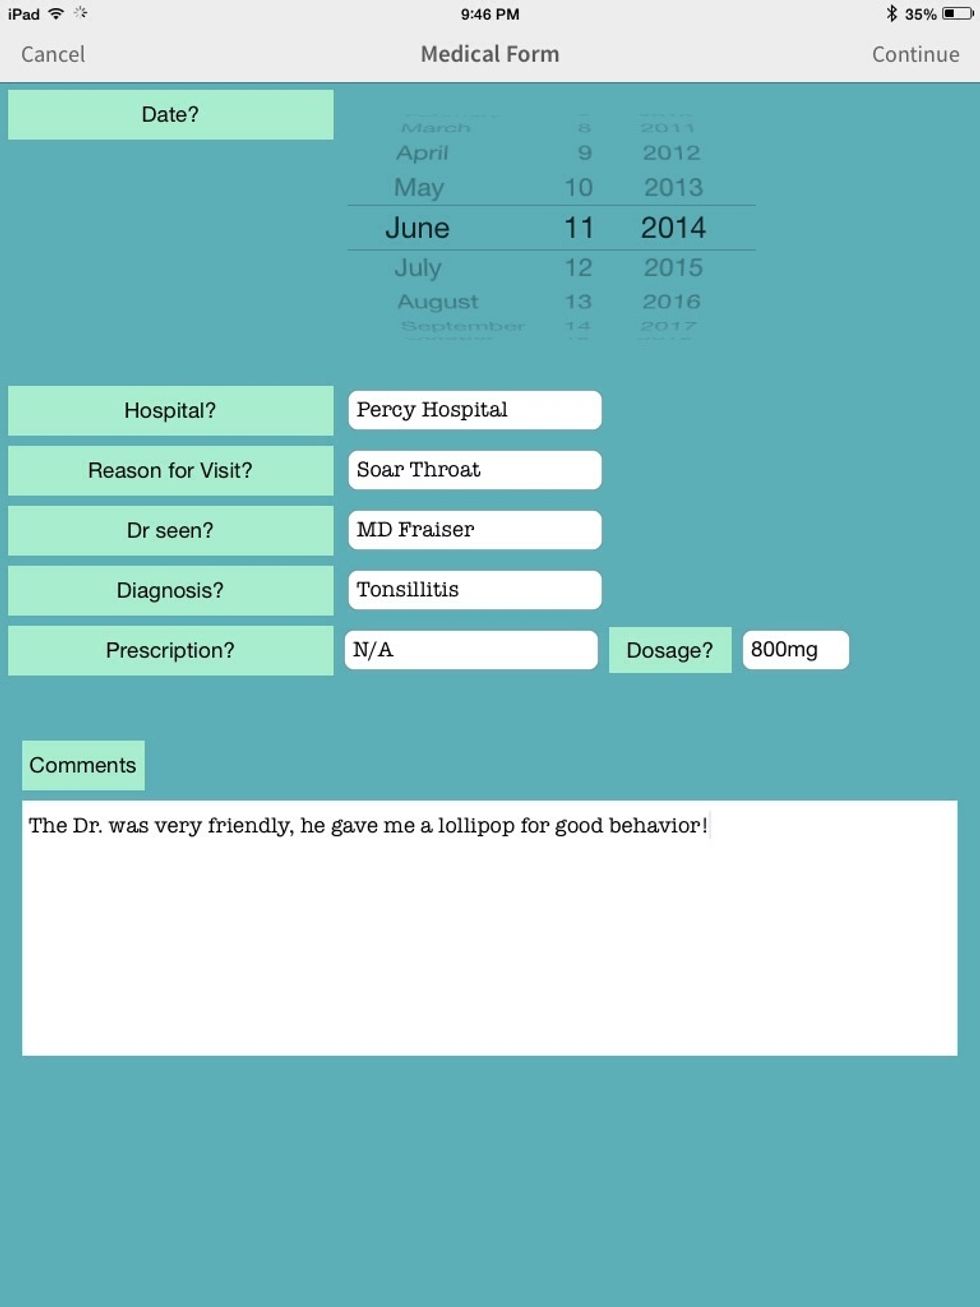
I made this hospital visit app in a matter of minutes. I needed it recently.
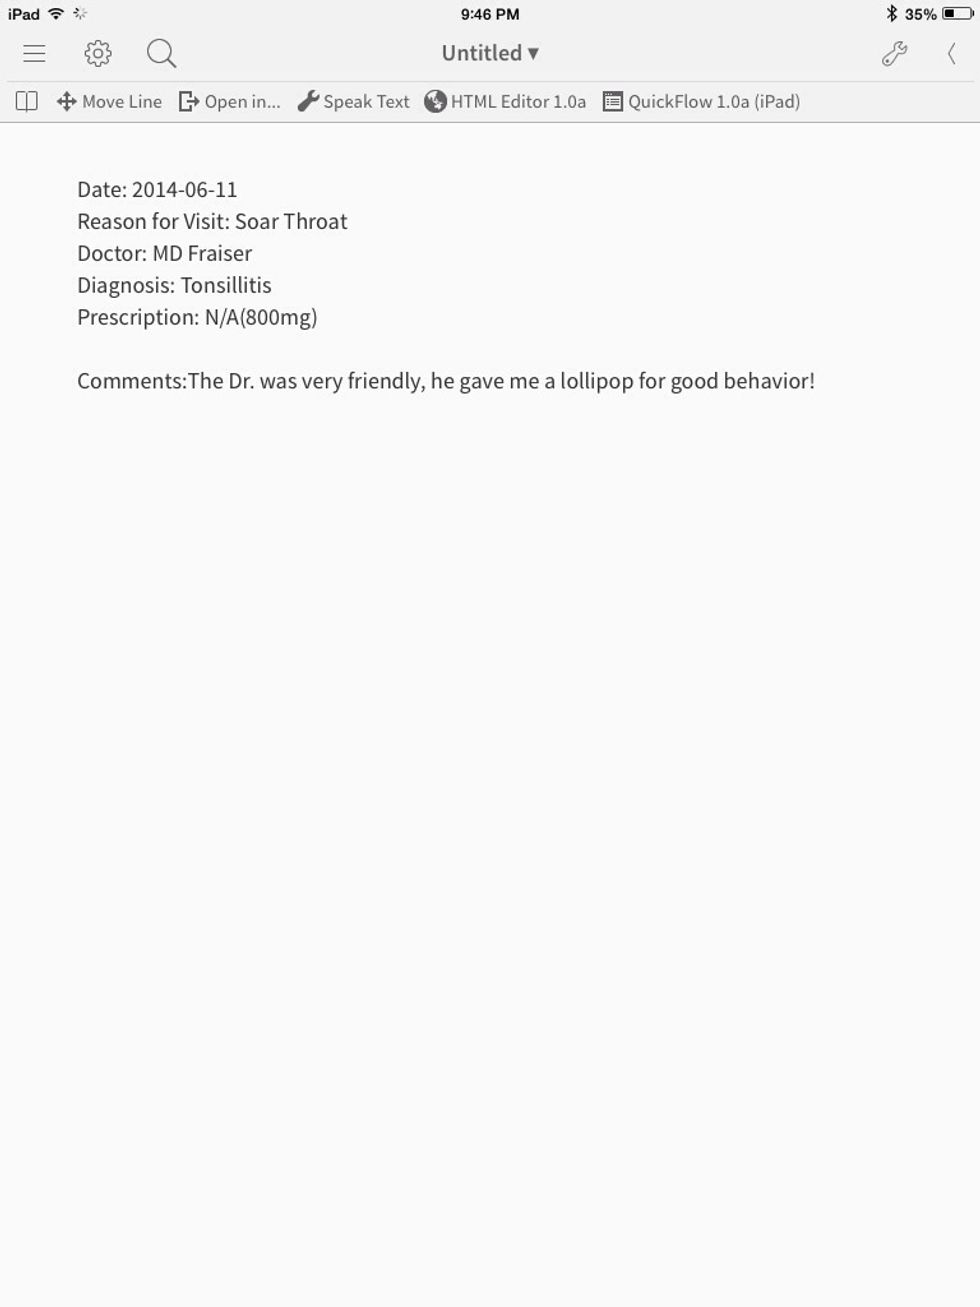
It automatically generates this report, which I can email or print using my custom "QuickFlow app"
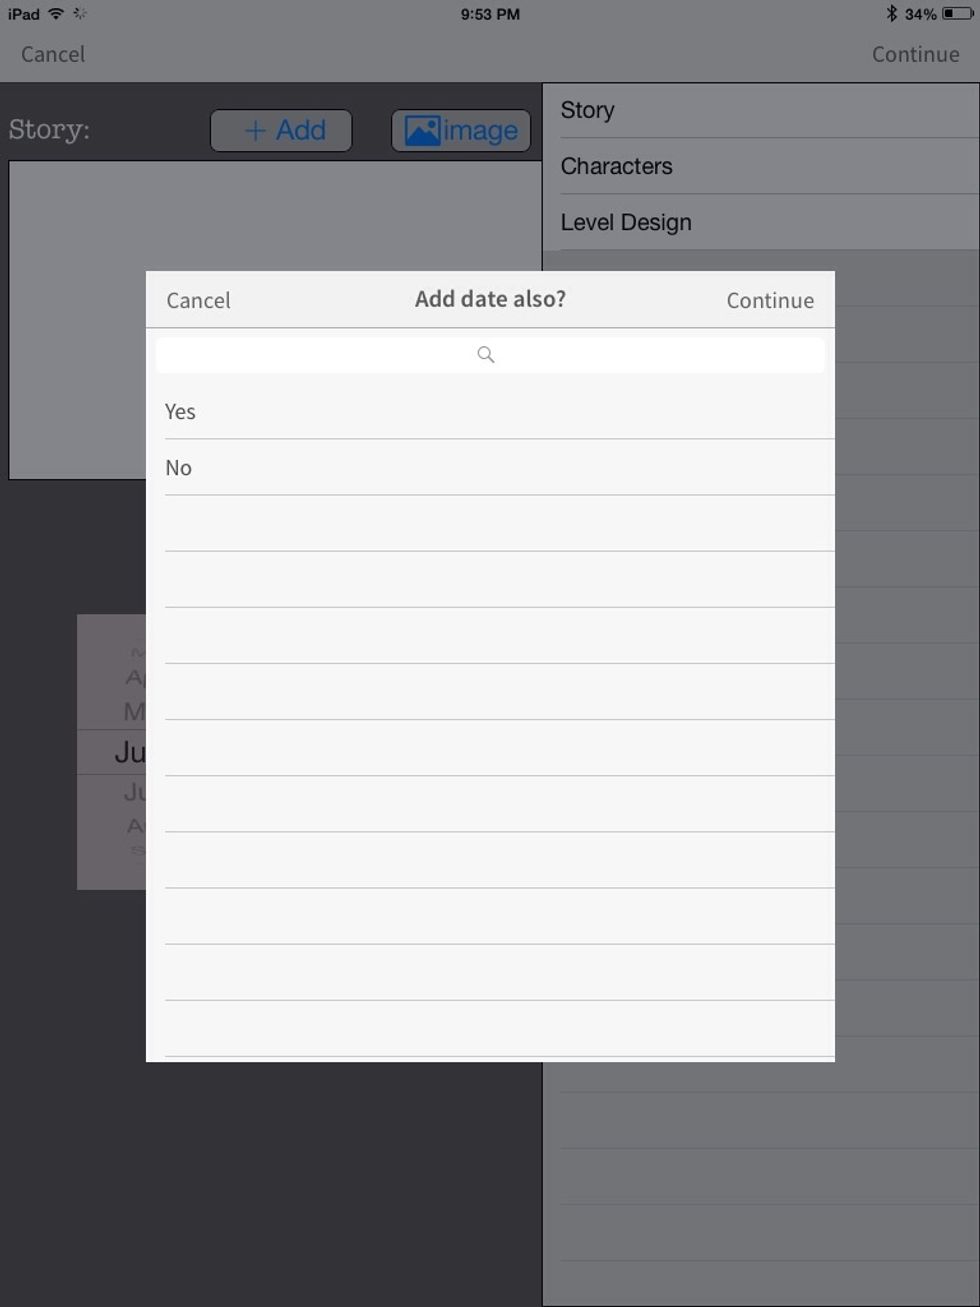
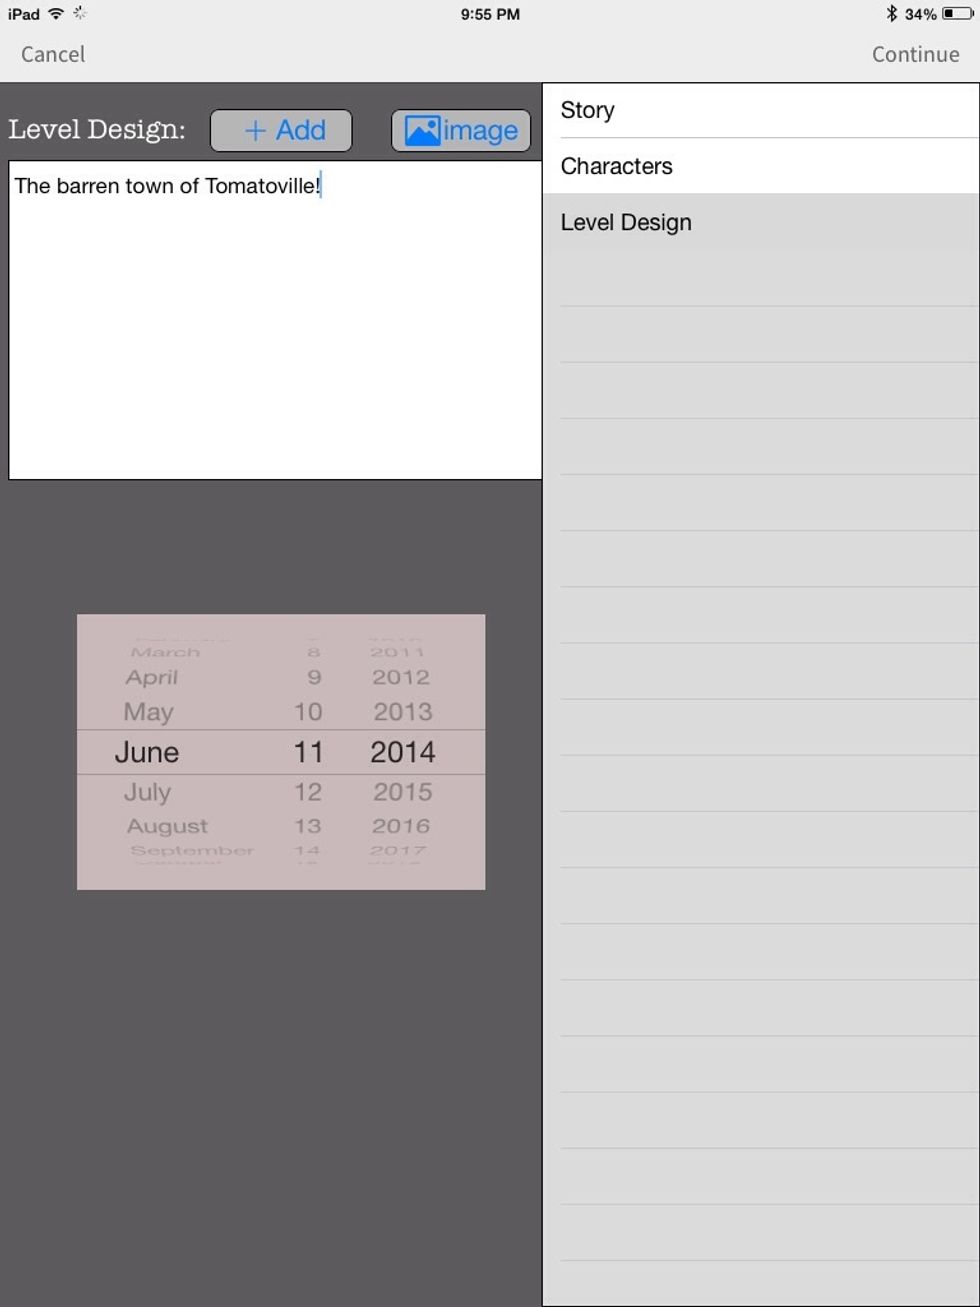
Game Design Document:

This is a Game Design Document app. It helps me write a design document for my game! A few minutes of work.