The Conversation (0)
Sign Up

Paint a landscape background on your paper plate, then let it dry. The Tempra paint will dry pretty fast.

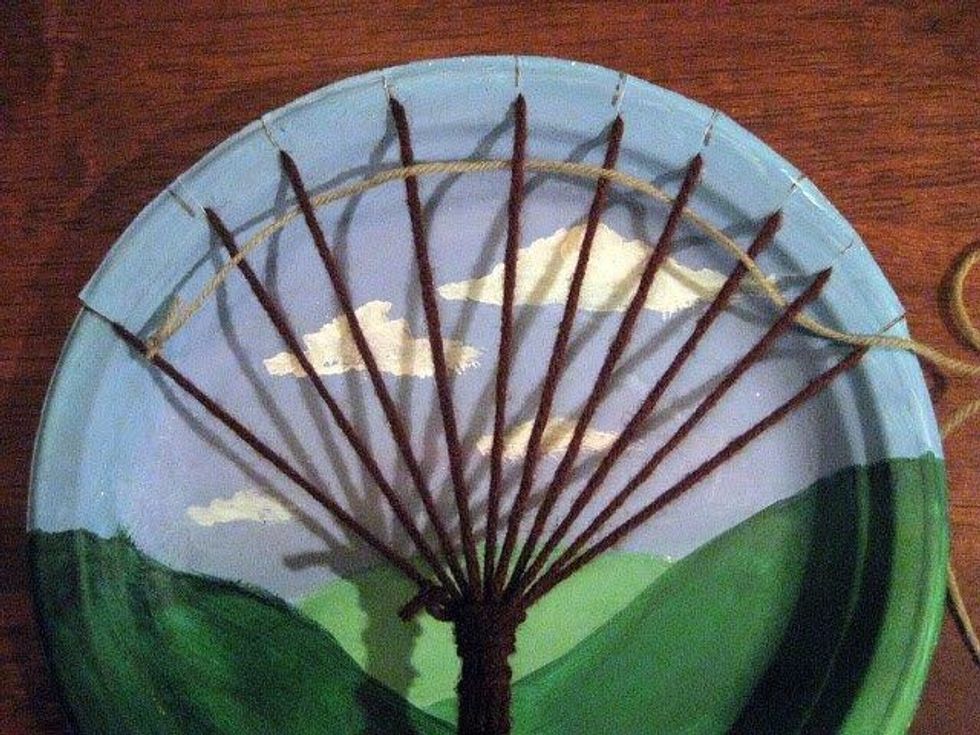
Place a tree weaving template over your plate. Use the template to draw the correct number of notches on the top (10) and bottom (2) of your plate. Cut the notches to the inner edge of your plate.
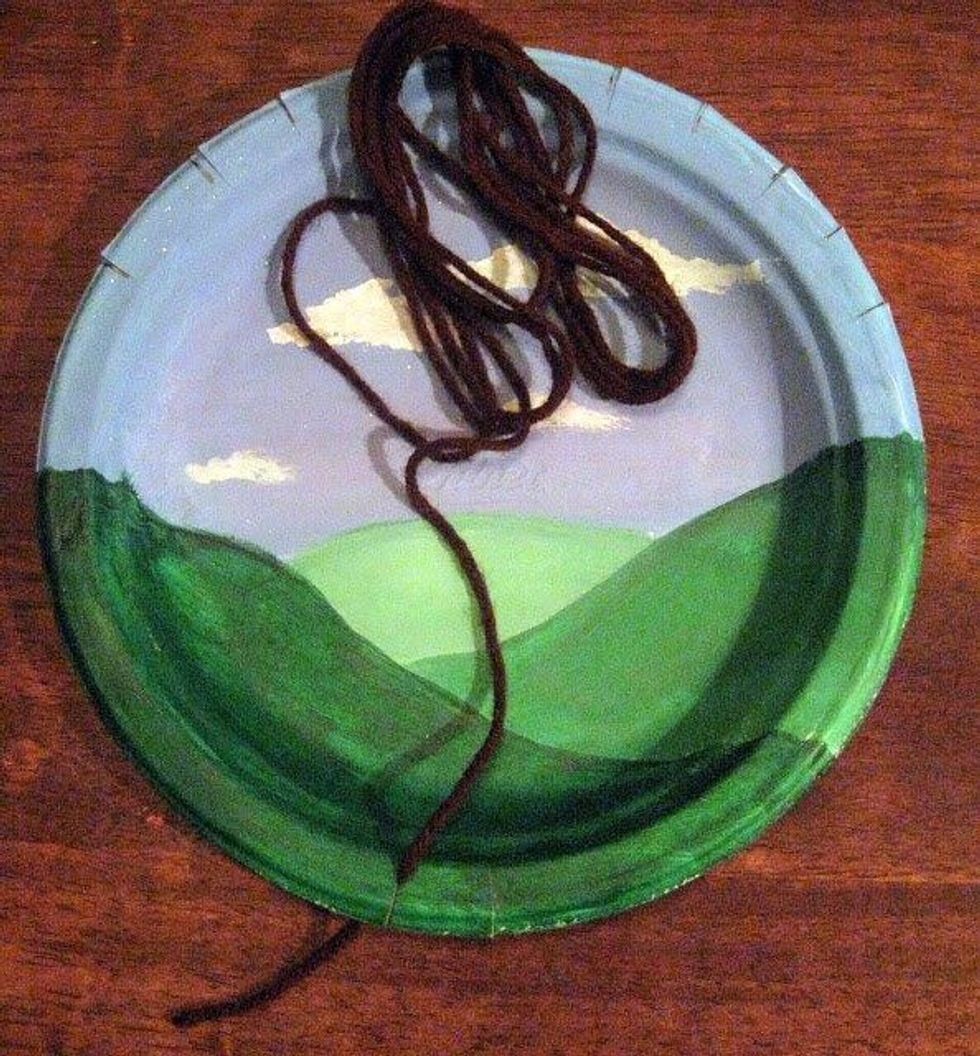
Wedge the end of your yarn into the bottom left hand notch.

Take the long end of the yarn and place it in the top far left notch. Keeping the yarn behind the plate, move the yarn to the notch directly to the right and pull it up and out.
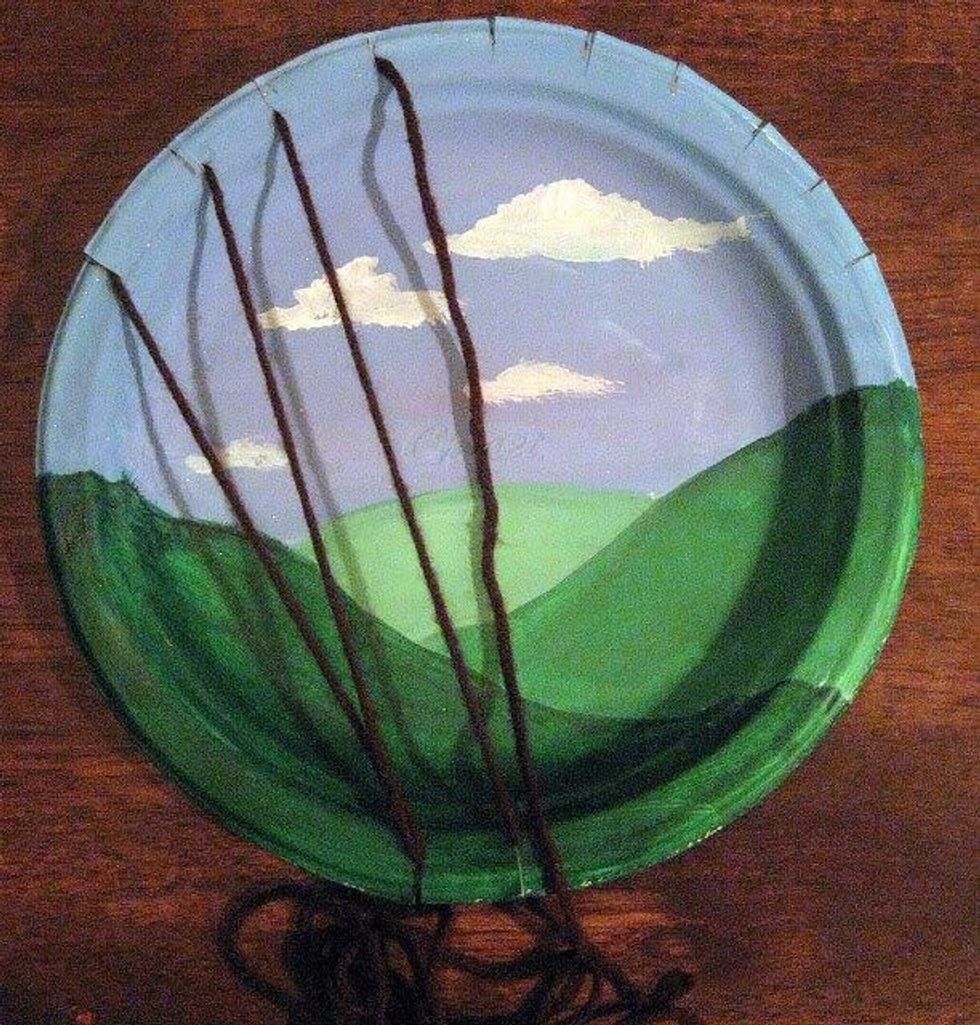
Now, pull the yarn to the bottom left notch (where you started) & push the yarn through. Staying behind the plate, move the yarn to the bottom right and pull up and out and go back up to the top.

Previous 2 steps continued: Repeat process until all notches are filled. End by going in the bottom left notch and coming out the bottom right.
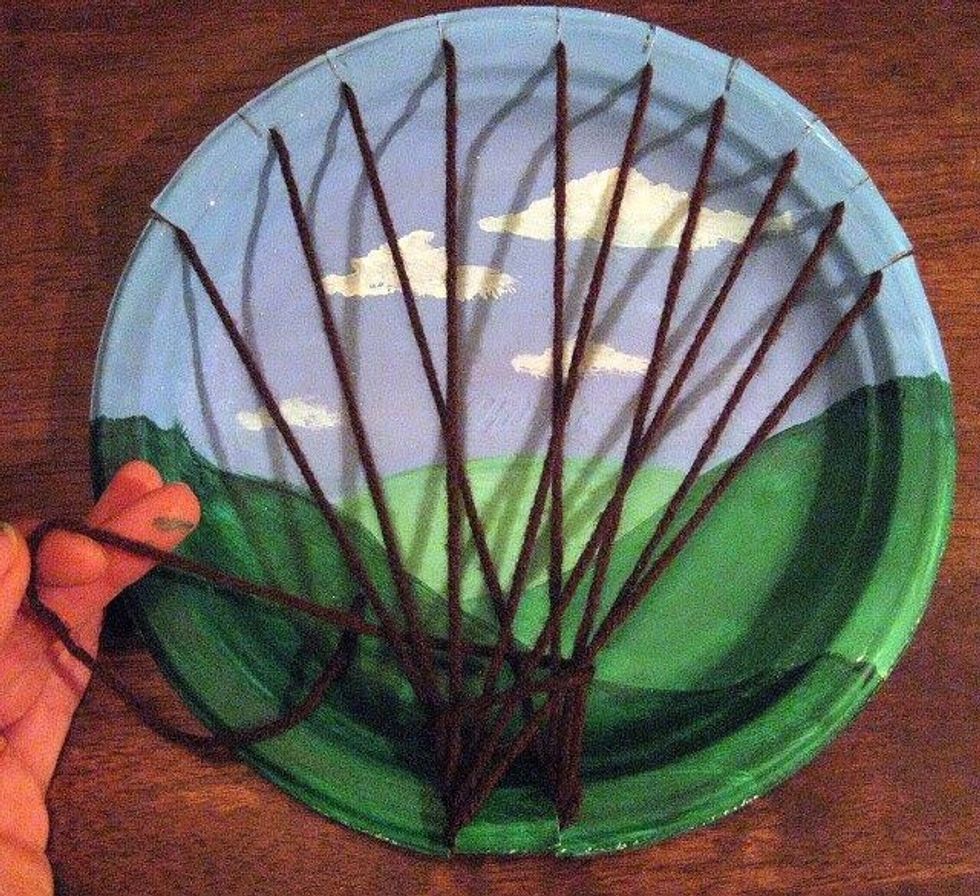
Making tree trunk: Take the end of the yarn (that you just pulled through the bottom right) & wrap it around the yarn at the bottom of the plate. Tug gently.
If you run out of yarn, double knot a new piece to the old. Once your trunk is tall enough, tie it off on a tree branch. You may cut the leftover tail of yarn. Now your tree is ready for weaving!
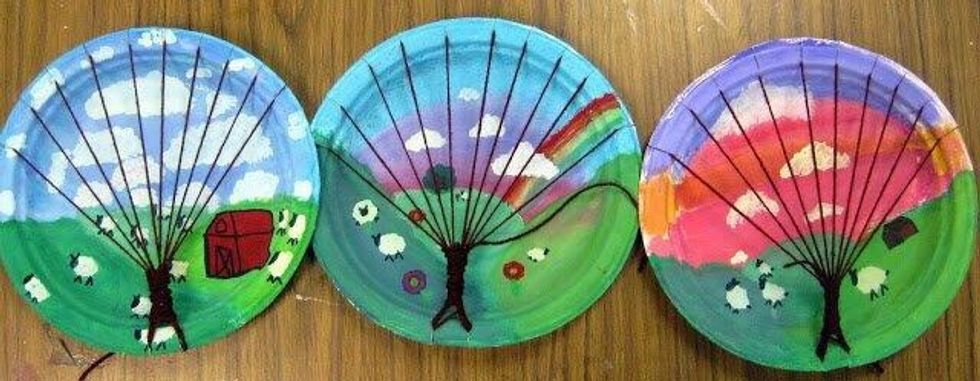
Double knot a chosen color to a tree branch on the end. Then weave LOOSELY over & under the branches. When you are ready to add a color, cut the colored yarn & double knot the end to an end branch.
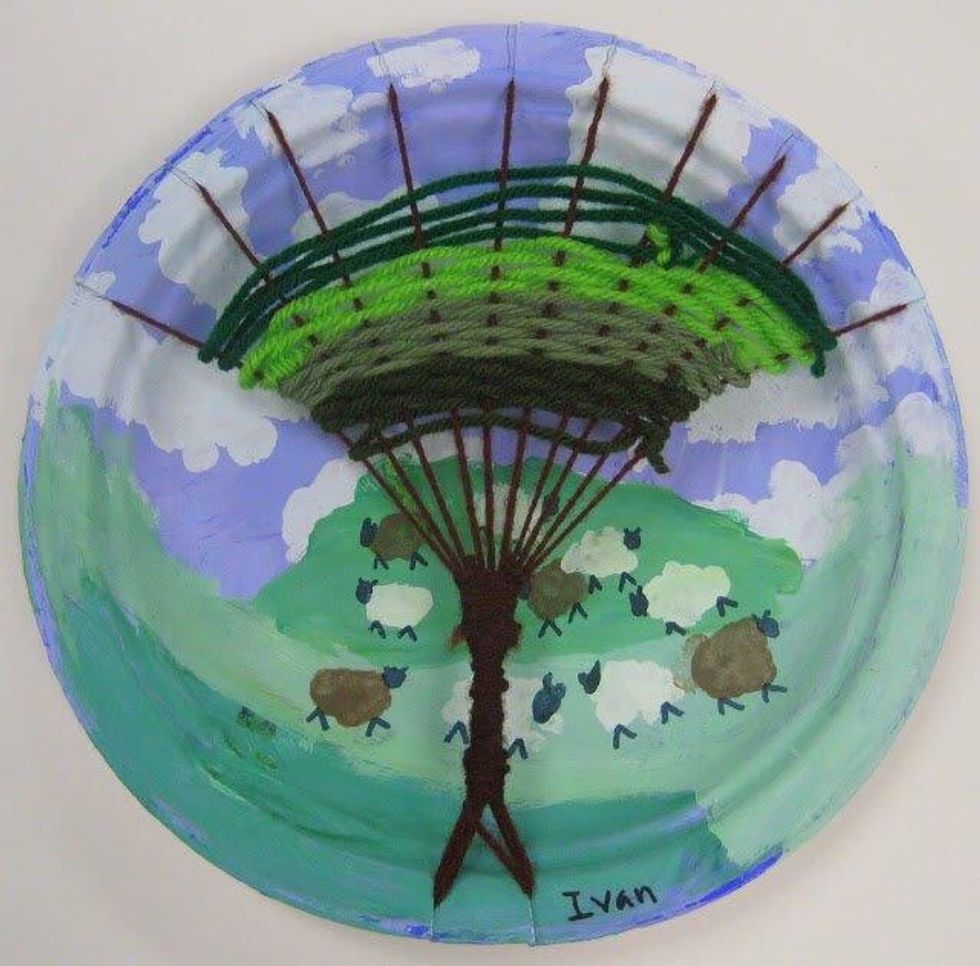
Add news colors to the tree branches by repeating the previous step.
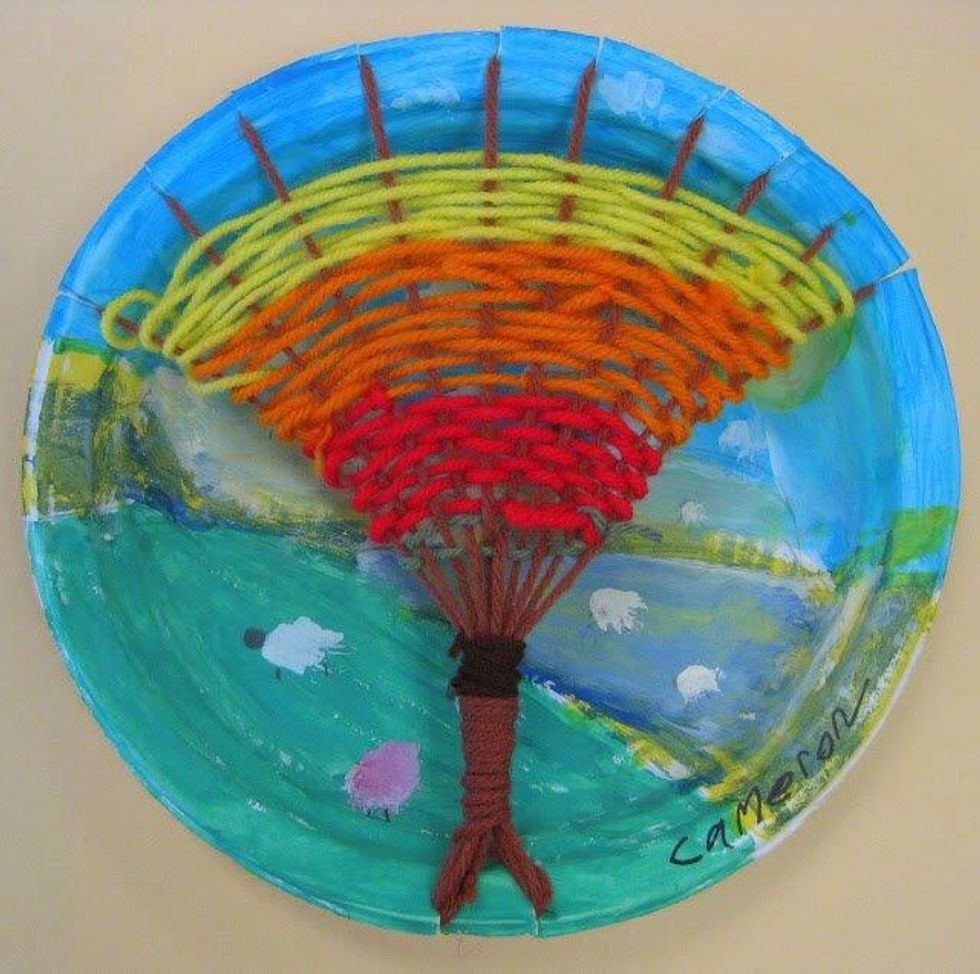
End your tree weaving with a double knot tie off.
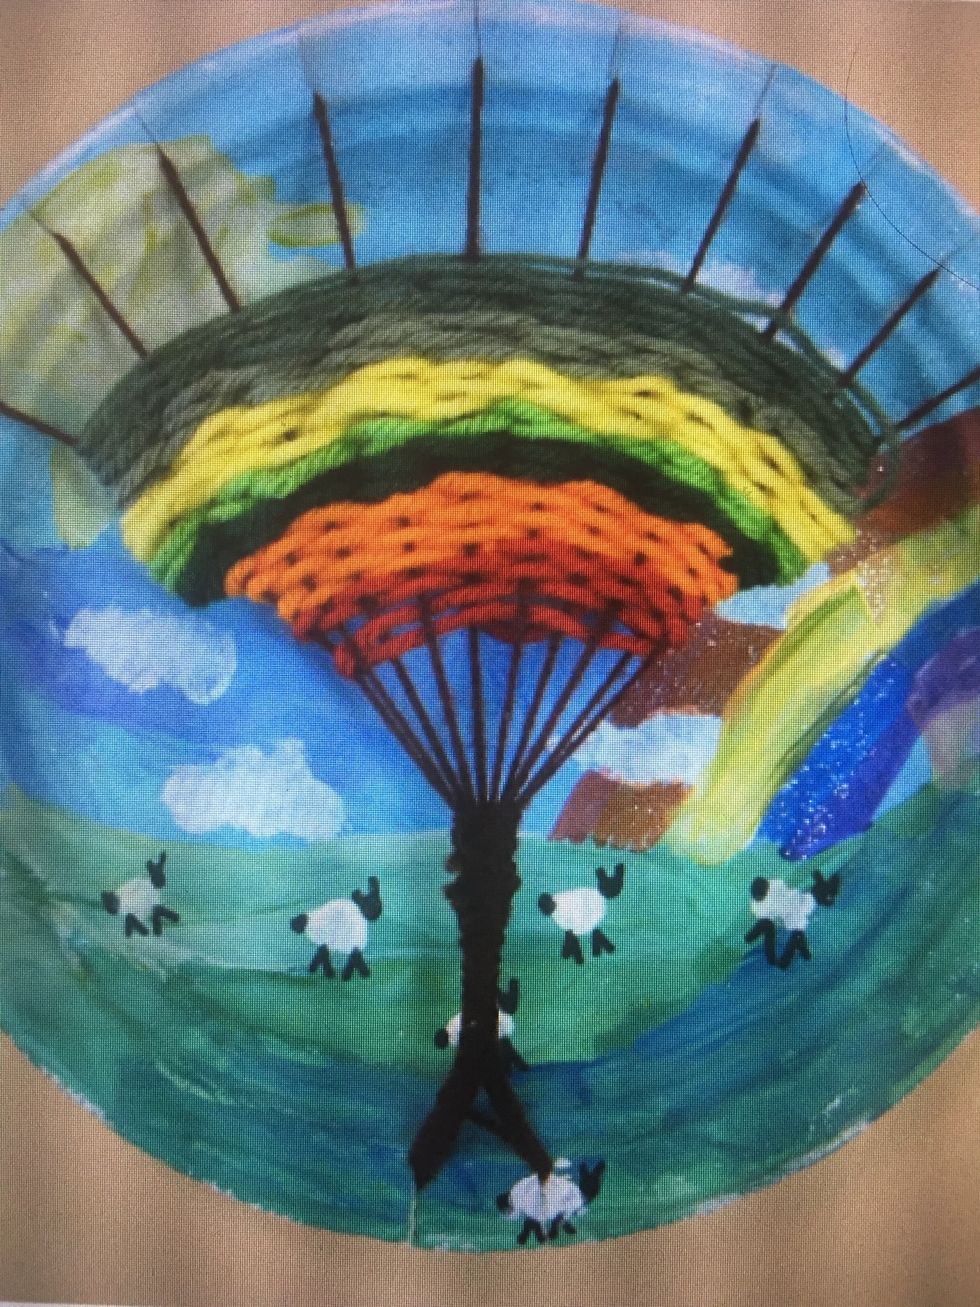
How beautiful!