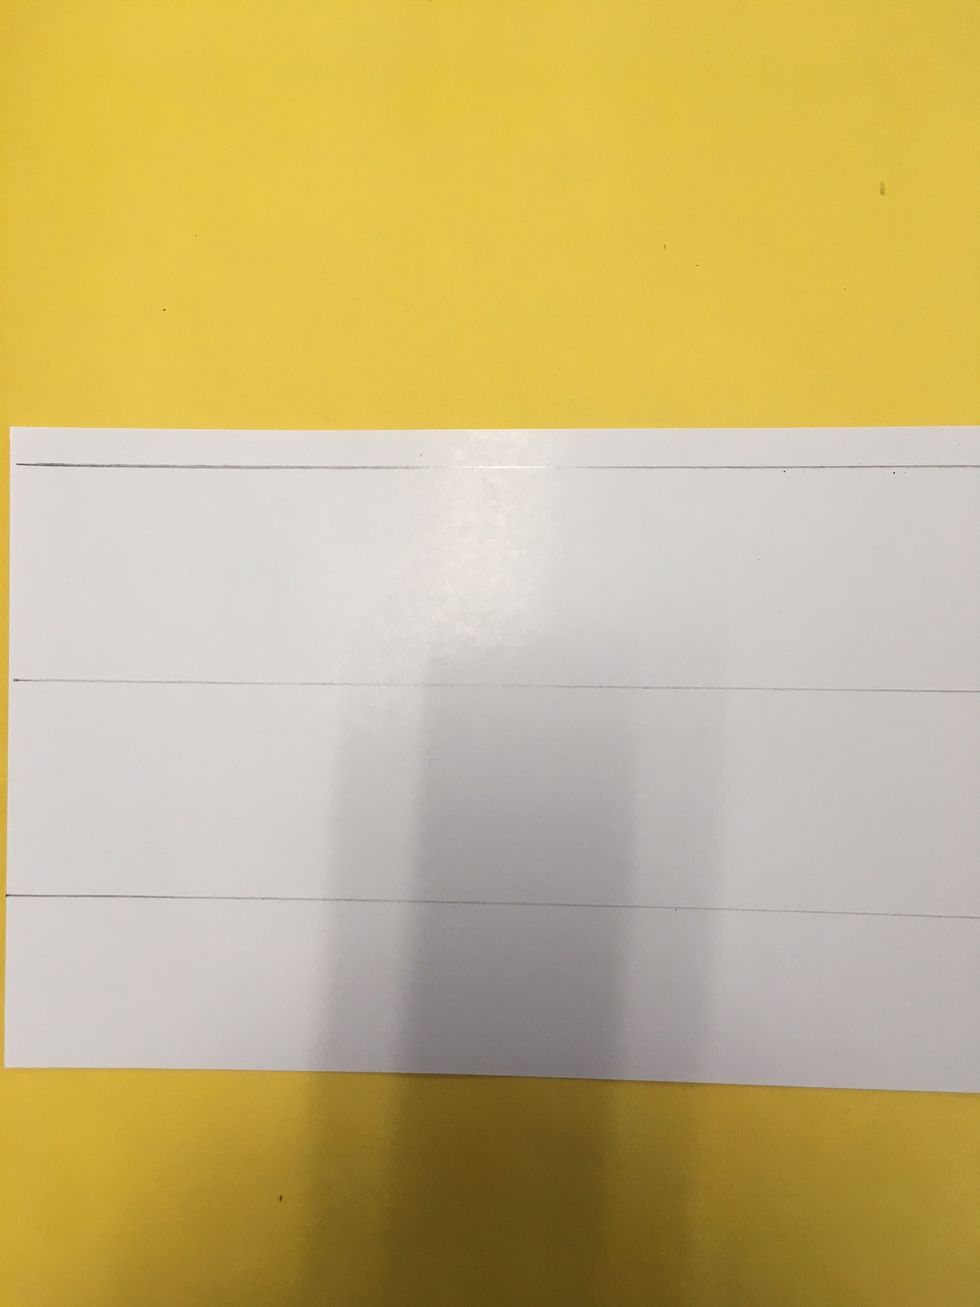
Start with glossy card stock paper, pencil, and a ruler.
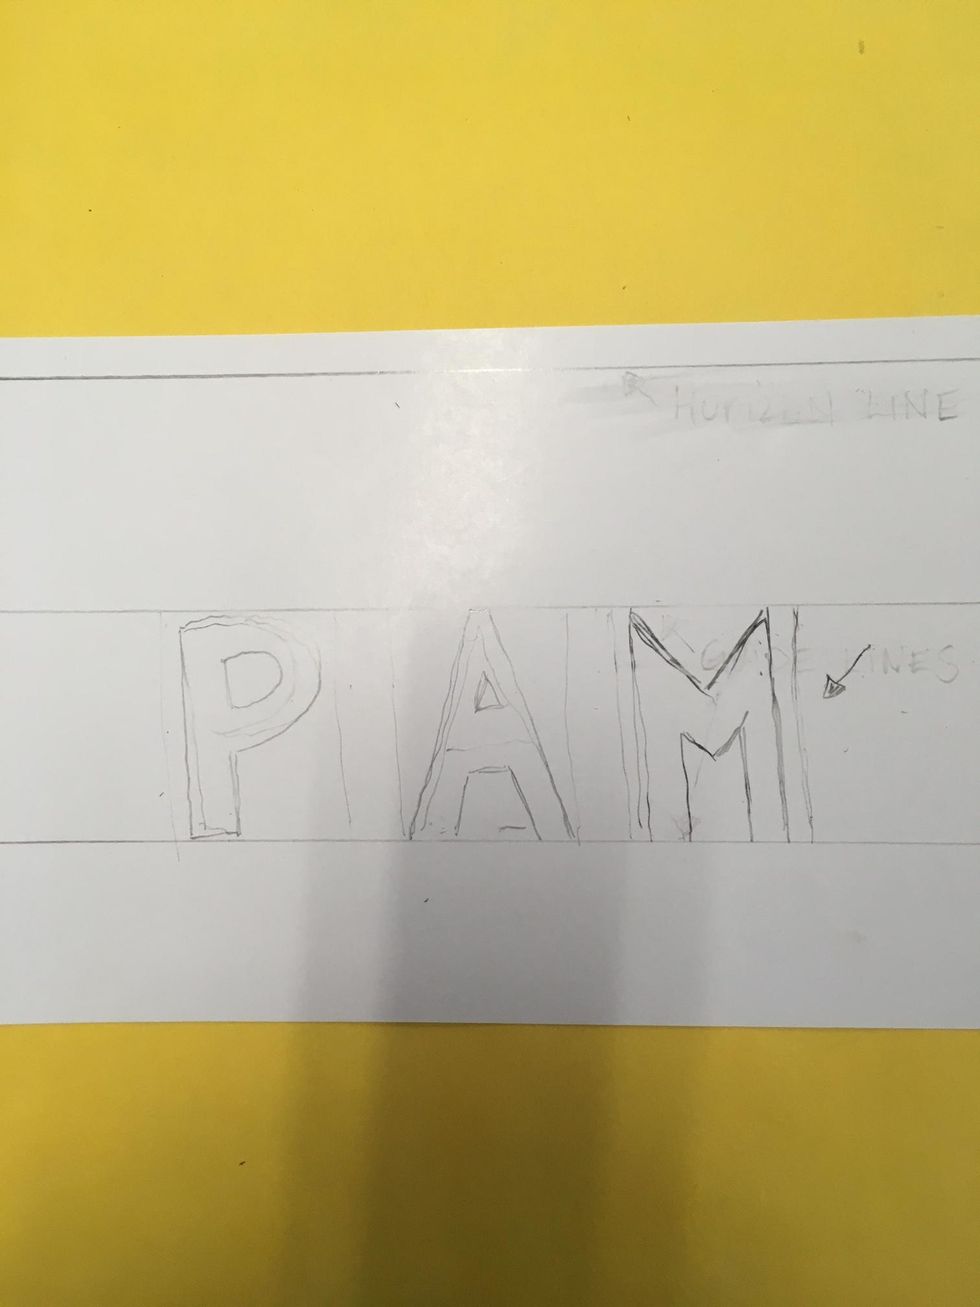
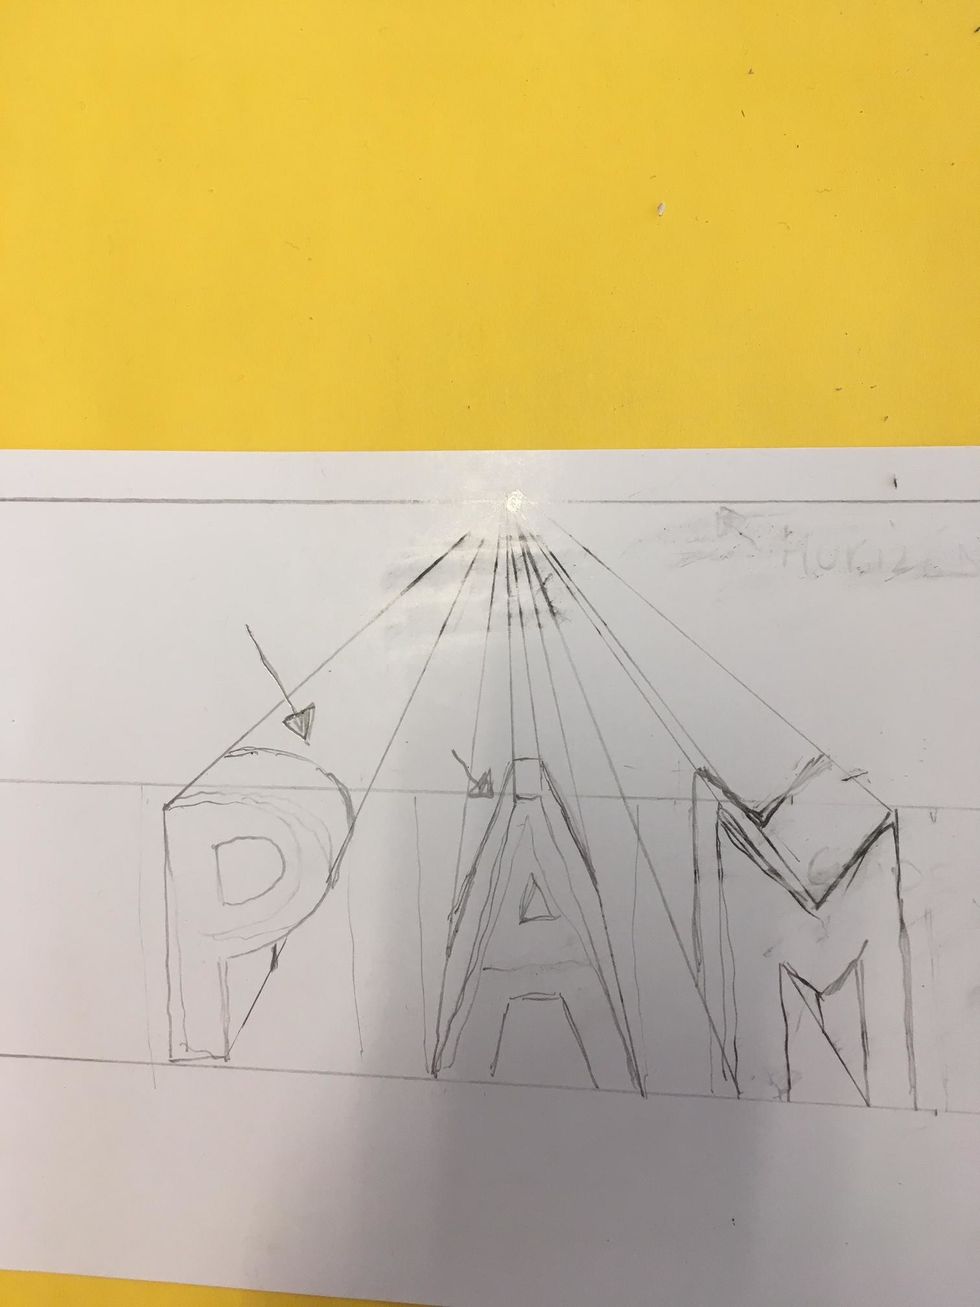
1) Draw three lines: one towards the bottom, one towards the middle, and one towards the top. The bottom two line are guide lines for your letters. The top line is a Horizon Line.
2) Create vertical lines to help space letters.
3) Sketch out block letters.
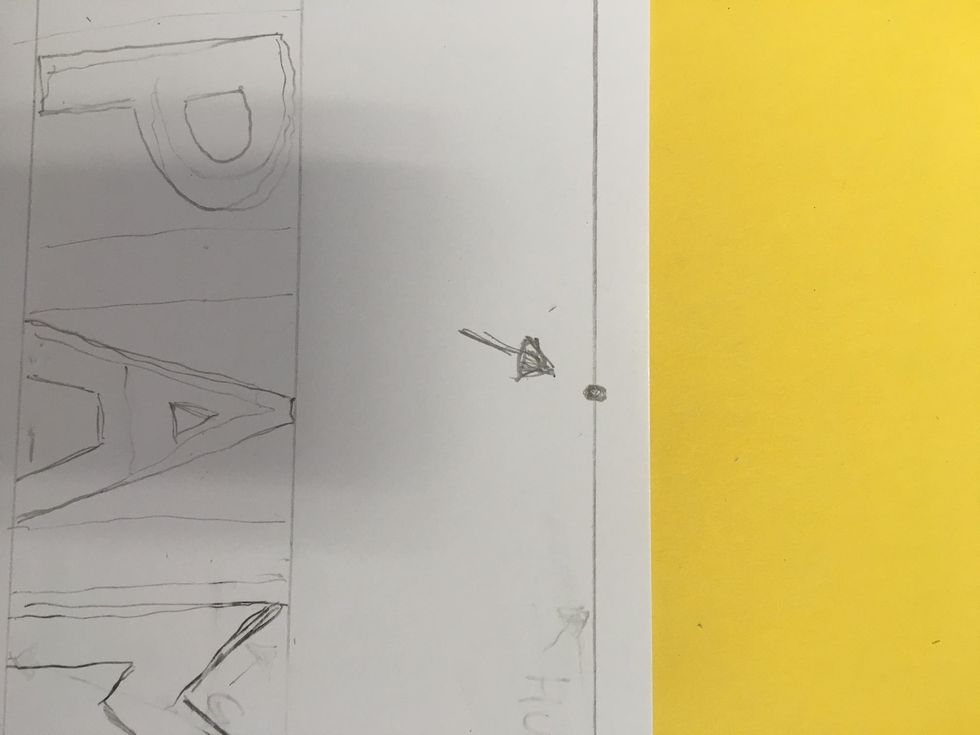
4) Draw a dot in the center of the Horizon Line.
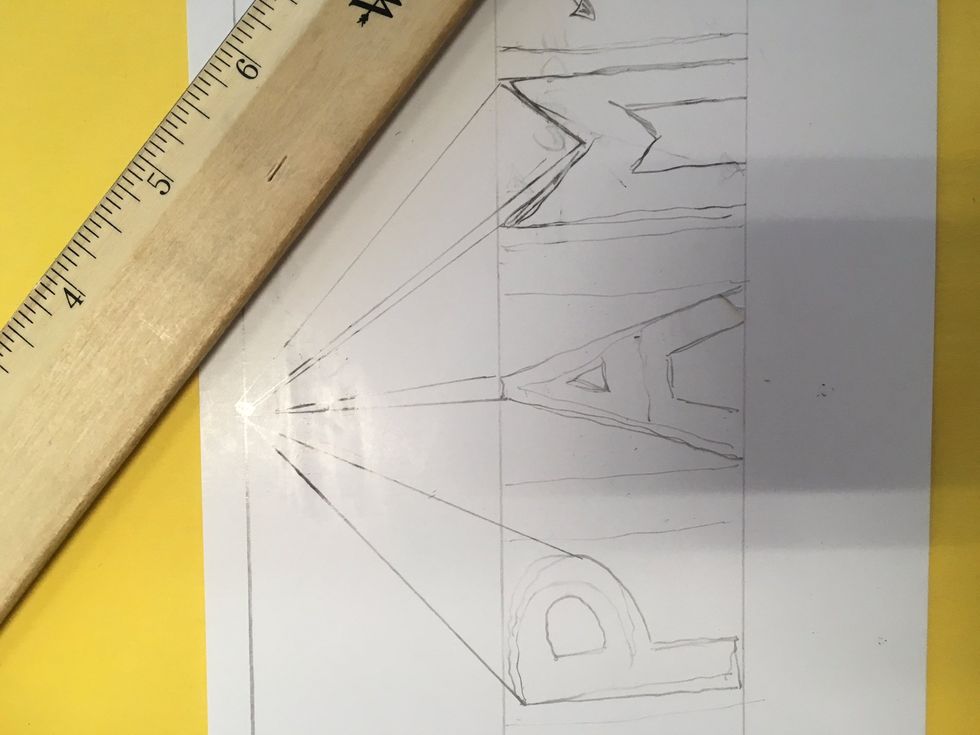
5) Using your ruler, line it up with the tops of the letters and the dot (Vanishing Point) on the Horizon Line.
7) Repeat with the lower points of the letter. (Stop when you hit another part of any letter.)
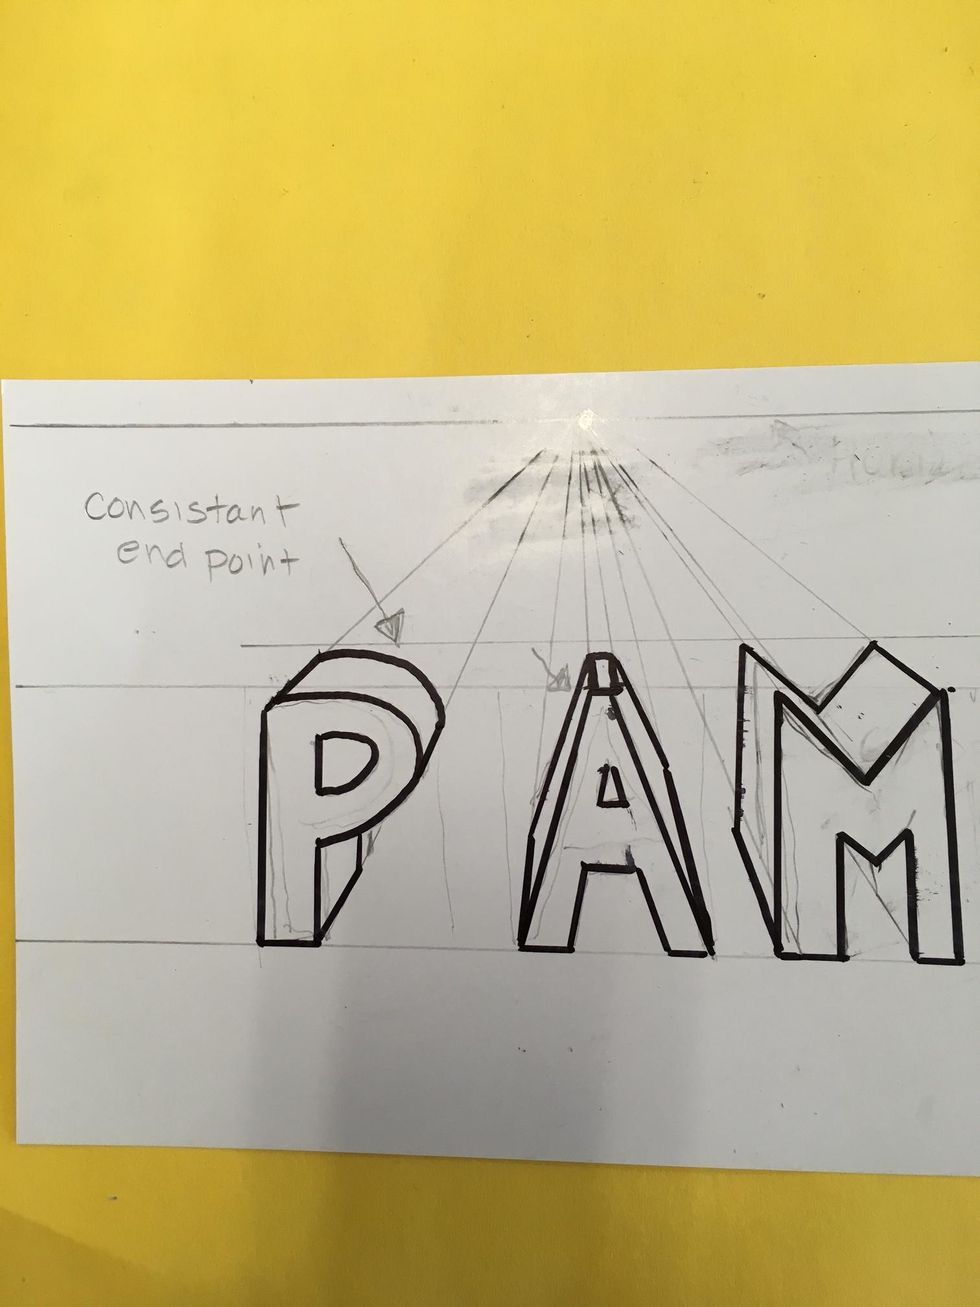
8) Once all lines are drawn to the Vanishing Point, you will end the letters. The end point for each letter should be consistent. The shape of the back of the letter should be parallel to the front.
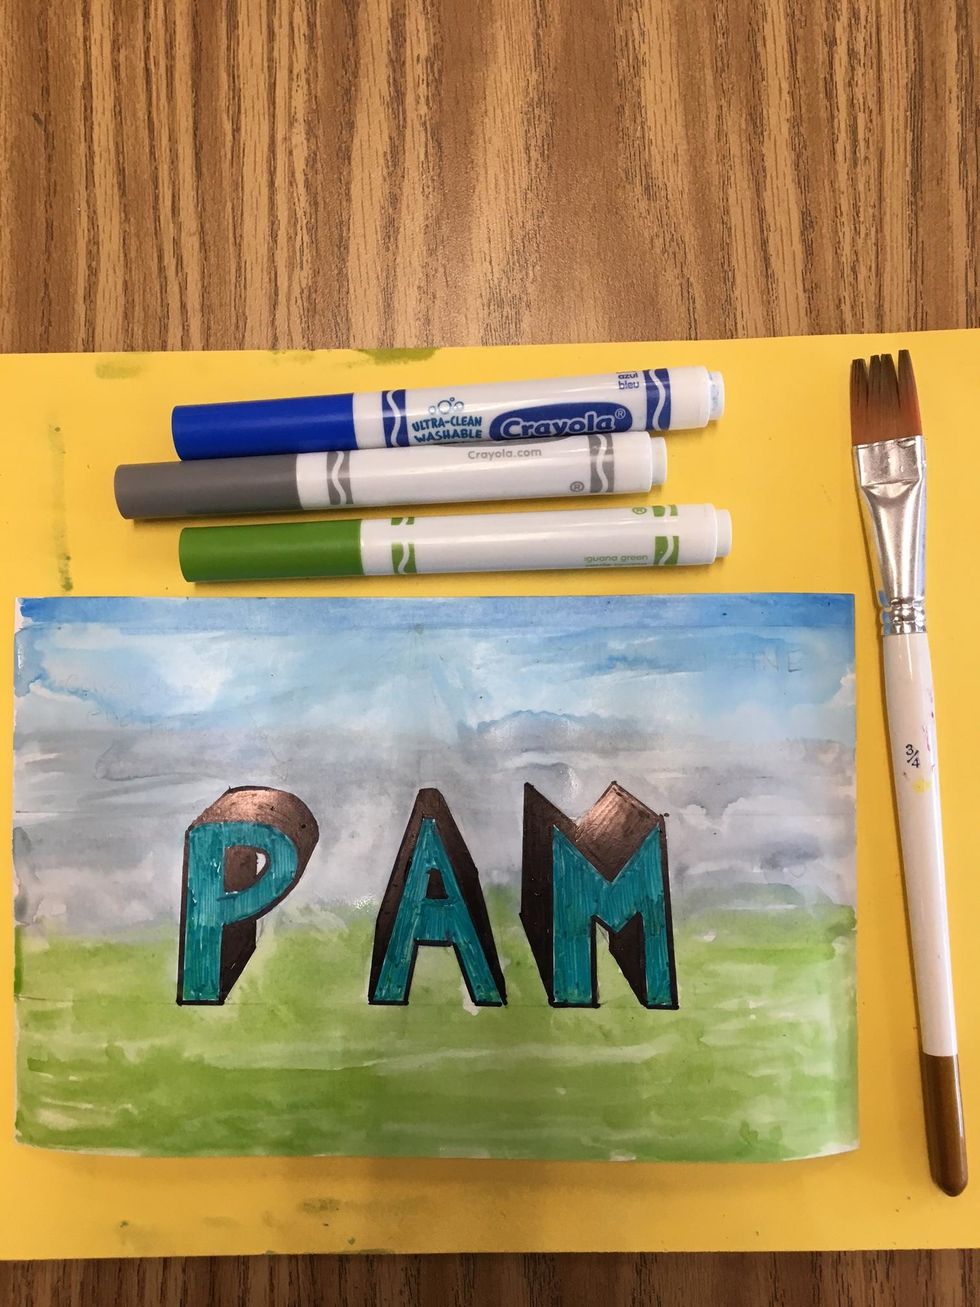
9) Go over the letter front to the end with black sharpie. (Do not marker the lines extending all the way to the Vanishing Point!)
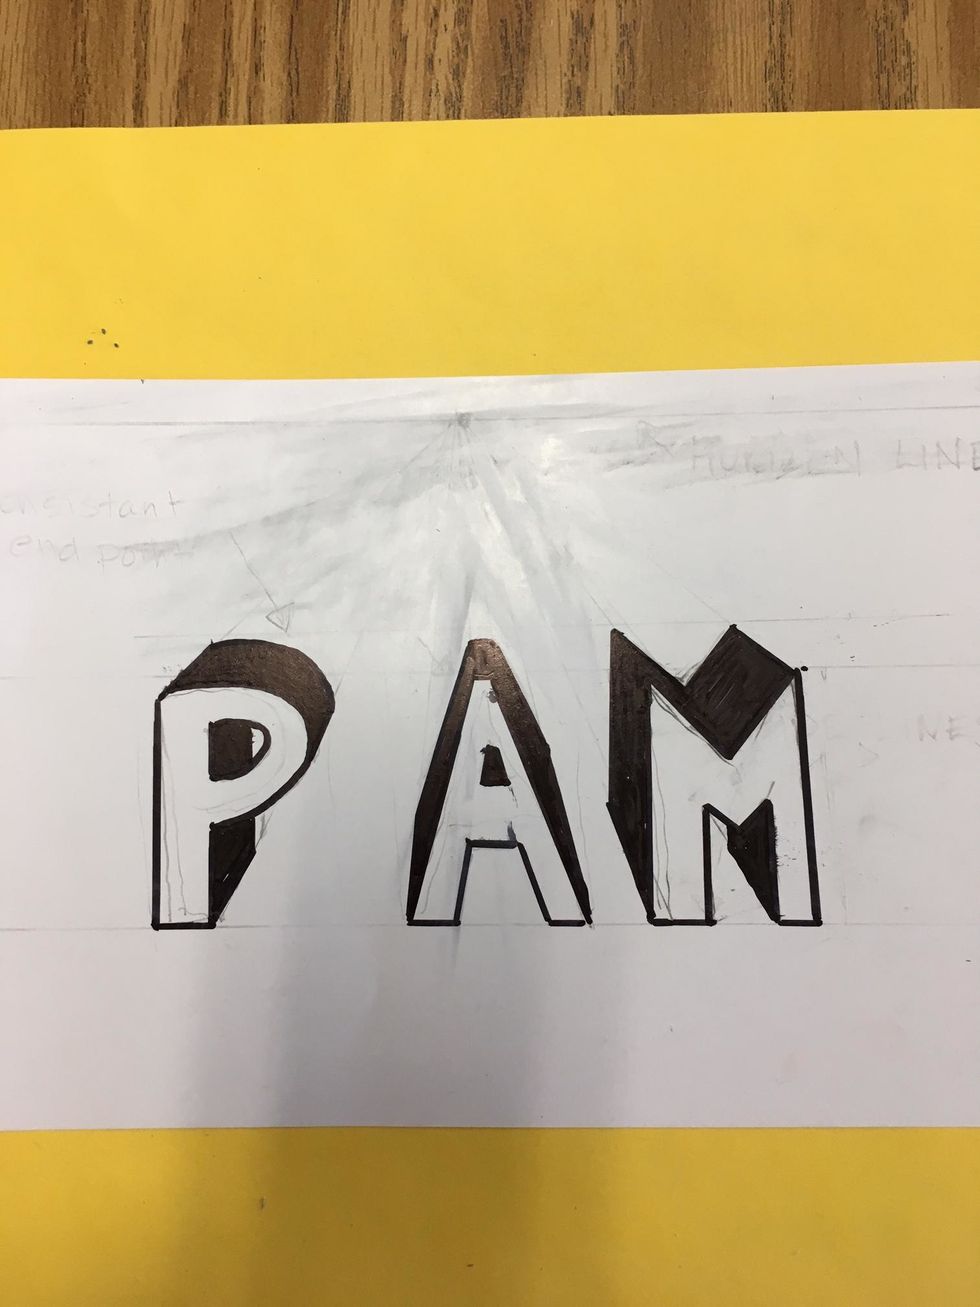
10) Erase the pencil lines. Color the receding tops and sides of the letters with black sharpie.
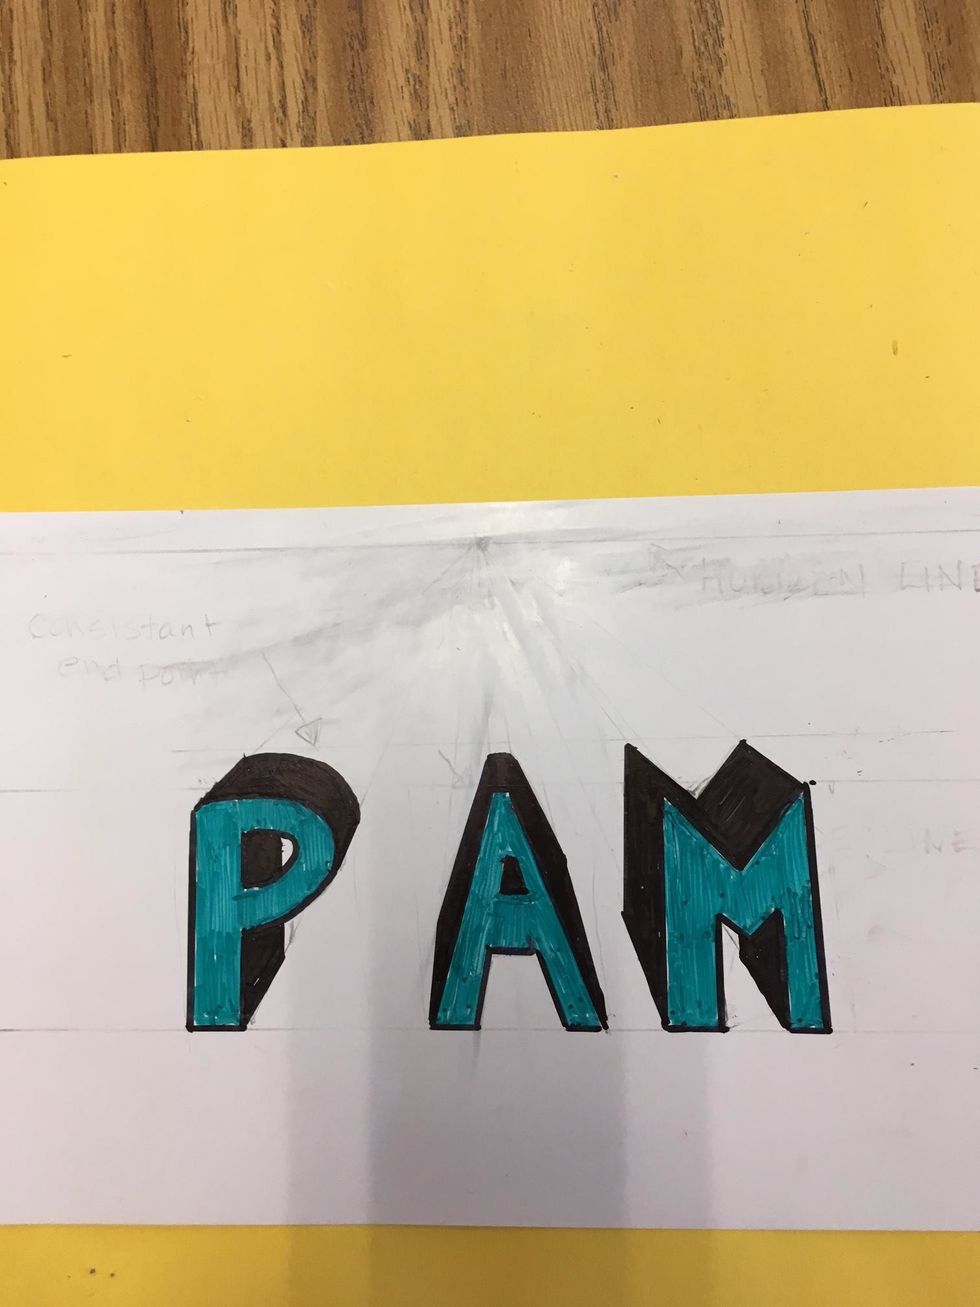
11) Color the front of the letter with a colored sharpie.
12) Use Crayola water based markers, a brush, and water to create a water color background.
13) Let dry. When dry, go back in with a black sharpie to do some zendoodle patterns in the background.