The Conversation (0)
Sign Up
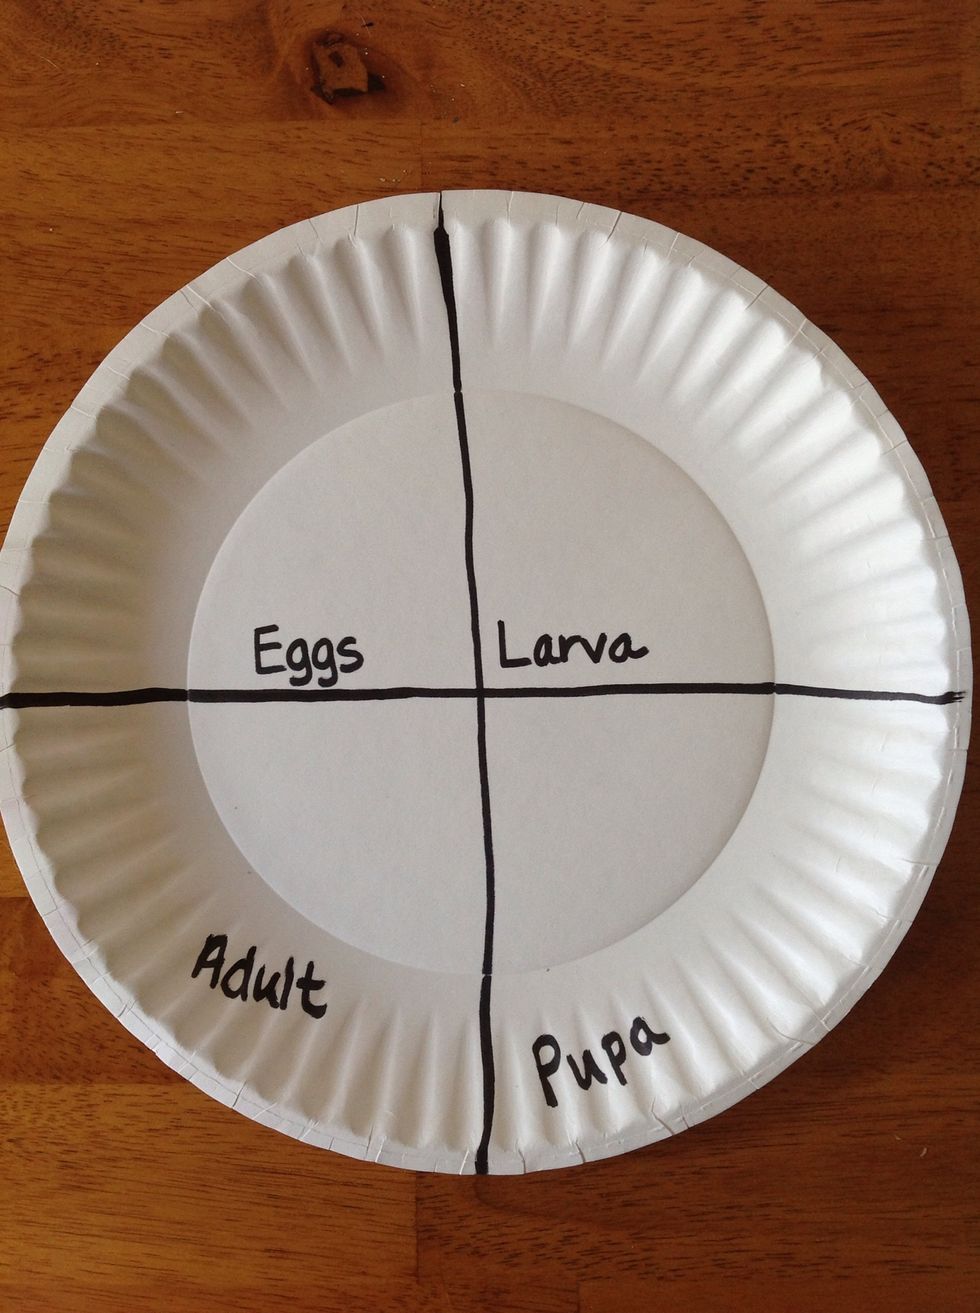
Divide your paper plate into four equal sections using a black marker. Write each life cycle stage in the sections. Make sure you put them in order.

Cut two leaves out of green construction paper. Use crayons to draw lines on the leaves to make them look real.
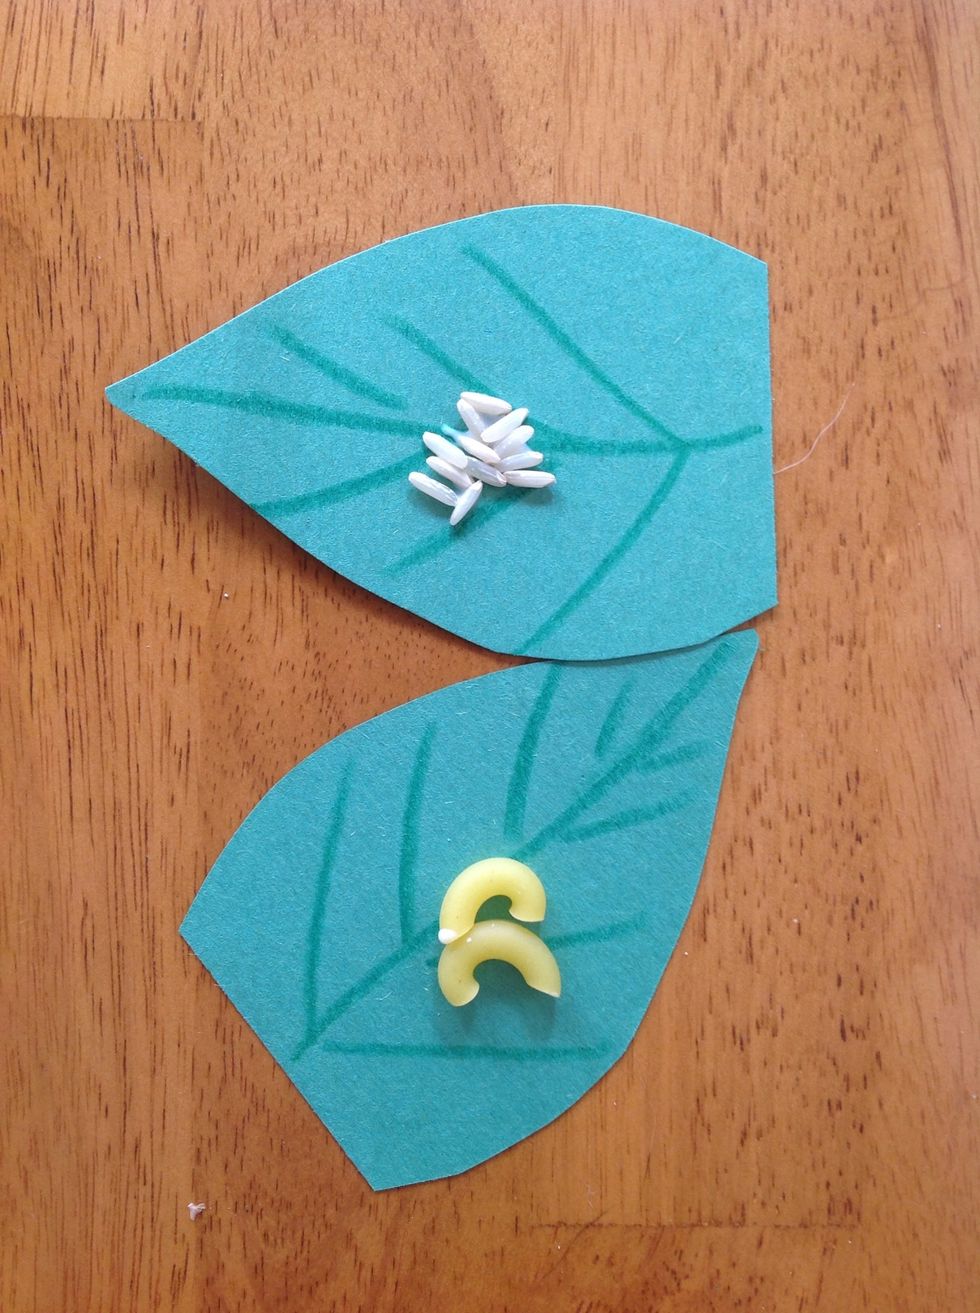
Glue several rice grains onto one leaf. Glue two elbow macaroni onto the other leaf.
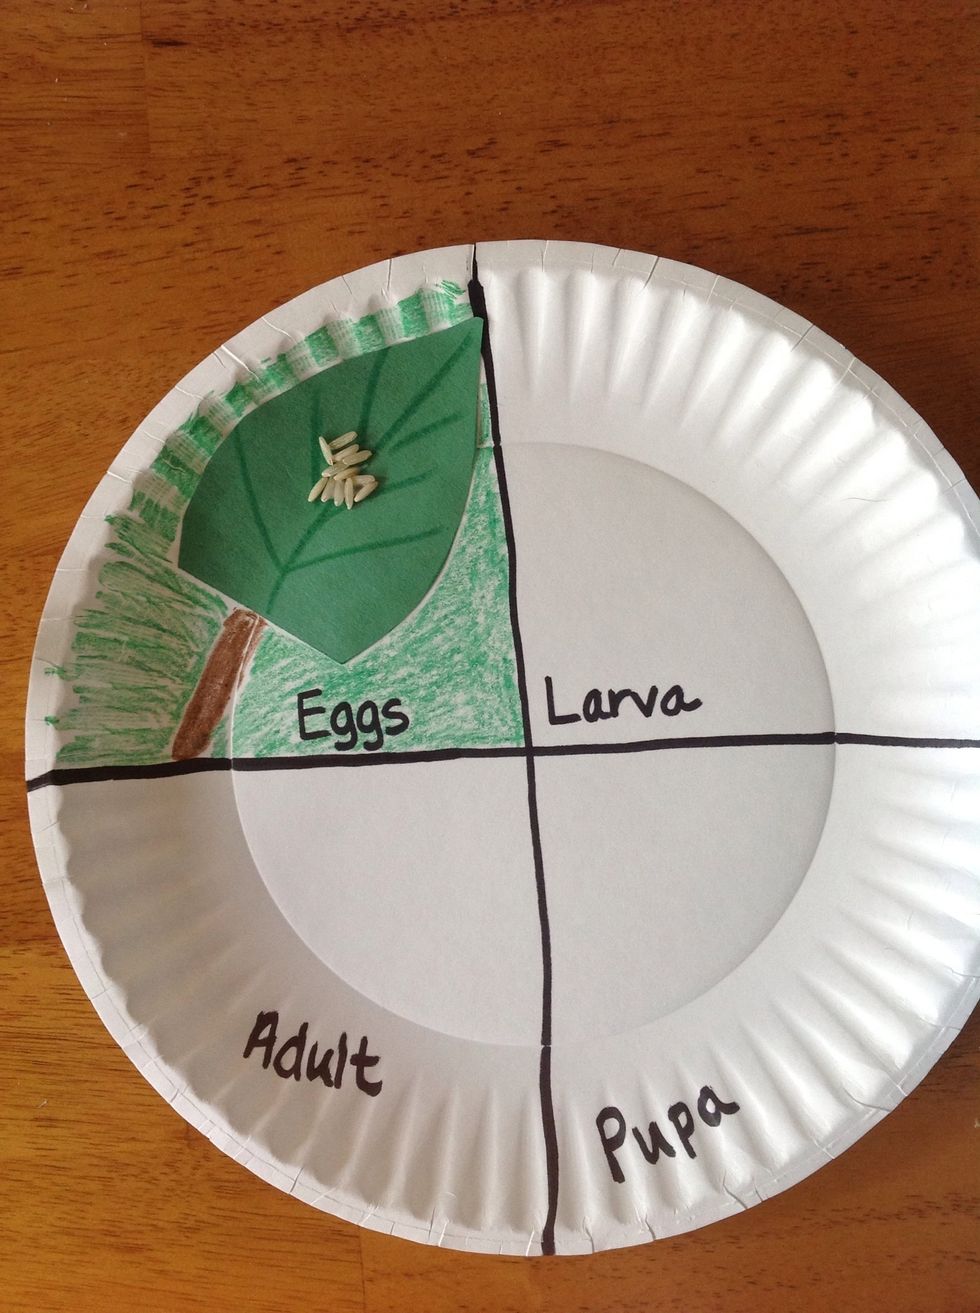
Glue the leaf with rice onto the eggs section. Using crayons color the background green and add a stem to the leaf.
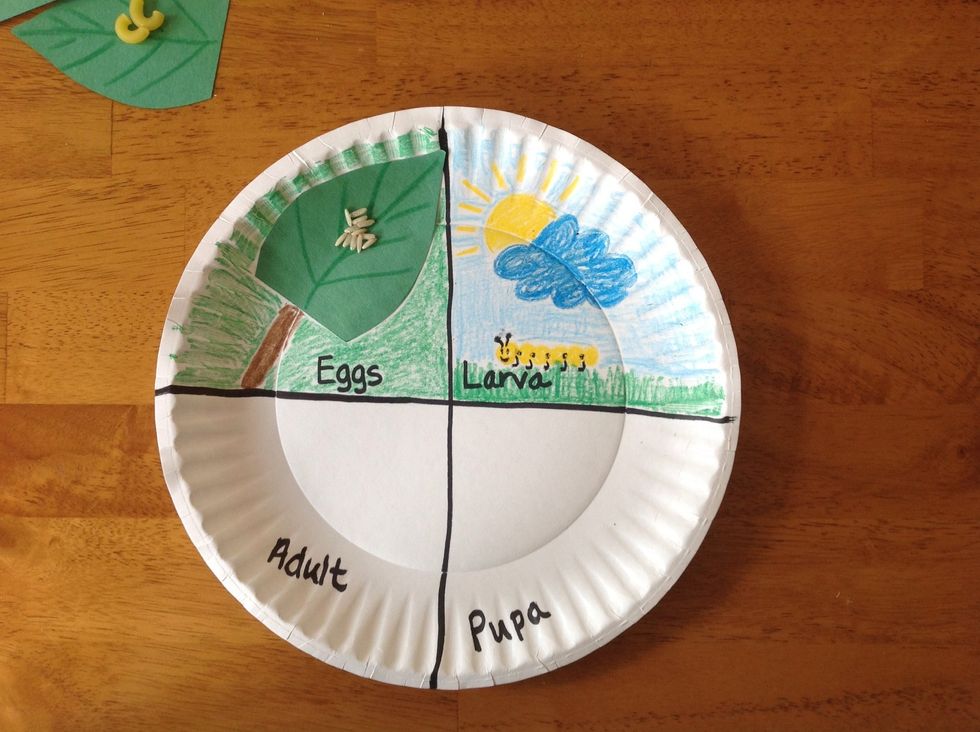
Using crayons, draw a caterpillar, grass, and background in the larva section.
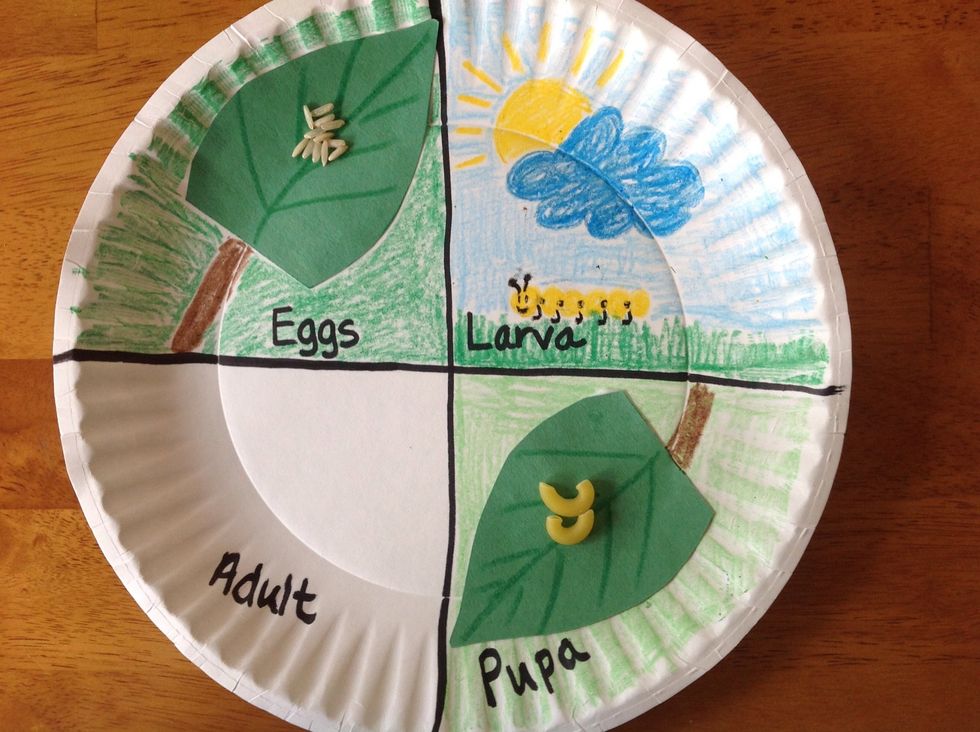
In the pupa section, color the background green. Glue the leaf with macaroni onto the plate and draw a stem.
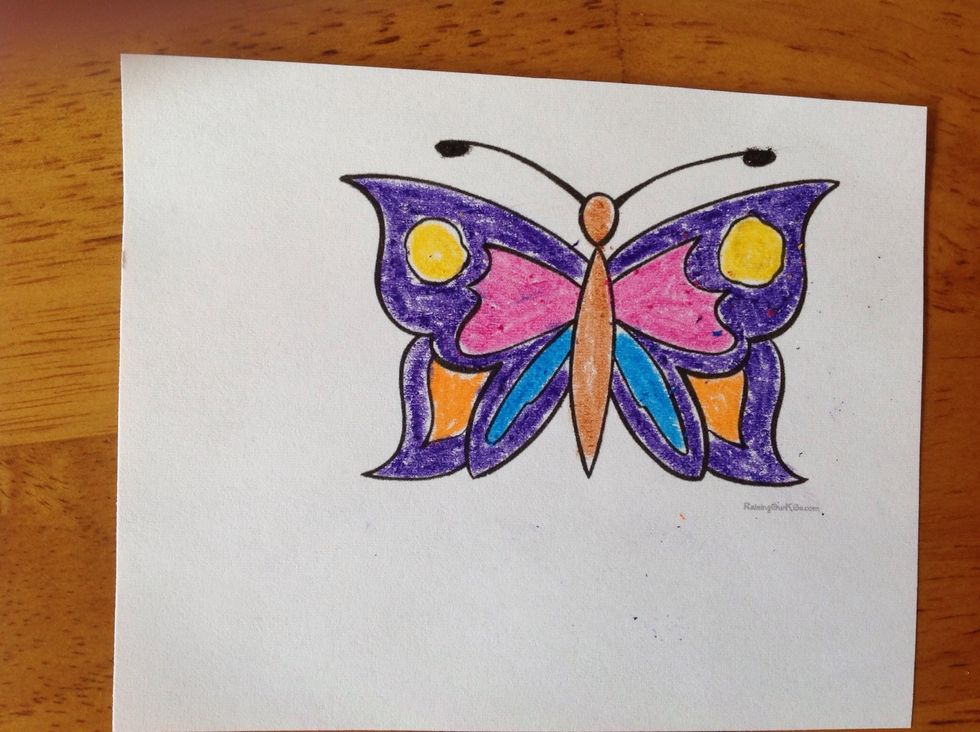
Color your butterfly template. Make sure to color it symmetrically. Then, cut it out.
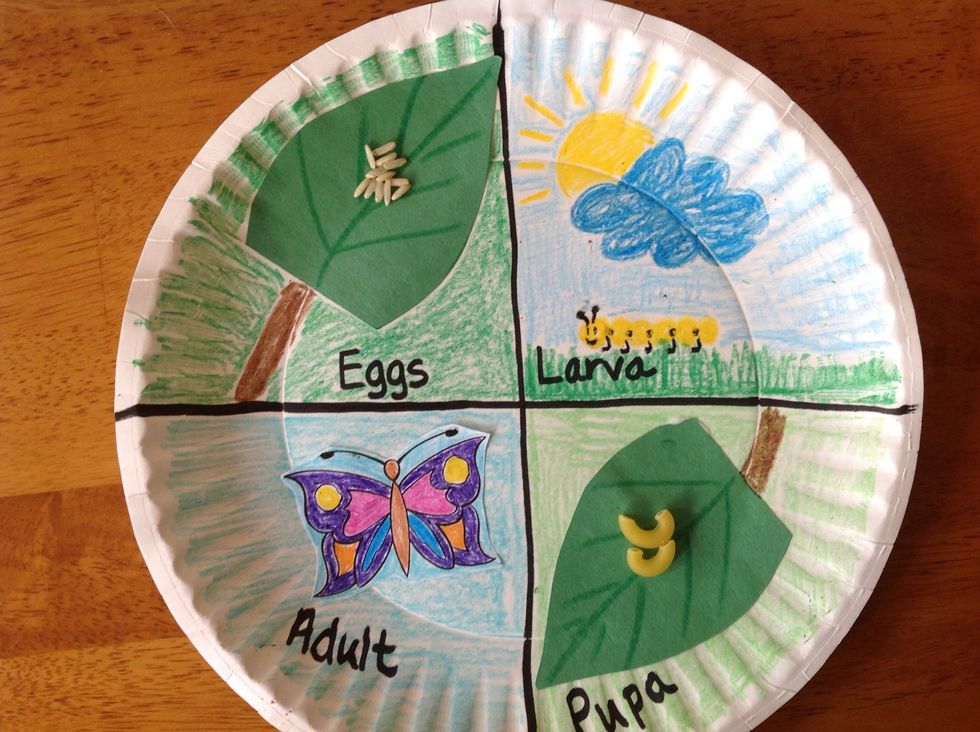
Color the background of the adult section blue. Glue the butterfly on. To make it look really nice, color any white around the butterfly with the same background color.