The Conversation (0)
Sign Up
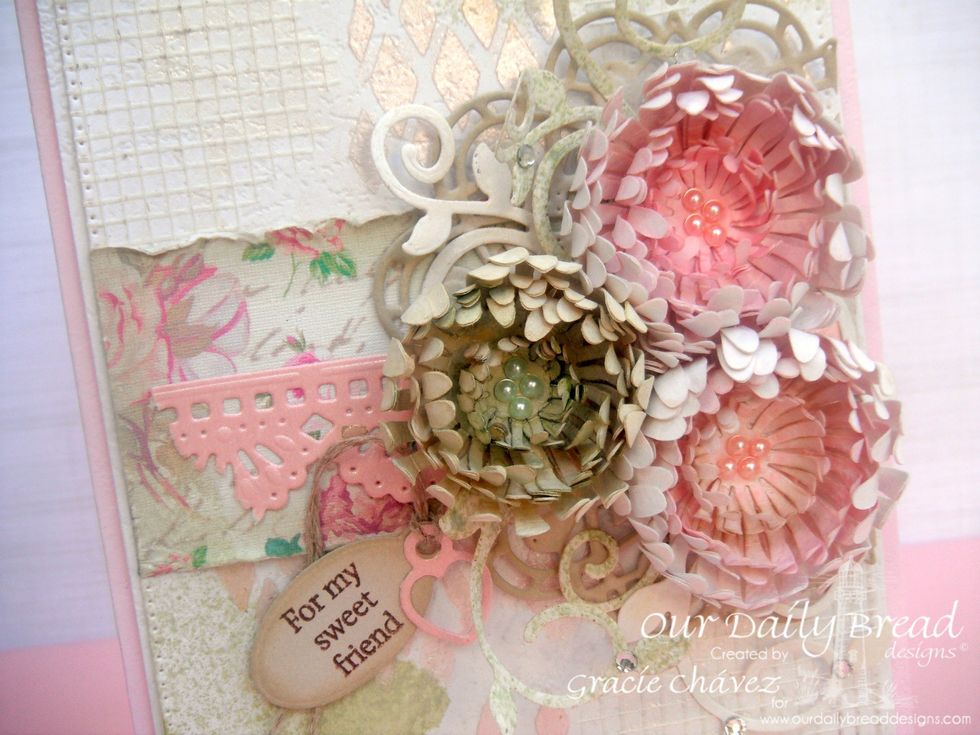
To create the background: 1. Die cut a pierced matting layer using ODBD's Flourished Star Pattern.
2. Use a stencil to add embossing paste. I mixed a drop of Distress re-inker in Spun Sugar to a bit of Dreamweaver Pearlescent paste.
3. Cut pieces of drywall tape (from the hardware store) roughly and adhere to the card as desired.
5. Add a piece of patterned paper and a die cut border from ODBD's Beautiful Borders across the center of the layer.

To make these flowers: Check out the video tutorial - https://youtu.be/nXjGpJSFFf4
2. Using a round nose plier roll each petal inwards very lightly so you don't rip the cardstock.
3. Glue the different flowers' layers one on top of the other using Tacky glue. Remember to use at least three of each size.
4. Color each flower with Distress Ink sprays and Perfect Pearls Mists. I used soft colors like Spun Sugar, Peeled Paint and Biscotti. Re-spray if needed. I applied more color to the center.
5. Next, apply heat using a heat tool to help the flowers curl inwards and dry them also.

6. Embellish flowers with pearls. For more projects and tutorials please visit http://gracielliedesign.blogspot.com