The Conversation (0)
Sign Up
I have my own little business called Sensational Creations and I wanted to make a crafty logo tag for my creations (bracelets, earrings and necklaces). Here's how I made it...
1. Print your info in one cardstock and your logo in another cardstock. Cut the edges using the guillotine and cut the logo using the flower hole punch (or any other hole punch with a design).

2. Take your logos and the edges of the cardstock and transform them into stickers. **To learn more about how to make stickers, take a look at my How To Create Your Own Sticker guide.
3. Put the logo sticker and a little piece of an edge of the cardstock, behind the cardstock with your info. 4. Use the heart hole punch (or any other hole punch).
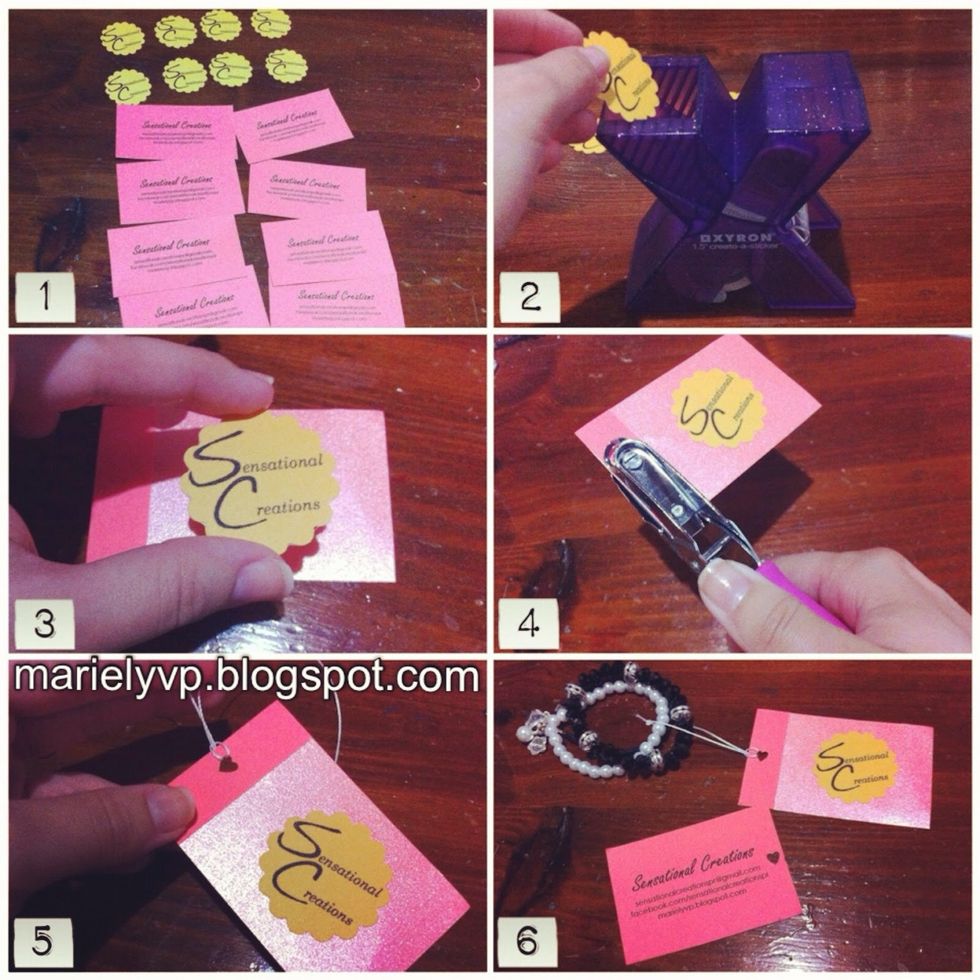
5. Insert a thread on the heart hole. 6. Your logo tag is ready to be attached!
Here's my blog: marielyvp.blogspot.com If you have any question, you can email me at sensationalcreationspr@gmail.com or you can find me on Twitter @MarielyVP. Thanks!