The Conversation (0)
Sign Up
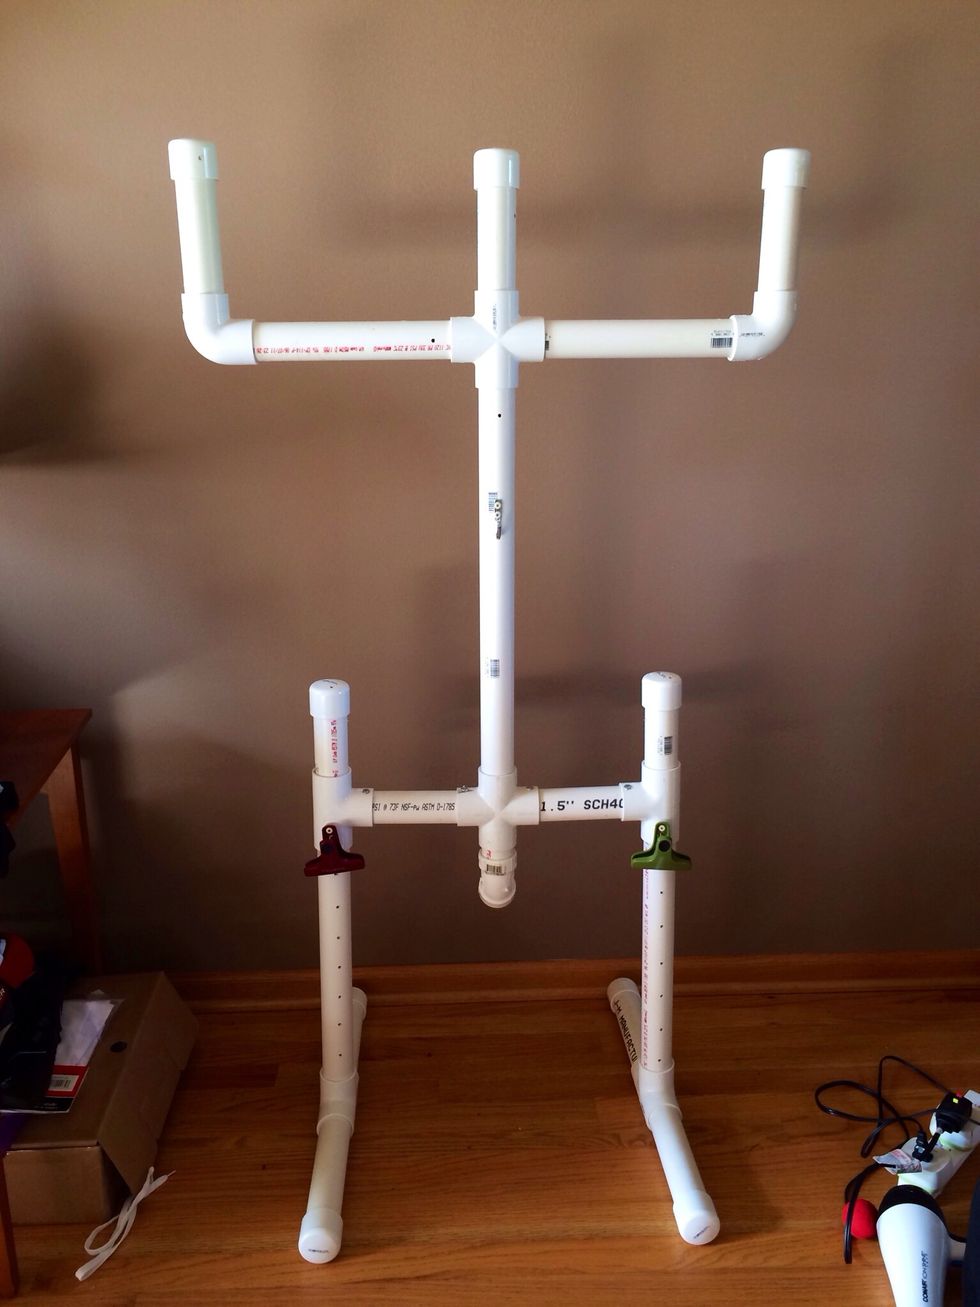
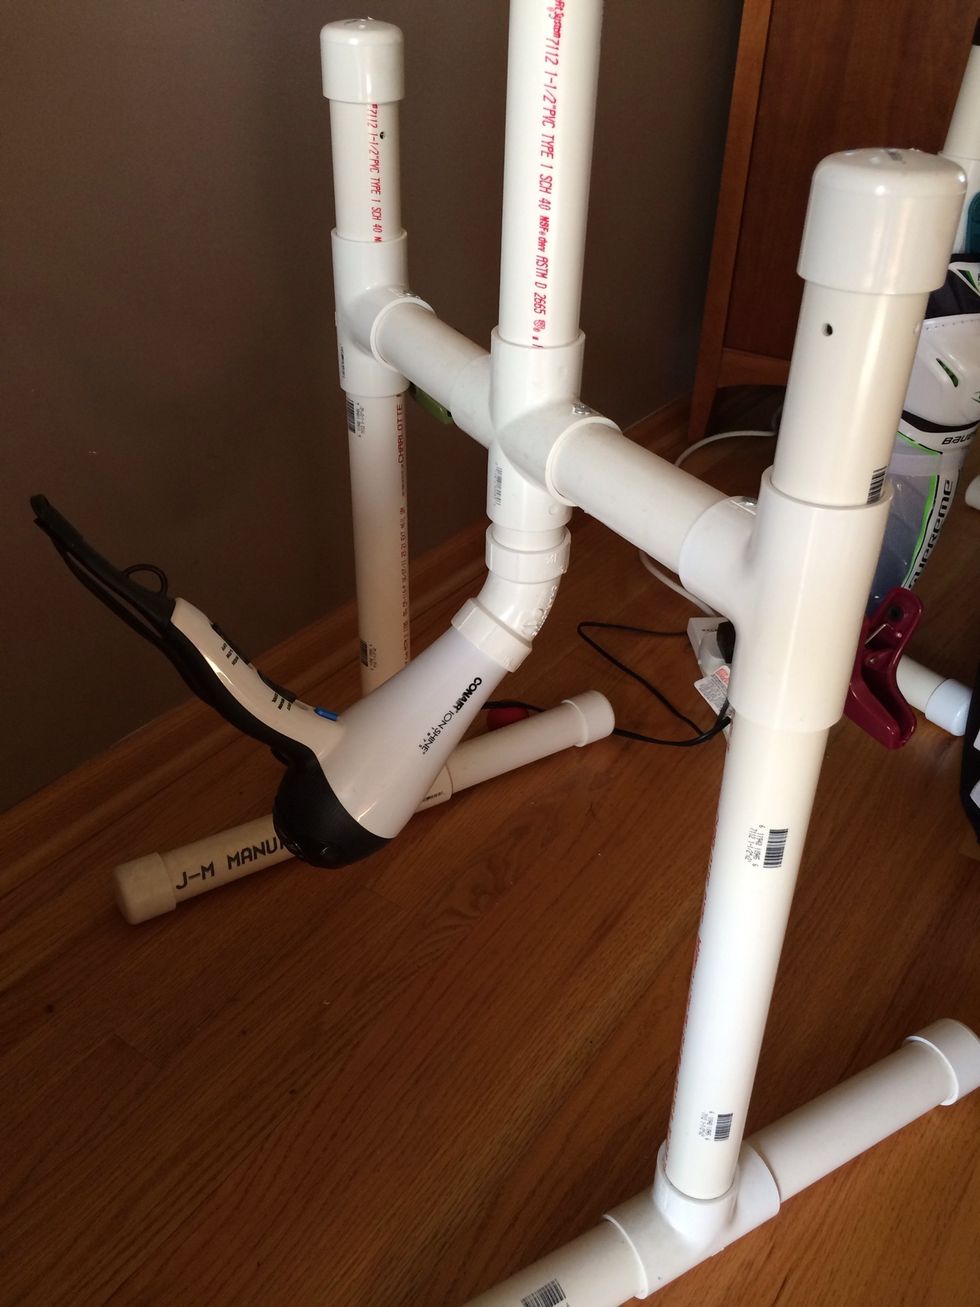
The finished product
Make sure to cut the 7 - 7" pcs. and the 2 - 18" pcs. off of one of the 8' pipes and the rest off the other 8' Pc.
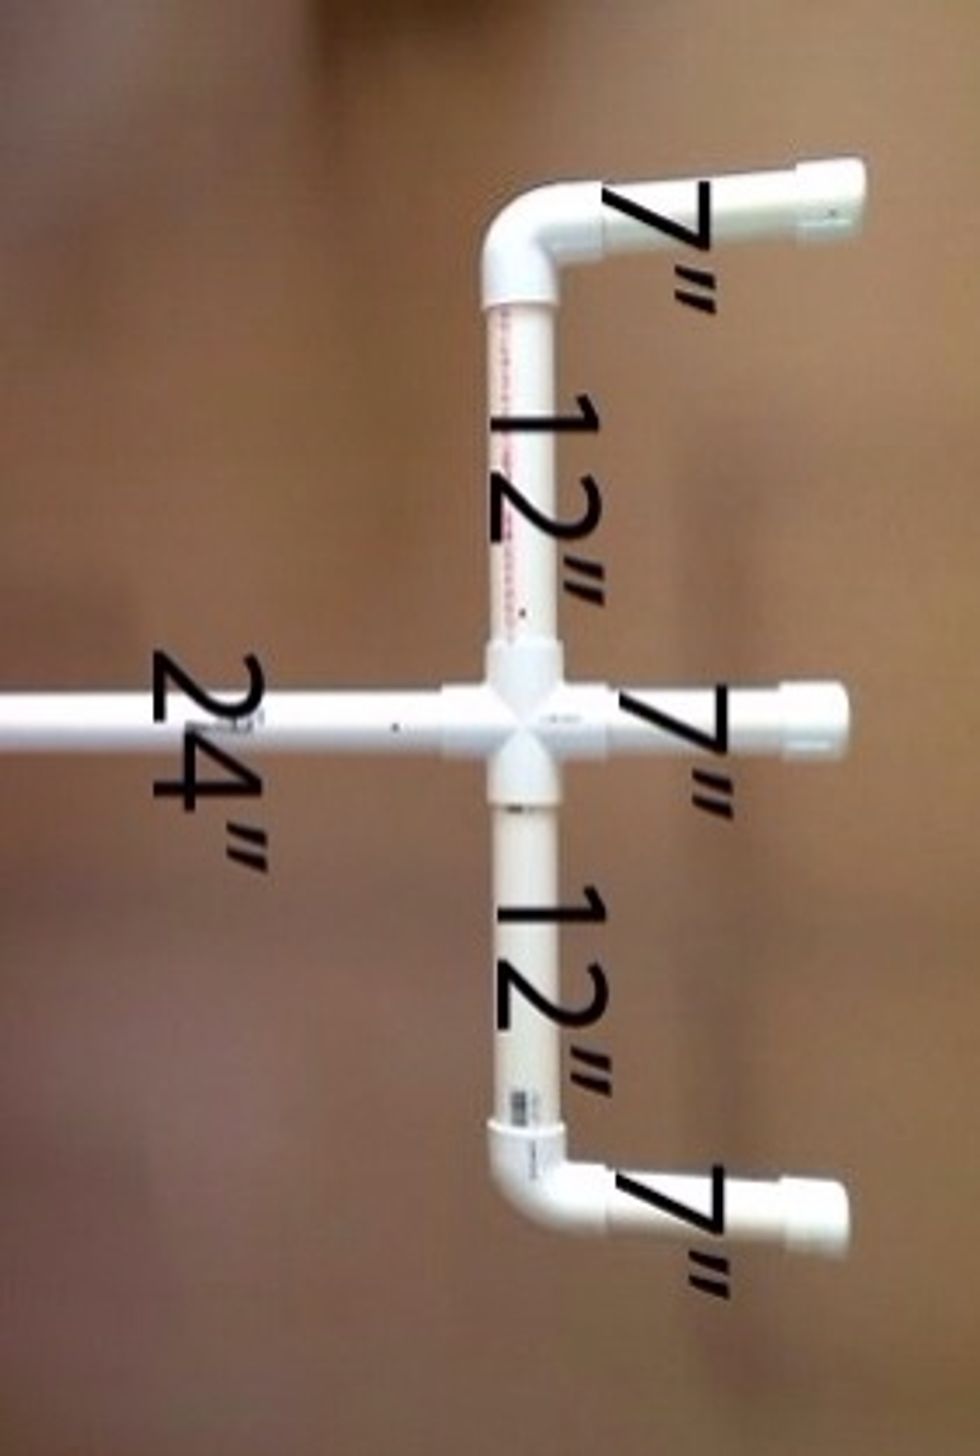
The measurements for the top
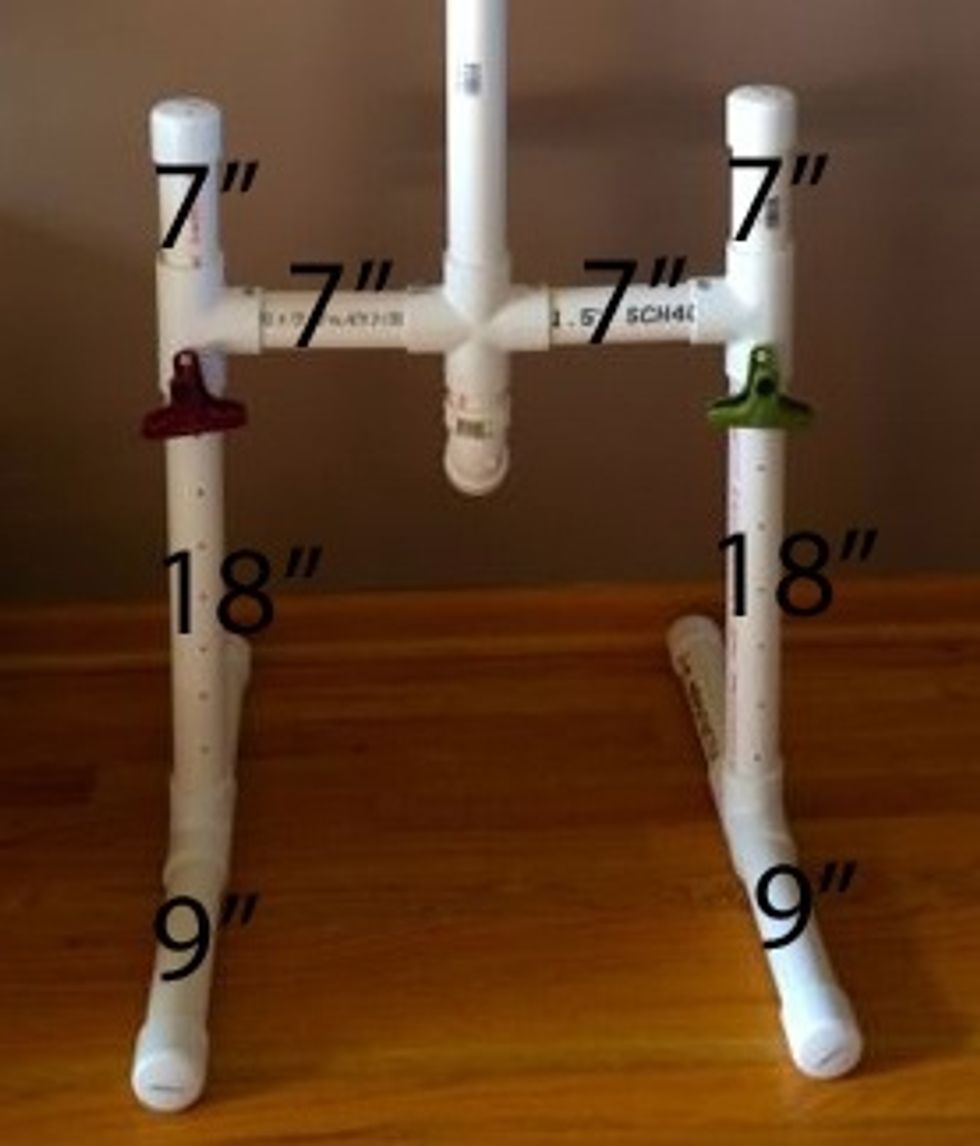
Measurements for bottom
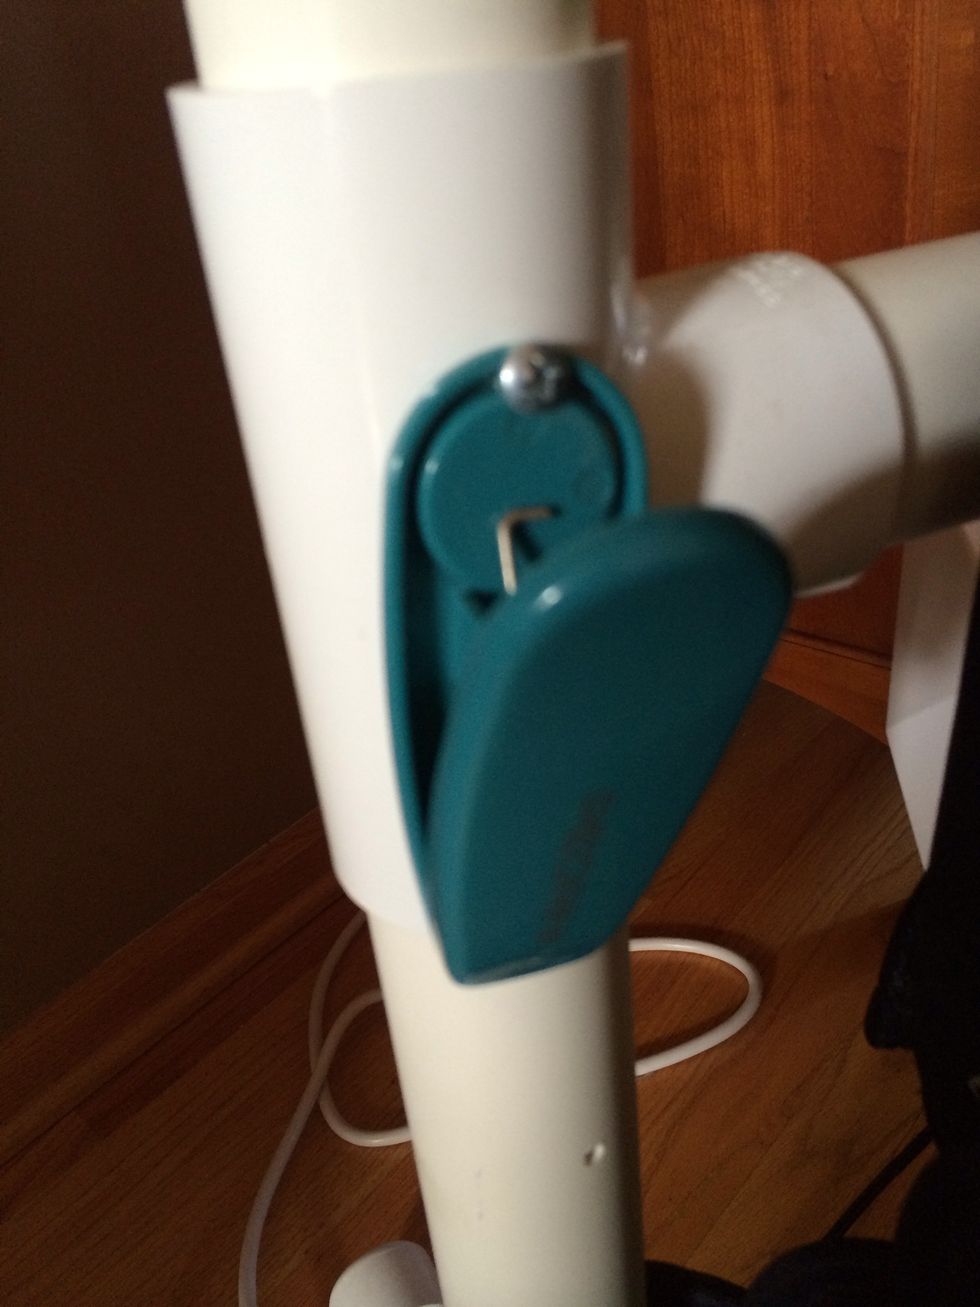
Add any type of clip to hold shin pads.
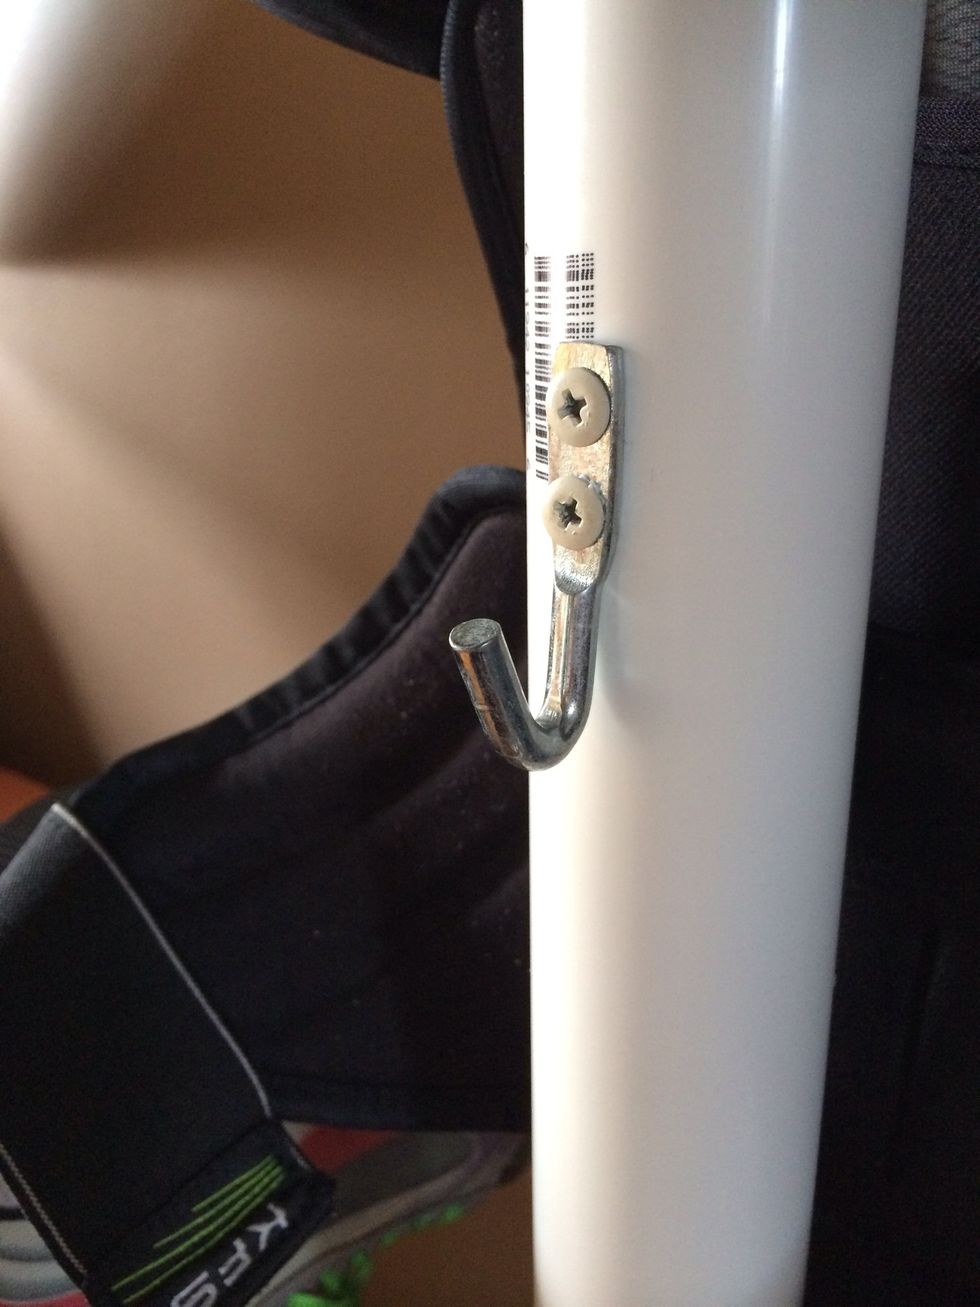
Add a hook on the middle pipe to hold the pants.
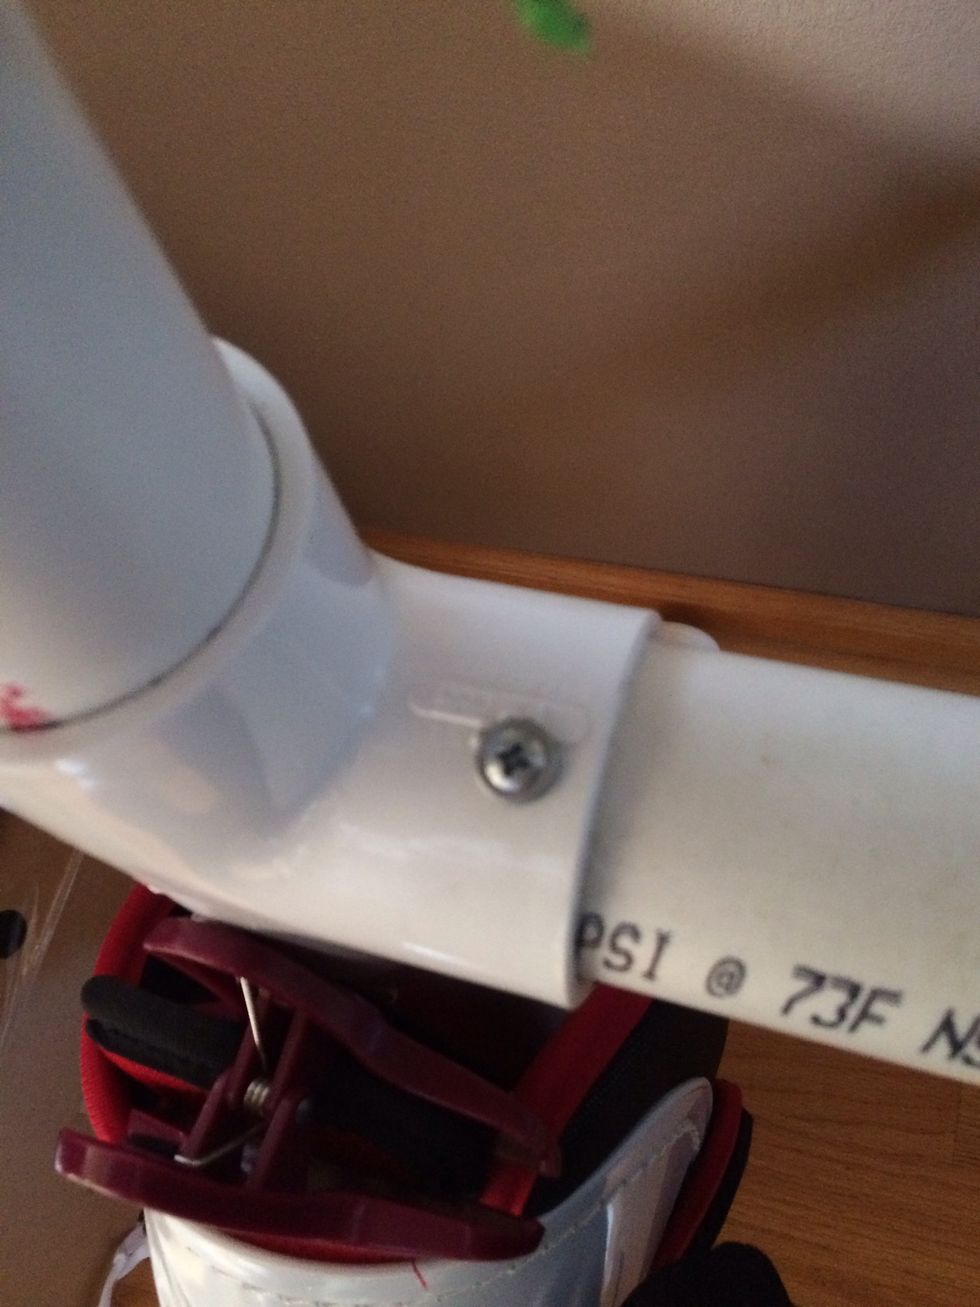
You can choose to screw together joints for stability or just hand tighten for easy disassembly in the offseason.
(Optional) Customize with air cooling. Replace the PVC Tee with the 4 hole joint.
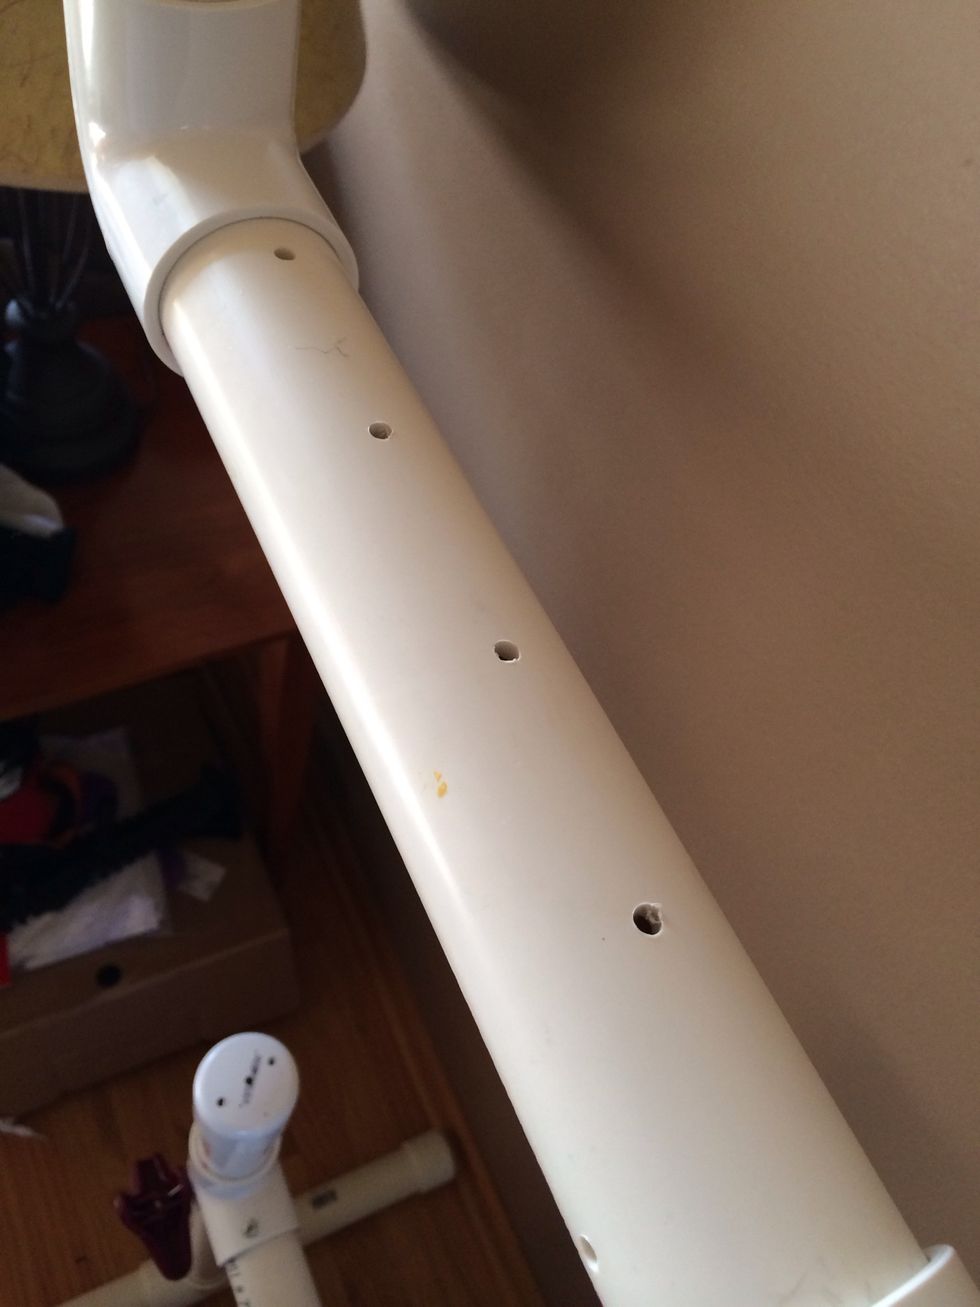
Drill strategic holes in pipe to allow airflow into gear for faster drying.
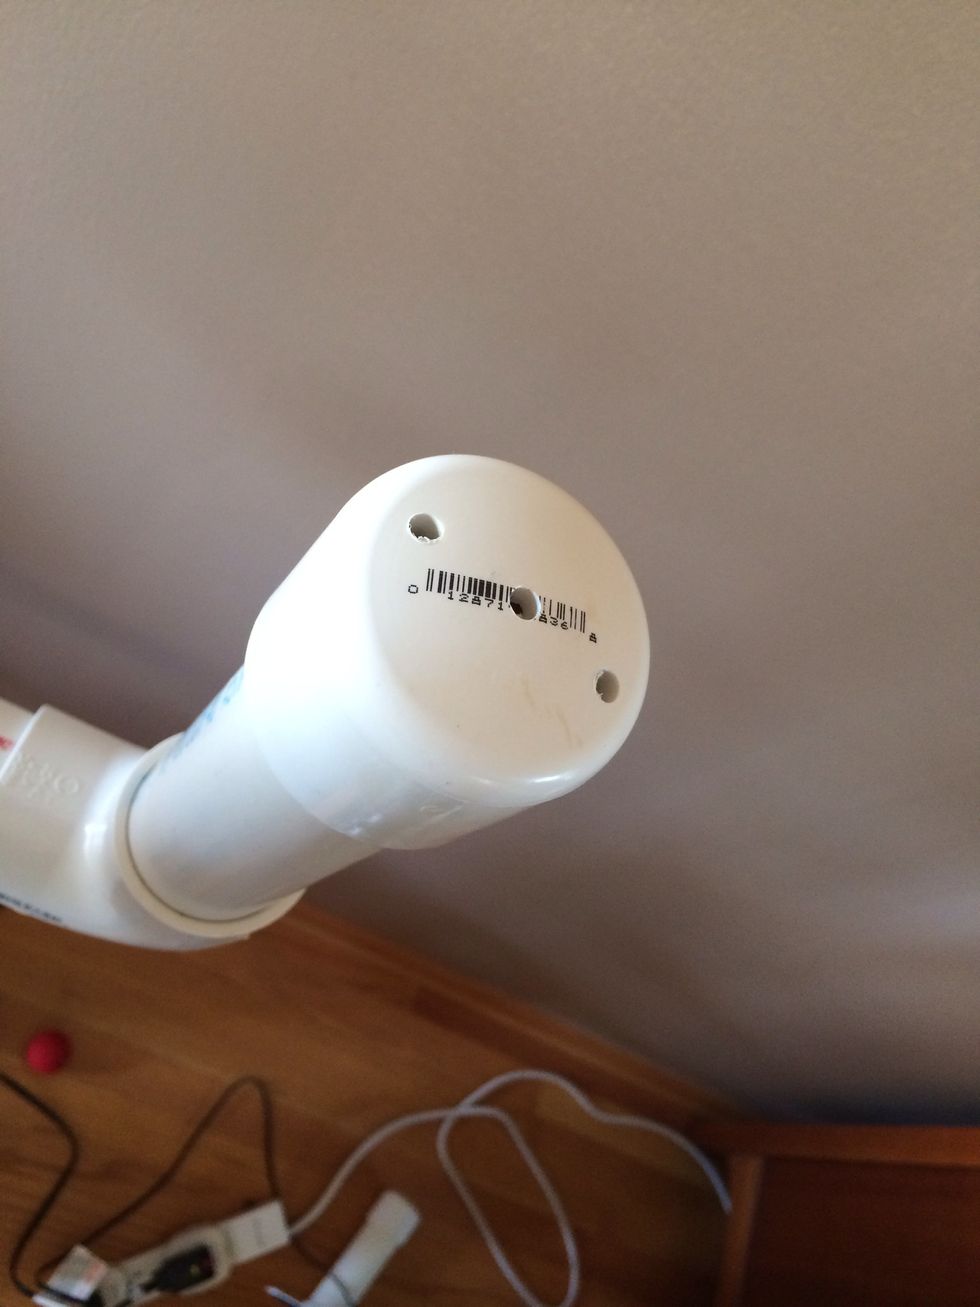
Holes on caps

Good luck in your season and go Blackhawks.