The Conversation (0)
Sign Up
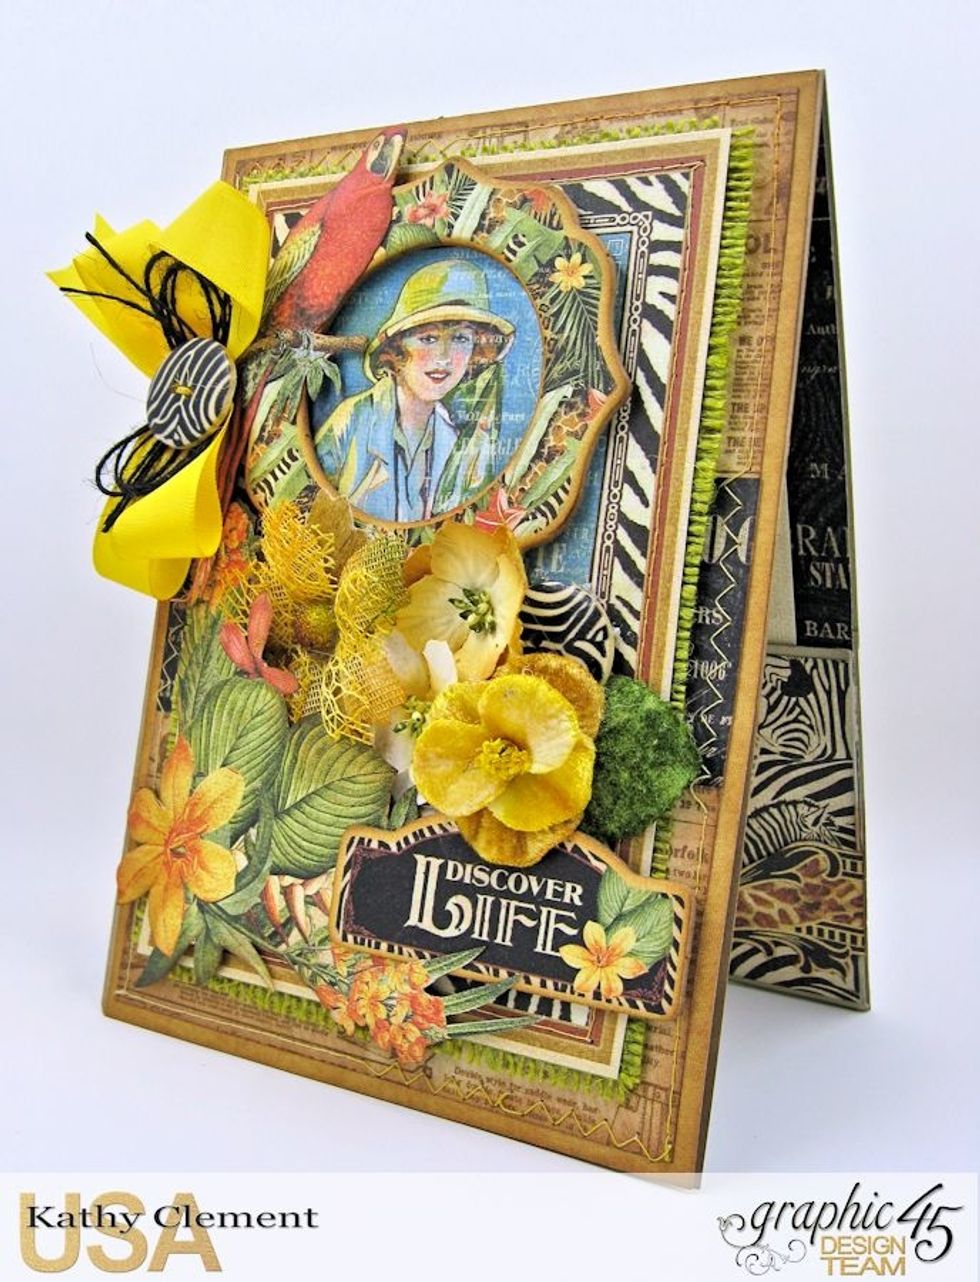
This vibrant top fold 5"x7" card has a chipboard sentiment that is fitting for retirement, graduation, birthday or travel. The inside is finished with pockets & tags. Let's get started!
Cut this image from Amazing Africa. Stitch to a slightly larger piece of avocado green burlap. Set aside.

Cut a 5" x 7" panel from the 12x12 patterns paper. Ink the edges with Vintage Photo Distress Ink.
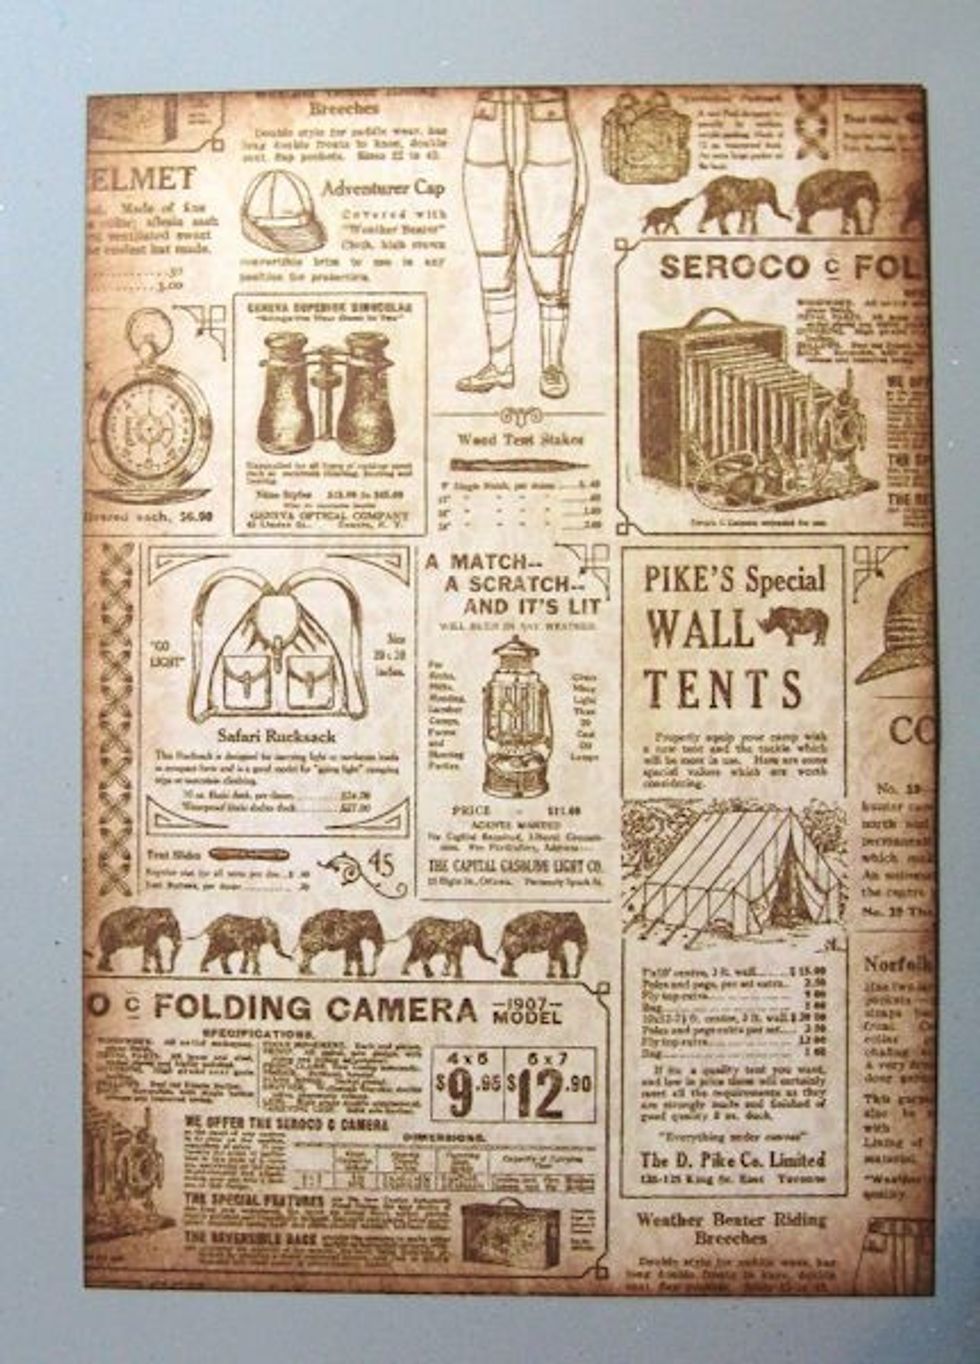
Cut a 4 3/4" x 6 3/4" panel of the tan advertisement paper from 12 x 12 patterns and solids pad. Ink the edges with Vintage Photo Distress Ink.
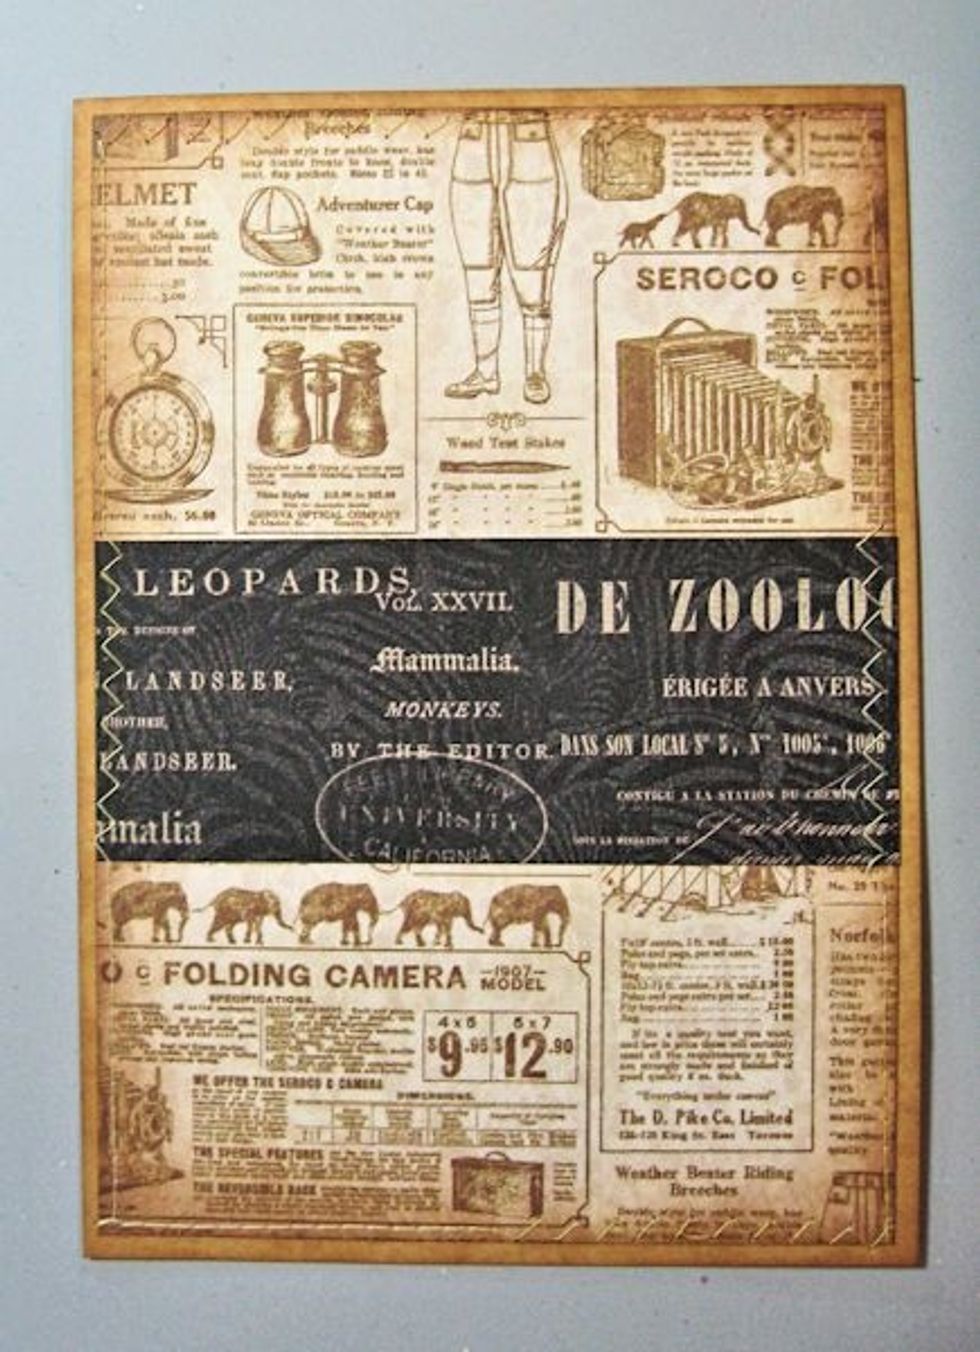
Glue a 2" tall belly band across the ad paper. Stitch the ad paper to the solid paper.
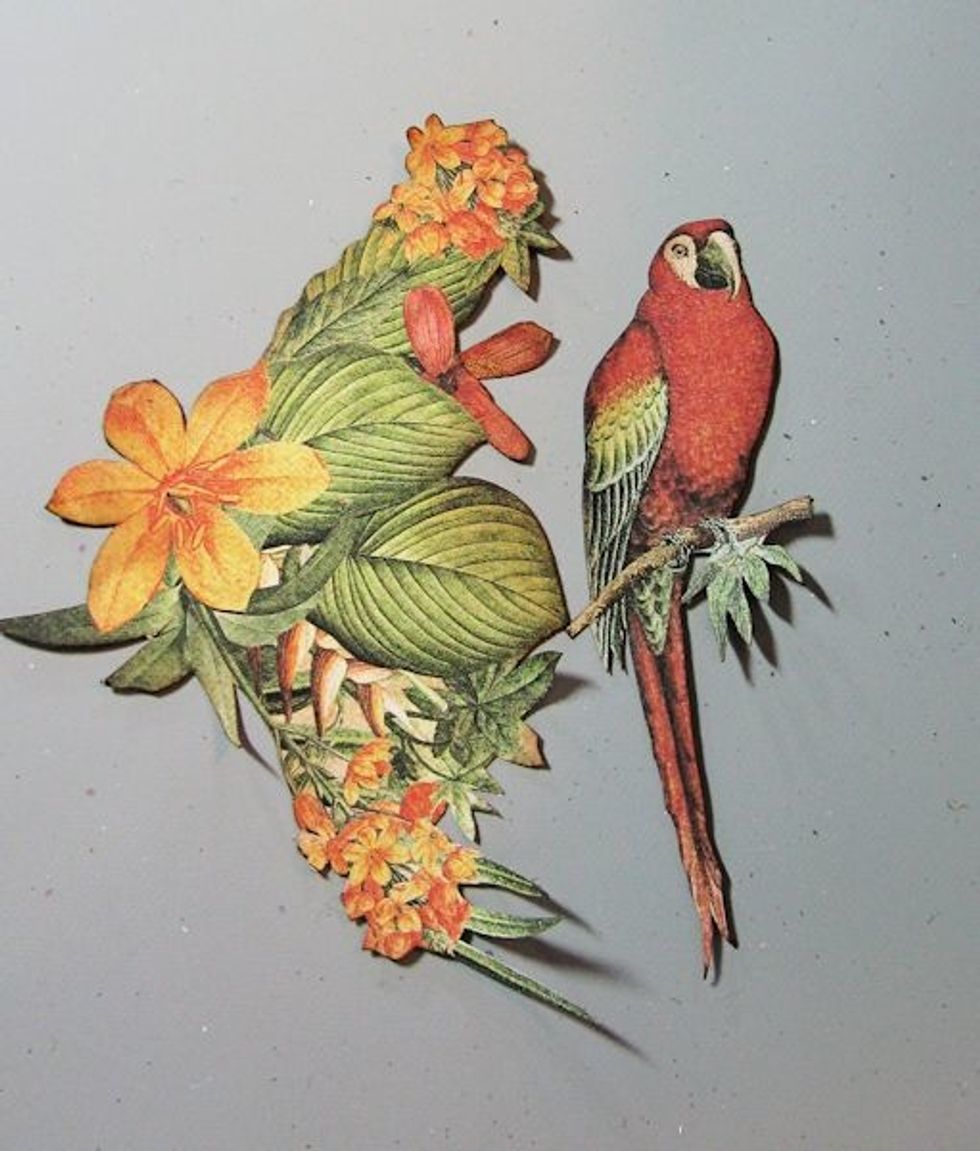
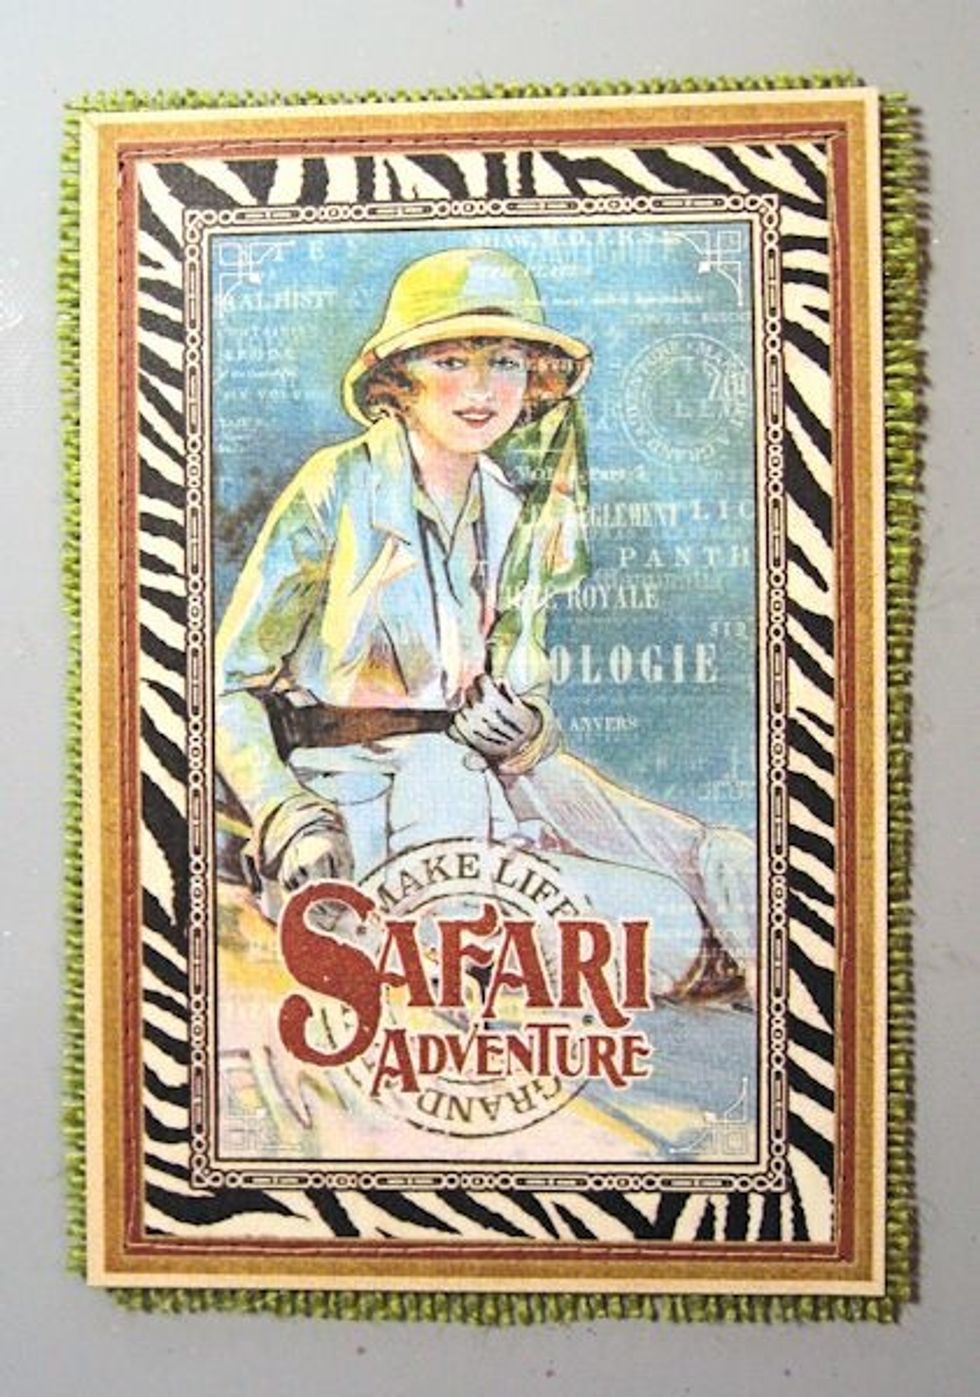
Fussy cut large flower cluster and red parrot from 12x12 Safari Adventure. Ink edges with Vintage Photo. Shape with stylus & foam pad or use your fingertips and a pencil eraser to add dimension.
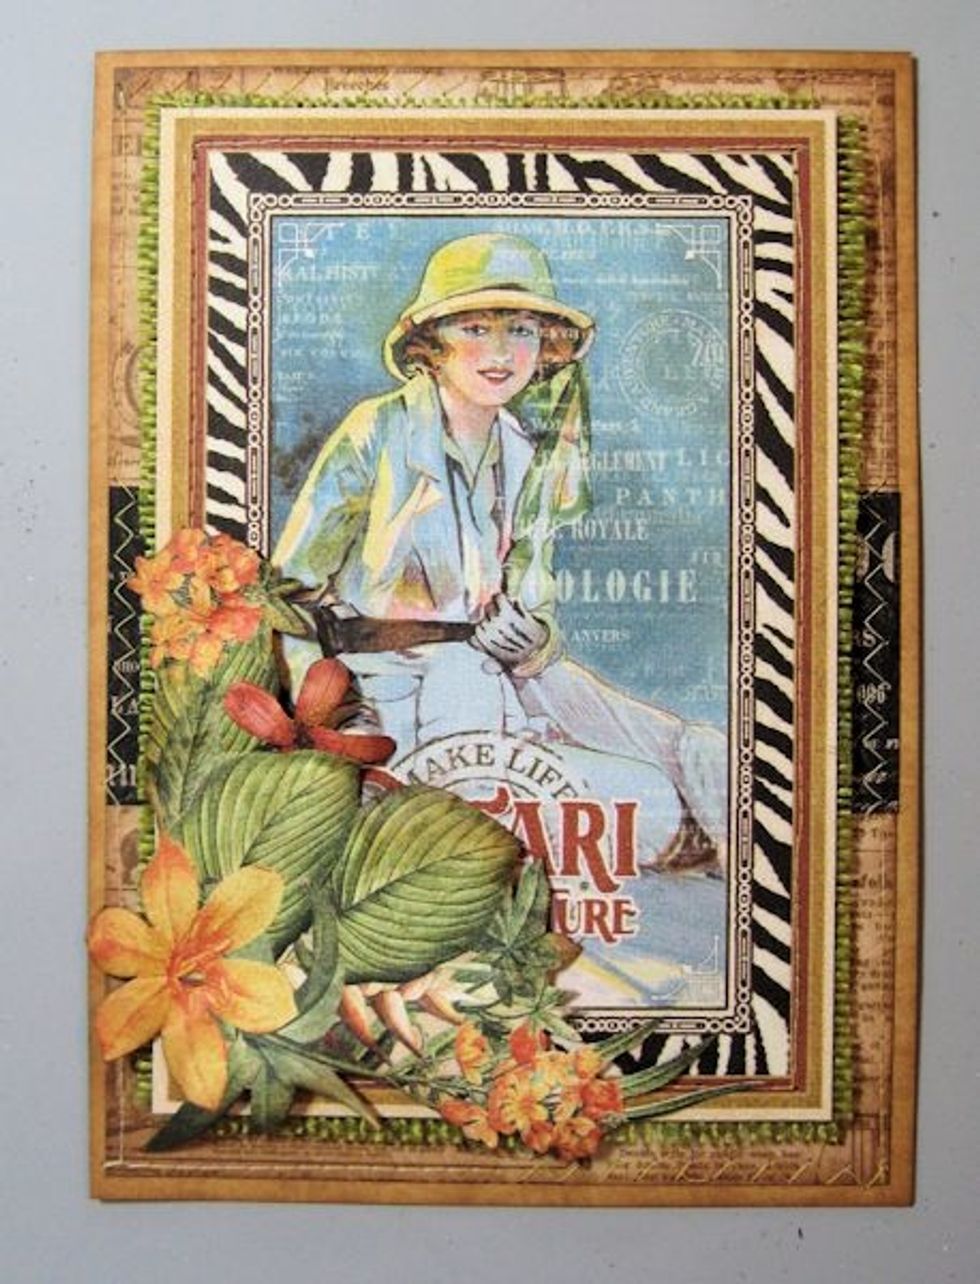
Use foam dimensionals to attach the main image to the card base. Attach the large flower cluster in the lower left hand corner with glue and foam dimensionals.

Ink the edges of the chipboard frame and sentiment with Vintage Photo Ink.
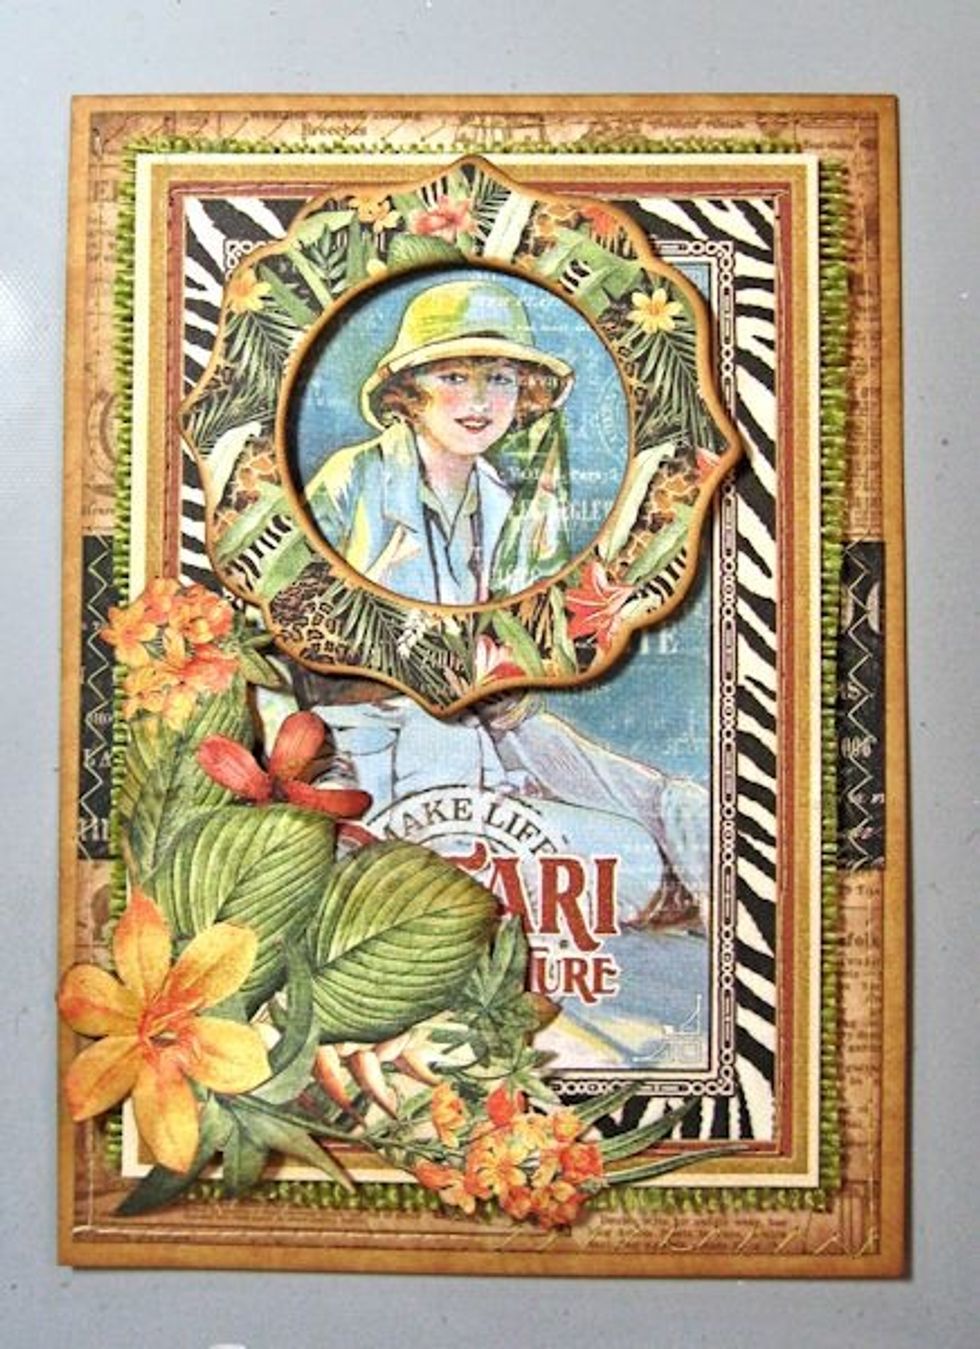
Secure the frame with foam dimensionals.
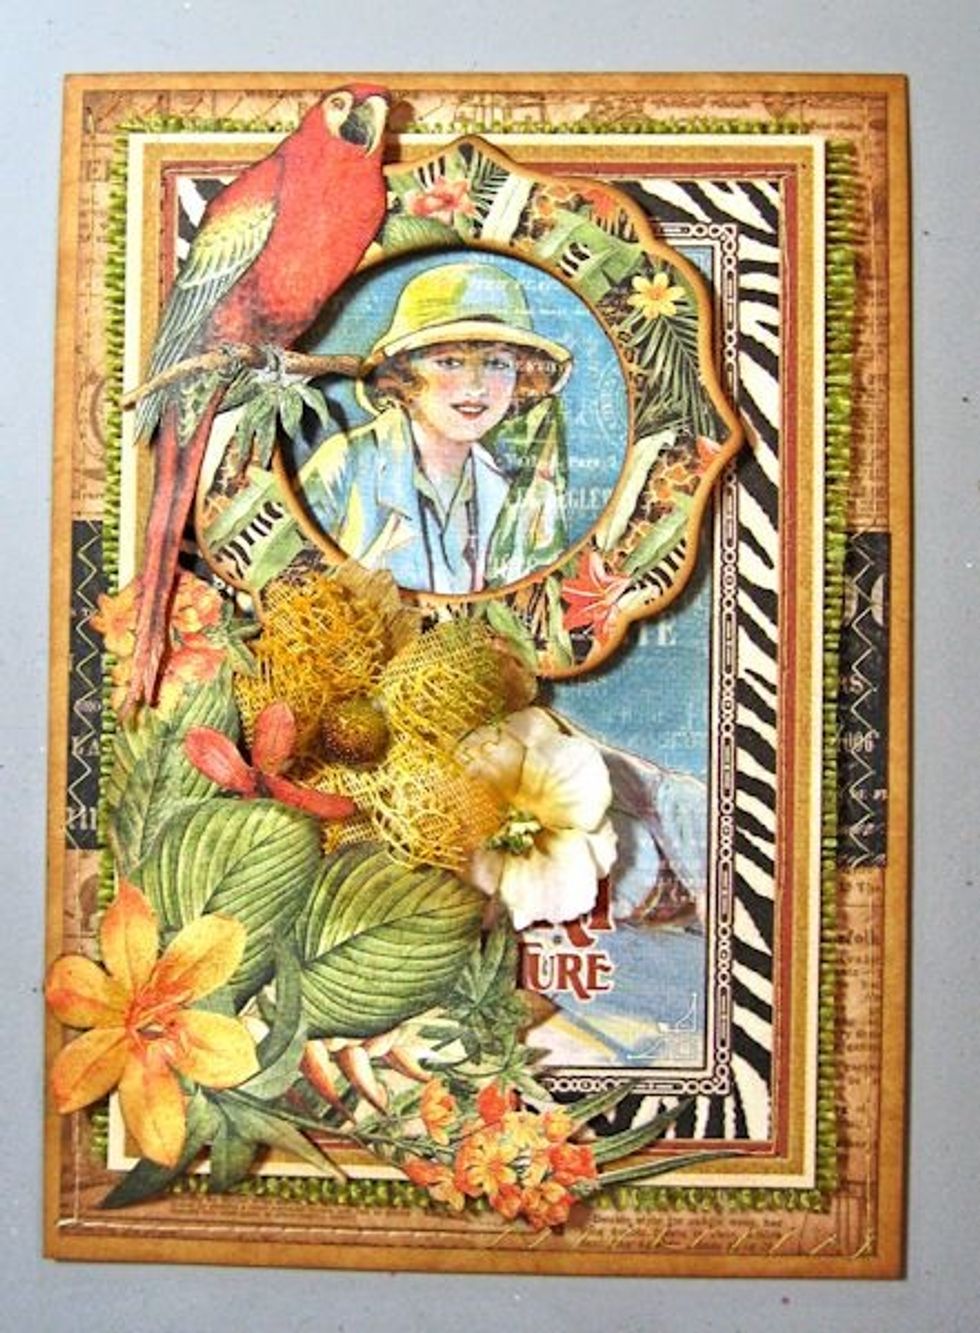
Glue the parrot to the frame. Add a large Petaloo textured flower behind the fussy cut flower cluster. Add another flower. Use your hot glue gun to hold them in place.

Add another flower. Use foam dimensionals to add the chipboard sentiment.
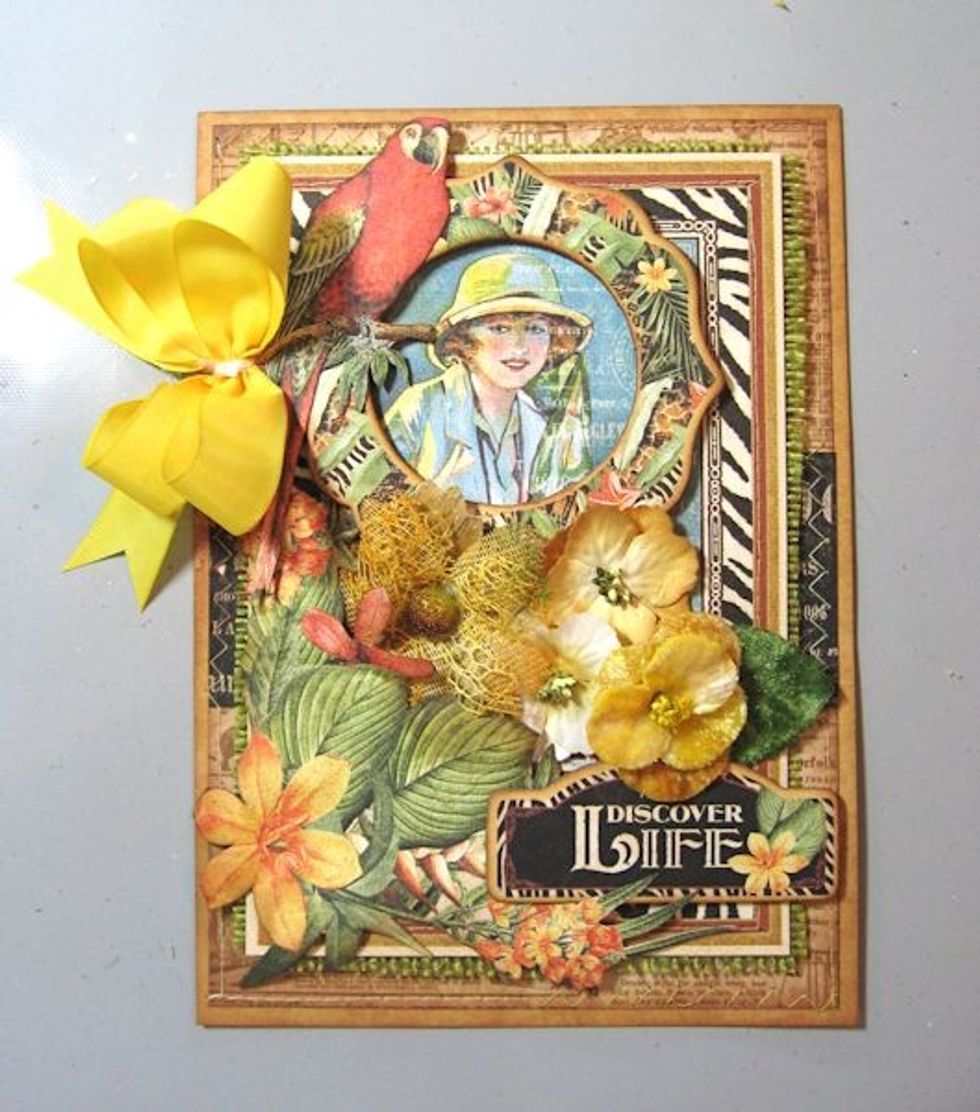
Add the Vintage Velvet Pansy and leaf. Tie a bow with Maize Taffeta Ribbon and hot glue in place.

Add black burlap string bow & zebra print button. Tuck a zebra print button behind the flowers. The outside of your card is complete! Finish the inside as you like, or use these photos as a guide.
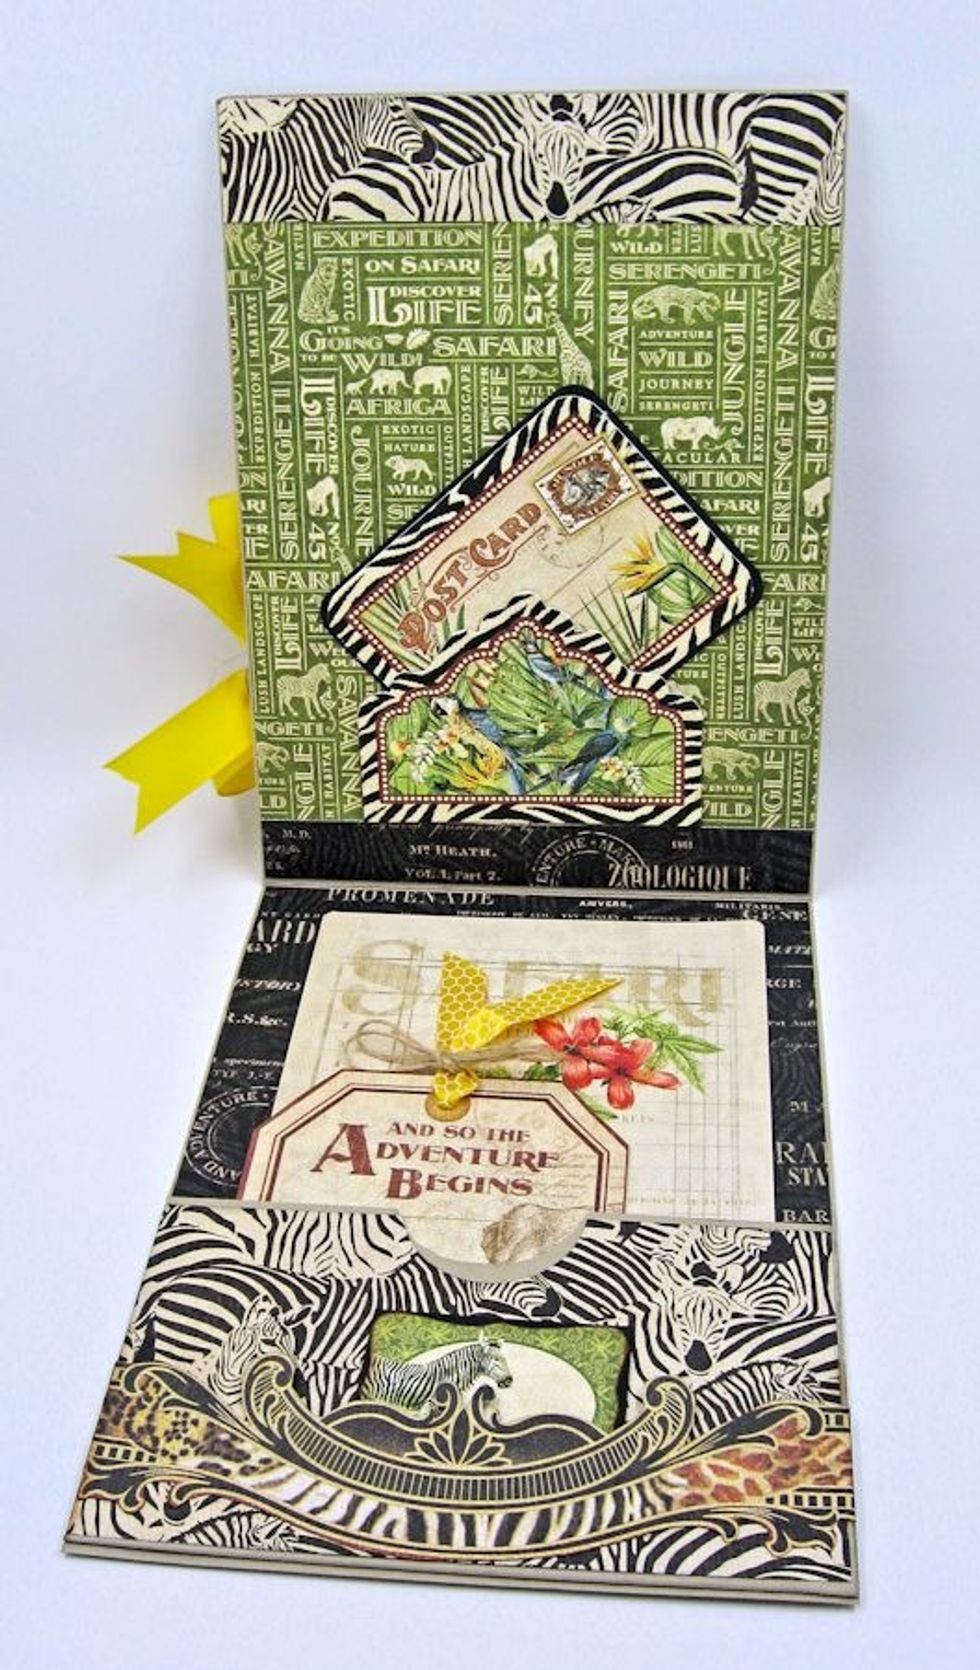
Cover the inside with these prints. Create small pocket by cutting Tags and Pocket in half. Mat postcard half with black cardstock and tuck inside. Create a pocket and fill with ephemera cards.
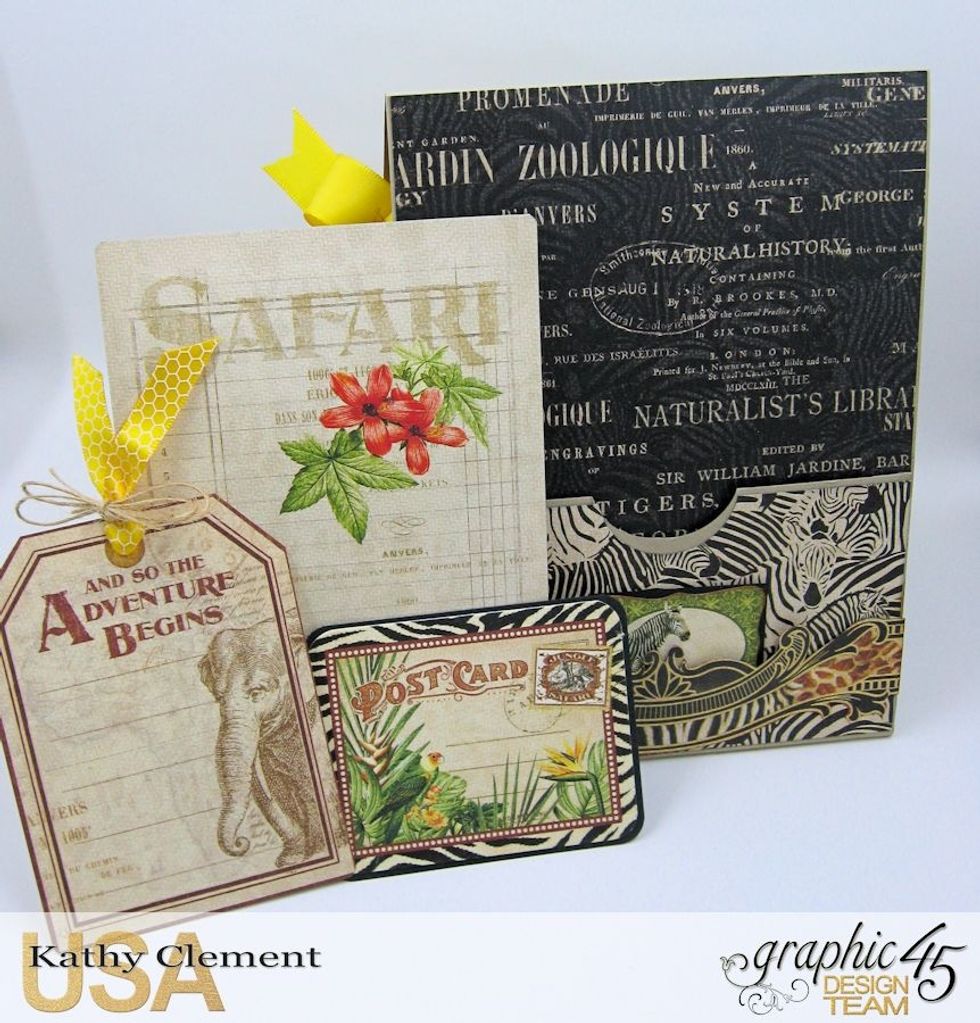
For gift giving, tuck a gift card, individually wrapped chocolate, photo or cash into the pocket.
Thanks for joining me for this quick and easy tutorial. I hope you will have fun making your own Discover Life Pocket Card with Graphic 45 Safari Adventure. Now, go get your craft on!