The Conversation (0)
Sign Up

Create a box using Core'dinations card stock and the template available at http://pixiehill.com/G45Spellbinder_BoxTemplate.pdf
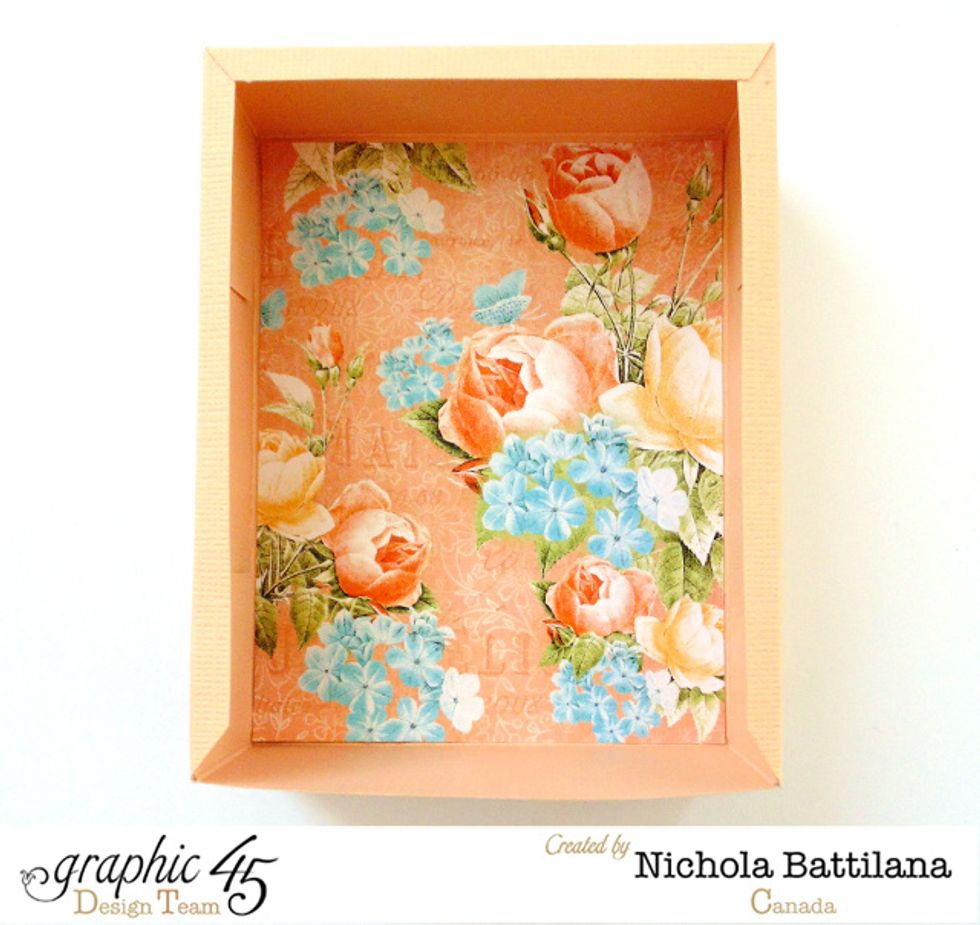
Add a square of Precious Memories, Baby's Breath as the backdrop.
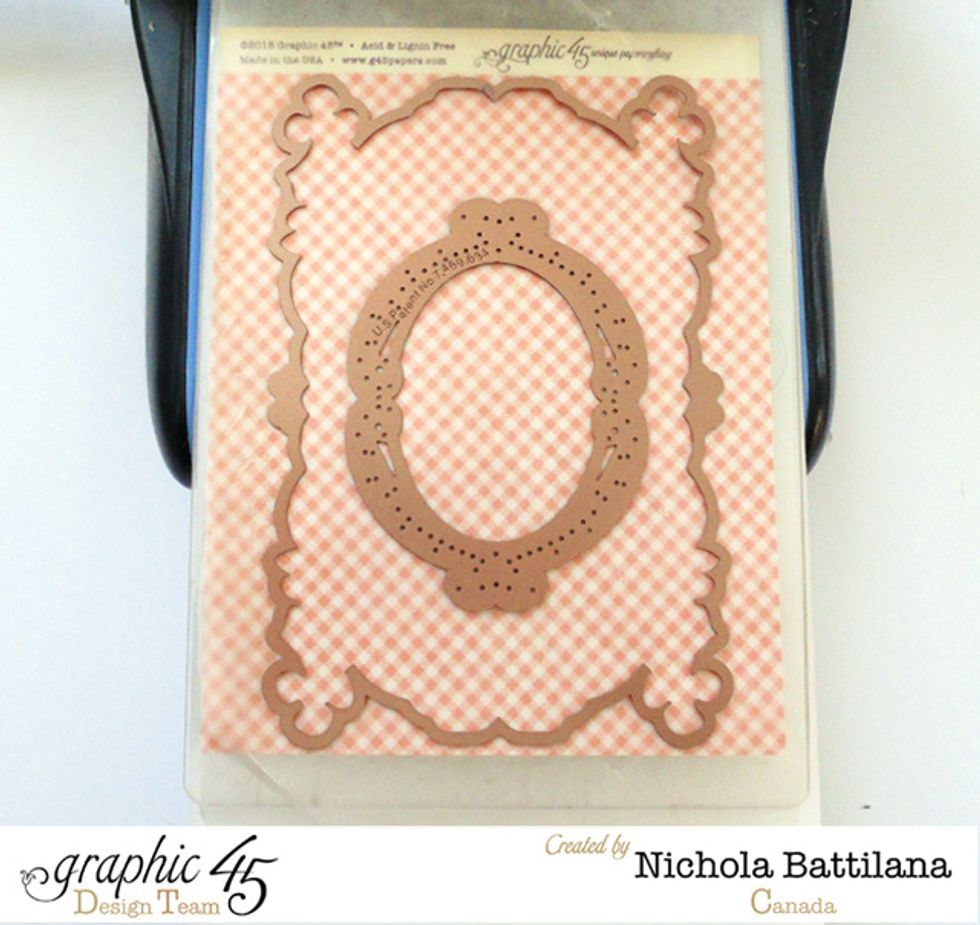
Nest Spellbinders dies S6-017 and S4-475 cut from Sugar and Spice. *Hint: a sheet of waxed paper between the die and the paper will help the paper to release from the die without tearing*
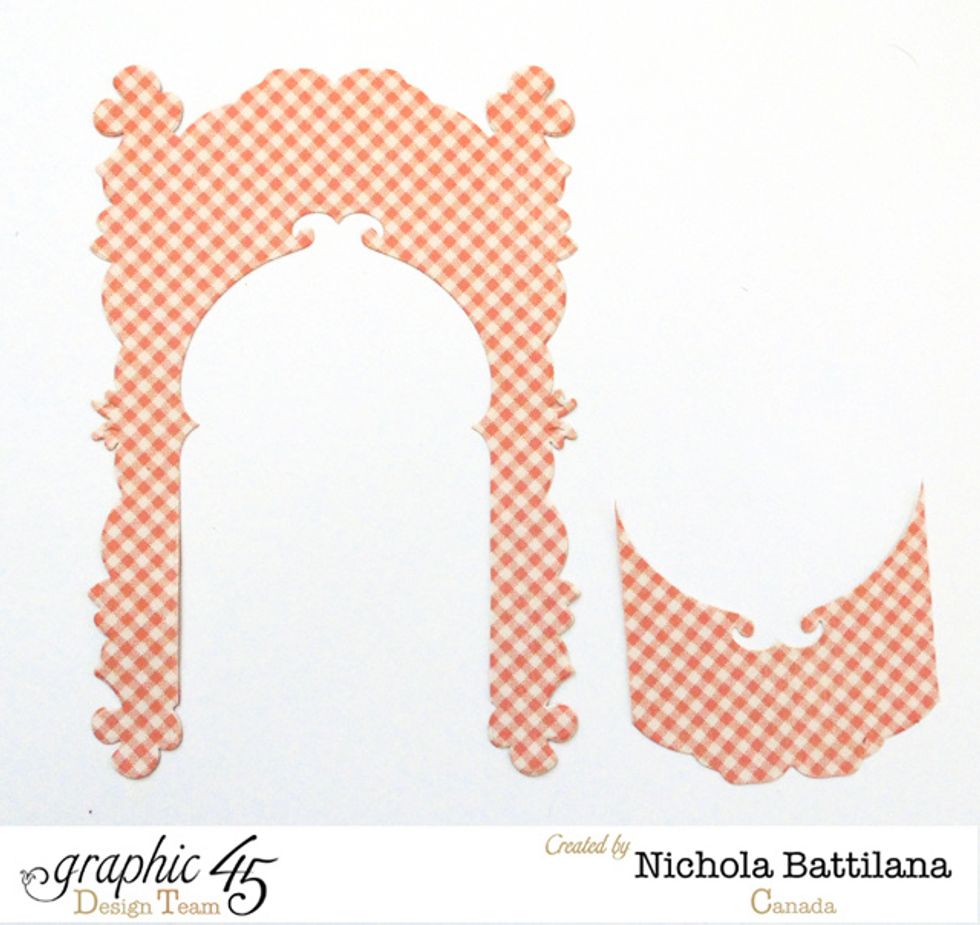
Cut the resulting piece like so.
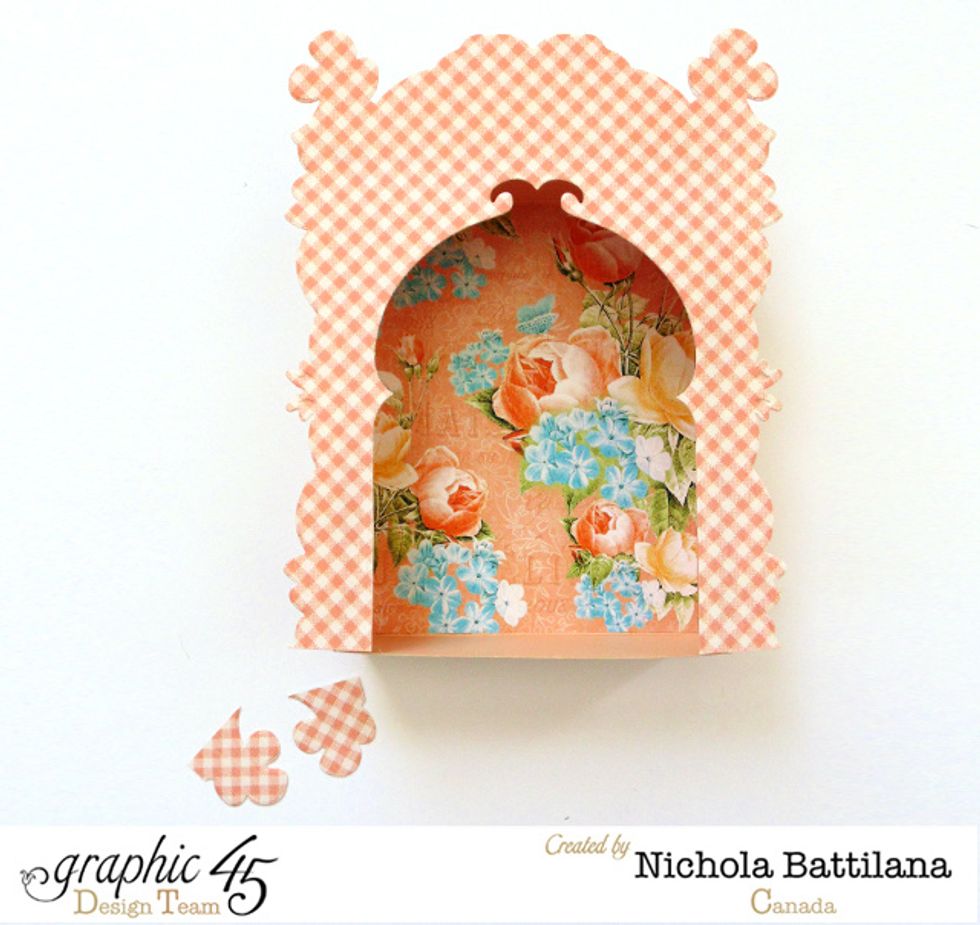
Affix to the front of the box and trim the bottom edges.
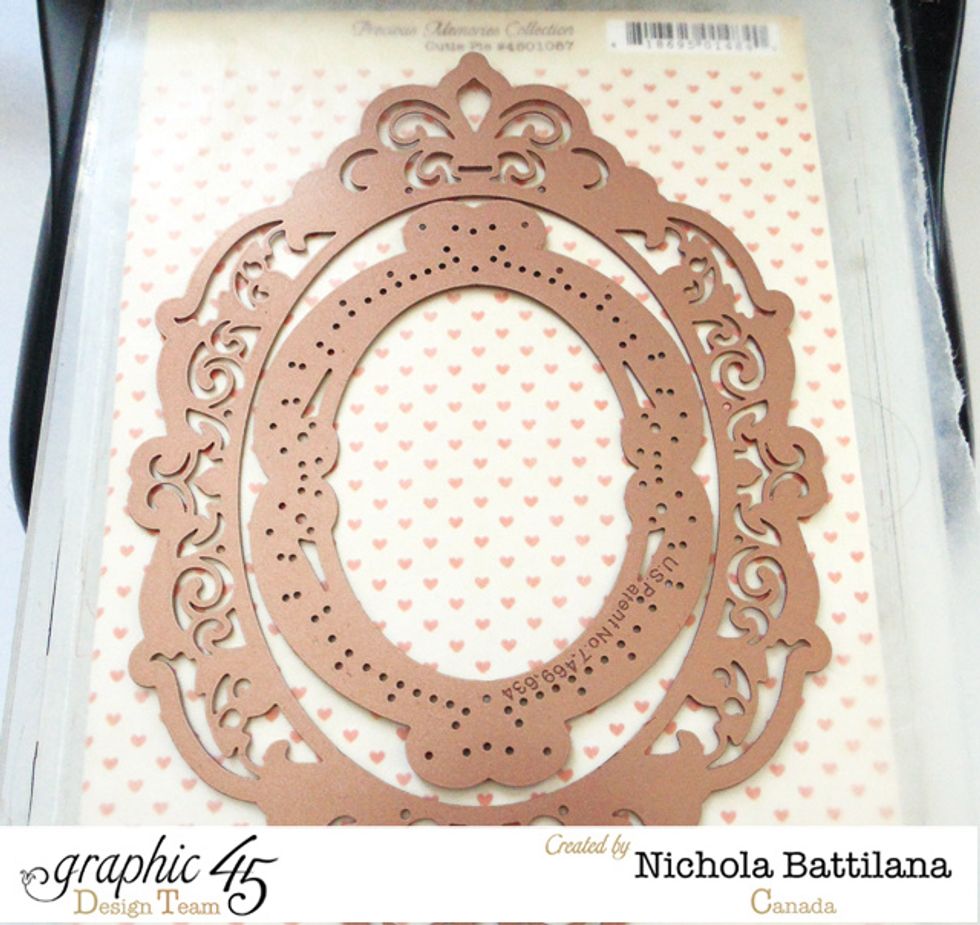
Nest Spellbinders dies S4-475 cut from Cutie Pie
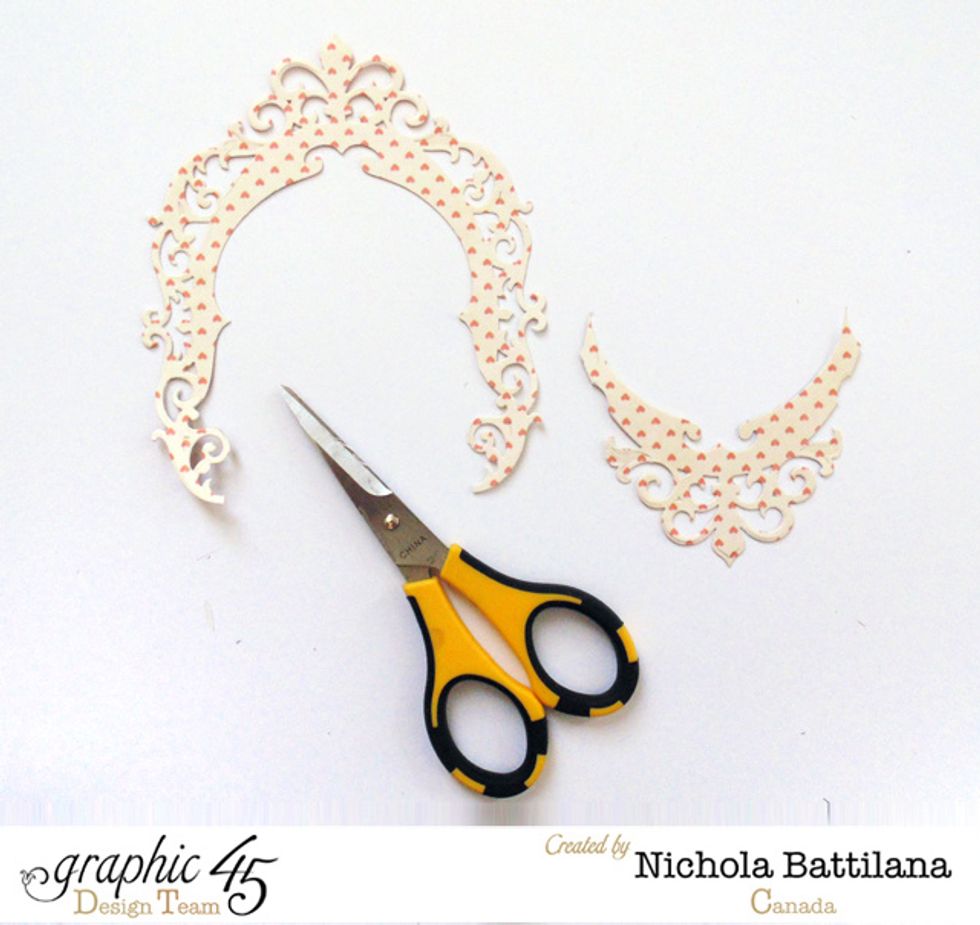
Be sure to keep all of your pieces. Cut the outside piece as shown.
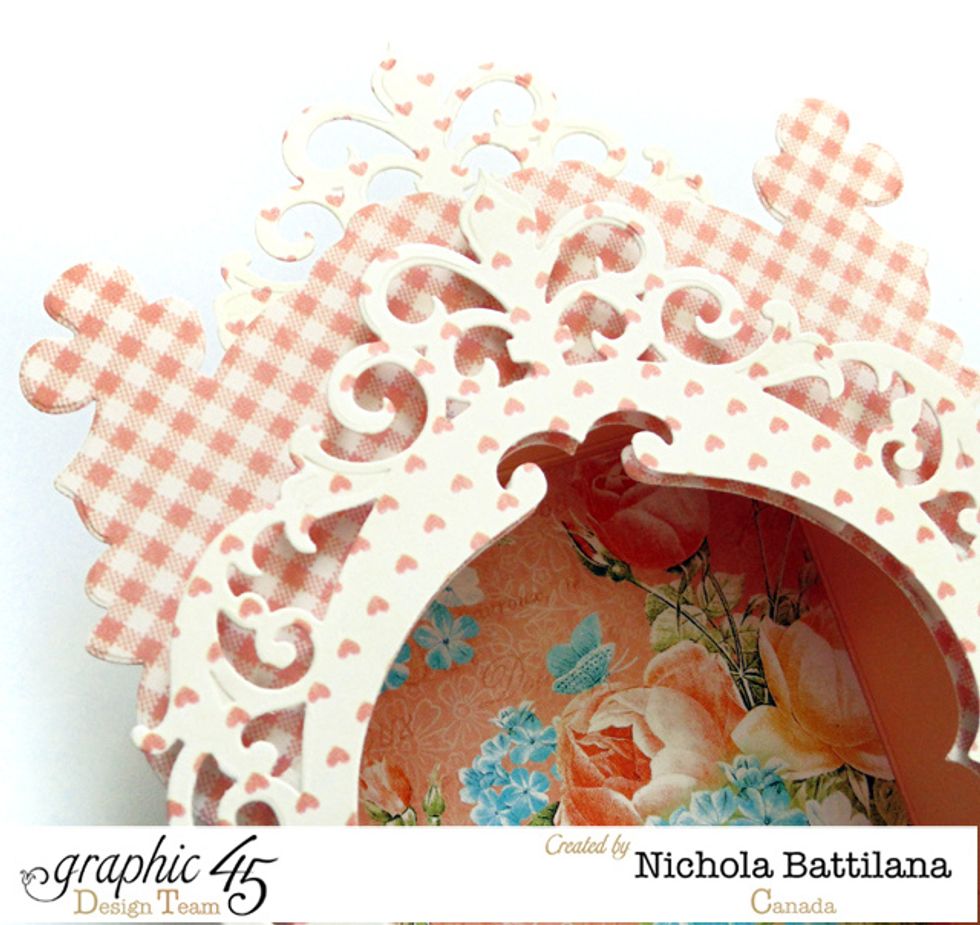
Place the larger piece on the front, aligning the shapes. Tuck the smaller piece at the top behind the facade. I've used foam squares to add dimension.
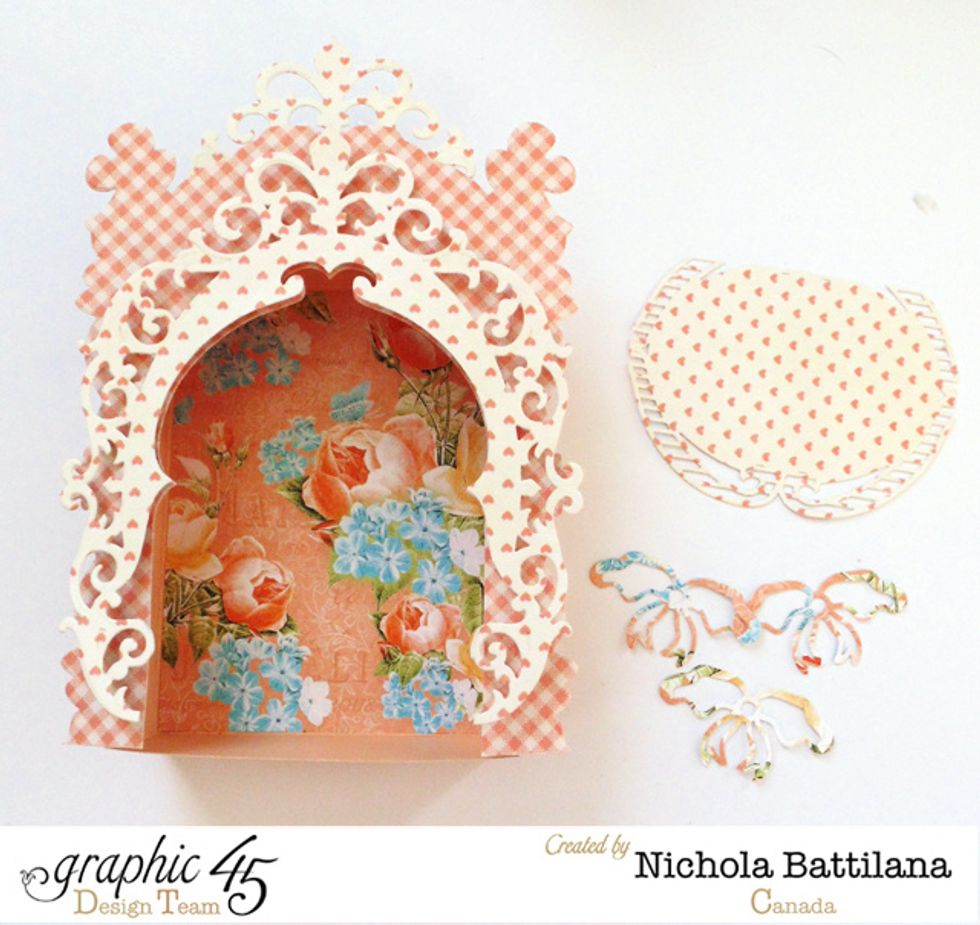
Trim the centre shape from previous die cut piece to fit the 'floor' of the box. Cut additional decorative pieces for embellishments.
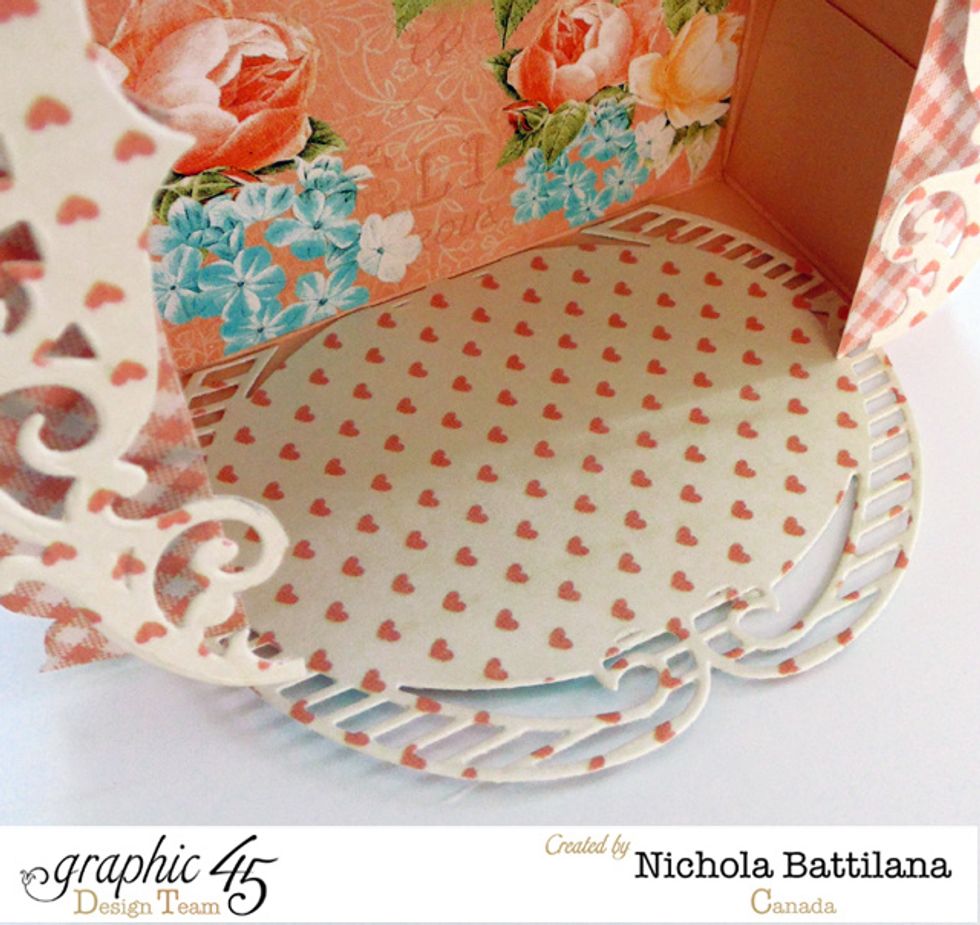
Apply to the bottom as shown. This will be the floor of your stage.
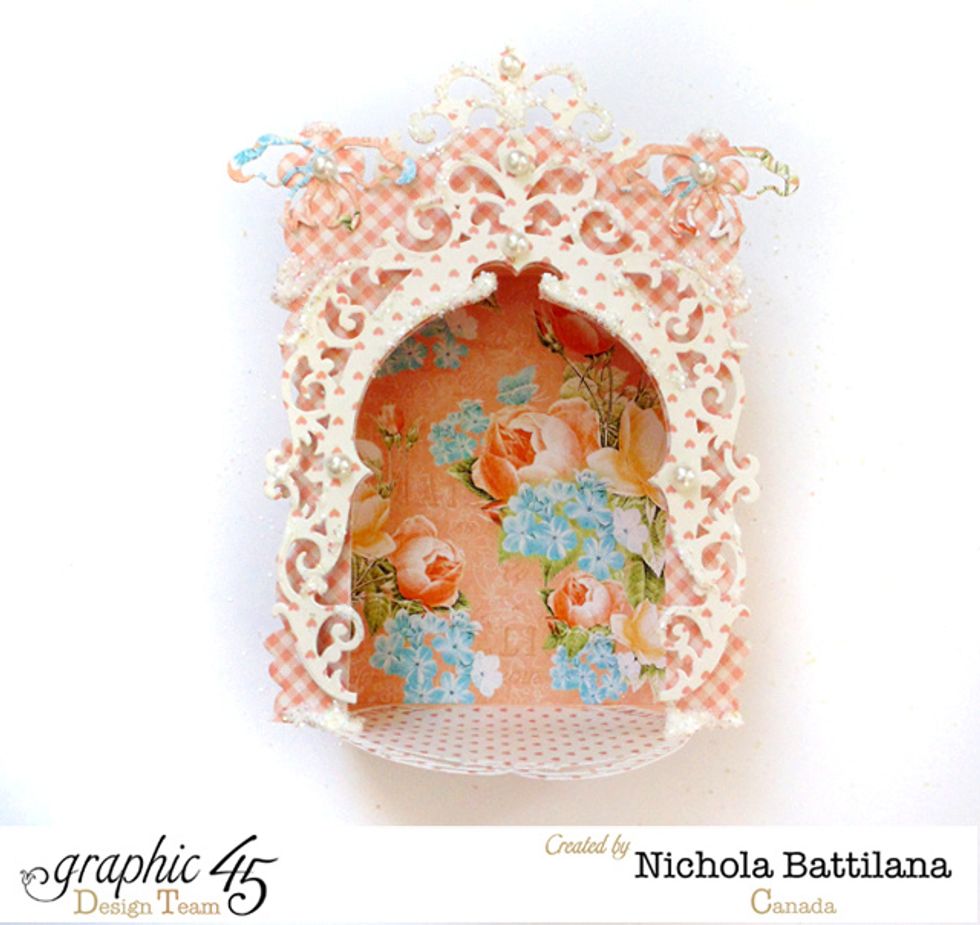
Add decorative bits, flat back pearls, and glitter.
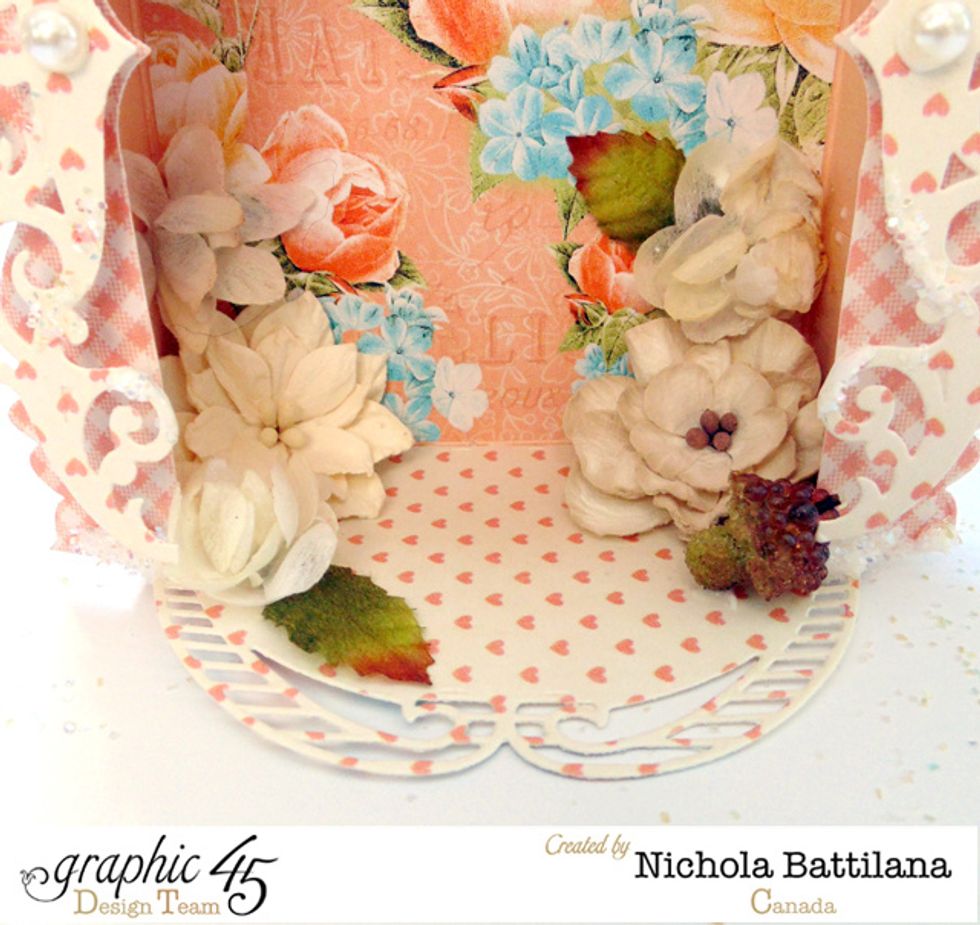
Tuck pretty Petaloo blooms into the corners.
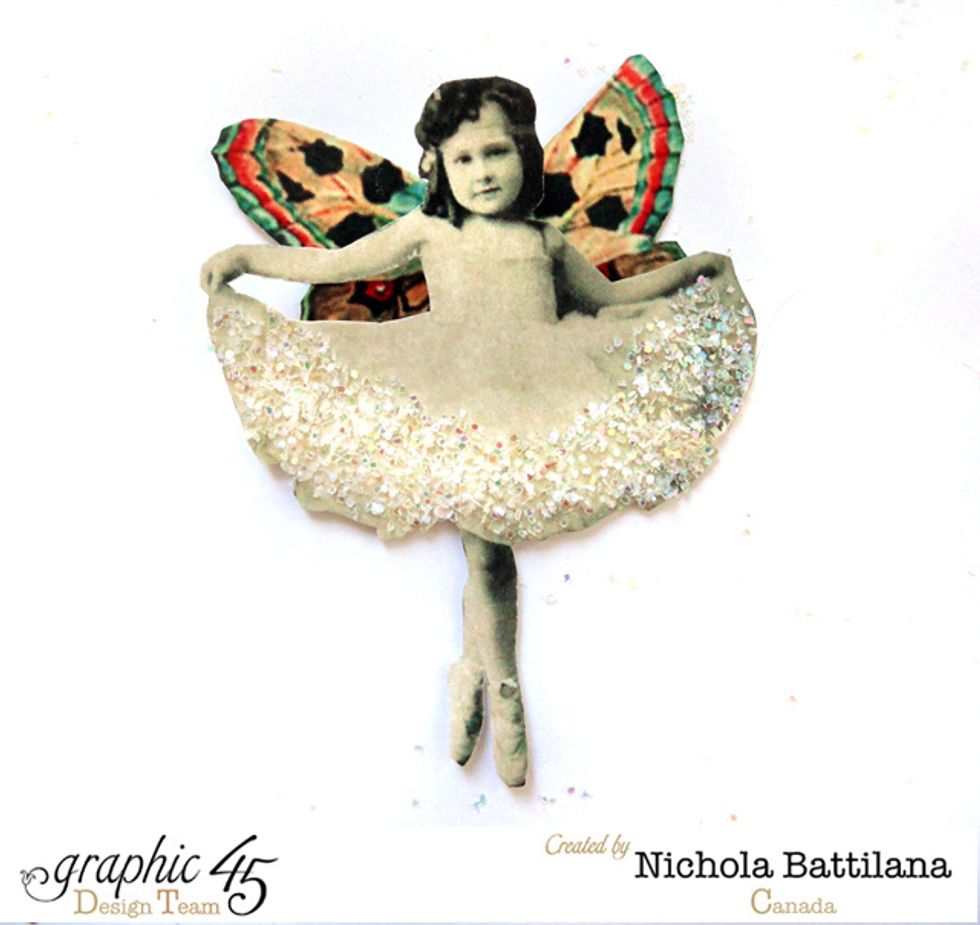
Print and fussy cut a pretty vintage image, add wings and glitter. For images, thegraphicsfairy.com is a great resource.
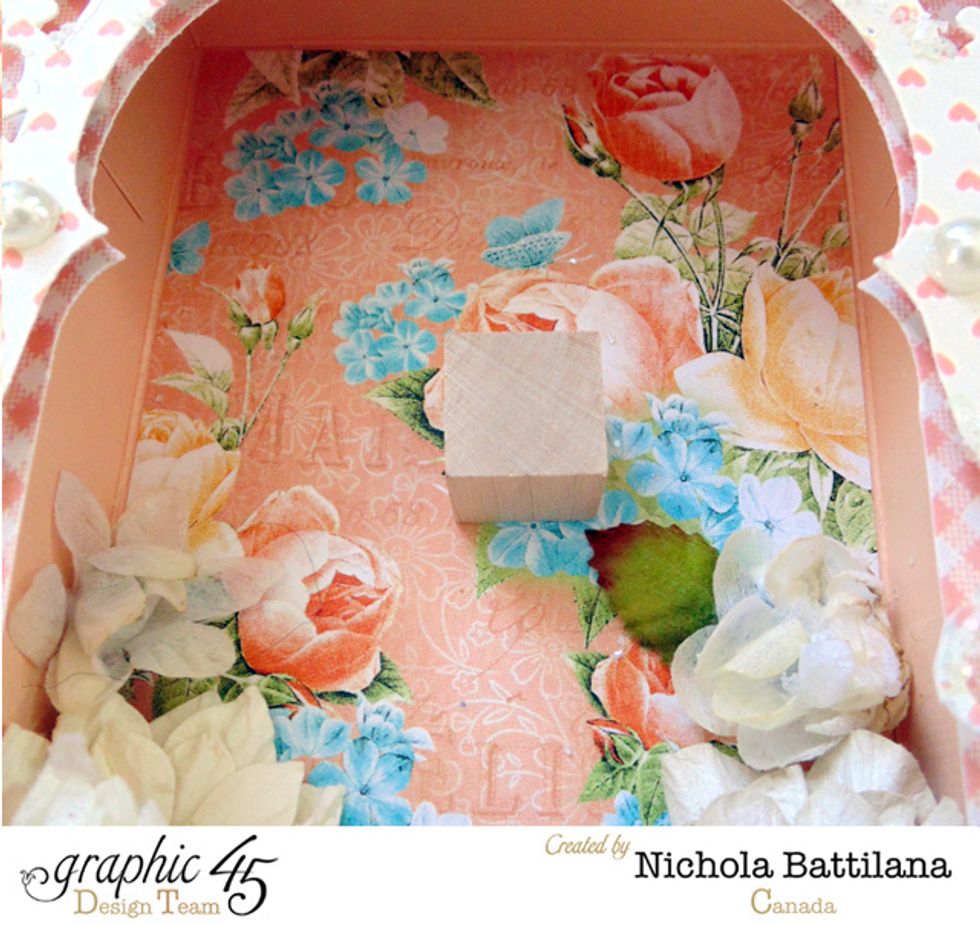
A small wooden block applied to the back of the box provides a sturdy base to affix your little fairy.
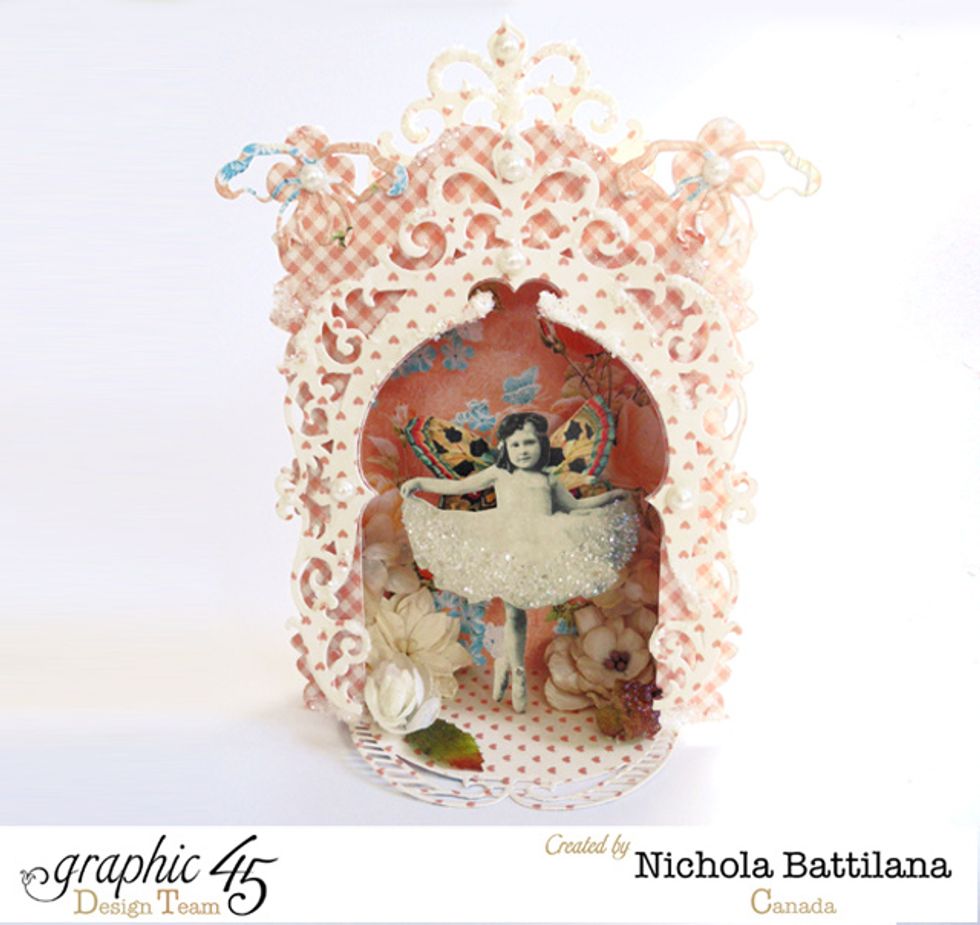
Add any other embellishments and pretty bits and bobs you like!
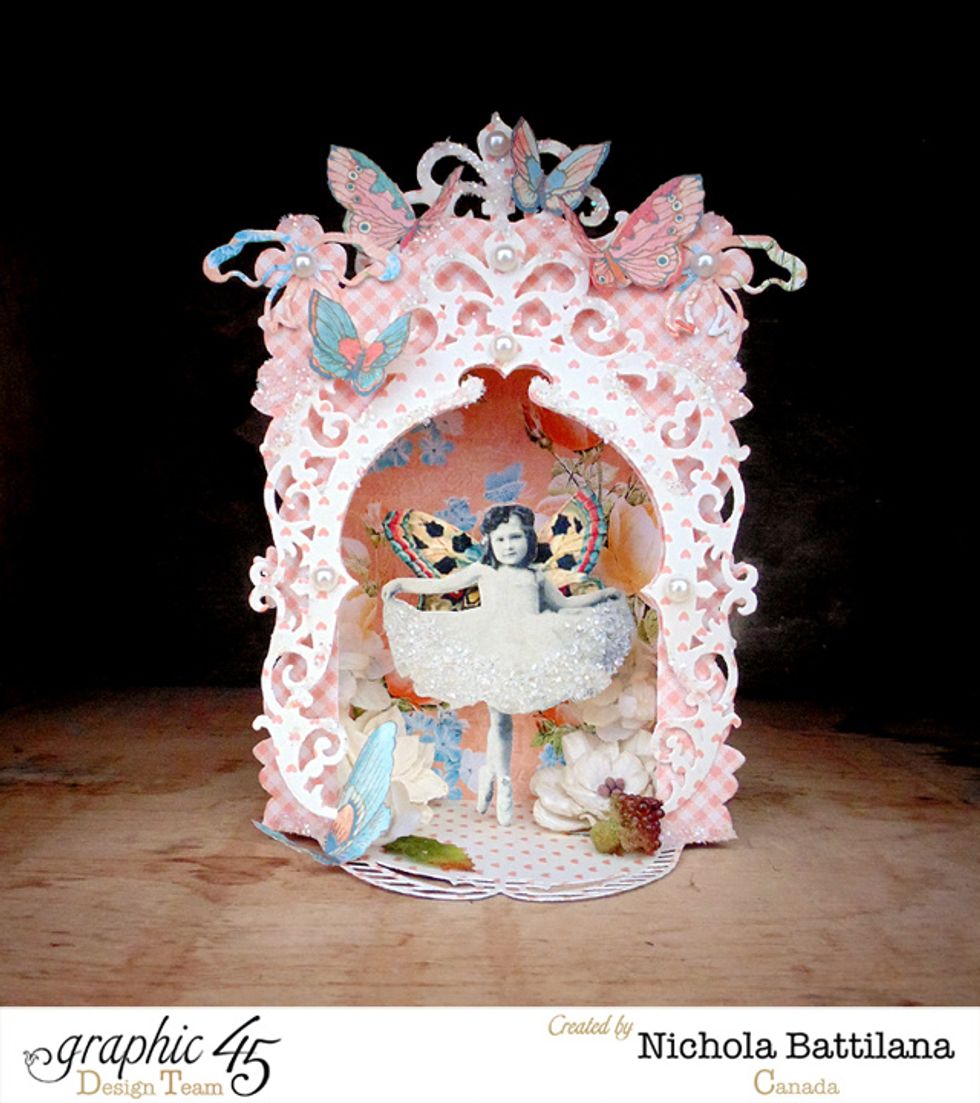
I've finished this piece off with butterflies from Graphic 45's Sweet Sentiments, Heart Song. Add whatever bits of whimsy you like! Finally, enjoy your bit of fairy magic :)