The Conversation (0)
Sign Up
The actual project uses all black elements, but since the steps are more challenging to see in black, I am using kraft colored paper/chipboard with black Tyvek strips to demonstrate the construction.
Cut 6 pieces black chipboard as follows (long dimension is stiff): 2 @ 3 7/8" x 9"...1 @ 7/8" x 7 1/4" 2 @ 3/8" x 7 1/4"... 1 @ 2 7/8" x 4 1/8"
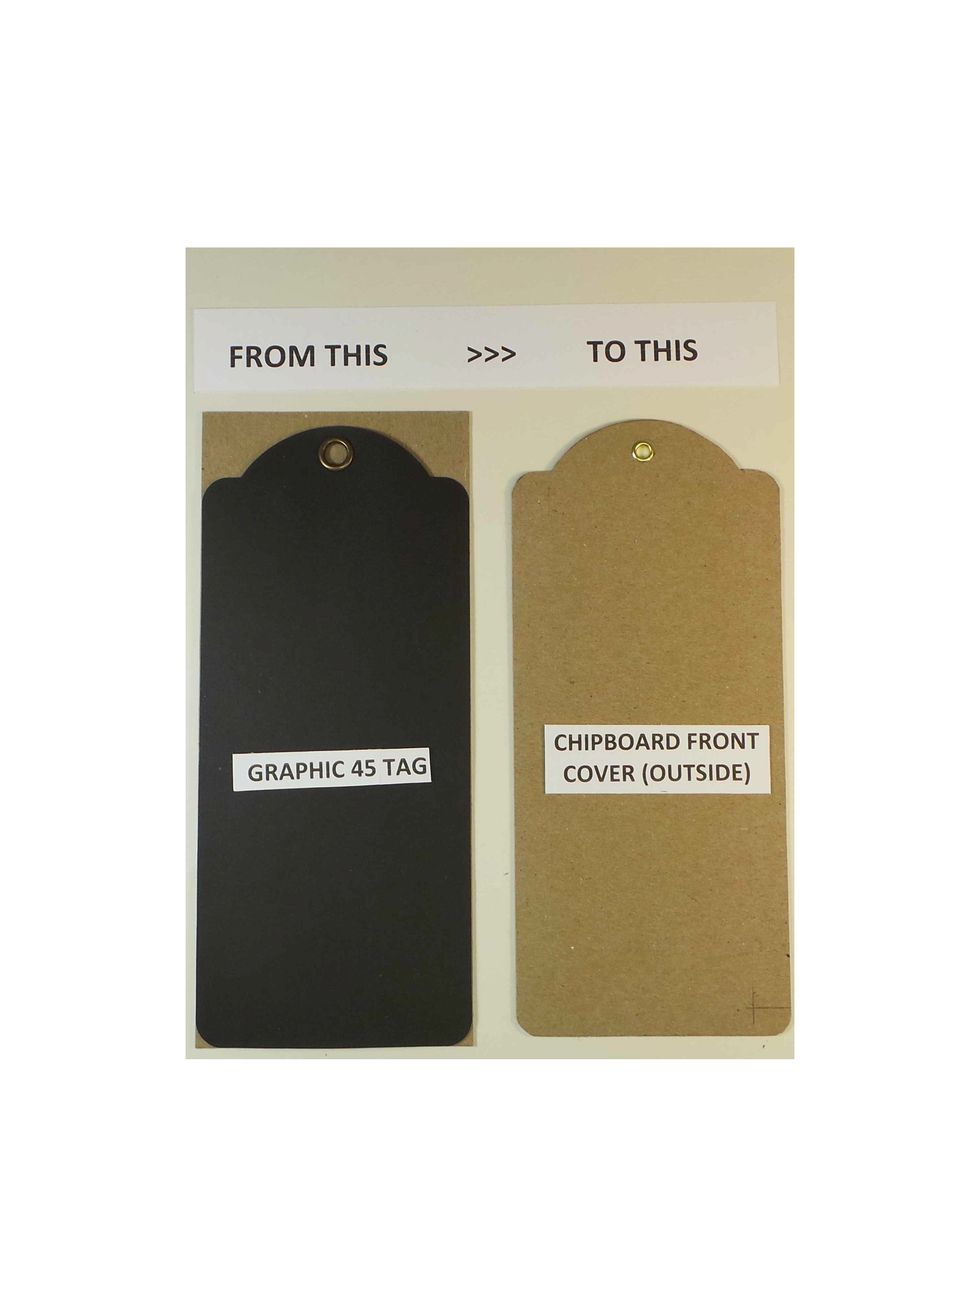
- Using a Graphic 45 tag as a template, cut a tag from each 3 7/8" x 9" black chipboard piece - (Optional) Add an eyelet to one (or both) chipboard tags
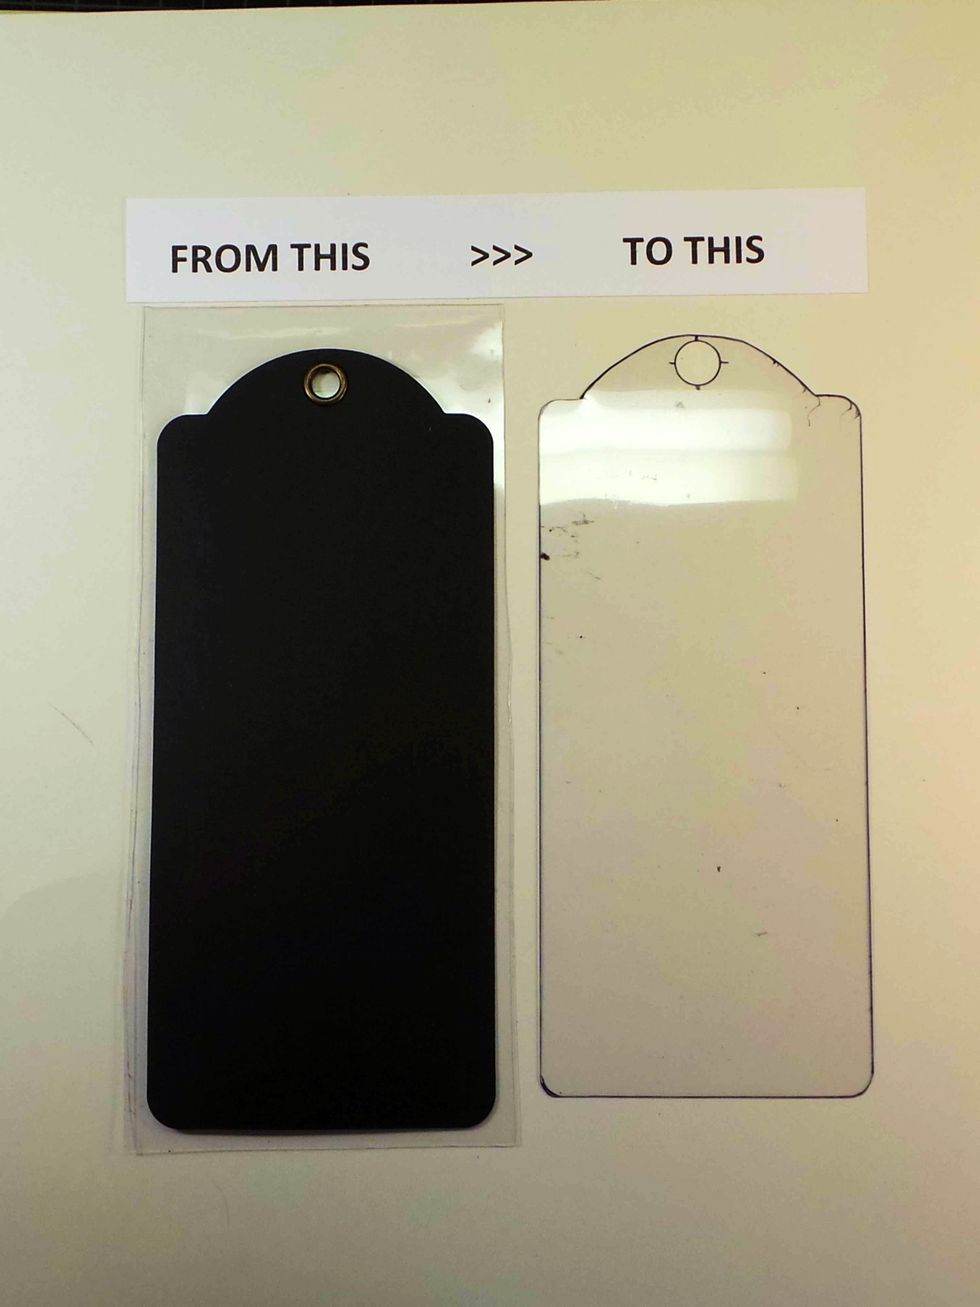
Use the Graphic 45 tag to make a template out of plastic or cardstock. Trim 1/16" from all edges. This will be used to cut the page backgrounds, sized to leave a 1/16" reveal around edges.
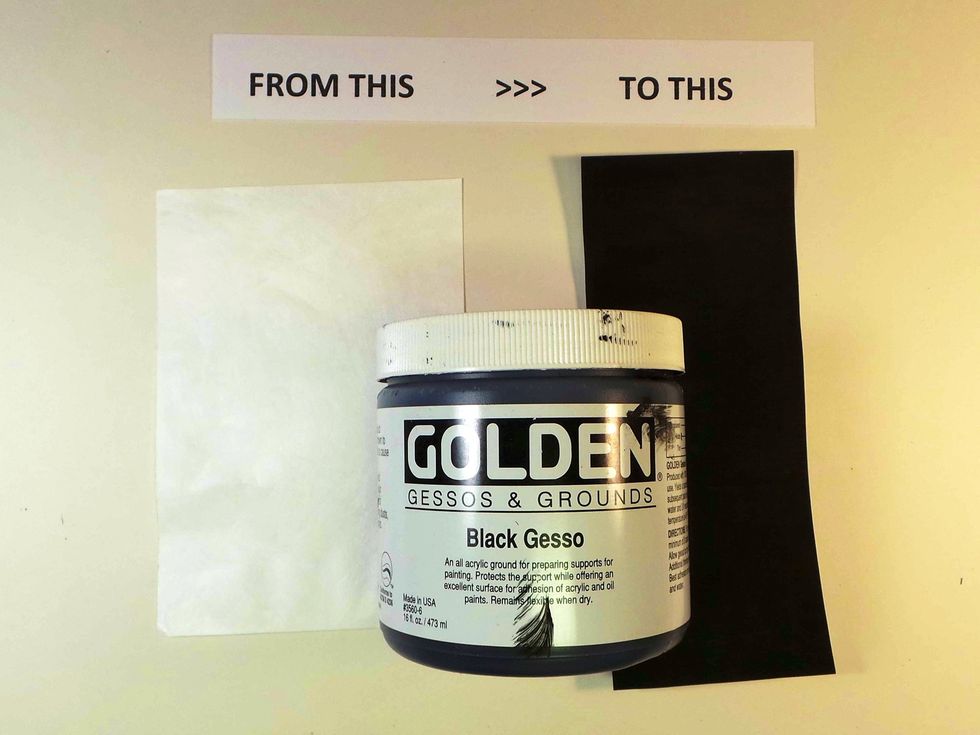
Paint Tyvek black using paint or gesso
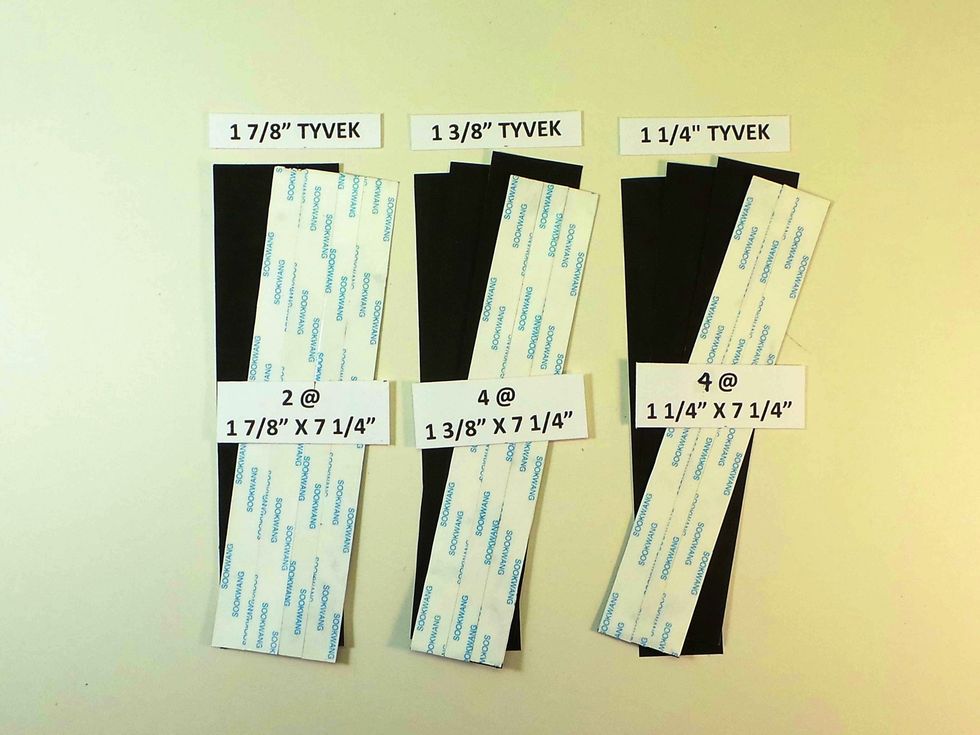
Cut Tyvek into 10 strips, all 7 1/4” long … 2 @ 1 7/8” wide … 4 @ 1 3/8” wide … 4 @ 1 1/4” wide Then add 1/2” Scor-Tape or similar to the long edges of all 10 pieces...
It is important to use either 1/2" tape or equivalent (2 strips of 1/4" tape) on the edges – this will make construction much easier. Fill in between the 1/2" strips with more Scor-Tape to cover Tyvek
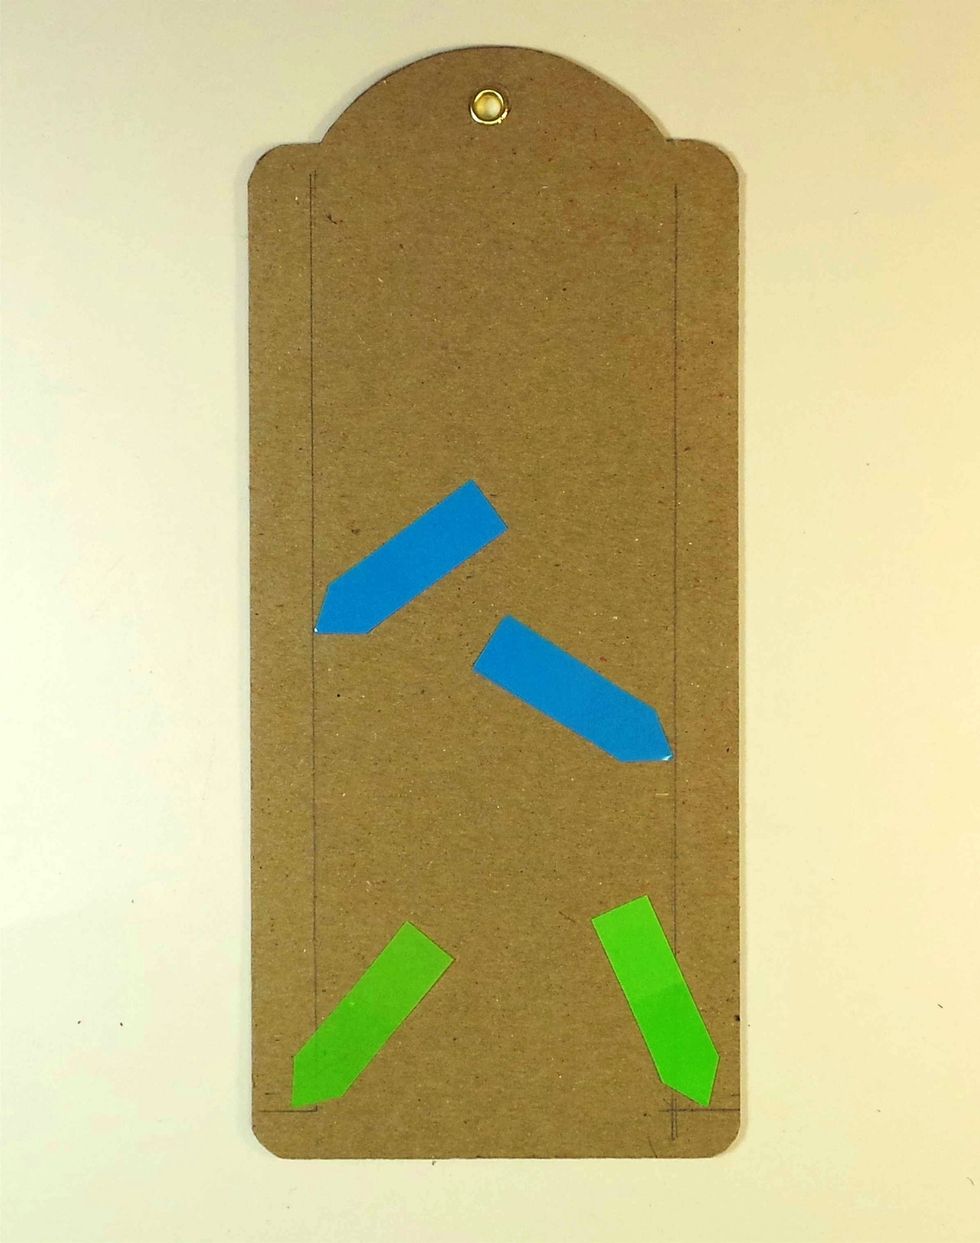
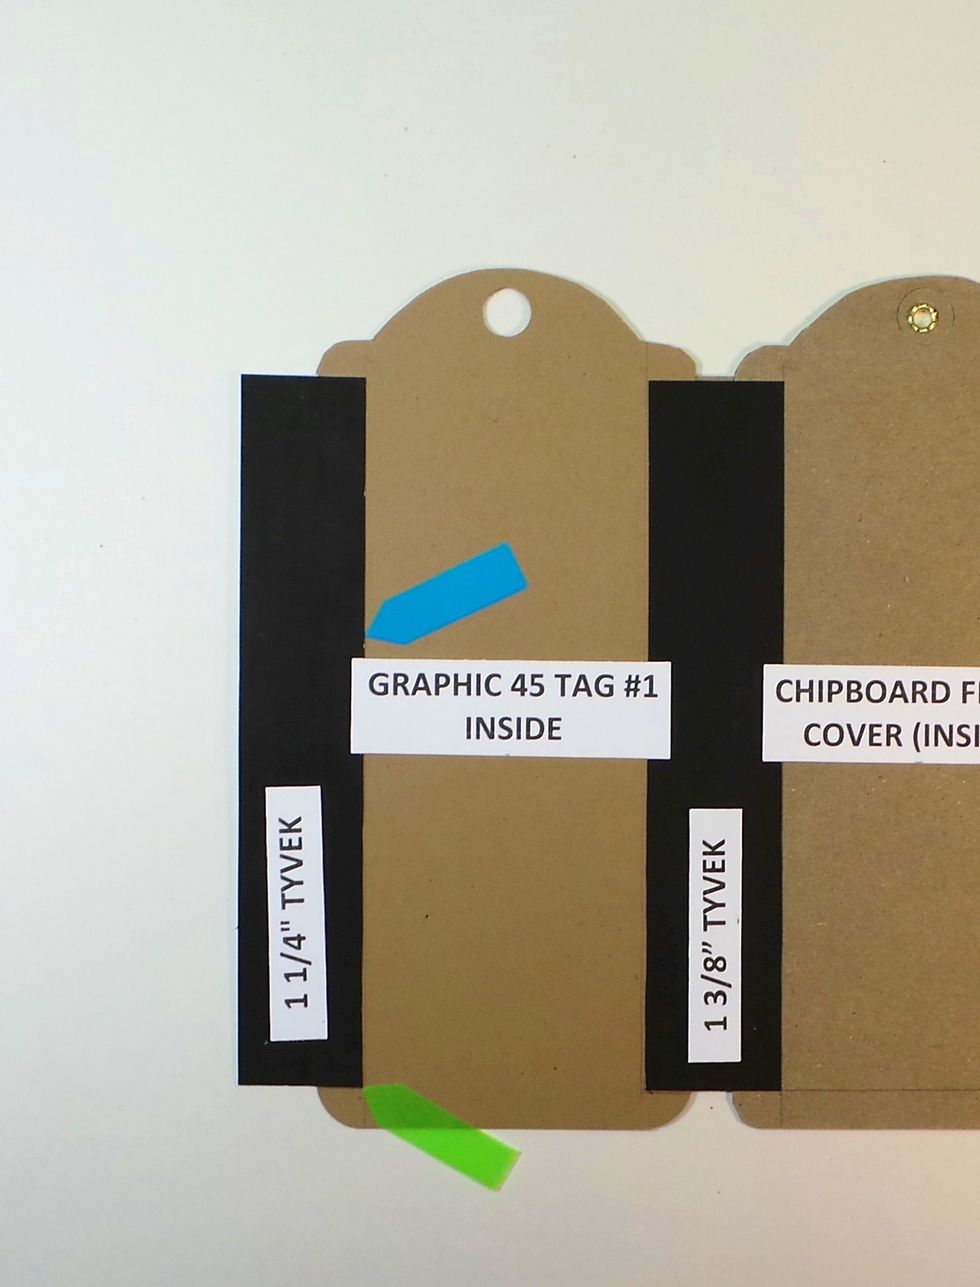
Prep all 6 tags by drawing a pencil line 1/2" from the vertical edges (blue arrows) and tick marks 3/8" from the bottom edge. Do this on both sides of each tag.
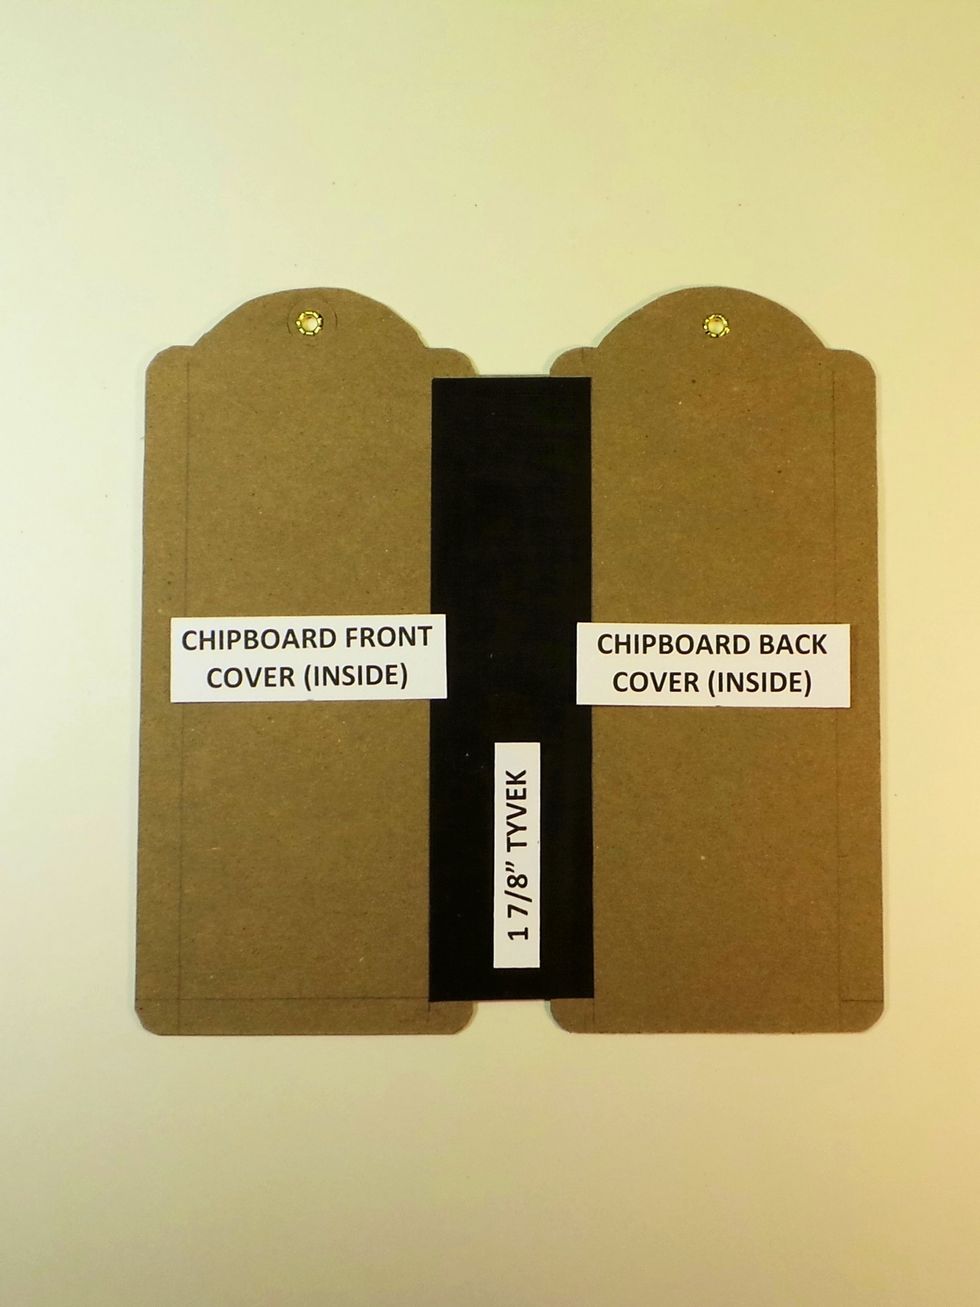
First we will join the main spine between the two chipboard tags (the covers) with the 1 7/8" Tyvek strip
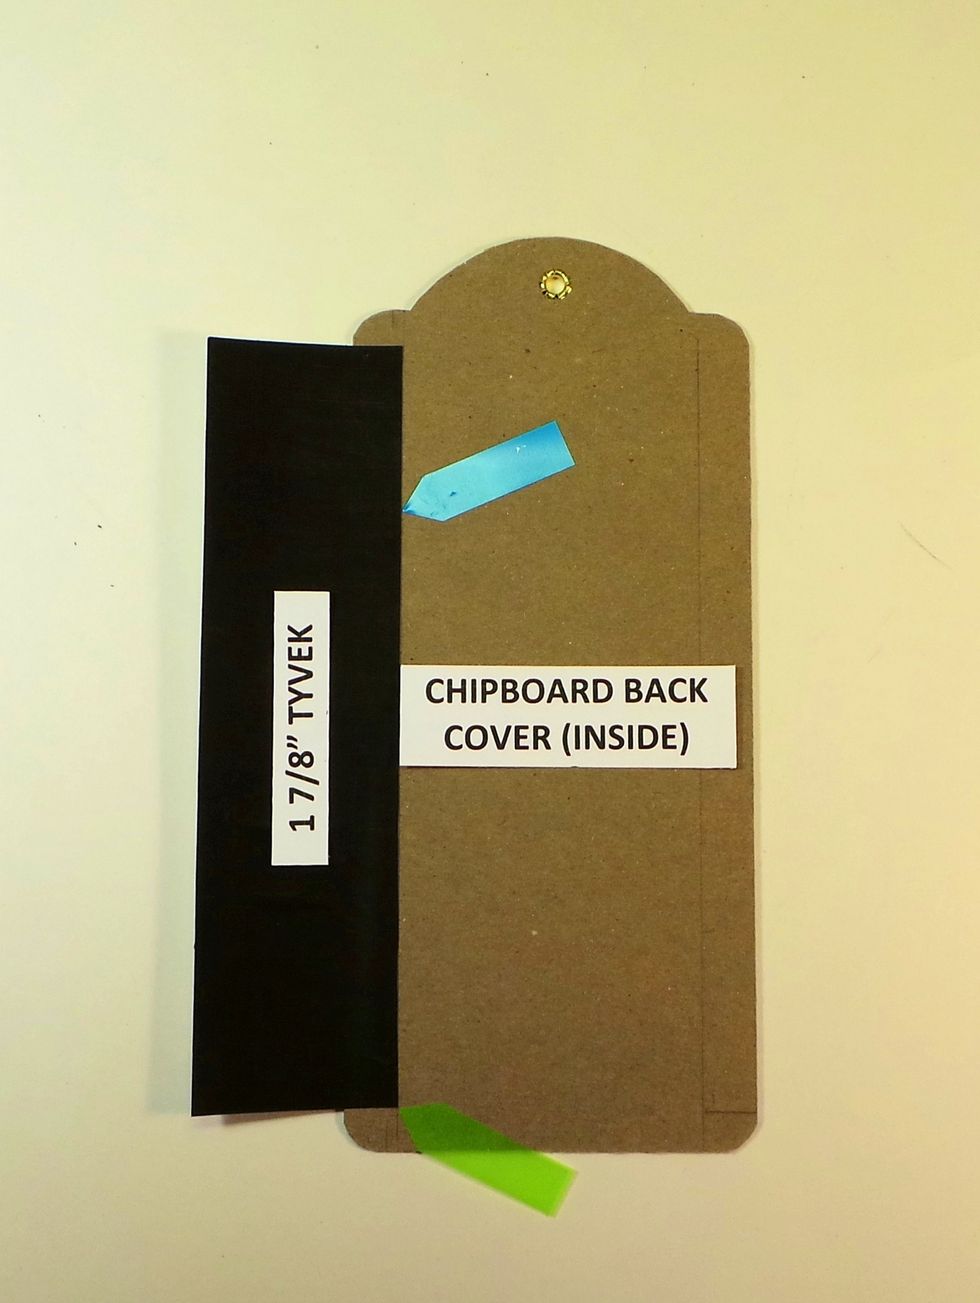
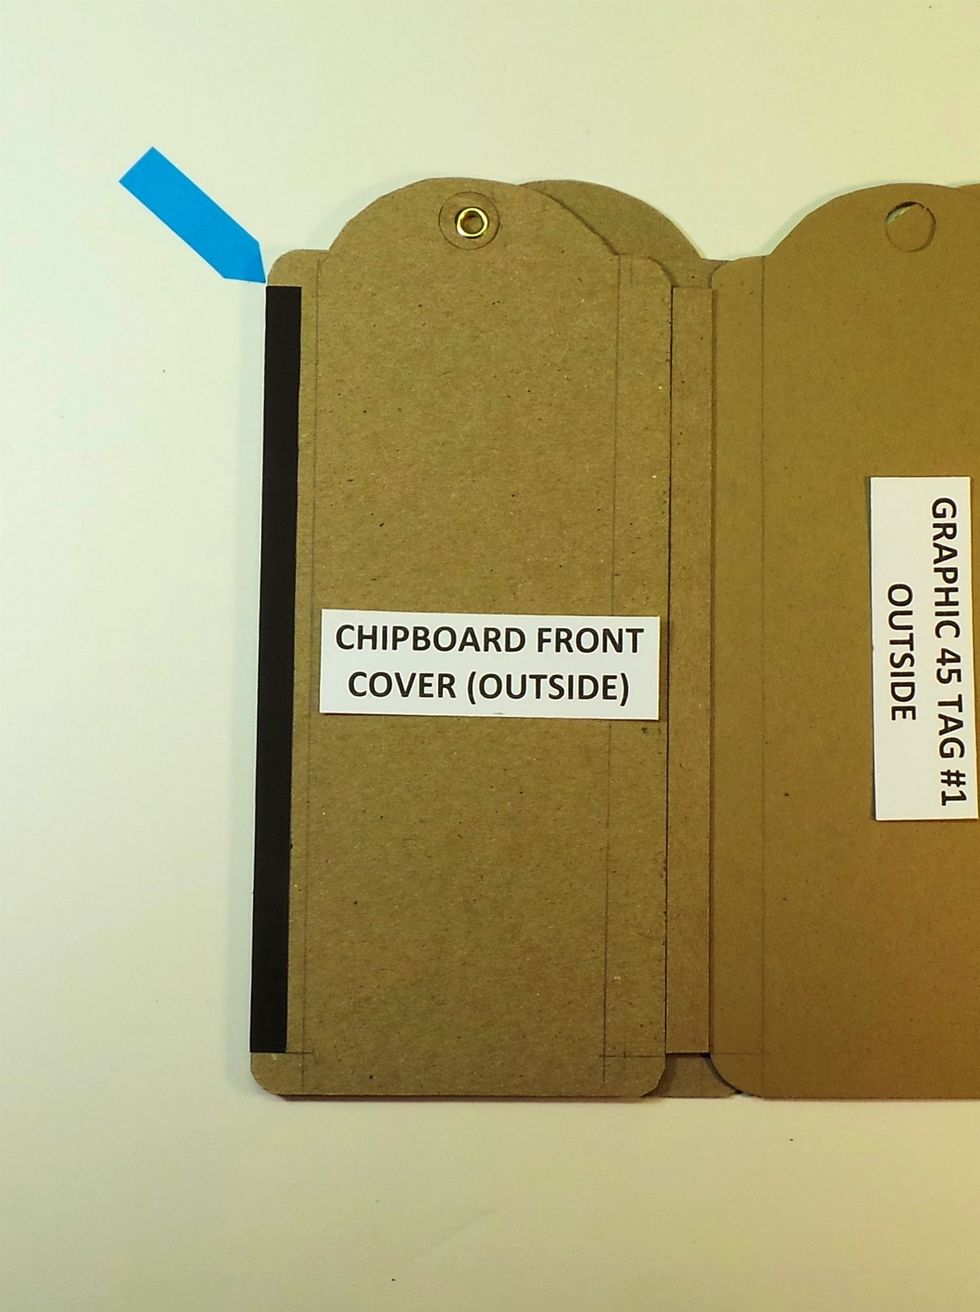
Place a Chipboard tag with inside facing up. Remove 1/2" tape backing from 1 edge of 1 7/8" Tyvek Align bottom corner with 3/8" line (green arrow), right edge with 1/2" line (blue arrow). Burnish
Flip Assembly over
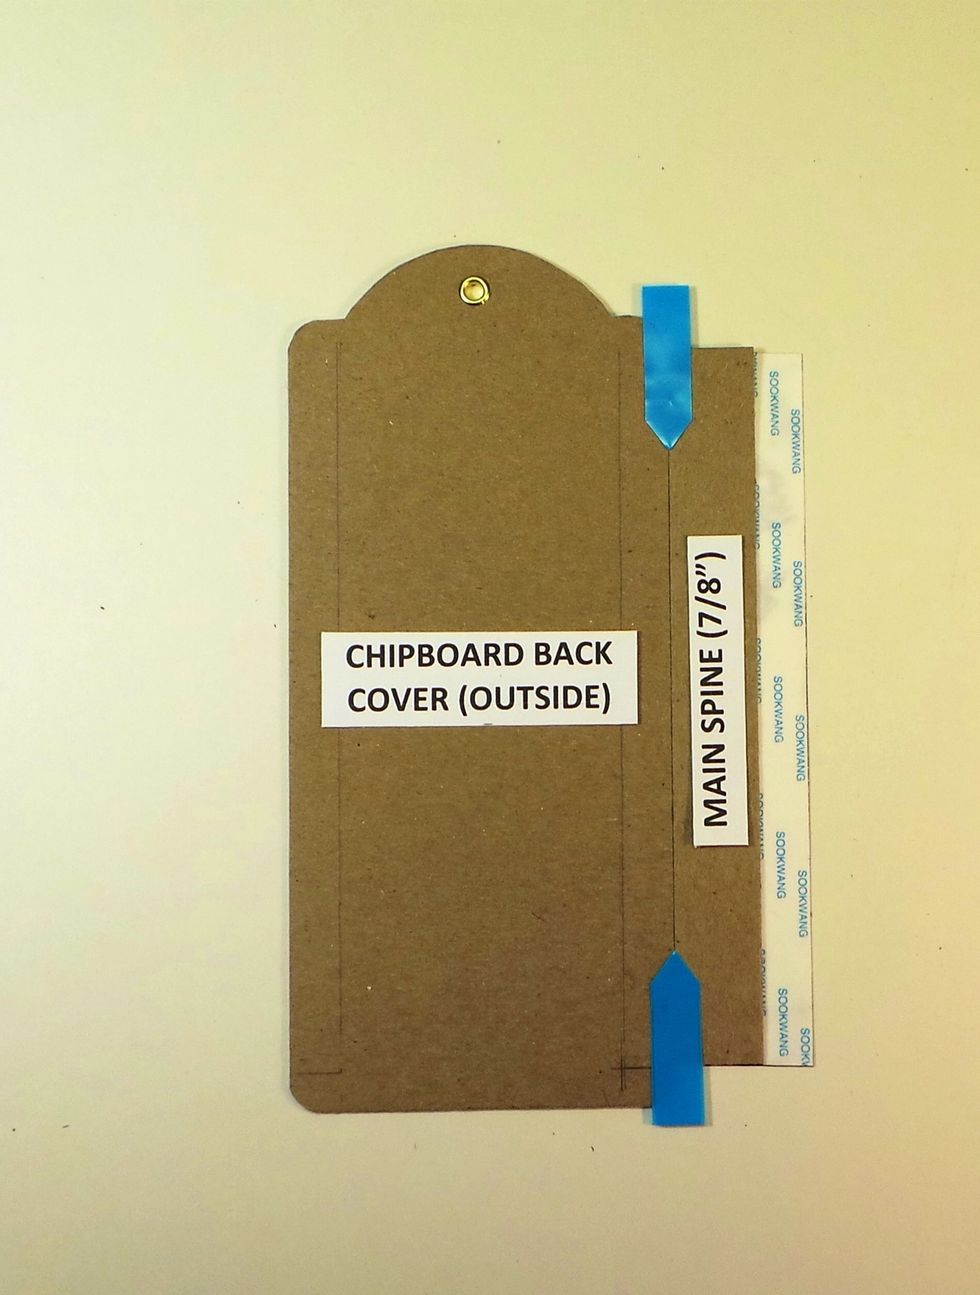
Remove tape backing from center of Tyvek strip and add main chipboard (7/8") spine, butting it against chipboard tag. Line up top and bottom edges of spine with Tyvek. Blue arrows = butt joint.
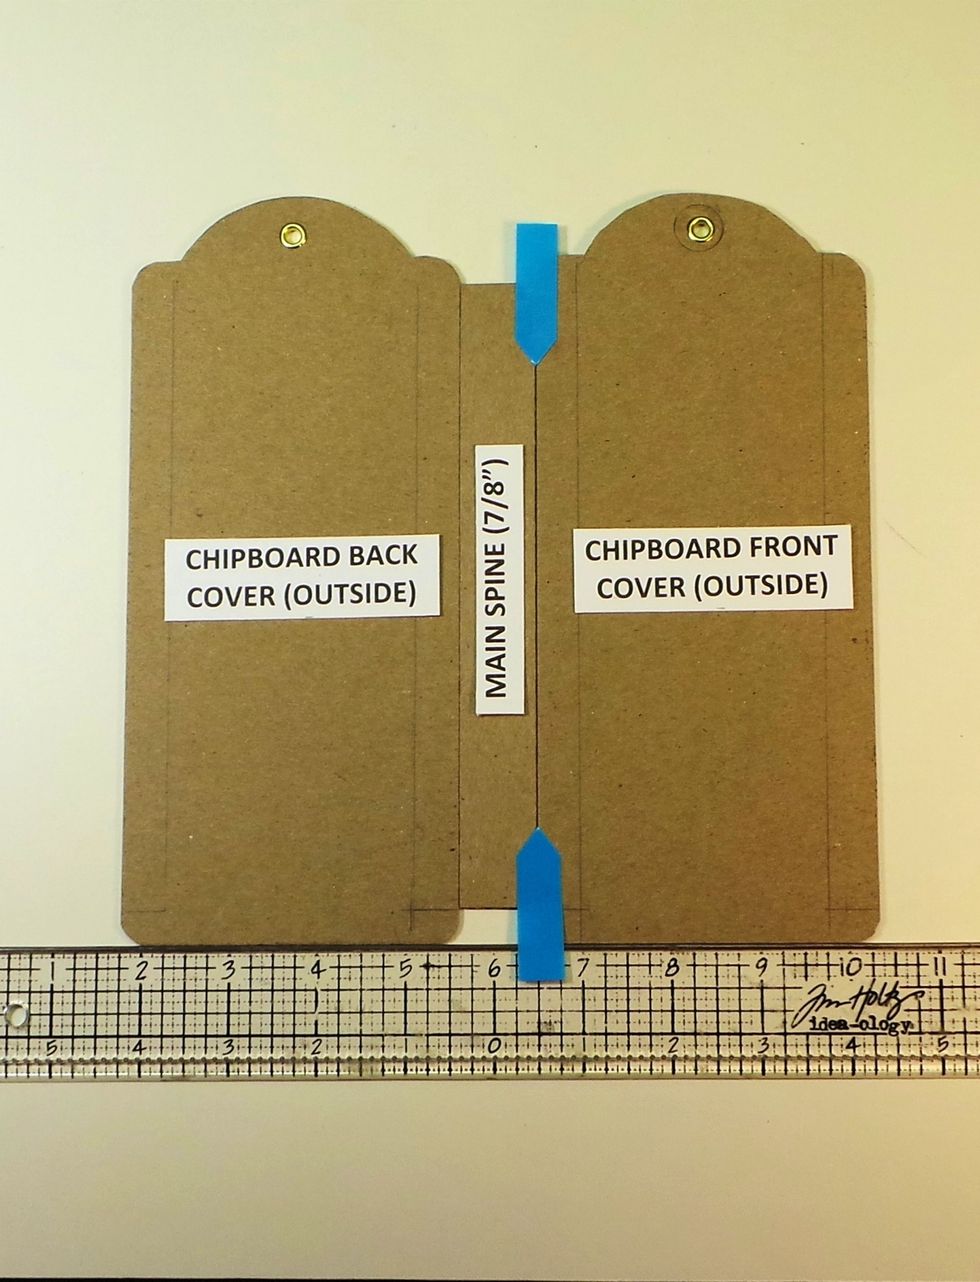
Remove backing from remaining Scor-tape and butt the other chipboard tag against the spine (blue arrows). The outside of tag should be facing up. Use a straight edge to keep everything in alignment.
Flip assembly over
Back on the inside now. Give the Tyvek a good burnish.
Next we will add the 3/8" spine between the front chipboard tag and the first paper Graphic 45 tag
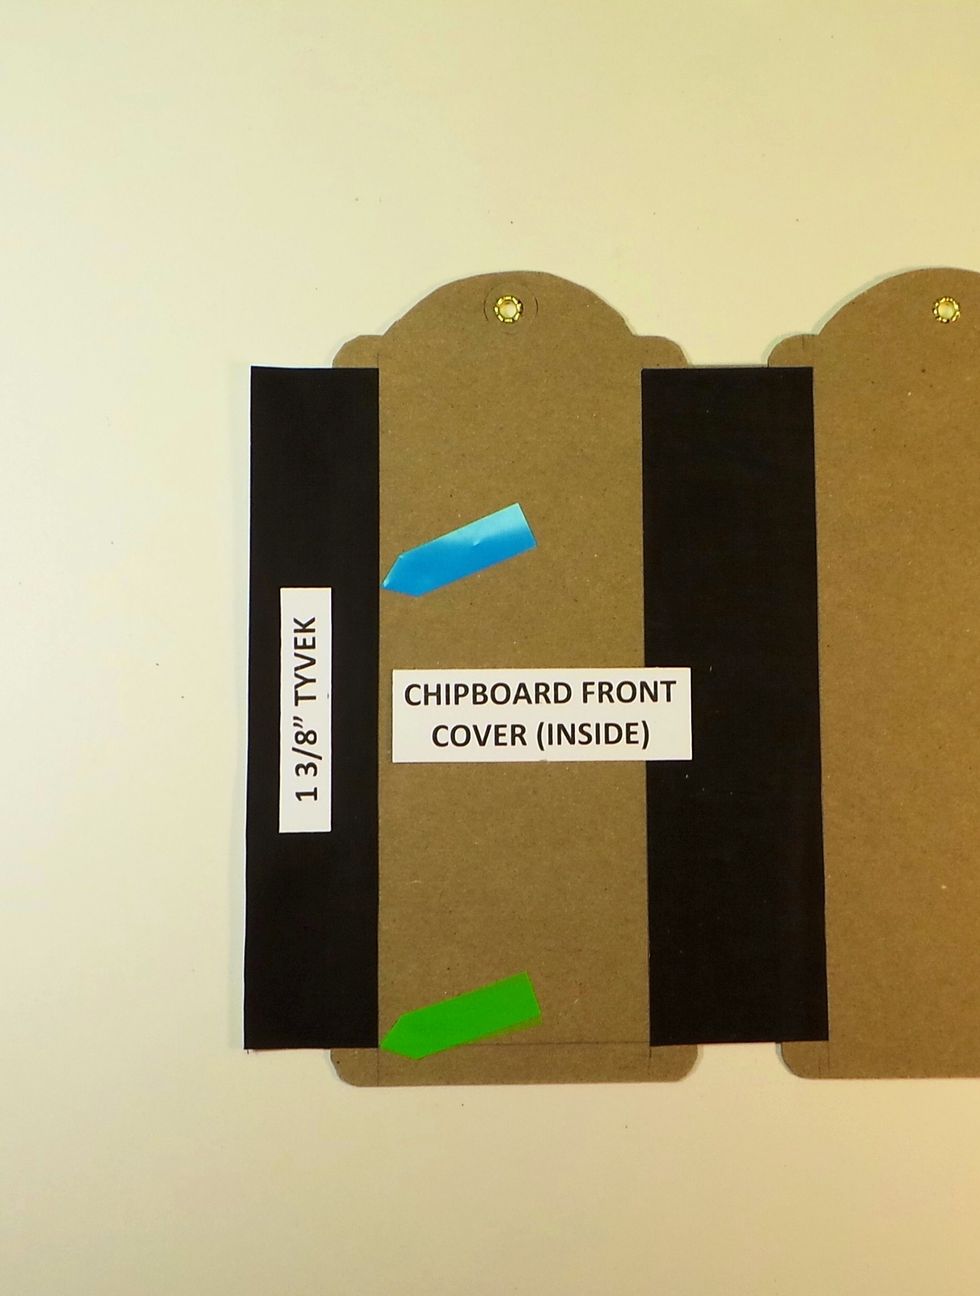
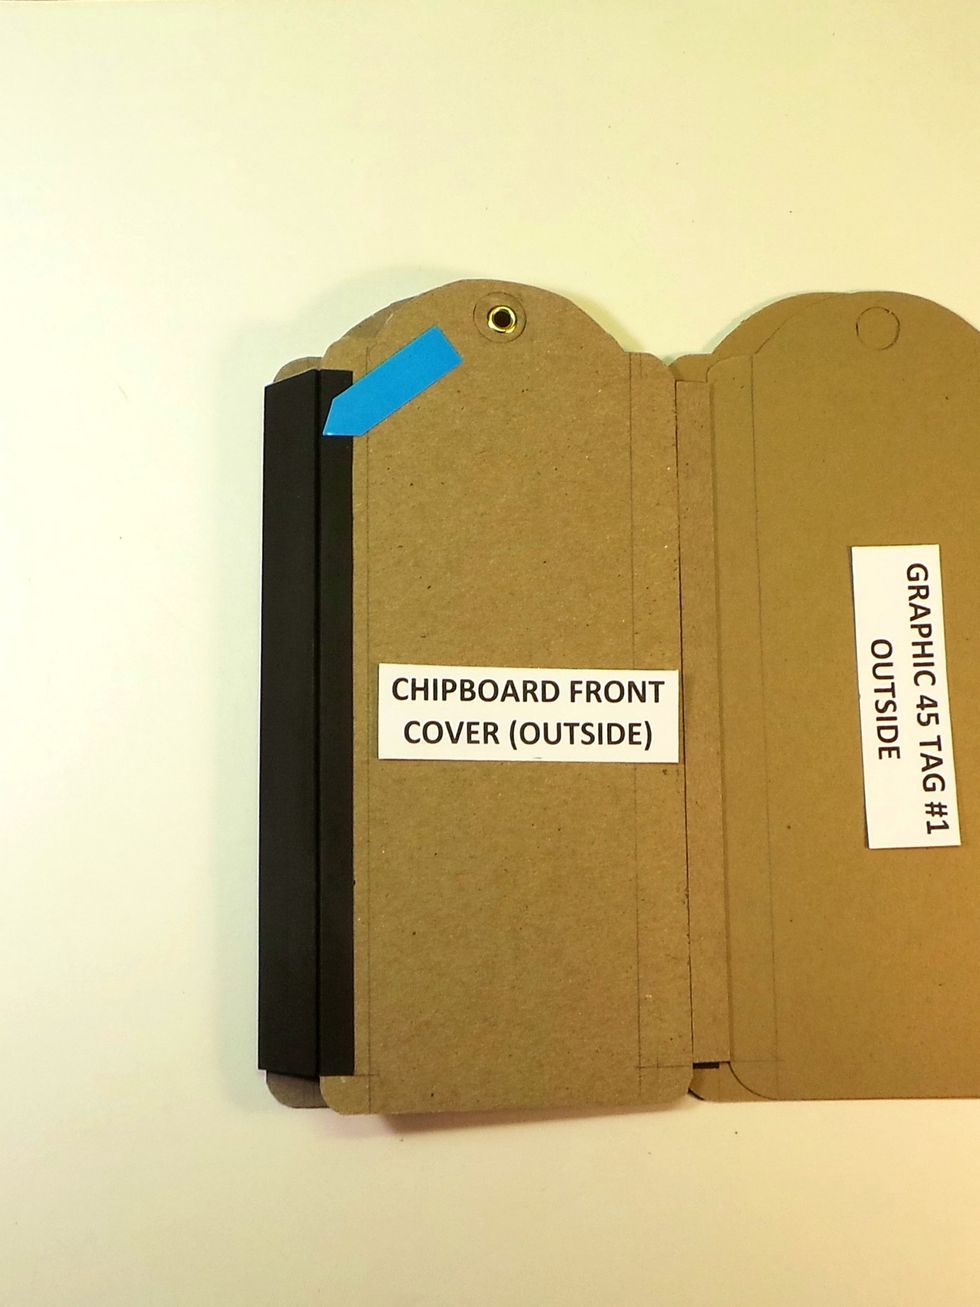
Remove tape backing from one side of 1 3/8" Tyvek strip. Add to the left side of the inside front cover. Line up vertical edge with 1/2" line on tag (blue arrow) & bottom with 3/8" line (green arrow)
Flip Assembly Over
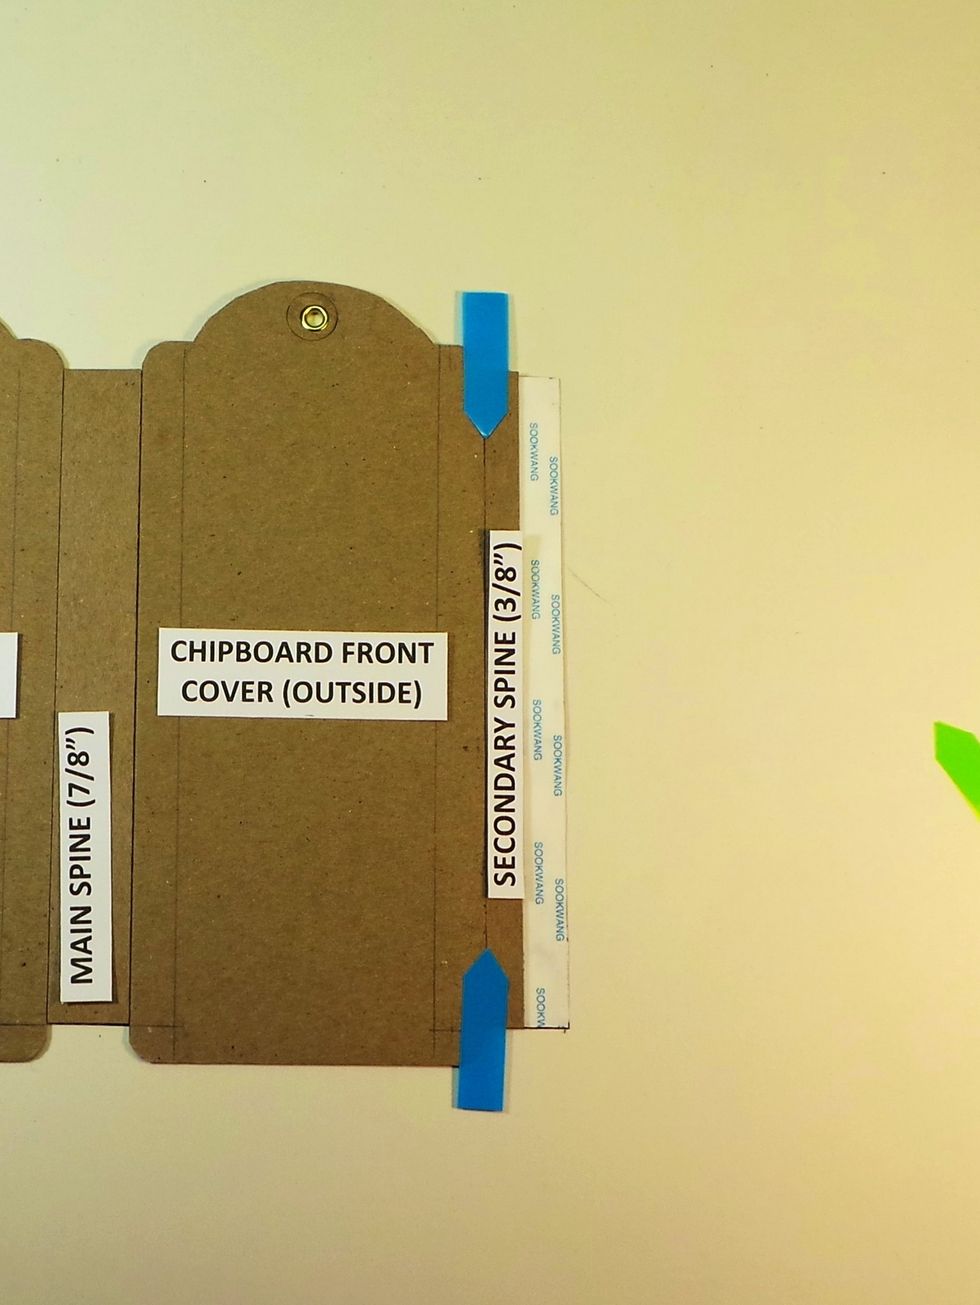
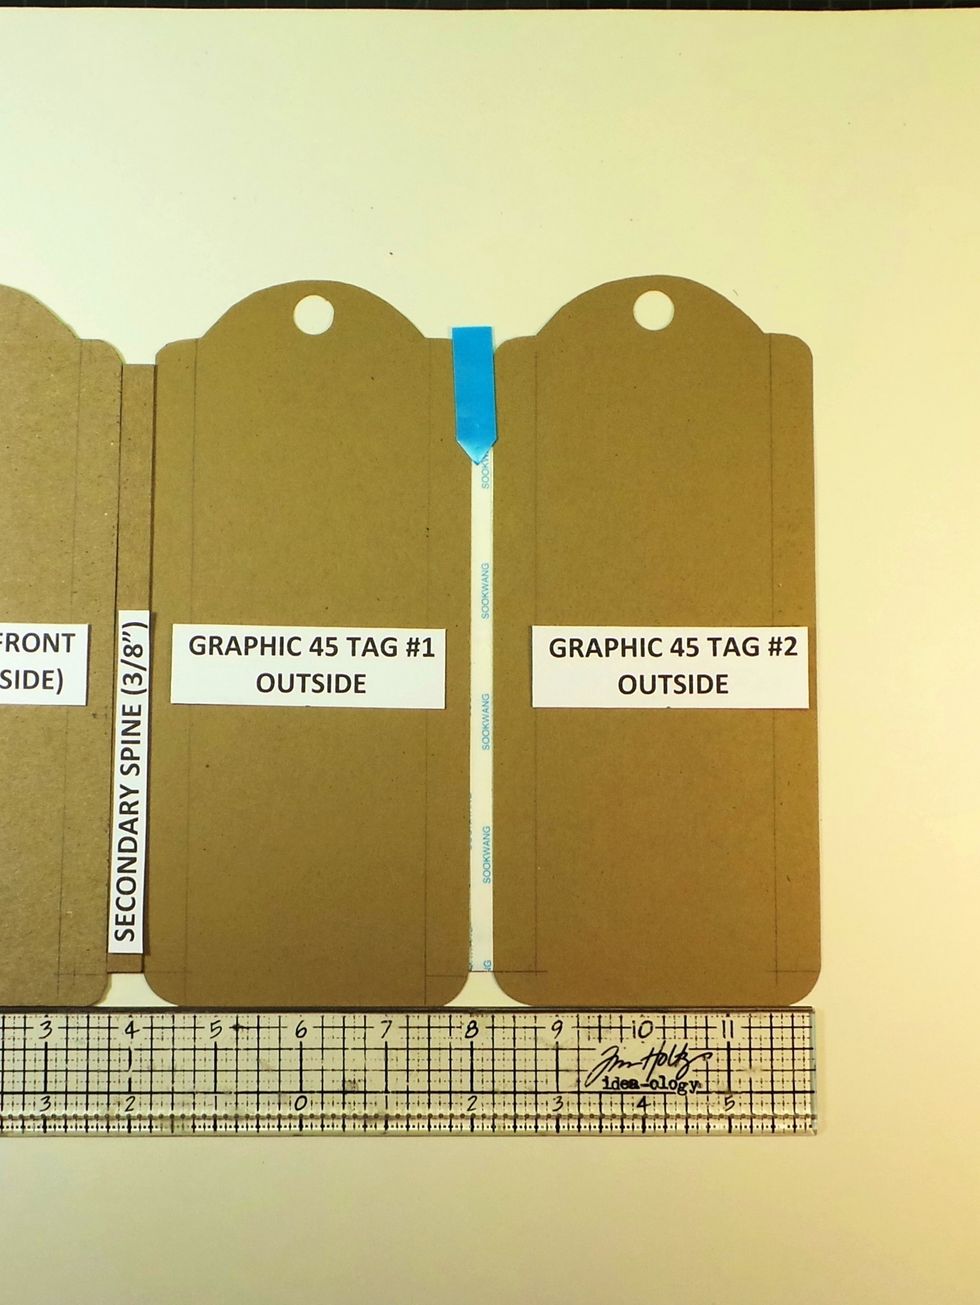
Remove backing from center Scor-tape strip on Tyvek and butt one of the secondary (3/8") spines against the chipboard tag (blue arrows) . The outside of chipboard tag should be facing up.
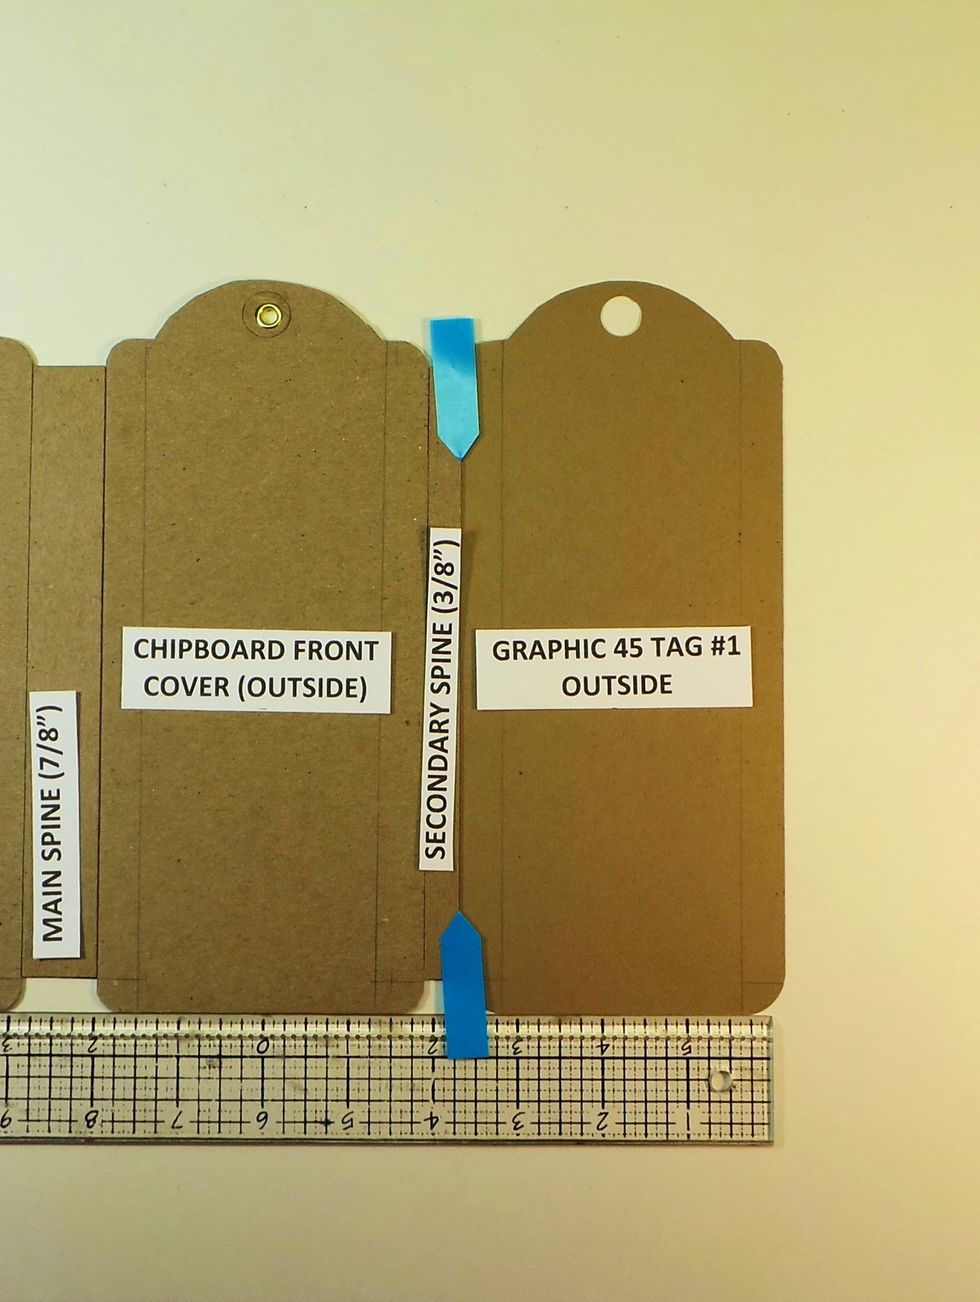
Remove backing from remaining Scor-tape and butt the a Graphic 45 paper tag against the spine (blue arrows). Outside of tag should be facing up. Use a straight edge to keep everything in alignment.
Flip Assembly Over
Back on the inside now. The red arrow shows the black Tyvek we just finished adding, and the new paper tag is on the left. Give the Tyvek a good burnish.
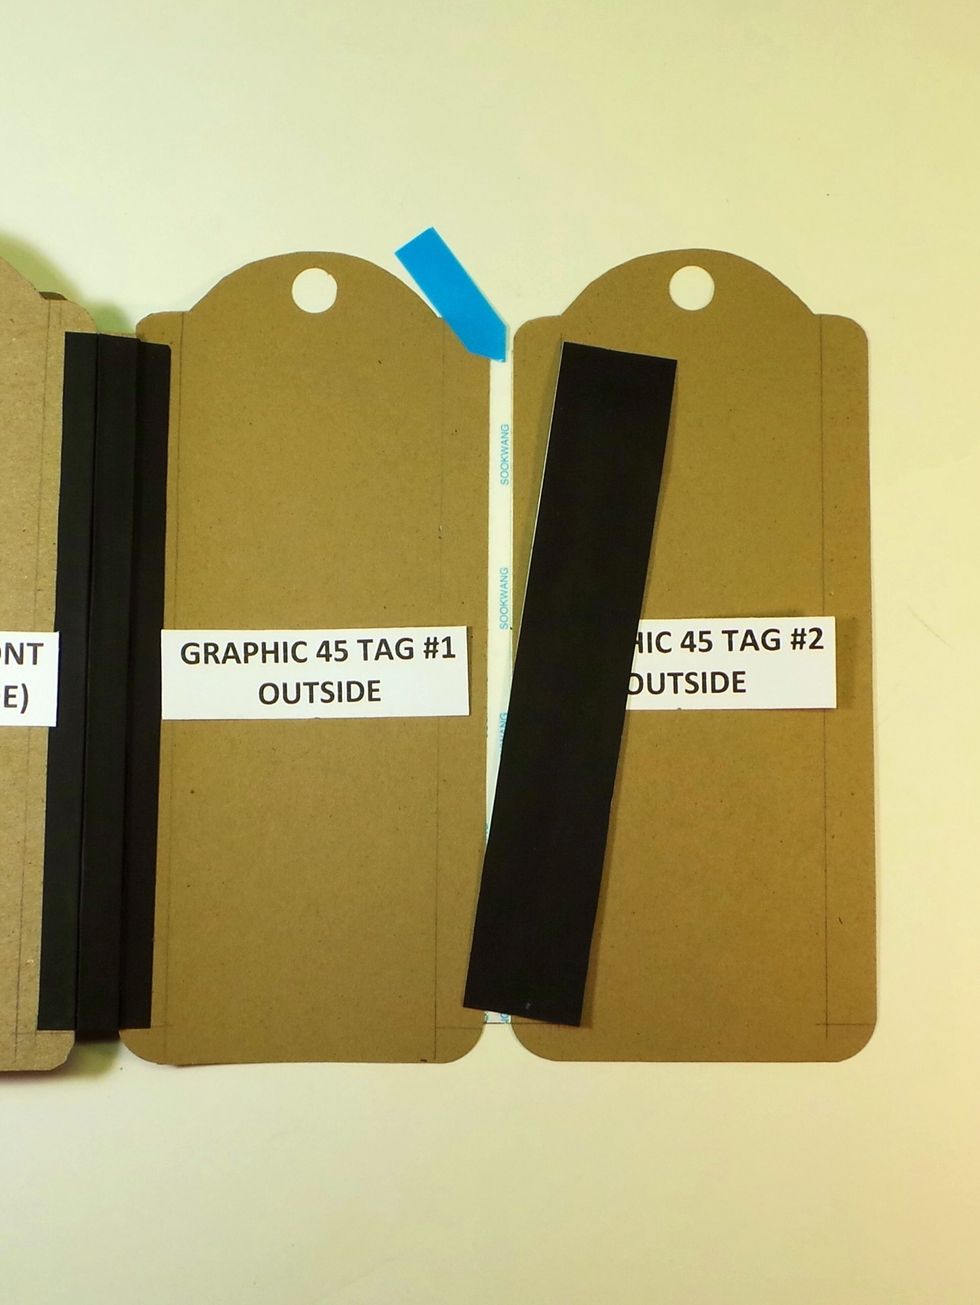
Next we will add another Graphic 45 paper tag to the left of the first one using an 1 1/4" Tyvek strip
Remove backing from one side of a 1 1/4" Tyvek strips. Add to the left side of Graphic 45 Tag #1. Line up vertical edge with 1/2" line on tag (blue arrow) & bottom with 3/8" line (green arrow)
Flip Assembly Over
Remove the backing from the 1/2" Scor-Tape on the edge. Leave a 1/4" gap between the two G45 tags. The 1/4" Scor-Tape is a good guide (blue arrow). DON'T REMOVE the backing yet from 1/4" strip.
Flip Assembly Over
Back on the inside now. The red arrow shows the black Tyvek we just finished adding, and the new paper tag is on the left. Give the Tyvek a good burnish.
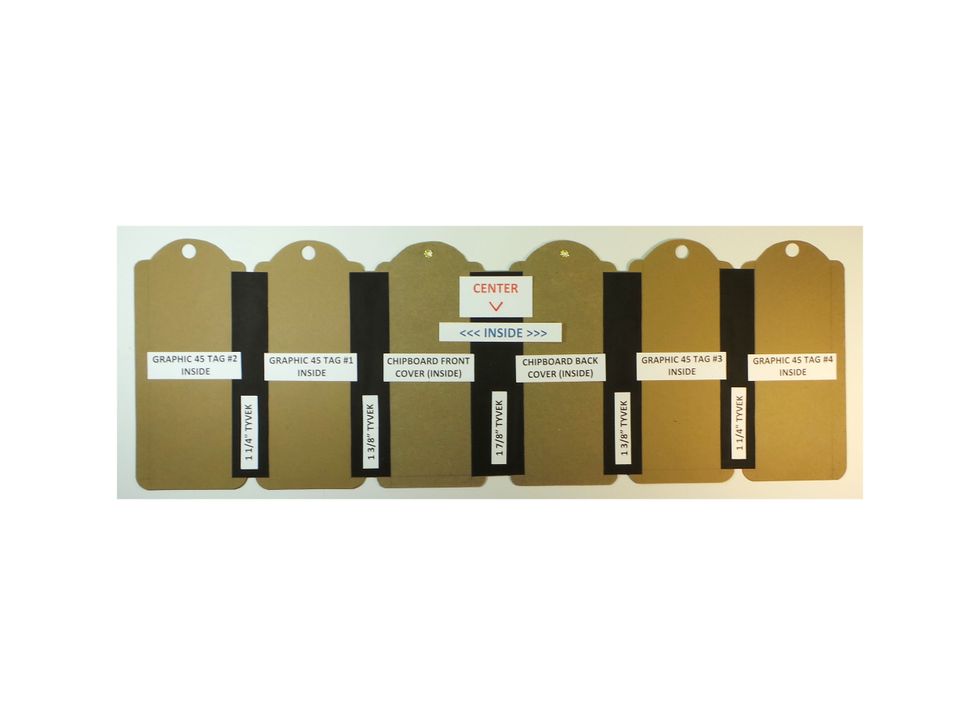
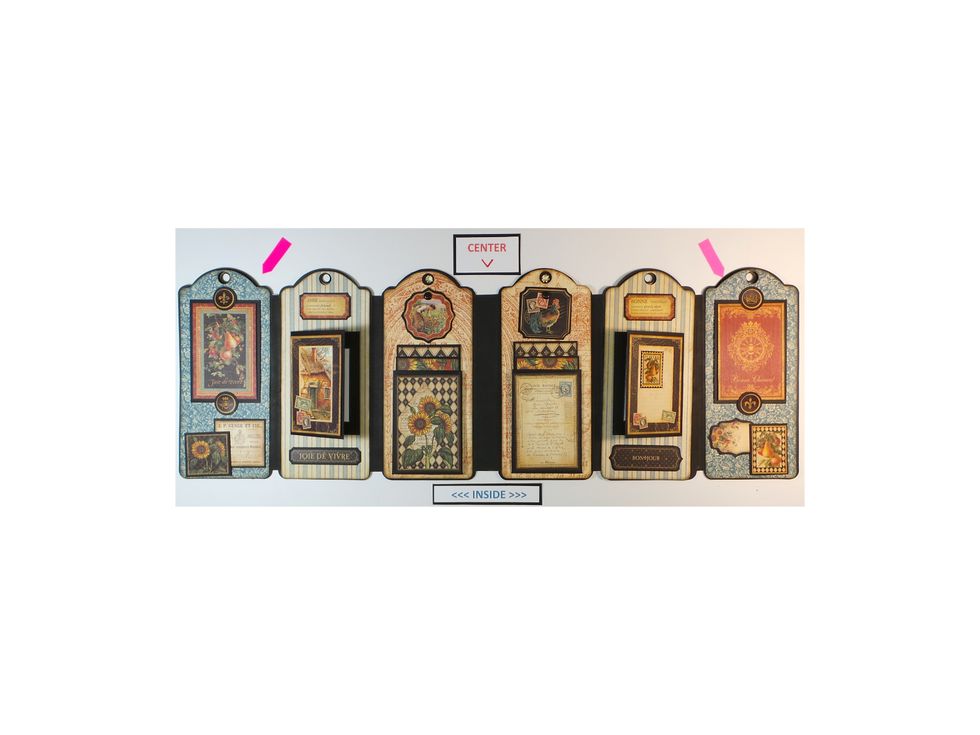
Repeat Steps 16-28 to add two Graphic 45 paper tags to the RIGHT SIDE, adding them to the other chipboard tag (the back cover). This photo shows what it should look like at this point.
Now let's add some Tyvek to give the outside of the spines a finished look. We'll start with the Main (7/8") Spine in the center and then do the Secondary Spines (3/8") & finish with the 1/4" Spines

Remove Scor-Tape backing from CENTER ONLY of the other 1 7/8" Tyvek strip. Center on the outside Main Spine using the 1/2" guide lines (blue arrows). Burnish in center only.
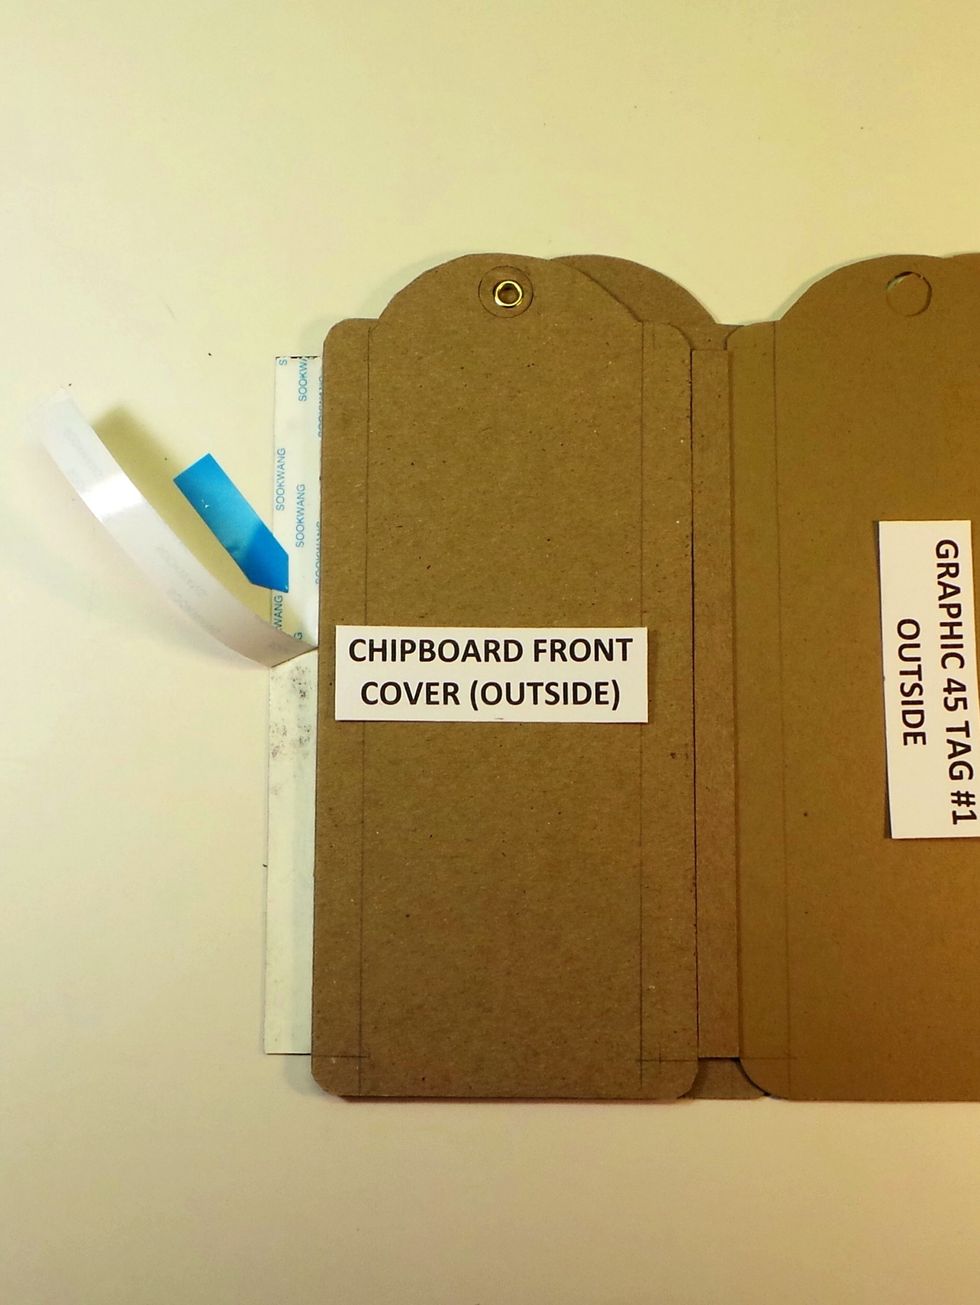
Flip the back cover underneath the Front cover and remove the Scor-Tape backing from the exposed 1/2" of the Tyvek strip
Wrap Tyvek around corner in two steps - FIRST burnish on the 1/8" edge, then wrap onto the front of the tag. Note the Tyvek will not reach the 1/2" line- that was just a centering guide. Burnish well
Repeat Steps 32-33 to fold the Tyvek over the opposite edge. Burnish well. When completed, the Main Spine should look like this with definite creases where spine meets tag.
Repeat Steps 31-34 to add Tyvek to the Secondary Spines. The only difference is that you will use 1 3/8" Tyvek strips. Next we will finish the hinge between the paper tags on the ends.
Even though there is not a chipboard spine to cover between the two paper tags, you will finish the "spine" as if there were. Don't forget to remove the Scor-Tape backing from the 1st Tyvek strip!
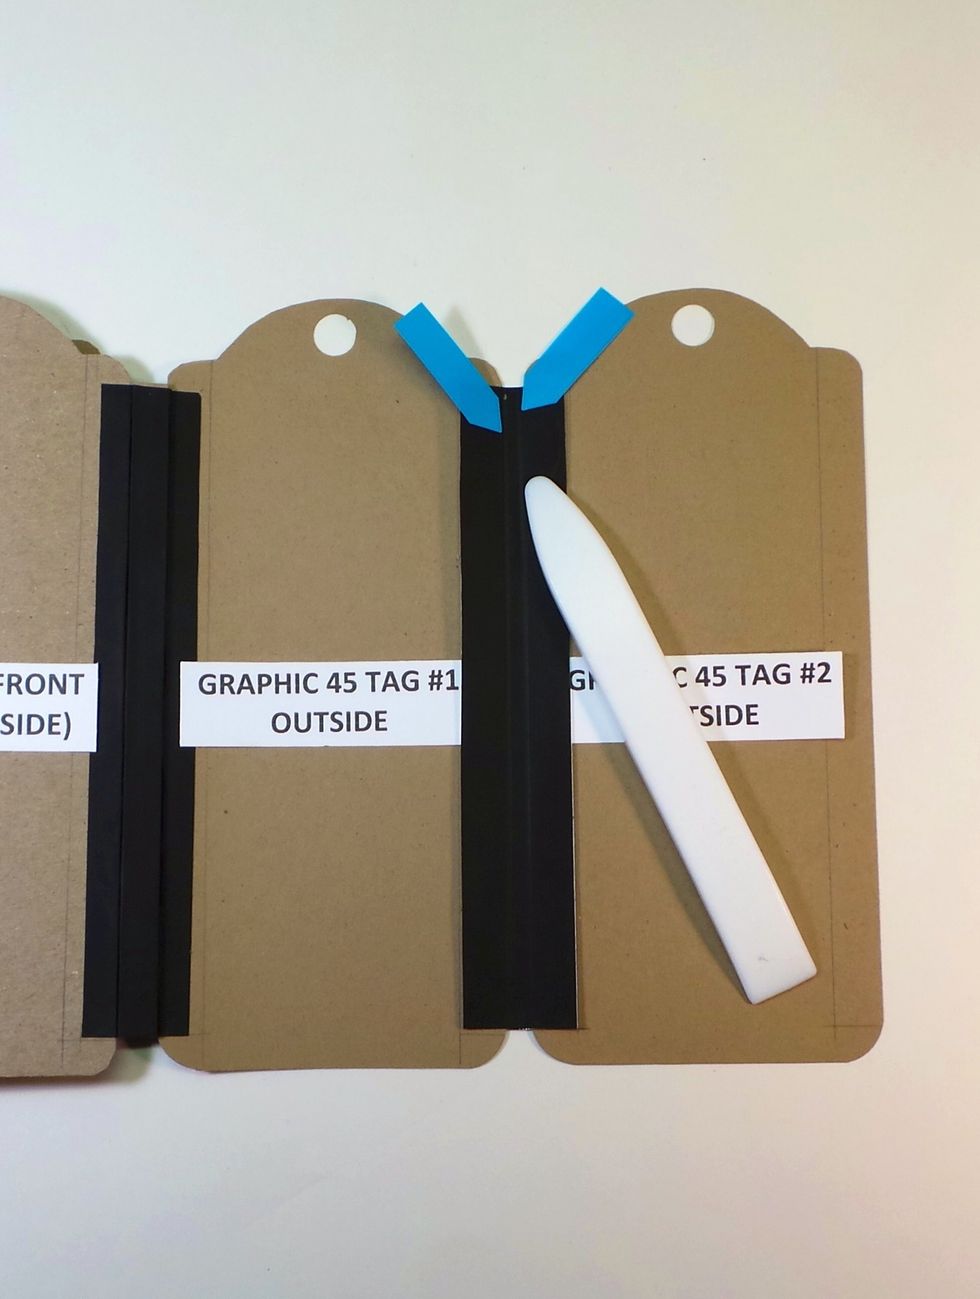
After you adhere the new Tyvek strip in the center, burnish along the edges of the tags - this will help you fold the tags to complete the finishing. This 1/4" "spine" is just Tyvek.
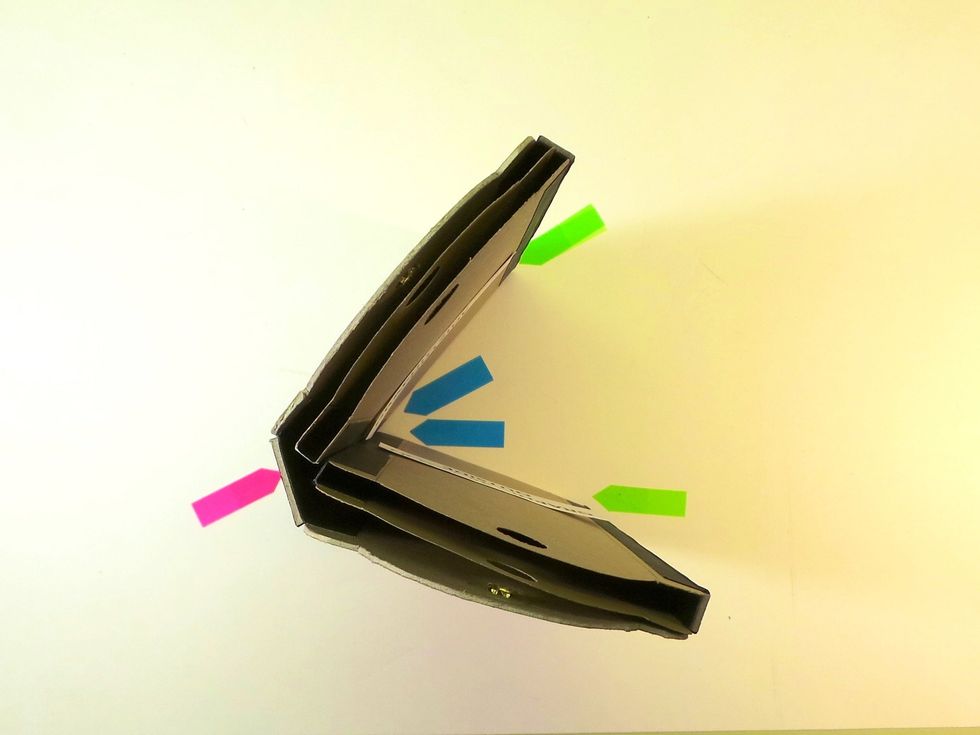
Here's what the skeleton of the mini-album looks like from above. Red = Main (7/8") Spine between covers, Green = 3/8" spines and Blue = 1/4" spines. The album folds in on itself from both sides.
It's time to make backgrounds, pockets and fold-outs, photo mats for 2" x 3" photos, and select all our Graphic 45 French Country paper decorative elements and back them with black cardstock.

Use the template we created in Step 4 to cut 12 backgrounds. I'm using the black for the covers. Ink edges if/as desired (throughout the project I used Distress Ink Gathered Twigs and Black Soot)
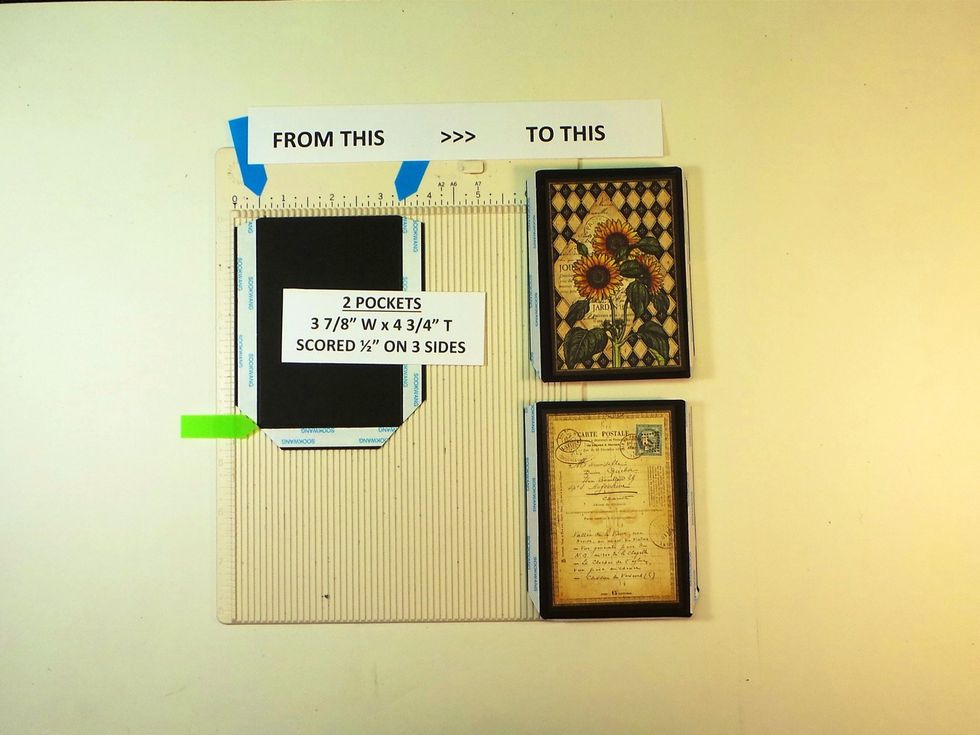
Make 2 pockets. Cut 3 7/8" W x 4 3/4" T. Score @ 1/2" on 3 sides. Add Scor-Tape to scored edges and miter corners. Add a cut-apart from 8x8 pad to the side with Scor-Tape. Fold on score lines.
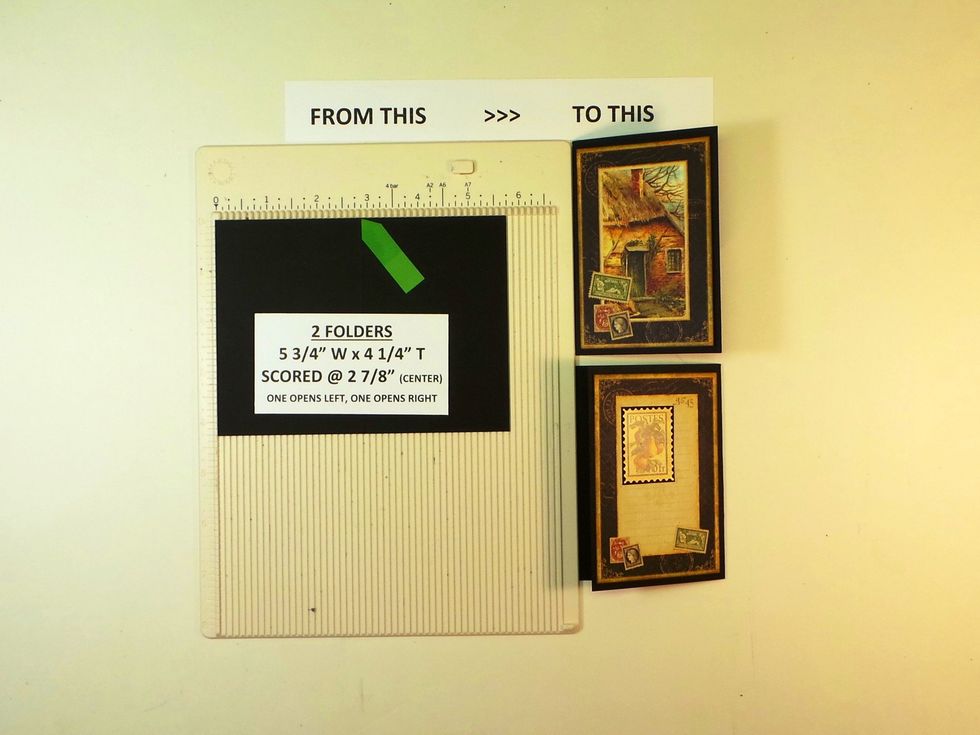
Make 2 Folders. Cut black cardstock 5 3/4" W x 4 1/4" T and score in center (2 7/8"). Add cut-apart from 8x8 pad to front (1 opens left, other right. There is room for two 2x3 photos in each folder
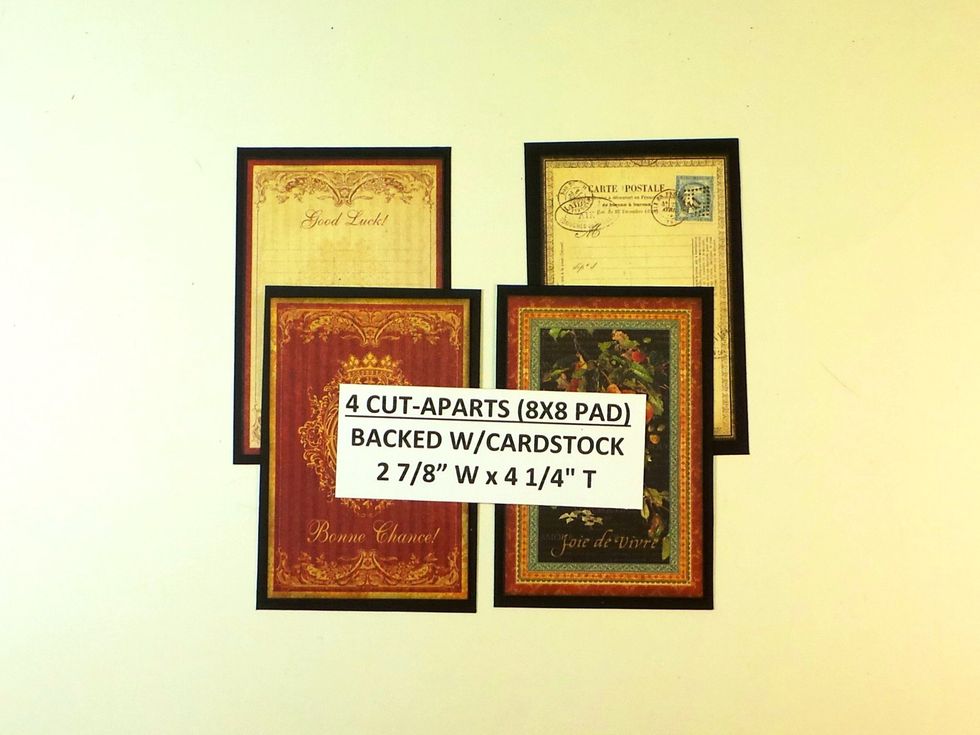
Back 4 of the cut-aparts from the 8x8 pad with black cardstock cut 2 7/8" W x 4 1/4" T. A photo can be added on the back to two of them (I did that on the darker ones in front).
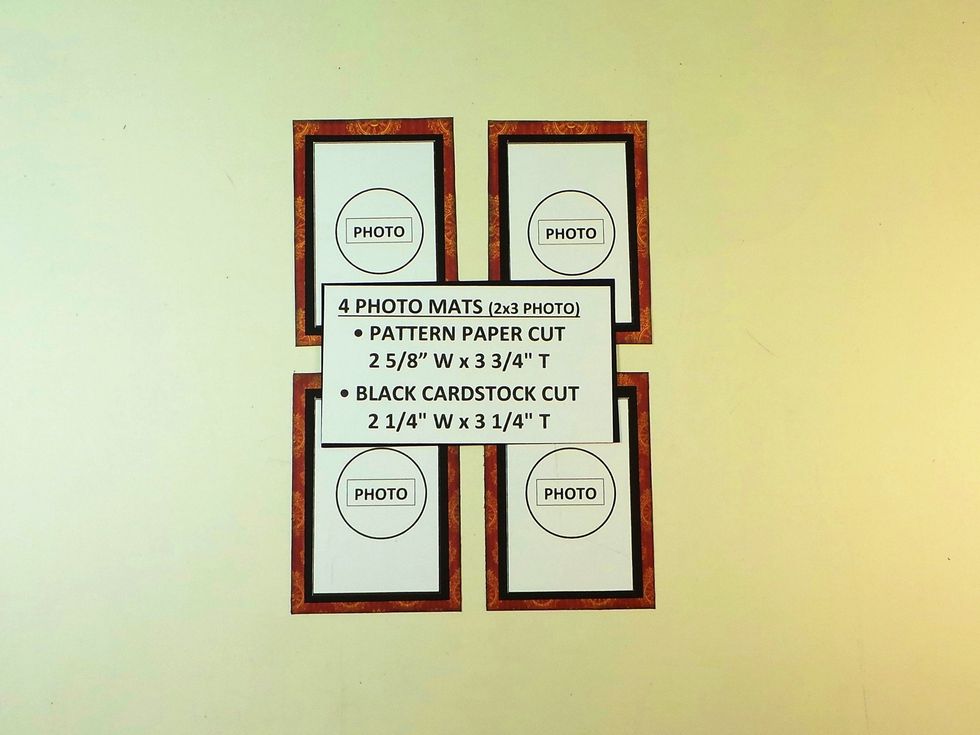
Create 4 more photo mats as shown.
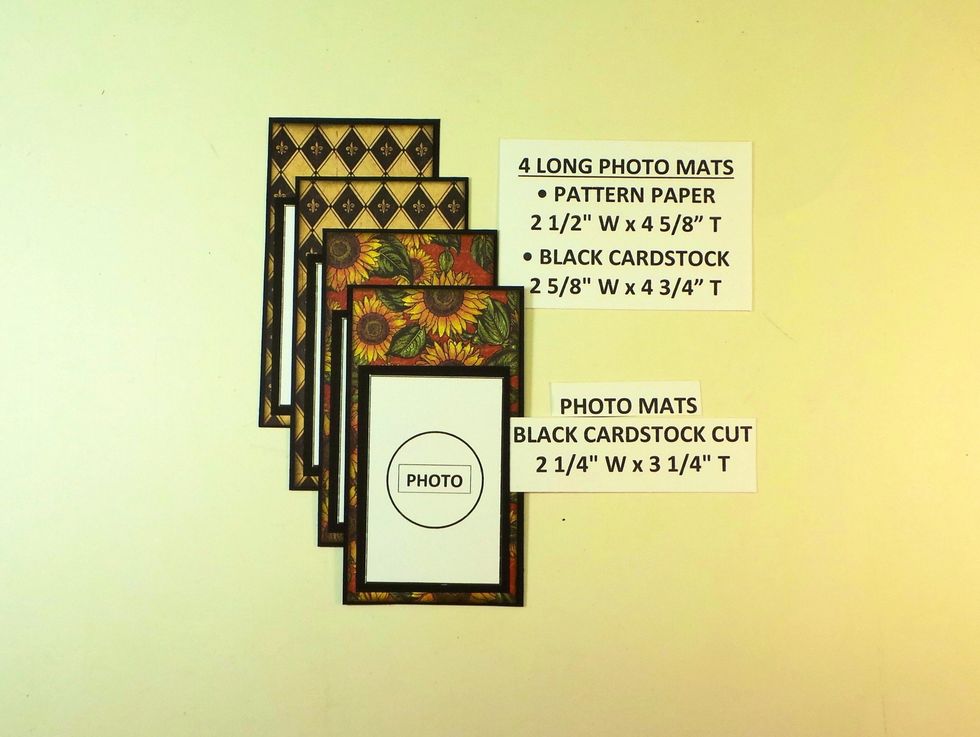
Each of the two pockets has room for 2 long photo mats. There are four layers to each long mat as follows - black cardstock, pattern paper, 2x3 photo with black cardstock mat. See dimensions above.
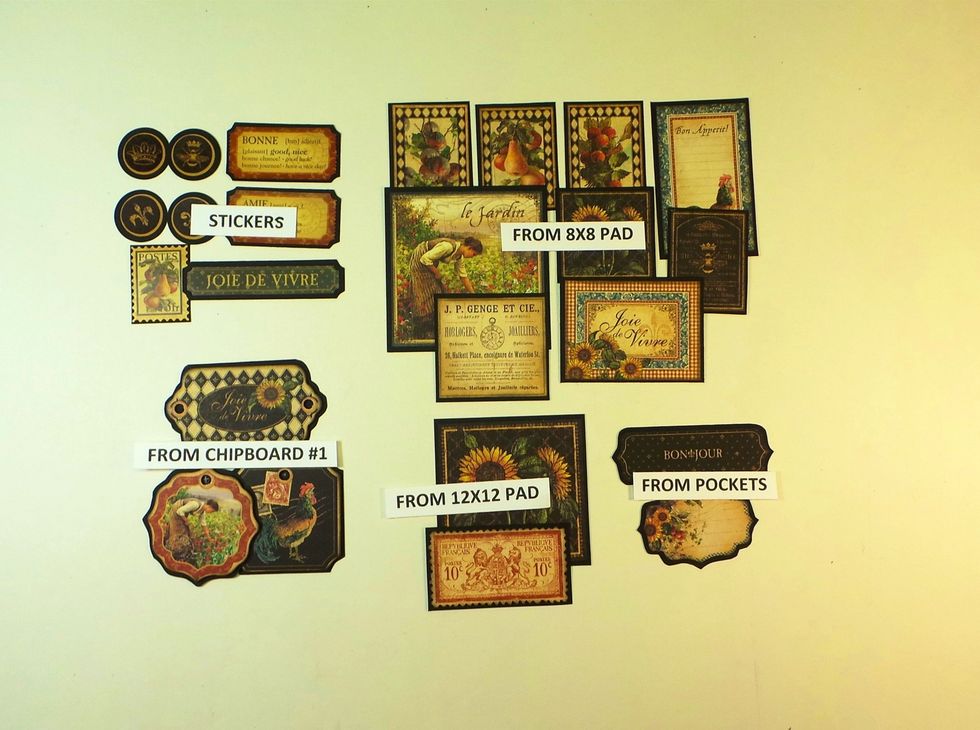
Prepare elements from Graphic 45 French Country paper & accessories as desired. Ink edges if desired and border with 1/16" reveal of black cardstock. Cut four 1" cardstock circles for round stickers
Now we can start assembling all the pages.
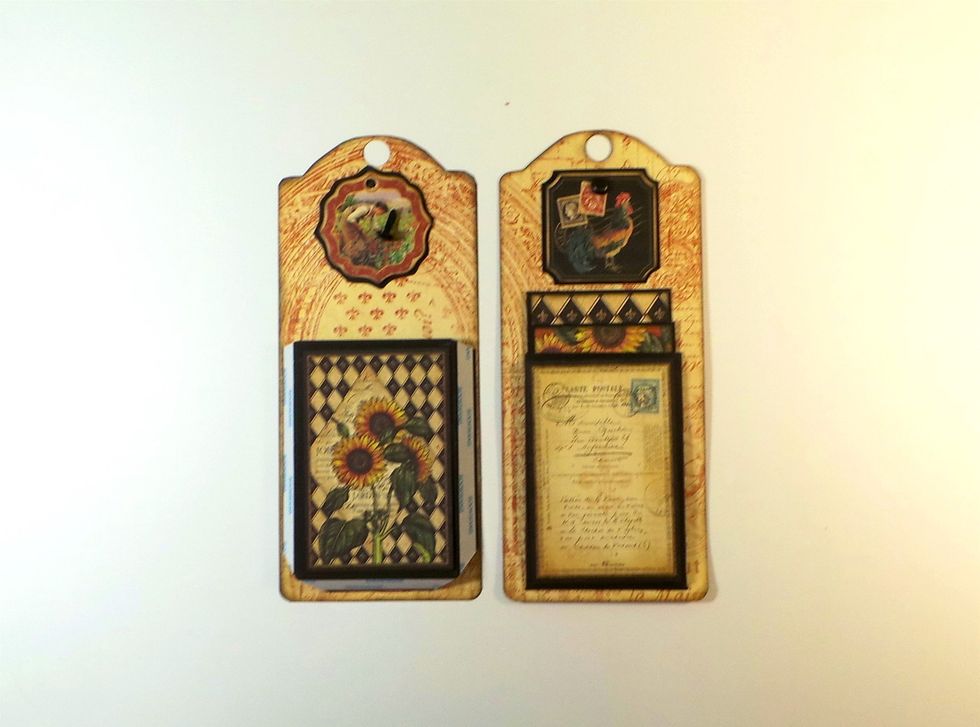
The first tags each get one of the pockets made in Step 41. Two long photo mats (Step 45) go in each pocket. Use the tags to create space in the pocket. Add a brad to the chipboard tag and adhere.

These two tags go in the center positions on the INSIDE of the mini-album. Use Scor-Tape or preferred adhesive to attach them.
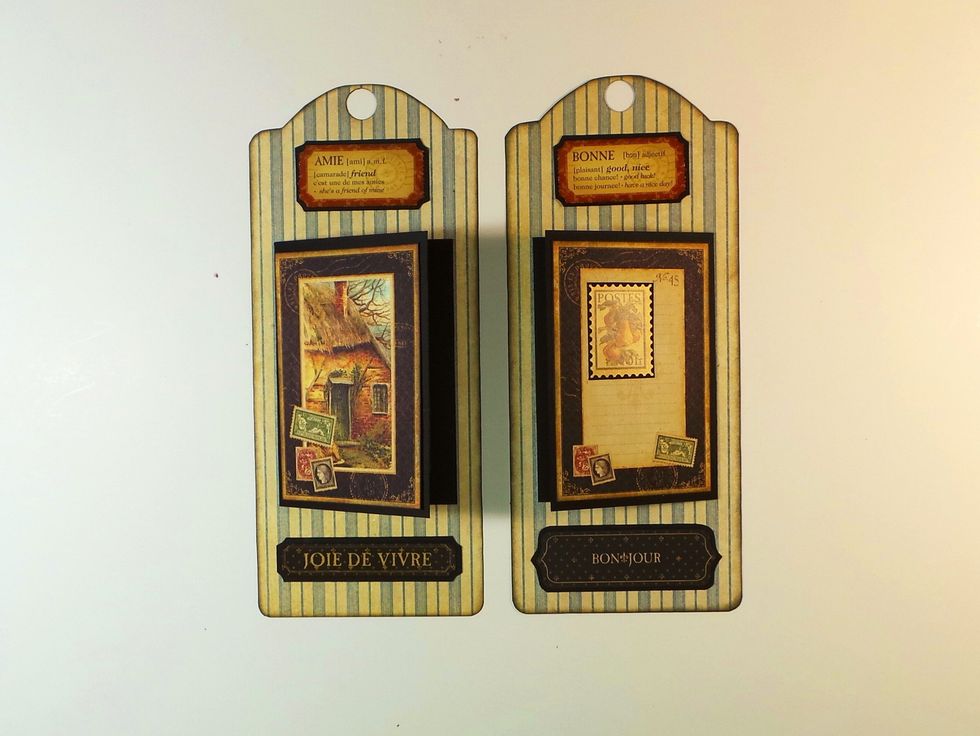
Next are tags with the folders we made in Step 42. Each has room for two 2x3 photos. The left one opens on the right; the right one opens on the left. Add other elements above and below the folders.

The tags just created get added to the INSIDE of the mini-album next to the the first tags (red arrows). Use Scor-Tape or preferred adhesive to attach. On to the next tags...
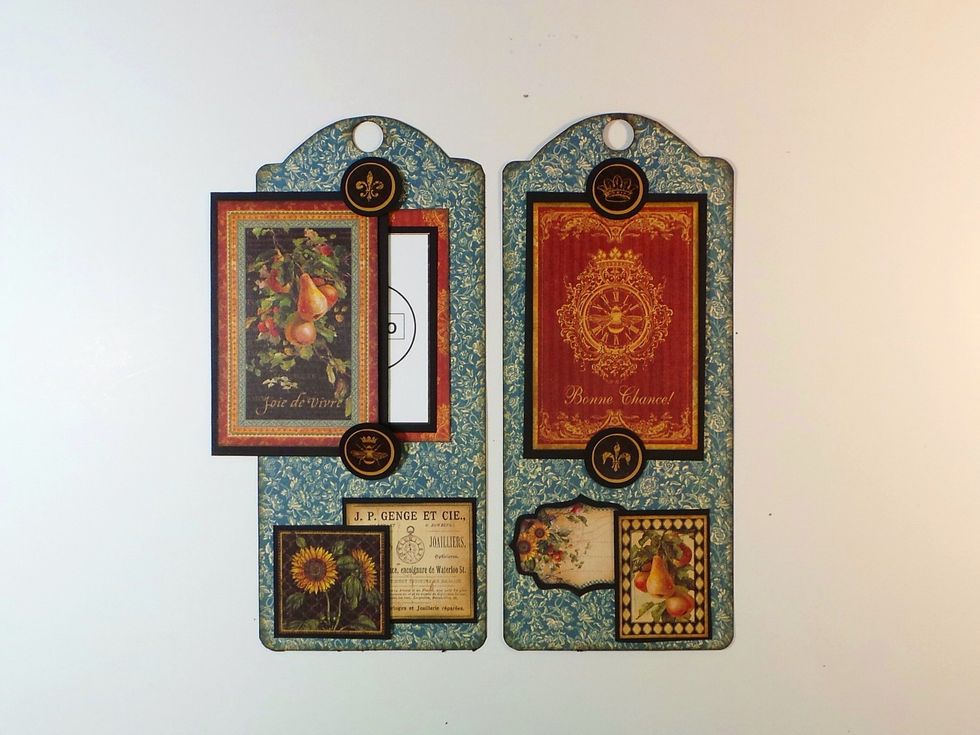
Attach small photo mat to background. Add glue to HALF of each of two 1" cardstock circles with stickers. Attach circles so a cut-apart mat can slide between them. Add additional elements below.
These two tags complete the INSIDE and go on the end positions (red arrows). Use Scor-Tape or preferred adhesive to attach tags to mini-album.

For Front, back Rooster Cut-Apart with chipboard cut in Step 2. Add brads to chipboard element and attach beneath rooster. The Back has no embellishments.
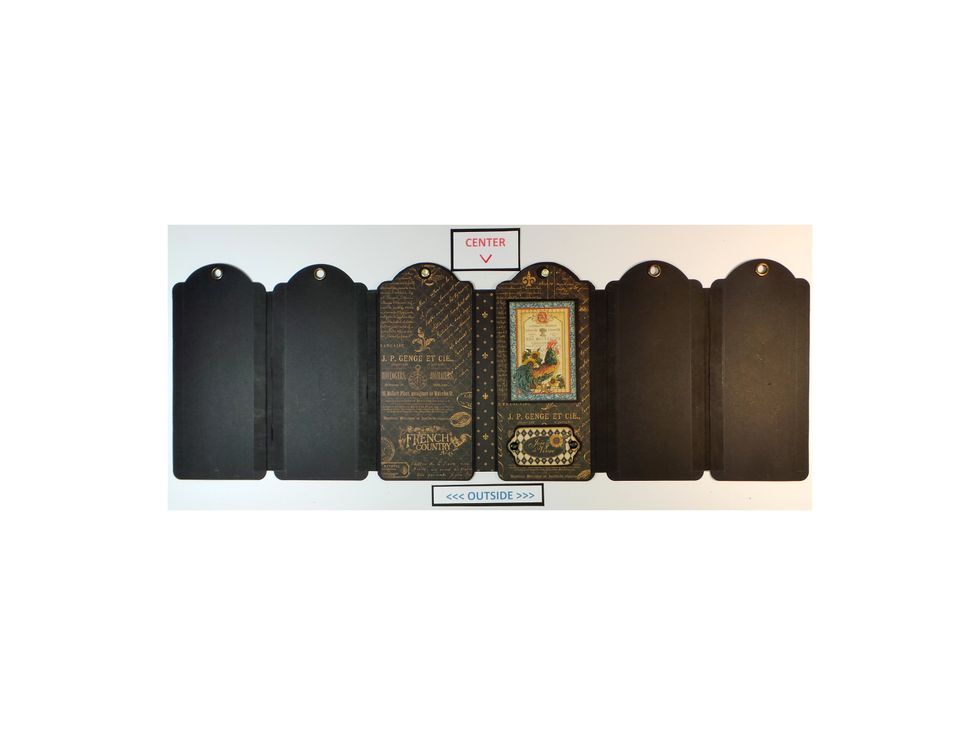
Now flip the mini-album over so you're on the OUTSIDE. Attach Back on LEFT and Front on RIGHT of center spine using Scor-Tape or preferred adhesive. Cut decorative paper 3/4" W x 7 1/8" T for spine.
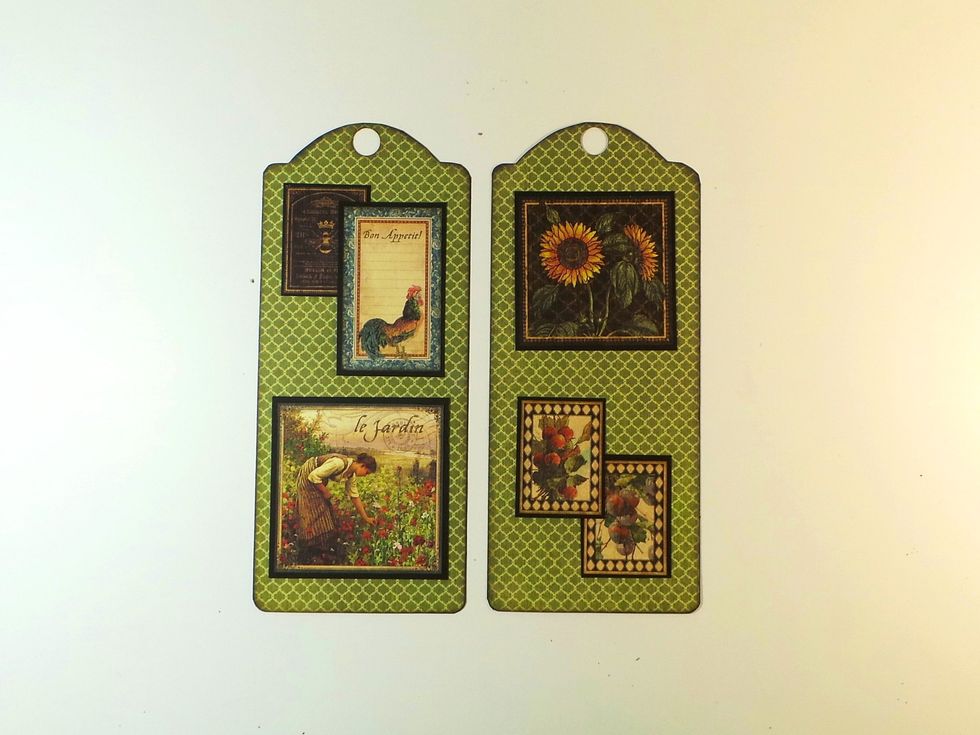
These tags consist only of decorative elements backed with black chipboard.
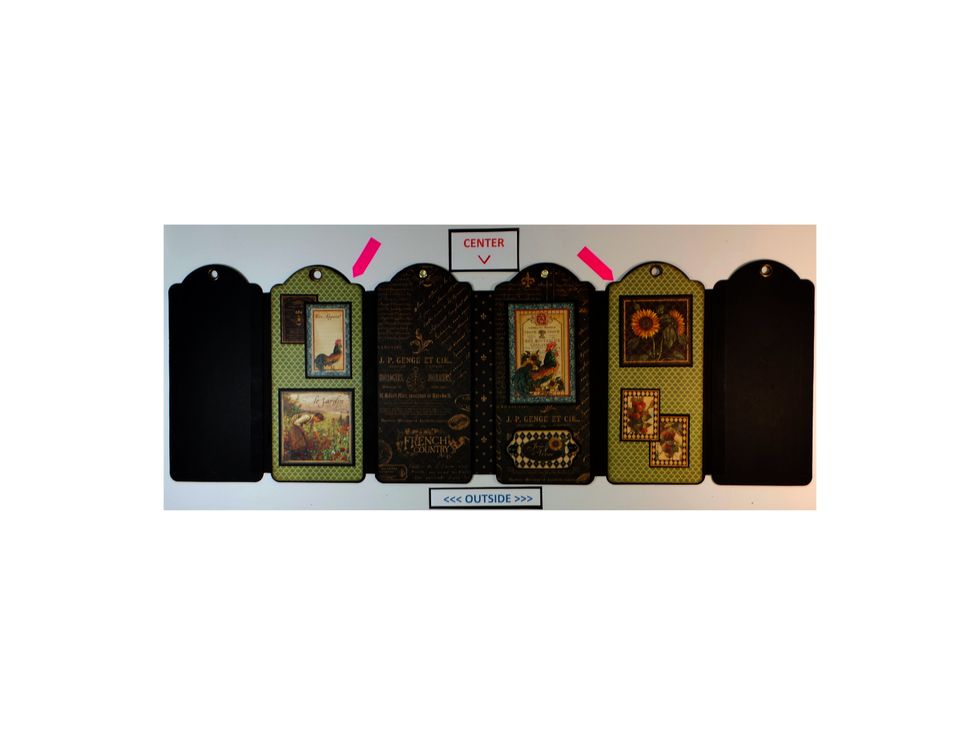
They go next to the cover tags on the OUTSIDE (red arrows). Attach using Scor-Tape or preferred adhesive.
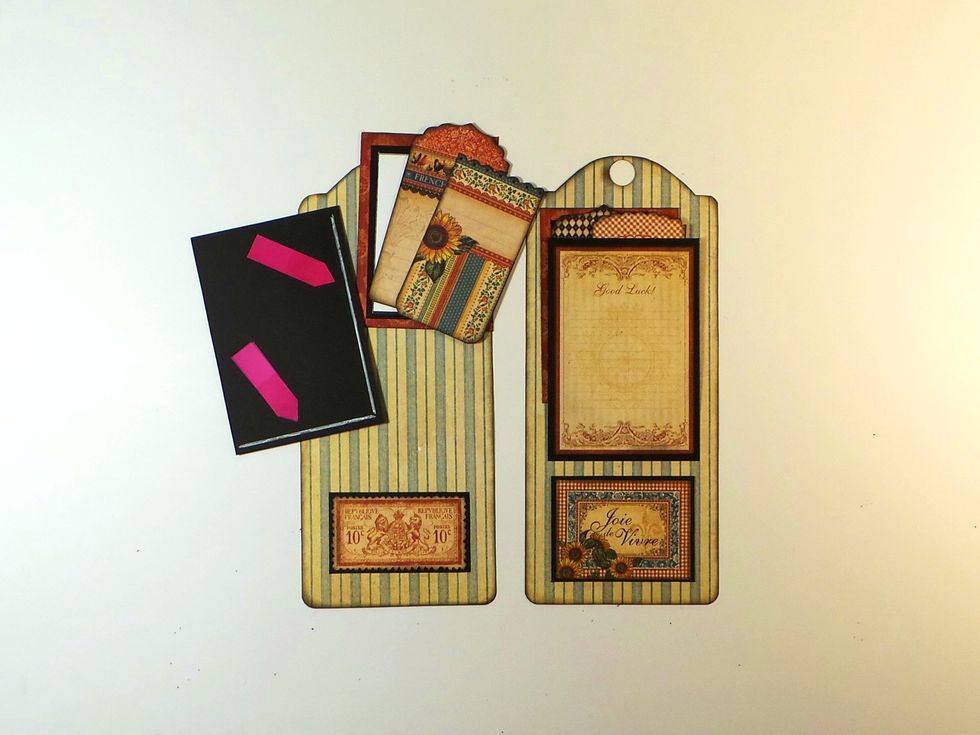
Add glue to one long edge & bottom (red arrows) of cut-apart to make pocket. Glue opposite long edge for other tag (1 opens left, the other right). Insert tags & photo mat. Add element under pocket.
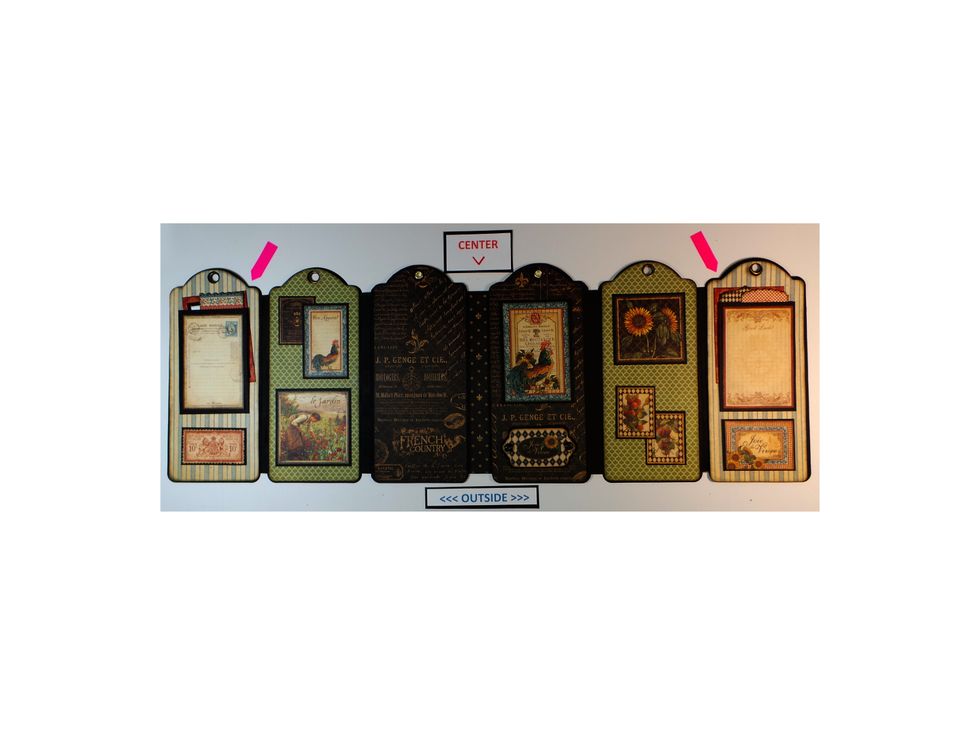
These tags complete the OUTSIDE of the album and go on the ends (red arrows). Use Scor-Tape or preferred adhesive to attach.
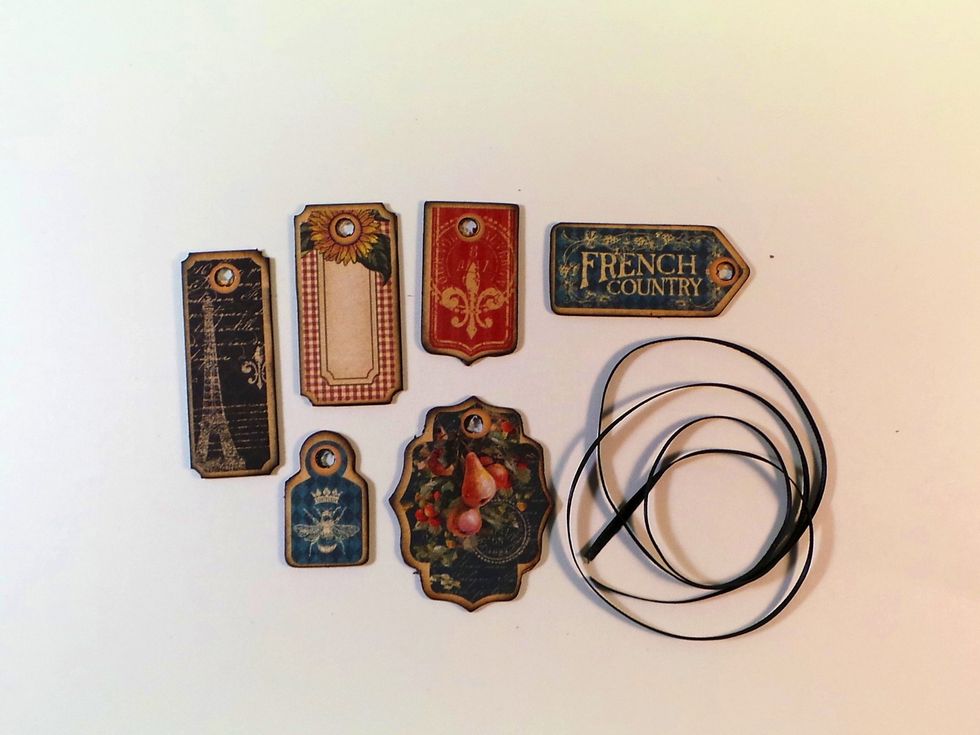
Optional: Create "Charms" to hang from eyelets on either/both Front and Back covers. Use tags from French Country Chipboard 1 and back with scraps of pattern paper.
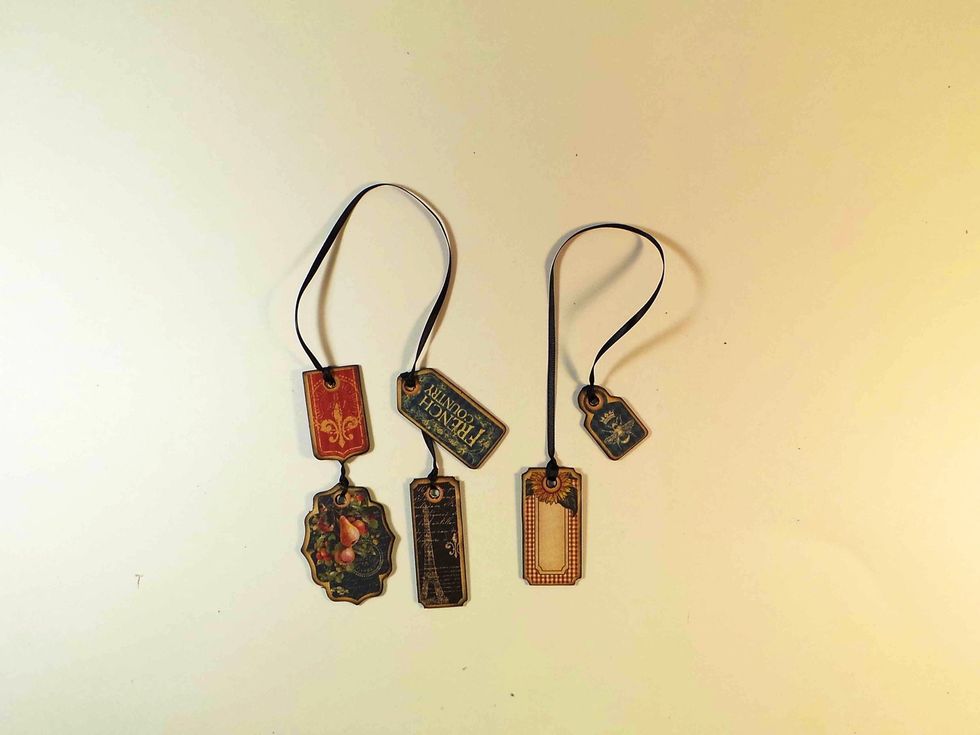
For Front Cover, cut ribbon approximately 20" long and add two tags to each end, spaced as desired. For Back Cover, cut ribbon approximately 15" long and add 1 tag to each end.
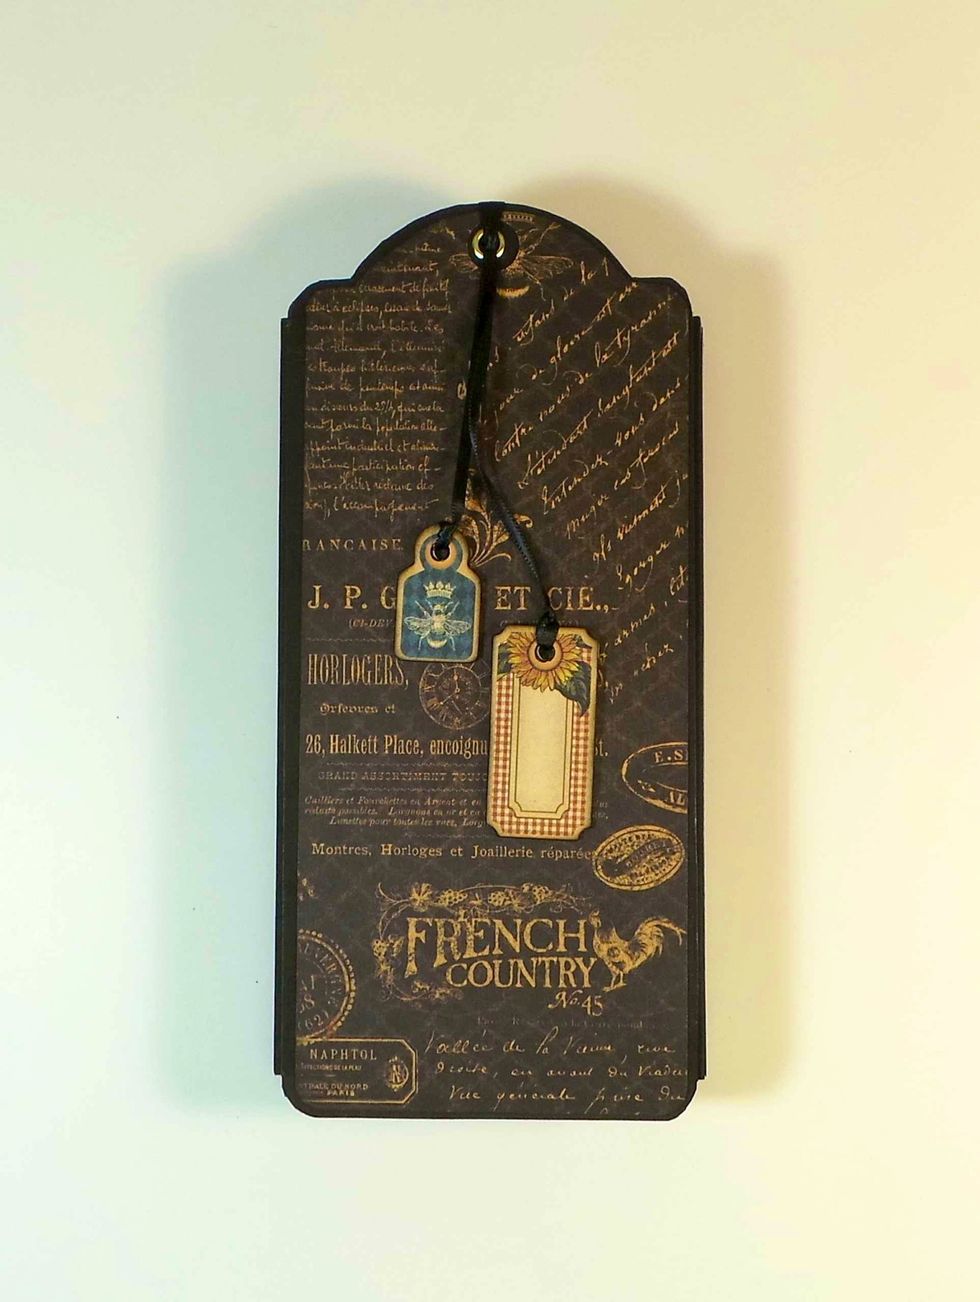
Here's the Back Cover with the charms. I used a Lark's Head knot -- Fold ribbon in half - stick resulting loop through eyelet from inside, drop ends through loop and adjust lengths as desired.
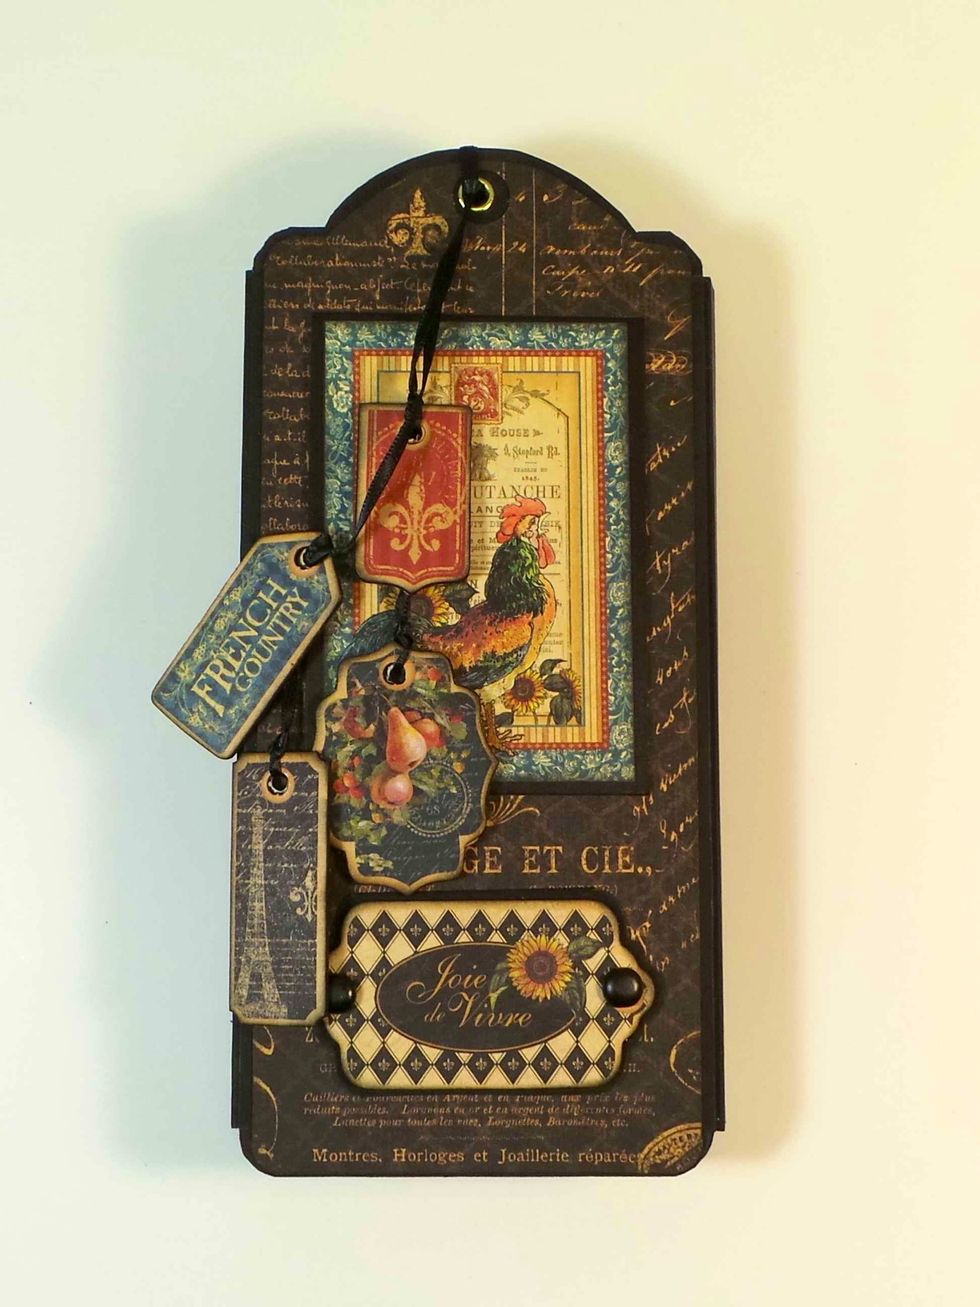
And here's the Front Cover with its charms. Let's start from here and open up the mini-album for a final look at the project...
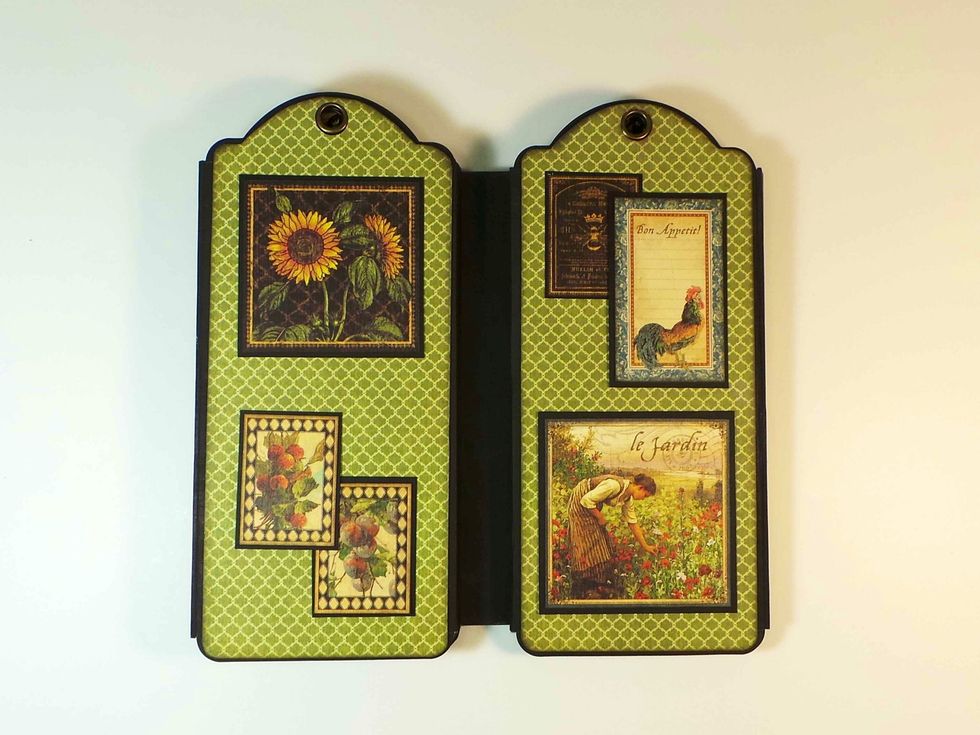
When we flip open the front cover, we see these two tags. Next we'll open each one of these to the left and to the right....
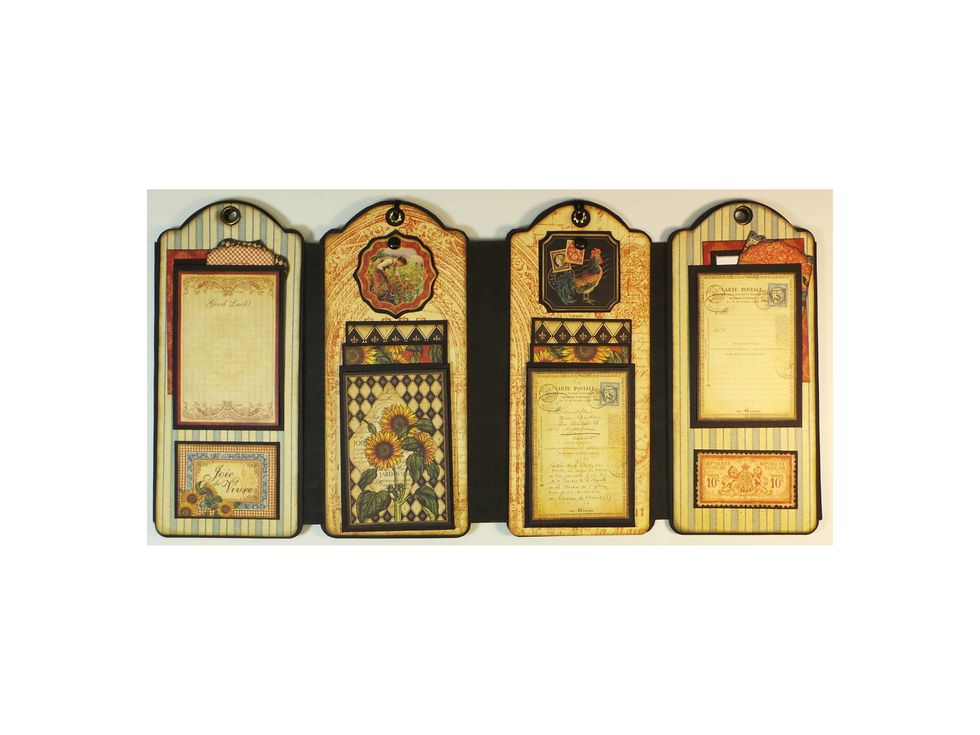
... and we start seeing the tags on the inside in the center. Then we'll open up the two end tags one more time...

...and see the mini-album completely open.