The Conversation (0)
Sign Up
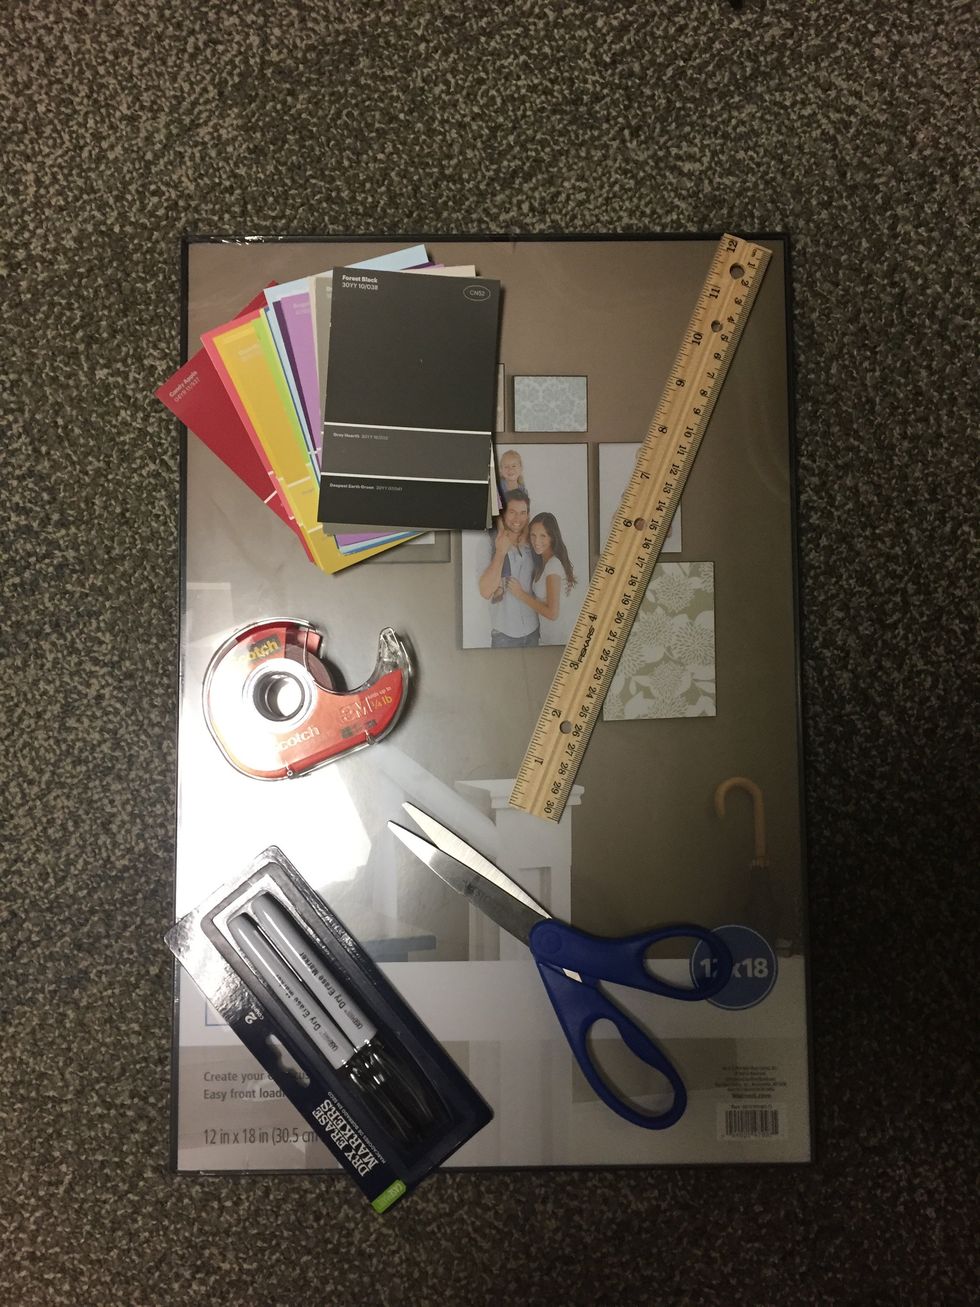
Gather all supplies
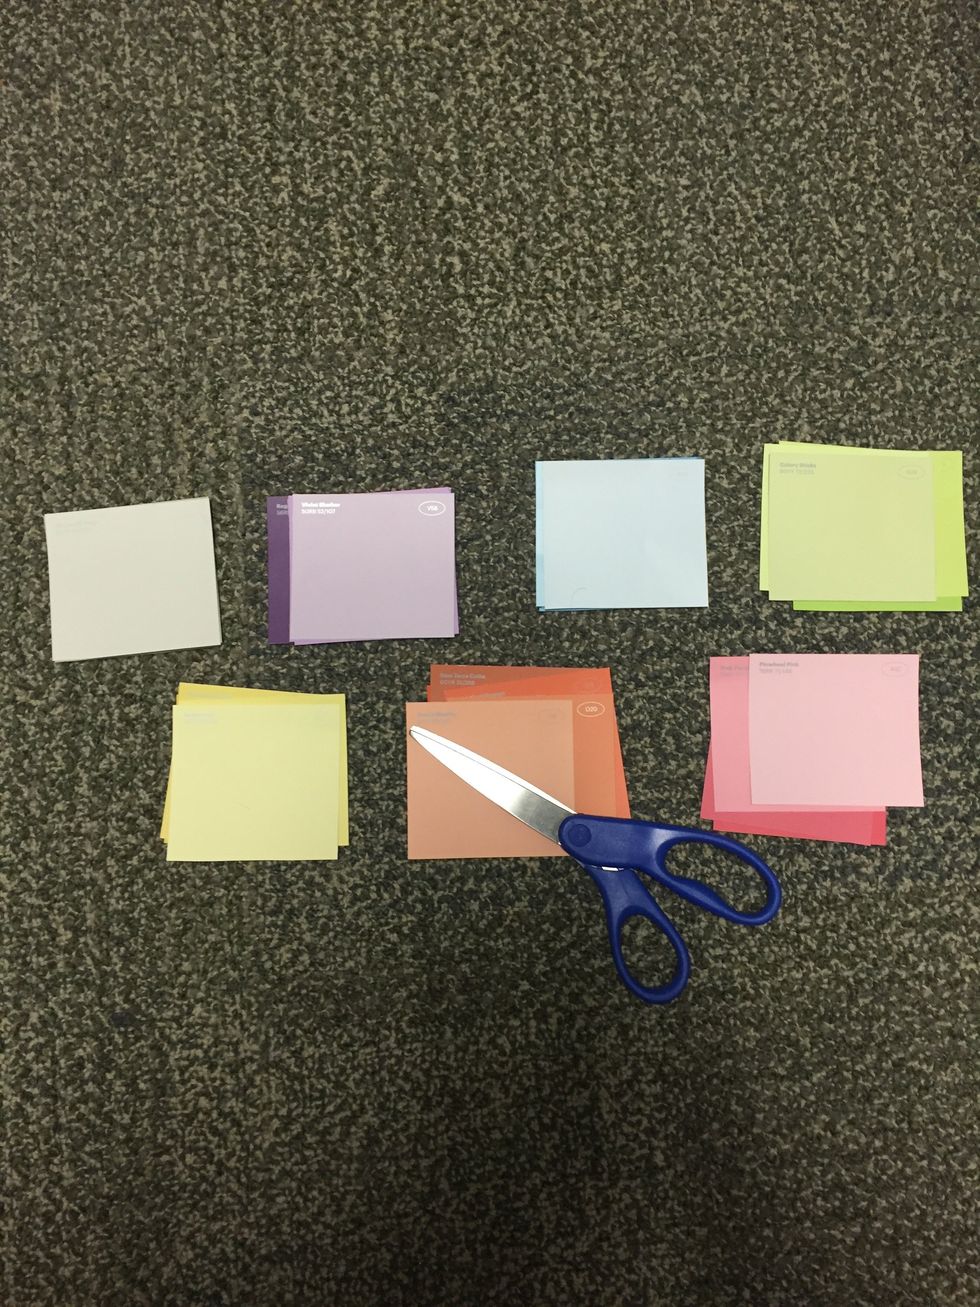
Cut each paint sample color into a 3 1/4 inch square. This size can be adjusted depending on the size of the frame. Save some scraps for step 3.
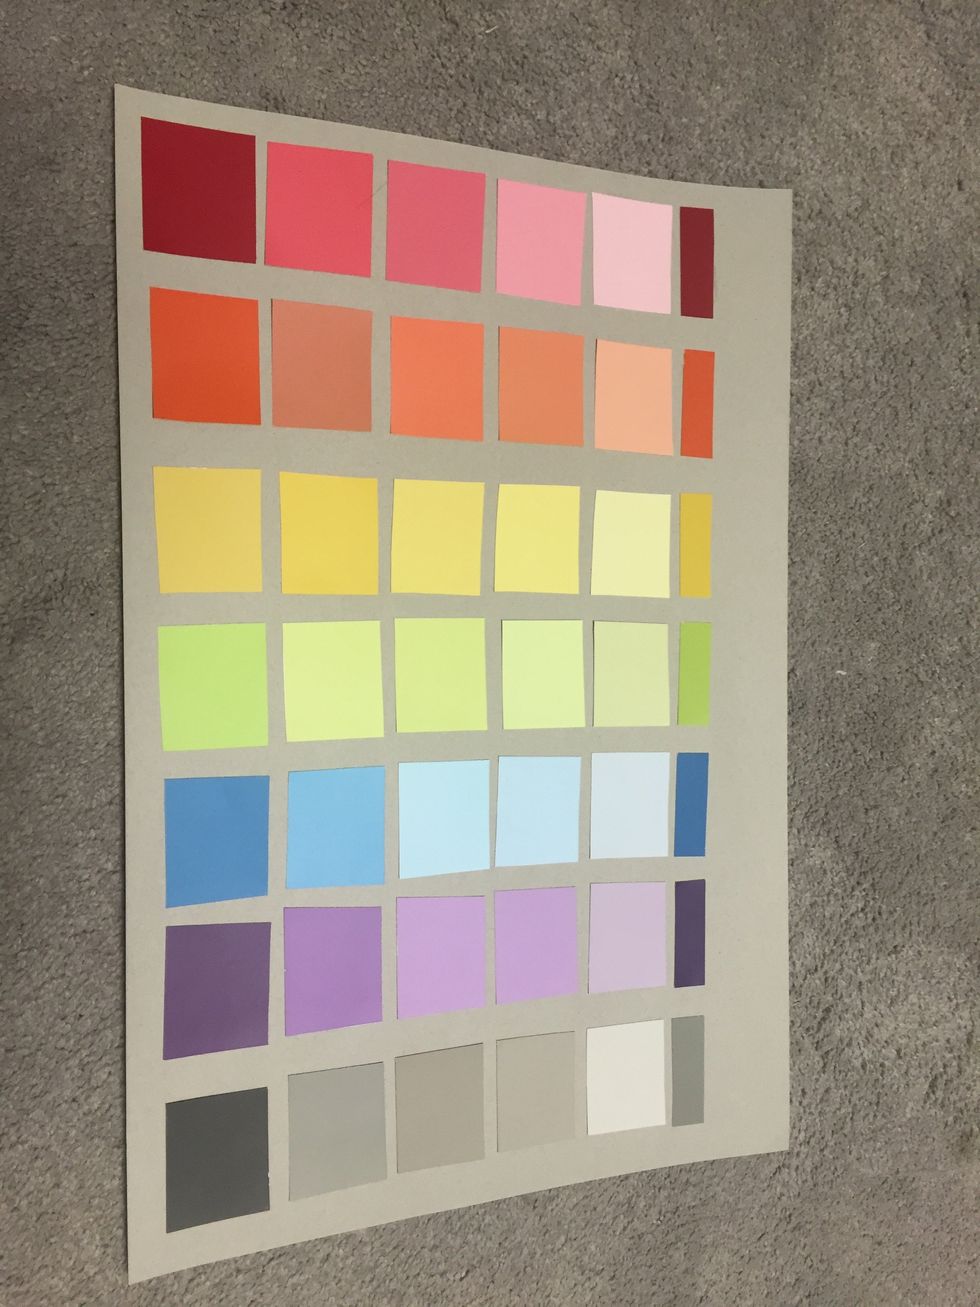
Use the back of the stock photo as a background, arrange the paint chips in 5 rows of 7 and tape them down. For the days of the week at the top, use scraps from the paint chips.
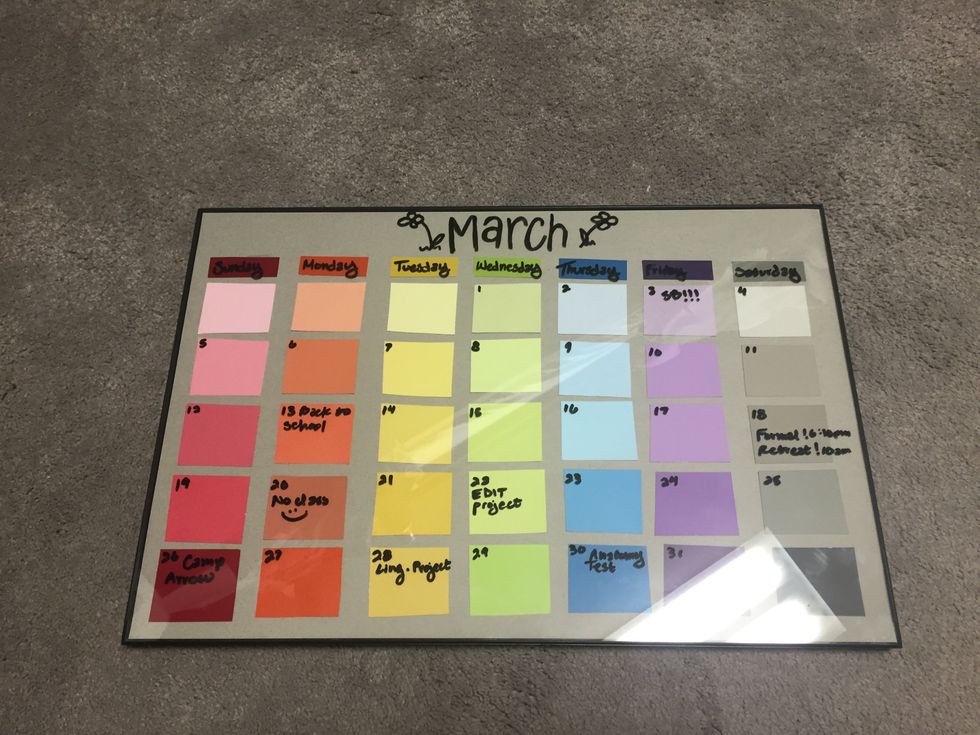
Put the arranged paint chips back into the frame, you may now fill in your calendar using a dry-erase marker