Here are some of the supplies you'll need

I removed these cute legs from a worn out footstool I found at the Nashville Flea Market - if you've never been - you gotta go - It's every month at the fairgrounds.

Fabric requirement depends on your perch size. The band needs to be continuous (no seam) so L x 2 plus W x 2. Mine was 36x24. I needed 3 1/2 yds. Allow extra to match patterns and prints

Cut your wood into 4 pieces. Mine bed is 36 x 24 so I cut the 2 side pieces 36.25" each and I cut the 2 ends 24.25" Then I used a chop saw to make 45 degree miter cuts on each end.
On a flat surface, prop your frame up at the corners with the leftover wood pieces to make it easier to work with.
Predrill holes so the wood won't split when you drill the screws in. Careful to keep the corners aligned so the drill bit goes through the first board exactly where it goes into the adjoining board
Two holes on one side at each corner
Add a little wood glue on one board.

Screw them together. I used the shorter screw in the top hole and the longer screw in the bottom hole. You just want the screw to connect the two boards together securely.
Measure each side of the frame to get an accurate measurement. Your pool noodles need to be cut 2 inchs longer than each of your measurements.
I have an electric kitchen knife that is great for cutting your noodles but a regular hacksaw works great too.

Split the noodles to the middle all the way down the side but be careful and don't cut all the way through.
Slip the noodle onto the side of the frame so that it overhangs 1 inch on each end. Use the hacksaw or electric knife to cut the miter exactly where the boards are joined.
Your frame should look like this

Remove noodles and set aside Cut upholstery webbing 8" wider than the frame Available here http://bit.ly/2ne4jcK Lay them out on a table spacing them evenly then lay the frame on top as shown
Wrap each strip over the frame and fold down along the 1/2" inside edge of the frame pulling it smooth and tight.
Staple securely continuing down the entire side.
Repeat the process on the opposite side of the board making sure to pull it tight and keep it straight.
It will look like this when you have finished this step.
Weave strips in and out going the opposite direction and repeat the process until you have a basket woven bottom.
It should look like this.
Slip the noodles back in place pushing it in all the way. Staple the Sew On HOOK side of the Hook & Loop tape along all 4 sides of the top then flip it over and staple along the bottom sides as shown
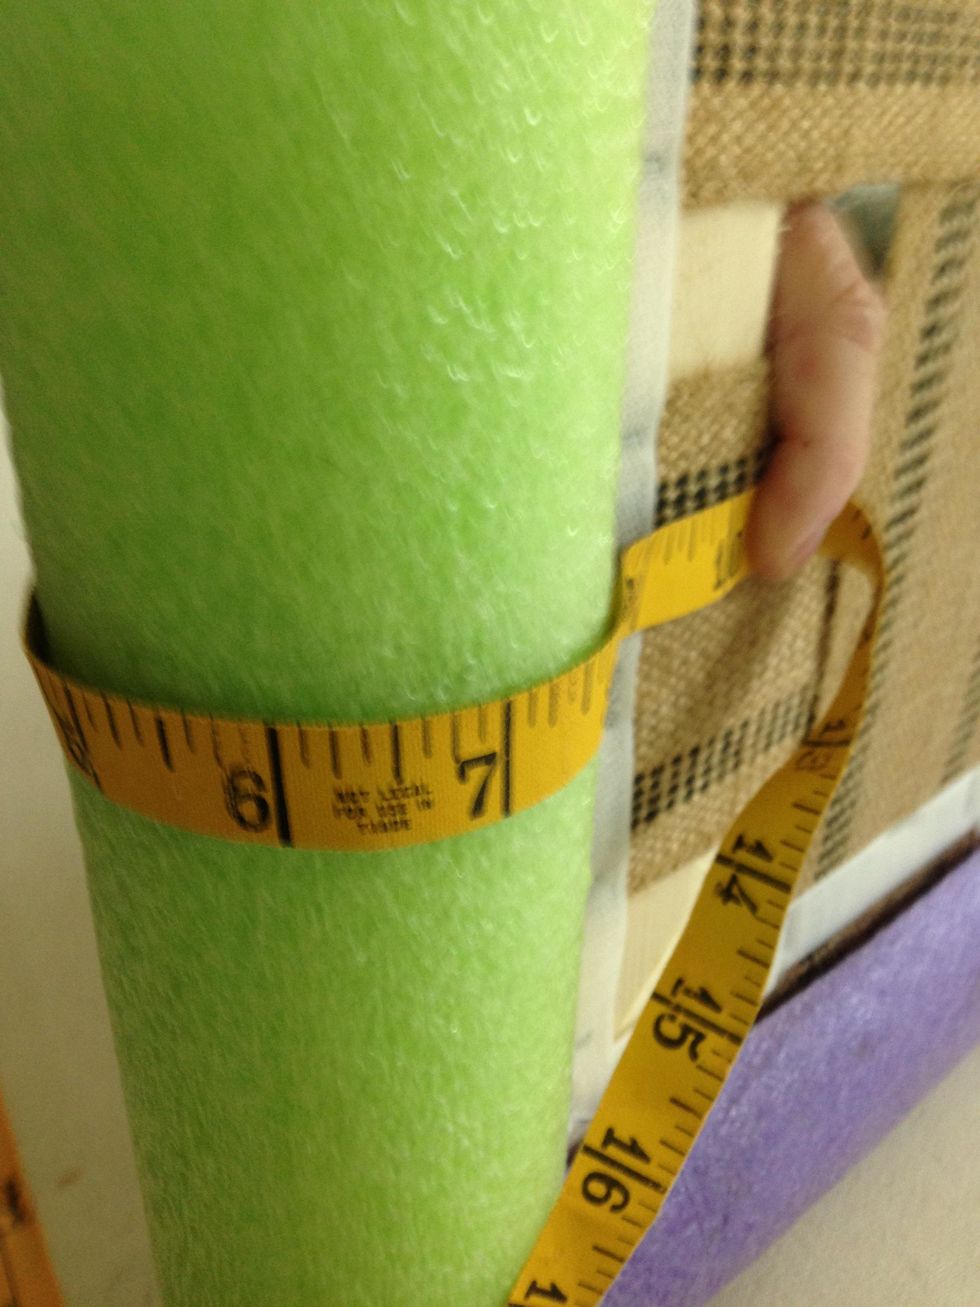
Measure starting at the front edge of the Hook & Loop on bottom side, around the noodle and out to the edge of the Hook & Loop on the top side of your frame.
As you can see mine was 10"
Then measure around the entire frame as shown.
Mine measured 116"x10". Cut your band a little longer I cut mine 122"x10" The design did not go all the way to the edge. The band wraps to the bottom so it doesn't show Serge or 1/4" hem the sides
Attention: The next few steps are shown with the fabric right side out because my temporary fabric marker would not show up on my fabric in photography.
For photography purposes I am doing the next few steps with the fabric turned right side out but you should form the corner miters and pin with the wrong side out for easier sewing.
Pin the band all the way around the frame (wrong side out) Pull it tight and smooth
Form three corners where the miters should be sewn and pin (wrong side out). (The ends of your band should meet at the 4th corner and overlap)
Pin the tuck and draw a stitch line (with fabric wrong side out)
My temporary fabric marker did not show up on my fabric so I used a pencil and marked mine right side out.
Flip your frame over and repeat these steps on the same corners of the bottom side of the frame then stitch all the miters.
On 4th corner your band will overlap itself. One end will look like this. Form the top and bottom miters in the end of the band so that it cups around the corner. Stitch
This what your opposite end will look like. It will have to be adjusted in a later step.
Finger press the corners of this last corner. It will have to be adjusted in a later step
Press all the corners
Sew the soft side of the Hook & Loop (http://bit.ly/2gxROJC) to both sides of the band so that it will attach to the hard side previously stapled to the frame
It will look like this
Fit the band on the frame again This is where you need to adjust the finger fold we did previously You want the fold to align with the miter seam Align the hook & loop as shown so they will attach
It's going to be awkward but it should be sewn like this
Make sure the fold and the seam aligh pervectly. Carefully remove the band from the frame and stitch the hook & loop tape to both pieces, top and bottom
Attach the legs.
Put you band back on the frame FOR THE LAST TIME and press the hook and loop firmly to connect It's a lot of work but it's so nice to be able to remove the band and wash it along with the pillow cover
Next measure the inside of your frame and make your pillow cushion accordingly.
This is the article featured in Southern Lady Magazine. It turned out so cute.